How to Create a New Growing Area
My step-by-step guide to creating new growing areas!
How to Create a New Growing Area
Did you know fall is the perfect time to prepare a new growing area for the following year? It’s true!
A little forethought and cleverness can save you hours, days and weeks of backbreaking work in the future.
Today, I’m going to show you how we transformed an utterly barren, unproductive area of our farm into a wonderland, bursting with blooms.
Before I show you the Step-By-Step process we used, I want to give you a bit of the back story.
The back corner of our farm was part of a crop field that was used to grow Round-up Ready corn/soybeans for 30+ years. Over those years, the sandy soil became depleted and by the time we moved here, it was dead. No matter how much I dug, I could not find a single earthworm or creepy crawly. No signs of life. We could not even get weeds to grow for the first couple of years.
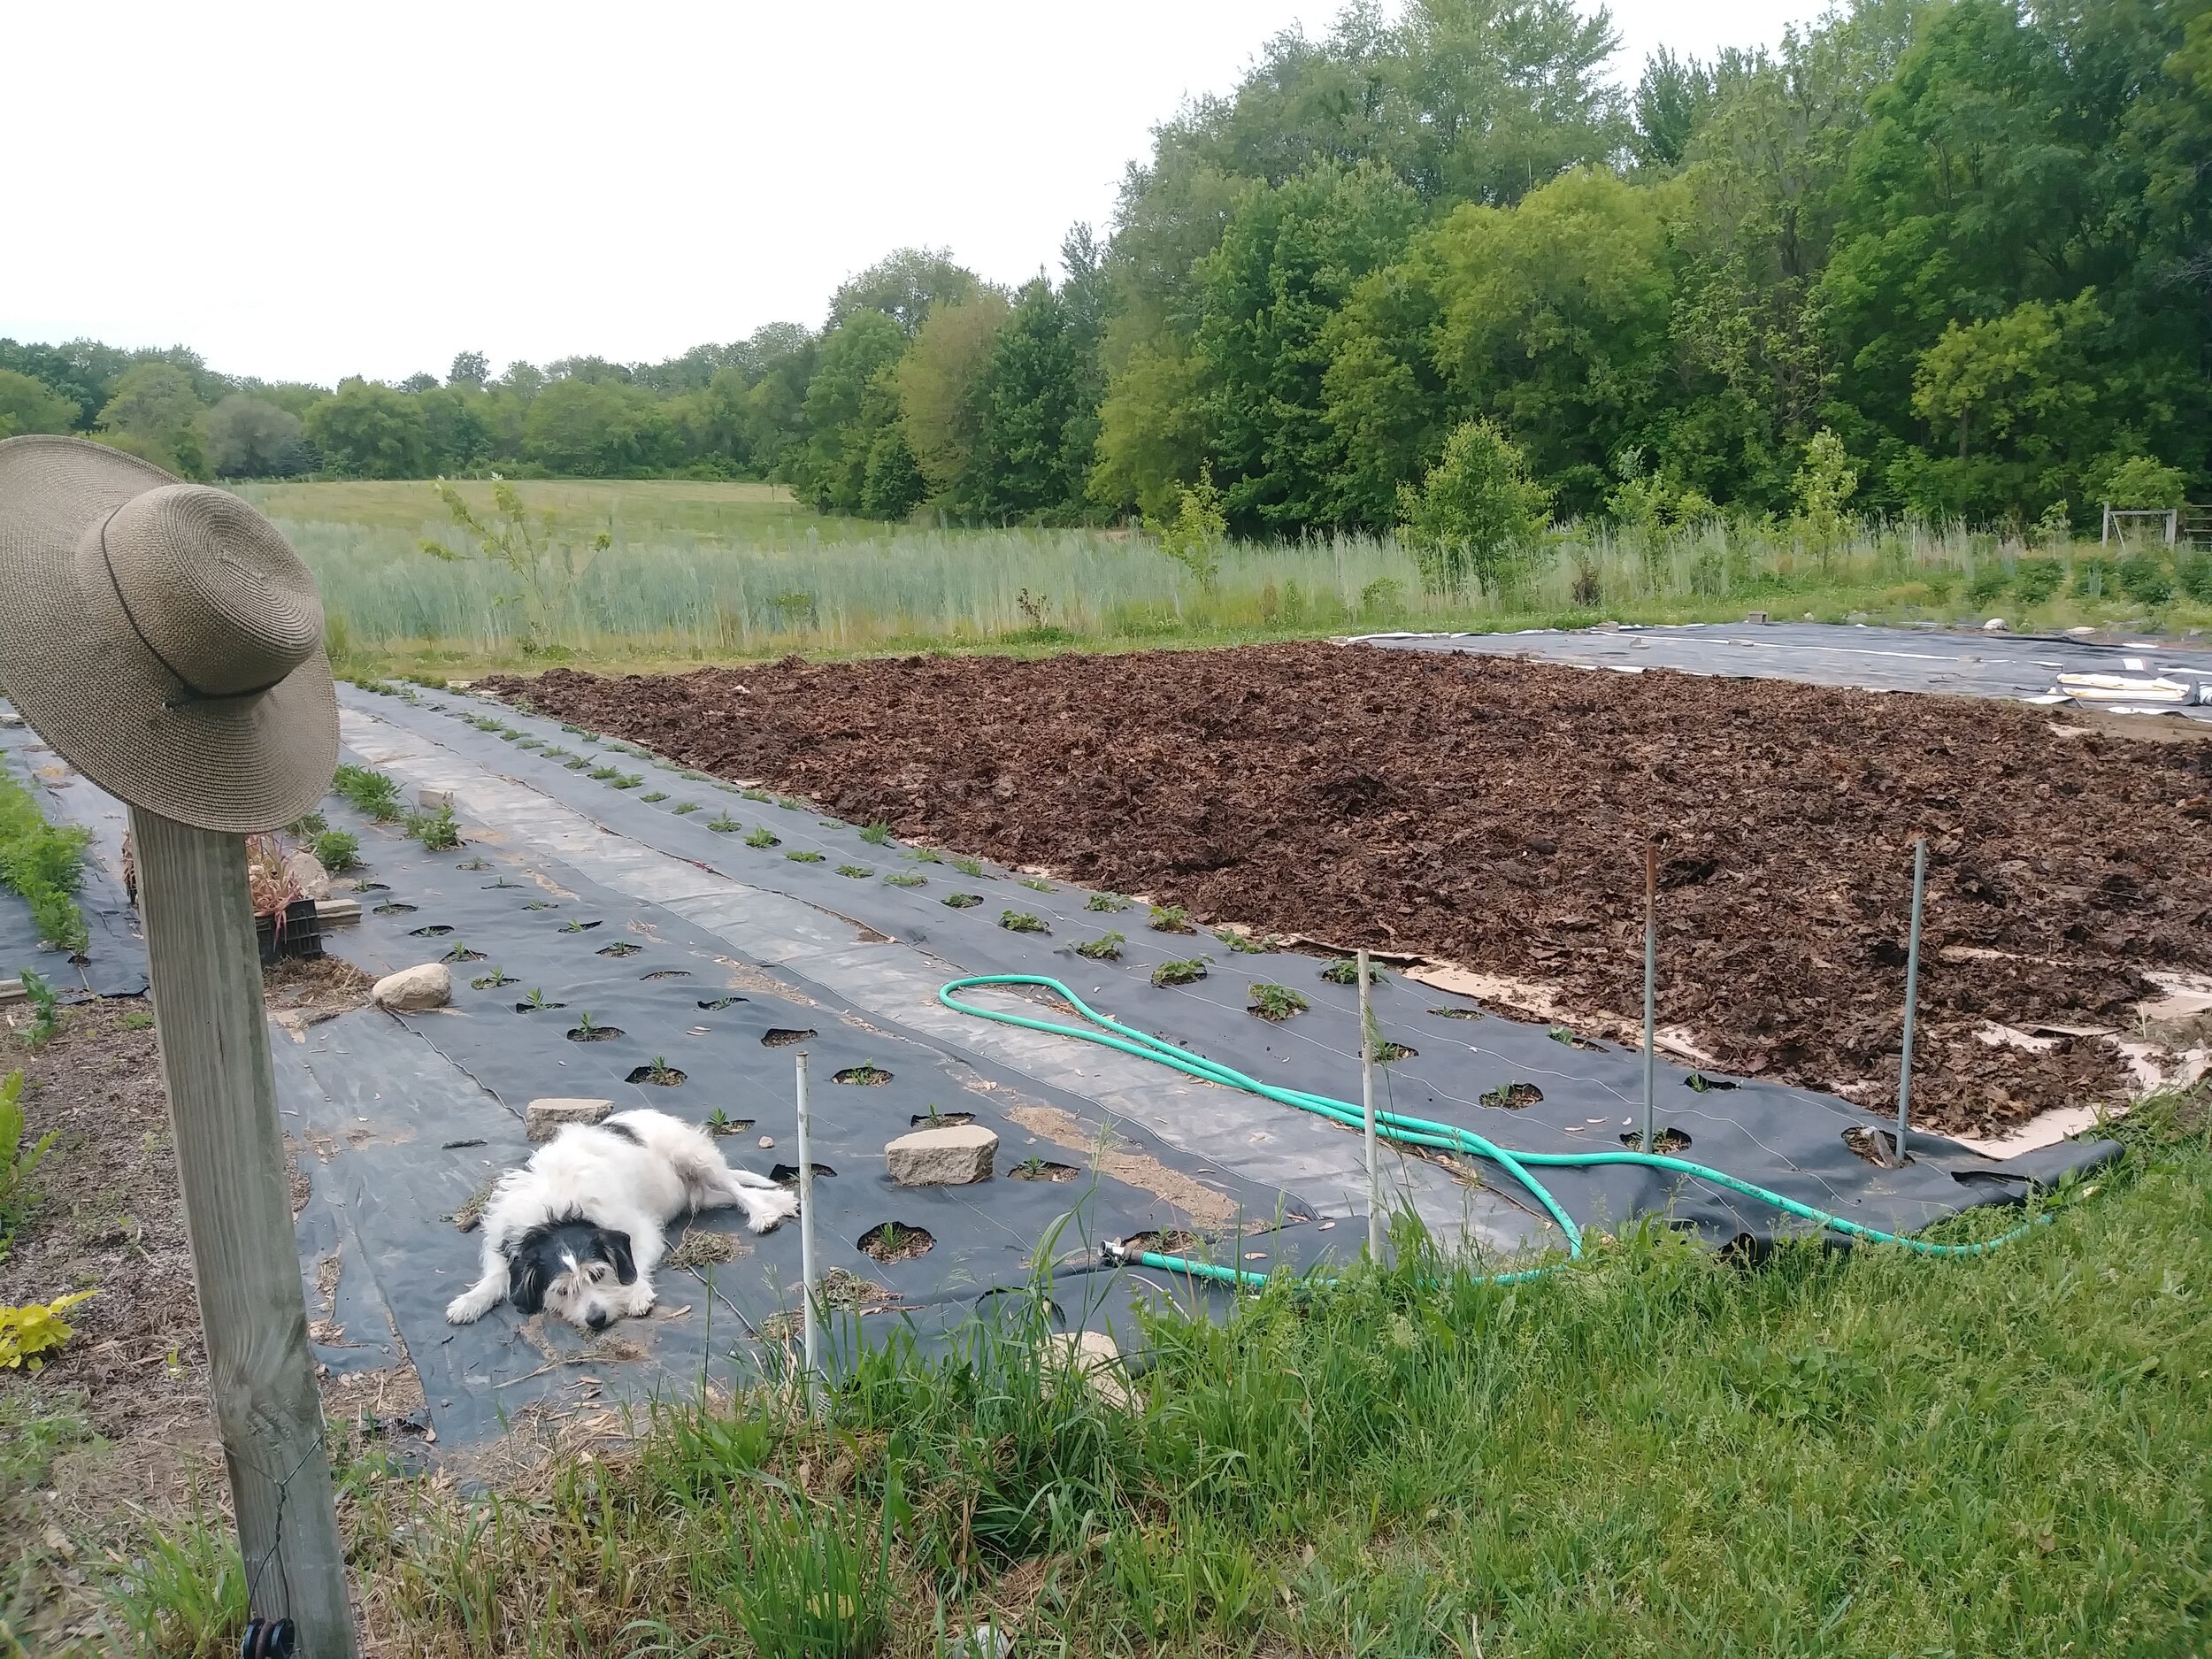
Here’s what it looked like:

We called it “The Barren Wasteland”. We knew it was going to take a LOT of time and work to bring this land back to life... but we DID IT!!! Let me show you how.
Step One: Cover the Ground to Kill the Weeds
If you want to plant a garden next year, RIGHT NOW is the time to start preparing that area!
On our farm, we avoid tilling as much as possible. While there is a time and place for tilling the ground, over time, it damages the soil structure… and this soil was already so damaged.
Instead, we use a method called “Occulation”, which involves covering the desired area with an opaque covering, such as a tarp. This method is easy and effective. First, mow/brushhog the area as short as possible. Then it takes only a few minutes to spread a tarp and weigh it down with rocks or sandbags. Then you simply leave it in place for a couple weeks or months until the vegetation underneath is dead.

We often spread the tarps in the late summer/early fall over spaces we want to plant the FOLLOWING spring. When you pull back the tarp in the spring, you have a growing area that is ready to go, no tilling needed! You can see what it looks like in the photo below, after we pulled back the tarps.

Step Two: Lay Down Cardboard Over the Growing Area
Please tell me I’m not the only one with a basement full of boxes! Ha! But seriously, we stash cardboard in our barn for projects like this. I had 4 years worth of stashed cardboard at my disposal and we used all of it.
A thick layer of cardboard helps to create a weed barrier so your desired plants can get established and not have to battle weed pressure. The cardboard eventually breaks down and turns into a highly desirable habitat for earthworms and other beneficial critters.
It took a couple hours, but we completely covered this area with cardboard. Hot tip: Don’t attempt this on a windy day ;) We had to weigh it down as we worked to keep it from flying away. Also, it’s helpful if you can wet down the cardboard with a hose while you’re working. But don’t worry if you can’t.

Step 3: Cover Cardboard with Composted/Old Leaves
If you have access to leaves in the fall… DON’T GET RID OF THEM! Composted, broken down leaves are perhaps nature’s most perfect FREE fertilizer. Our neighbors have several large maple trees, and the previous fall, we gladly (and eagerly!) took ALL of their leaves and made a massive leaf pile to use in our growing beds… and had tons of fun playing in it for a few weeks. Remember how much fun it was to play in a leaf pile?!? Still fun when when you’re 40+ years old ;)
The trick is to turn the leaf pile a few times over the months to encourage them to begin breaking down and decomposing. Otherwise, the leaves can begin to form an impenetrable mat that repels water.
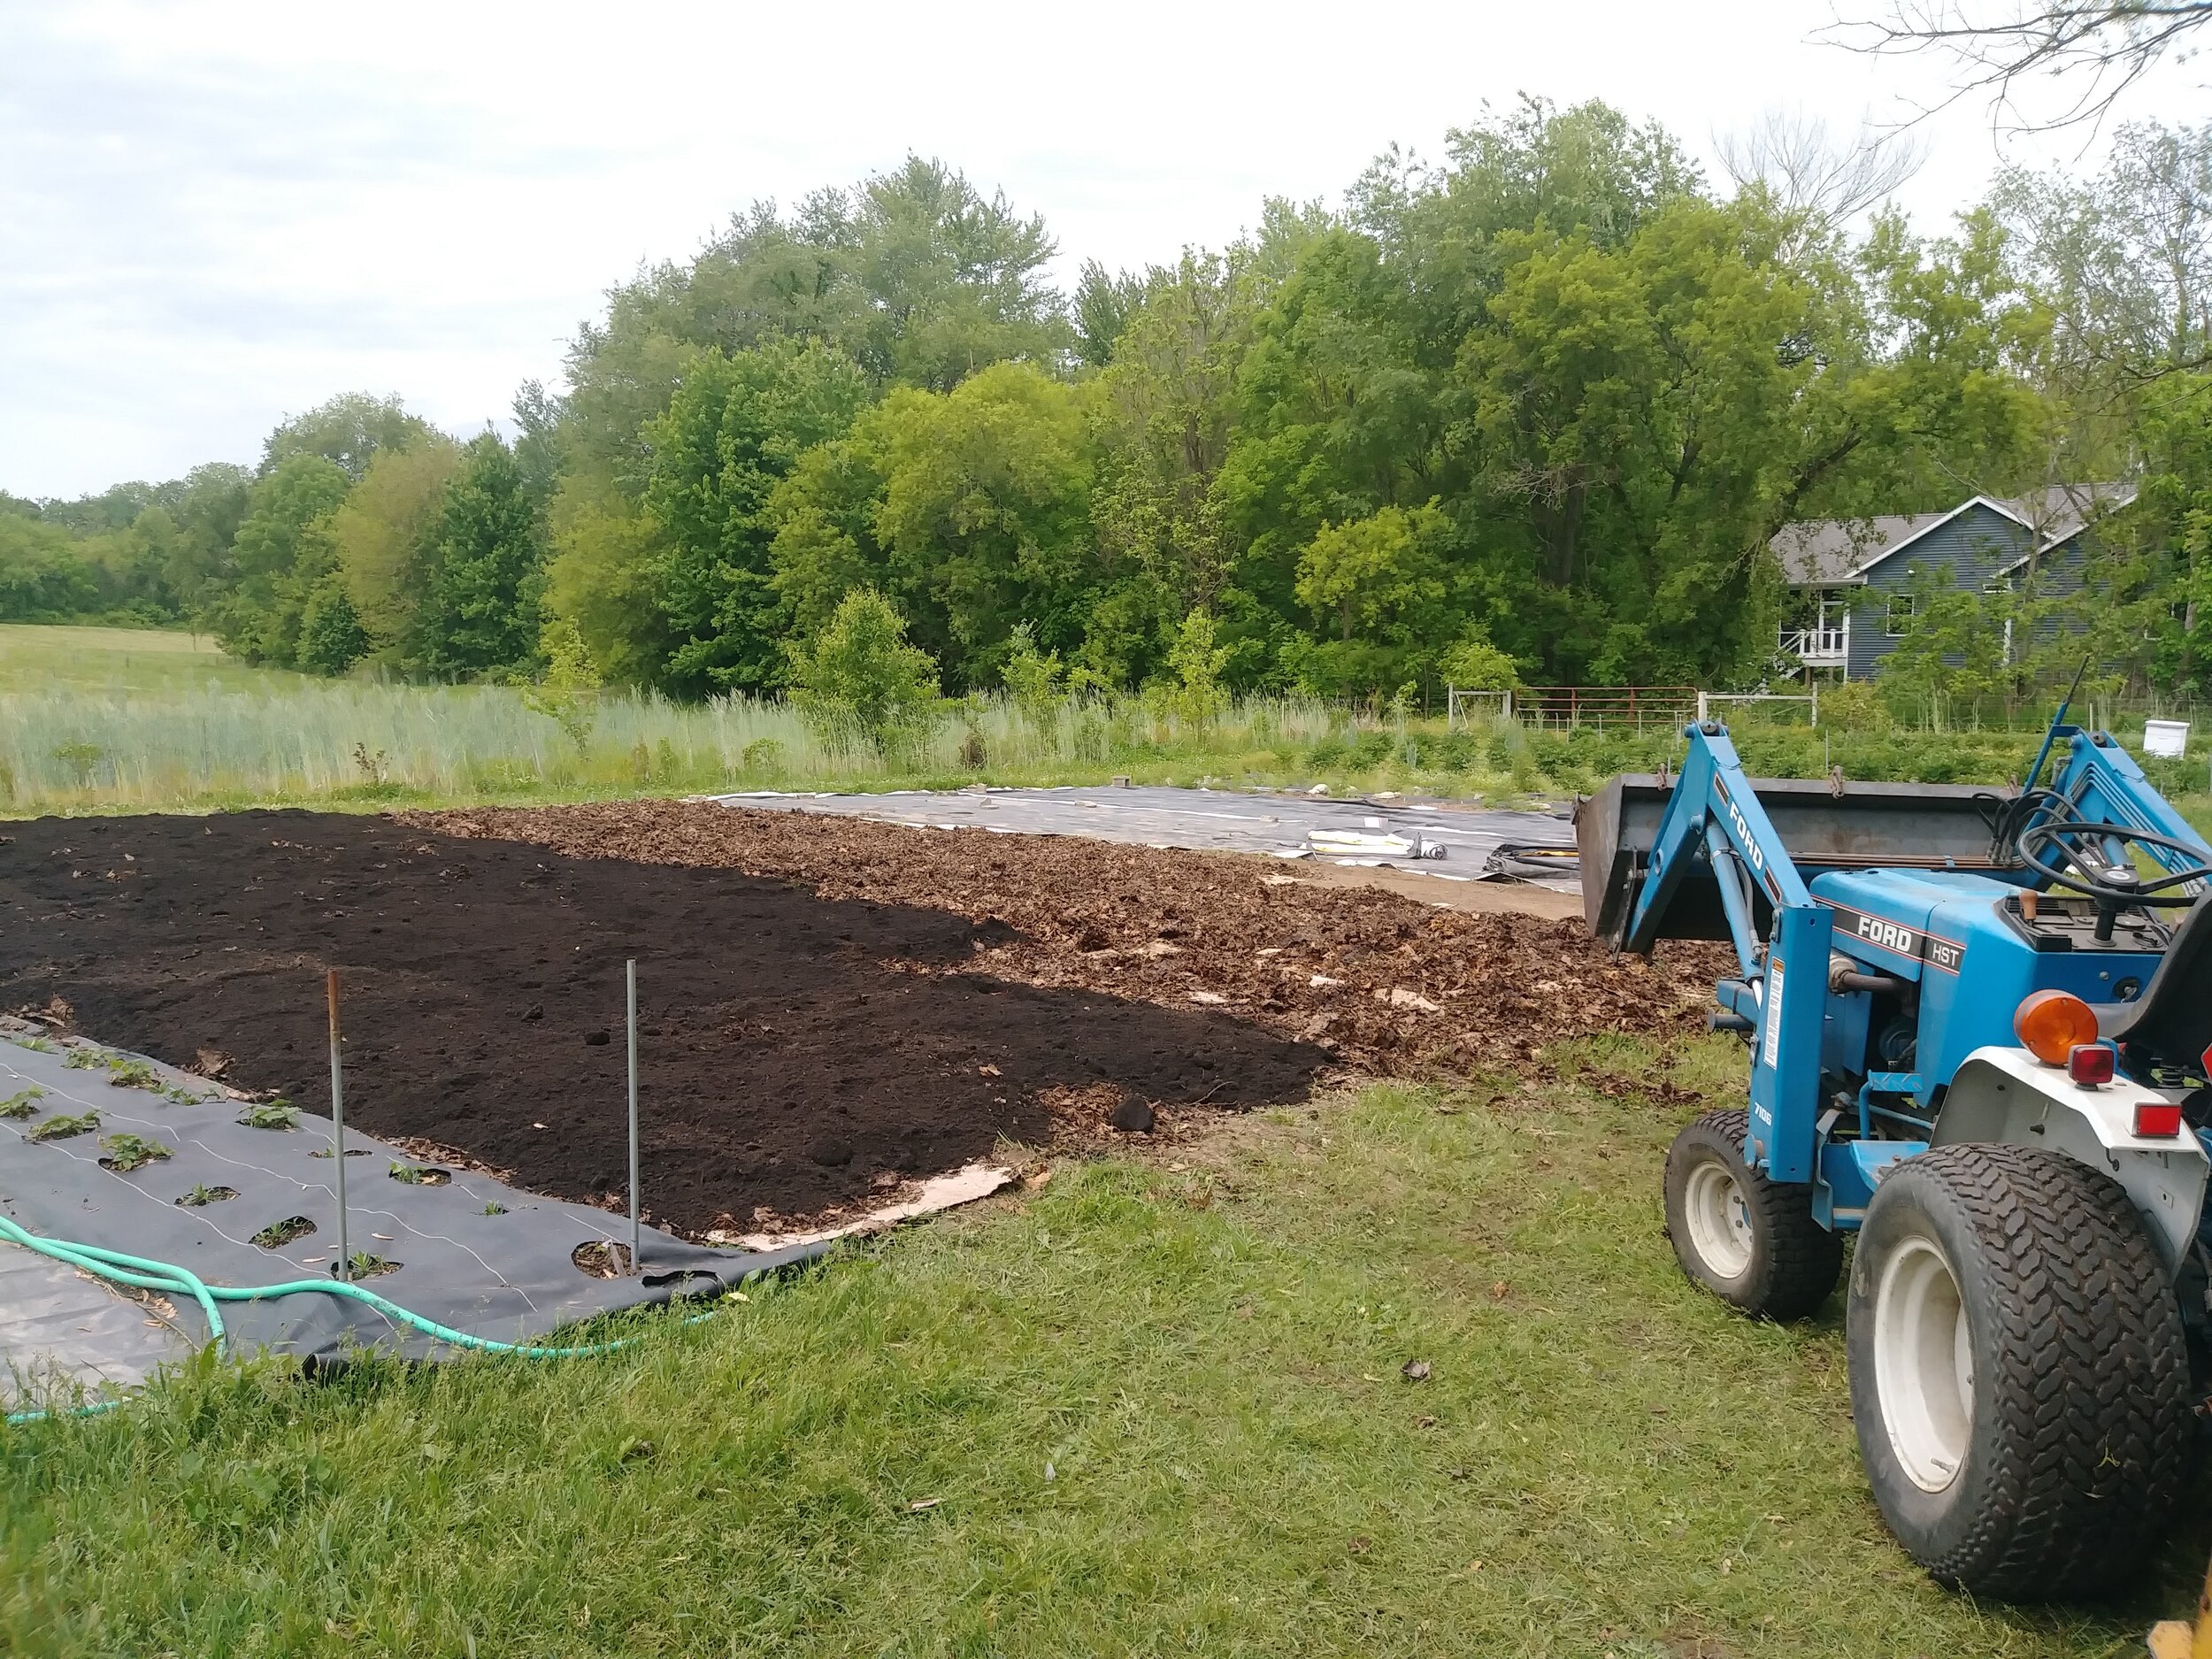
By the following spring, the leaf pile was absolutely crawling with earthworms and other beneficial organisms. When we spread the leaves over the cardboard, we were actually importing new life into the growing area!

Step 4: Cover Leaves with Compost
Next, we covered the leaves with a 6 inch layer of compost. “Compost” is a loose term and can mean many different things, so I will point out that this was well aged and broken down compost made from mostly vegetative matter, NOT animal manures.

We planted our seeds and seedling directly into this compost. If you are using composted animal manures, you may need to add some soil to the mix, as the compost may be too rich or “hot” and kill your seedlings. (We do use composted animal animal manure on our farm (goat and chicken), but always age it for a minimum of 2 years before using it)
I have a simple test for knowing when compost is ready to be used in a garden. If you would be willing to stick your hands in it and bring it up to your nose to smell it’s sweet earthy scent… then it’s ready. If not (or smells gross!), it’s too fresh and needs more time to break down.

Step 5: Plant Your Seedlings and Be Proactive About Weeds
Here is an infallible truth: If you leave soil exposed, it WILL grow weeds. Nature loathes bare soil , which causes erosion, so nature created the perfect solution to combat erosion: Weeds. Yup, that’s right. Weeds DO serve a purpose ;)
If you don’t want your growing area to be overrun with weeds, YOU HAVE GOT TO COVER THE SOIL. You can cover the soil with straw mulch, woodchip mulch, grass clippings, pine needles, or whatever you have handy in your growing area. Or you can use landscape fabric like we did, with holes for the seedlings. Yes, some weeds will also grow in those little holes, but it makes things much more manageable.
Want to see how we make the holes in the landscape fabric? You can see a video in this blog post.
You can plant seedlings/plugs in the growing area or simply direct sow the seeds.
We also laid drip tape for irrigation in the growing area. You can put the drip tape UNDER or OVER the landscape fabric. UNDER is preferable, but the timing didn’t work out and I needed to get the seedlings in the ground before we had a chance to run the drip tape under the fabric. It still works great, since the fabric is water permeable.

The End Result….
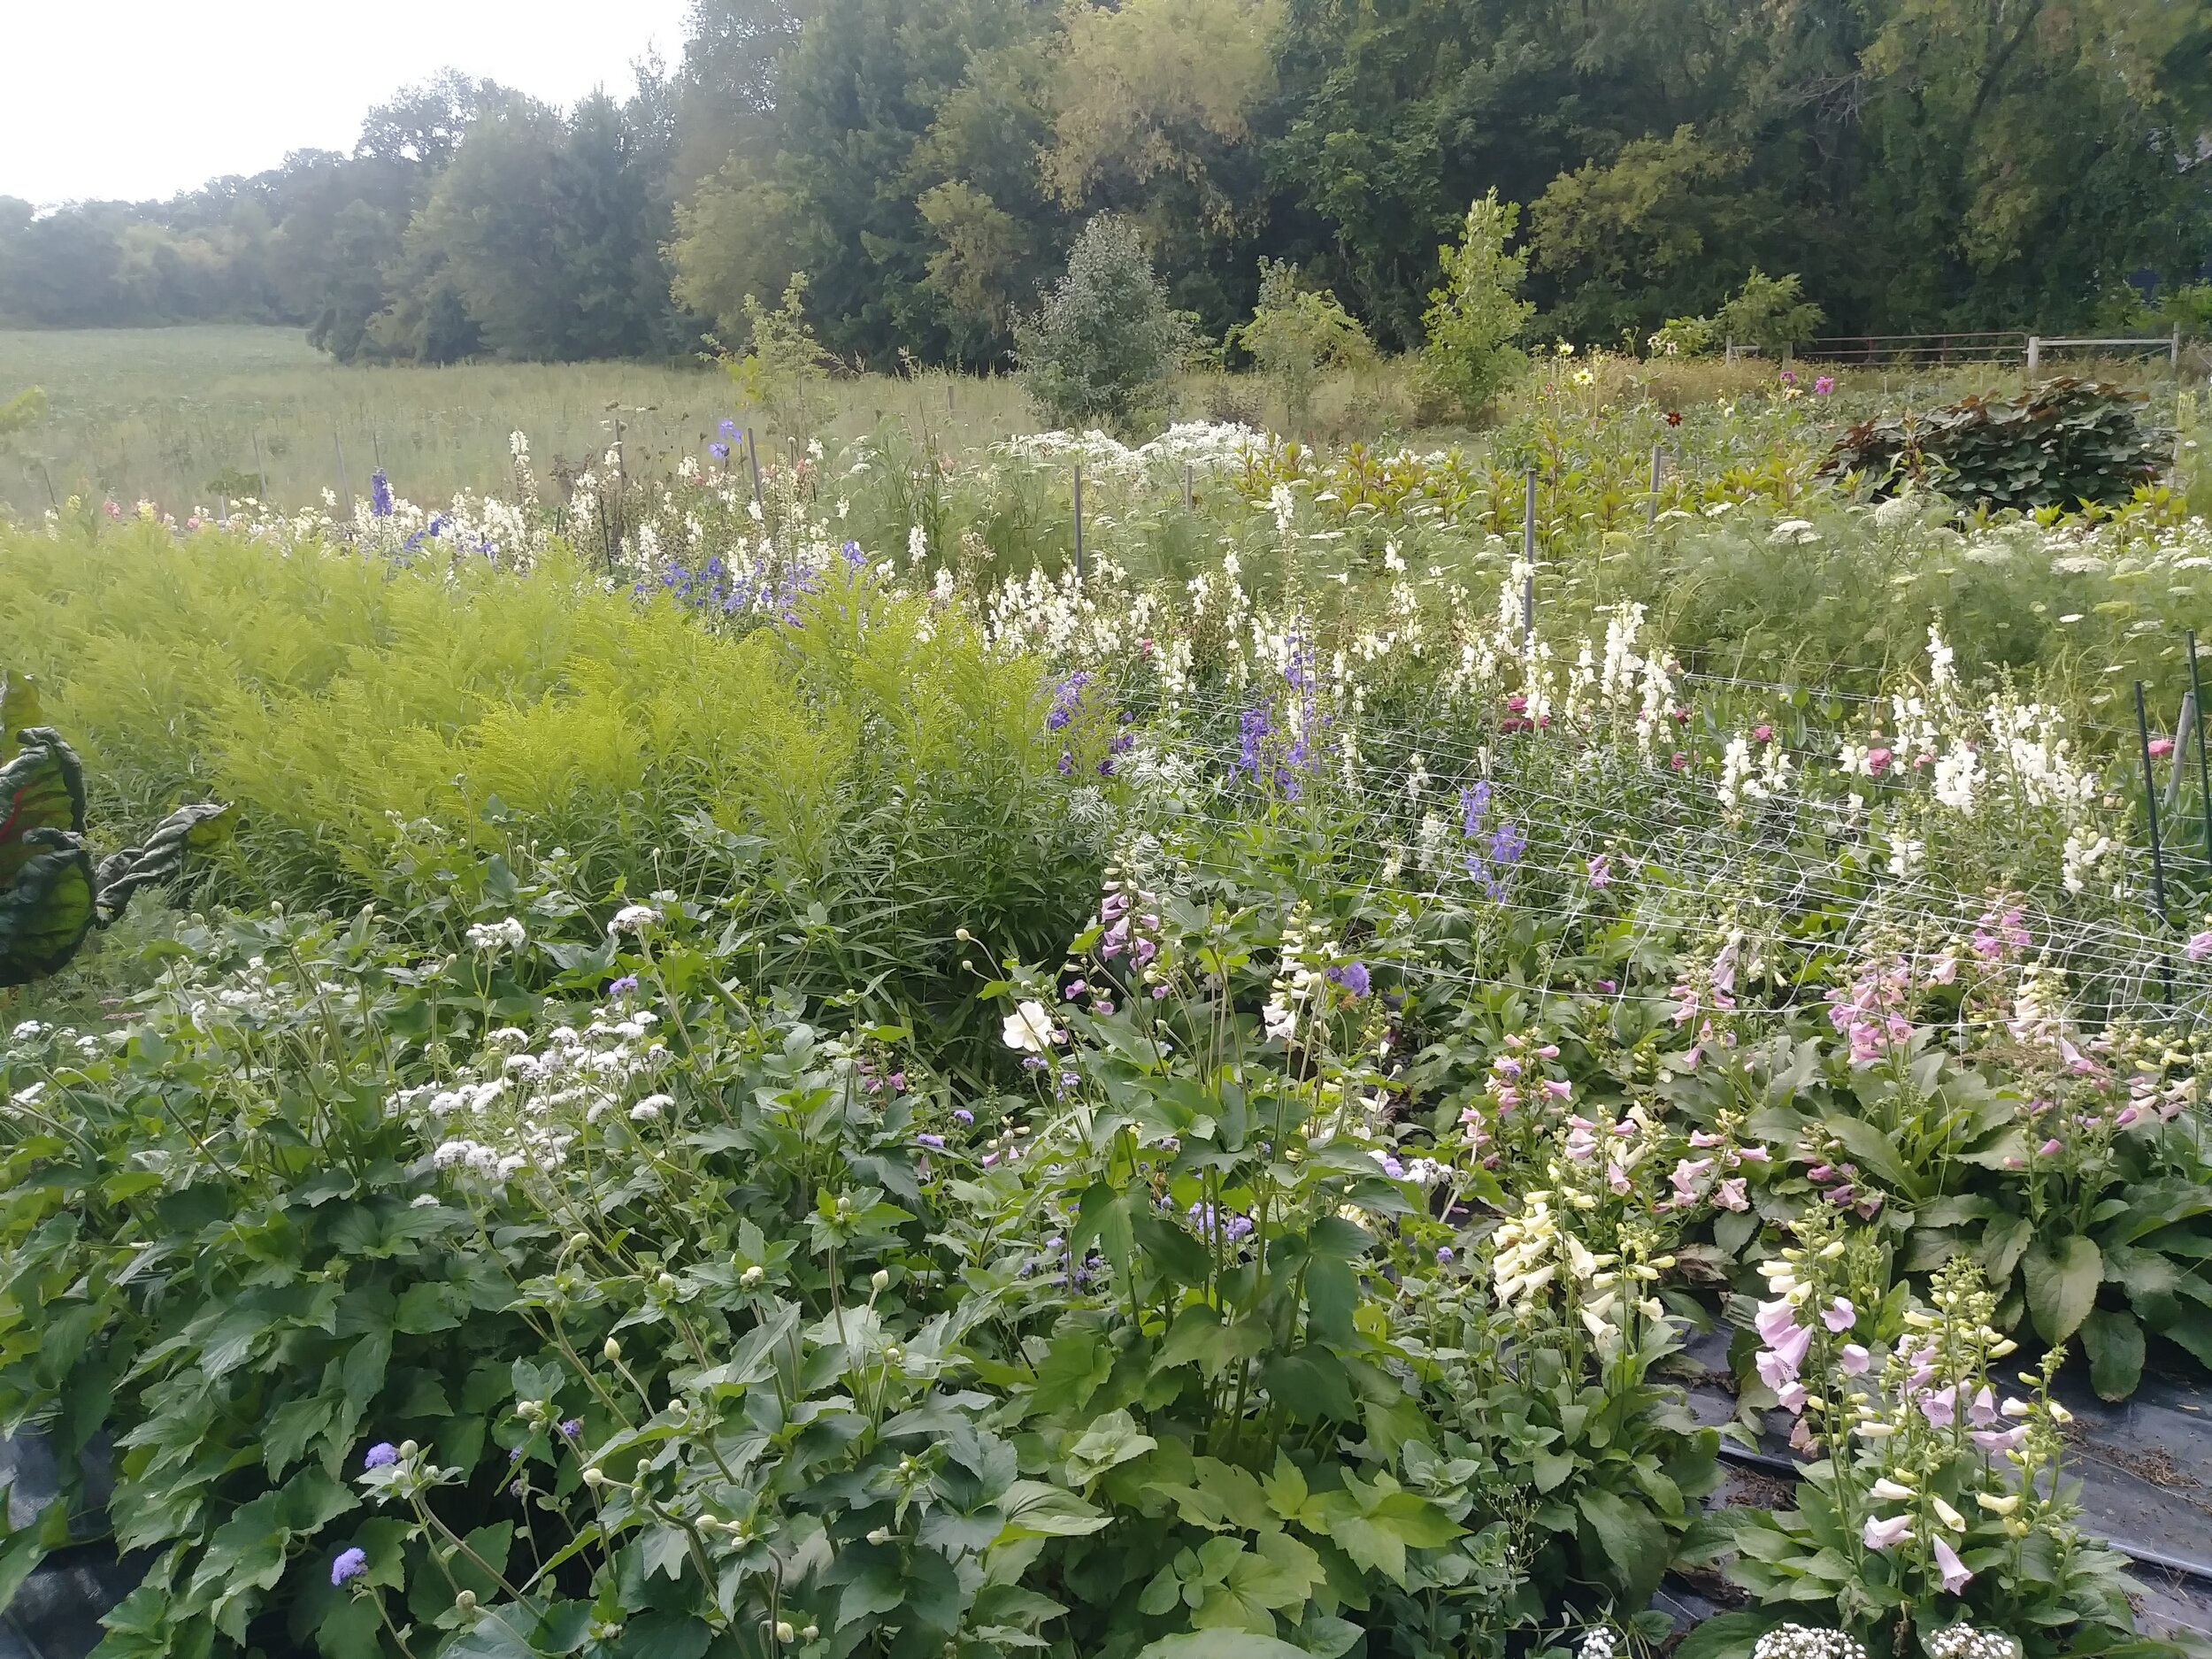
Here is a photo taken from the same spot as the one above, 2 months apart…

Eventually, I’d like to transform this area into a perennial garden, but right now, it’s an eclectic mix of annuals, biennials and perennials.
Instead of calling this area “The Barren Wasteland”, like we did for years, we now call it “The Secret Garden”, as it’s a growing space just for me to play and experiment.
It’s been incredibly productive and keeps cranking out more blooms than I can possibly use!
Here’s what I’ve got growing in the Secret Garden, in no particular order ;)
Rudbeckia (several kinds)
Gypsophila (“Million Star”)
Japanese Anenome (“Honorine Jobert”)
New England Aster
Obedient Plant
Lisianthus (several kinds)
Feverfew (several kinds)
Echinacea (several kinds)
Euphorbia (“Snow on the Mountain”)
Goldenrod (“Moonlight Glory” and “Romantic Glory”)
Delphinium (several kinds)
Aruncus
Foxglove
Lace Flower
Ammi (“Green Mist”, “Select White” and “Dara”)
Snapdragon (several kinds)
Sweet William
Scabiosia (several kinds)
Cosmos (several kinds)
Statice (several kinds)
Gomphrena (several kinds)
Celosia (several kinds)
Shiso/Perilla
Strawflower (several kinds)
Trachelium
Sea Holly
Dahlias (grown from seed, not tubers)


I hope this post inspires you to get out there and prepare your own growing area. Remember, fall is the PERFECT TIME to start planning and preparing for next season!
The Great "Kiddie Pool" Tulip Experiment (A.K.A. "Lori vs Voles: Part 3")
The results of my tulip planting experiment!
The Great “Kiddie Pool” Tulip Experiment
***This is my original social media post I published on November 26, 2019.***
***Read all the way to the bottom to see the results of the experiment!***
Welcome to another episode of “Lori vs. Voles”. 😂👊
Don’t know what voles are? Lucky you.🐁 They are mouse-like critters that tunnel around under the snow all winter long (where the barn cats can’t find them), decimating everything in their path.
One of their favorite foods? Tulip bulbs.🌷
We have a TERRIBLE time with voles around here. I’m about to give up on planting them altogether, but my Dutch blood wants tulips SO BAD.
Here's my track record for "Lori vs. Voles".
1st Cut Flower Tulip Planting Attempt: 125 bulbs planted. Voles ate 122 bulbs. 😭
2nd Cut Flower Tulip Planting Attempt: 500 bulbs planted. Covered with wire mesh to prevent voles. Voles still managed to eat 250 of them. 😭
This year, I’m trying ONE LAST TIME. This method will prove to be either a brilliant success 🙌🙌🙌🙌... or a spectacular failure 💥💥💥. Tune in next spring to find out! 😂
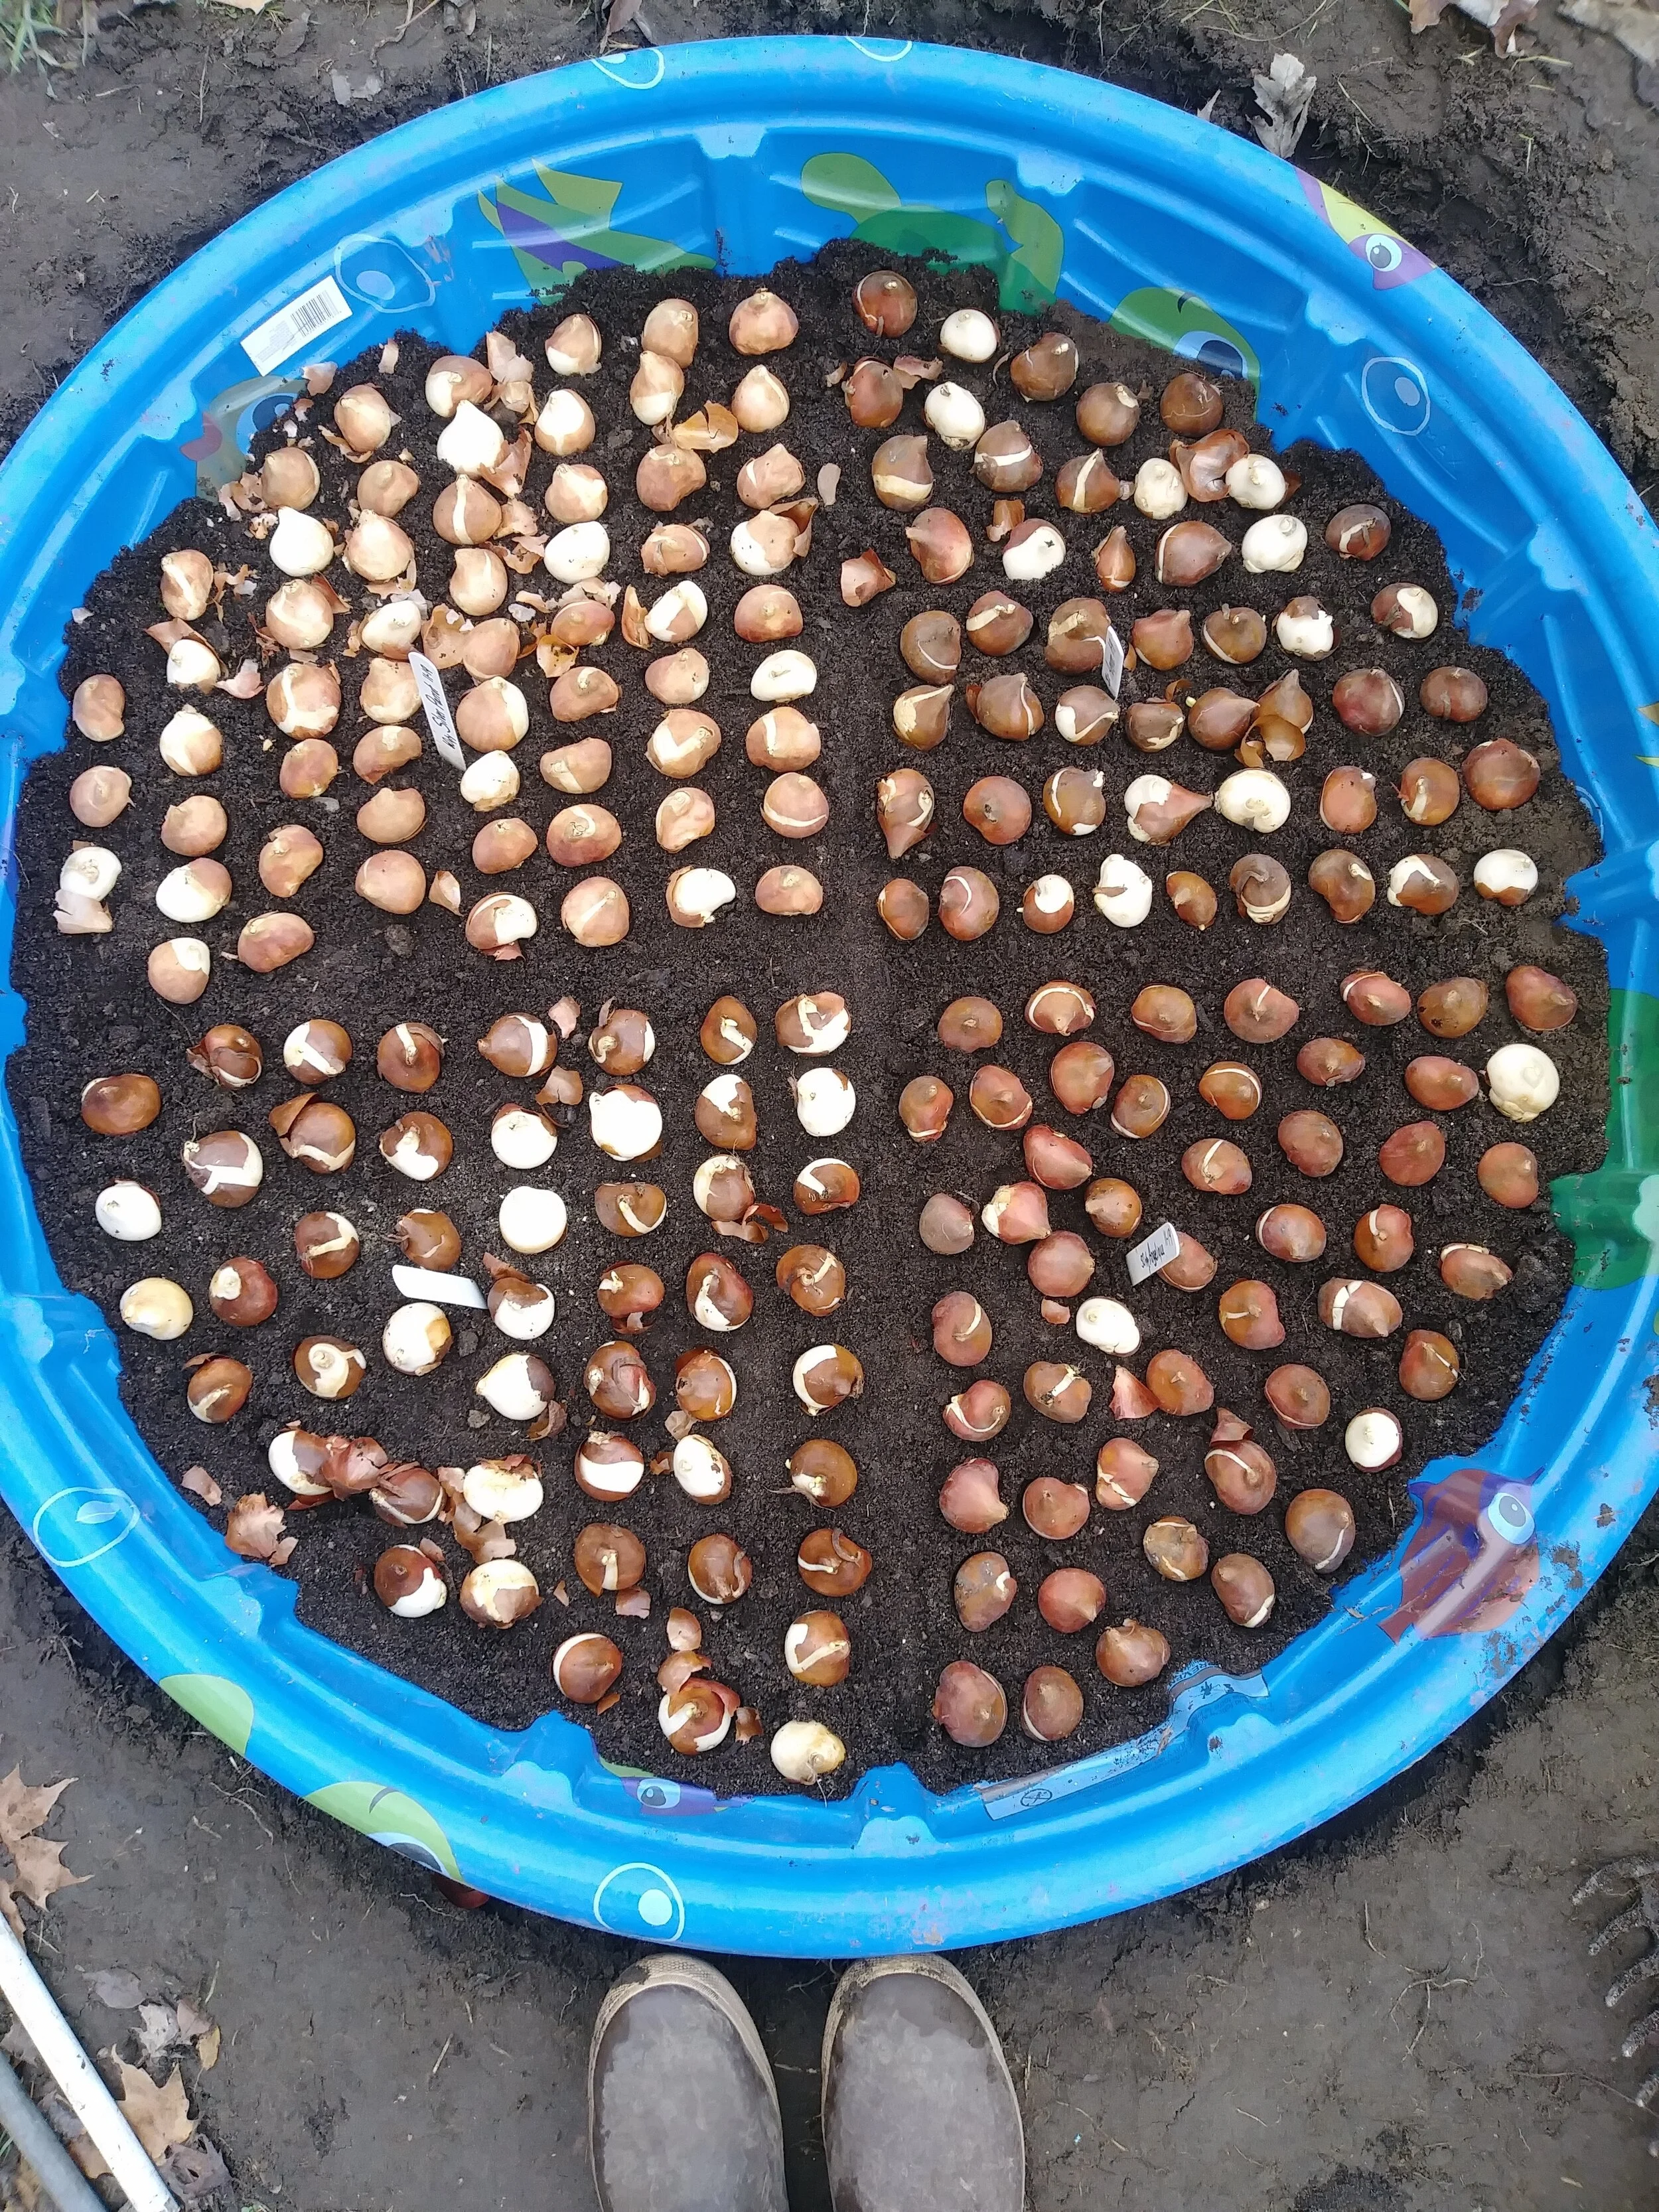
I’m trying the “Kiddie Pool Method”. Actually, it’s not a method. It’s just something I made up. 😉 The tulips will be completely protected on the top, sides and bottom.
Here’s what I did:
🌷Dug a shallow hole for the kiddie pool, so I could sink it to ground level.


🌷Drilled drainage holes in the bottom of the pool.

🌷Filled the pool with a few inches of soil.
🌷Added a bucket of compost and some bone meal fertilizer. Mixed it all up.

🌷Planted the bulbs (they are planted close, like eggs in a carton).

🌷Backfilled the pools with remaining soil until bulbs were covered with a few inches of soil.

🌷Mulched with leaves.
🌷Drilled holes on the edges of the pool and zip-tied wire mesh “hardware cloth” on top of the pools.

Early next spring, I will remove the wire mesh hardware cloth so the tulips can emerge (once the snow is gone, the barn cats can patrol for me 🐱🐱🐱).
Oh, my goodness people. This is a lot of work for tulips and I’m not recommending you try this. 😵 I hope I actually have something to show for all this work!
I keep muttering “I WILL outsmart you, stupid voles….”
Did I mention that not only do Dutch people have incredible love for tulips, but they are also incredibly stubborn? ;)
And the final results in the spring of 2020…..
NOT A SINGLE BULB LOST TO THOSE BLASTED VOLES!!!!
But I do wonder…. was it the kiddie pool method? Or was it the fact we barely had any snow this winter and our barn cats were able to hunt all winter? Usually, we have about a foot of snow and the voles hide under the snow cover, safe from the kitties.
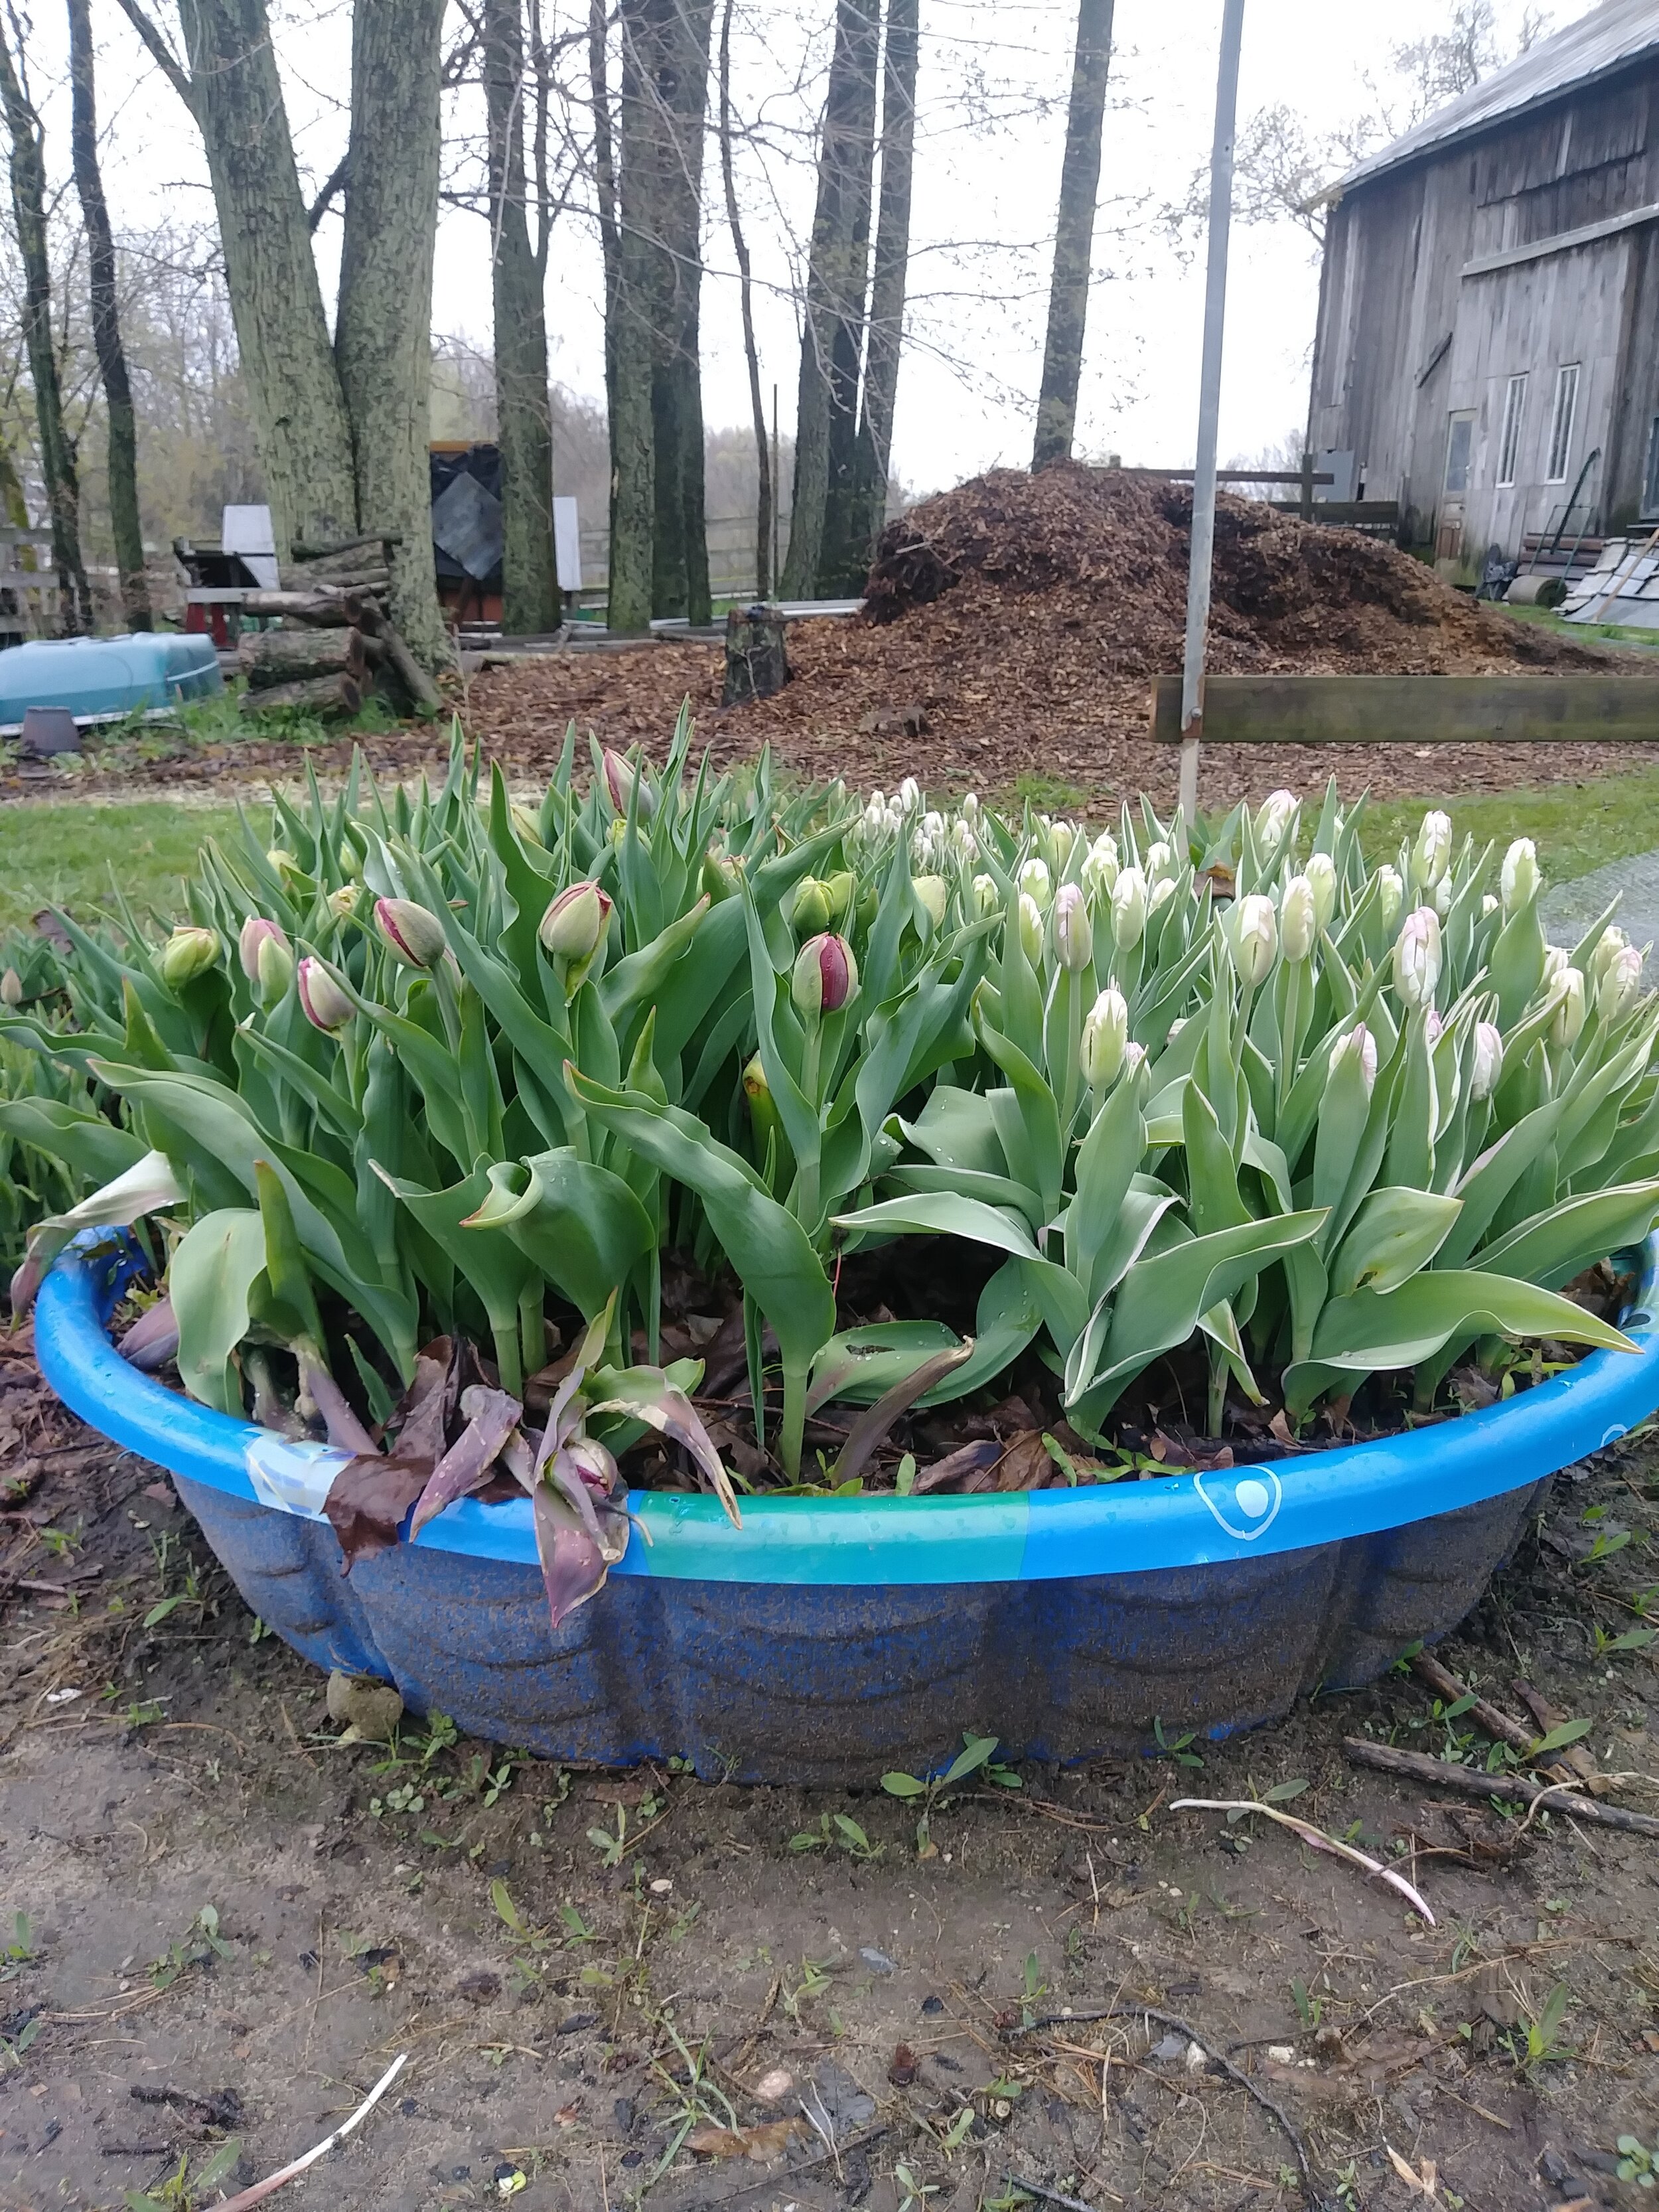
Just for fun, I sunk 1 pool in the ground and left other other ABOVE the ground. I planted the same exact types of bulbs in the 2 beds, hoping to compare them side by side (which one blooms earliest, which one has the longest stems, etc.)

There really was no huge difference. The tulips in the “sunk in the ground “ pool had slightly longer stems, likely because they were colder (tulips need cold temperatures in order to create long stems).

Hope you enjoyed reading about The Great “Kiddie Pool” Experiment!
Would I do it again? Maybe… ;)
Foliage - The Secret to Fabulous Bouquets!
Want to know how to make your bouquets truly shine? It’s all about the foliage!
Foliage - The Secret to Fabulous Bouquets!
When I first started growing flowers, like most people, I was completely enamored with all the beautiful blooms. I would go out into my garden and cut loads of flowers in different colors and drop them all in a jar. Voila! Perfect!
But eventually, something didn’t seem quite right. Why did my homemade bouquets look so… well, homemade? I wanted to make them look classier, a bit more polished looking.
That is when I discovered the importance of FOLIAGE.
While out cutting flowers one day, I noticed all the sage growing in my herb garden. I clipped a few stems, added them to the flowers and WOW!!! The sage provided a wonderful backdrop to highlight all the blooms and I began to realize that foliage might even be MORE important than flowers!
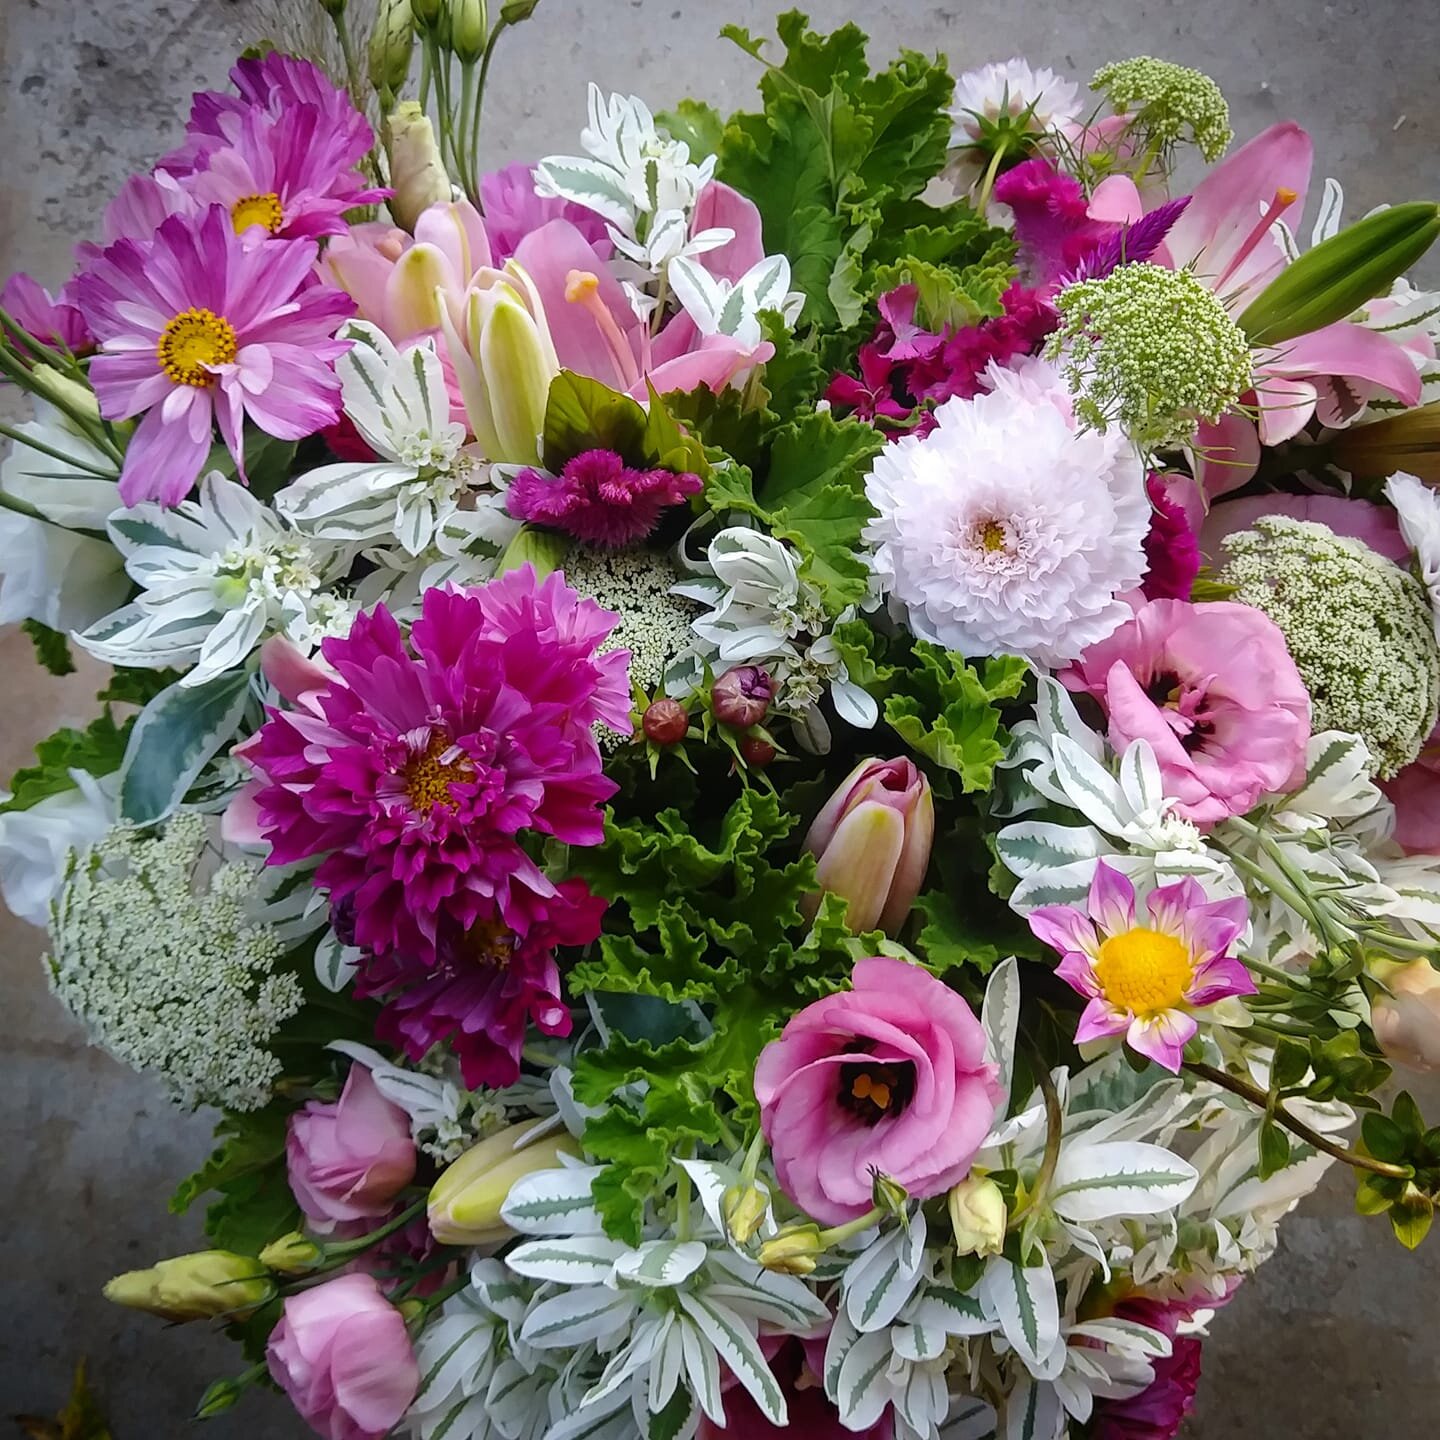
During our flower-designing events on the farm, I often have people say, “Help! I feel like I’m missing something.” I lead them over to my beds of foliage, cut a few stems for them and watch their eyes light up with joy as they see what a difference it makes!
Early on, I was advised that half of my cutting garden should be foliage. That seemed pretty extreme to me and I thought I knew better than the experts.
Silly me. That first season, I was always scrambling for more foliage. Since then, I’ve made it a point to grow WAY more foliage each season. I’ve now reached the point where I get more excited about foliage than I do about the blooms!
I hope when you’ve finished reading this blog post, you’ll feel the same way… or at least have a new appreciation for all that luscious greenery!
Anatomy of a Bouquet/Arrangement
To achieve a full, lush, professional looking arrangement, it’s helpful to pay attention to the 3 main parts:
Focal: The center of attention, usually 1-3 main blooms. The rest of the arrangement is built upon the focal flowers.
Filler: The majority of the arrangement. These smaller flowers/plants compliment the focal flowers.
Foliage: The backbone/foundation of the arrangement. Provides structure, mass and enhances the flowers.
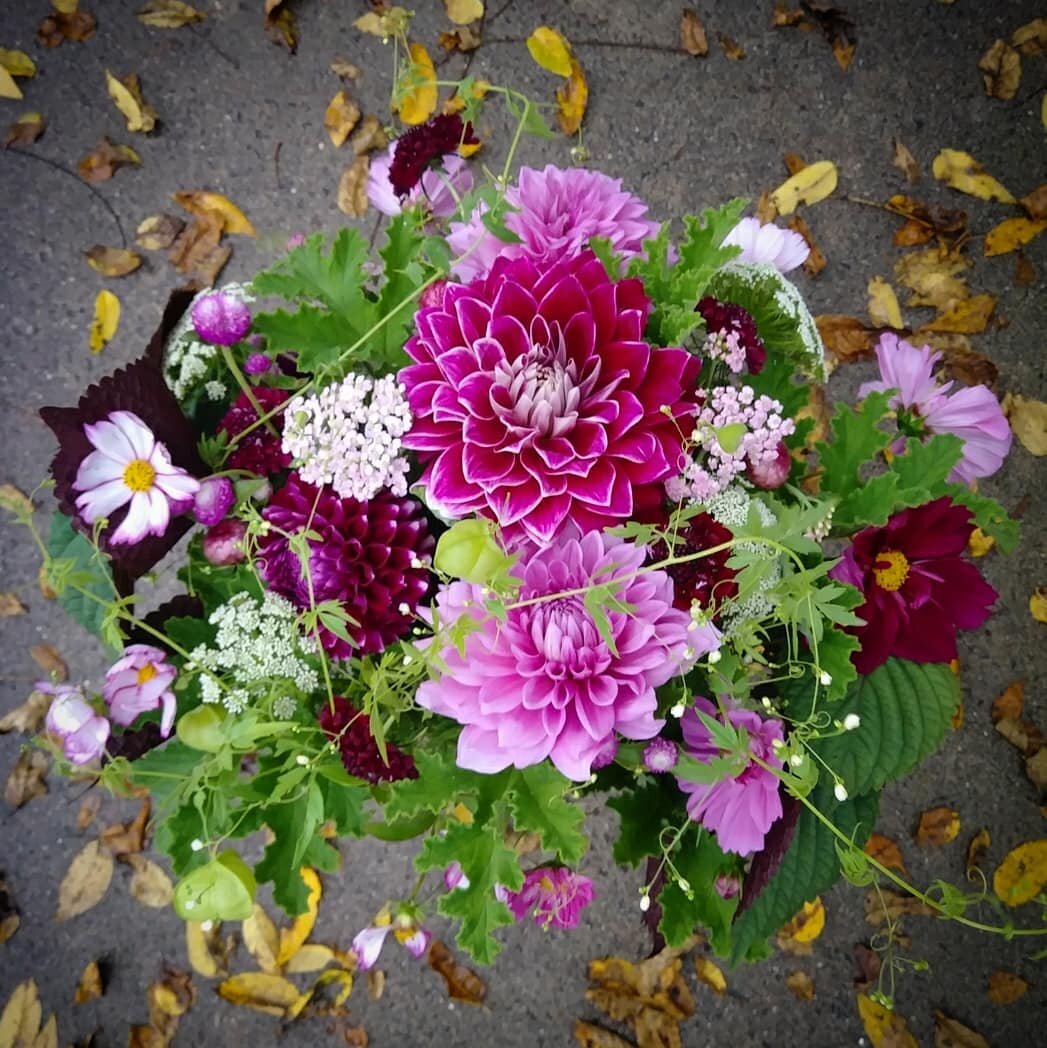
Here’s an example below….
Focal: Dahlia
Filler: Ammi, Celosia, Cosmos, Statice
Foliage: Lemon Bee Balm, Scented Geranium
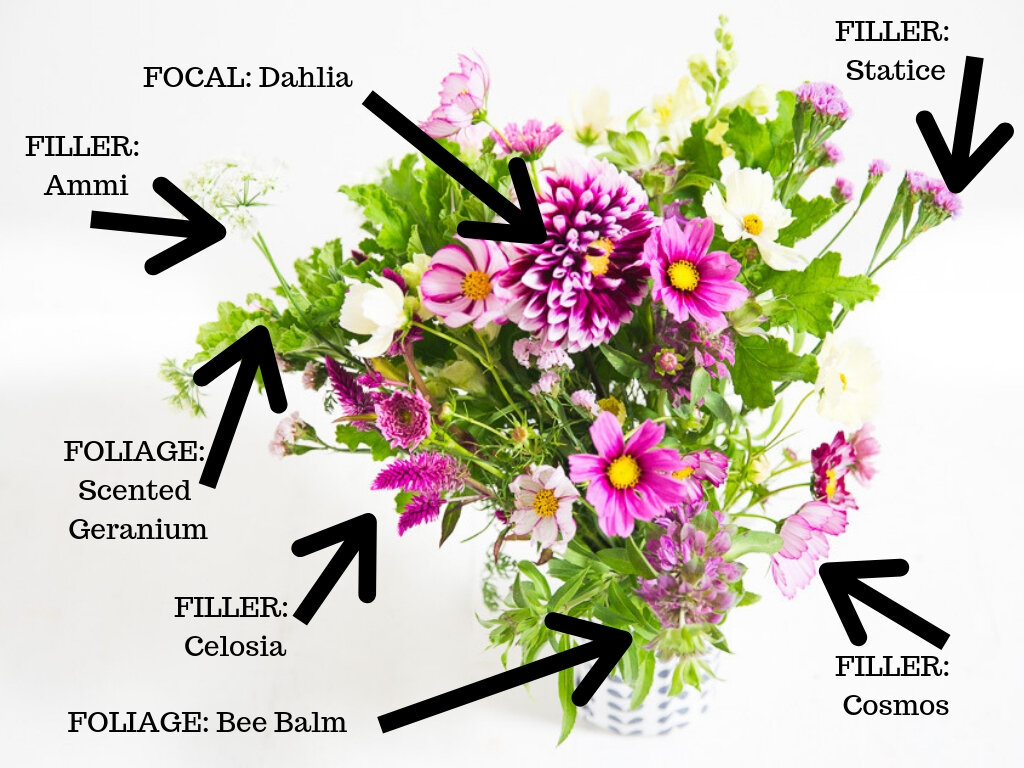
See how the foliage and filler really compliment the focal flower?
Here is a list of some of the foliage we grow at Three Acre Farm to get you inspired!
Asparagus
Every spring during planting season, I walk past my asparagus bed about 18 million times a day and think “I really need to harvest that asparagus!” And then I don’t. And then the asparagus spears transform into these huge towering ferns… that actually look awesome bouquets! It makes me feel not quite so bad about missing asparagus season… again. ;)

Basil
Basil makes a wonderful, long lasting foliage if cut at the proper stage and time of day. Be sure to cut it after the stems have become “woody” and cut very early in the day or in the late evening (coolest parts of the day). Basil cut in the heat of the day will wilt almost immediately and has a hard time recovering. “Mrs. Burn’s Lemon” is delightfully scented and a lovely lime green. “Amoratto” is a beautiful mixture of dark green/violet.

Bells of Ireland
One of my favorite foliages! Harvest when you see the tiny white flowers inside the “bells” begin to open up.

Blackberry Foliage
If you have blackberry plants, they can do double duty as a fruit and foliage plant. Double points if you grow “thornless” blackberries, like I do ;)

Bupleurum
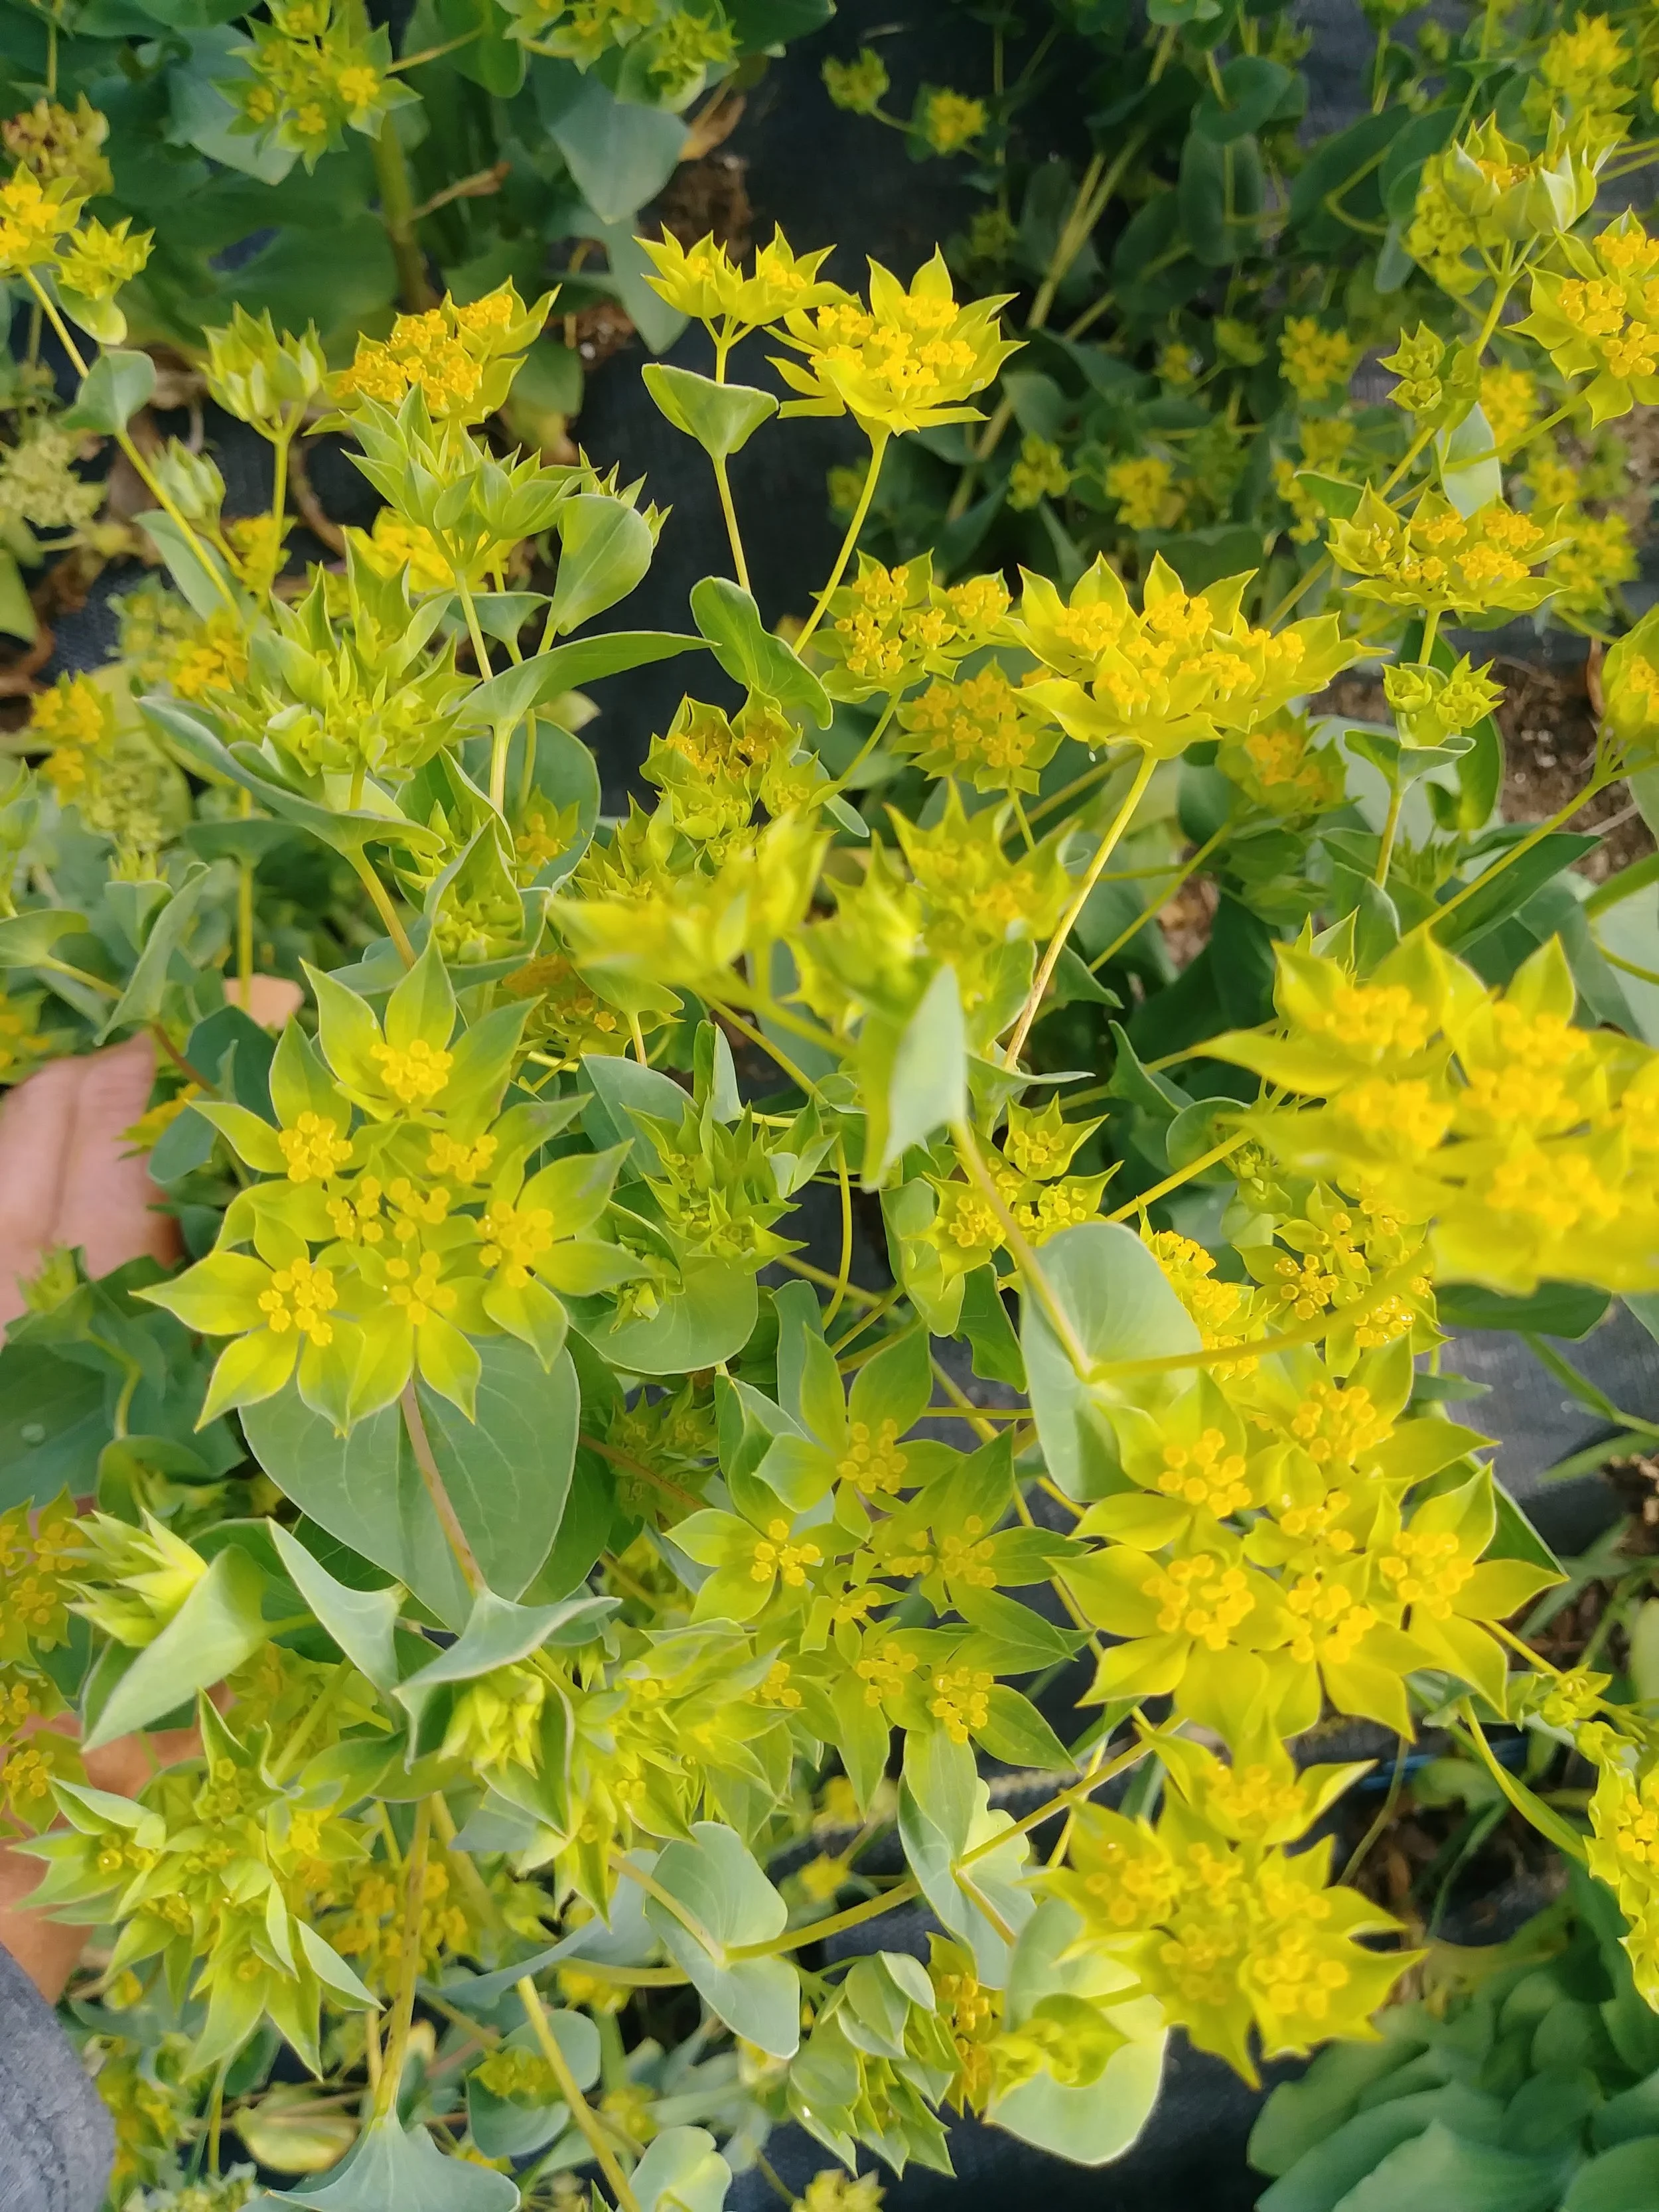
When this is in season, I start every single bouquet with a stem of Bupleurum. The wiry, sturdy stems are the perfect base for weaving other flowers into. The bright cheery lime green color compliments nearly every color scheme.
Dill
Perhaps Dill belongs in the “filler” category, but I wanted to mention it because it’s so fantastic. Allow the head to shed the little yellow flowers and wait until they form bright green seed pods. They truly sparkle in bouquets!

Euphorbia (“Snow-on-the-Mountain”)
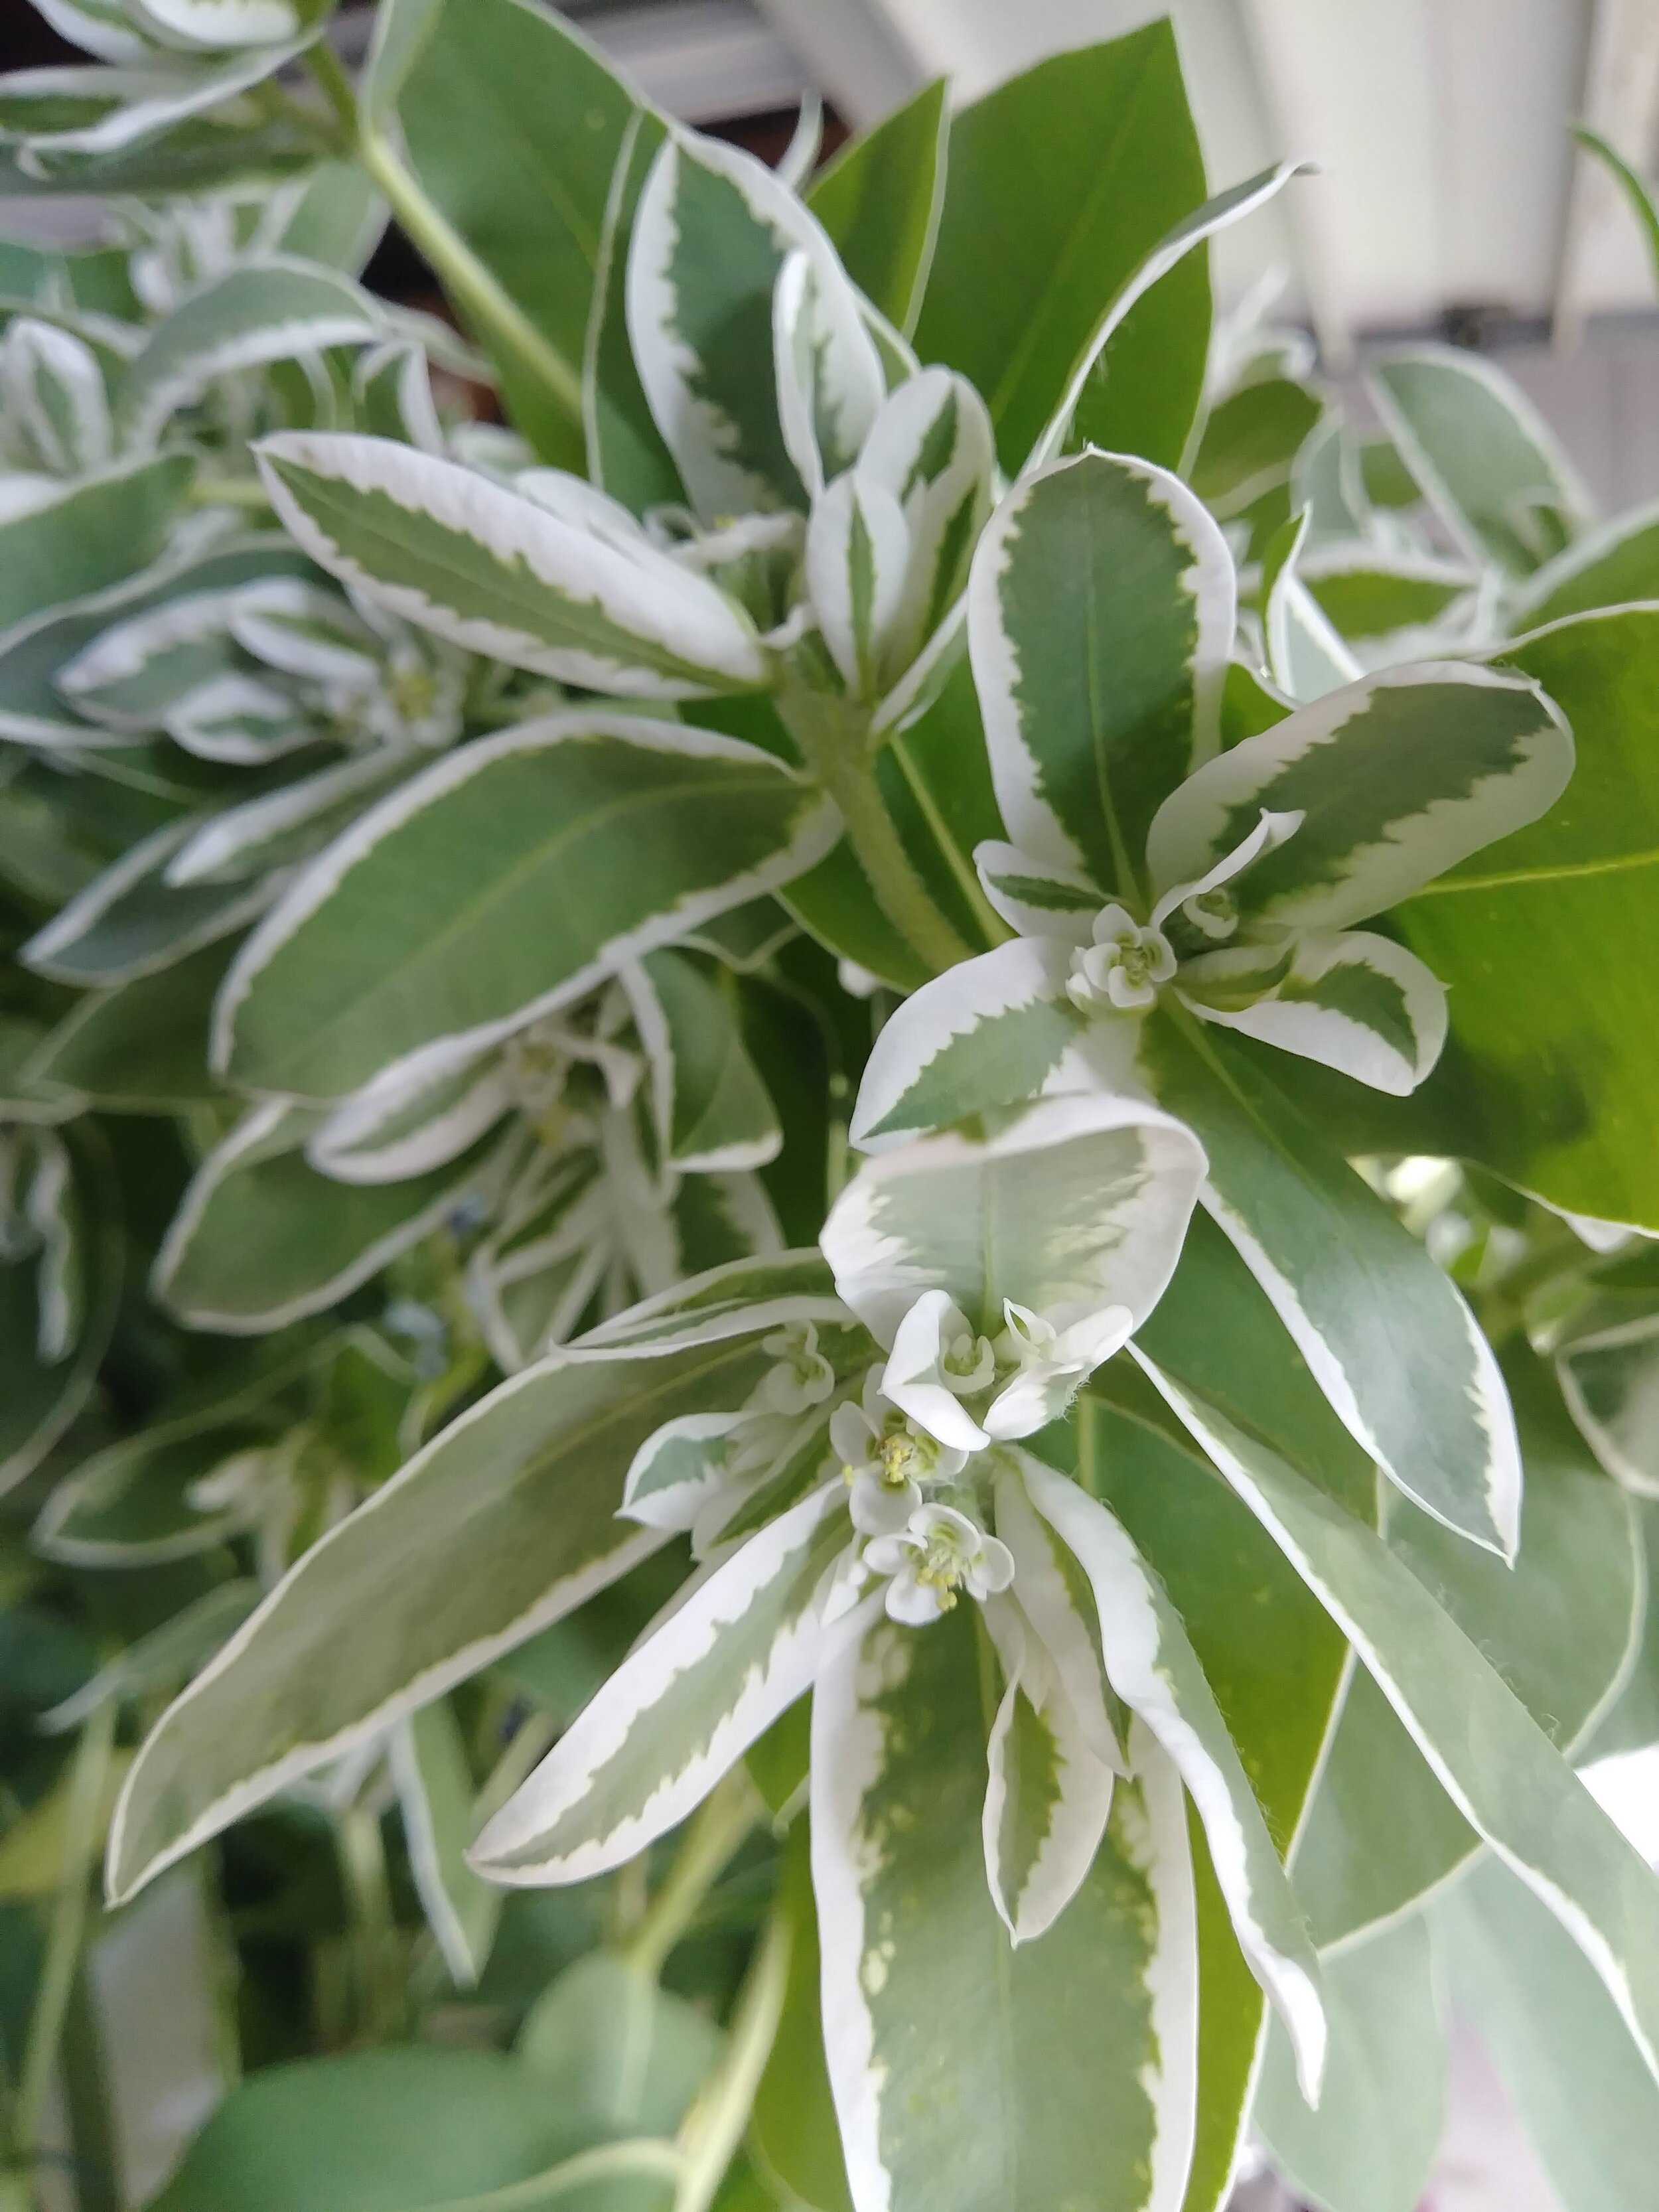
I grew this for the first time this year… and I’m torn. The foliage is STUNNING and everyone swoons over it. But…. I feel like I need to wear a hazmat suit while harvesting it. The stems leak sticky white sap that irritates skin. And can cause major eye irritation. And it gets SUPER wilty if I cut if after the sun is up. Not sure if I’ll grow it again.
Flax
Yes, this is the same plant you get “flax seed” from. The plant sends up little blue flowers, but I wait until those are gone and harvest the seed pods instead. They look so sparkly and playful in bouquets!

Frosted Explosion/Sprinkles Grass
This grass is magical. A few stems here and there, and your bouquet shimmers.

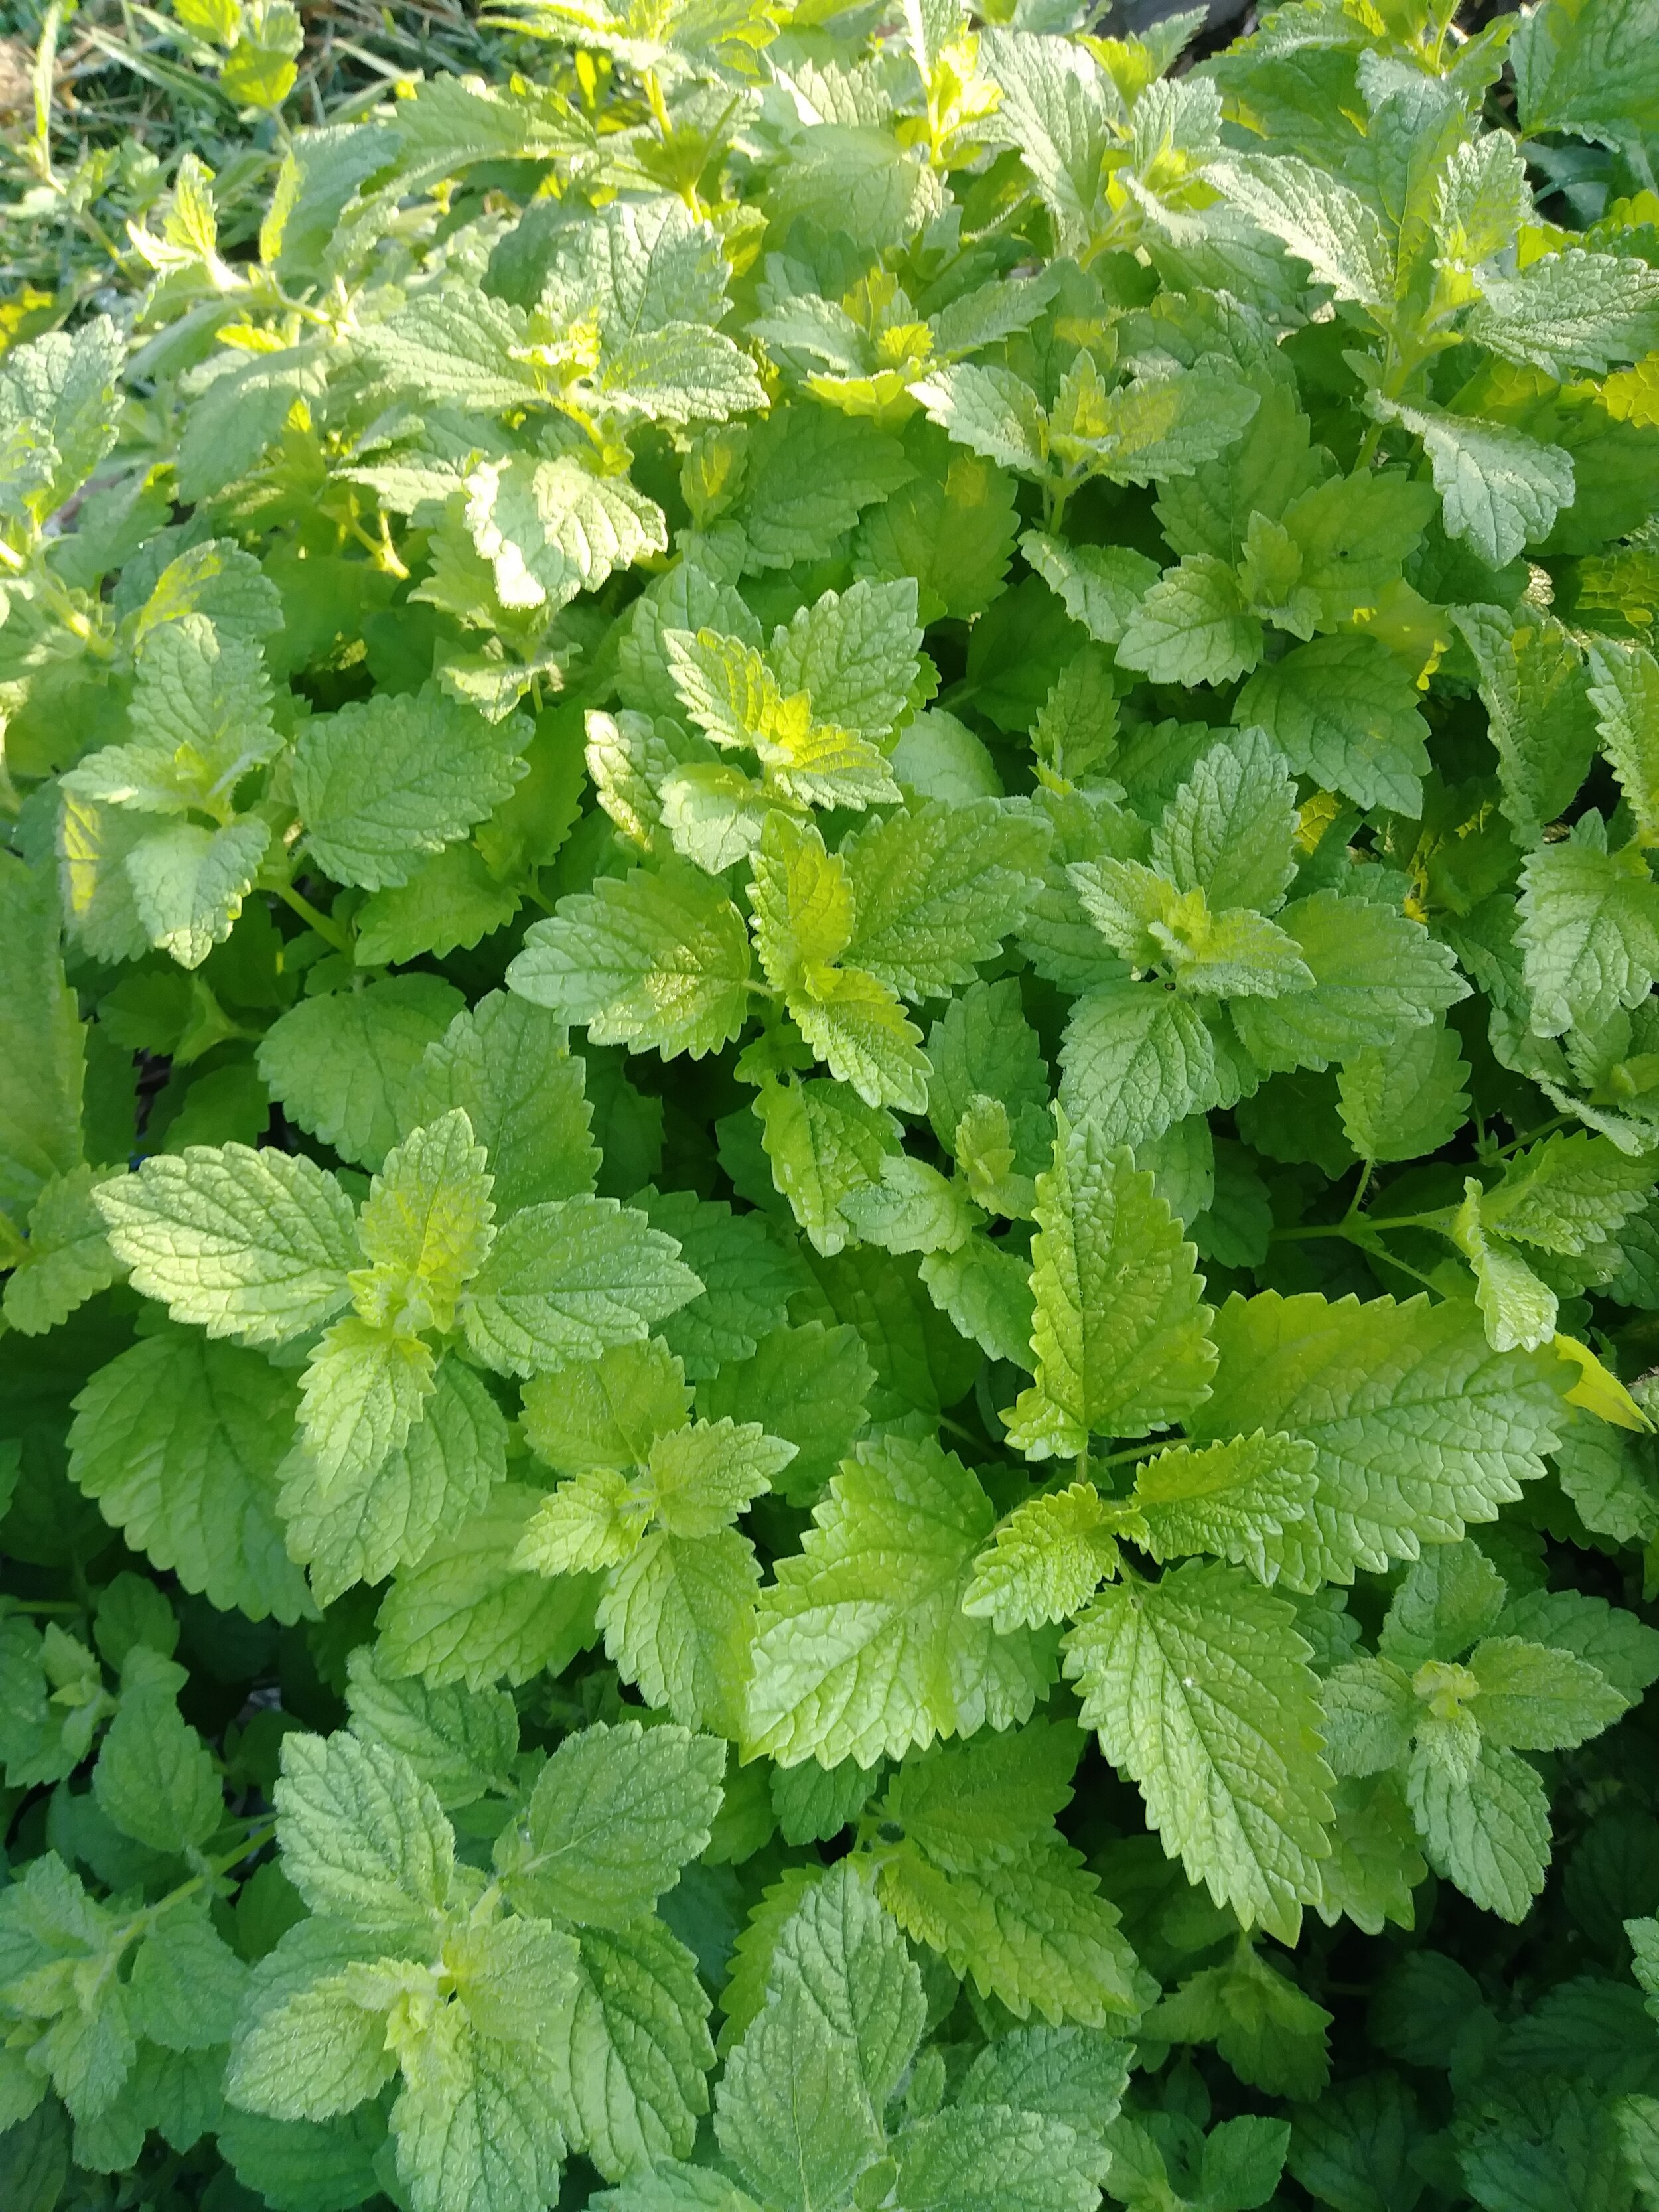
Lemon Balm (Melissa officinalis)
A member of the mint family, this stuff will spread like crazy. The good news is it smells AMAZING and you can dry the leaves to make tea. Not so bad after all! Wait until the stems are “woody” and firm before cutting, and cut only in the cool of the day.
Lemon Bee Balm (Monarda citriodora)
This is a fun looking plant that can double as a flower or foliage. The gray/green/pink color scheme looks great with almost anything. It has a tendency to wilt, so harvest in the cool of the day and wait until the stems are “woody” and firm.

Love-in-a-Puff
This dainty, delicate looking vine is so much fun. The little lantern-like seed pods are adorable, playful and festive. Inside each seed pod are 3 round seeds with hearts on them. No joke! “Love-in-a-Puff” indeed! The tiny white flowers are adored by pollinators.

Mint
Mint spreads like CRAZY, so be forewarned…. But it’s lovely in bouquets… and mojitos ;) “Apple Mint” is a great variety for cut flower use.

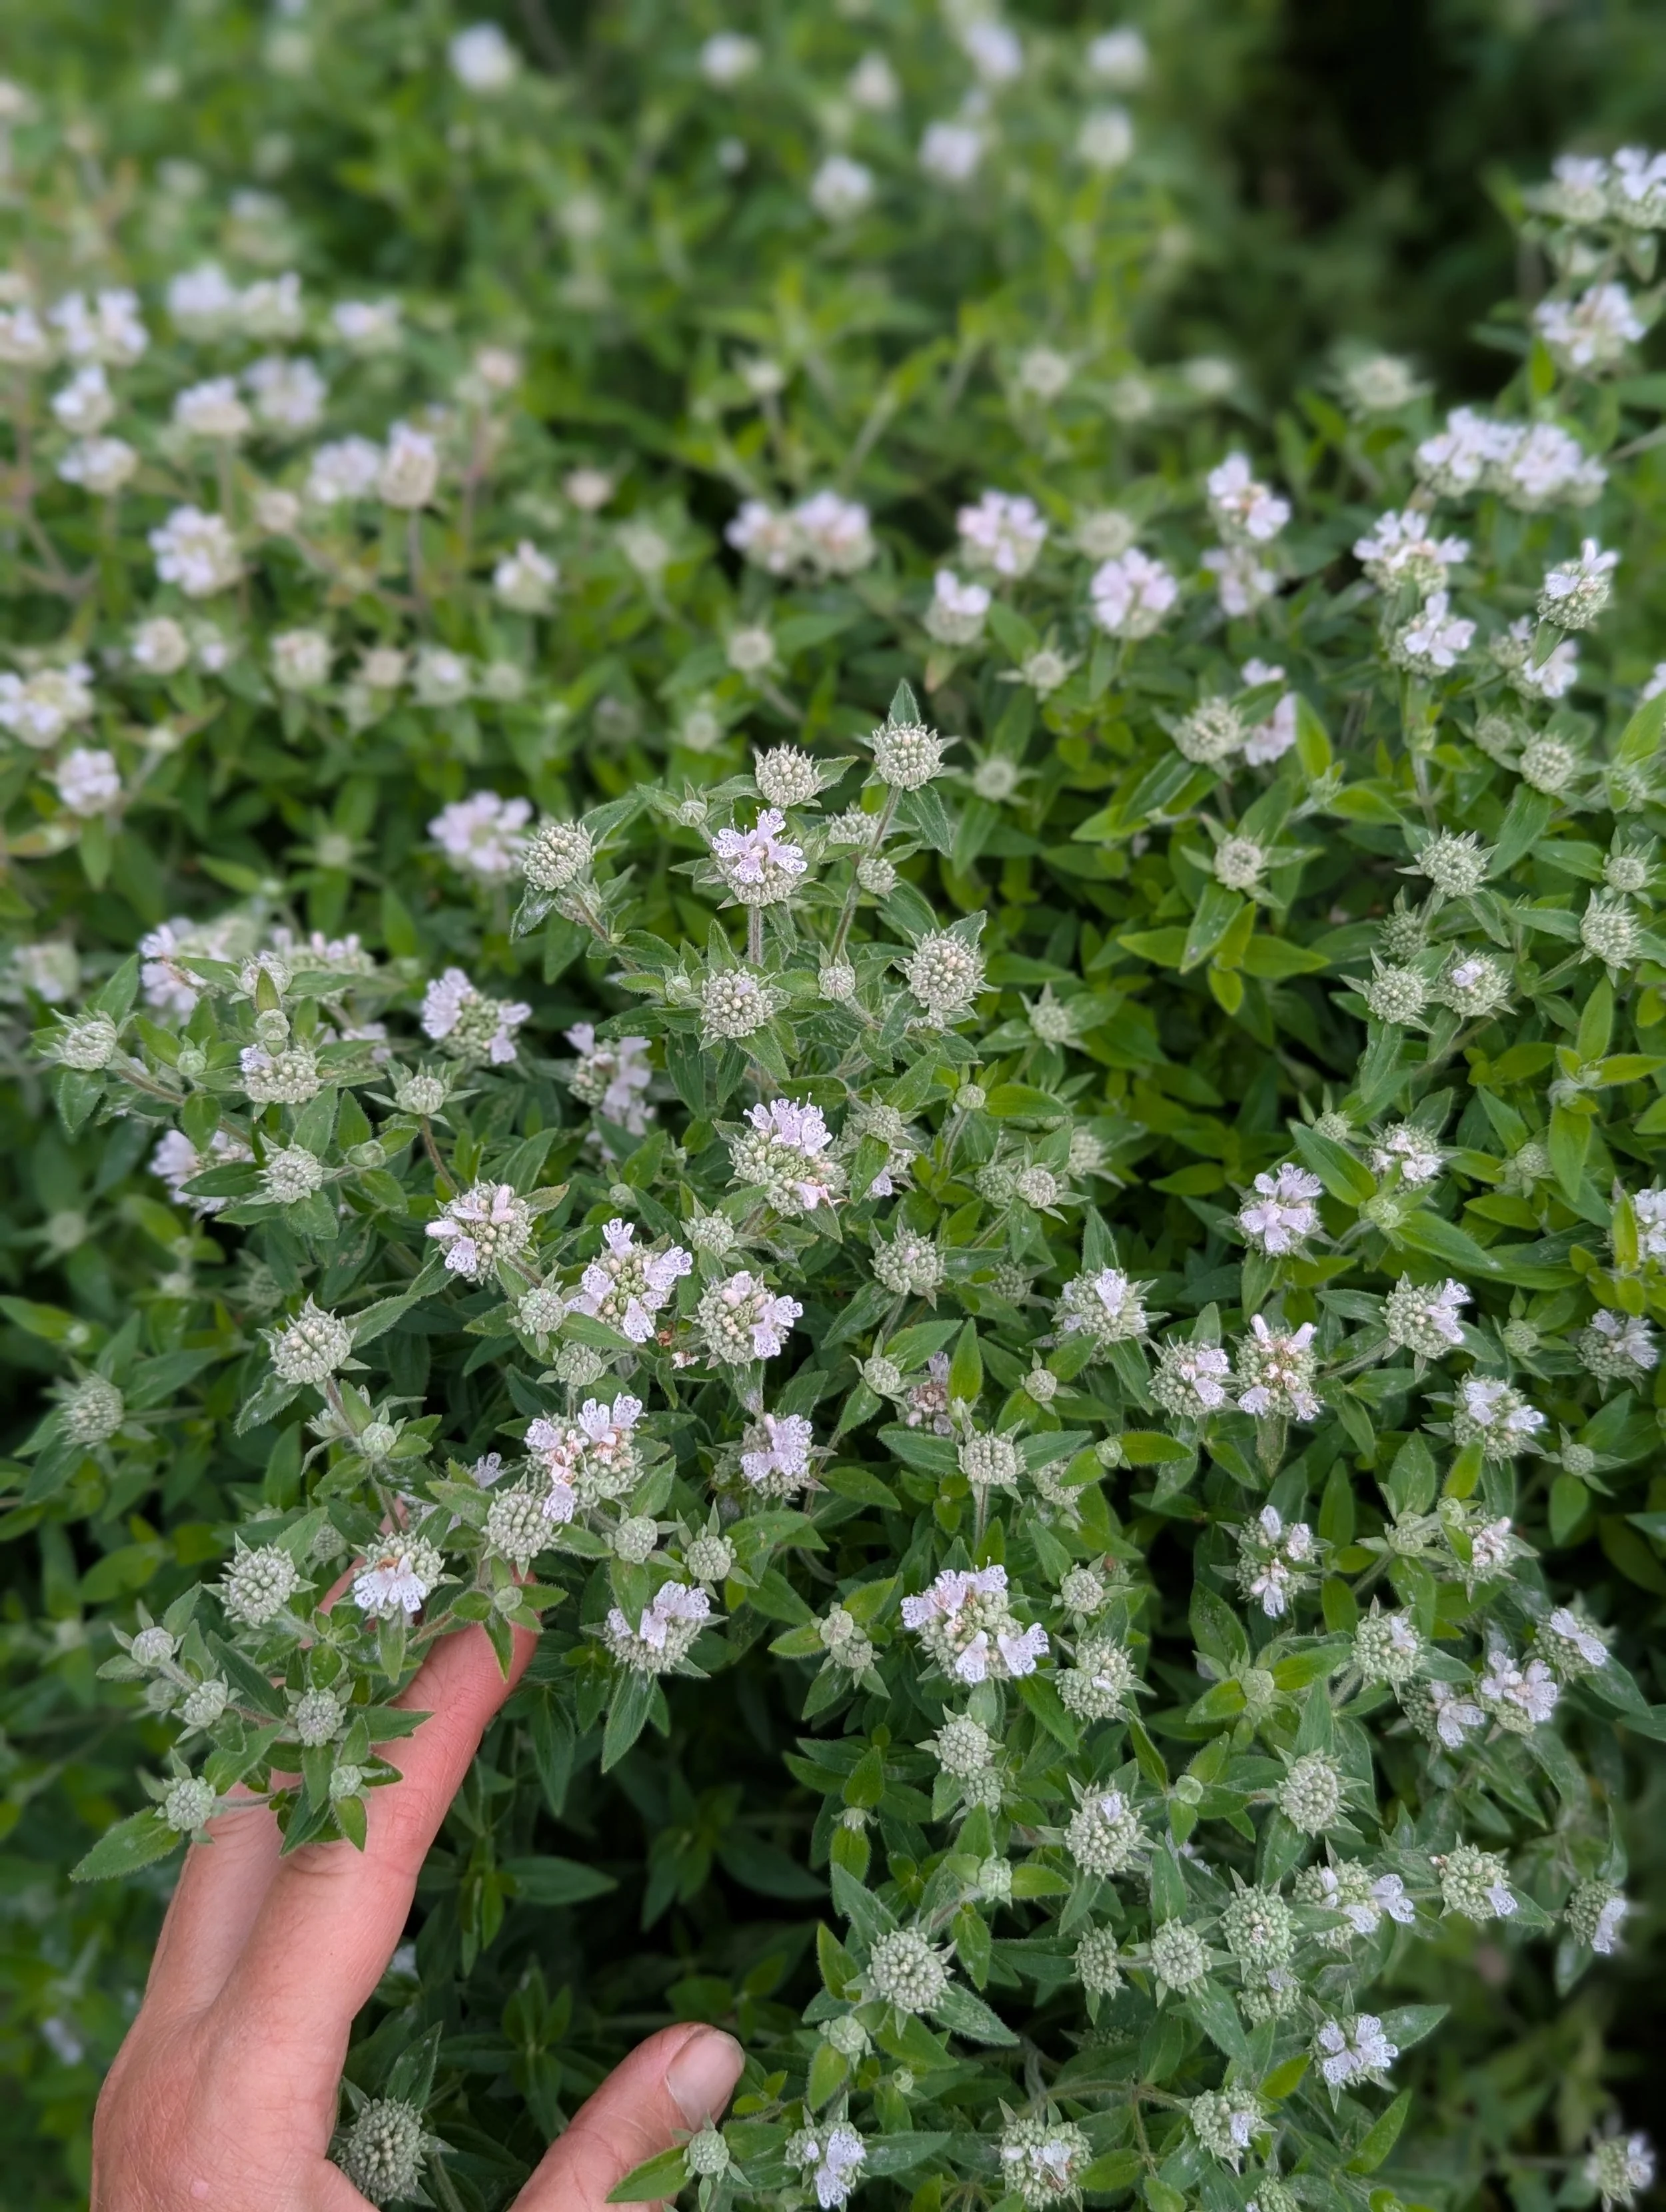
Mountain Mint (Pycnanthemum pilosum)
Apparently there are other types of Mountain Mint that flower farmers swear by… but I planted the wrong kind. Ha! Anyway, I’m glad I made the mistake. I adore this Mountain Mint. It smells fantastic, doesn’t spread aggressively like regular mint, and the stems form beautiful flowers later in the season. A winner in my book!
Ninebark
When I first started flower farming, I asked a florist what was her favorite foliage to work with. Without hesitation, she said “Ninebark. Plant as many as you can. They are AMAZING.” She was right. Ninebark is actually a large shrub, so you’ll have to find one at your local plant nursery. Be sure to not cut more than ⅓ of the plant each season. “Autumn Jubilee” is my favorite.

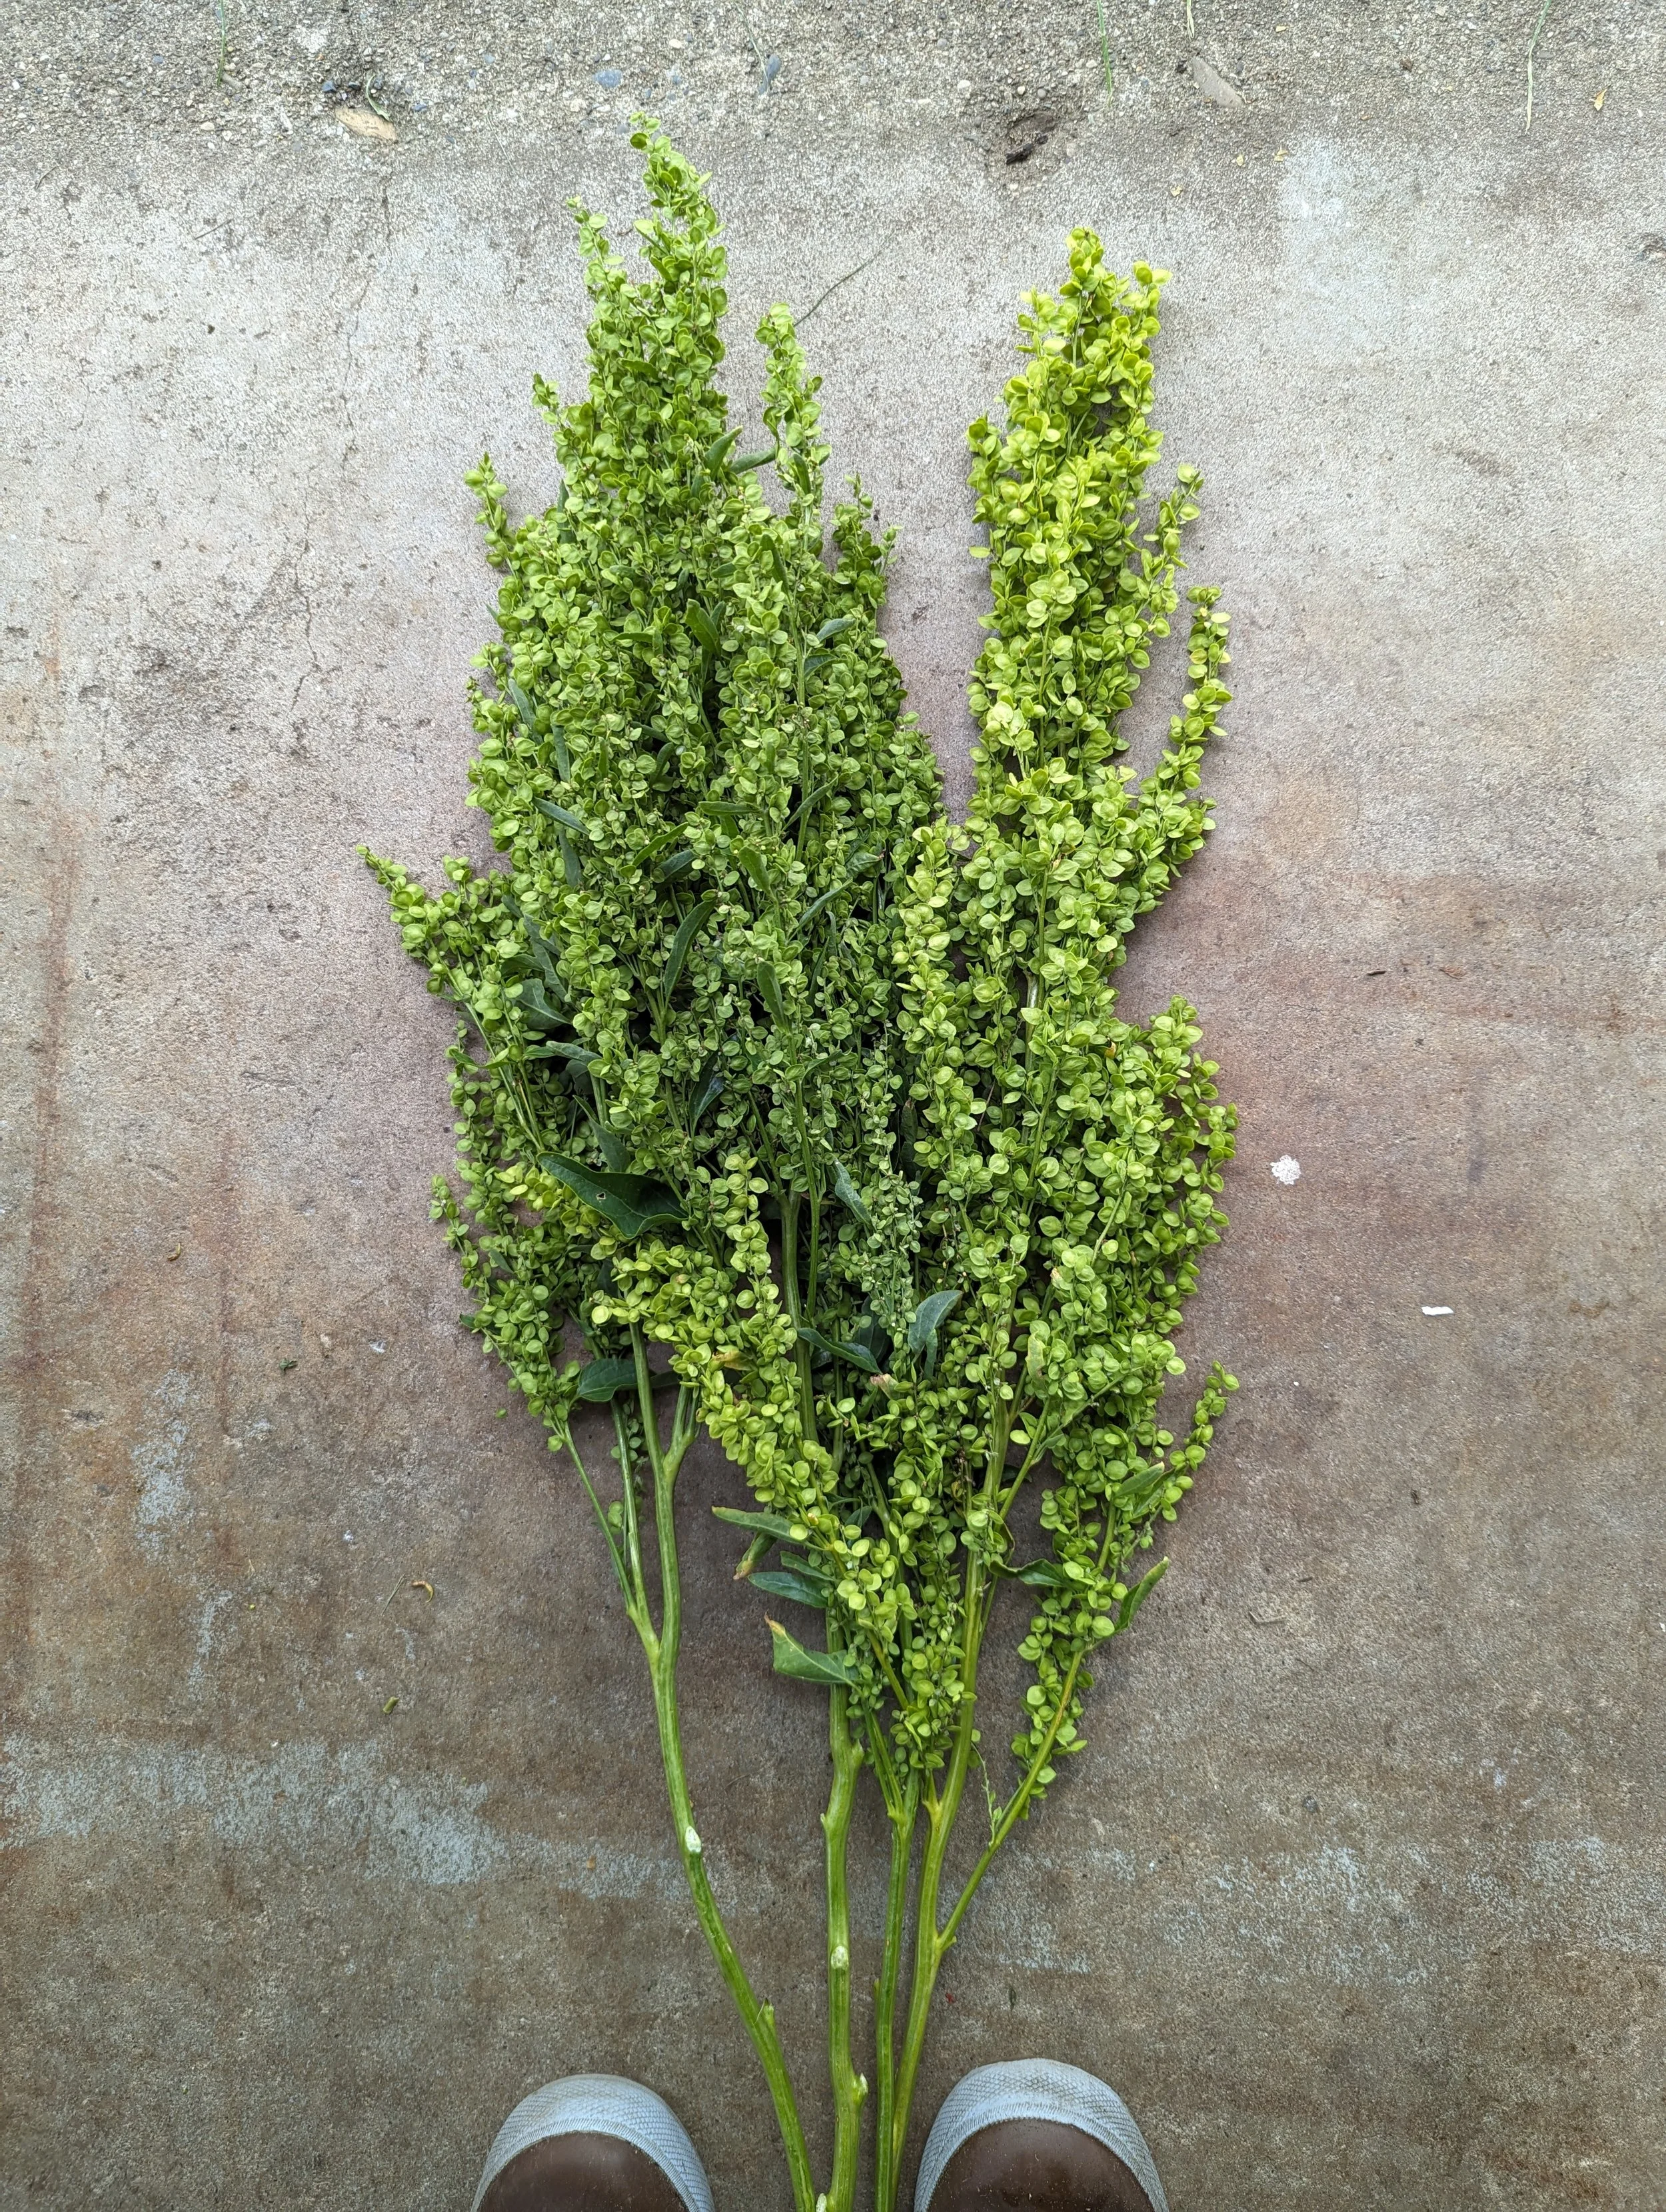
Orach (Atriplex)
This is actually a type of spinach. Instead of harvesting the greens, allow the plant to “bolt” and go to seed. The seed pods look like glitter in bouquets!
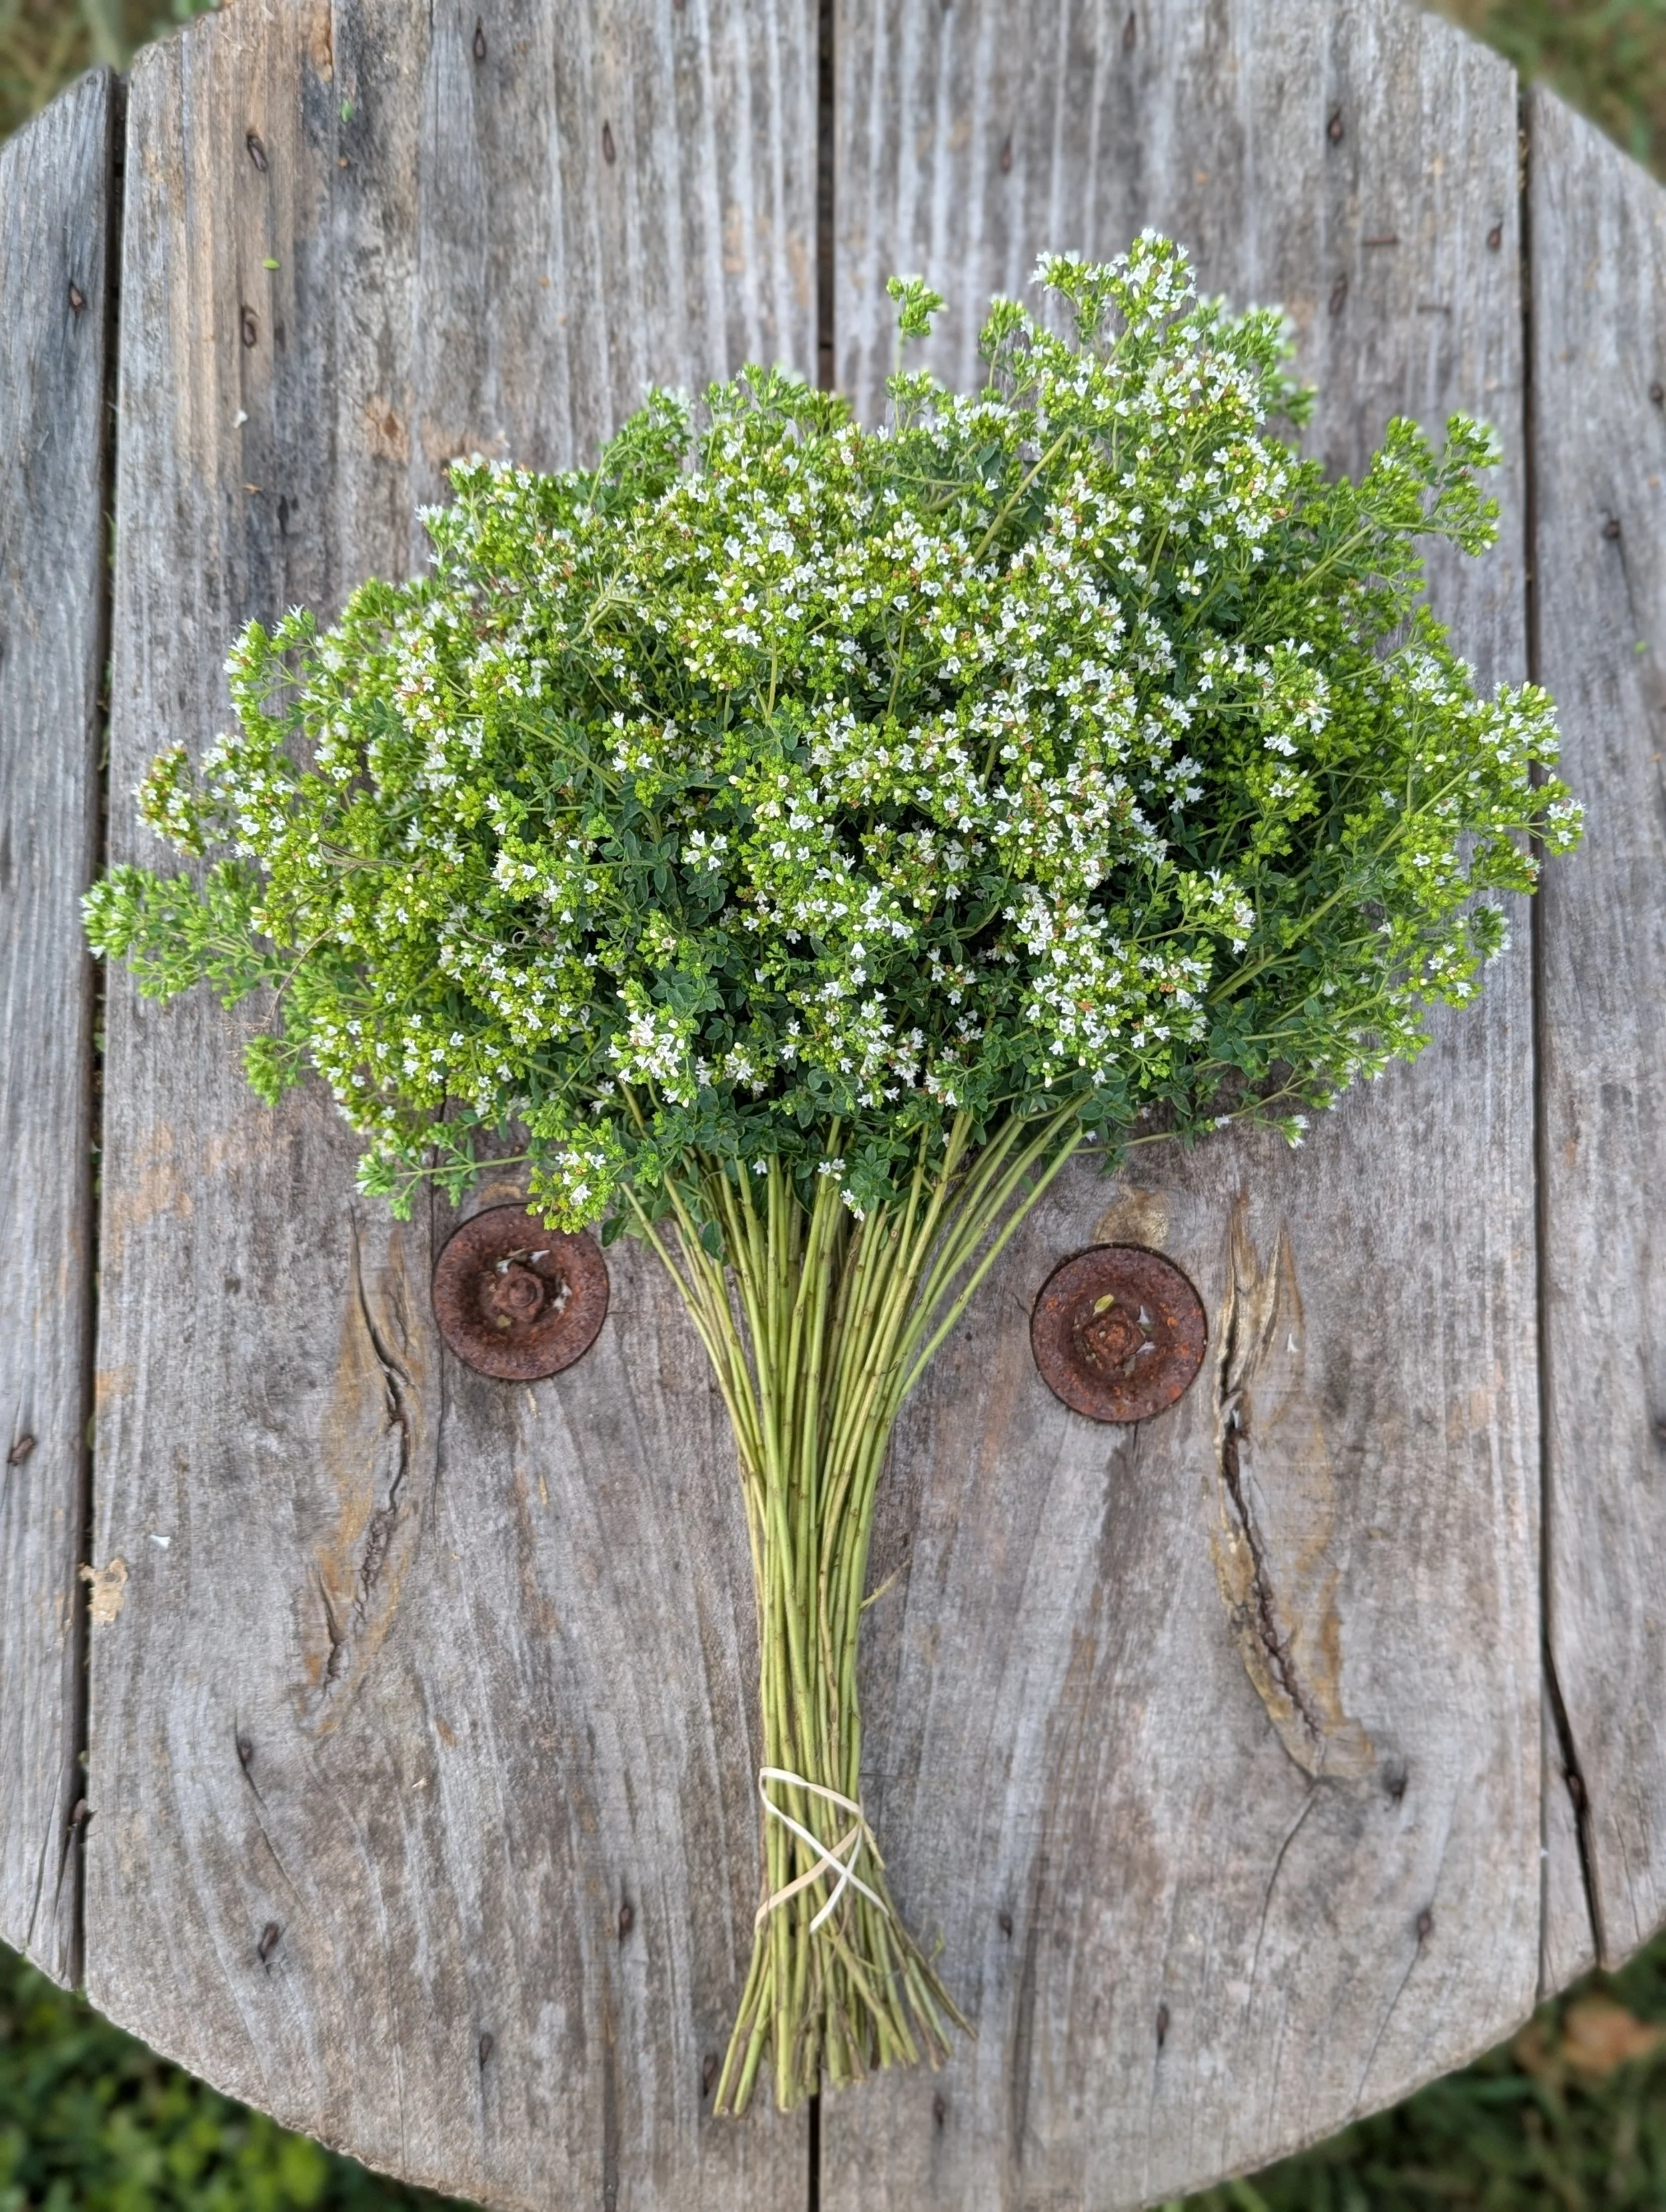
Oregano
Oregano looks unassuming until it forms it’s lovely little while flowers later in the season. They look fantastic in bouquets and add a nice herbal scent.
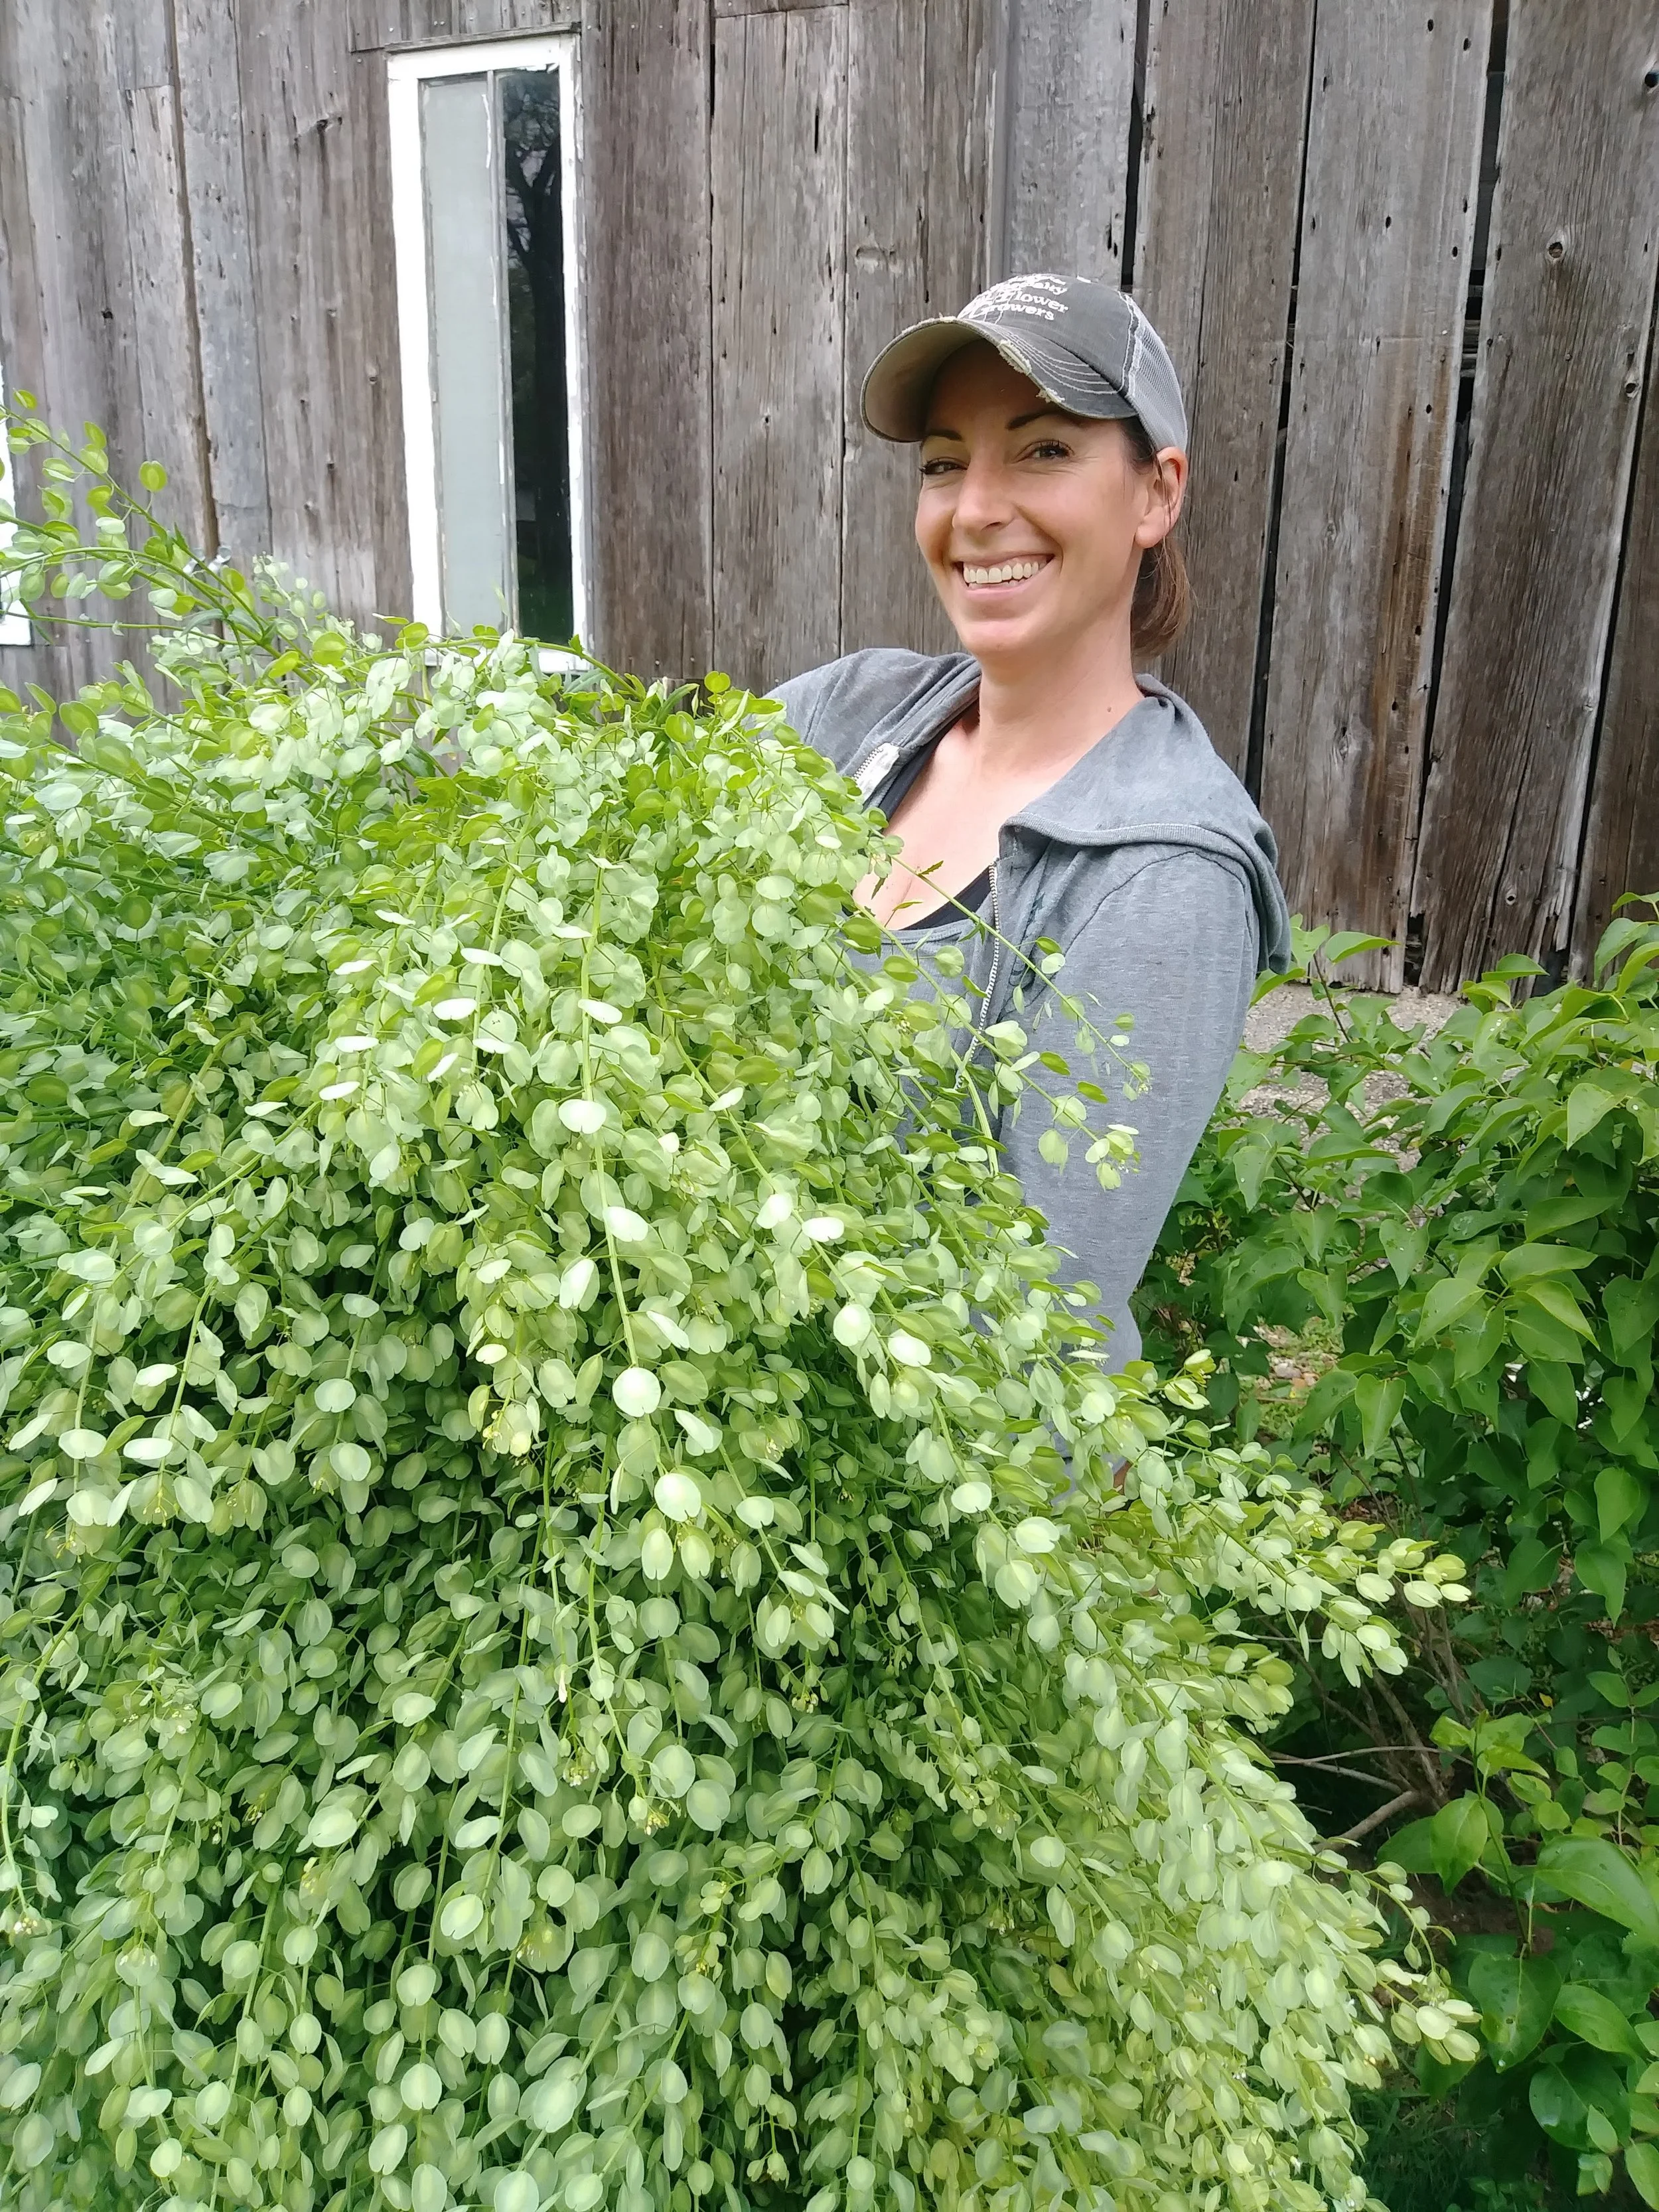
Penny Cress
These “weedy” looking plants form fun, playful looking seed pods that add great textural interest to bouquets. They can also be dried! This is a “once and done” plant - you get one stem per plant.
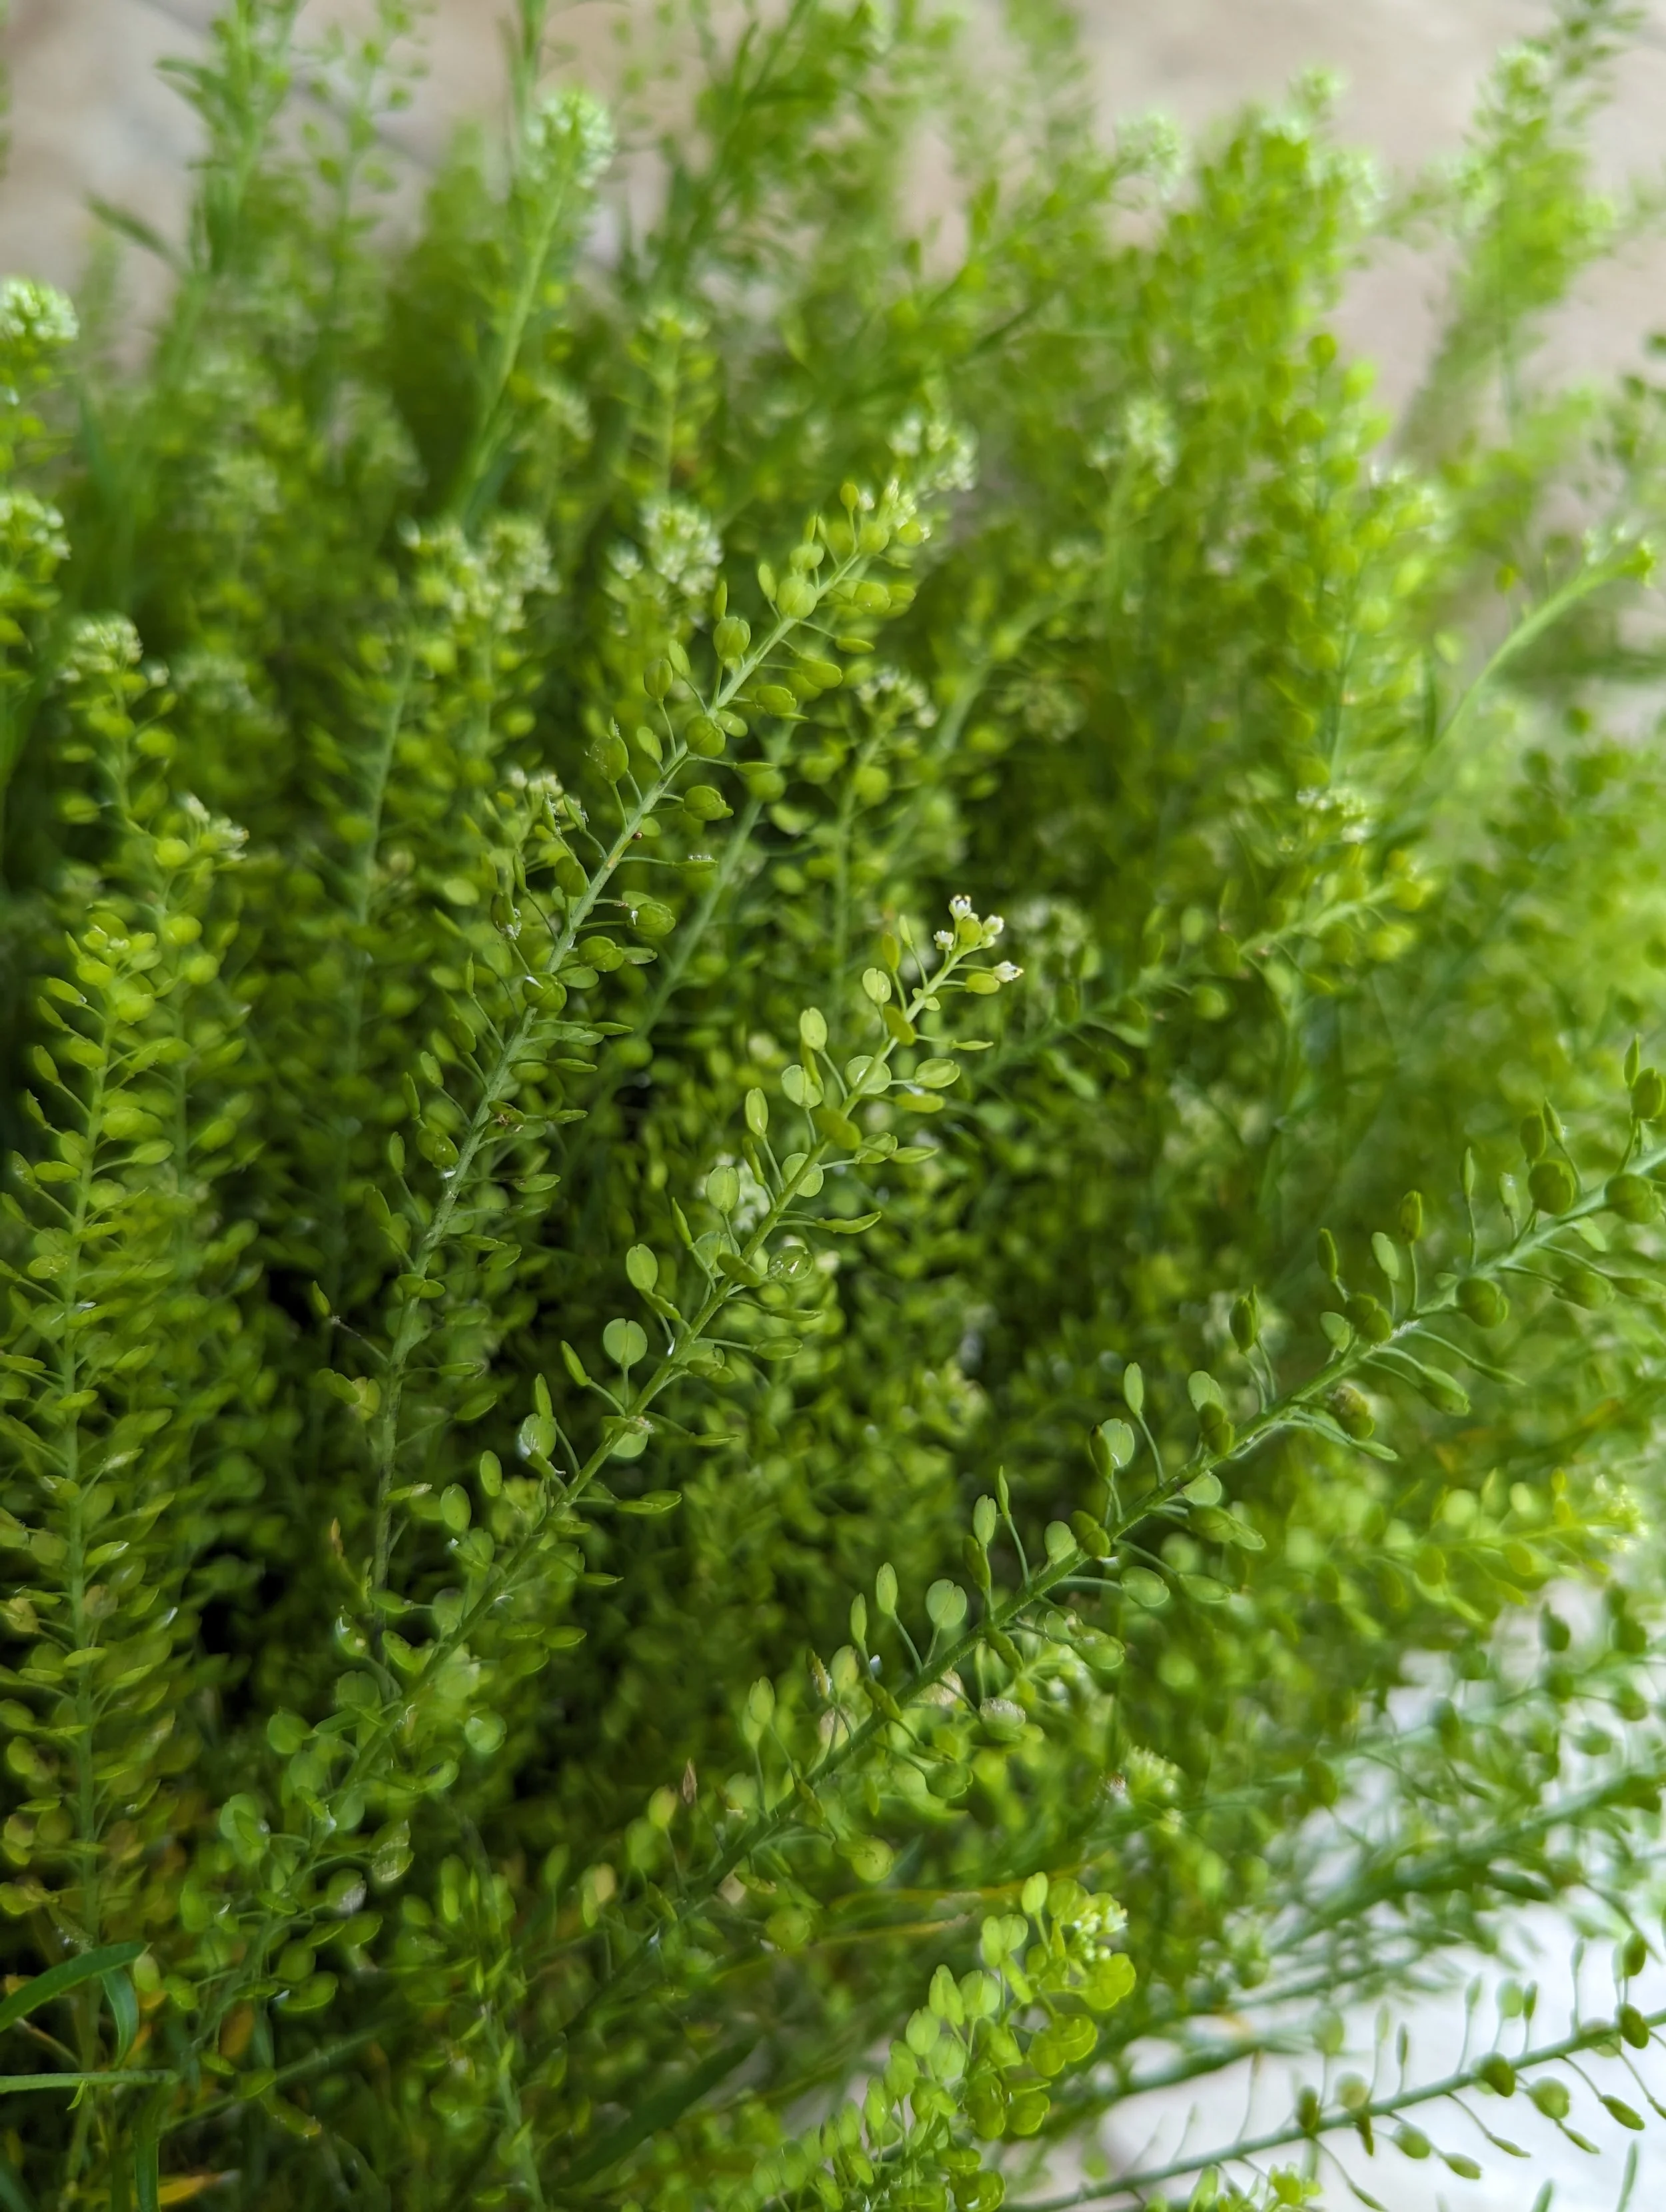
Peppergrass
This plant looks so beautiful and sparkly in bouquets. It grows best when direct-sown early in the spring and treated as a Hardy Annual.
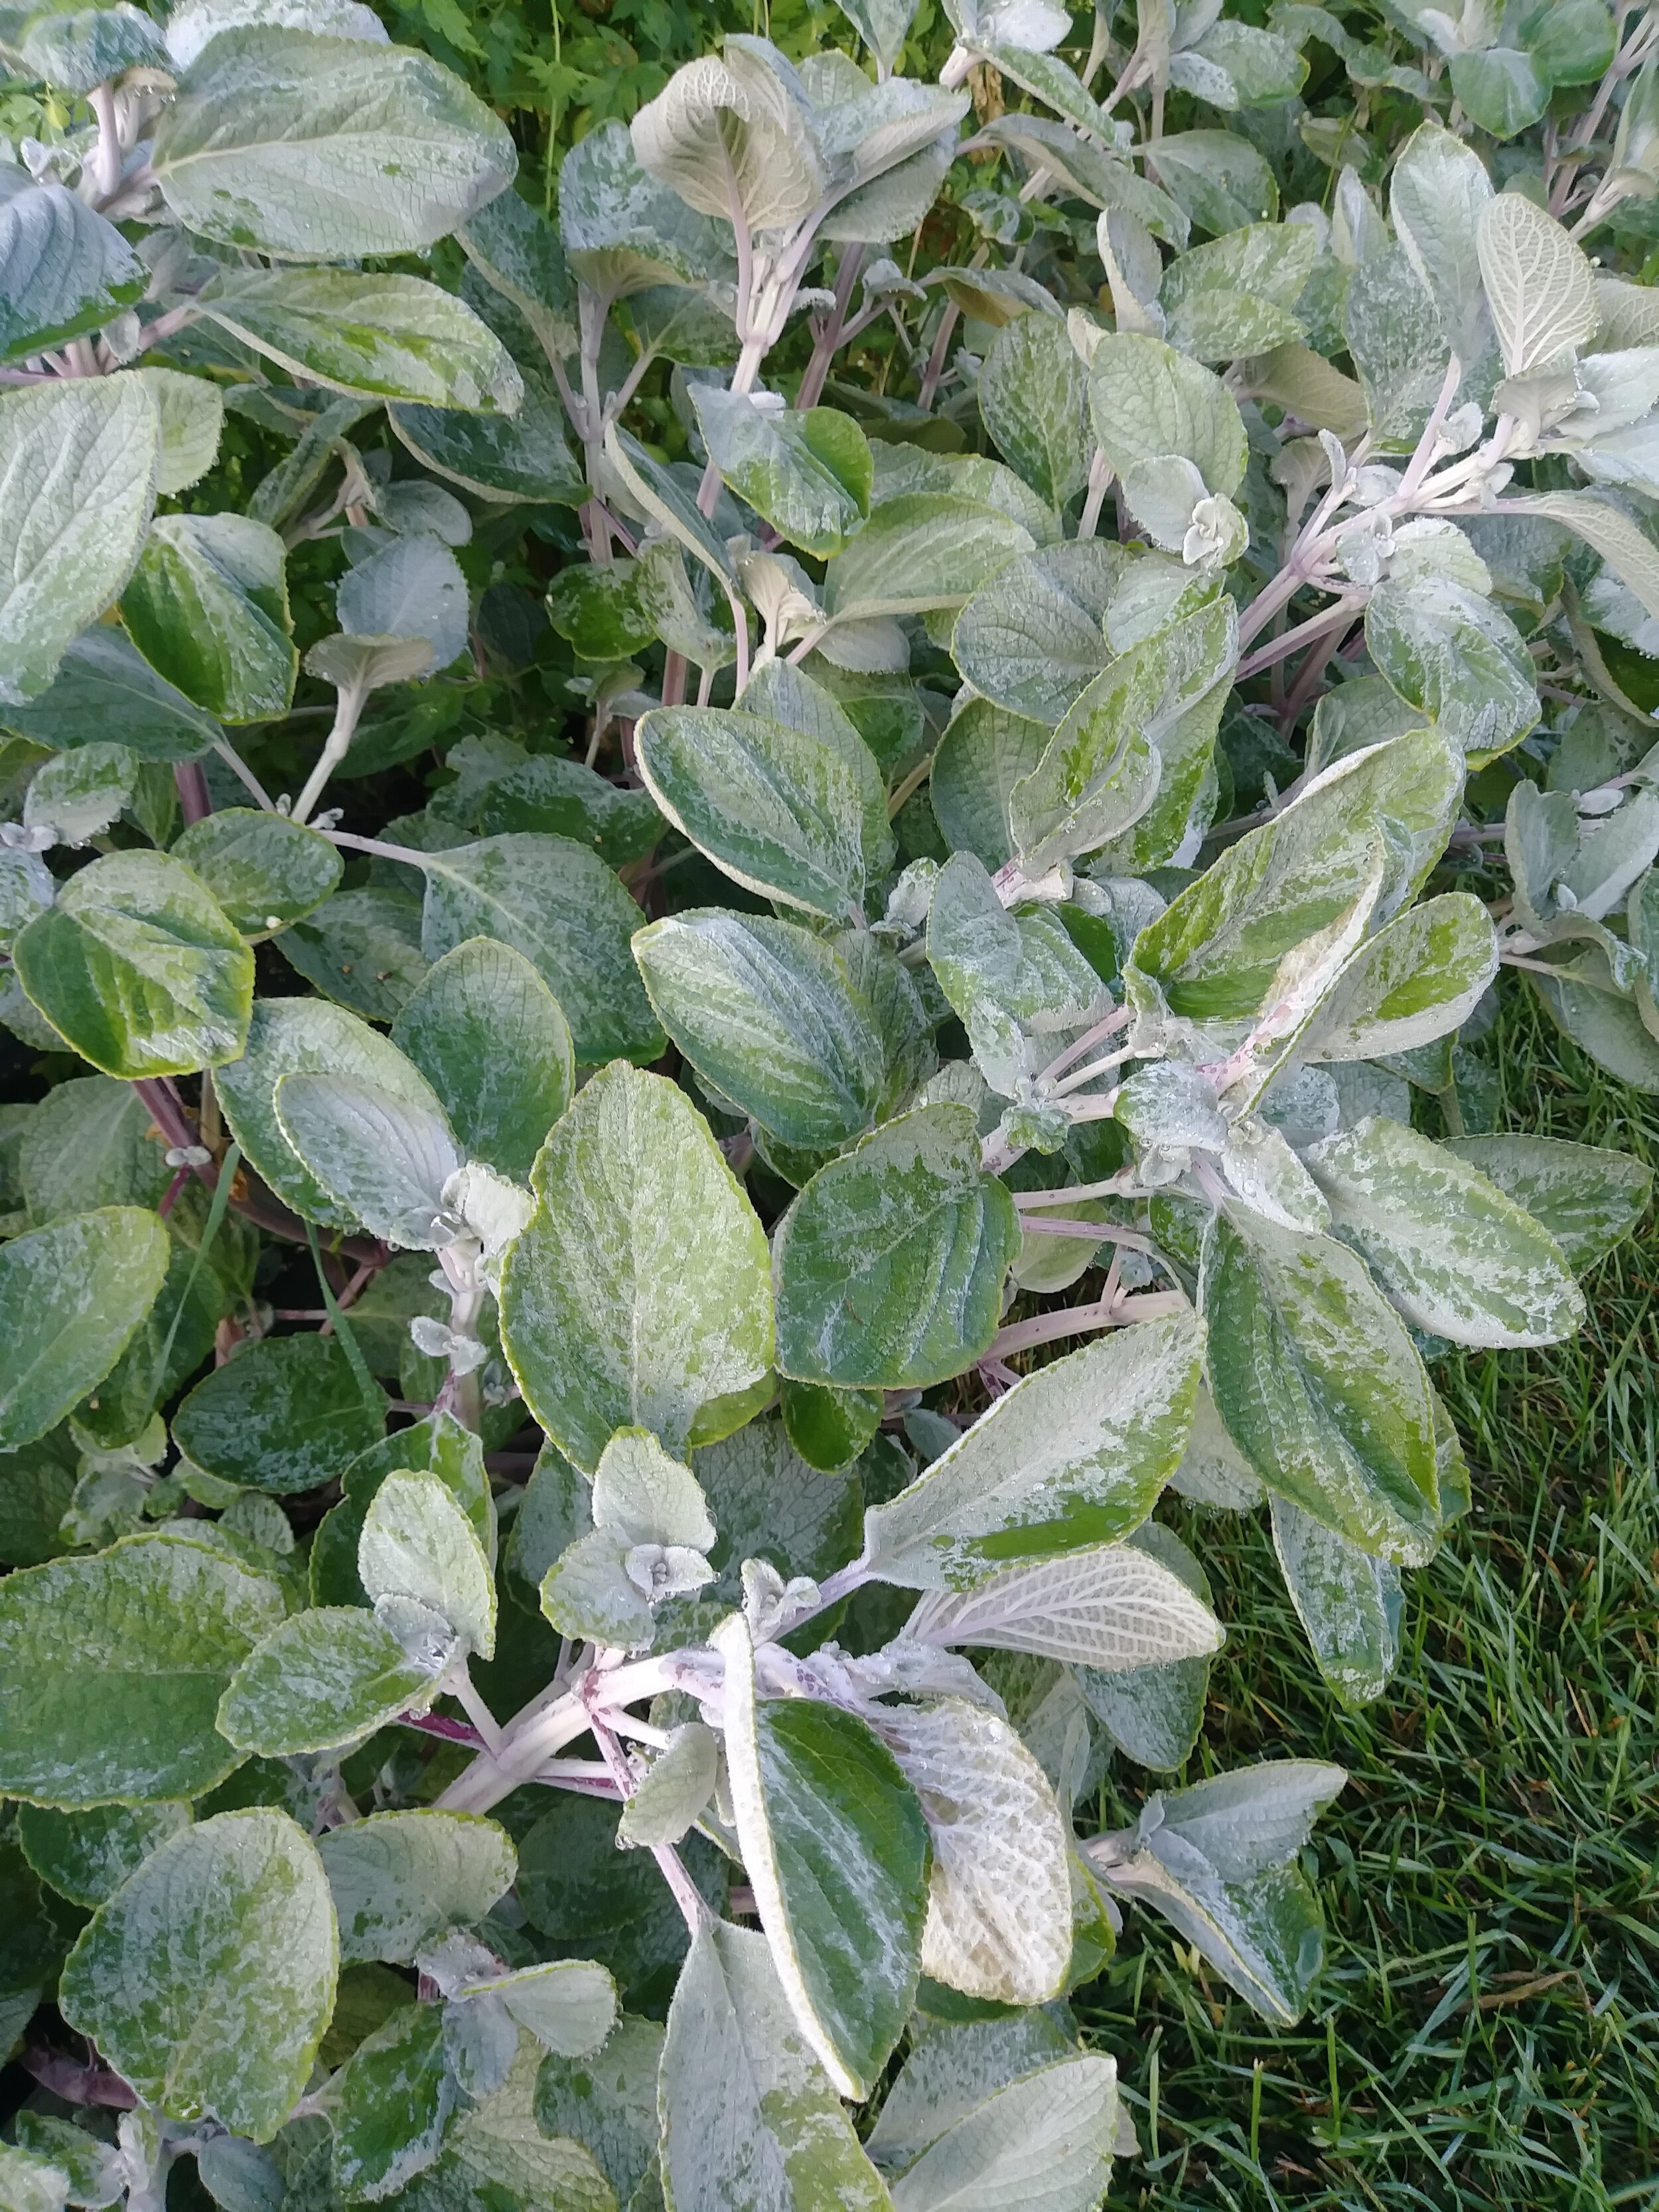
Plectranthus
I’ve grown Dusty Miller for years now, but can never seem to get it to grow tall enough to use in bouquets. I’m so glad I found “Silver Shield” Plectranthus instead! The stems easily get 18-24” long and they hold up well (over 2 weeks!) if harvested in the cool of the day and when the stems are more mature. The beautiful silver-green color is fantastic!
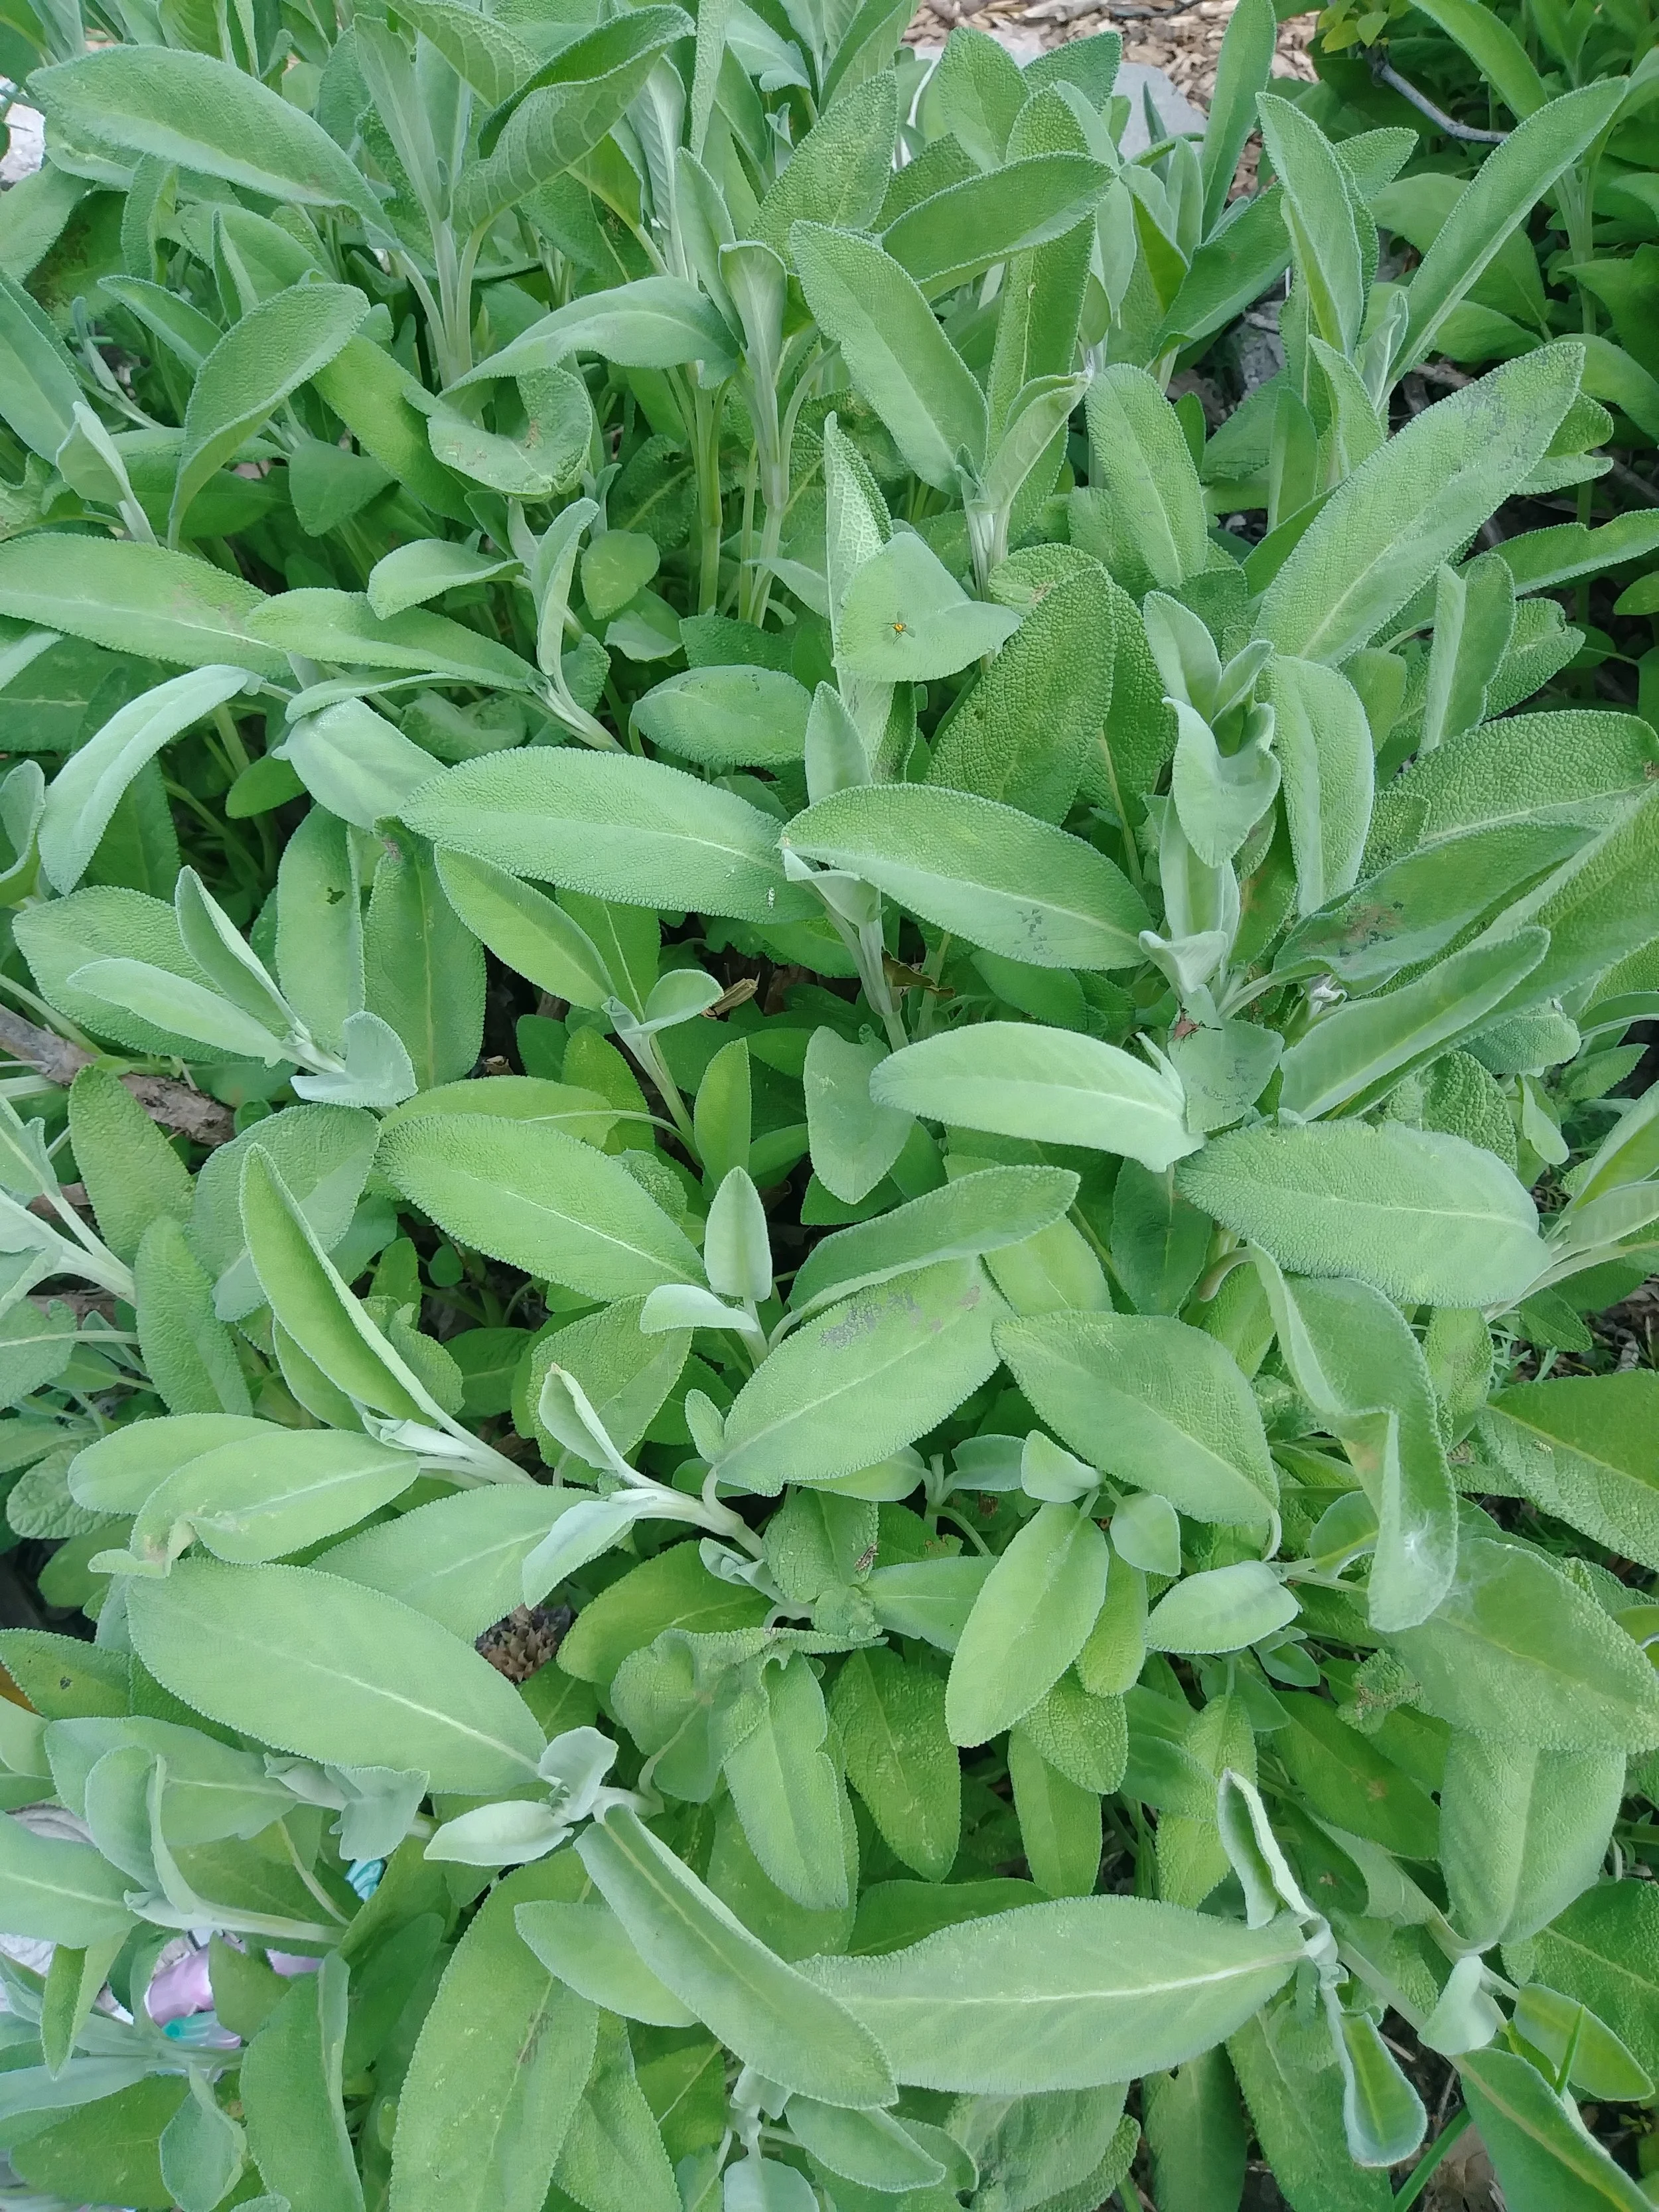
Sage
Regular old garden sage is a lovely plant to work with. In the spring, they send up beautiful violet blooms. If you cut the plants back after blooming, they will reward you with gorgeous silver-gray foliage. Cut in the cool of the day and when the stems are “woody”.
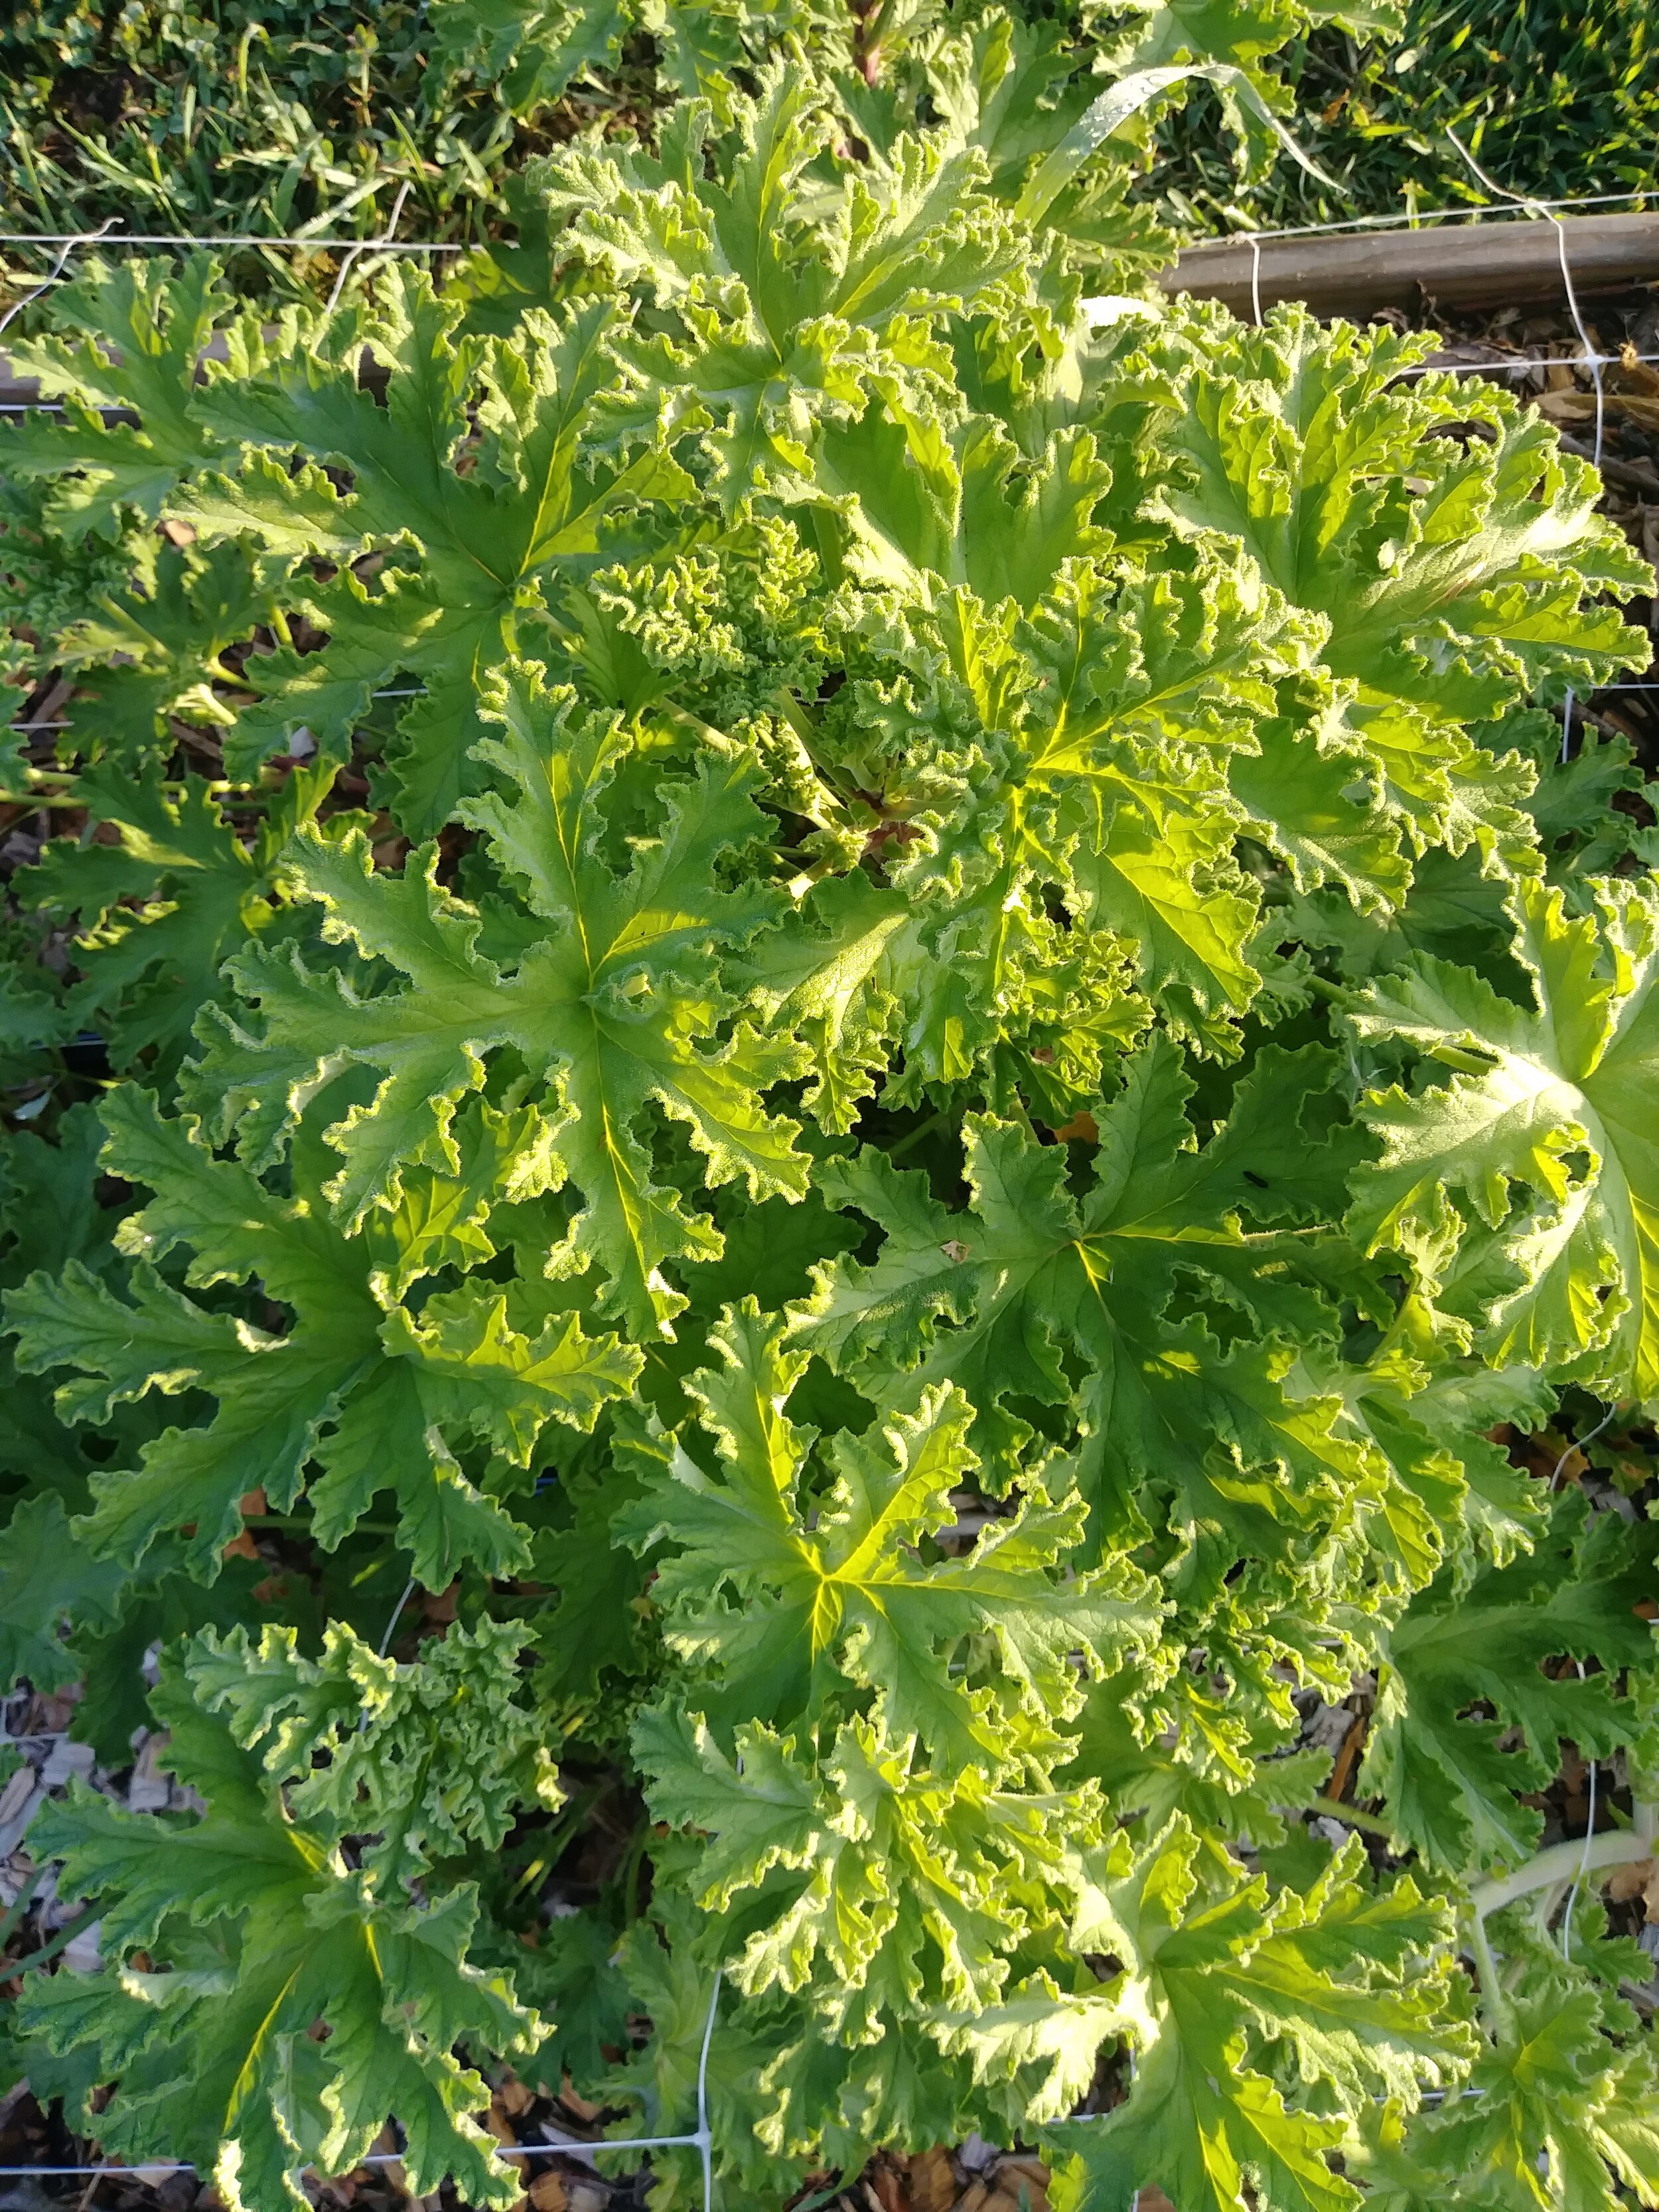
Scented Geranium
Hands down, Scented Geranium is the MVP on my farm. People are always surprised when I show it to them because it looks so unassuming…. But add just one stem to a bouquet and WOW! That’s exactly what it needed.
Most flowers have no scent and that is a real bummer. So, instead, I always try to add some scented foliage to the bouquet to delight the senses. Scented Geranium plants come in a HUGE variety of scents. My favorites are “Attar of Rose” (rose scented), “Orange Fizz” (orange scented - for real!) and “Sweet Mimosa” (earthy, floral scent).
Scented Geranium is grown via cuttings, not seed, so you’ll need to buy a plant at a nursery.
Shiso/Perilla
This culinary herb widely used in Japanese culture also looks beautiful in the vase! Allow the plants to mature and begin forming flowers/seed heads, otherwise they will wilt. Harvest in the cool of the day.

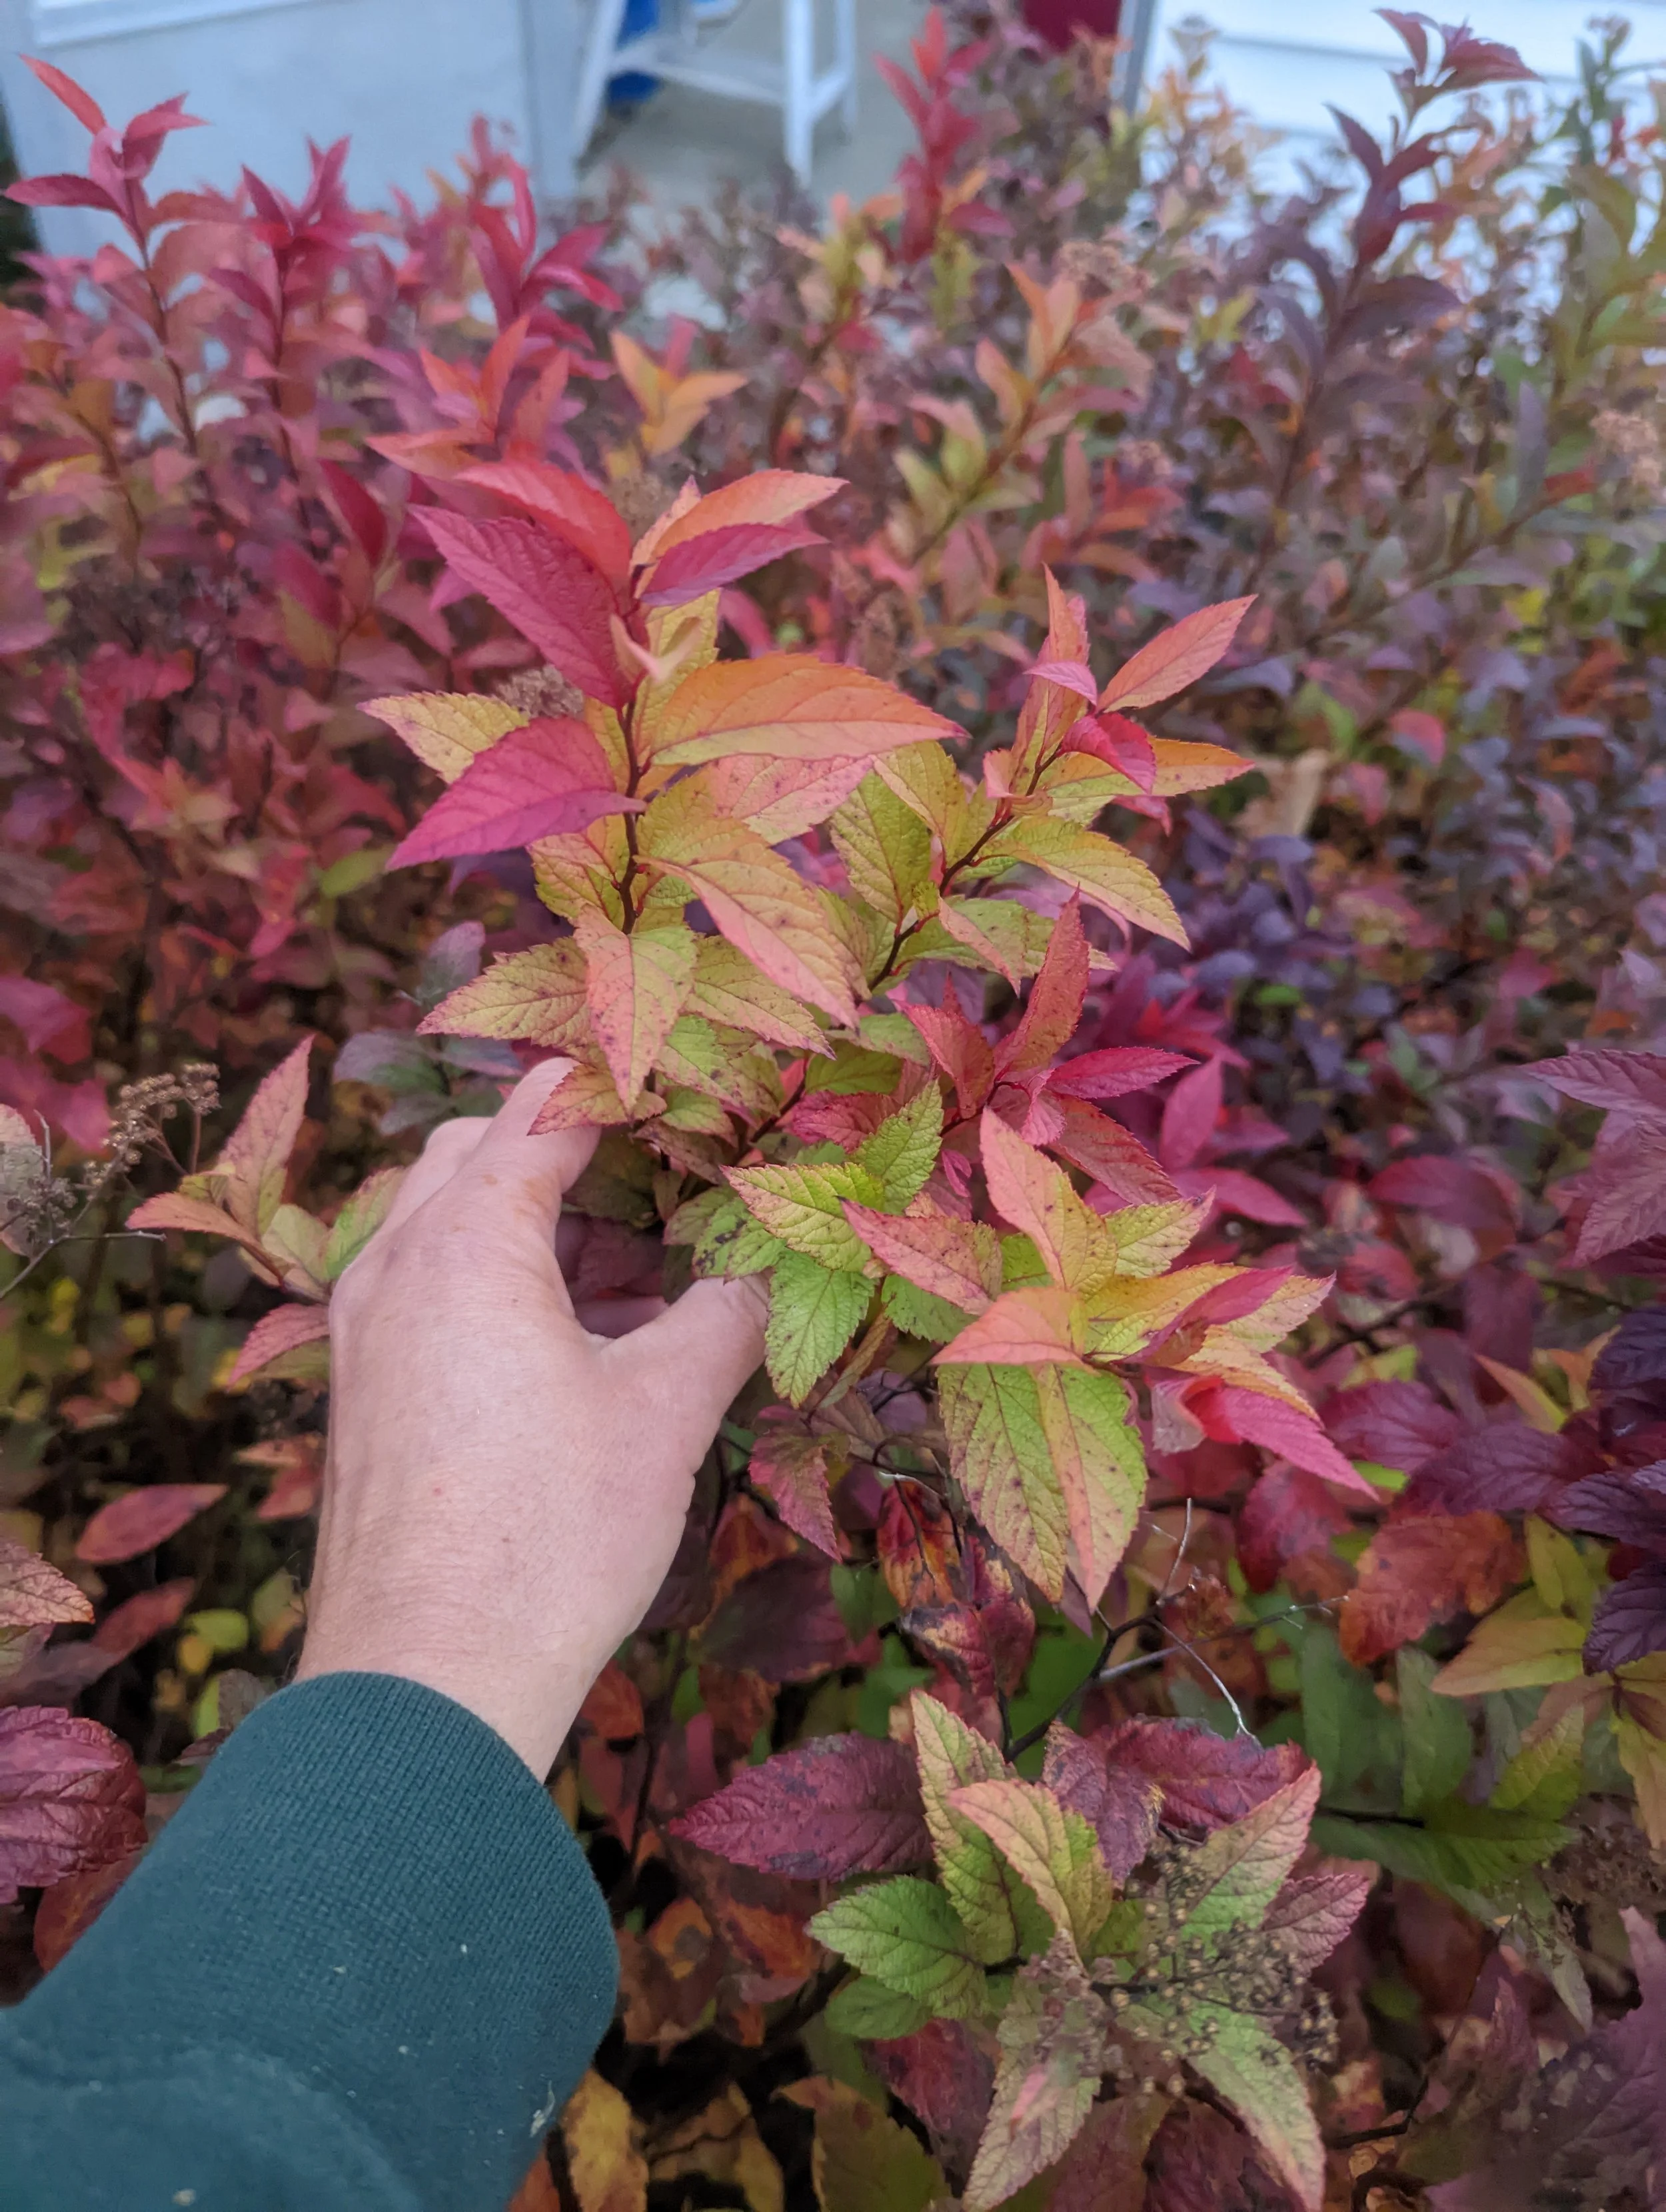
Spirea
If you have any of these shrubs in your landscaping, they are great for foliage… and even their spring blooming flowers look beautiful!
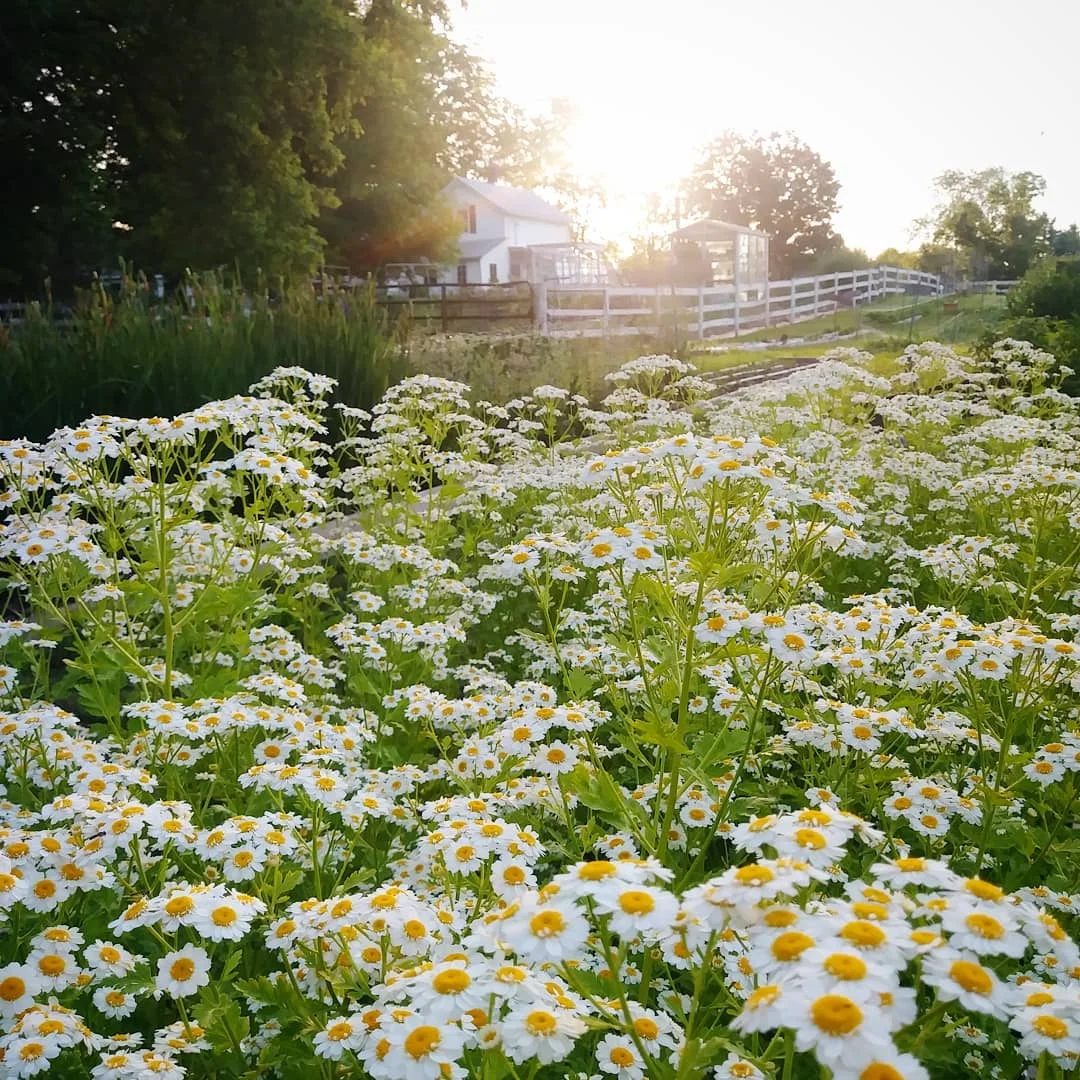
Sweet Annie (Artemisia)
This herb has a delightful sweet scent. The lacy foliage develops tiny yellow flowers later in the season. Can be dried for herbal wreaths.

My Top 10 Favorite Cut Flowers
It was hard but I did it… here are my Top 10 Favorite Cut Flowers!
My Top 10 Favorite Cut Flowers
I was recently asked “If you could only grow 10 types of cut flowers, what would you grow?”
What a fun question! I looked at her and said “Wow, that sounds like a GREAT blog post idea!” ;) So here you go!
On our farm, I grow over 60 varieties of flowers and foliage (probably lots more than that, but who has time to count?!?). It was a real challenge to narrow down my list of favorites to 10.
If you grow cut flowers for arrangements, it’s helpful to know that a bouquet is generally made up of 3 basic parts:
1. Focal: This is your big flashy flower that sets the tone/feel for the whole bouquet.
2. Filler: These are all the other types of flowers that make the majority of the bouquet. They compliment and enhance the focal flower.
3. Foliage: These are the leafy greens that fill out the bouquet and make all the colors pop. I was once told that 1/3 of a cutting garden should be foliage. I thought that was extreme, but turns out I was DEAD WRONG. Don’t forget to grow enough foliage!
*Please note that these are loose categories and some flowers can fit into multiple categories. For example, a large Zinnia would make a great Focal, while small Zinnias are perfect Fillers.
For my Top 10 List, I made sure to choose a few from each category in order to have a well balanced bouquet.
1. Dahlia (Focal)
Dahlias are the flower that started it all at Three Acre Farm. There is no other flower that captivates me quite as much as the dahlia. Yes, they can be a bit temperamental. Yes, they are a TON of work for me to dig up every fall, store all winter and replant each spring.
But when I see their gorgeous blooms, I don’t care about all the work.
Dahlias are not the longest lasting flowers, averaging 3-5 days… but those 3-5 days are GLORIOUS.
Favorite Varieties: ”Jowey Winnie”, “Lovely Lana”, “Rosemary Webb”, “Prince Noir”, “Nicholas”, “ Alpen Diamond”, “Ferncliff Copper”, “Linda’s Baby”, “Woodland’s Wildthing”, “Bracken Sara”, “Bracken Rose”

2. Sunflower (Focal)
There is nothing quite as bright and cheery as a sunflower! They are easy to grow and come in a variety of shapes, sizes and colors.
Sunflowers fall into 2 categories: Single Stem or Branching. Single Stems produce one flowers per plant and can be planted close together (about 6” apart). Branching sunflowers produce multiple stems and should be planted about 18” apart.
Favorite Single Stem: “ProCut Gold Lite”, “Sunrich Summer Provence”
Favorite Branching: “Starburst Panache”, “Starburst Lemon Aura”, “Cherry Rose”, “Autumn Beauty”

3. Zinnia (Focal or Filler)
Ok, I must be honest. Zinnias are NOT actually one of my favorite flowers, so I almost didn’t add them. Not sure why… I think I’m just ruined by the dahlias and the zinnias simply can’t compete. Ha!
However, they are so versatile and easy to grow, it seems like a shame to leave them off the list. I’m well aware that most people simply adore Zinnias!
Large Zinnias are an excellent Focal flower (like “Uproar Rose” or “Benary’s Giant”), while smaller ones are perfect as Filler (like the “Oklahoma” series, “Jazzy Mix” and “Sunbow Mix”)
Favorite Varieties: “Uproar Rose”, “Queen Series”, “Oklahoma Salmon”, “Oklahoma Carmine Rose”, “Benary’s Giant Series”

4. Snapdragon (Filler)
These flowers are so underappreciated! I always wonder if it’s because they are “spike” shaped instead of round/disk, like so many other flowers. The spike shape add visual interest and height to bouquets.
Here in my garden, they bring me endless delight and I adore them. They make every bouquet pop and their sweet scent is lovely.
Favorite Variety: Any of the “Madame Butterfly” series, but especially “Bronze with White”, “Rocket Bronze”, “Rocket Rose Shades”

5. Ammi/Queen Anne’s Lace/Dara (Filler)
While it’s totally fine to use the wild Queen Anne’s Lace that grows as a ditch weed around here (a gorgeous ditch weed, I must add! And did you know it’s actually a wild carrot?!?), there are similar types of flowers that have been grown specifically for cut flower use.
Ammi makes every bouquet look lush, full and romantic. I feel lost without it!
Dara or Daucus (or Chocolate Lace Flower) is unique version of Queen Anne’s Lace that comes in shades of wine, deep pink, pale pink and white. It’s stunning!
Favorite Varieties: Ammi “Select White”, Ammi “Green Mist”, Daucus “Dara”

6.Cosmos (Filler)
Dreamy. Swoon worthy. Magical.
Cosmos are all of those and more… and they are easy to grow and produce like crazy. I’m in love. Grow some. You'll be in love too.
Flowers last longer if they are harvested before the bees pollinate them, so harvest them just as the buds are about to open up.
Favorite Varieties: “Double Click” Series (all the colors are beautiful!), “Versailles”, “Tip Top Picotee”, “Afternoon White”

7. Feverfew (Filler)
These cheery little button flowers are one of the best Fillers out there. Bouquet looking a little drab? Add a stem of Feverfew. Boom. Instant fabulousness (is that a word?).
In some climates, Feverfew will act like a perennial and come back each year. Whoo hoo!
Favorite Varieties: “Magic Single”, “Magic Yellow”

8. Statice (Filler)
“The 90’s called and they want their Statice back.” ;)
Ok, bear with me. Statice reminds me of those stuffy dried flower arrangements you used to see in the late 80’s/early 90’s. When I first grew it, I thought it was horribly out of style and worthless.
And then I found a pack of “Apricot” Statice seeds… and I fell in love. It fills out a bouquet so nicely… and bonus! It’s an “Everlasting” flowers (read more about them HERE), which means it pretty much lasts forever if you dry it.
A few stems of Statice in each bouquet and you’re on the right track! It has a nice structure that supports other flowers and allows them to shine.
Favorite Varieties: “QIS Apricot”, “Seeker Rose Shades”, “Seeker White”,

9. Buplureum (Foliage)
I’ve been growing this flower/foliage for years now and still don’t know exactly how to say it. Ha!
Boo-plur-um? Bup-ler-um? Who knows… I wish someone would come up with a better name…
Anyway… this plant is incredibly unique and makes a FANTASTIC filler. When I’m making bouquets, I always reach for this first, as it creates a great structure/base to weave all the other flowers into.
I love the bright lime green leaves and cheery little yellow flowers but the plants even look beautiful as they start to fade and turn brown. Buplureum is self-seeding, meaning it will drop it’s seeds and keep coming back each year if you allow it (leaving the soil untilled).

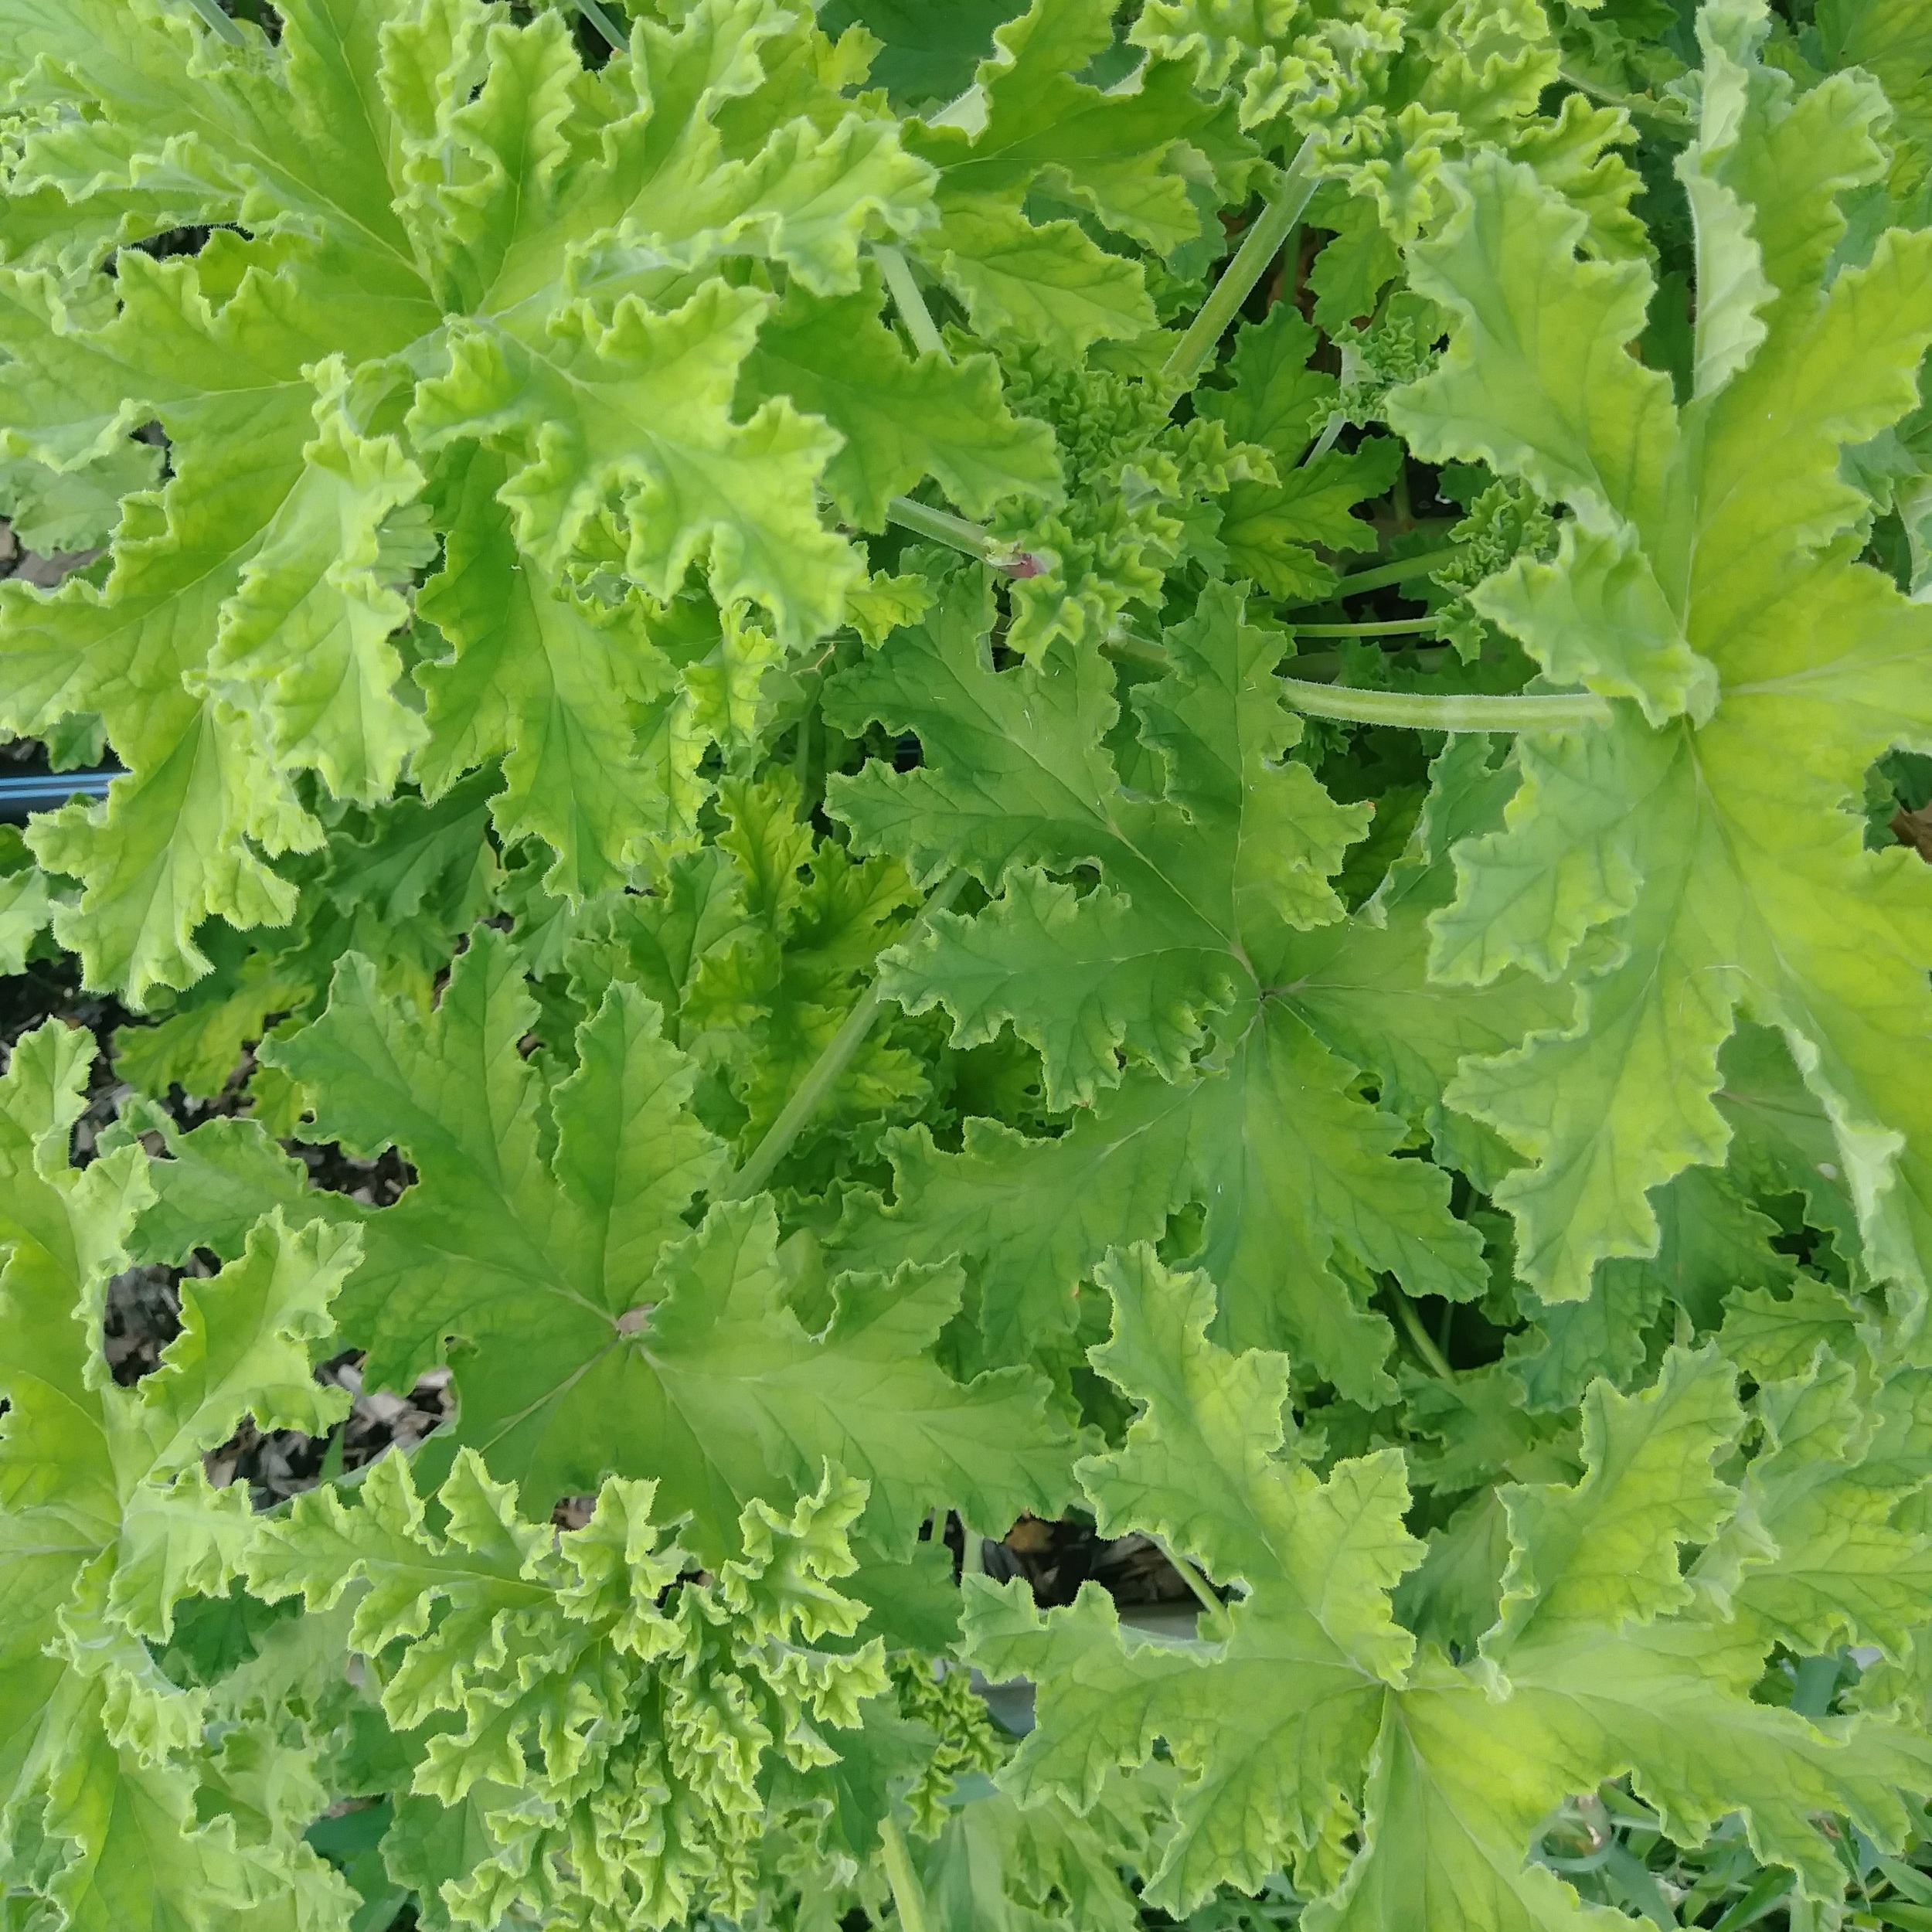
10. Scented Geranium
Last, but certainly NOT least… Scented Geranium is probably the most useful plant I grow on the farm. When it’s in season, pretty much every bouquet I make has Scented Geranium in it. ;)
Most cut flowers have no scent, which is a real bummer. We all want our fresh flowers to smell beautiful and floral… and Scented Geranium is how we achieve this on our farm It’s intoxicating scent is perfect!
There are many different varieties of Scented Geranium, including the most well known variety called “Citronella” (which I probably would NOT recommend using, unless you like bouquets that smell like bug spray!).
The thick leaves transform a bouquet from ho-hum to stunning. Scented Geranium is my “Go-To” foliage.
Scented Geranium is not grown from seed. Instead, it’s divided/propagated by making cuttings. The best way to get your hands on Scented Geranium is to purchase a plant at a garden center.
The stems will wilt if cut in the heat of the day, so be sure to harvest very early in the morning, or late in the day.
Favorite Varieties: “Attar of Rose”, “Sweet Mimosa”, “Orange Fizz”, “Apricot”
Not convinced? Here’s what it looks like in bouquets…


There you have it! My Top 10 Cut Flowers… although I’m sure this list will change over time!
Now I’d like to know… what are YOUR top 10 favorite cut flowers??? Or maybe just your top 5. ;)
Can’t wait to hear them!
Ready for more?
If you’re serious about growing the garden of your dreams this year, register for my online course, “Backyard Cutting Garden 101”. You’ll find everything you need to plan, grow, harvest and arrange your stunning blooms. I can’t WAIT to help you grow! Click on the button below for all the details.
Chocolate Peppermint Lip Balm/Lotion Bar
A perfect homemade gift that will have people asking for more!
Chocolate Peppermint Lip Balm/Lotion Bar
Today, I want to share one of my favorite body care products recipes! Years ago, I stumbled upon a recipe for lip balm/lotion bars* and I had to try it out. I loved it so much, I decided to make a batch for my family and friends for Christmas.
Let's just say gift funds were a bit tight that year, so I officially declared to my loved ones that this was going to be a "Homemade Gifts Only" Christmas. Much to my delight, everyone was thrilled with the idea!
*In case you are wondering "What is a lotion bar?", it's simply lotion in solid form. When you rub the bar on your skin, the heat of your body allows the lotion to spread.
Why I love this recipe:
1. It's simple. Only 4 ingredients (yay!!!!).
2. It's completely edible and contains 100% natural ingredients, so I don't have to worry about my kids eating it. Have you read the ingredient labels on other lip balms? Eek!
3. It smells AH-mazing. Men and women will enjoy the delicious scent and the pleasing tingle from the peppermint oil. True story - I gave this as a gift my son's kindergarten teacher and she raved it but only had one complaint... her husband stole it from her because he loved it so much. I gave her another container! Ha!
4. It's multipurpose. It's fantastic as a lip balm, but also can be used as lotion.
5. It WORKS. My hands get absolutely wrecked during the farming season and this the only product that heals my poor abused skin. I put it on every night.
6. It's a great way for me to use the beeswax I collect from our beehives each year!
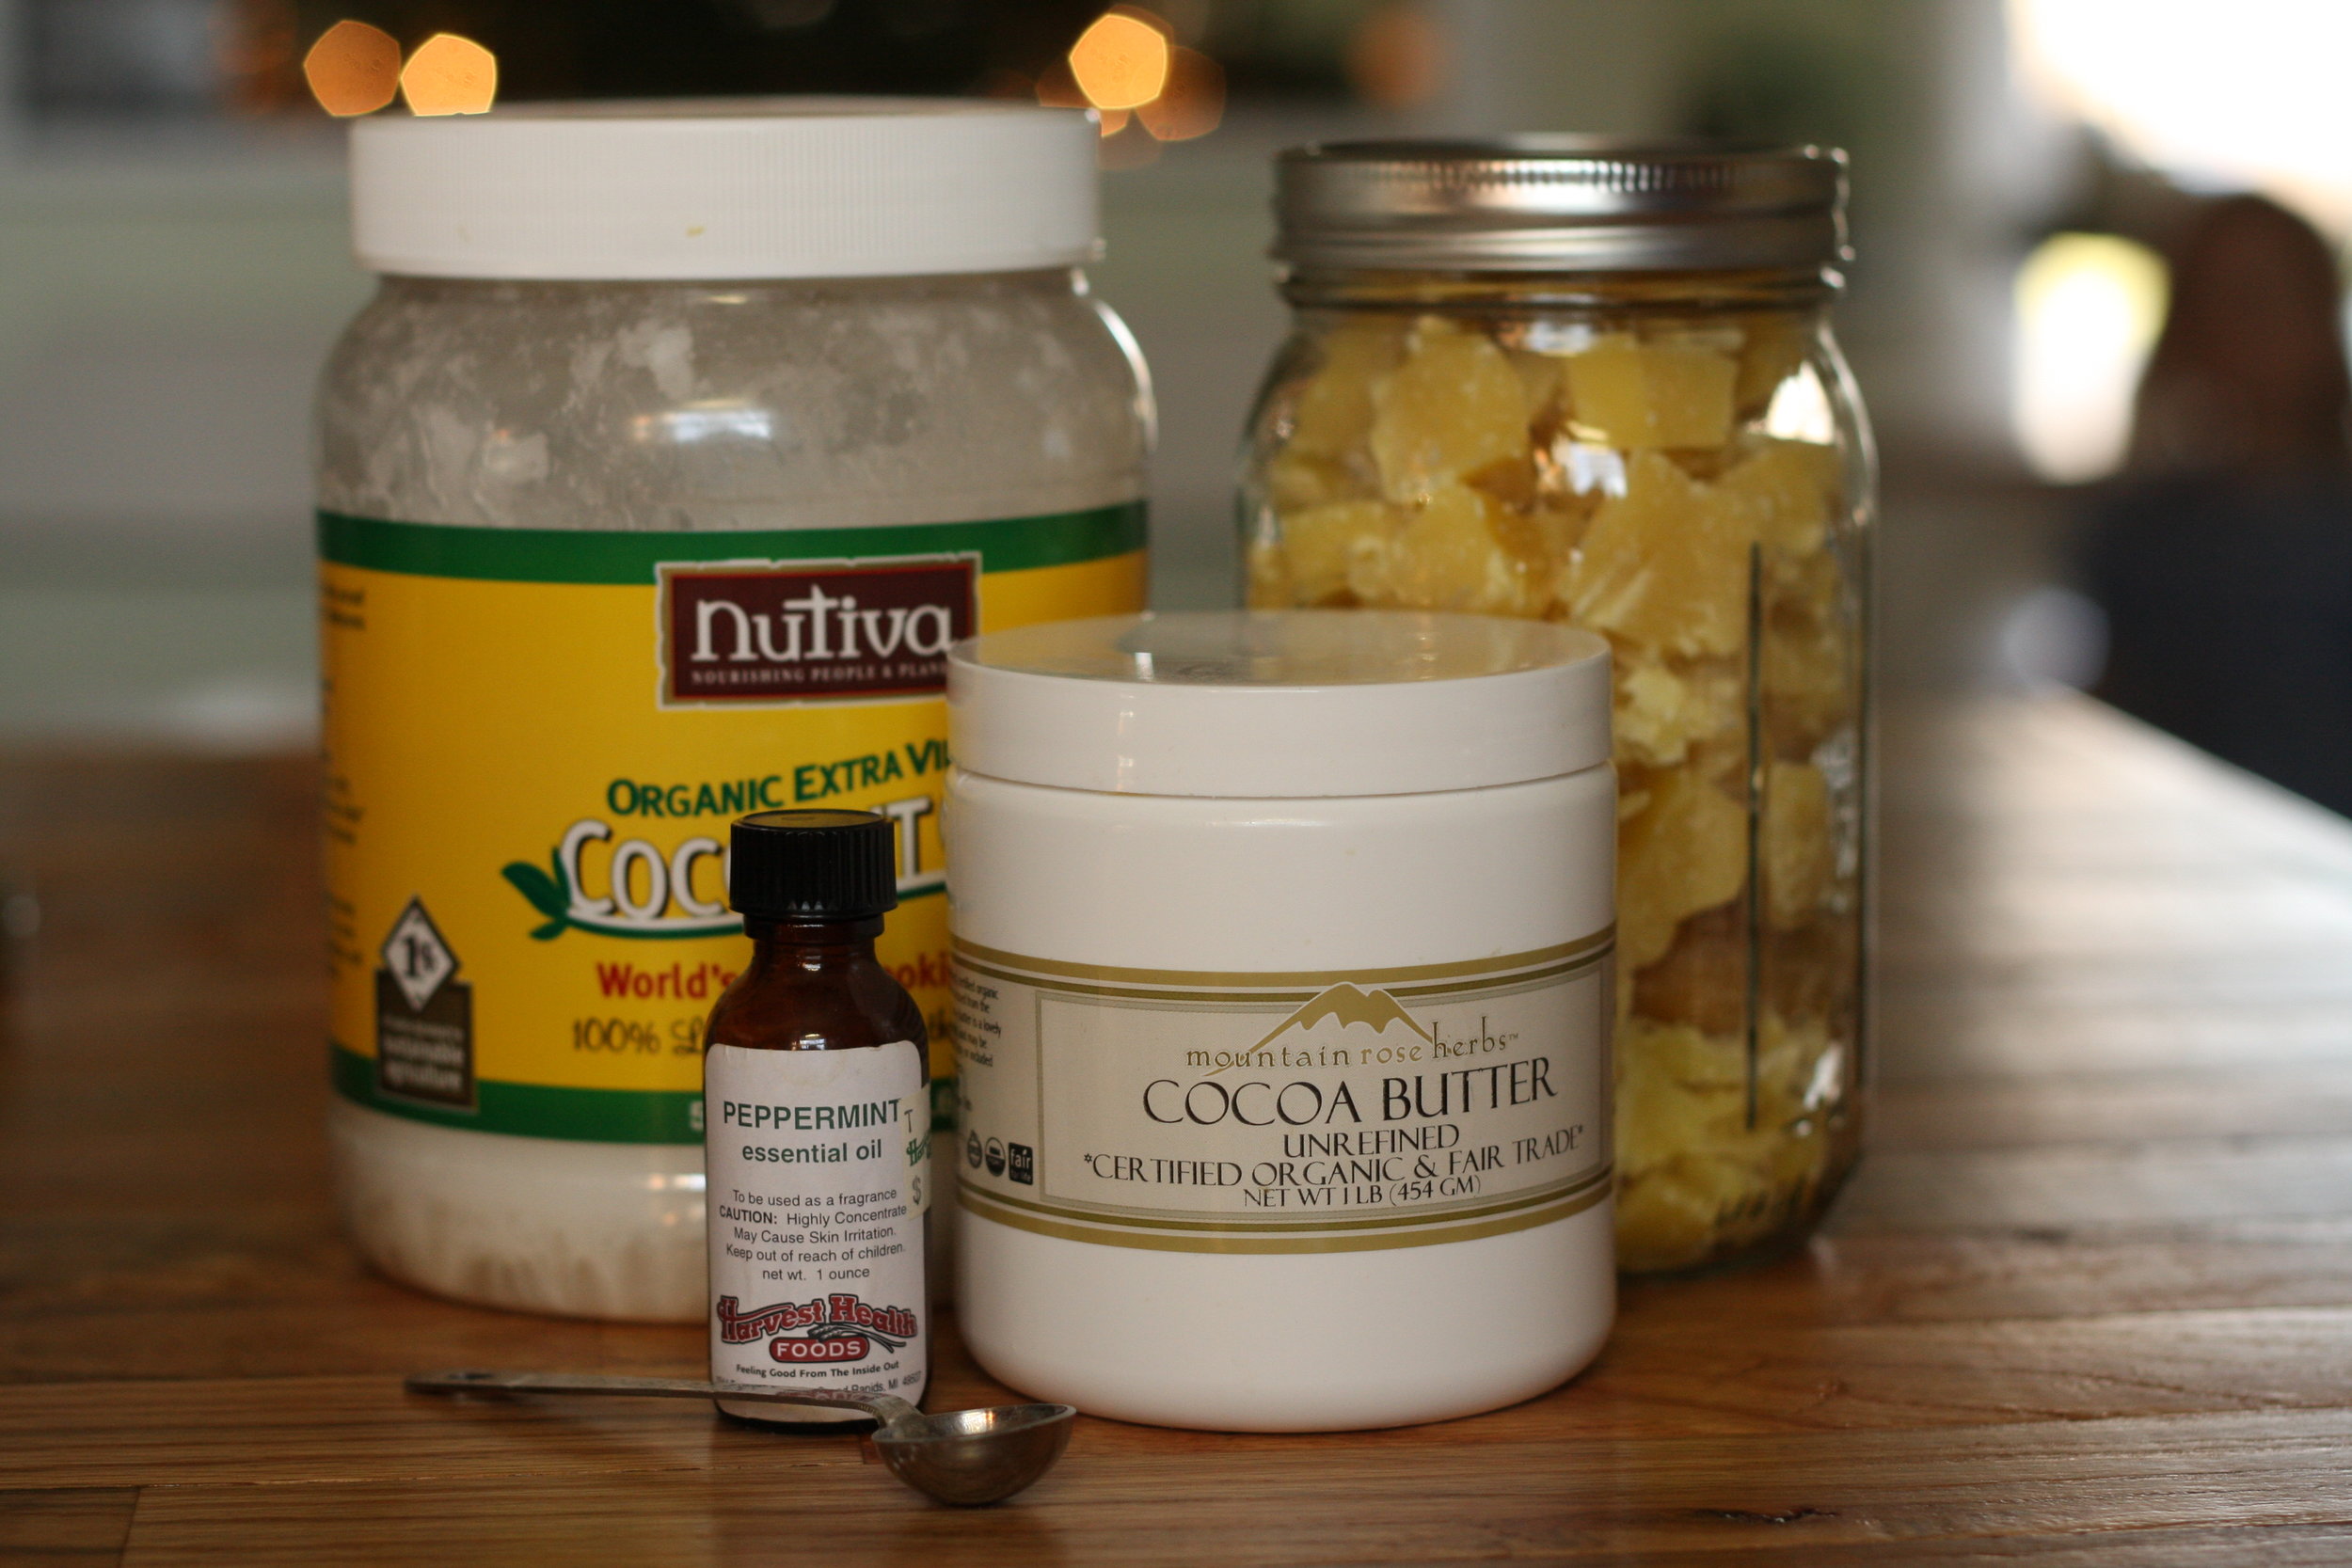
What You Will Need
3 oz or 1/3 cup beeswax, in chunks or pastilles
3 oz or 1/3 cup cocoa butter
3 oz or 1/3 cup coconut oil
2 tsp peppermint essential oil
Scale for weighing the ingredients. If you don't have a kitchen scale, you can use measuring cups, but it's a little tricky because the beeswax and cocoa butter are hard. You'll have to find a way to chop them into small pieces so your measurements will be somewhat accurate.
Containers for the lotion bar/lip balm. If you are making lotion bars, look for candy molds at the craft store or you can pour into muffin tins. Lip balm can be poured into tubes, pots or tins.
A pint sized mason jar (or similar glass jar). You will melt the ingredients right in the jar.
Saucepan. For heating the mixture.
Method
1. Measure the beeswax, cocoa butter and coconut oil. Put them in the mason jar.
2. Put the mason jar inside a saucepan filled with a few inches of water. Turn heat on to begin warming the water, which will melt the mixture in the mason jar. Heat the beeswax, cocoa butter and coconut oil until melted. Stir with a bamboo skewer or Popsicle stick (something you can throw out or compost when you are done). While you are waiting, set out some paper on the counter (to protect surfaces from spills) and arrange your containers.
3. When completely melted, remove the mason jar from the heat. Stir in the 2 tsp of peppermint oil.
4. Quickly (and carefully!) pour the hot mixture into your waiting containers. The mixture will begin to harden up almost immediately. Use caution - hot wax will burn your skin!
5. If the mixture begins to harden in the jar before you use all of it, simply place it back in the saucepan of hot water to melt again.
6. Allow the balm to set up for about an hour before using. Any leftover balm can stay in the mason jar, covered with a lid. Simply store in your cupboard. Next time you need to refill your balm containers, just reheat and pour!
Want a printable recipe? Click on the button to download and print a copy!

Presentation
I pour the mixture into 3 different containers:
1. Lip balm tubes
2. Round lip balm tins
3. Muffin tins, to make bars ( I pop them in the freezer for a few minutes and they come out of the muffin tins easy as pie). The lotions bars fit nicely into the round tins as well, but can be removed and rubbed over the whole body, like a bar of soap.

You could have all sorts of fun giving this lotion/balm as gifts. The options for molds and containers are endless. If you are crafty like a fox, I'm sure you could figure out some way to decoupage some pretty fabric or paper onto the container. Get wild and crazy.
Enjoy the recipe and let me know how you like it! I love to hear your comments!
-Lori