
My Philosophy on Pest Control on our Cut Flower Farm
Let me introduce you to the bane of my existence this time of year: cucumber beetles. All it takes is one nibble, and the bloom is destined for the compost pile instead of being proudly displayed in a vase.
With the drought we’ve been experiencing on our farm AND the extreme heat, the Dahlias are stressed. Unfortunately, stressed plants are magnets for pests.
It’s a real bummer, but it’s also part of the reality of growing ANY crop, especially one that has to be 100% blemish-free to be acceptable (that’s the reality of growing cut flowers for sale - they must be perfect. Any insect damage means they are unsalable and worthless).

EMBRACING THE REALITY OF LOSS
I’ve learned to expect that I’ll lose ⅓ of my blooms to pests, disease, or weather-related issues. While that might sound defeatist, it actually gives me a TON of peace of mind. Instead of:
Freaking out
Getting upset
Fretting and stressing
Beating myself up
Feeling like a failure
…I simply acknowledge the issue, chuck the bloom into the compost pile (where it will turn into AMAZING soil to grow next year’s flowers!), and move on with my life. Since I plan on losing ⅓ of my blooms, I make sure to plant ⅓ MORE than I expect I need.
A PRACTICAL APPROACH TO PEST MANAGEMENT
We could put organza bags over the blooms to prevent cucumber beetle damage, but with over 2,000 plants and multiple blooms per plant, it would require thousands of bags and hundreds of labor hours to cover, uncover, harvest, and recover the blooms. This would mean I’d have to charge an exorbitant price per stem just to break even.
Instead, I simply accept that loss goes hand in hand with growing. Nothing has gone wrong. This is real life!
I’m sharing this with you because it’s easy to look at other people on the internet and think they have it all figured out and that you are doing everything wrong. It’s not true. We’re all just out here, stumbling around and figuring things out as we go! The people that “fail” the most are also the people that try the most.
HOLISTIC PEST CONTROL: PARTNERING WITH NATURE
I get lots of questions about what we spray on our flowers to keep the bugs off of them, and many are surprised when I say that we don’t use sprays. There are lots of reasons we don’t spray:
It’s expensive.
It’s time-consuming.
It can be hazardous to the health of humans, animals, and the environment (many insecticides are not safe for use around pollinators). We love knowing our fields and flowers are safe and won’t cause long-term health issues.
Instead, I like to take a more holistic approach. Instead of trying to dominate nature, I like to partner with it.
Instead of trying to control everything and stressing out about a damaged bloom, I accept the reality that there will always be loss in growing.
We plan for loss because loss is NORMAL.
CREATING A BIRD SANCTUARY FOR PEST CONTROL
My dad was a biology teacher, and I grew up spending a lot of time in nature, studying how ecosystems work. I’ve always been fascinated by how all the parts and pieces work together to create a healthy, thriving environment.
So when we started noticing pest damage on our Dahlia blooms about a month ago, I didn’t reach for a bottle to kill all the bugs (if you do decide to use insecticides, PLEASE read the instructions on the bottle very carefully, follow the directions precisely, and make sure you know EXACTLY what pest you are targeting).
Instead, we made a trip to the hardware store and bought several bird feeders. We decided to make our flower fields a bird sanctuary. We set up feeders, created water sources, and made places to perch. We rolled out the red carpet for the birds and invited them in because birds are nature’s #1 ally for pest control.

THE RESULTS OF OUR EXPERIMENT
Do we still have pest damage? Yes. Is it less than the previous years? Yes. Is it because of the birds? Not sure.
It could be that the pests have completed their life cycle, the drier weather has slowed them down, or maybe the birds really have helped to restore the balance.
Either way, it’s an exciting experiment, and hiring the birds to do what they do best has been a lot of fun!
Working in a farm ecosystem that is fully alive with plants, insects, and animals is very rewarding. I encourage you to:
Observe what you see in your ecosystem
Mimic how nature works to solve problems
Partner with nature instead of trying to dominate nature… because spoiler alert - Nature always wins. “Jurassic Park” taught me that when I was 13. ;)
QUESTIONS?
Ask them here and I’ll get back to you!
Ready for More?
If you’re serious about growing the garden of your dreams this year, register for my online course, “Backyard Cutting Garden 101”. You’ll find everything you need to plan, grow, harvest and arrange your stunning blooms. I can’t WAIT to help you grow! Click on the button below for all the details.
Why Aren’t My Dahlias Blooming Yet?
It’s time for my Annual Summer Dahlia Public Service Announcement!
If you've been staring at your Dahlia patch lately, wondering why you don’t see any blooms yet…
Relax. Take a deep breath.
Nothing has gone wrong.
Every single summer, right around this time, my inbox fills up with some version of the same panicked message: "My dahlias are healthy, but there's not a bloom in sight. What am I doing wrong?"
Friend, you're not doing anything wrong. You're just impatient. (No judgment here; I am too.Ha!)
Dahlias Are Fall Blooming Flowers
When you’re buying and planting tubers in the spring, it’s easy to forget something important: Dahlias are fall-blooming flowers. You wishing they would bloom earlier does not change this fact (I know. It’s hard to hear that. I keep wishing they would bloom earlier every year!).
Expecting them to bloom in early summer is like expecting a Tulip to bloom in the fall (it CAN theoretically be done, but requires a lot of light and temperature manipulation, which is just as complicated as it sounds).
Most Dahlias take somewhere between 12 and 16 weeks from planting to their first bloom. So if you tucked your tubers into the ground in mid-May, as a lot of us in Zone 5B did, you're looking at your first blooms somewhere between mid-August and mid-September.
Not July. Maybe not even early August… although there are sometimes outliers that show up to the Dahlia party earlier!
Here's how the season tends to unfold:
Late July: Maybe a few early, overachiever blooms
August: Things start picking up steam as the month goes on
September: Peak dahlia season, my favorite month of the entire year!
October: They keep blooming their fool heads off until they get hit by a killing frost (usually around Oct 15, but sometimes as late as November!)
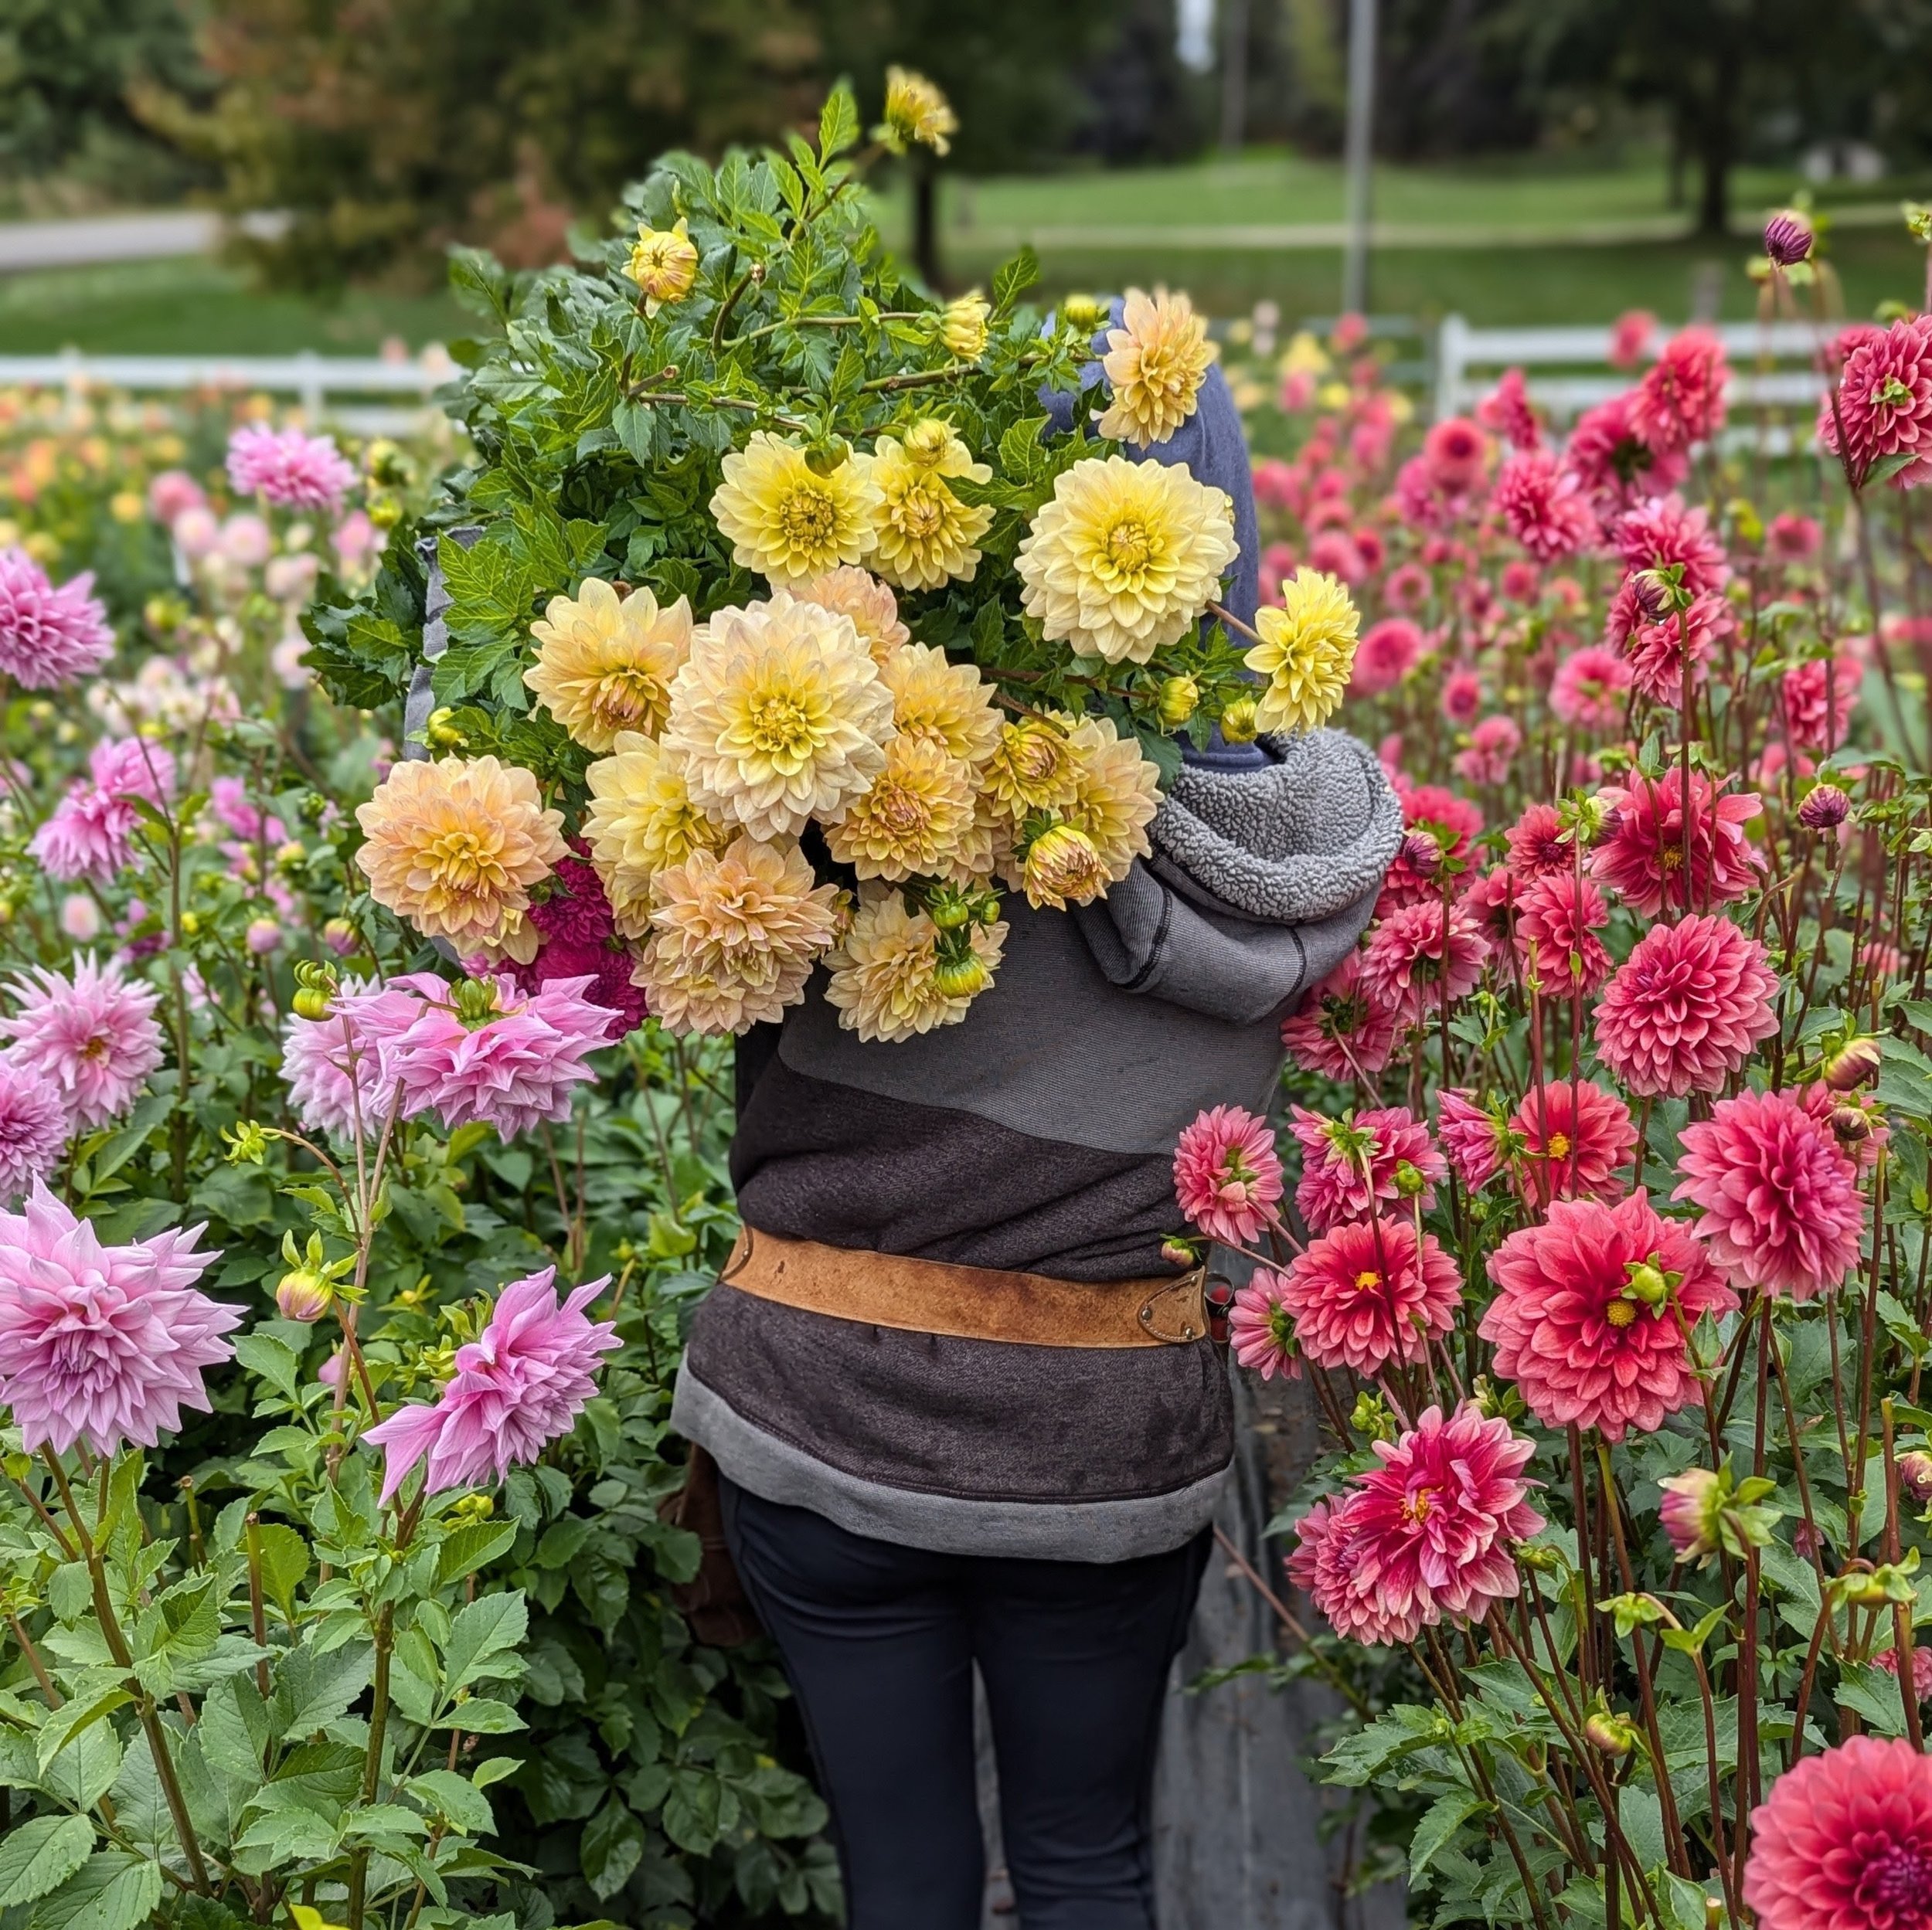
Dahlia field on Oct 7
Some nerdy science stuff…
This is the part I find fascinating, so bear with me for a second.
Dahlias are what's called "facultative short-day plants." That's just a fancy way of saying they prefer shorter days, and they hit their blooming stride when daylight length drops to somewhere around 12 to 13 hours.
So during the long days of summer, the Dahlia is putting its energy into growing. You’ll see a lot of leaf growth during the summer, and this is the time to make sure your plants are getting all the food and water they need to grow.
Once the days start shortening in late summer and early fall, something shifts. The plant gets the signal that the growing season is winding down, and it shifts into reproduction mode… which means it’s time to start sending up flowers, which will be pollinated by bees, go to seed, and start the circle of life all over again.
What Daylight Looks Like on Our Farm
If you're gardening near Grand Rapids, Michigan, sitting up around the 43rd parallel like I am, here's roughly how our daylight hours shift as summer turns to fall:
End of July: About 14.5 hours of daylight
End of August: Around 13 hours
End of September: Around 12 hours
End of October: Around 10 hours
Once we drop into that 12–13 hour range, that's when the Dahlias really take off.
If you're gardening somewhere else, your exact daylight numbers will look a little different depending on your latitude, but the pattern holds everywhere: shorter days trigger the bloom.
Other factors affecting bloom time…
Daylight length is the main driver, but a few other factors matter too.
Temperature matters. Dahlias like warm days and cool nights. If your area has been stuck in a stretch of brutal heat (we feel you), your Dahlias are probably sulking a little. They tend to perk up once temperatures ease off. If you live in a hot southern climate, your Dahlias might not bloom until mid-fall (October or November). This is one case where Northern growers might see blooms BEFORE their Southern growing friends (because it’s cooler in the north and the Dahlias stop sulking)!
Food and water matter, too. Dahlias are hungry, thirsty plants. If you've been slacking on feeding and watering (it happens!), now is a great time to get back on a regular schedule. Your plants will appreciate it. We use nitrogen-based fertilizer during the growth stage, then switch to a phosphorus-based fertilizer when we see the plants setting buds.
Perspective From Our Own Field
If it helps to know you're not alone in this: we currently have about 2,000+ dahlia plants on our farm, and as of today, July 29, 2026, I’ve harvested exactly three blooms.
Three. Out of two thousand plants.
We've been fighting drought and seriously oppressive heat this summer, so our Dahlias are not happy campers right now.
This gorgeous Dahlia photo? It was taken in early October, when the plants were thriving during the warm days and crisp, cool nights.
So if your Dahlia patch looks like a sea of green right now, you're in good company… and nothing has gone wrong.
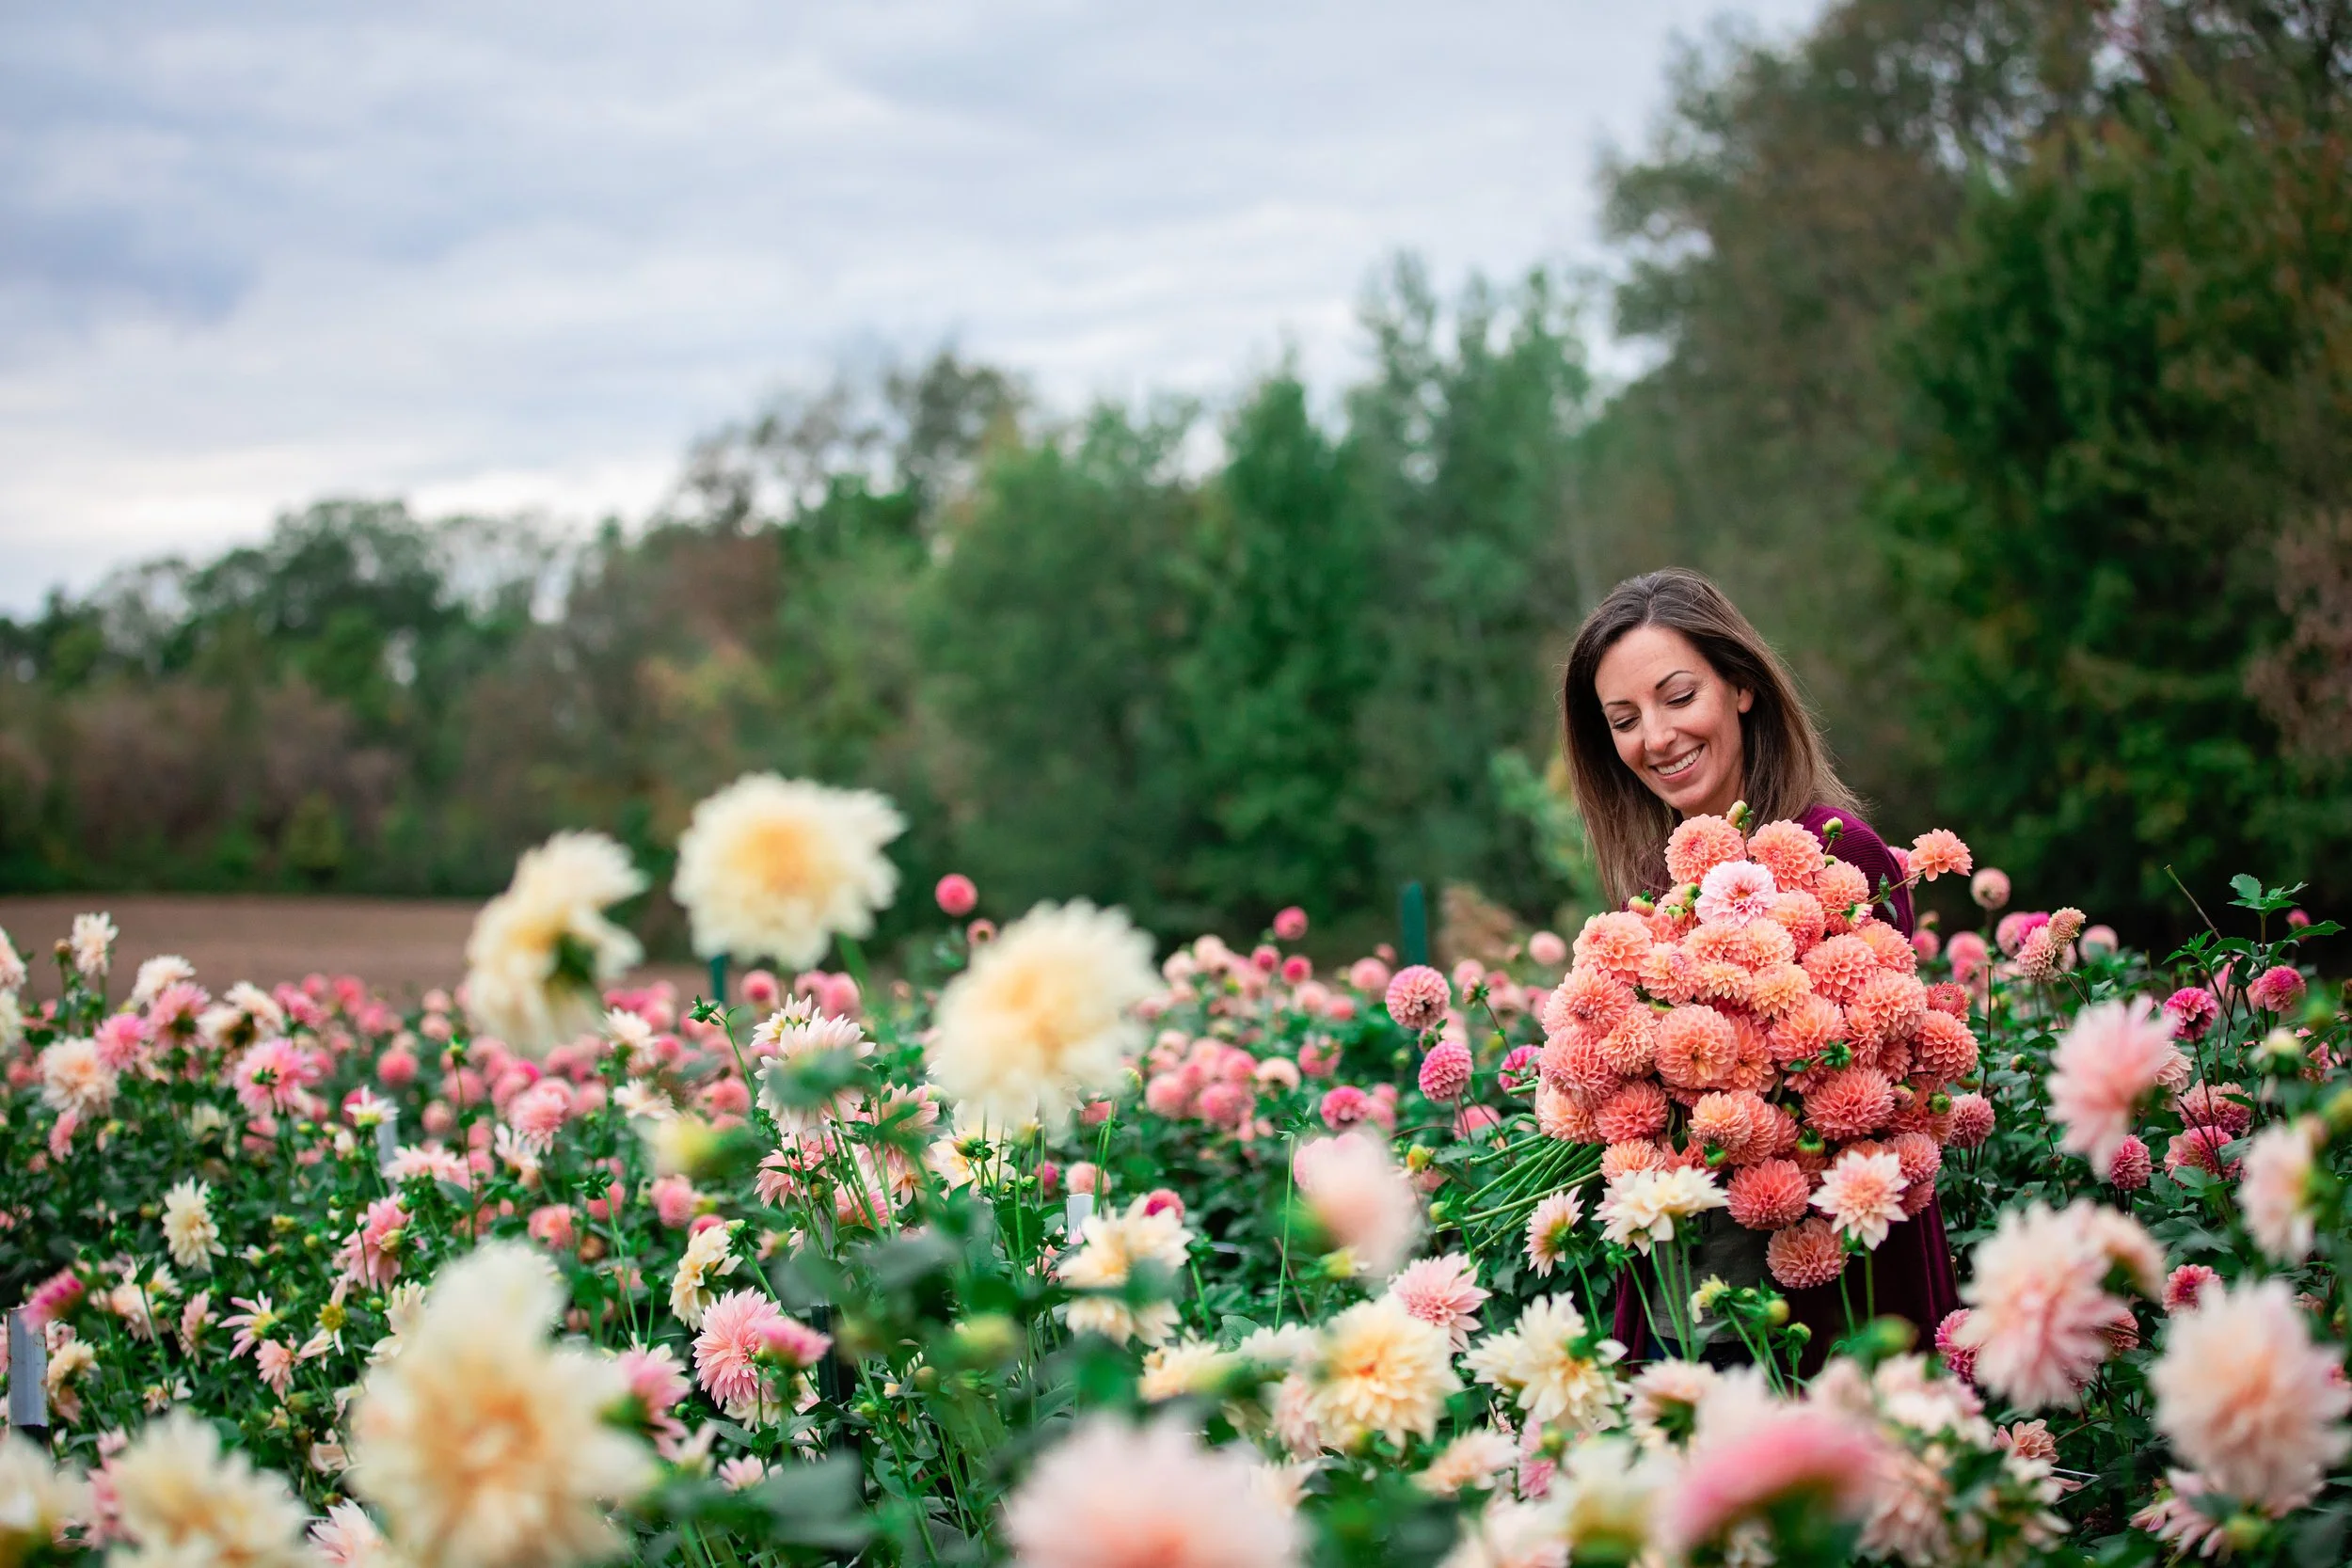
Dahlia Field on Oct 10
The Bottom Line
Dahlias bloom most prolifically as the days shorten toward the fall equinox. That's simply how they are designed.
Be patient. Keep watering, keep feeding, keep weeding.
I promise you’ll be rewarded in the fall!
Ready for more?
🌸The Dahlia Quick-Start Handbook🌸
Grow stunning blooms your first season… without the overwhelm.
A warm, practical, and personable guide that walks you through your entire first dahlia season, from planting day in the spring to digging tubers in the fall.
Written like I'm sitting at your kitchen table with you, not lecturing you from a podium.


My Favorite Dahlias for Cut Flower Use 2025
The top performing Dahlias at Three Acre Farm.
“What are your favorite Dahlias for cut flower use?”
I was asked this question a few weeks ago and I decided it would make an excellent blog post topic!
I’ve grown hundreds of different Dahlia. Some are keepers. Some are not. Every year, I add a few new Dahlias to the mix… and cull a few that no longer “make the cut” (pun intended).
“Cut Flower Dahlias” vs “Garden Dahlias”
Let me be clear. I am growing Dahlias for cut flower use, not landscape/garden use. I only care how the bloom looks in the vase. I don’t care how leggy or unattractive the plant looks.
My #1 goal is to harvest each and every bloom at just the right stage and get it into the hands of Dahlias lovers in my community.
Some people prefer to grow Dahlias as a bedding/decorative/landscape plant. They want a plant that looks good in the garden AND produces nice blooms. These are usually Dahlia plants they purchase at a plant nursery, which are quite different than the Dahlias I plant on my farm (there are THOUSANDS of different varieties of dahlias, bred for different uses).
A pretty landscape plant is not my goal, so please note the plants I’m recommending will produce lovely blooms, but the plants may look unsightly. In fact… cutting gardens in general can look a bit unsightly!
Here's what I’m looking for in a good Dahlia for cut flower use:
Sturdy Stems. No bobbleheads or bendy stems, please!
Long Stems. I harvest our dahlias into 5-gallon buckets, so I need the stems to be 18-24”. In order to get long stems like this, most of the dahlia varieties I grow reach 4-6 feet tall. Most bedding/landscape Dahlias are bred to be much shorter and are not suitable for cut flower use.
Long(er) Vase Life. As a general rule, the tighter the petals, the longer the vase life. The “Ball” type dahlias have a longer vase life than most other types. You’ll notice that nearly all the Dahlias I recommend in this blog post are Ball-type Dahlias… and it’s because they have the best vase life.
Sturdy Petals. Some Dahlias are stunning, but their petals bruise easily and they don’t hold up well.
Versatile Color. For floral design, I’m usually looking for more muted, subtle colors. Some dahlias can be gaudy, garish and over-the-top.
A few other notes:
Because of their short vase life (3-5 days), Dahlias are considered an “Event Flower”, not a bouquet flower. This means, they are great for events like weddings, baby showers, parties, etc, where they only need to look good for the day of the event. Don’t expect them to last a week in a vase, like many other types of flowers. You CAN use them in bouquets but know they will expire faster than the other flowers.
Dahlia colors can vary wildly depending on soil type, nutrient availability and weather conditions.
Some Dahlias grow better in certain climates and may need time to acclimate to a new environment. For example, when I order Dahlia tubers from producers on the West Coast, I usually have to grow them for 2-3 seasons before I can get an accurate assessment of them. Don’t give up on them after 1 season!
When harvesting your Dahlia blooms, be sure to cut DEEP into the plant, about 18-24” down from the bloom, making the cut above a set of leaves. This signals the plant to send up 2 new stems from the set of leaves you left behind.
Ok, here are just a few of my favorite Dahlias for cut flower use out of the 98 varieties I’m trialing this year!
Brown Sugar

These rusty, spicy cinnamon-y tones are absolutely PERFECT for autumn bouquets and bunches. Great flowers, great growth habit, great tubers!
Caitlin’s Joy

This Dahlia is a trifecta - gorgeous long-lasting blooms, productive upright growth habit and an amazing tuber producer. The warm shimmering tones are perfect for late summer/fall arrangments.
Chimacum Troy
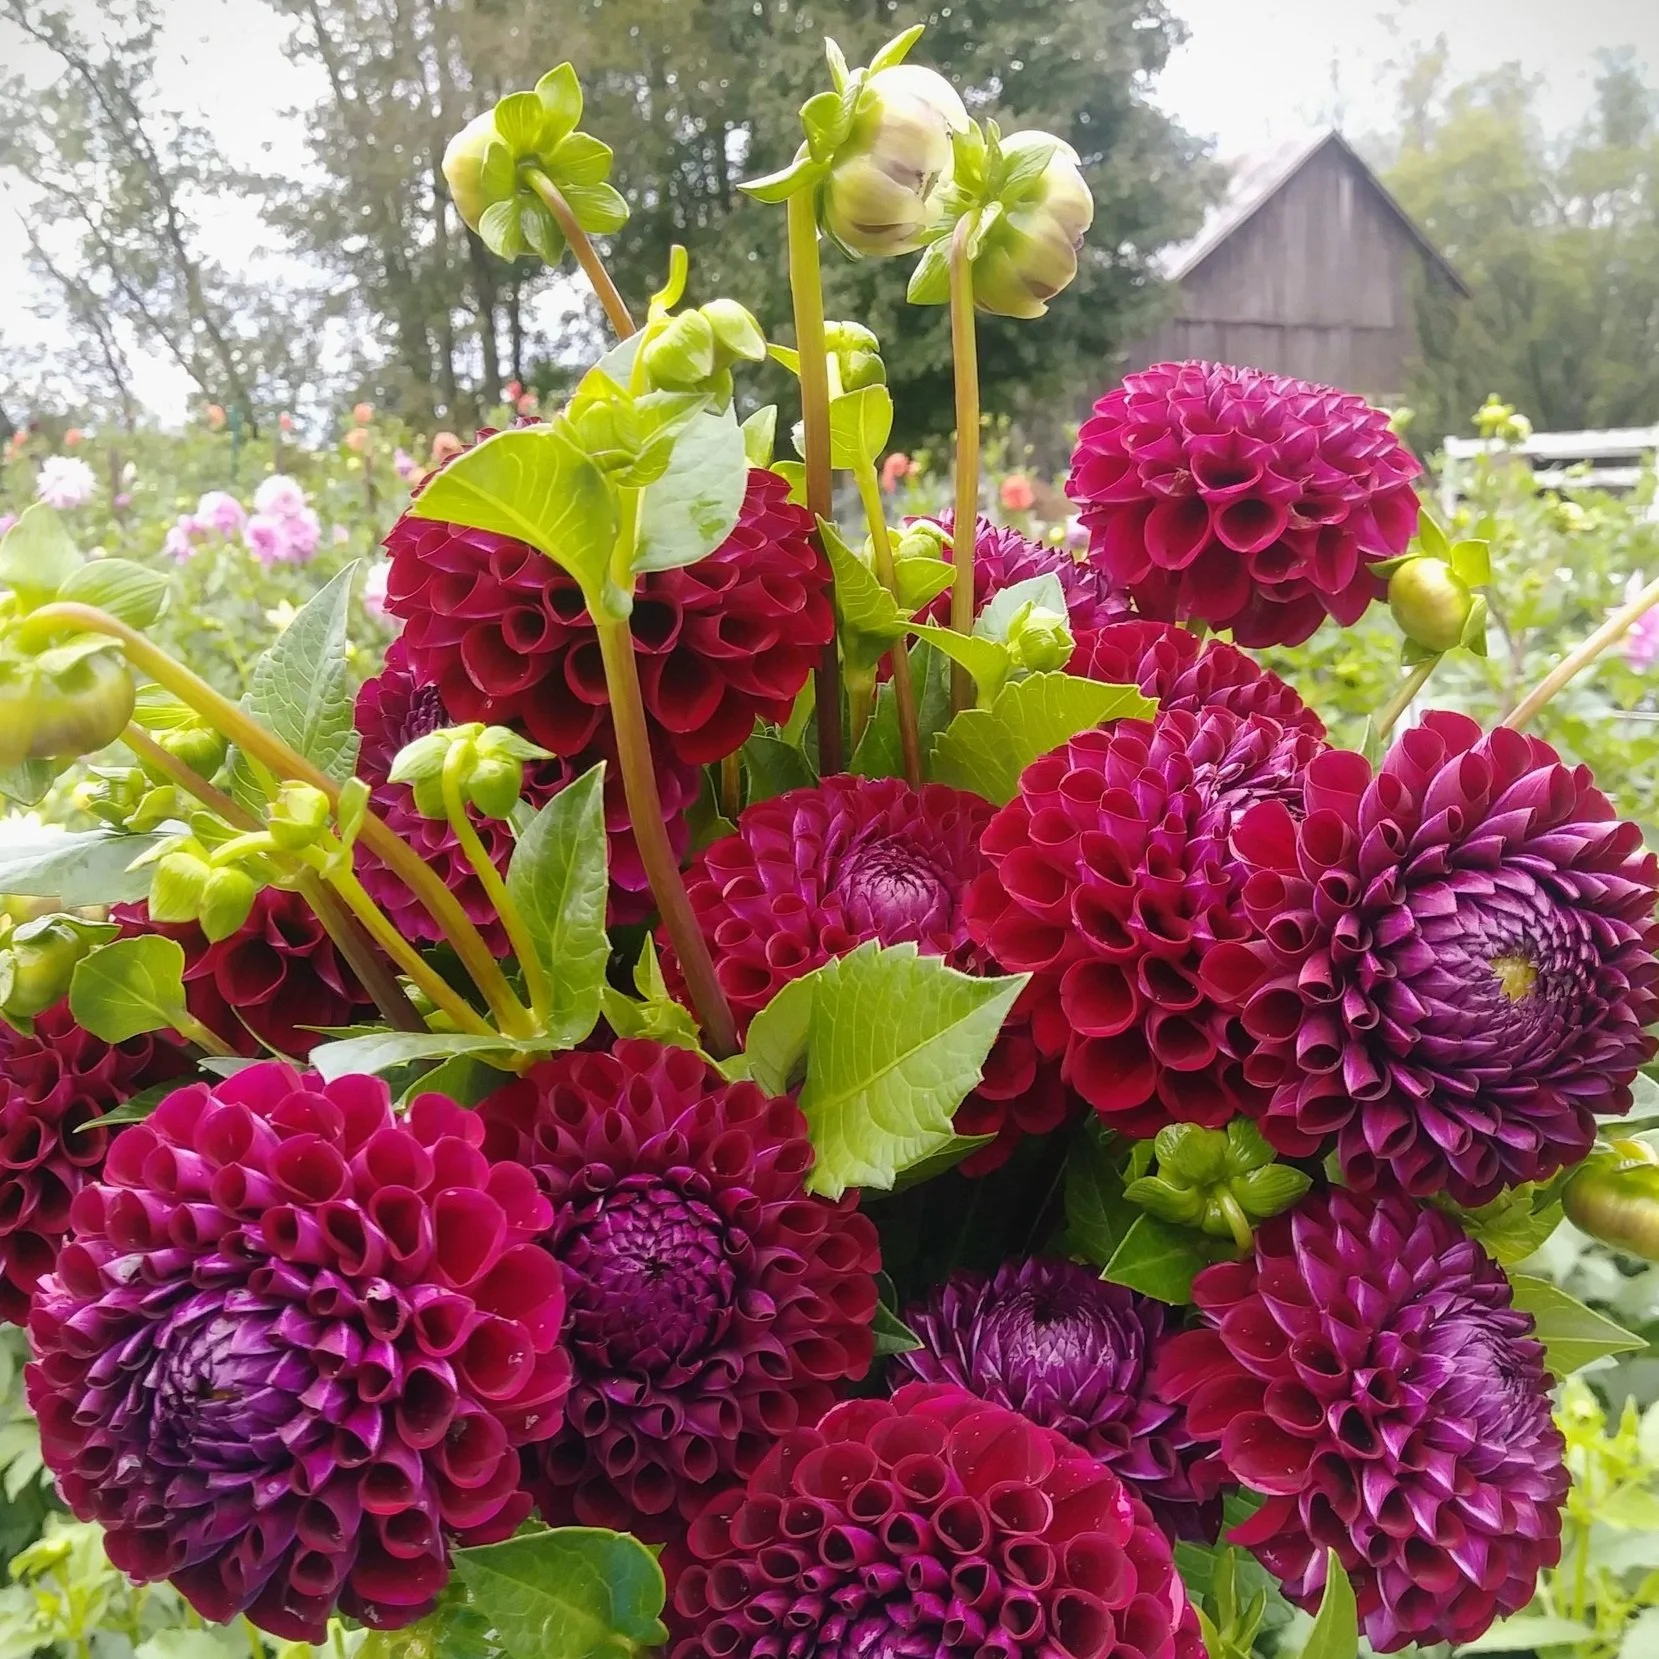
If you’re looking for a classic wine colored dahlia, look no further. I can’t get enough of this one!
She’s a good bloom producer and tuber producer. “Ivanetti” is a very similar dahlia. Their coloring and size is almost identical, but I find “Chimacum Troy” is more prolific with her blooms.
Clearview Peachy

One of the most impressive Dahlias I’ve ever grown. The stems are exceptionally sturdy and long, and the blooms are tough and hold up to lots of handling. Clearview Peachy is the longest lasting Dahlia bloom I’ve ever encountered. I once had blooms that lasted for 14 days (3-5 is average for Dahlias!).
The peachy tones are perfect for late summer/fall.
Coralie

Talk about a winner of a Dahlia! Coralie is early to bloom and super productive over the growing season. The bloom color is endlessly versatile. The petals are surprisingly sturdy and she is an excellent cut flower.
Cornel Bronze

Ok, if you had to grow just ONE dahlia for cut flower use, I’d hands down recommend “Cornel Bronze”. The plants are sturdy and vigorous, and the blooms are bulletproof. The bronze-orange color is fantastic in fall arrangements.
She’s also a good tuber producer!
Crichton Honey

This one is swoon worthy! The first 3 seasons I grew her, the plants were quite short (2-3 ft) and the stems had a tendency to flop over. I almost gave up on her, but I’m glad I didn’t. Now the plants are vigorous and 3-4 tall, and holding up nicely with support.
The blooms are stunning shades of apricot, orange and yellow, and most welcome in fall arrangements.
Diva

Diva deserves to be in every Dahlia patch. She tall, strong and sturdy with classically beautiful wine colored blooms. They pair beautifully with “Chimacum Troy” and “Bracken Rose”.
While the blooms are larger, the petals are still quite durable.
Ferncliff Copper

Have you ever seen a dreamier color?!? “Ferncliff Copper” makes my jaw drop every time. Be sure to harvest her a bit on the early side, as she’ll keep opening up in the vase.
Blooms are large and robust, as are her tubers.
Ice Tea

These colors are so yummy and delicious! I can’t get enough of “Ice Tea”. The blooms are sturdy and the perfect size for arrangements.
Isabel

Isabel grows about 3ft tall, which means she offers the best of both worlds: nice long stems for cutting, but not so tall and lanky that she requires lots of support.
Her color is a stunning cool pink with violet undertones. The petals have an iridescent quality and seem to glow from within
Jowey Linda

What a gorgeous cheerful autumn color! Vigorous plants have exceptionally sturdy stems. Jowey Linda has a long vase life and the petals are extremely durable and weatherproof. She also grows great tubers that are easy to divide!
Jowey Paula

These ombre pink, orange, yellow and green blooms are so gorgeous, I actually squealed in delight the first time I saw them. The petals are incredibly sturdy and the plant are vigorous. A great cut flower Dahlia!
Jowey Winnie
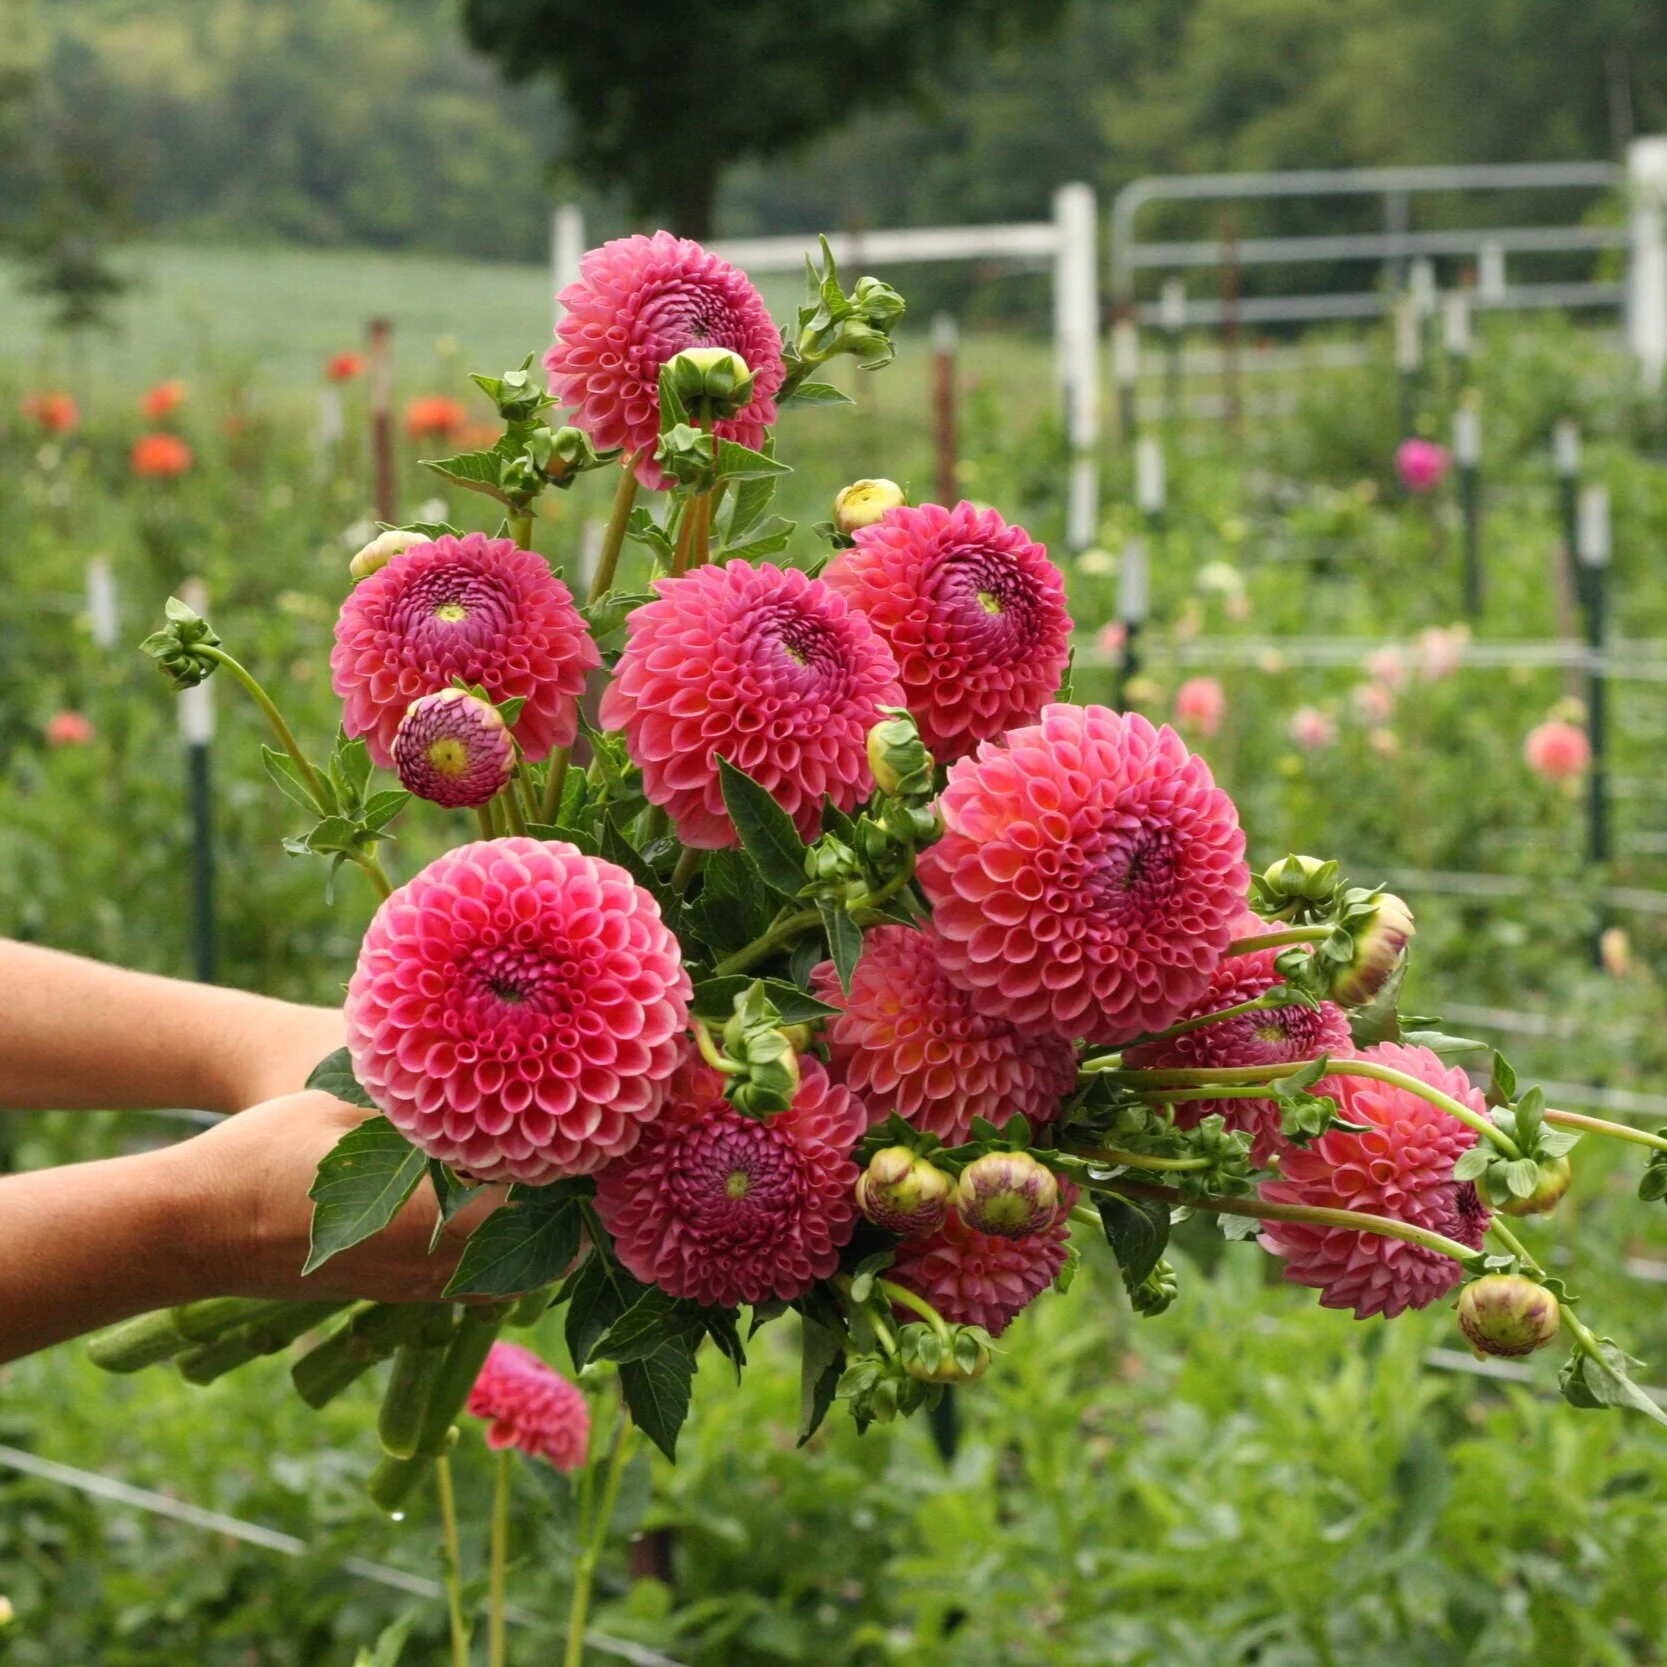
Another “must have” for the cutting garden. “Jowey Winnie” blooms are a larger ball type dahlia and the bright coral color goes well with multiple color schemes. I always reach for these blooms first when I’m making arrangements.
The plants are on the smaller side (2-3 feet) but will produce nice long stems if you cut deep into the plant when harvesting.
Just Peachy

Swoon-worthy blooms in gorgeous “tropical punch” hues. These blooms look delicate, but they are tough and hold up well to handling. The plants are sturdy, vigorous and produce great tubers.
Lark’s Ebbe

Plants are on the shorter side (about 3ft tall), but make up for lack of size with amazing productivity. The warm pink/coral/apricot blooms are exactly what colors I want to see in September and October. She’s a winner!
Mini Cafe au Lait

This Dahlia is a variety that was sold to us years ago as “Cafe au Lait”, but it was mislabeled and we have no idea what it’s actually called.
The blooms are similar coloring to “Cafe au Lait”, but have a different petal shape and the blooms are much, much smaller than the dinnerplate sizes “Cafe au Lait”, which makes them easier to use in bouquets and arrangements. They come in shades of pink and cream. I’ve tried to separate the pink plants from the cream plants over the years… only to notice they will change color halfway through the season! I give up ;) They are all beautiful.
The plants/stems are incredibly strong and sturdy, and they are an excellent tuber producer. The only downside is the petals can bruise easily, which almost made me cull them from this list… but if you can handle with care, they make a great addition to the cutting garden.
They pair perfectly with “Cafe au Lait” and “Bracken Rose”.
Peaches ‘n Cream

“Peaches n’ Cream” is one of the earliest blooming and most prolific bloomers on our farm. The plants seems to tolerate heat and humidity better than other dahlias.
Her blooms are truly magnificent and it’s 100% worth trying to get your hands on some. Stems are thin, yet sturdy and the bloom size is perfect in arrangements.
Robin Hood

Those colors!!! So juicy and delicious, I just want to take a bite! “Robin Hood” is a fantastic cut flower. The plants are incredibly productive and the blooms are perfect for late summer/fall bouquets. You’re going to love this one!
Snoho Doris

“Snoho Doris” is such a fun, playful Dahlia. I love using her blooms in mixed bouquets. They are a little bit funky, but in a subtle way. ;) Each bloom is different and colors change over the growing season.
Snoho Sonia

Snoho Sonia is pure perfection. Long sturdy stems, super productive and long lasting blooms. She’s a dream come true.
Valley Rust Bucket

These adorable little blooms pack a big punch of bright rusty orange color! Their smaller size makes them ideal for tucking into bouquets and bunches.
Woodland’s Wildthing
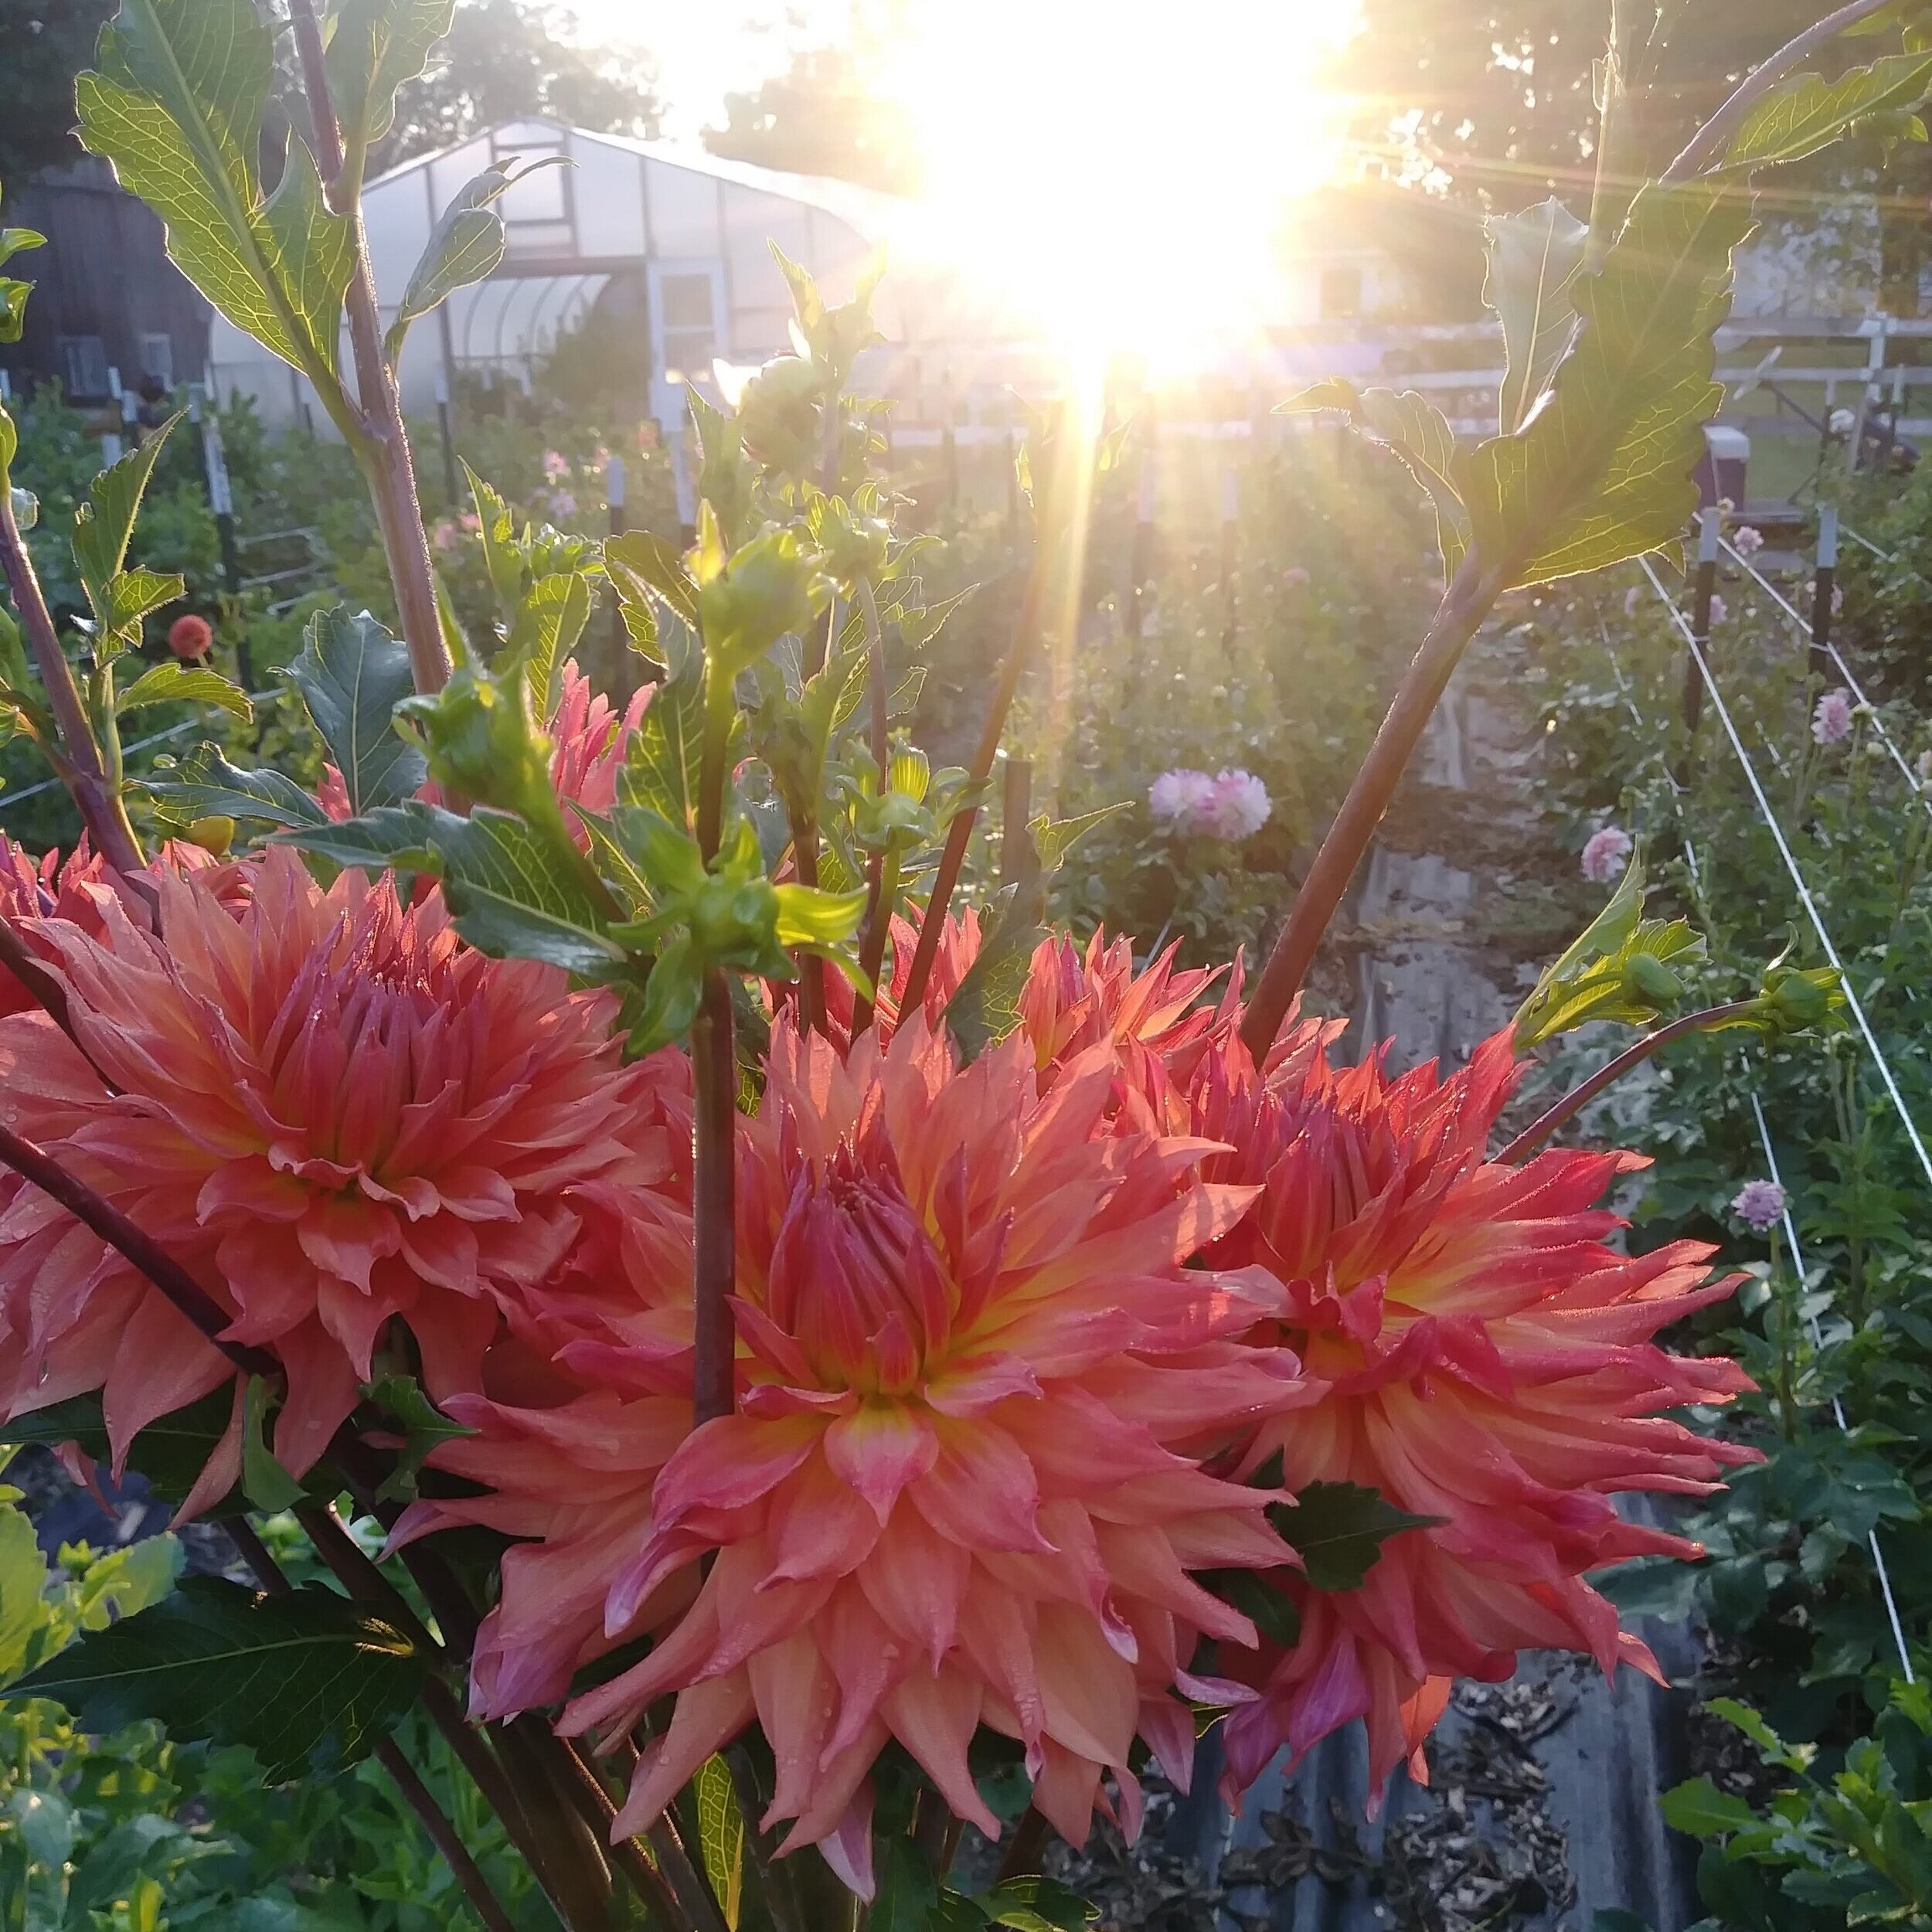
One of the first Dahlias we grew on Three Acre Farm, “Woodlands Wildthing” is like a good friend you’re thrilled to see again each year. She makes me laugh with delight!
Be sure to give her lots of support because she gets wild! Plants can easily reach 6-8 feet tall. Bloom are absolutely gorgeous, on nice long stems. Harvest her blooms when they are in this stage shown above, then watch them open and unfurl. The blooms are at their most stunning stage right before they expire.
Want to know when our Dahlia tubers are available? We offer them in the spring, after we have finishing dividing, inspecting and inventorying all the tubers.
Join our email list using the form below to make sure you don’t miss out!
Want to learn more about Dahlias? Check out these resources:
Three Acre Farm Dahlia Tubers
Beginner’s Guide to Growing Dahlias

It’s Dahlia Evaluation Time on the Farm!
It’s Dahlia Evaluation Time on the Farm!
Right now is the PERFECT time to do a Dahlia Evaluation before they get hit by frost and the growing season abruptly ends. Dahlia Evaluation time means I’m inspecting each plant, looking to make sure:
It’s properly labeled.
It’s healthy and productive. Any plant that looks suspect or is not producing blooms true to form is immediately culled and destroyed.

MORNING WALKS IN THE DAHLIA FIELD
This time of year, most mornings are spent walking the Dahlia field. While it’s a beautiful way to start the day, it also has purpose. One of my best (and also exhausting) qualities is observation. I notice EVERYTHING. My eyes are evaluating every plant:
Is it healthy?
Is it productive?
Is it true to form?
Is it labeled correctly?
Is it experiencing disease or pest issues?
Most of these answers are cataloged in my brain, where I file away a decade's worth of observation, examination, and scrutiny. As I get older, I become more aware that these thoughts, observations, and awareness need to be recorded or they will be lost forever. So I’m starting to record them.
A UNIQUE PERSPECTIVE ON DAHLIAS
Each Dahlia variety is unique and has different characteristics and qualities. I think of them like people. Even though they are all the same species, the variations are astounding—just like humans. I even find myself talking to them like old friends. When they start blooming, it’s usually been 9-10 months since I’ve last beheld their beautiful faces. It’s so good to see them again, and I tell them how much I’ve missed them. Every morning is a new delight. I’m cherishing these quiet moments, knowing that my time with the Dahlias is limited.
We could have 6 weeks left before frost ❄️… or 2 weeks… or somewhere in between. So I soak it all up, into my body, into my bones… to get me through that 9-10 month absence from my dear friends.
EVALUATING FOR NEXT SEASON
As I make decisions about what to grow next year, I like to keep it simple, growing about 100 different Dahlia varieties each year. This means that if I’m adding 10 new varieties, I must say goodbye to 10 varieties as well.
We are a “Cut Flower Farm,” which means we are growing Dahlias for the purpose of cutting the stems for bunches or bouquets, NOT as a landscape plant. If the Dahlia is beautiful but too short for bouquets or the petals get too damaged in arrangements, then it’s not worth our time or effort to grow it (except in a few cases where we grow them just for fun).
At the end of each season, I take about 3-4 hours and walk the field with my clipboard, making observations and notes about each Dahlia, looking for things like:
Does it grow tall enough to be used as a cut flower? If not, does it have any other redeeming qualities?
What kind of growth habit does it have? Are the stems easy to harvest for cut flowers?
Did this variety have specific issues with disease or pests?
Did I like the color? Was it easy to use in bouquets and bunches?
Are the petals sturdy and able to hold up to handling during harvesting and bunching? If not, does it have any other redeeming qualities?
Is it a good tuber producer? Some Dahlias grow incredible blooms but have consistently poor-quality tubers that make reliable tuber storage difficult. I usually give these varieties three seasons, and if it doesn’t get easier, I will discontinue growing them.
FINAL THOUGHTS ON DAHLIA EVALUATION
If you haven’t done a Dahlia Evaluation yet… you’ve still got time! Grab a notebook, inspect your plants, and start making decisions for next season. Your “Future Self” will thank you!
We have our first chances of frost this week, so if you haven’t done your Dahlia evaluation and inspection, NOW is the time to do it! If we do get frost, I expect it to be very patchy. It won’t kill the plants. It usually takes temperatures below freezing to truly end the Dahlia growing season. We call this our first “Killing Frost” or “Frostmas.” Frostmas is a celebrated holiday on our farm that signals the completion of our growing season, but we never know exactly when the holiday will arrive! It’s usually around October 15, but some years Frostmas arrives weeks before or after that date.

Once the Dahlias are killed by frost, they become completely unrecognizable, so it’s important to do your inspection and evaluation while you can still see what they look like! I walk up and down the rows with my Dahlia Map, ID tags, a Sharpie, and a spade, inspecting every single PLANT that I grow:
Is it labeled correctly? If not, be sure to flag it.
Is it healthy? If not, remove it and dispose of it.
Are the flowers true to form? If not, remove it and dispose of it.
I’m also taking notes on my clipboard about each VARIETY that I grow:
Does it grow tall enough to be used as a cut flower?
Are the stems easy to harvest for cut flowers?
Did this variety have specific issues with disease or pests?
Was the color easy to use in bouquets and bunches?
Are the petals sturdy and able to hold up to handling during harvesting and bunching?

LOOKING AHEAD TO NEXT YEAR
Next year, we are going to divide our Dahlias into two groups and two separate fields:
Dahlias for Cutting/Production: The tried-and-true varieties that perform well as cut flowers in bunches and bouquets.
Garden Dahlias: The varieties that are best enjoyed in the garden. While they still CAN be used as cut flowers, these may be Dahlias with fragile blooms or short stems, which are otherwise better suited for garden decoration.
I'll be sure to share my evaluation this winter!
QUESTIONS?
Ask them here and I’ll get back to you!
Ready for More?
If you’re serious about growing the garden of your dreams this year, register for my online course, “Backyard Cutting Garden 101”. You’ll find everything you need to plan, grow, harvest and arrange your stunning blooms. I can’t WAIT to help you grow! Click on the button below for all the details.

Meet the Dahlia Harvest Cart 1.0
Meet the Dahlia Harvest Cart 1.0
Let me introduce you to the Dahlia Harvest Cart 1.0
It’s a bit of a rough design, but it gets the job done!

Harvesting Dahlias is extremely time consuming and somewhat cumbersome because we sanitize our snips in a 10% bleach water solution between every single plant… which means we have to haul the solution with us up and down the aisles while harvesting.
(This protocol is recommended by the American Dahlia Society to help prevent the spread of virus and other disease from plant to plant. Virus is easily spread via snips, which is why we don’t allow anyone else to harvest our Dahlias. We work hard to keep our Dahlia fields as disease free as possible!)
We used to carry a bucket down the aisles with us, dipping our snips into bleach water between each cut.
However, 3-4 hours of constantly bending over to dip the snips in the bucket was hard on our bodies!
So we started imagining a better system that would allow us to sanitize the snips without bending over.

The Harvest Cart has a caddy that holds our bleach and rinse water jars. The bottom of the cart has a large bucket for holding the cut flowers.
It’s so much easier on our bodies and now we’re not bending over a million times a day!
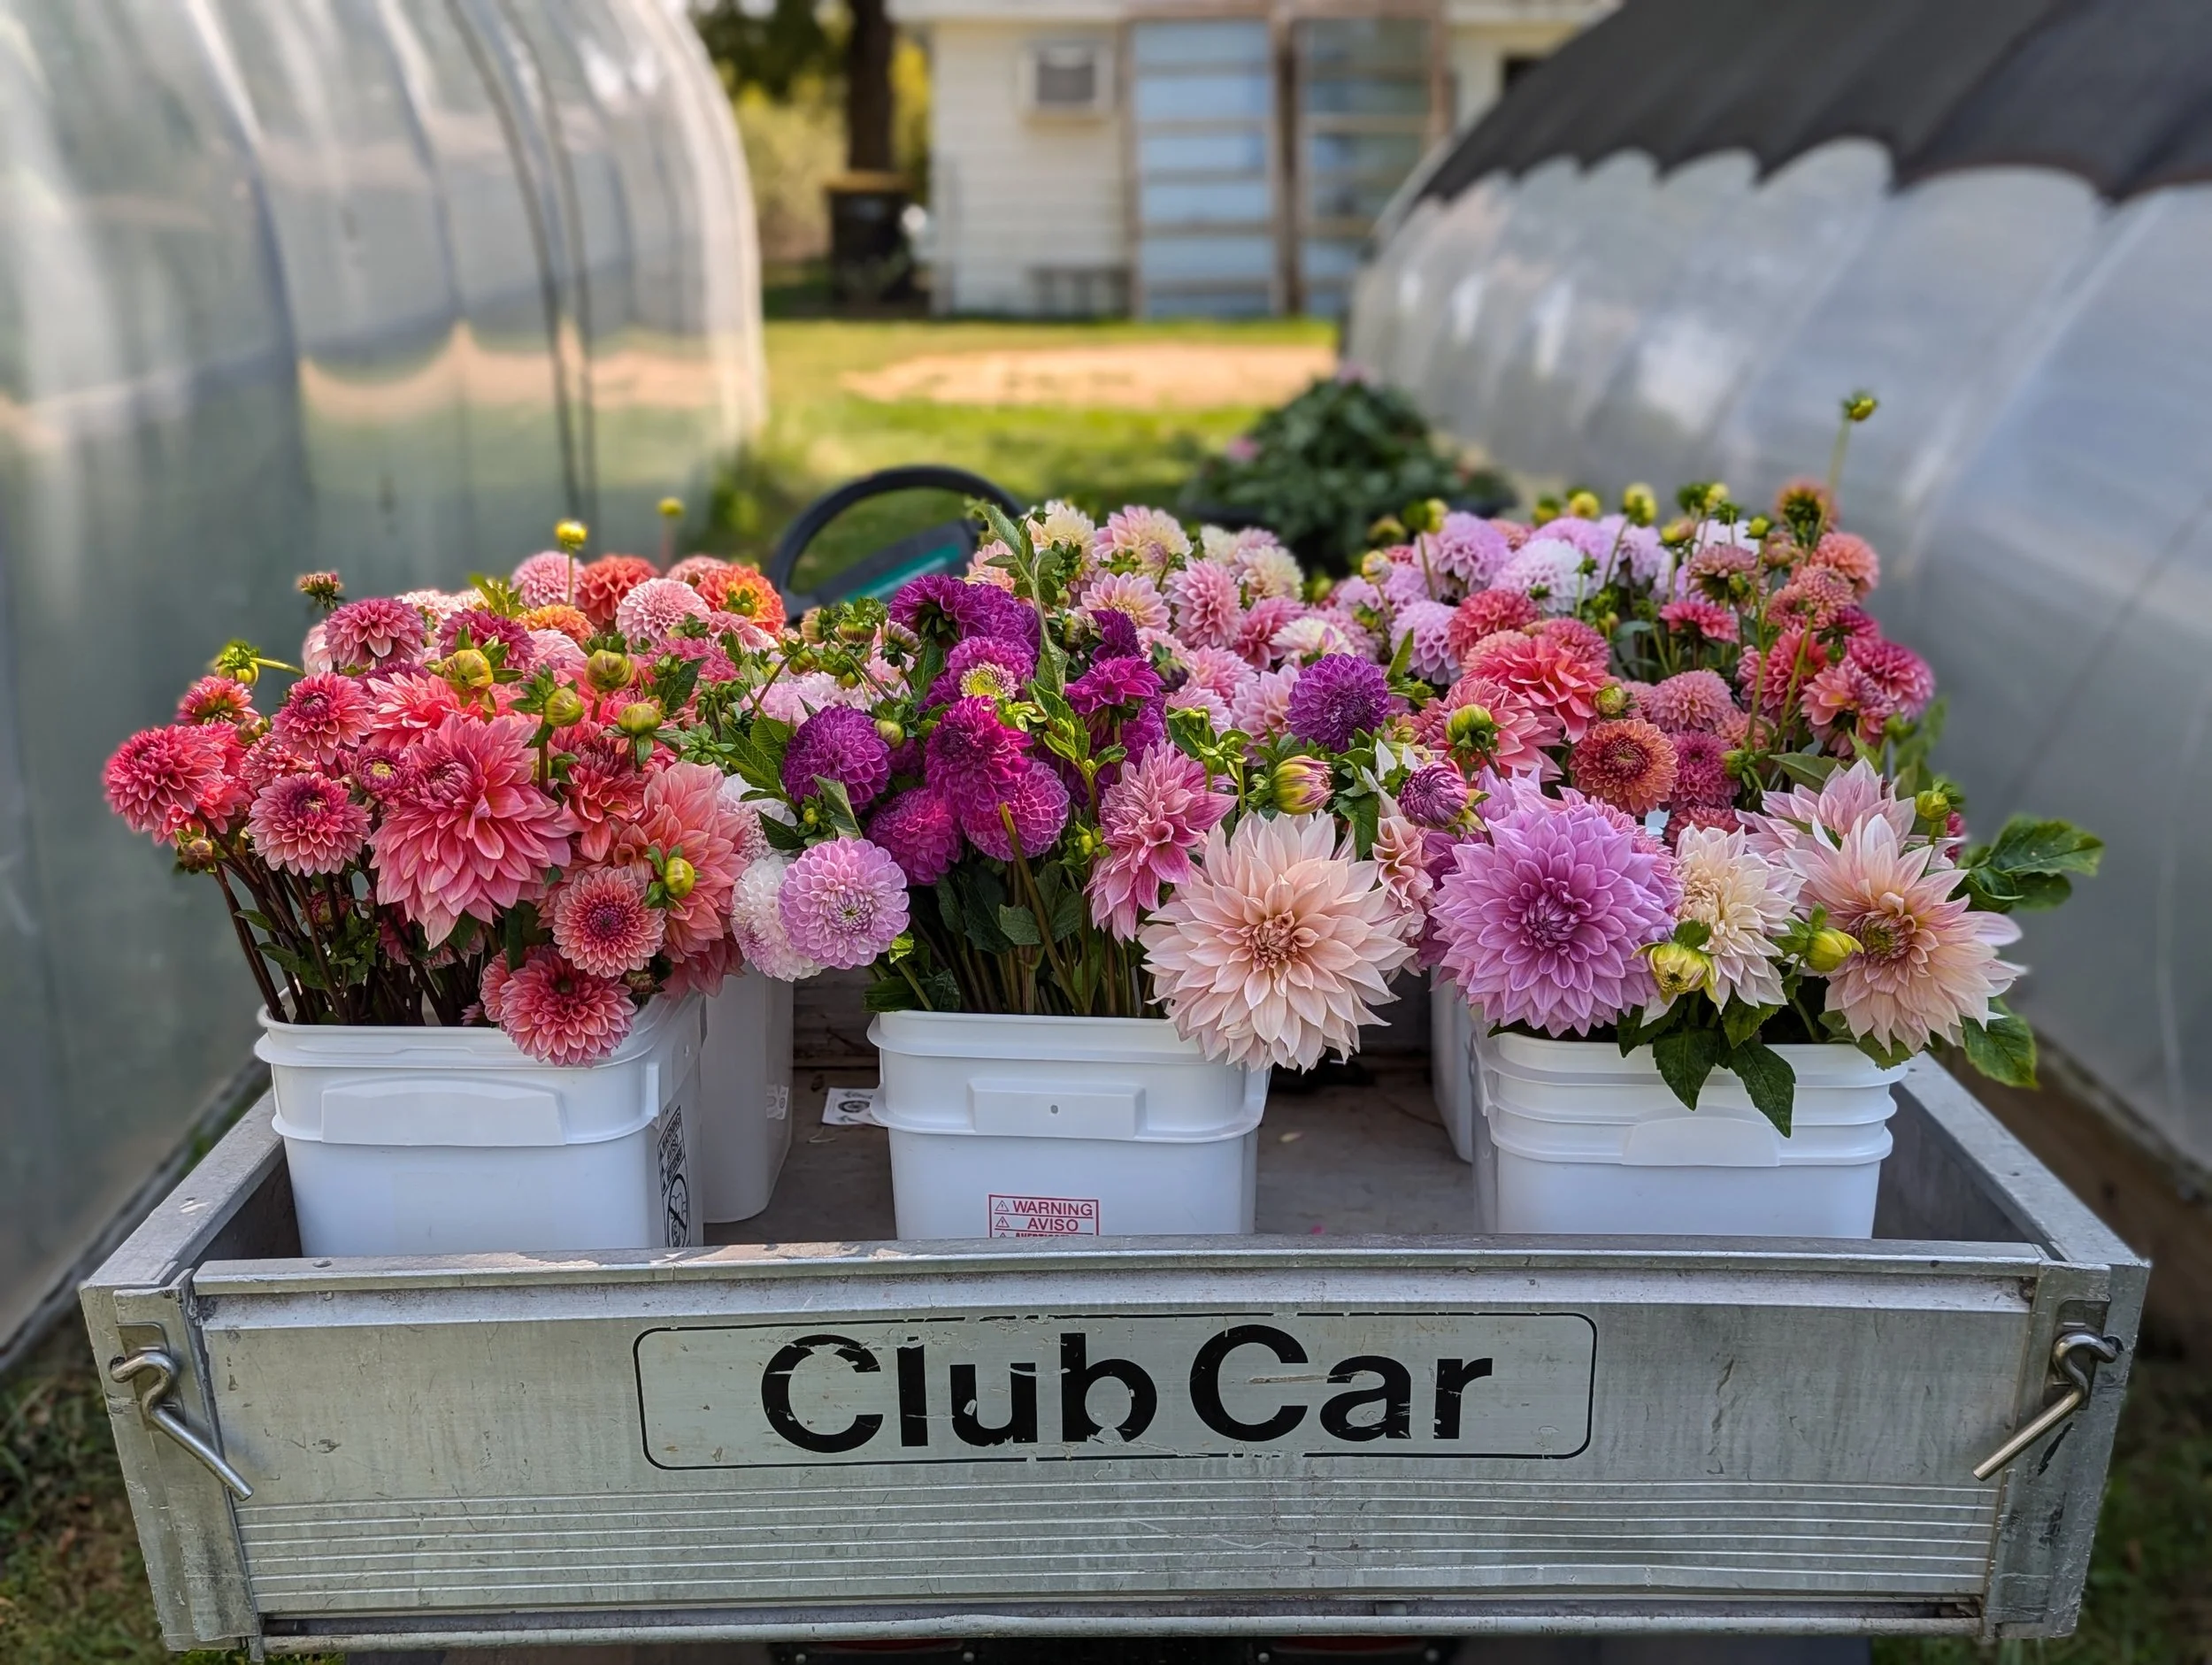
Here’s our workflow for harvesting Dahlias:
Fill clean buckets with cold water and drive them out to the Dahlia field in the golf cart.
Scrub and sharpen snips. Good sanitation practices are important to keep plants healthy!
Fill the jars with bleach solution and wheel the Harvest Cart out to the Dahlia field.
Push the Harvest Cart up and down the Dahlia aisles, cutting stems with freshly sanitized snips between each plant.
Drop cut stems into Harvest Cart bucket (bucket is dry, but stems are only out of water for a few minutes).
When finished with the row of Dahlias, push the Harvest Cart back to the golf cart.
Place cut stems on a table or golf cart seat and begin processing - cutting off foliage and unnecessary side shoots into wheelbarrows.
Before placing in water, recut the stems so they can take up water.
Once buckets are full, place them in a cool, dark place to rehydrate overnight before arranging.
We’ll likely make some modifications in the future, but for now… it works!

QUESTIONS?
Ask them here and I’ll get back to you!
Ready for More?
If you’re serious about growing the garden of your dreams this year, register for my online course, “Backyard Cutting Garden 101”. You’ll find everything you need to plan, grow, harvest and arrange your stunning blooms. I can’t WAIT to help you grow! Click on the button below for all the details.