
All About Dahlia Tubers
Questions about dahlia tubers? Here you go!
All About Dahlia Tubers
Are you a beginner dahlia grower? If so, you probably have lots of questions about dahlias and how they are grown. I’m here to help answer some of your questions!
1. How are dahlias grown?
Dahlias are grown from tubers, which are “bulbs” that grow underground. Dahlia tubers are a lot like potatoes - you plant one tuber and end up with many more at the end of the season.
Dahlias CAN be grown from seed, but dahlias grown from seed are not genetically stable and often turn out to be “duds”, with irregular forms and deformed petals, like the one pictured below. I was told by Dahlia breeders that it takes planting about 800-1000 Dahlia seeds to discover a “diamond in the rough”… and I believe it!

If you’re mostly concerned about growing flowers for bees, Dahlias from seed is fine. But if you’re looking for beautiful blooms for bouquets or Dahlia shows, you’ll want to grow Dahlias from tubers, which are genetic “clones” of their mother plant.
Growing from tubers is the easiest and most popular way to grow dahlias. To grow a dahlia plant, all you need is ONE tuber with ONE “eye”/sprout.
A viable tuber needs to have an “Eye”, a neck and a body. If the “tail” is too long, you can cut off up to 3/4 of the tail and the tuber is still viable.
For new growers, locating the “eye” can be tricky at first, but with practice you’ll be able to spot them.

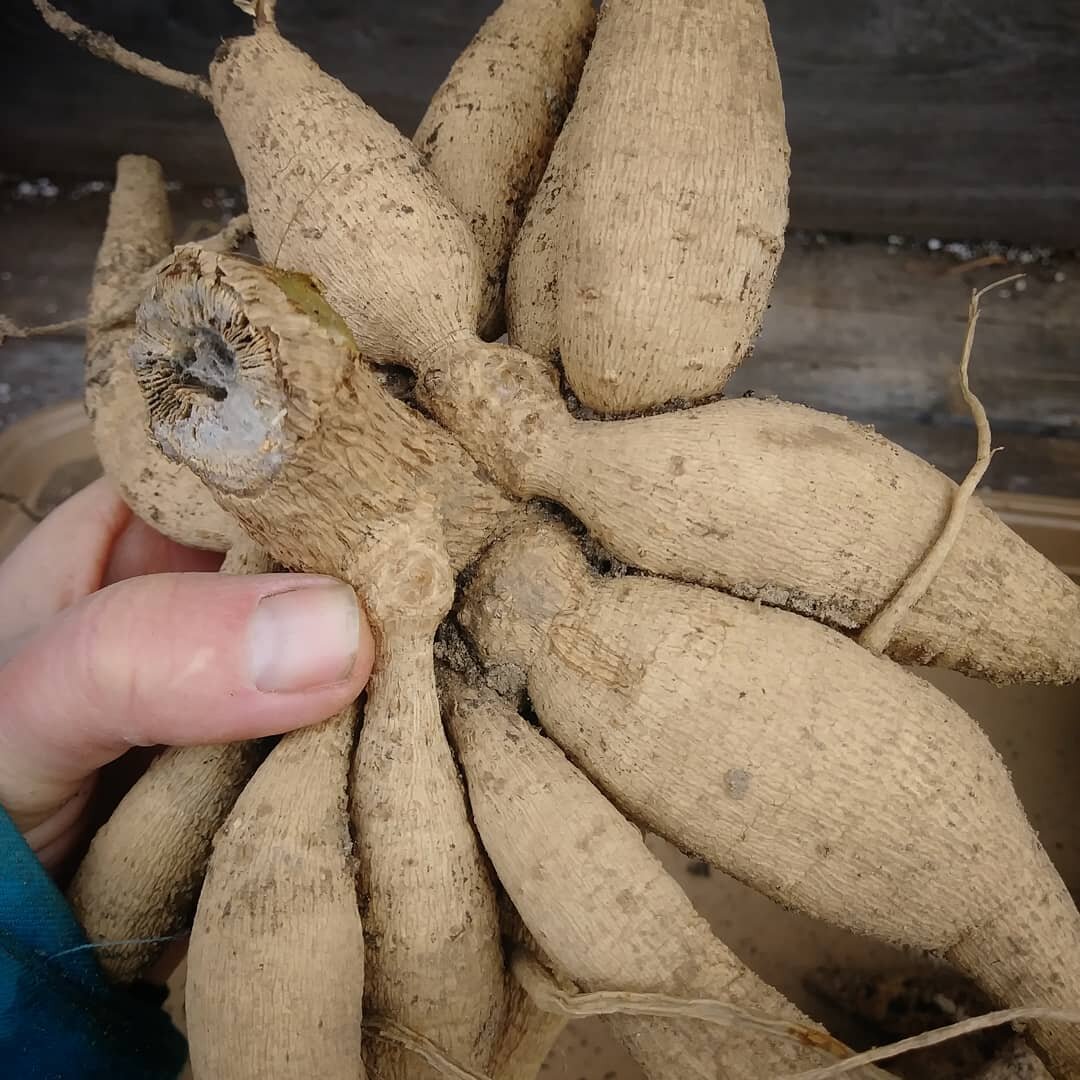
When you plant one tuber in the spring, the plant will grow and multiply… and when you dig up the plant in the fall, you will have MULTIPLE tubers! It’s like magic!
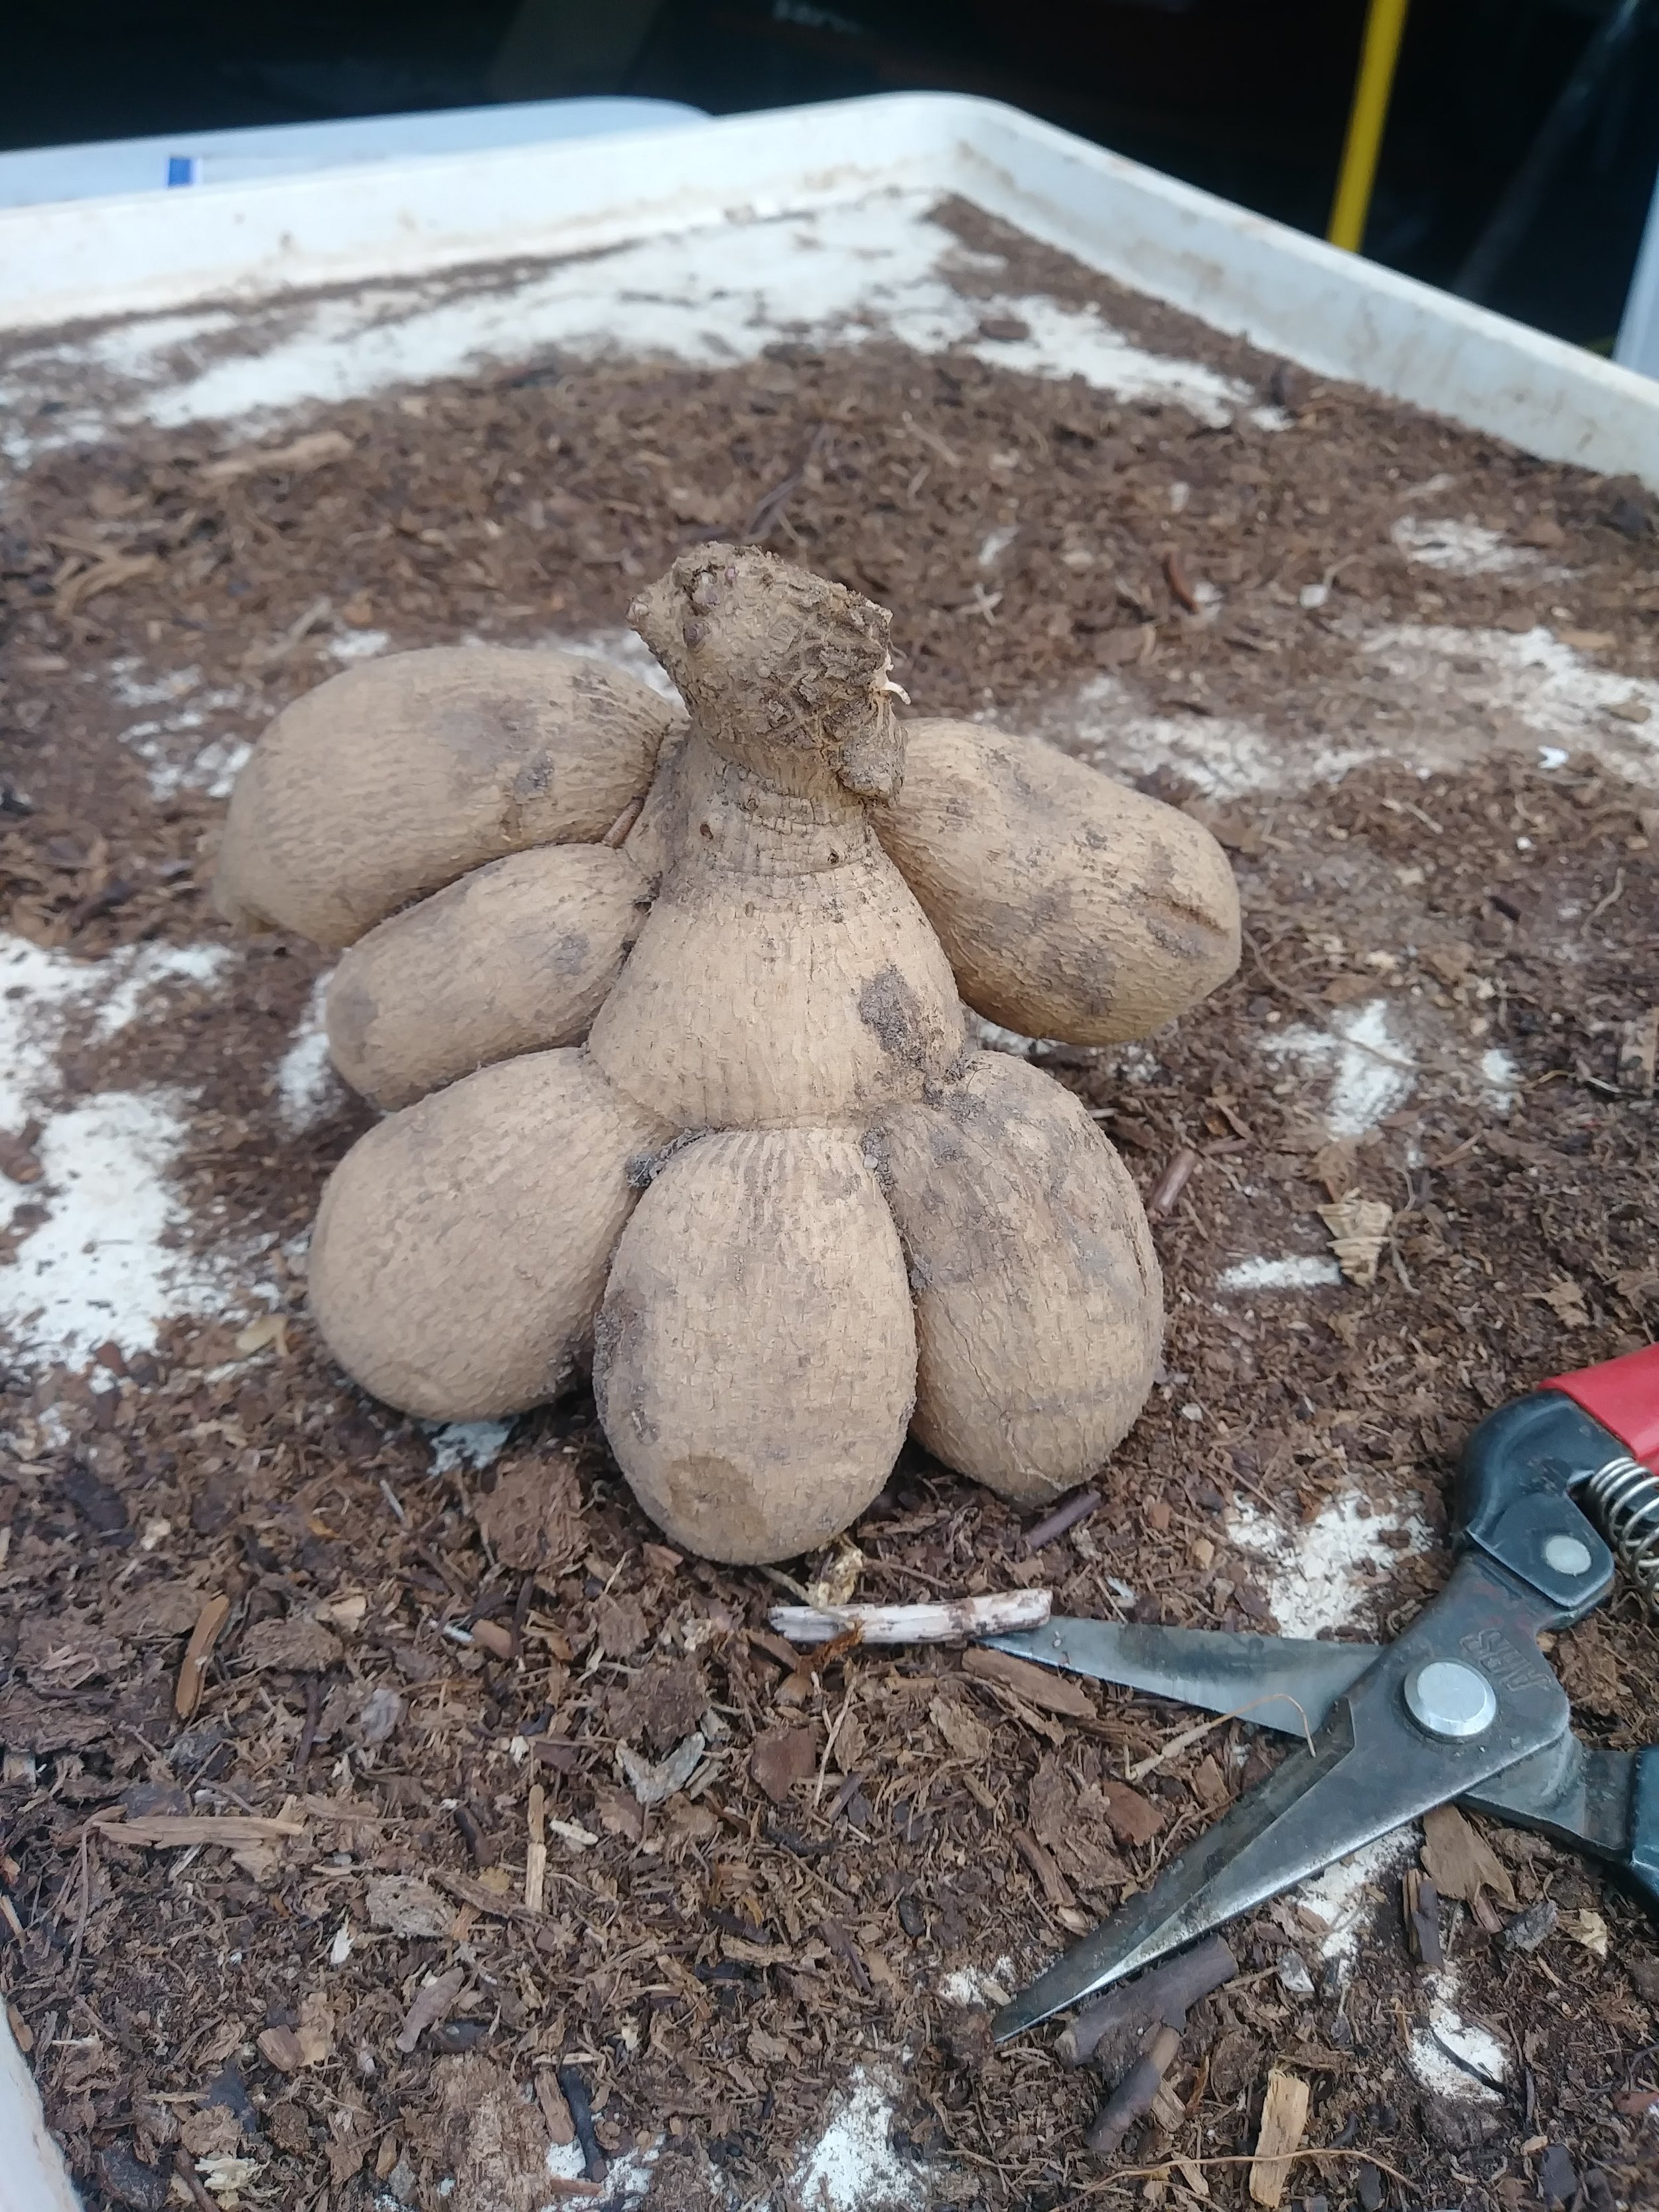
Yes, ALL of these tubers in the photo below grew from ONE tuber! Each one of these tubers can be planted out and now you have over a dozen plants!
2. Do all tubers look the same? Does the size of the tuber matter?
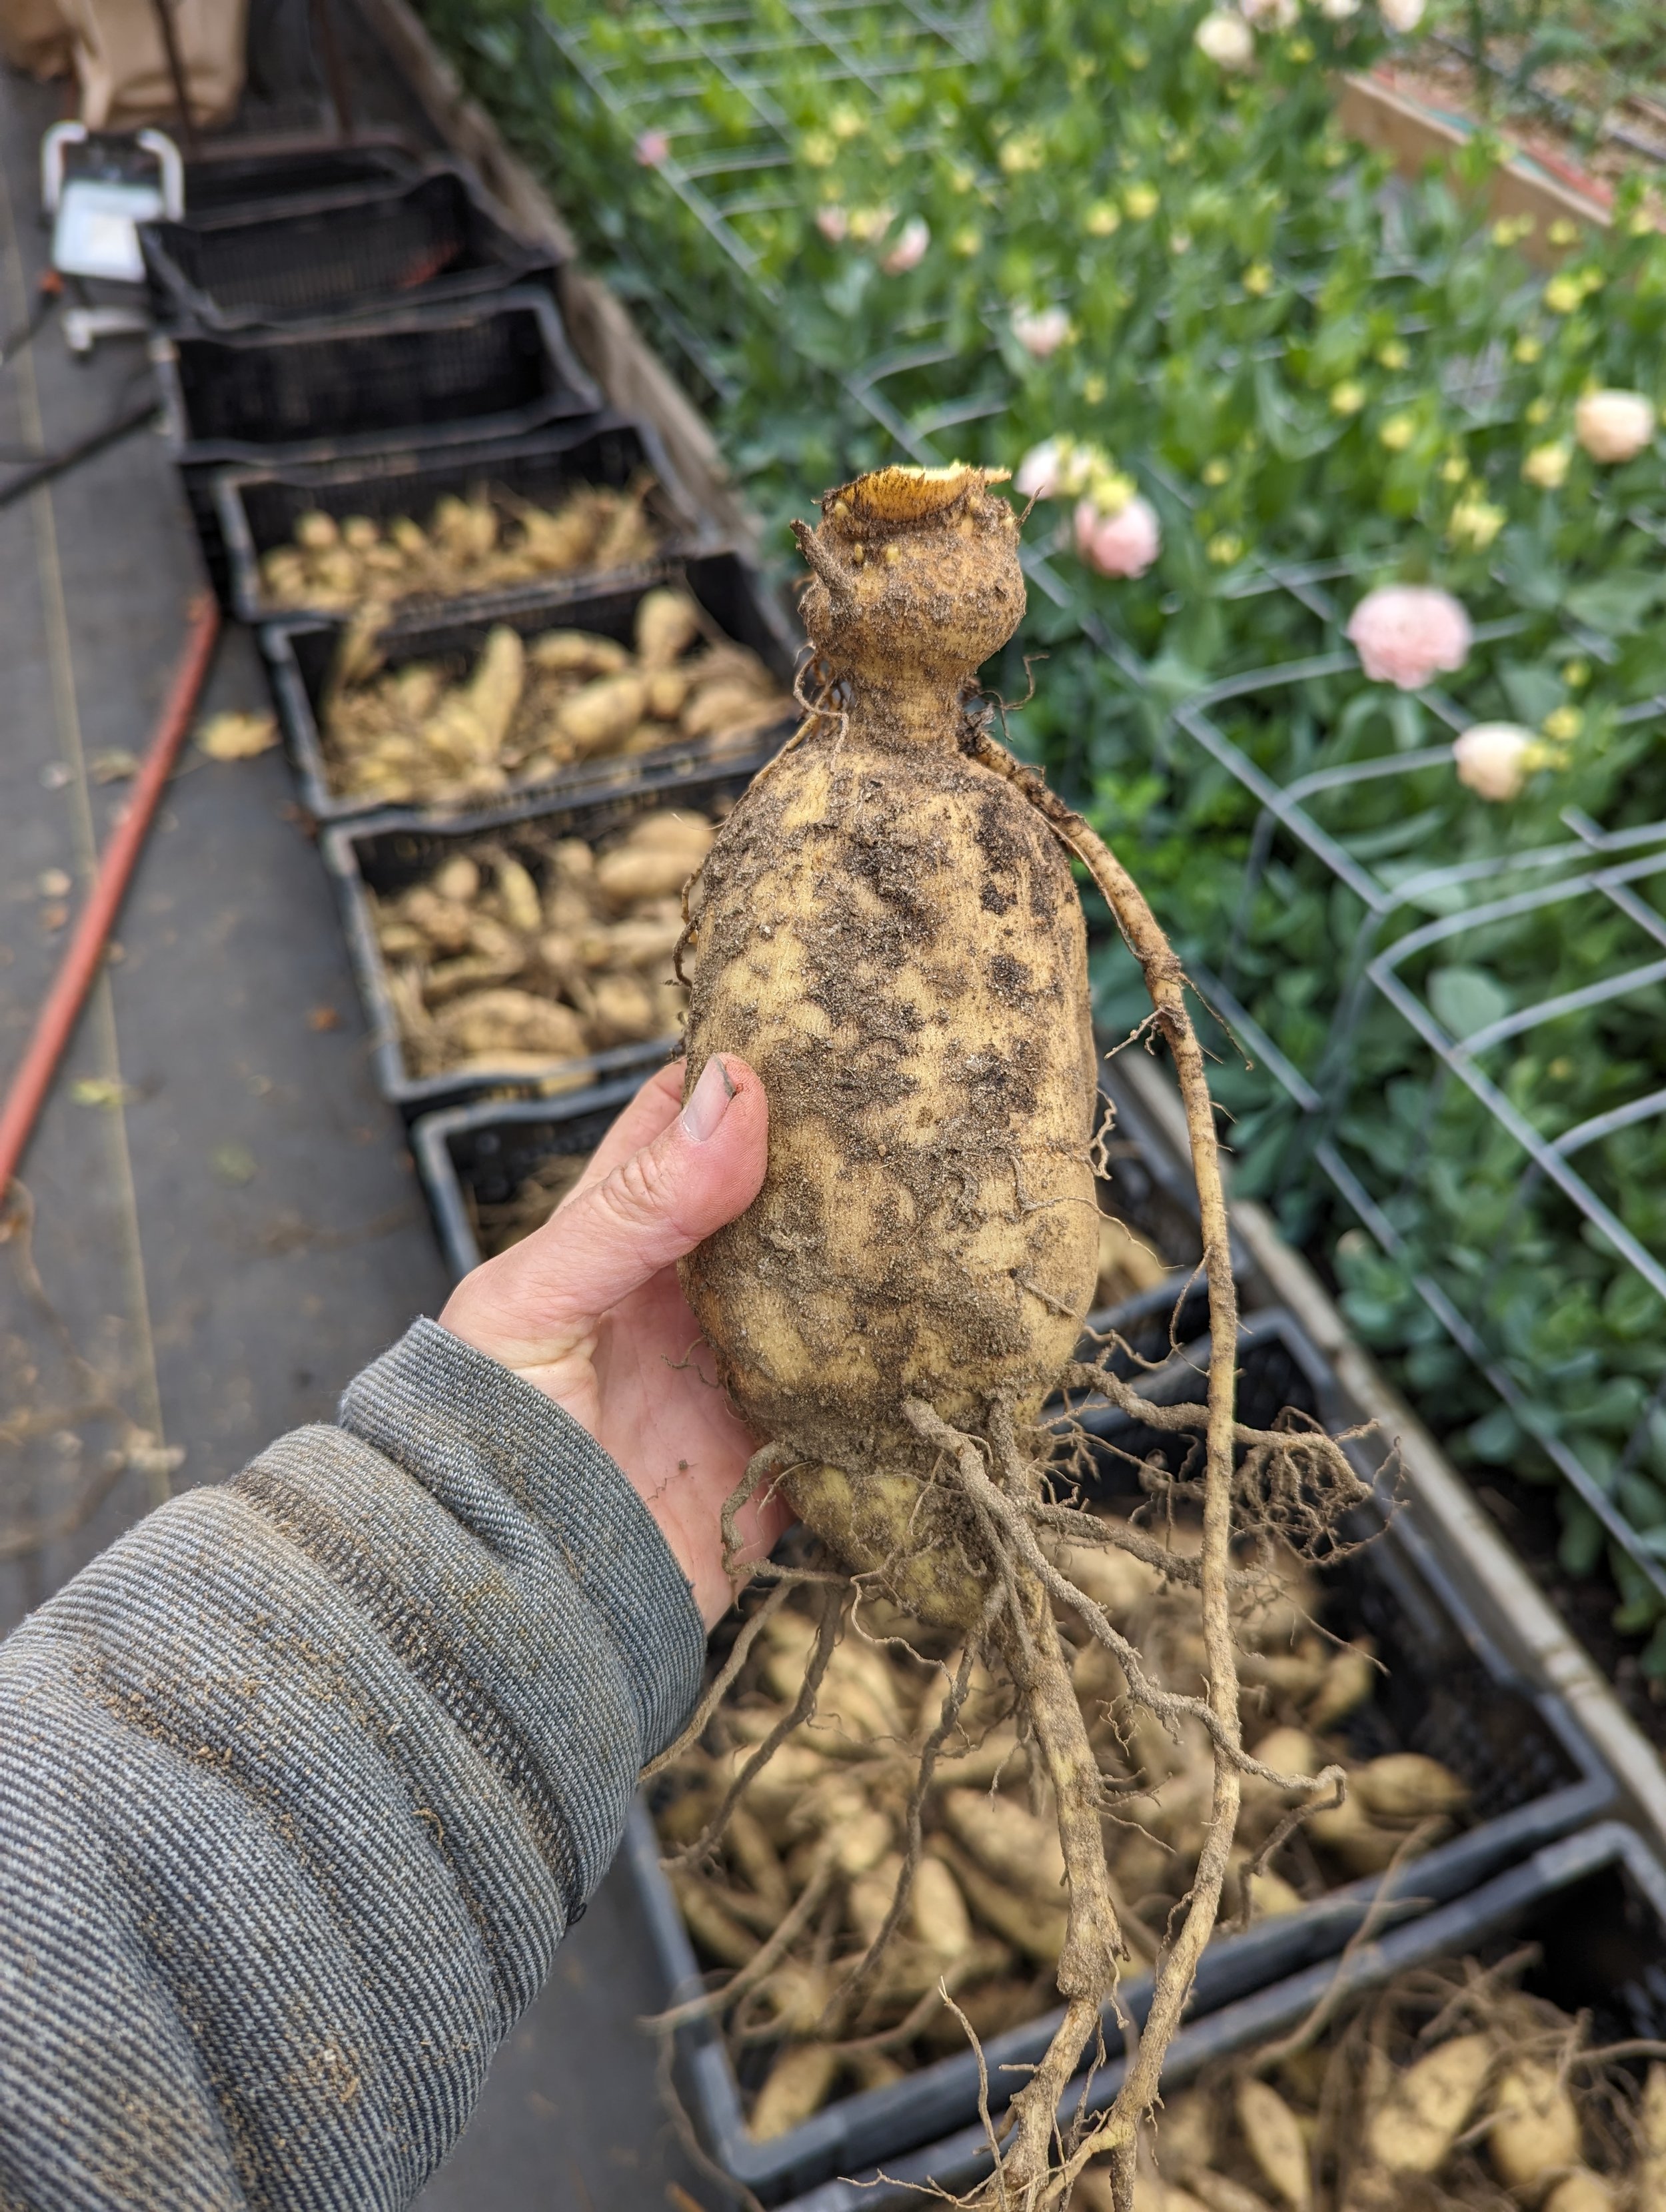
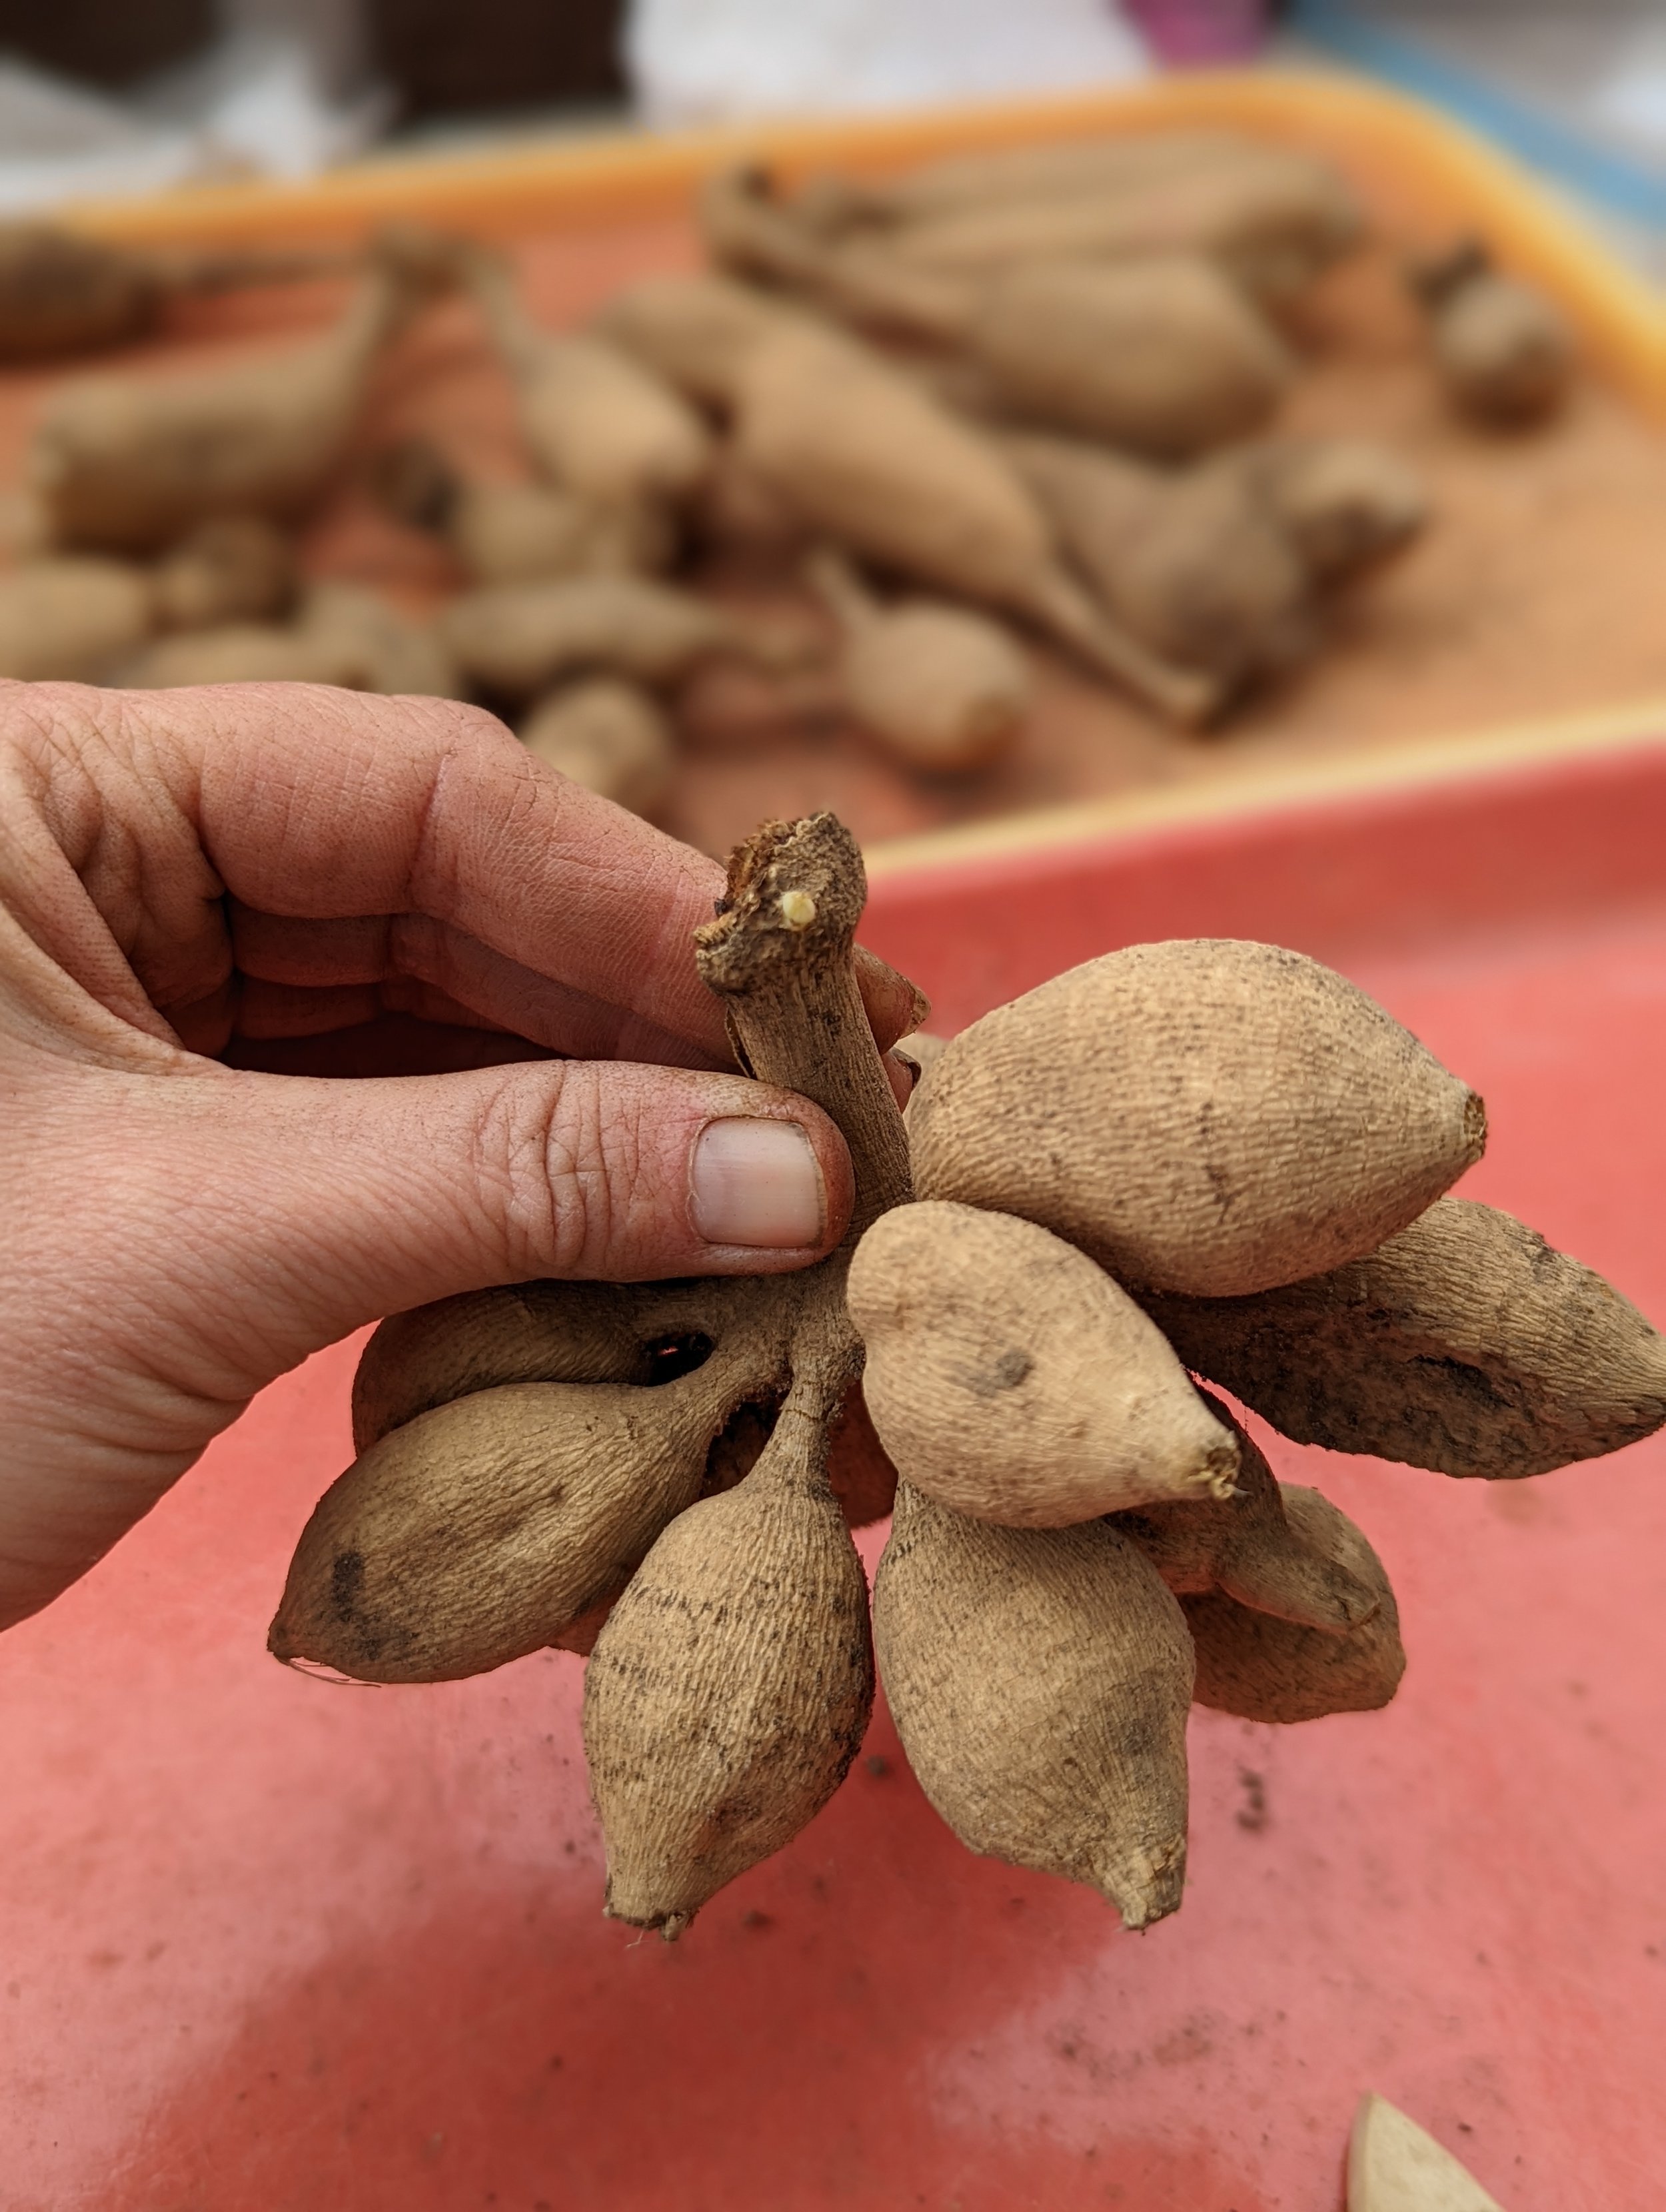
NO!!!!! There are thousands of different types of dahlias…. and each one grows it’s tubers a little differently. There is a shocking amount of variety in shape and size!
Some are tiny and slim, like a pencil. Some are short and stubby, with little to no neck. Some are huge and chunky. Some are skinny with loooooooong necks.
The size of the tuber is irrelevant in most cases. We grow some varieties of dahlias that never produce tubers larger than our pinky, while some produce HUGE tubers that we have to cut down to size. It all depends on the variety of dahlia.
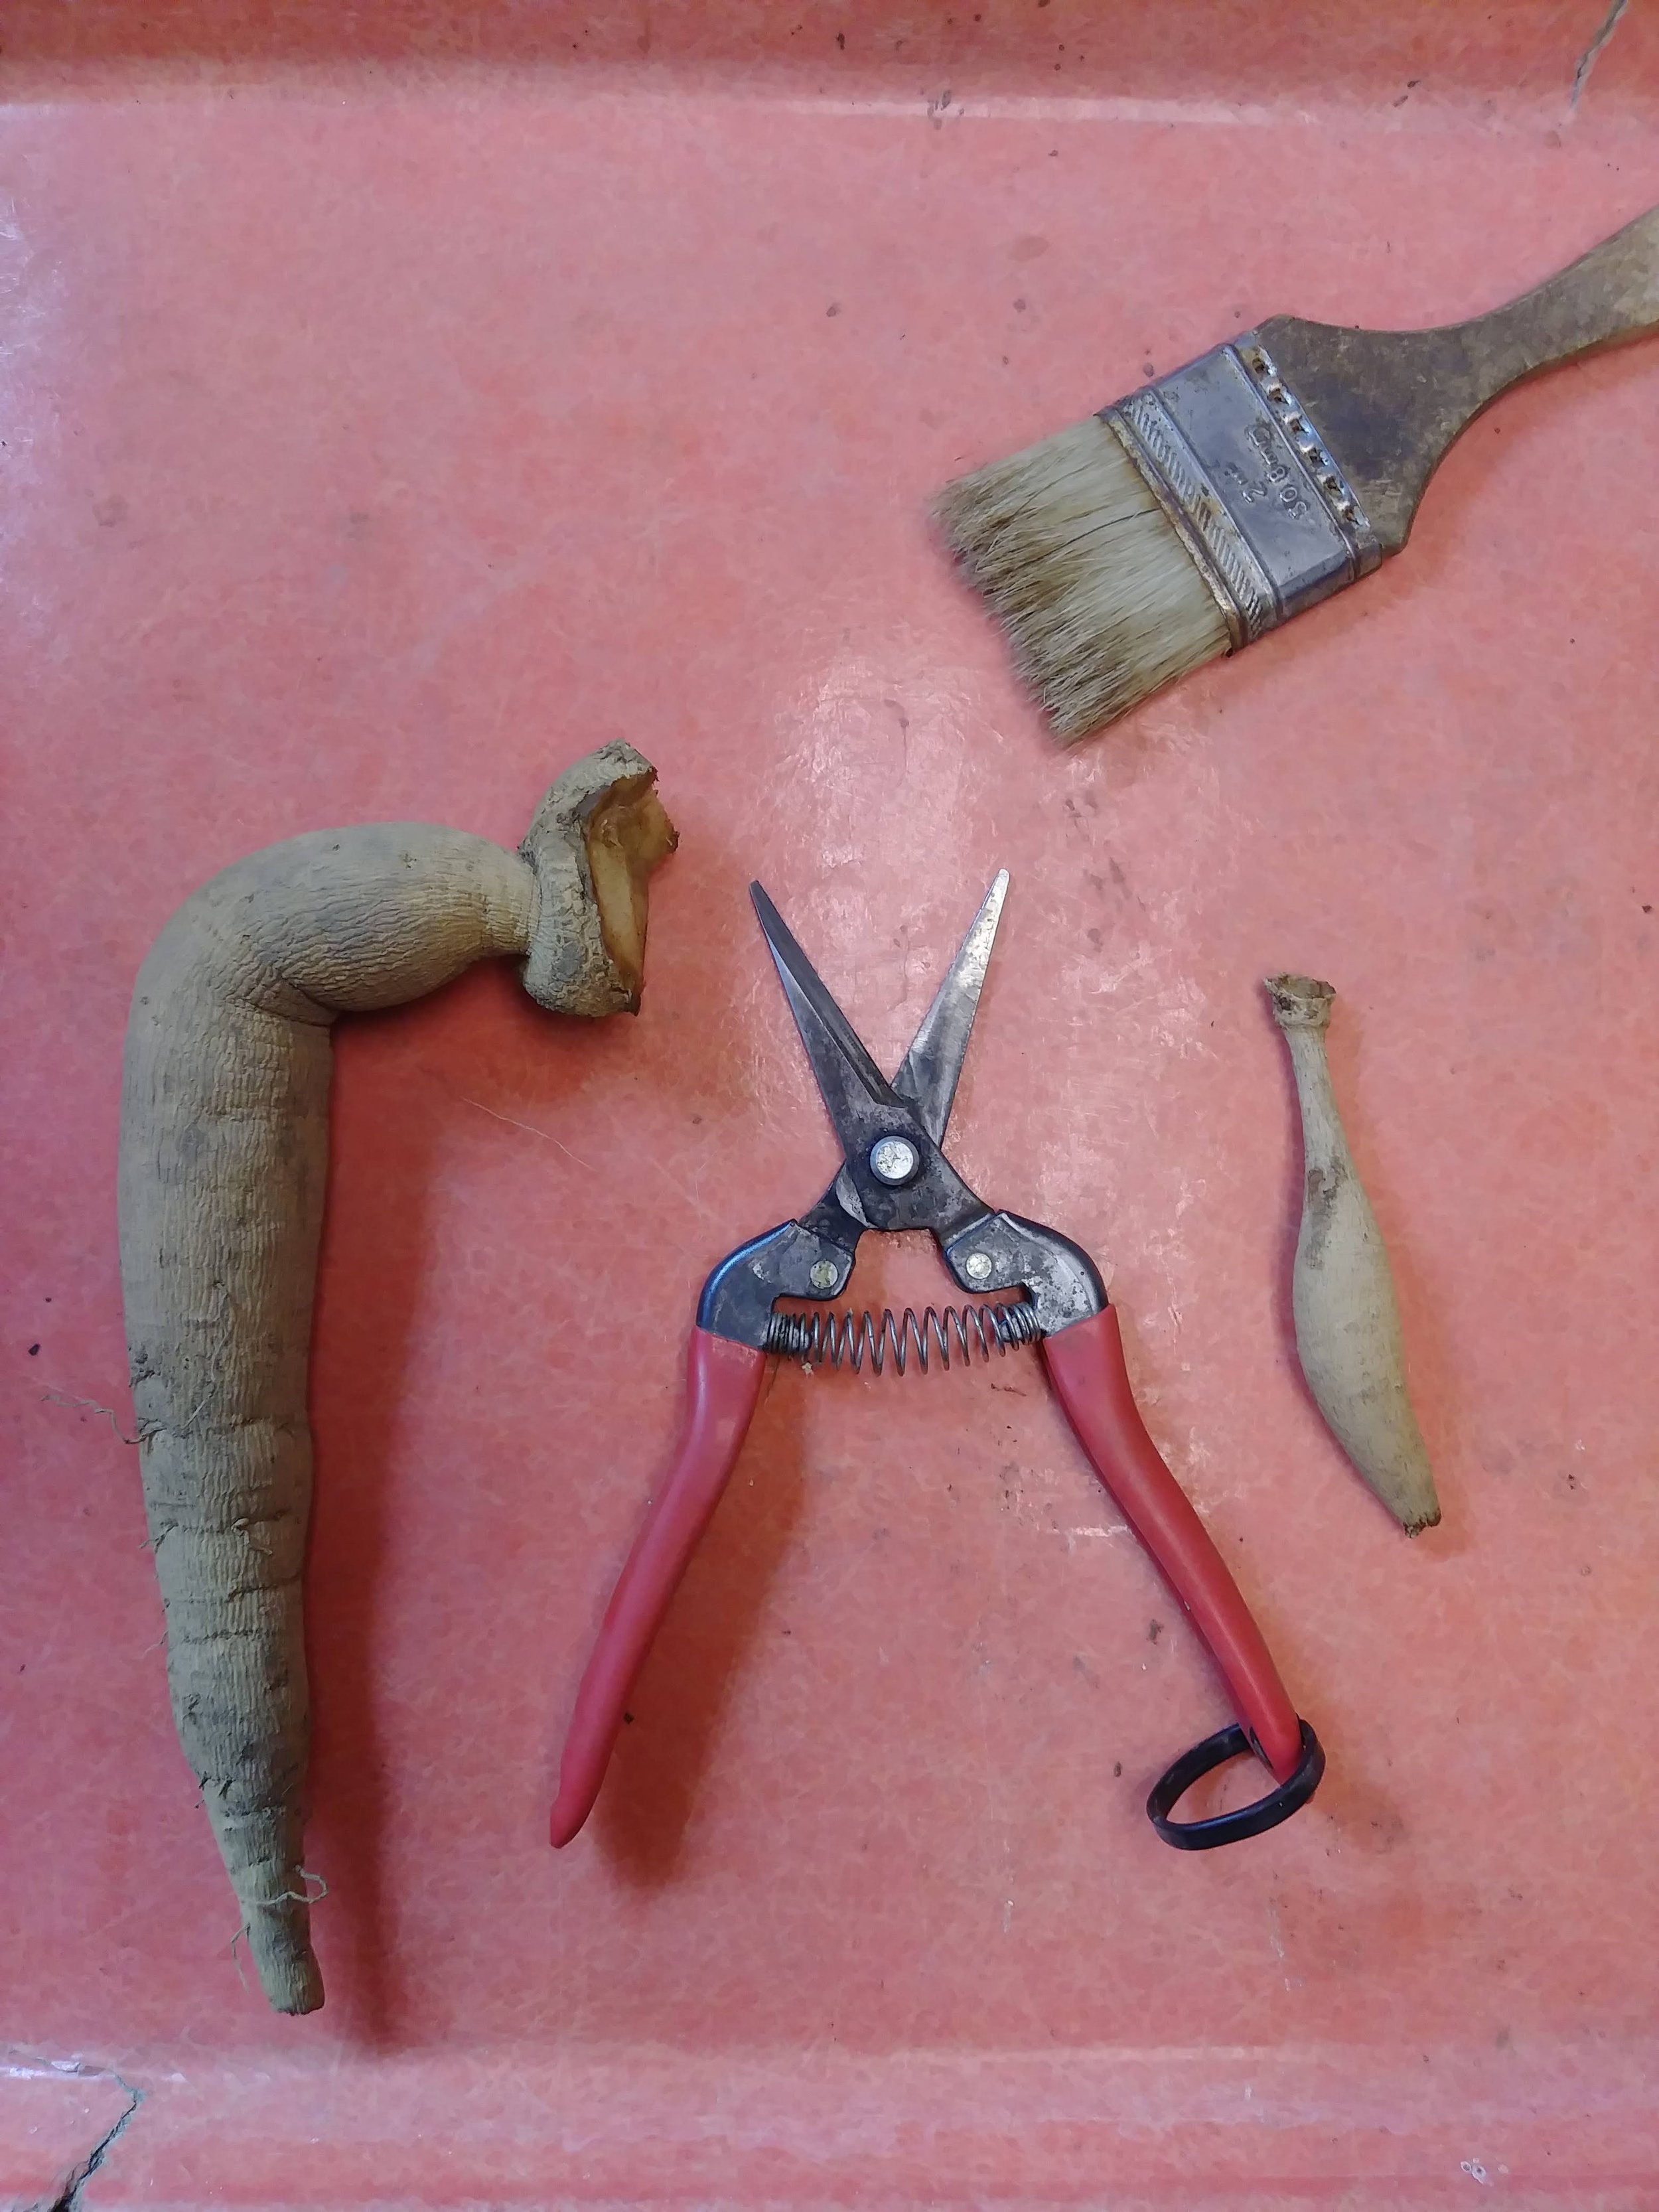
Here is an example of some of the dahlias we grow. Notice how all of them look completely different! Each one of these tubers is good example of their variety.

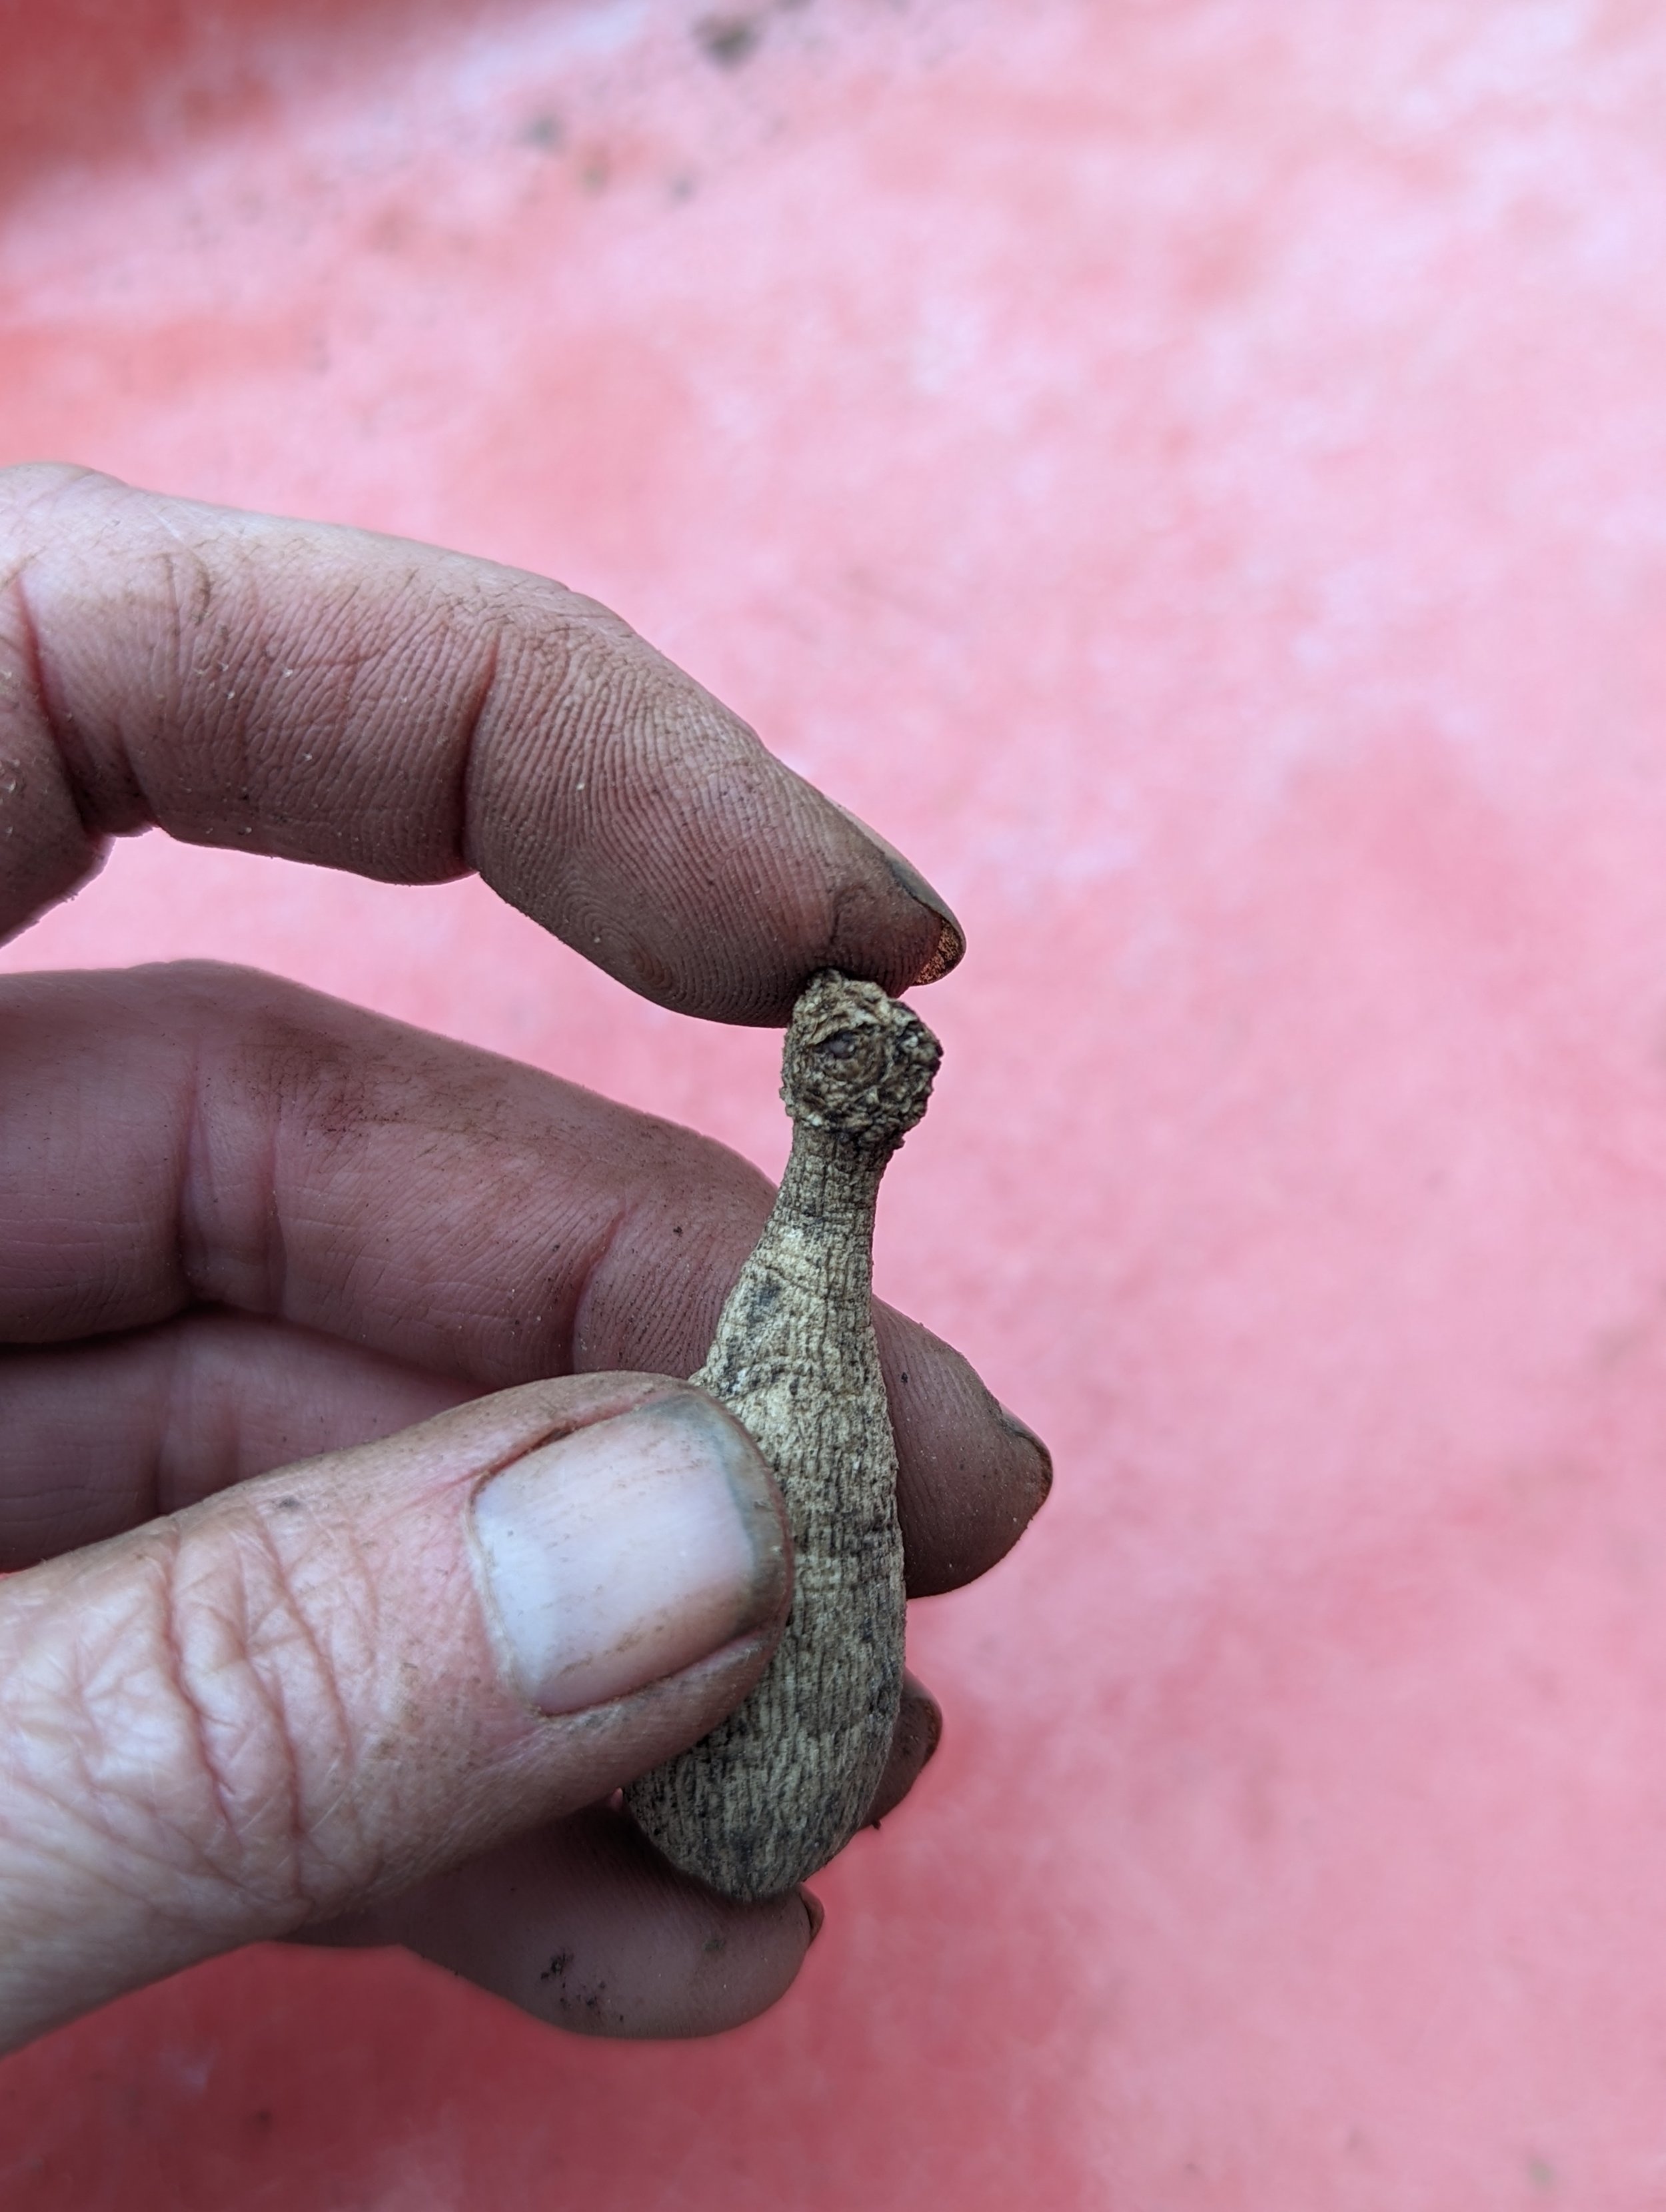
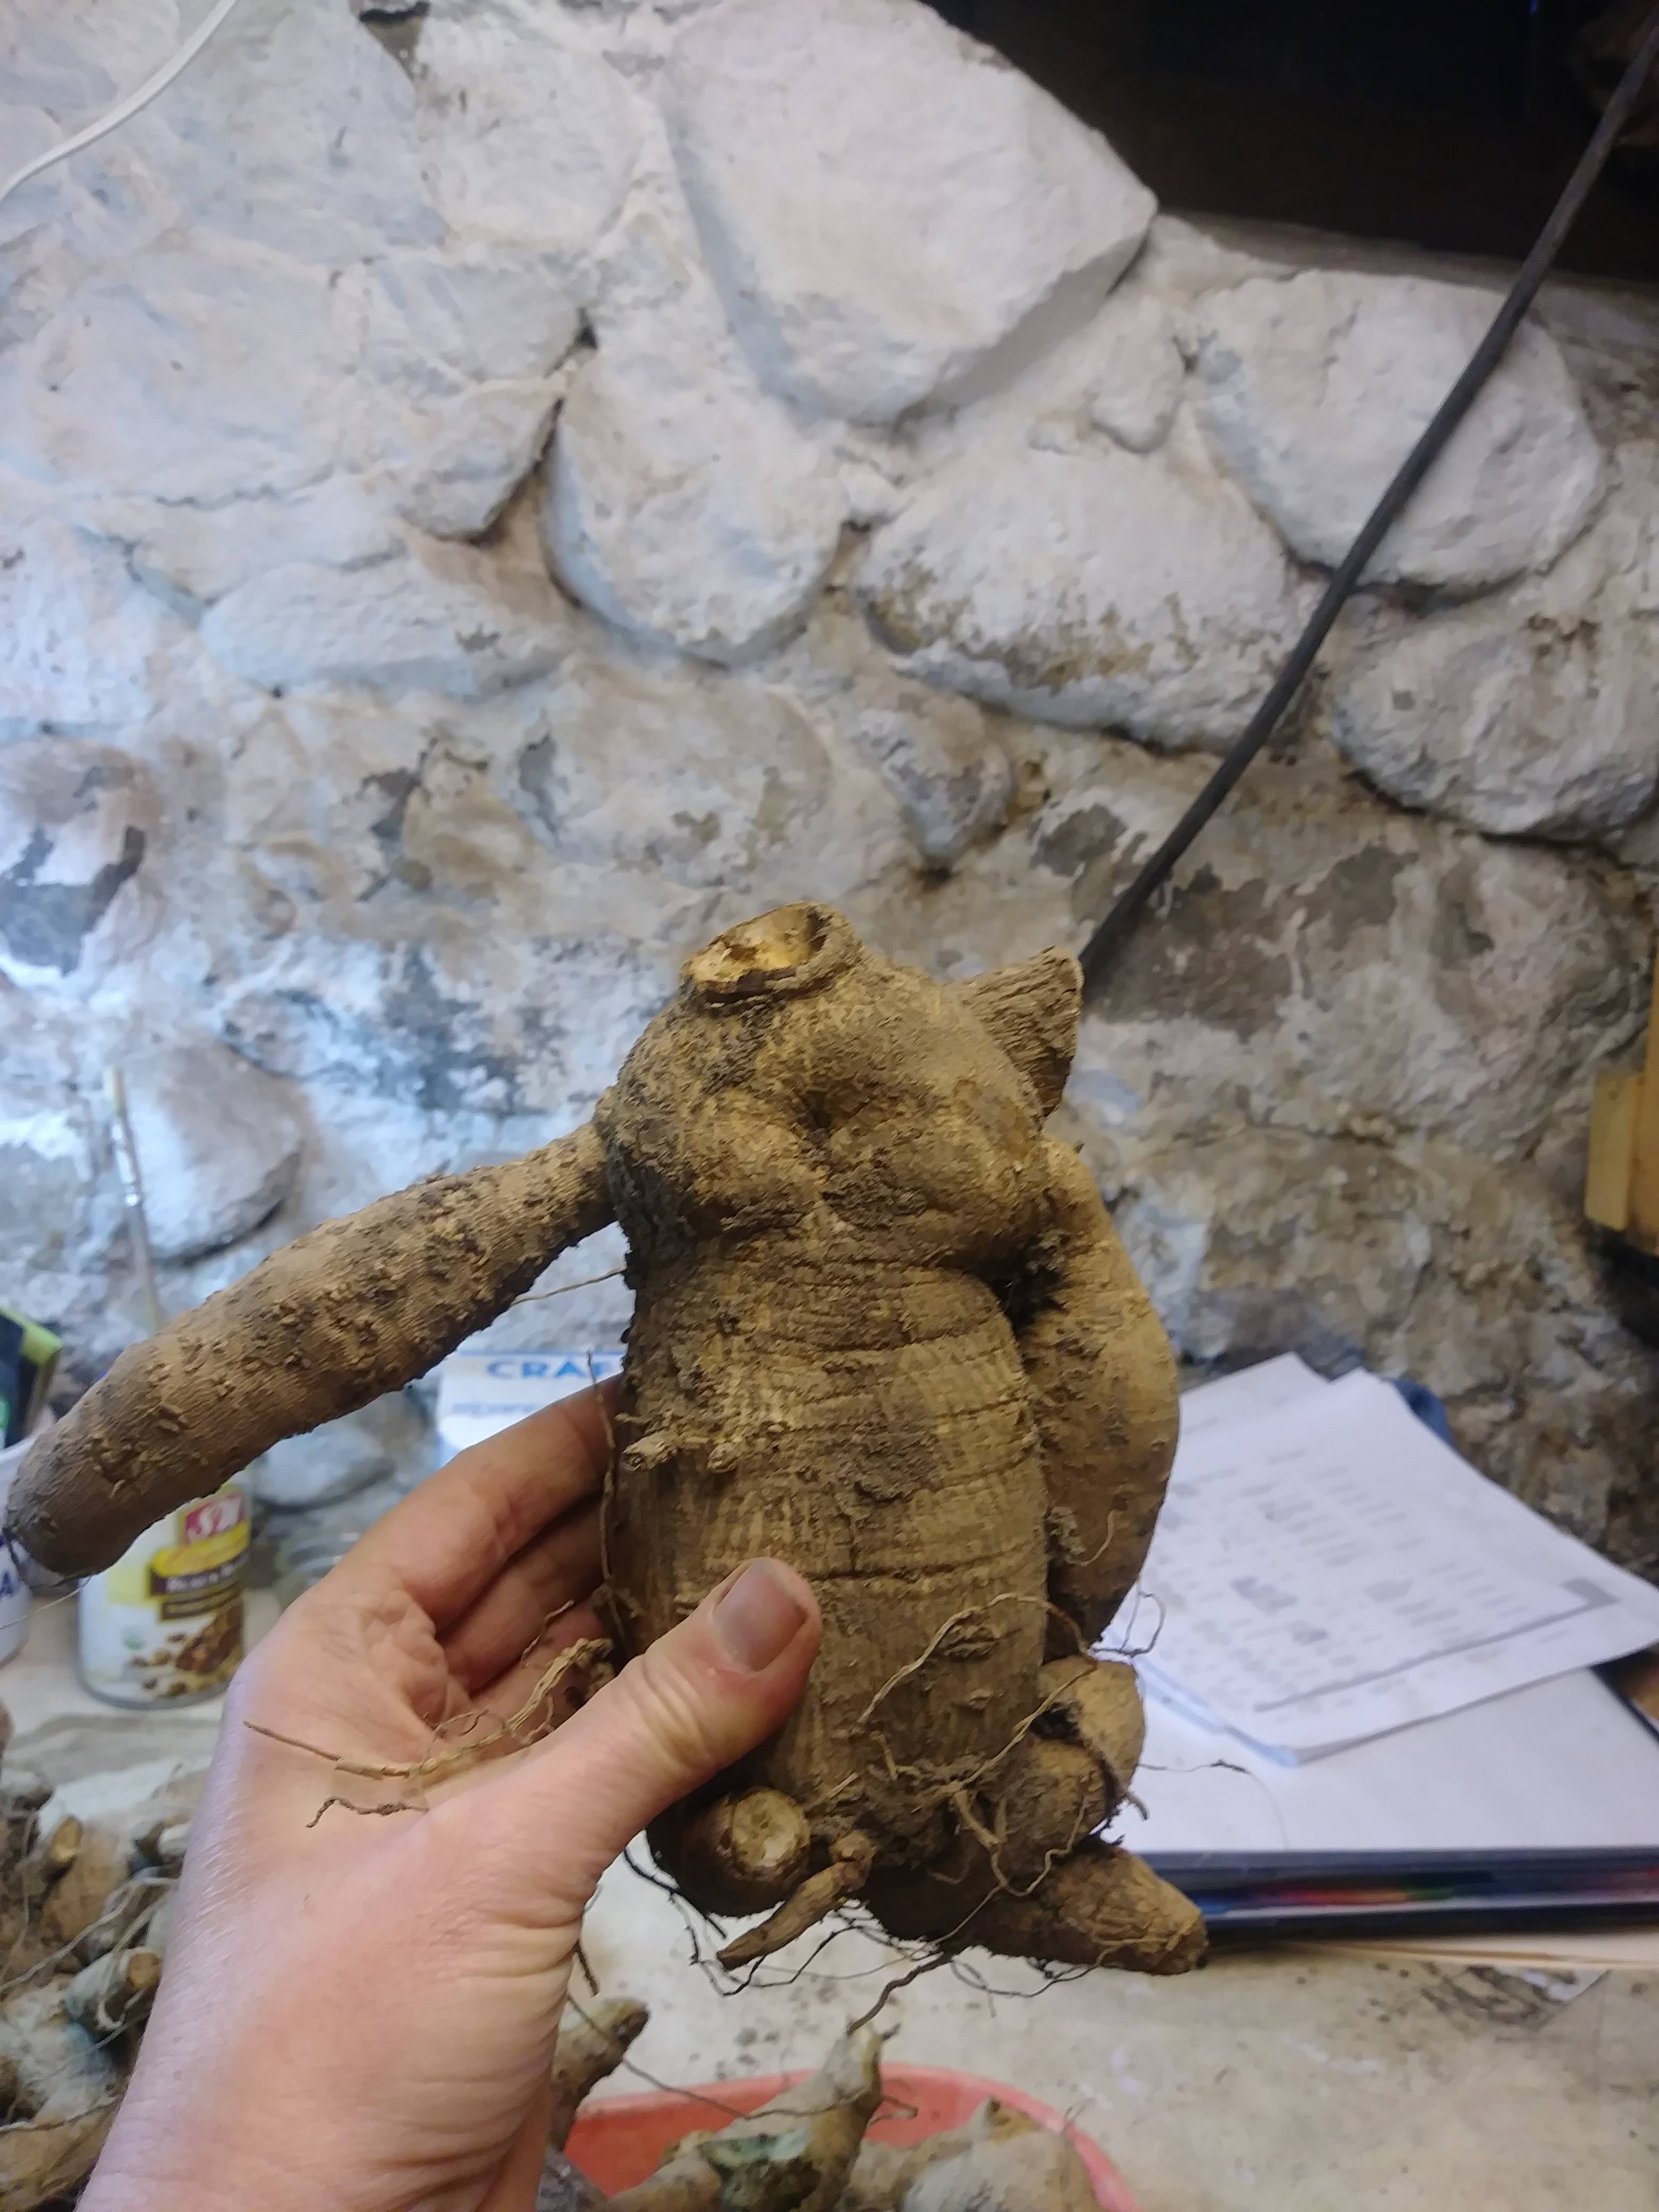
And here are a few more examples of viable tubers. Some of them look pretty funny ;)
3. My tubers look a little shriveled. Will they still grow?
In most cases, YES. Remember, as long as the tuber has an eye, it will grow.
Give the tuber a squeeze.
Is it firm and pliable? It’s probably still ok. Plant it!
Is it slimy, mushy and oozing? Throw it out.
Is it brittle and cracked? Throw it out.
Here is an example of a tuber that is completely dried out and desiccated, and does not have an eye. This one will not grow.

This tuber felt suspect, so we cut it open. Healthy Dahlias have clean firm white tissue. This one is rotting.

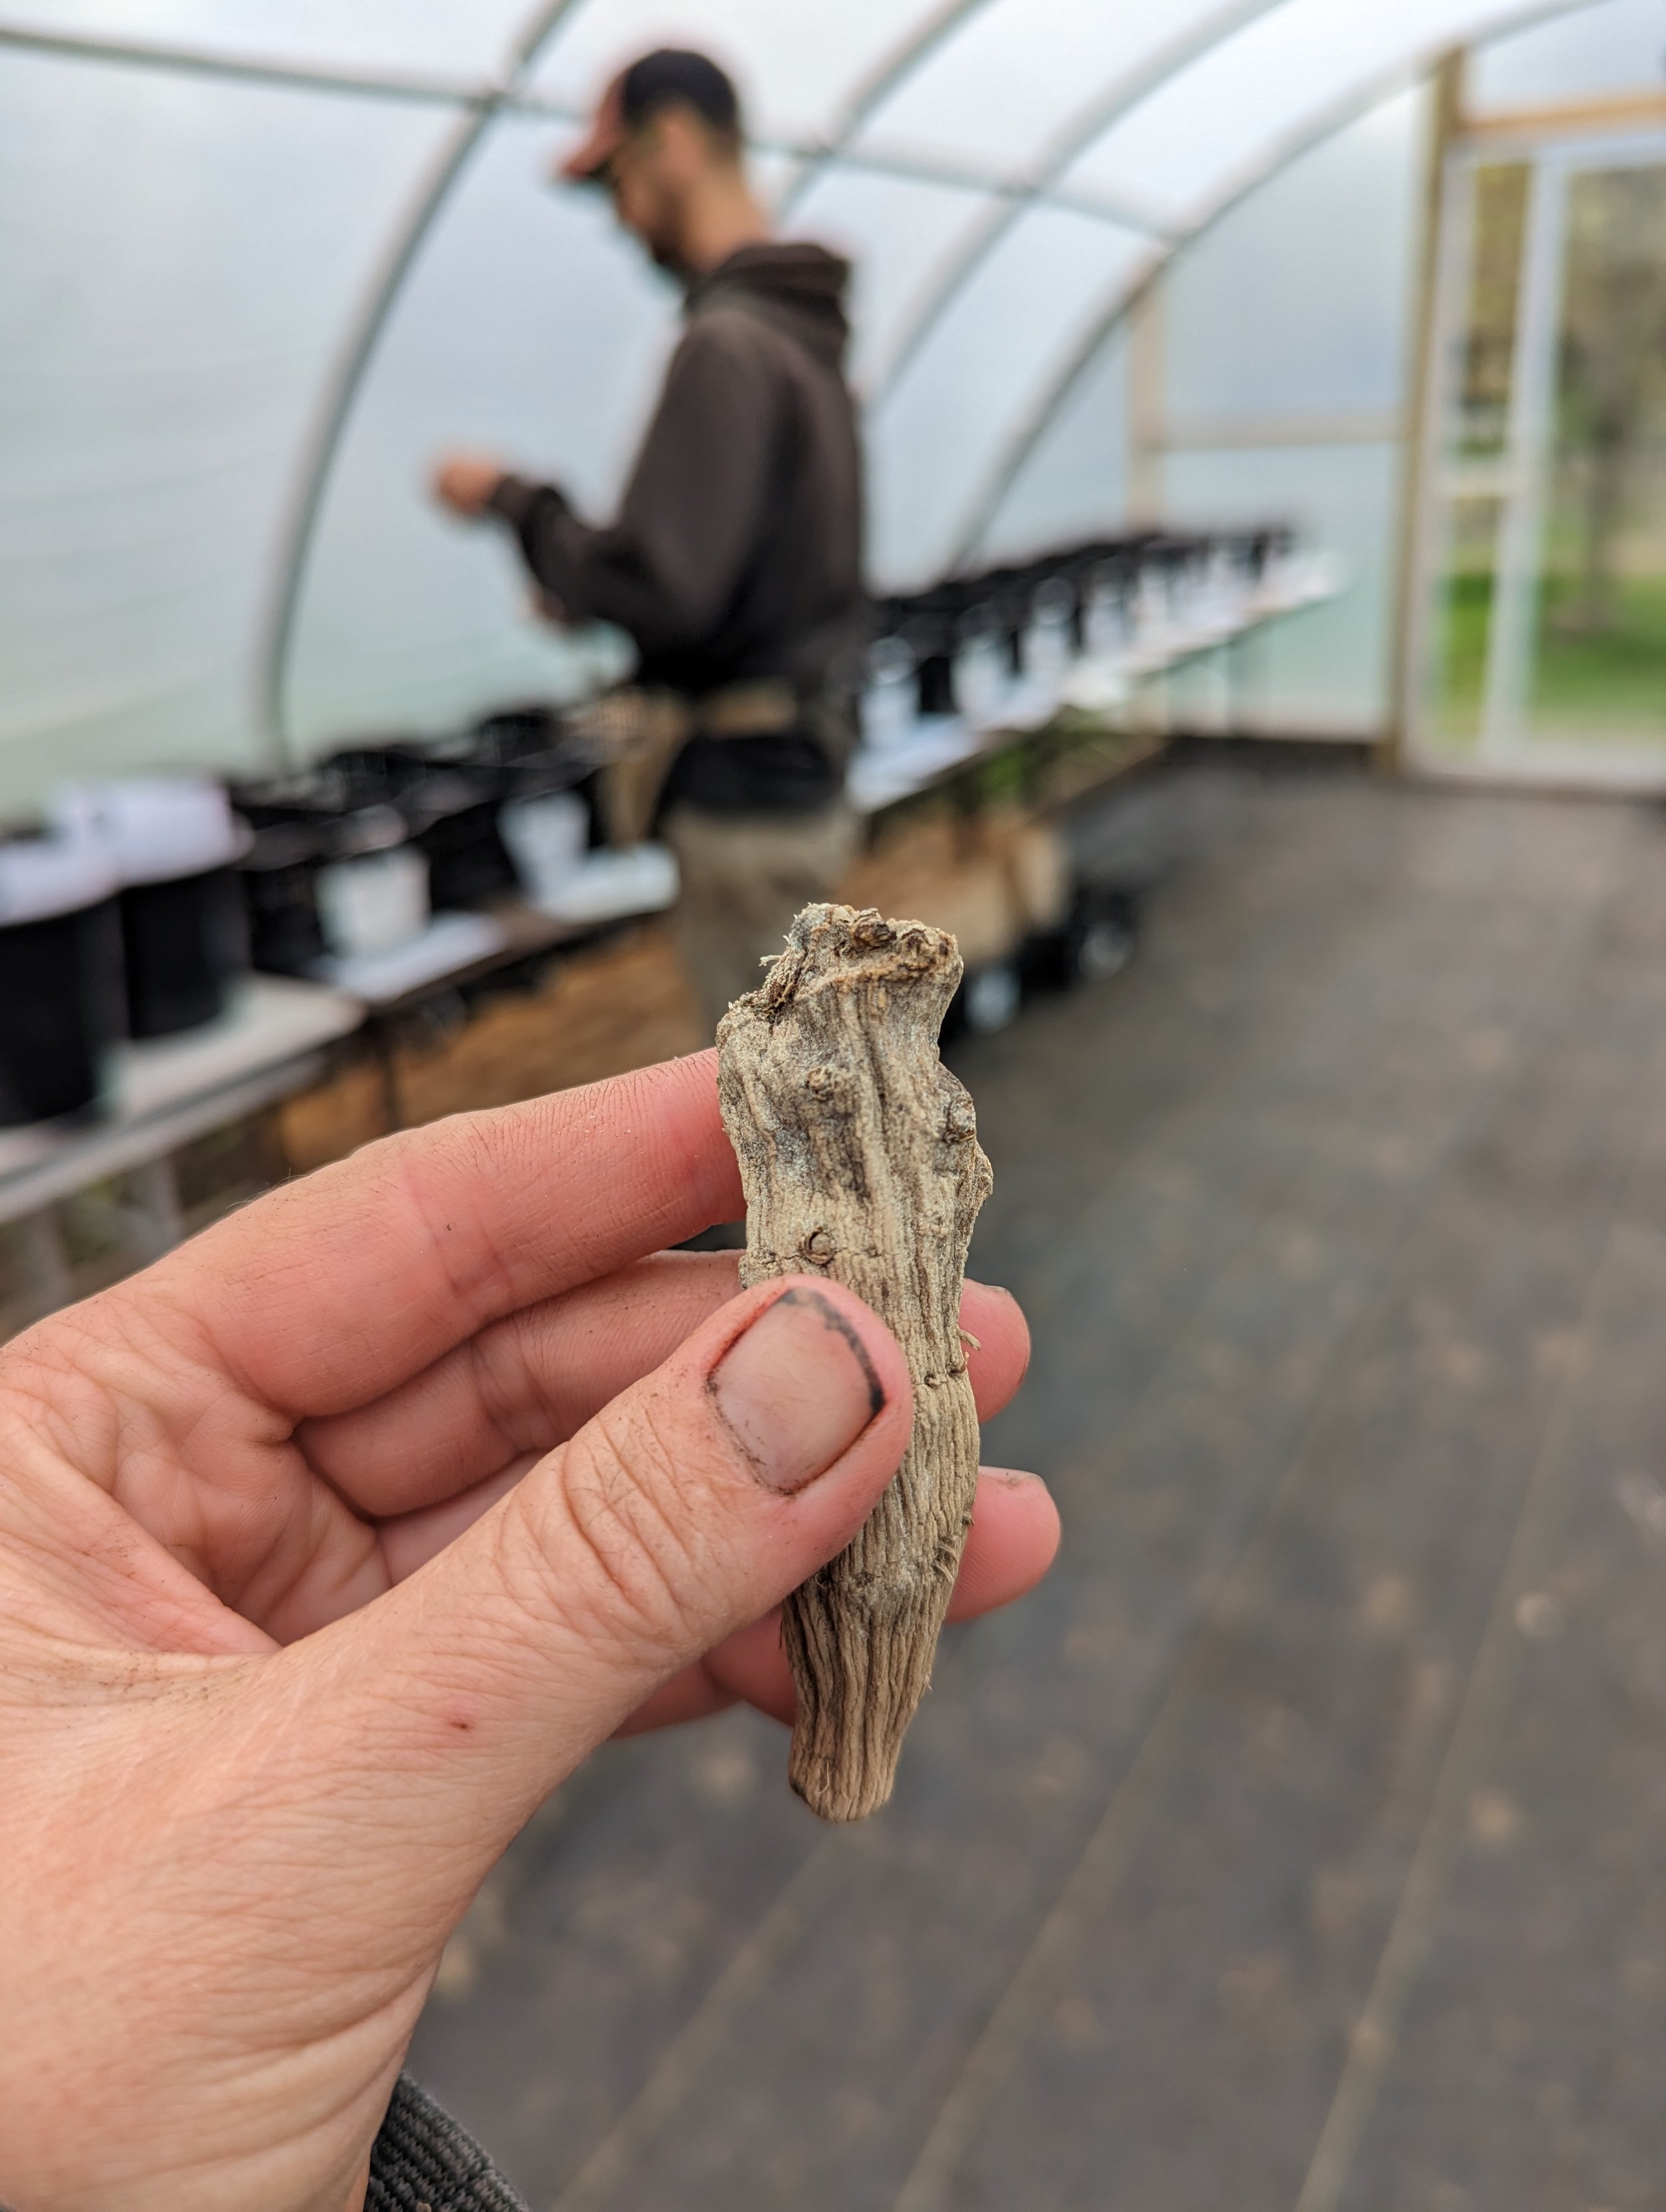
Below is an example of one that looks ugly, wrinkly and a little dried out…. but it will still grow. Notice the eye at the top. This tuber is not pretty, but it will still get the job done!
If all your tubers are shriveled and dried out, it means your storage space is too dry. Dahlias do best stored in locations that stay about 40F with 80-85% humidity.

Do not assume that tubers are worthless just because they look ugly. Those “ugly” tubers usually grow just fine. On our farm, we sell the “pretty” tubers and keep the “ugly” ones for ourselves. We love ugly tubers ;)
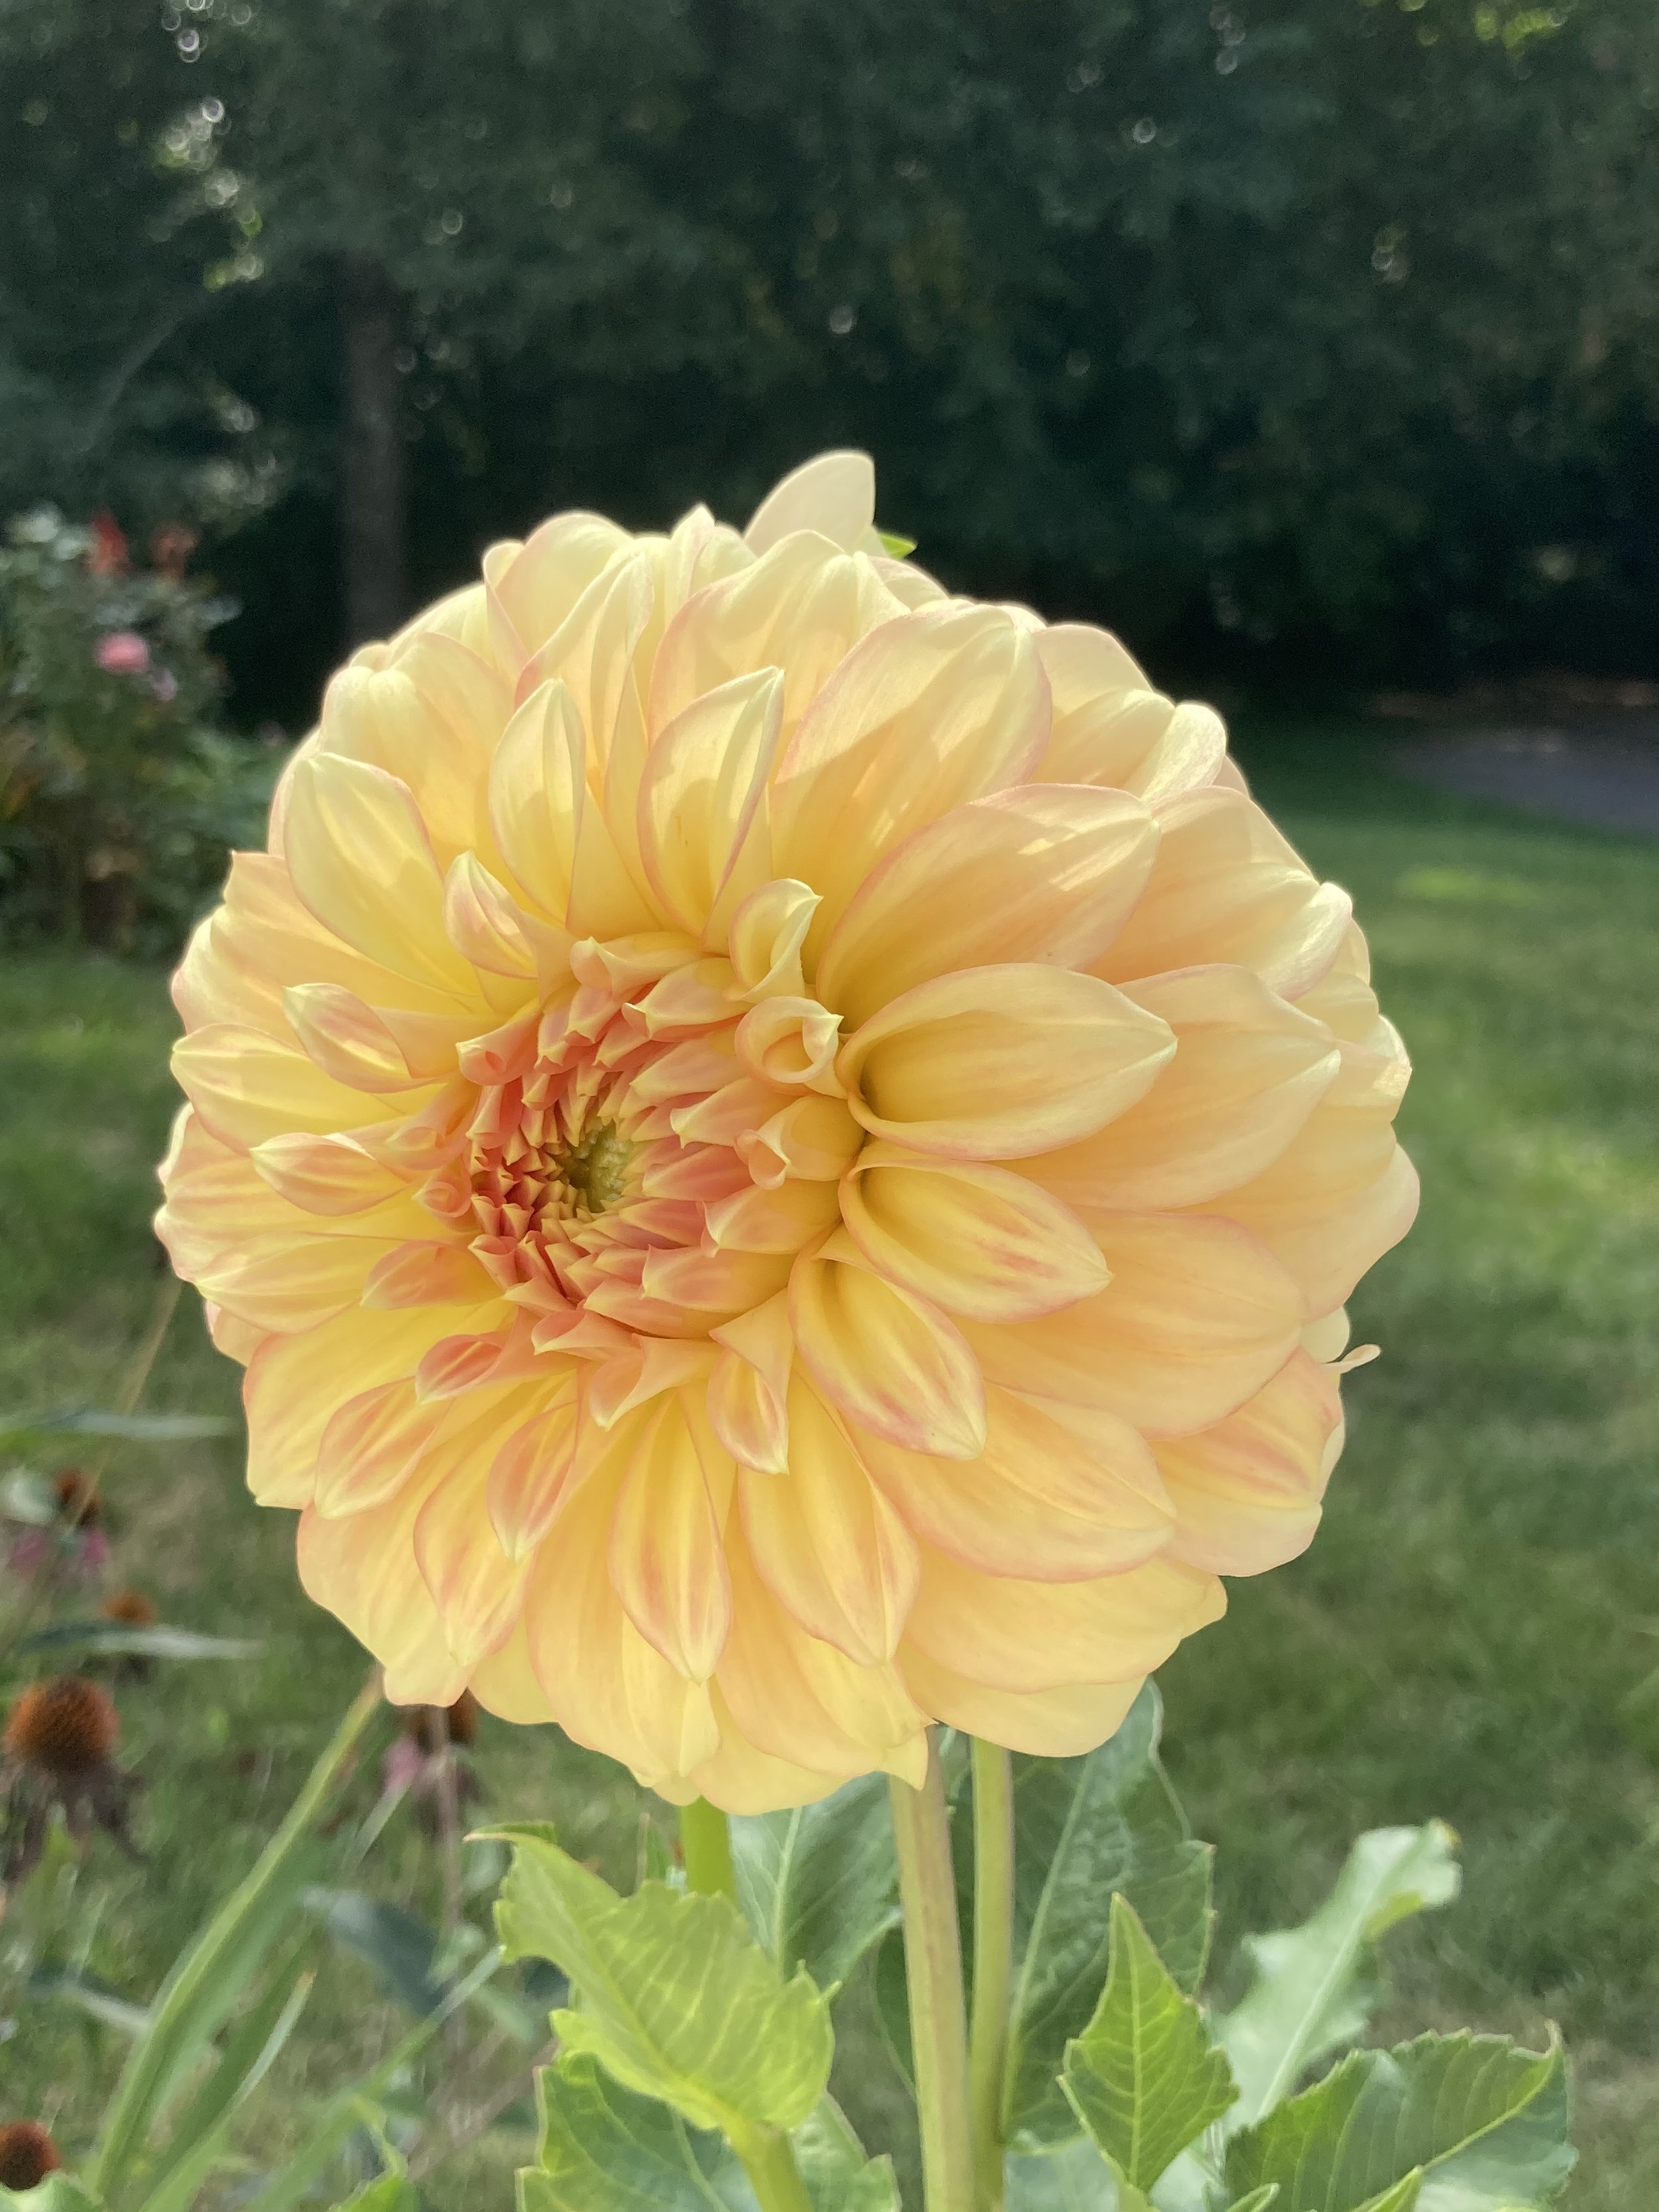
Below is an example of an “ugly tuber”… and the beautiful bloom it grew!
4. I DIVIDED MY TUBERS AND NOW THEY HAVE BLUE MOLD WHERE I CUT THEM! What do I do?!?
Step One: Take a deep breath and relax. :) It’s probably going to be ok.
Step Two: Check the tuber. If it’s slimy, oozing or mushy… discard the tubers. If it’s still somewhat firm (not slimy, oozing or mushy), proceed.
Step Three: Wipe off the mold with damp towel or brush it off.
This type of blue mold is very common. It’s usually a surface mold and it does not penetrate the tuber. Most often this mold grows because the humidity level in your storage space is too high. Try moving the tubers to a location that is a bit less humid.
See the “Before” and “After” photos below. Underneath the blue mold, the tuber is still firm.


5. Can I “pot up” my dahlia tubers to give them a head start?
Absolutely! We pot up a couple varieties each year, but the vast majority are NOT started in pots, simply because we don’t have room to pot up 1,000+ tubers ;)
Potting up is easy. Simply fill a 4” pot with potting soil, stick the tail end of the tuber in the soil and leave the head sticking out. Keep the soil slightly damp, allowing it to dry out between waterings. Do NOT over-water, as tubers can rot in wet conditions.
Keep the pots in a warm, sunny spot.
(You can watch a video demonstration of the process HERE)
After a few weeks, you will notice the eyes beginning to sprout and roots poking out of the bottom of the pot. Hooray! The tuber has done it’s job! The tuber is simply a food source until the plant creates roots.

Roots starting to poke out the bottom!

Eventually, the eye will turn into a sprout!
Bonus: If you are plant savvy and know how to make “cuttings” of plants, you can make cuttings from your tubers and propagate/clone them that way. It generally has about at 50-75% success rate, depending on your skill level. It does NOT hurt or damage the tuber, and the tuber will send up more sprouts to replace the one you cut off.

When it’s time to plant them outside, simply dig a hole about 6 inches deep and wide. Take the sprouted tuber out of the pot and bury it so the head is a couple inches below the surface of the soil. If the sprout sticks out of the soil, great!
If not, no worries! It will grow and emerge from the soil in no time. And if you accidentally break off the sprout - do not panic! It will grow a new one.
If you are planting a potted up, actively growing Dahlia plant with leaves/foliage, be sure to water it well at planting time and water the plant regularly as it’s growing.
In contrast, if you are planting a Dahlia tuber (not actively growing leaves), be sure to avoid watering until AFTER you see the sprouts/leaves emerging from the ground.

Hope this information helps! if you have any more questions, leave them below!
-Lori
Want more info about dahlias? Here you go!
The Beginner’s Guide to Growing Dahlias
Too Soon to Plant Your Dahlias? Here’s What to Do

Too Soon to Plant Your Dahlia Tubers? Here's What to Do
Too cold to plant your dahlia tubers? Here’s what to do while you wait!
If you are like us, we are DYING to get our dahlias in the ground in the spring!
Unfortunately… dahlias are NOT FROST HARDY and cannot handle freezing temperatures. Around here in West Michigan, our “Average Last Spring Frost” is May 15, which means we really need to wait until mid-May before we think about planting them outside. On our farm, our goal is to get them in before Memorial Day, but some years, we’re still planting in June.
The main rule for planting time for Dahlias? The soil should be WARM (60°+) and relatively DRY, as opposed to cold and wet (which can cause the tubers to rot).
So, what are you supposed to do when your tubers start arriving in the mail in mid-April, but you can’t plant them out for another MONTH?!?
You have 2 options:
1. Leave them right in the bag they arrived in. Be sure to open up the bag to let them “breathe” a bit and regulate humidity. Store the bags of tubers in a cool, dark, dry location, such as a basement or garage. Do NOT store them in a place that dips below freezing.
2. Pot them up! You can fill a small pot with potting soil and pop the tuber in there. Be sure to “plant” it tail down, and head up (look for the “eye” or sprout on the head of the tuber). Water the pot sparingly (not too wet, not too dry) and place in a warm, sunny spot. The tuber will send up shoots and leave above the soil and roots into the soil.

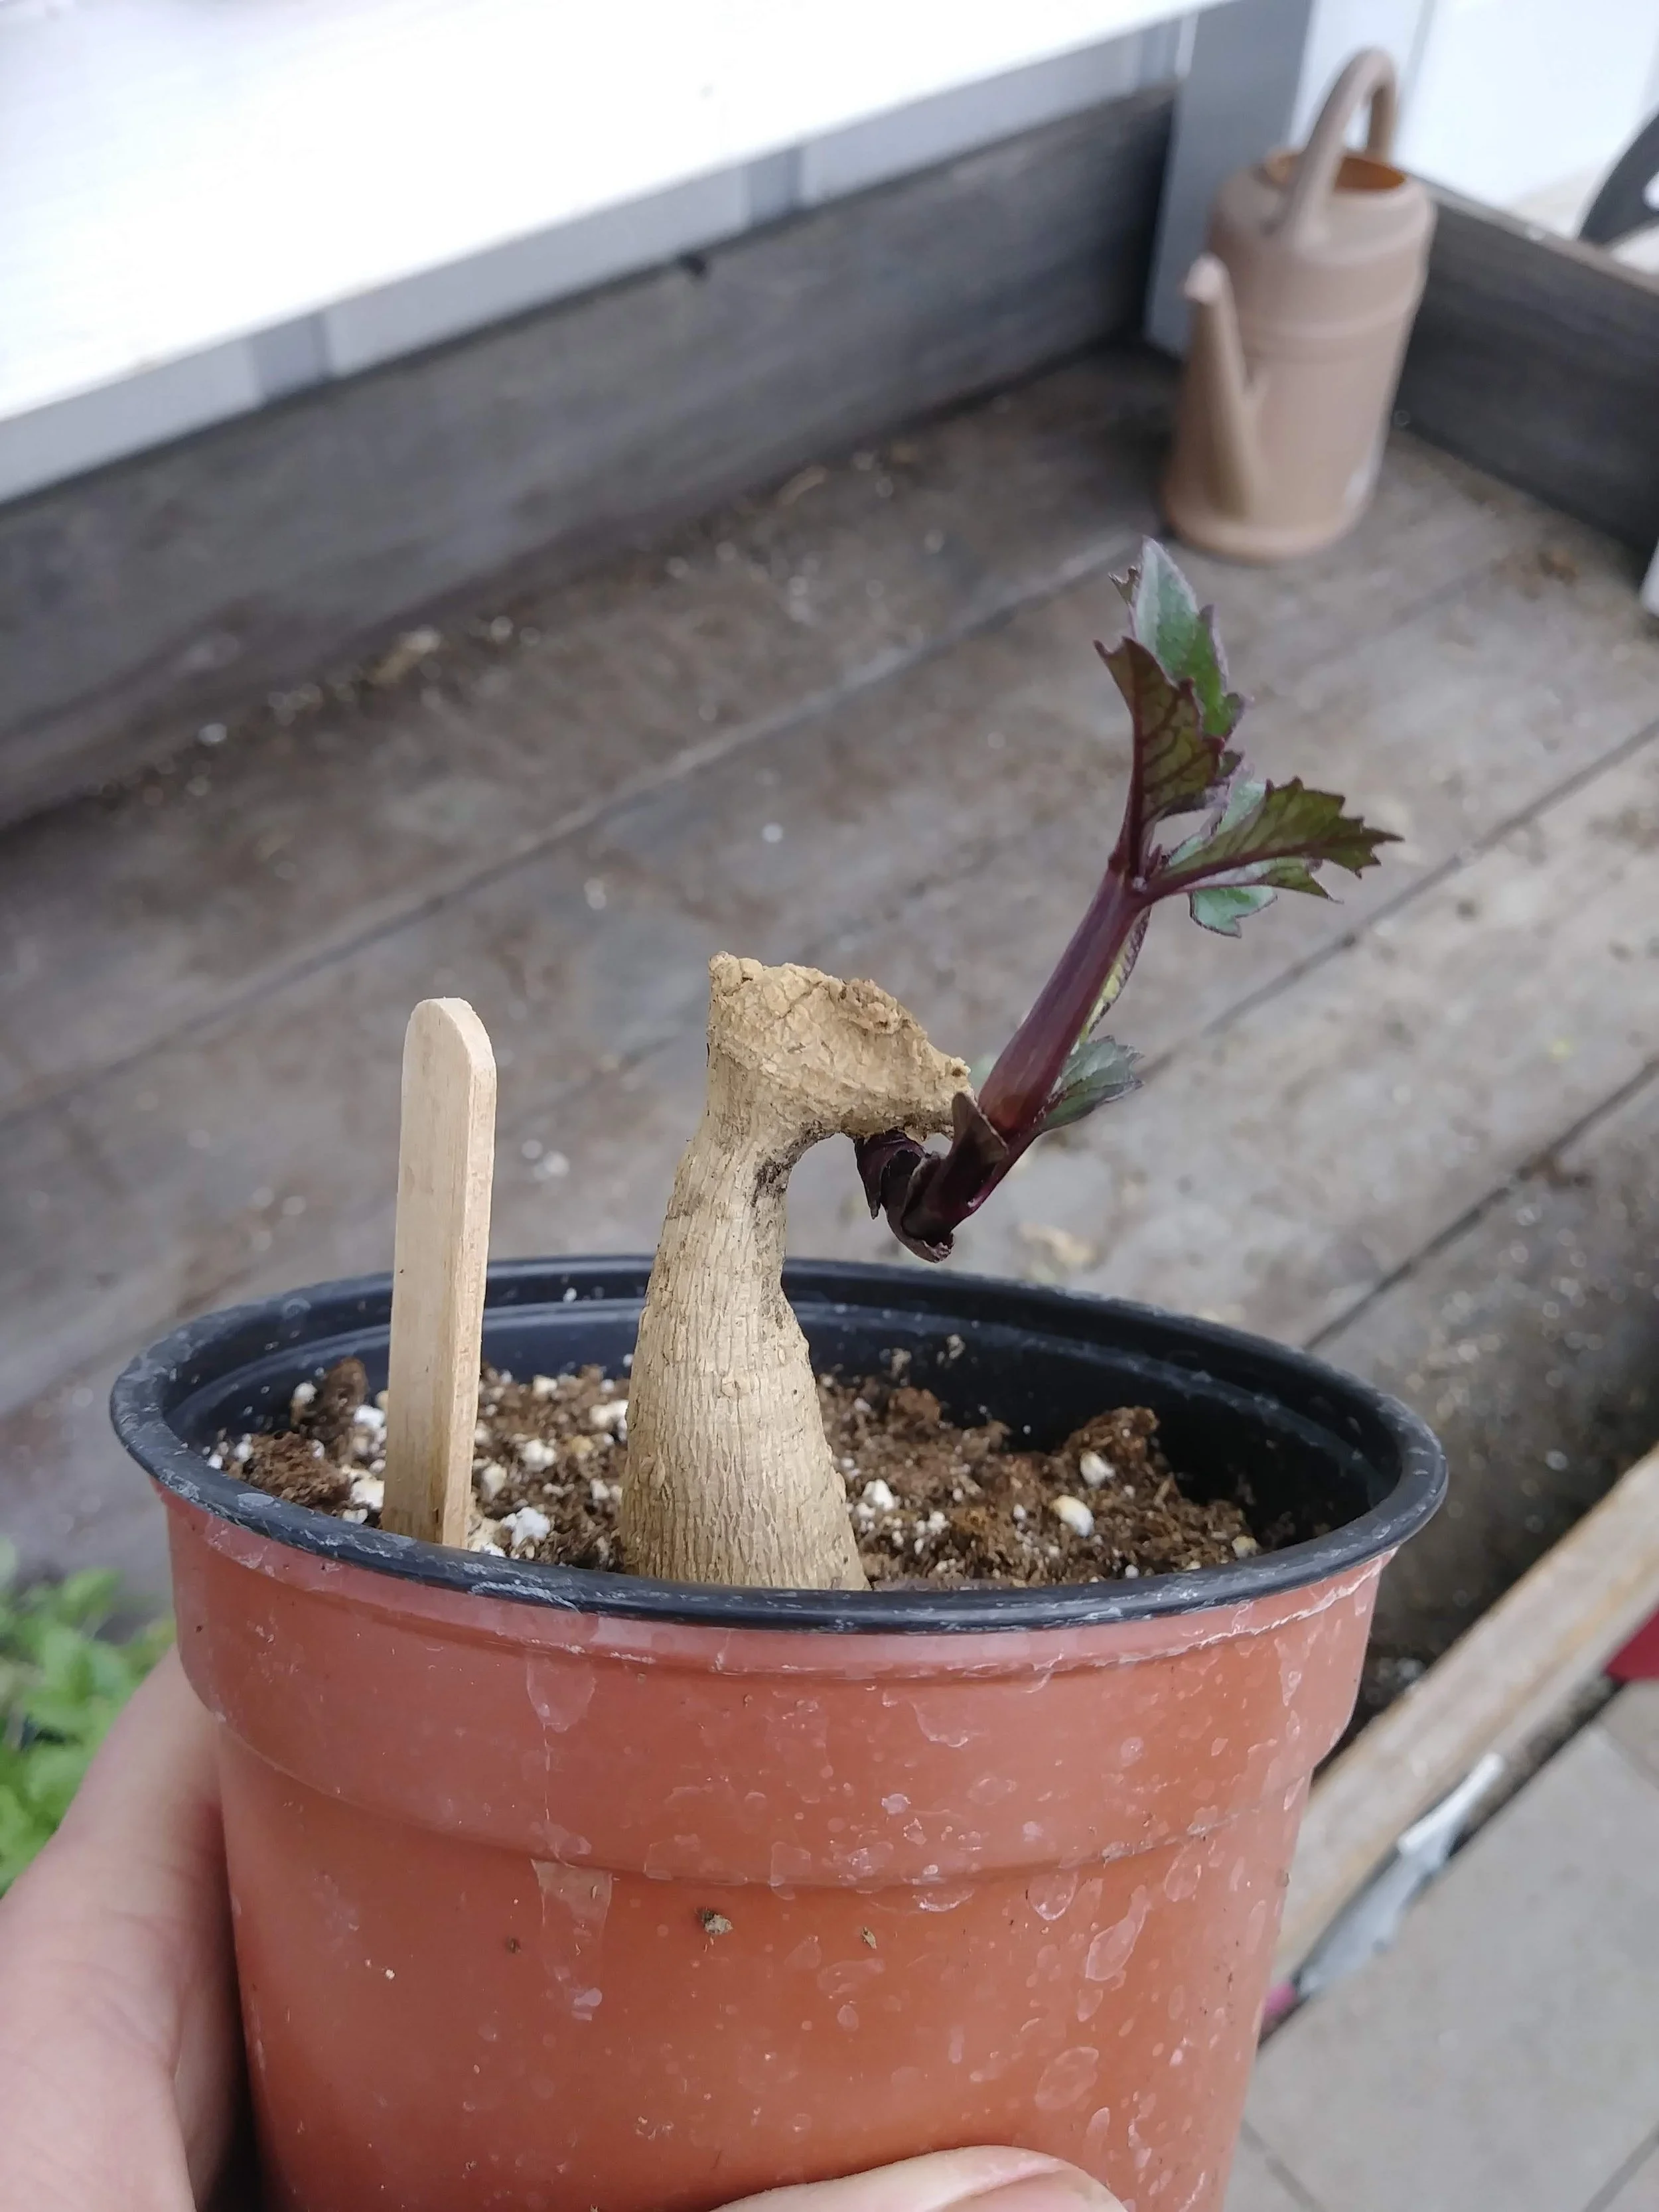
Watch the tutorial below to see how it’s done!
Once your soil is warm and dry, and the risk of frost is over, you can plant them out!
If you’ve potted up the tuber, simply remove the entire contents of the pot (tuber with the potting soil) and place it in the ground (dig a hole slightly larger and wider than the pot), being sure to bury the crown of the tuber (where the shoot/leaves are coming out) about 4” below the surface of the soil.
This might mean you’re completely burying the shoot/leaves. Don’t worry - it’s not a problem at all. The shoot will keep growing and poke out of the soil soon.
And if you happen to accidentally break off the shoot while planting… Don’t panic! It will send up a new shoot!
Water regularly to help the plant get established. This is an established plant, and like all newly planted plants, it needs generous watering at planting time and beyond.
If you’re planting an unpotted tuber, simply dig a 4-6” hole in the ground, drop the tuber in with the eye facing up, and backfill the hole. DO NOT WATER until you notice the shoots/leaves pushing through the surface of the soil (unless your soil is very dry! Dahlias do need some moisture in the soil to grow. The goal here is to avoid planting into cold, saturated soil, which can cause them to rot).

Want to know more about dahlias? Be sure to check out this post: The Beginner’s Guide to Growing Dahlias
Happy planting!
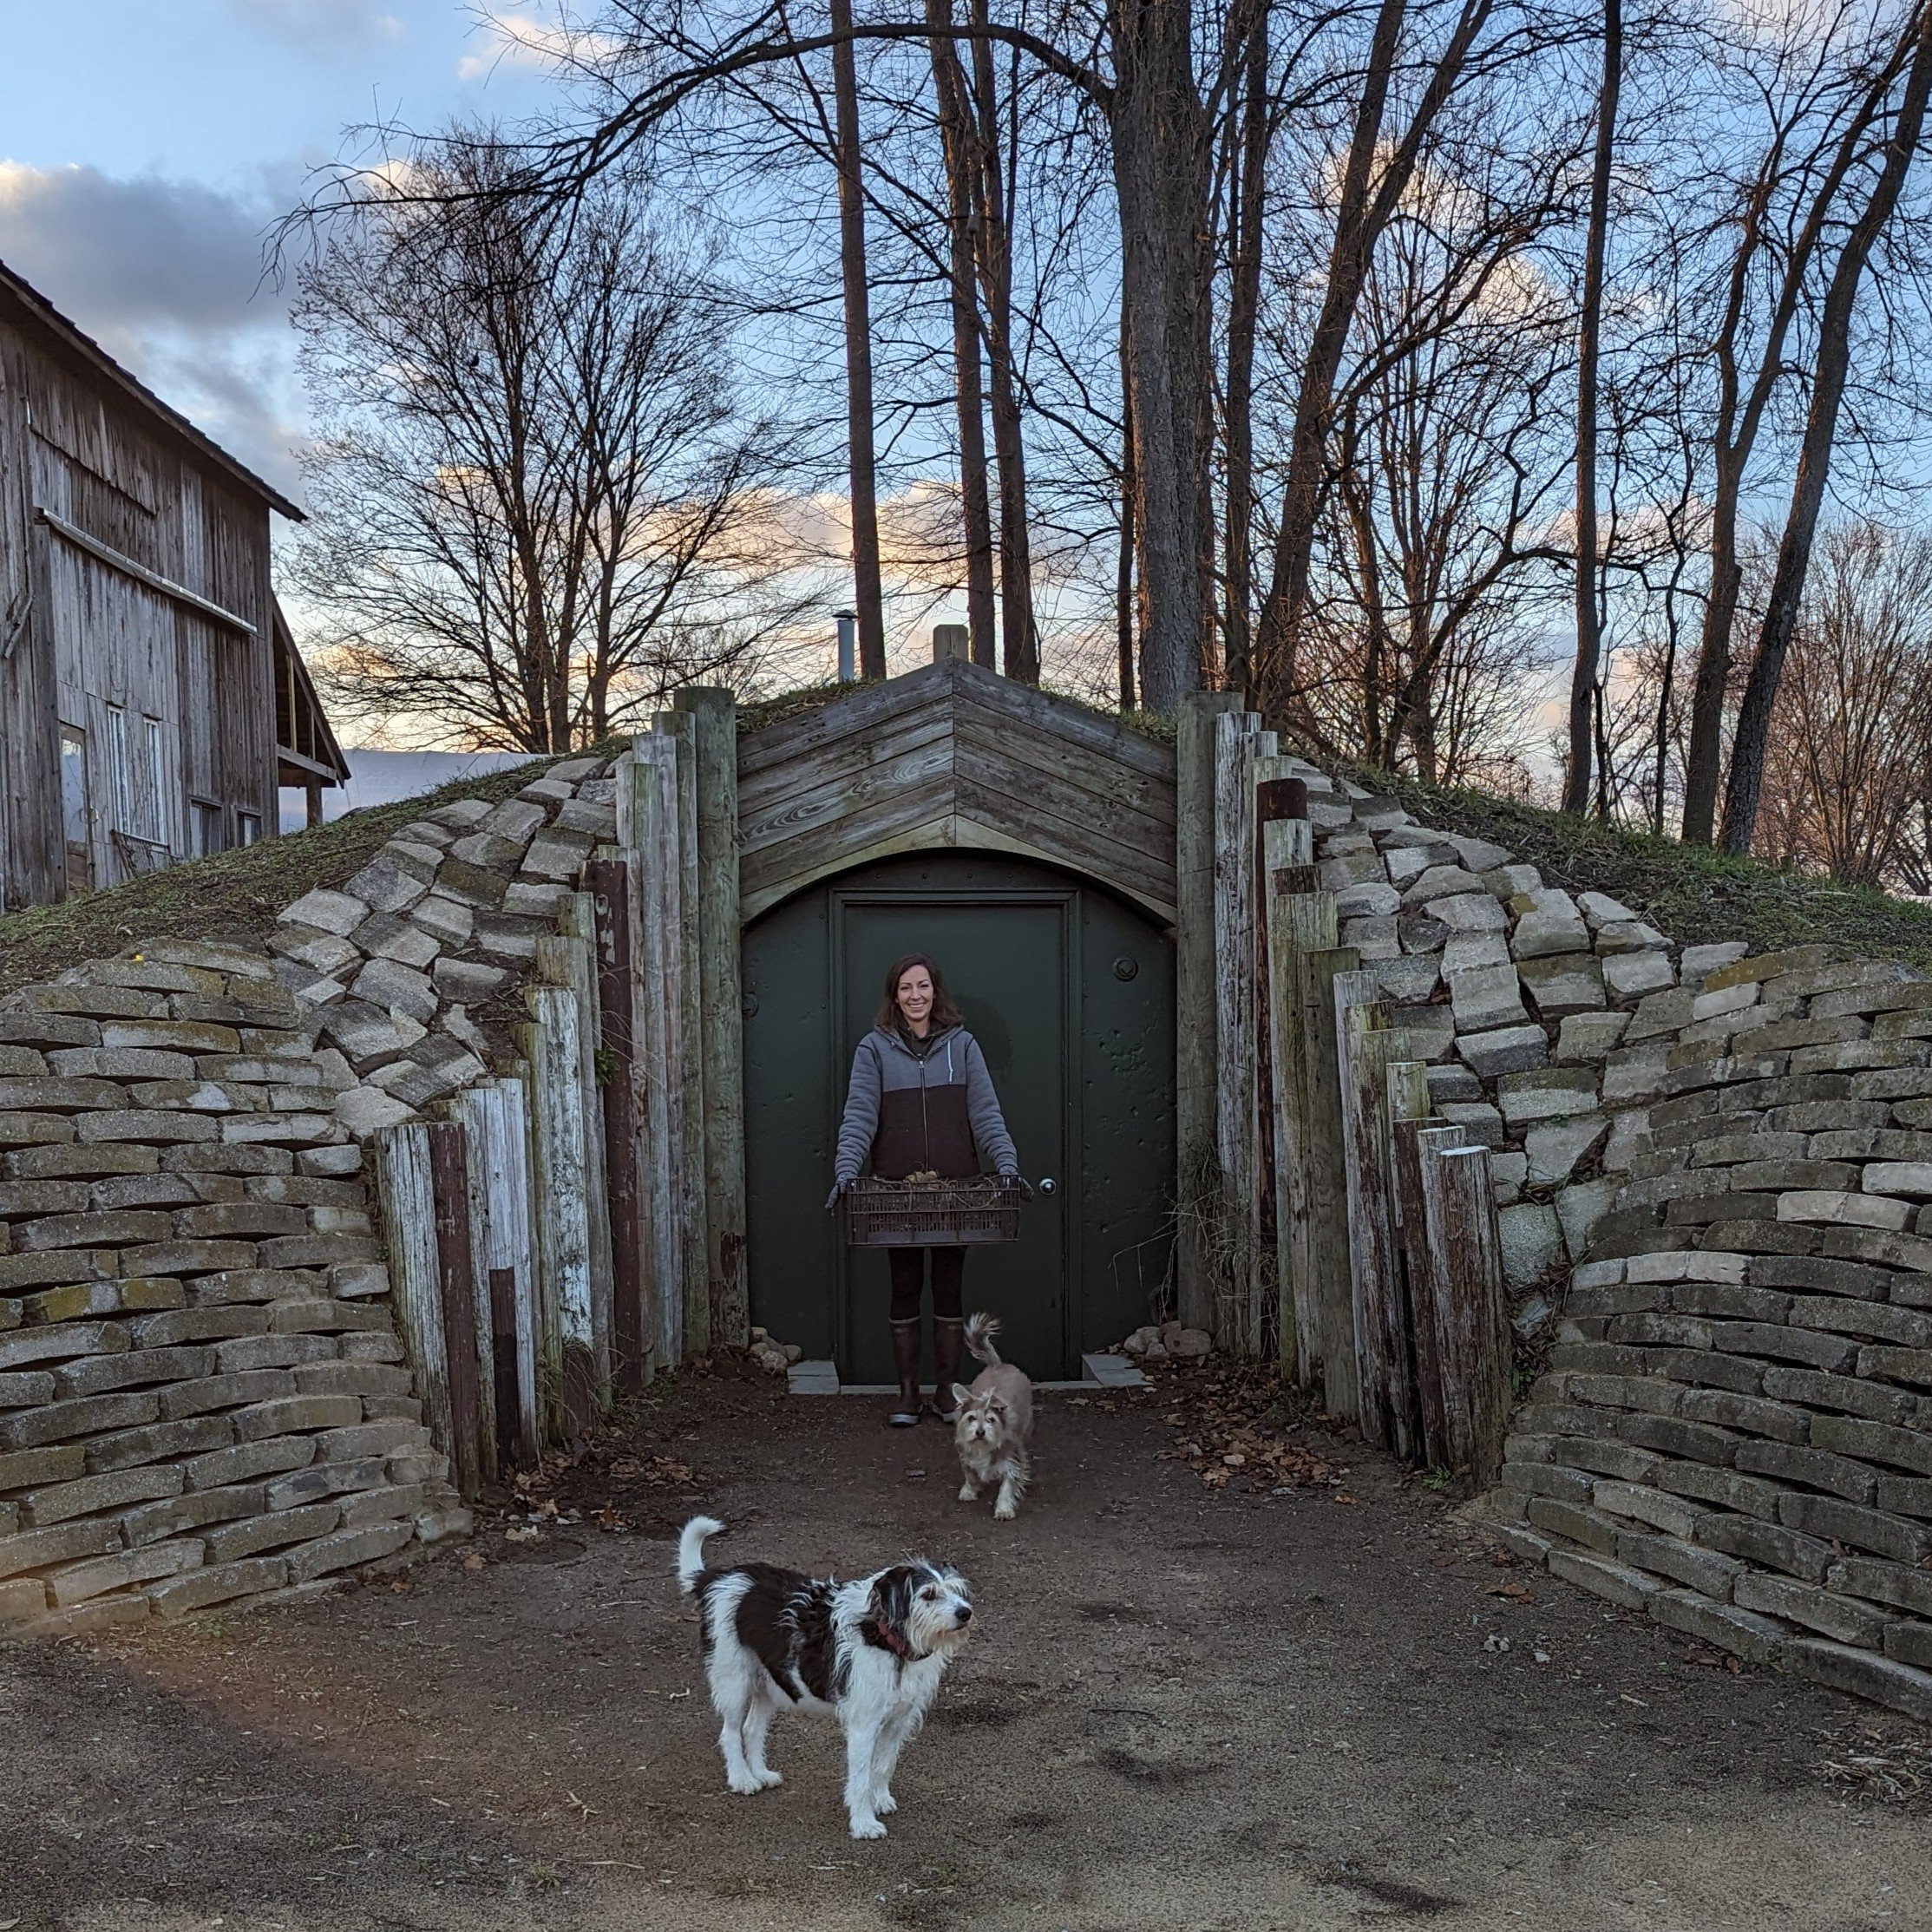
Hobbit Hole Root Cellar
A behind the scenes tour of our Dahlia tuber root cellar.
Hobbit Hole Root Cellar
“In a hole in the ground there lived a hobbit. Not a nasty, dirty, wet hole, filled with the ends of worms and an oozy smell, nor yet a dry, bare, sandy hole with nothing in it to sit down on or to eat: it was a hobbit-hole, and that means comfort.” - J.R.R. Tolkien
Anyone who has grown Dahlias knows that storing the tubers over the winter is TRICKY BUSINESS. They can be quite finicky, and unfortunately, they can easily rot or dry out… which can mean losses of hundreds or even thousands of dollars. Eek!
For years, we stored our Dahlia tubers in my parent’s basement garage, where the conditions were perfect - cool, humid and never dipping below freezing, even the winters where there were lows around -20 F! We were grateful to have such an ideal storage space, despite having to box up and haul all the tubers back and forth each year (it took several trips!).
And then… my parents sold their house this summer. After a few weeks of fretting (“What are we going to do NOW?!?”), my husband decided to build a root cellar on our farm.
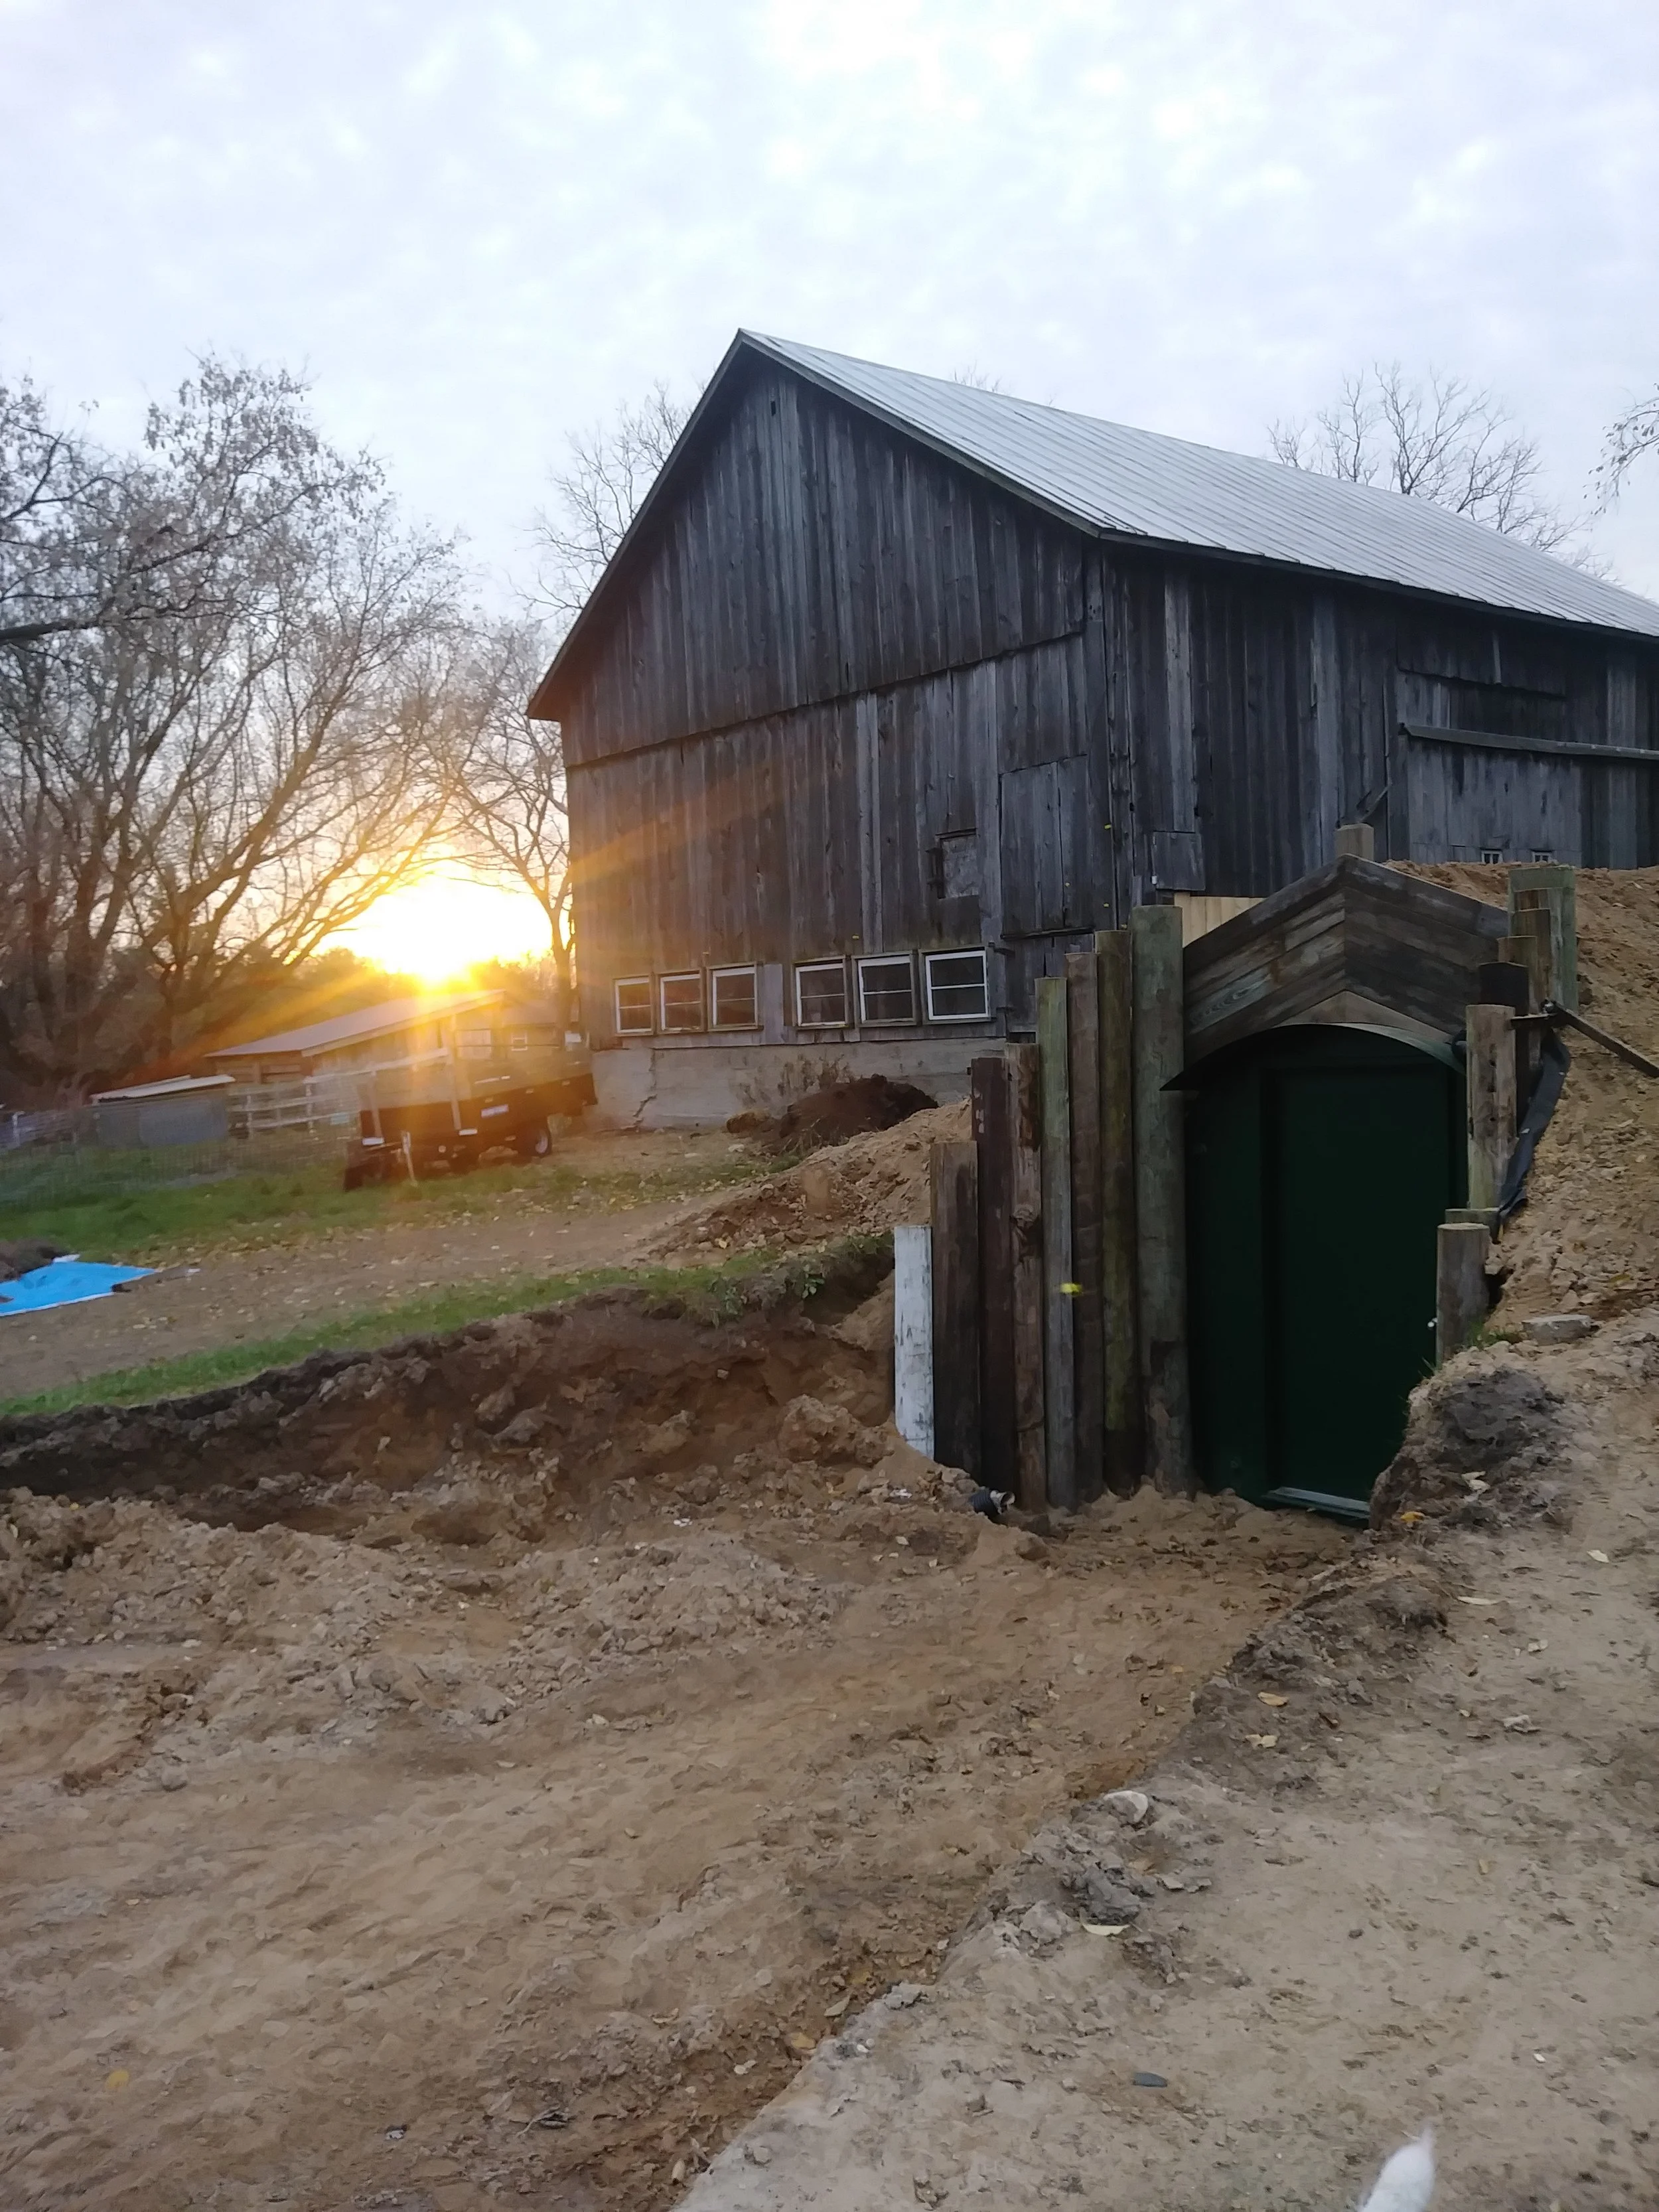
Historically, most farms had root cellars at one time. They were typically built into hillsides, with a door for access. The earth insulated the root cellar, keeping the contents cool and humid, but not freezing or wet.
Unfortunately, we don’t really have any hills on our little 3 acre farm… so my husband MADE one using our trusty little blue tractor.
When my husband told me he wanted to make root cellar, my one request was “Can we make it look like a Hobbit House?” Obviously, I have my priorities straight. Ha!
I may or may not be a WEE BIT obsessed with all things Middle Earth (the setting of the classic book “The Hobbit” and the “Lord of the Rings” series by J.R.R. Tolkien).
Let me tell you the story of how the Hobbit Hole Root Cellar came to be at Three Acre Farm. Ready to come on an Unexpected Journey? Sorry, I can’t help myself…
First order of business: Tracking down some really big steel tanks to bury underground. My husband, John, who is the REAL hero of this story, tracked them down on Facebook Marketplace.
These were tanks used in the natural gas extraction process and are about 8’ in diameter and 10’ long. So yeah. Big.
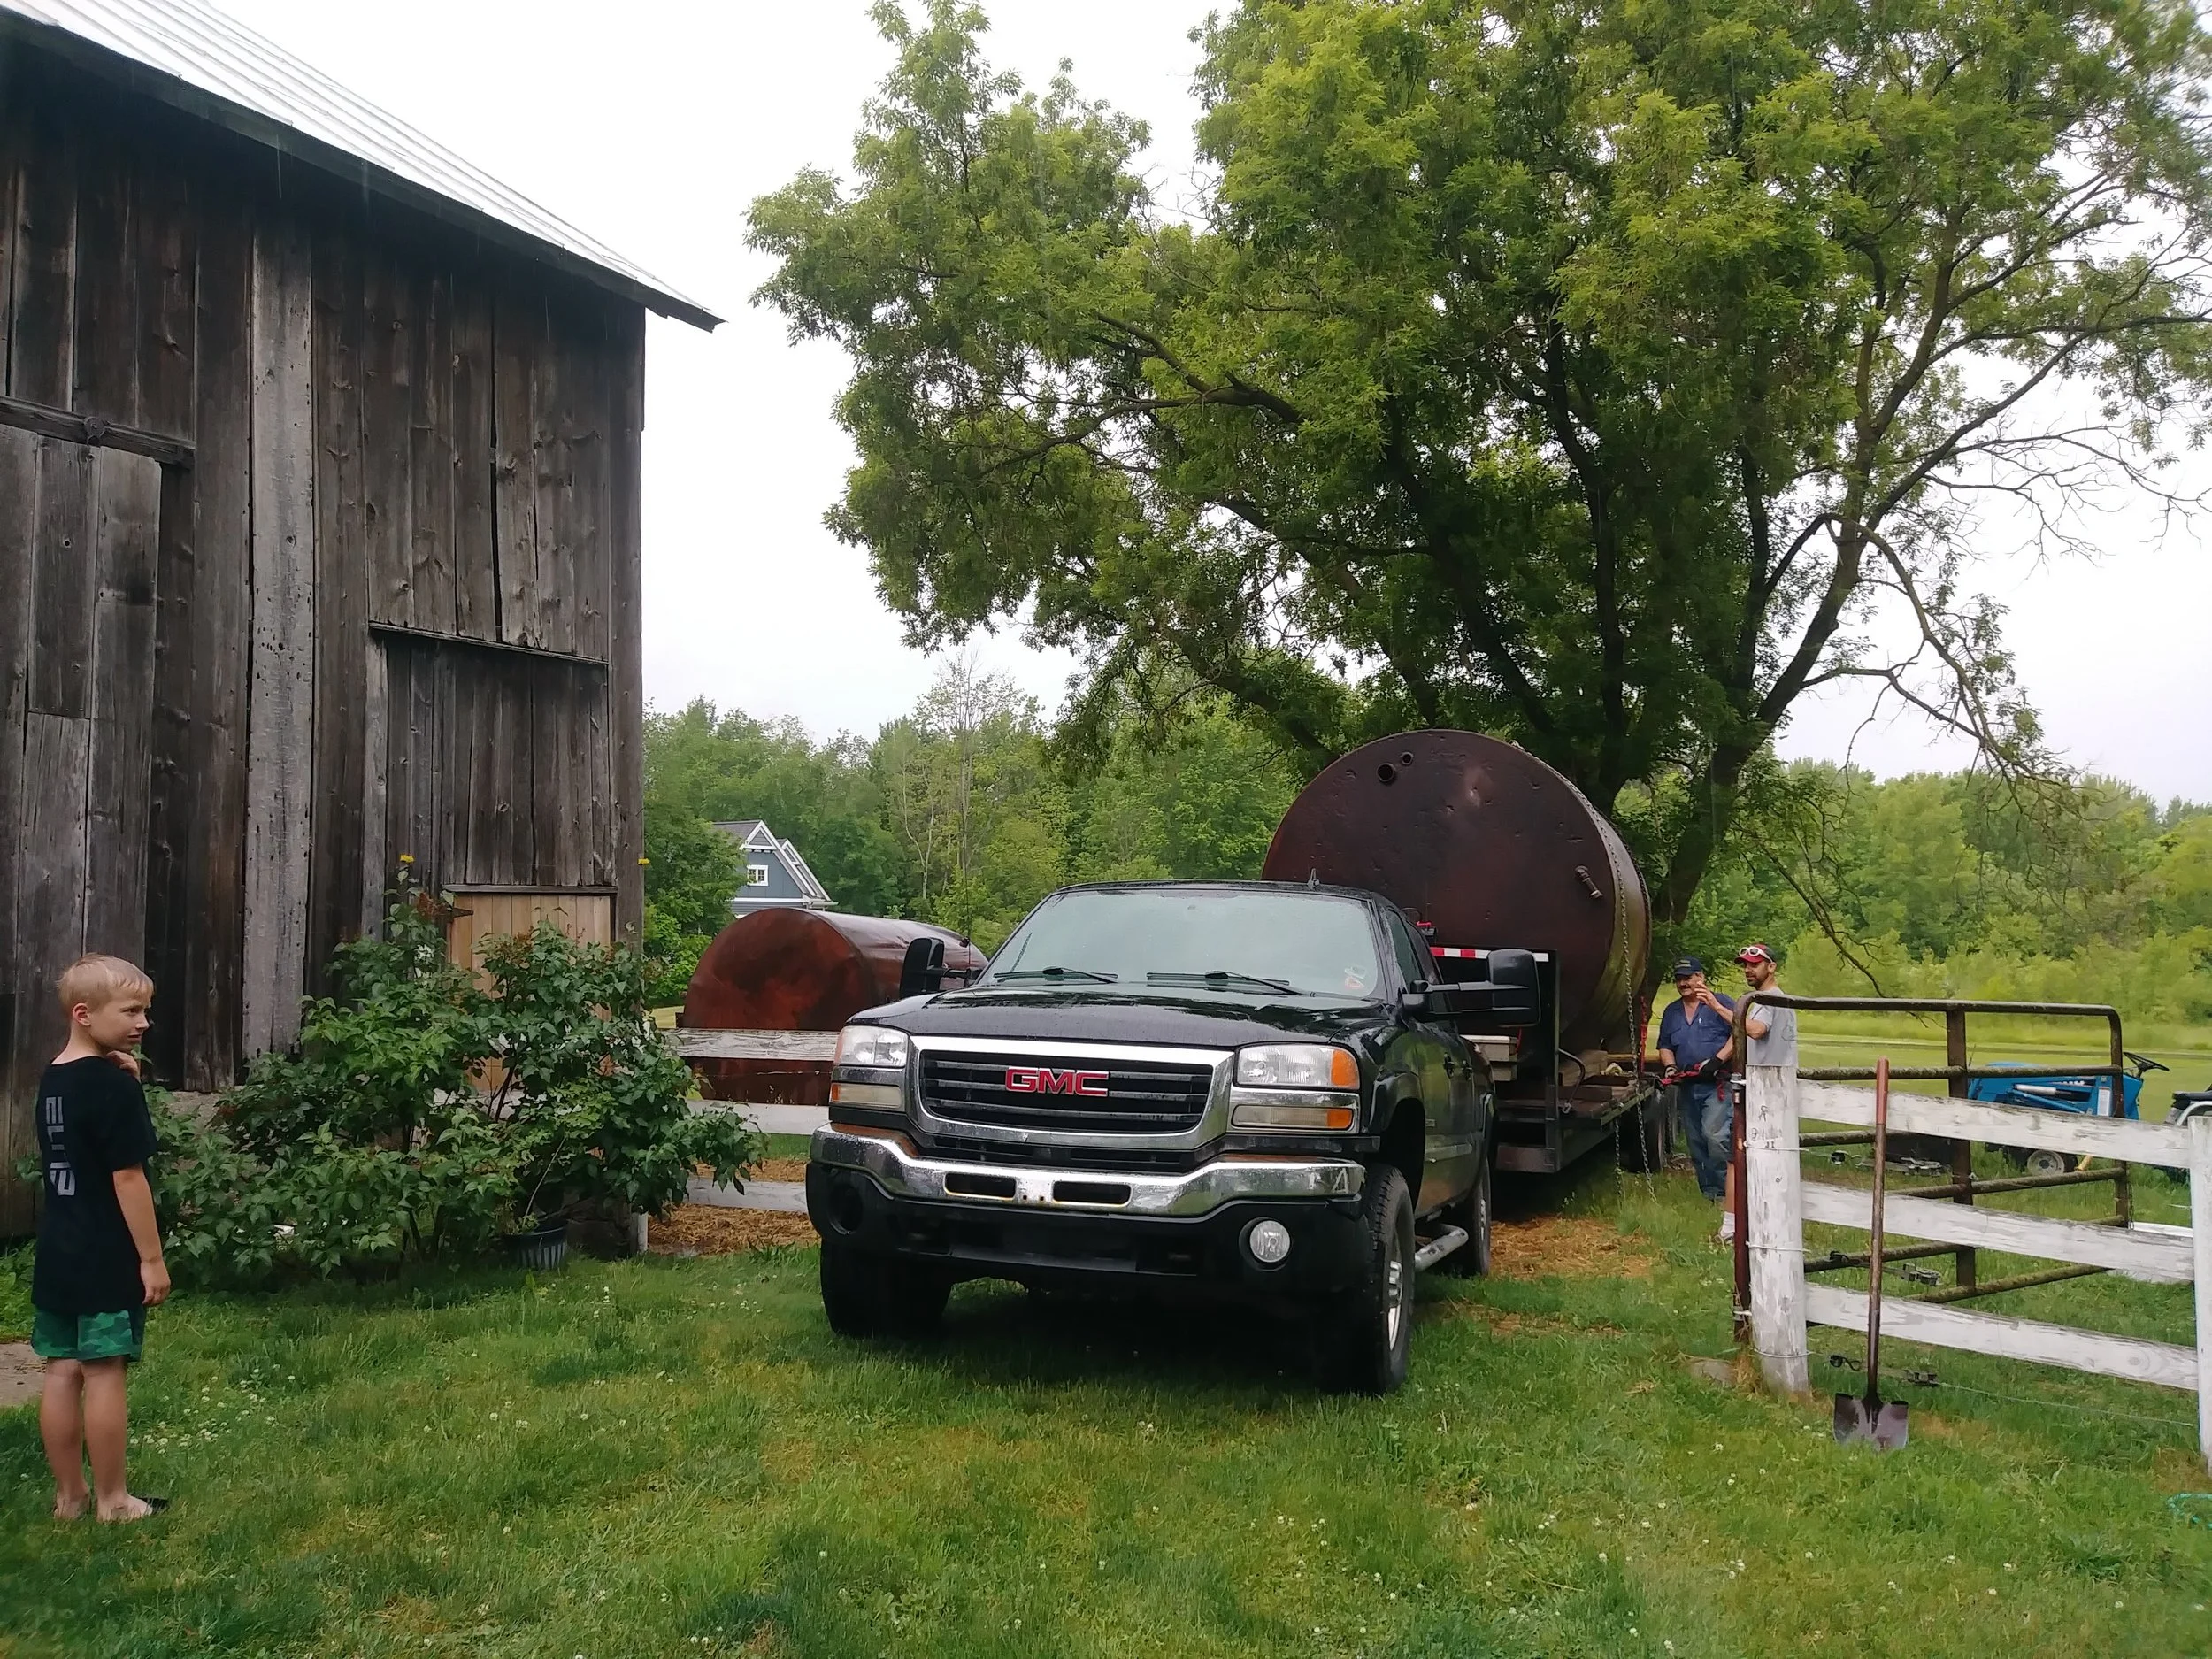
Once we had the tanks, it was time to cut doors in them. John designed the root cellar so that the tanks were end to end to create one long space… like a long tube.

Next up, he painted the outside of the tanks with foundation coating to help prevent further rusting.
Then it was time to dig.
So… digging the hole for the tanks was somewhat time consuming. Our tractor, trusty “Little Blue” was a bit undersized for the job, but she managed!
I took the photo below for scale, so you can see how deep the hole is. Also, have I mentioned that our farm is basically a sand dune?
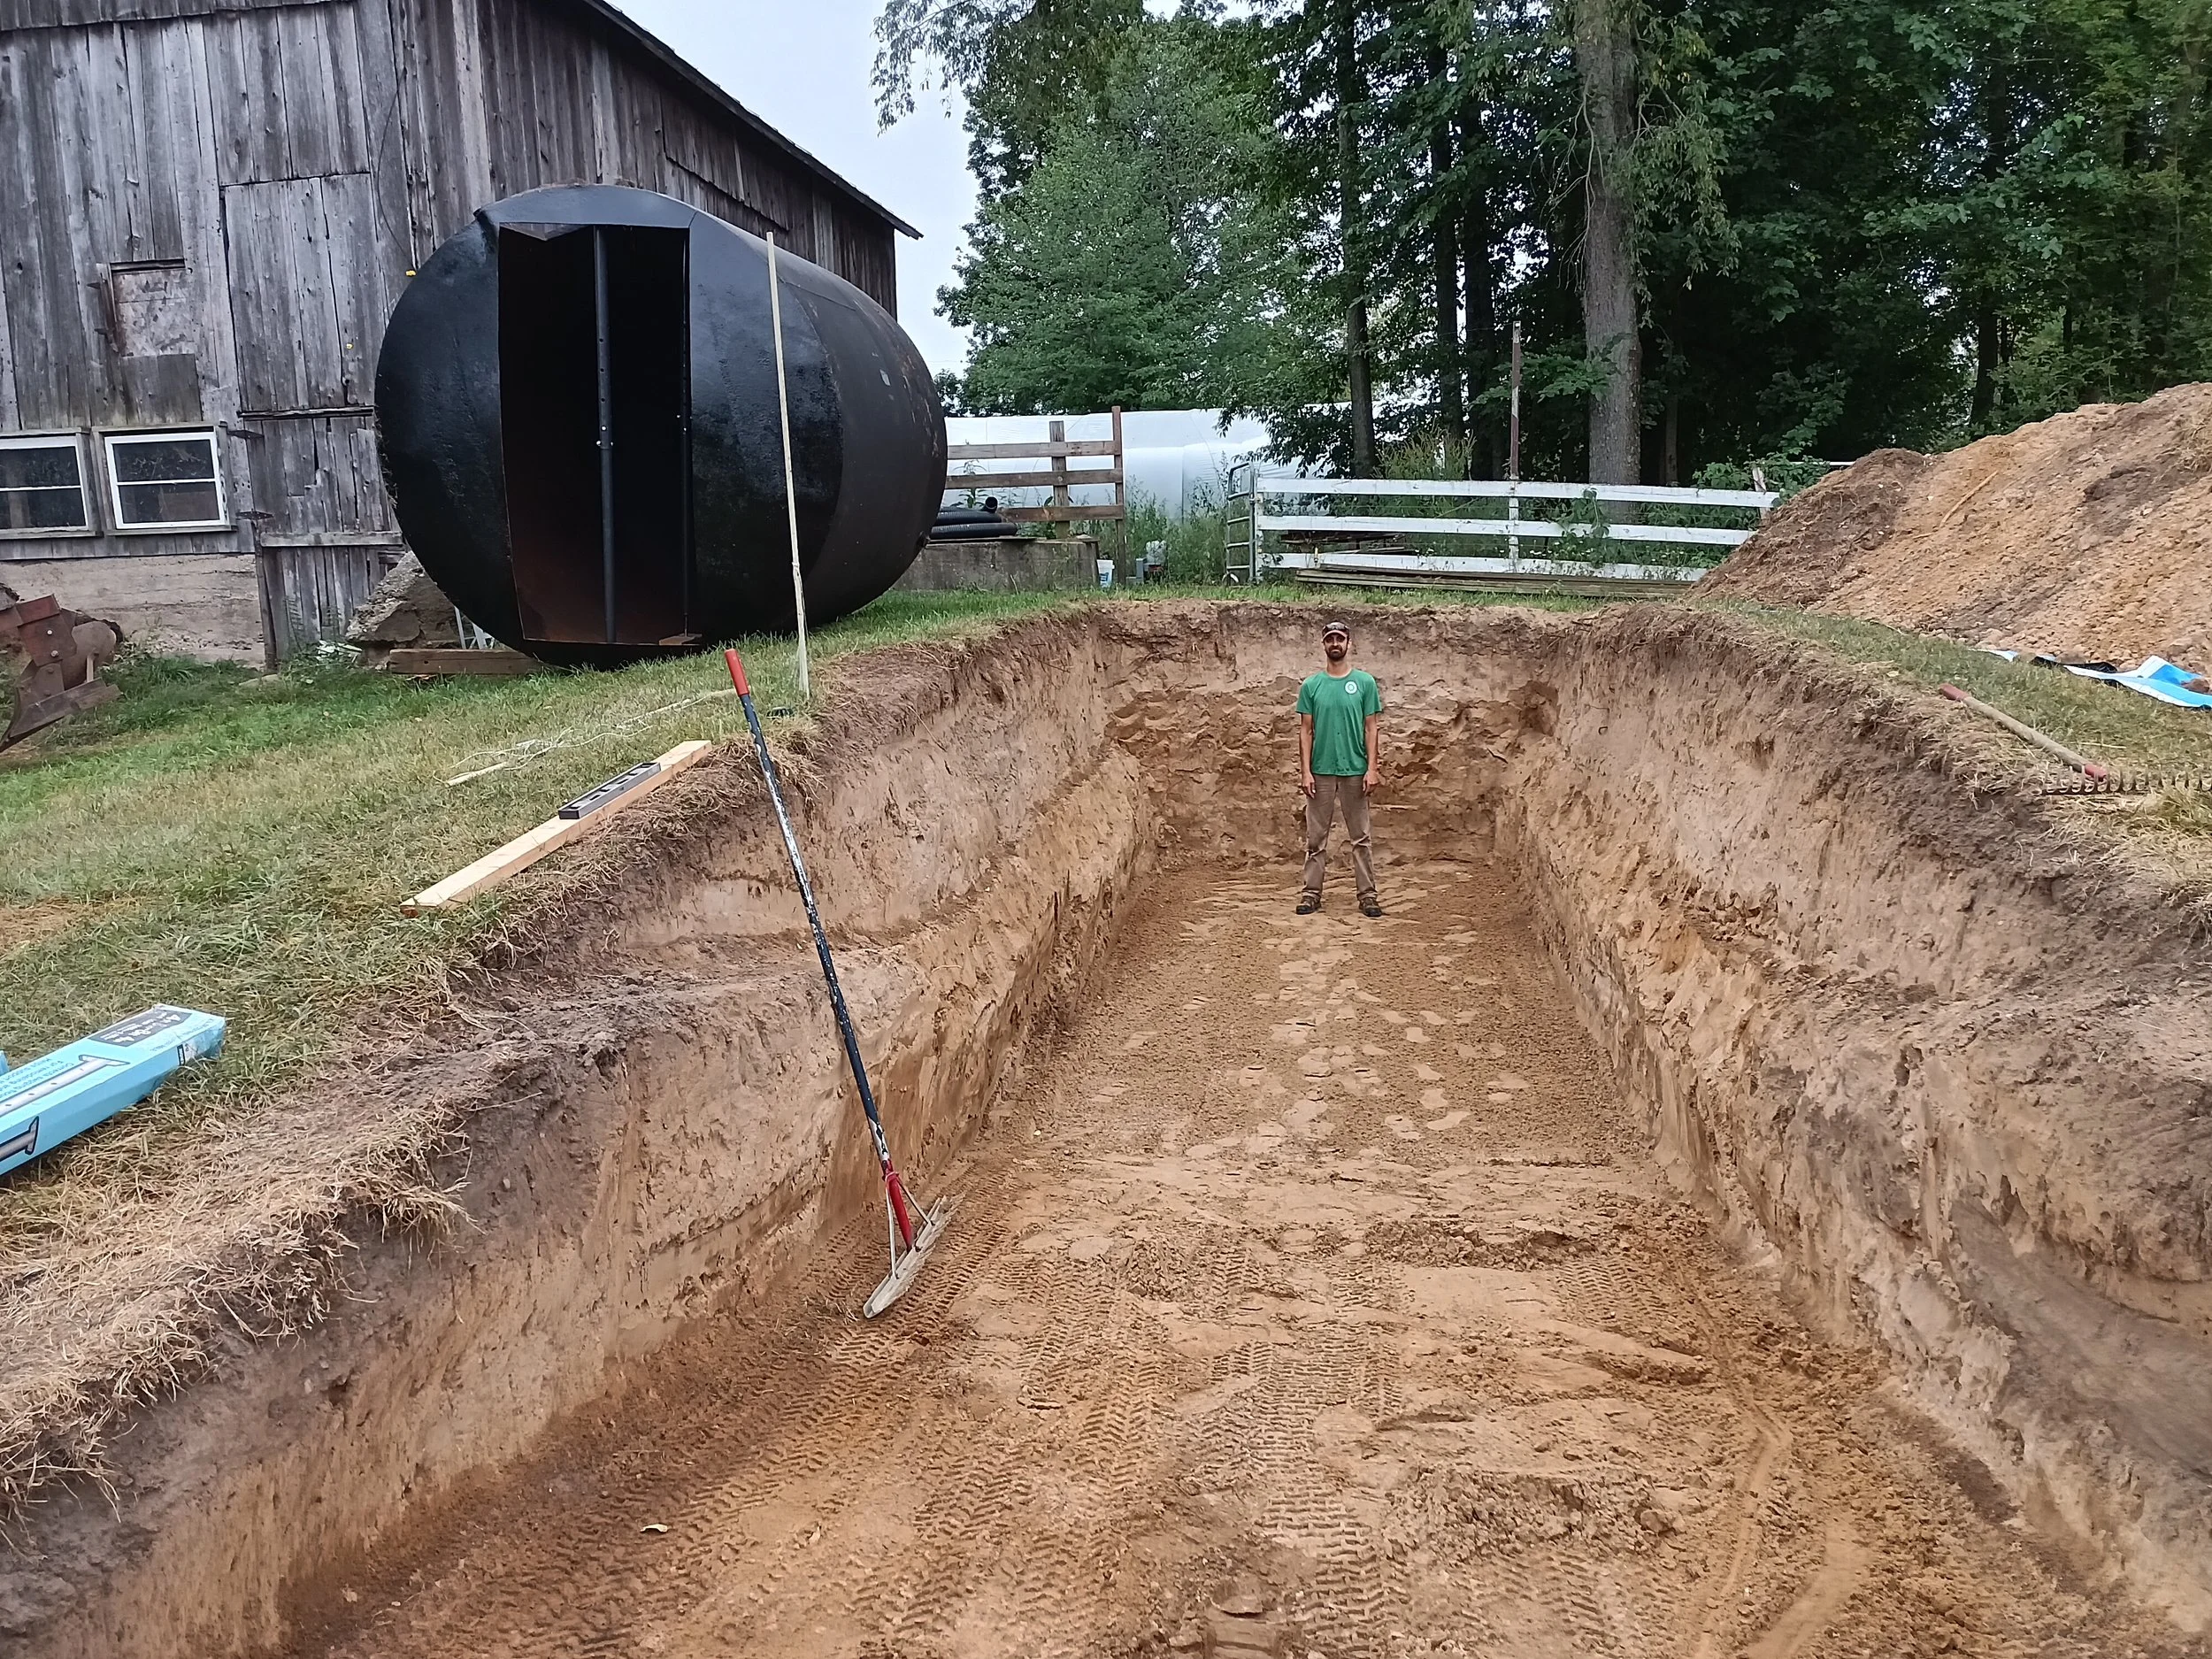
And then somehow (not quite sure how, but I was watching!), he managed to use “Little Blue” to push the tanks into the hole, making sure they rolled in at just the right angle that the door was in the proper place (well, they needed a tiny bit of adjustment). My husband is pure magic.

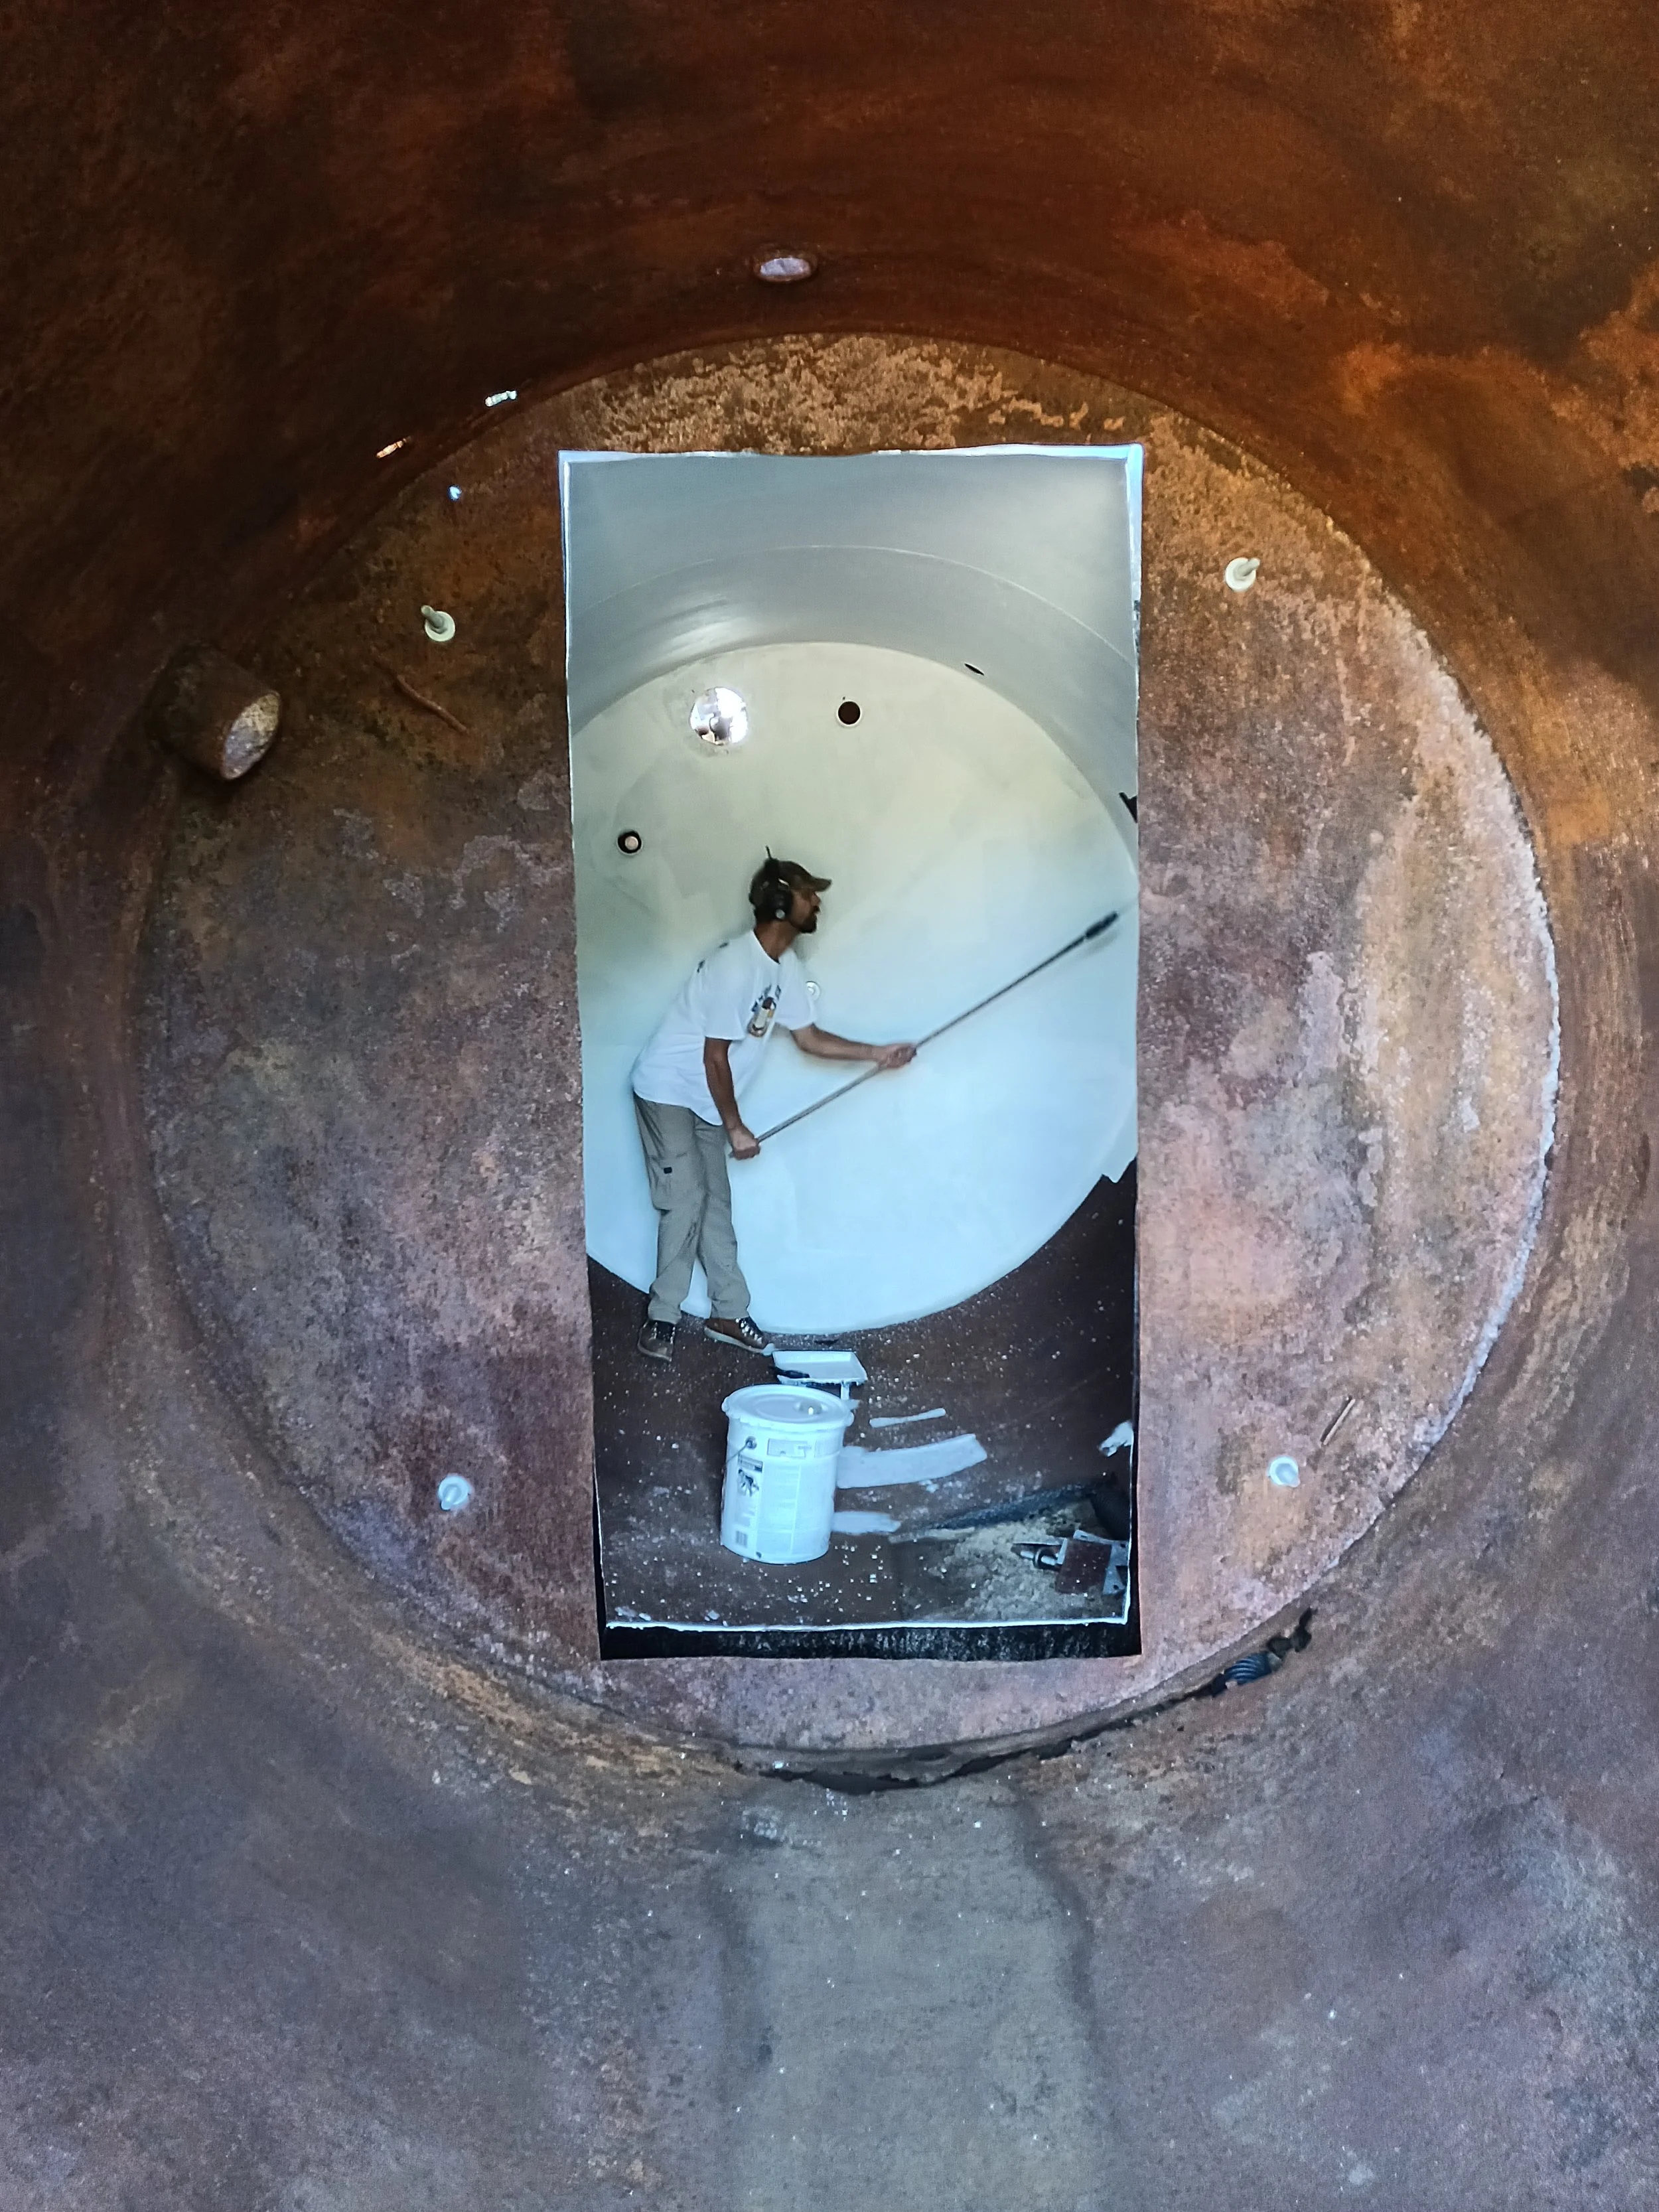
Then he painted the inside of the tanks so it didn’t feel quite so creepy. ;)
He laid a giant tarp over the whole thing, then heaped a crap load of dirt over top of it. The tanks are surrounded by earth to help keep the temperature above freezing (hopefully!).
Bonus! The kids finally have a sledding hill on the farm Ha!
He also built a retaining wall around the front door to keep the dirt from collapsing around the doorway.
You can also see the exhaust vent sticking out of the back. There is a fresh air vent in the front… in case we ever need to use it as a bomb/tornado shelter. ;) No, actually, it’s to help keep the air fresh in there.
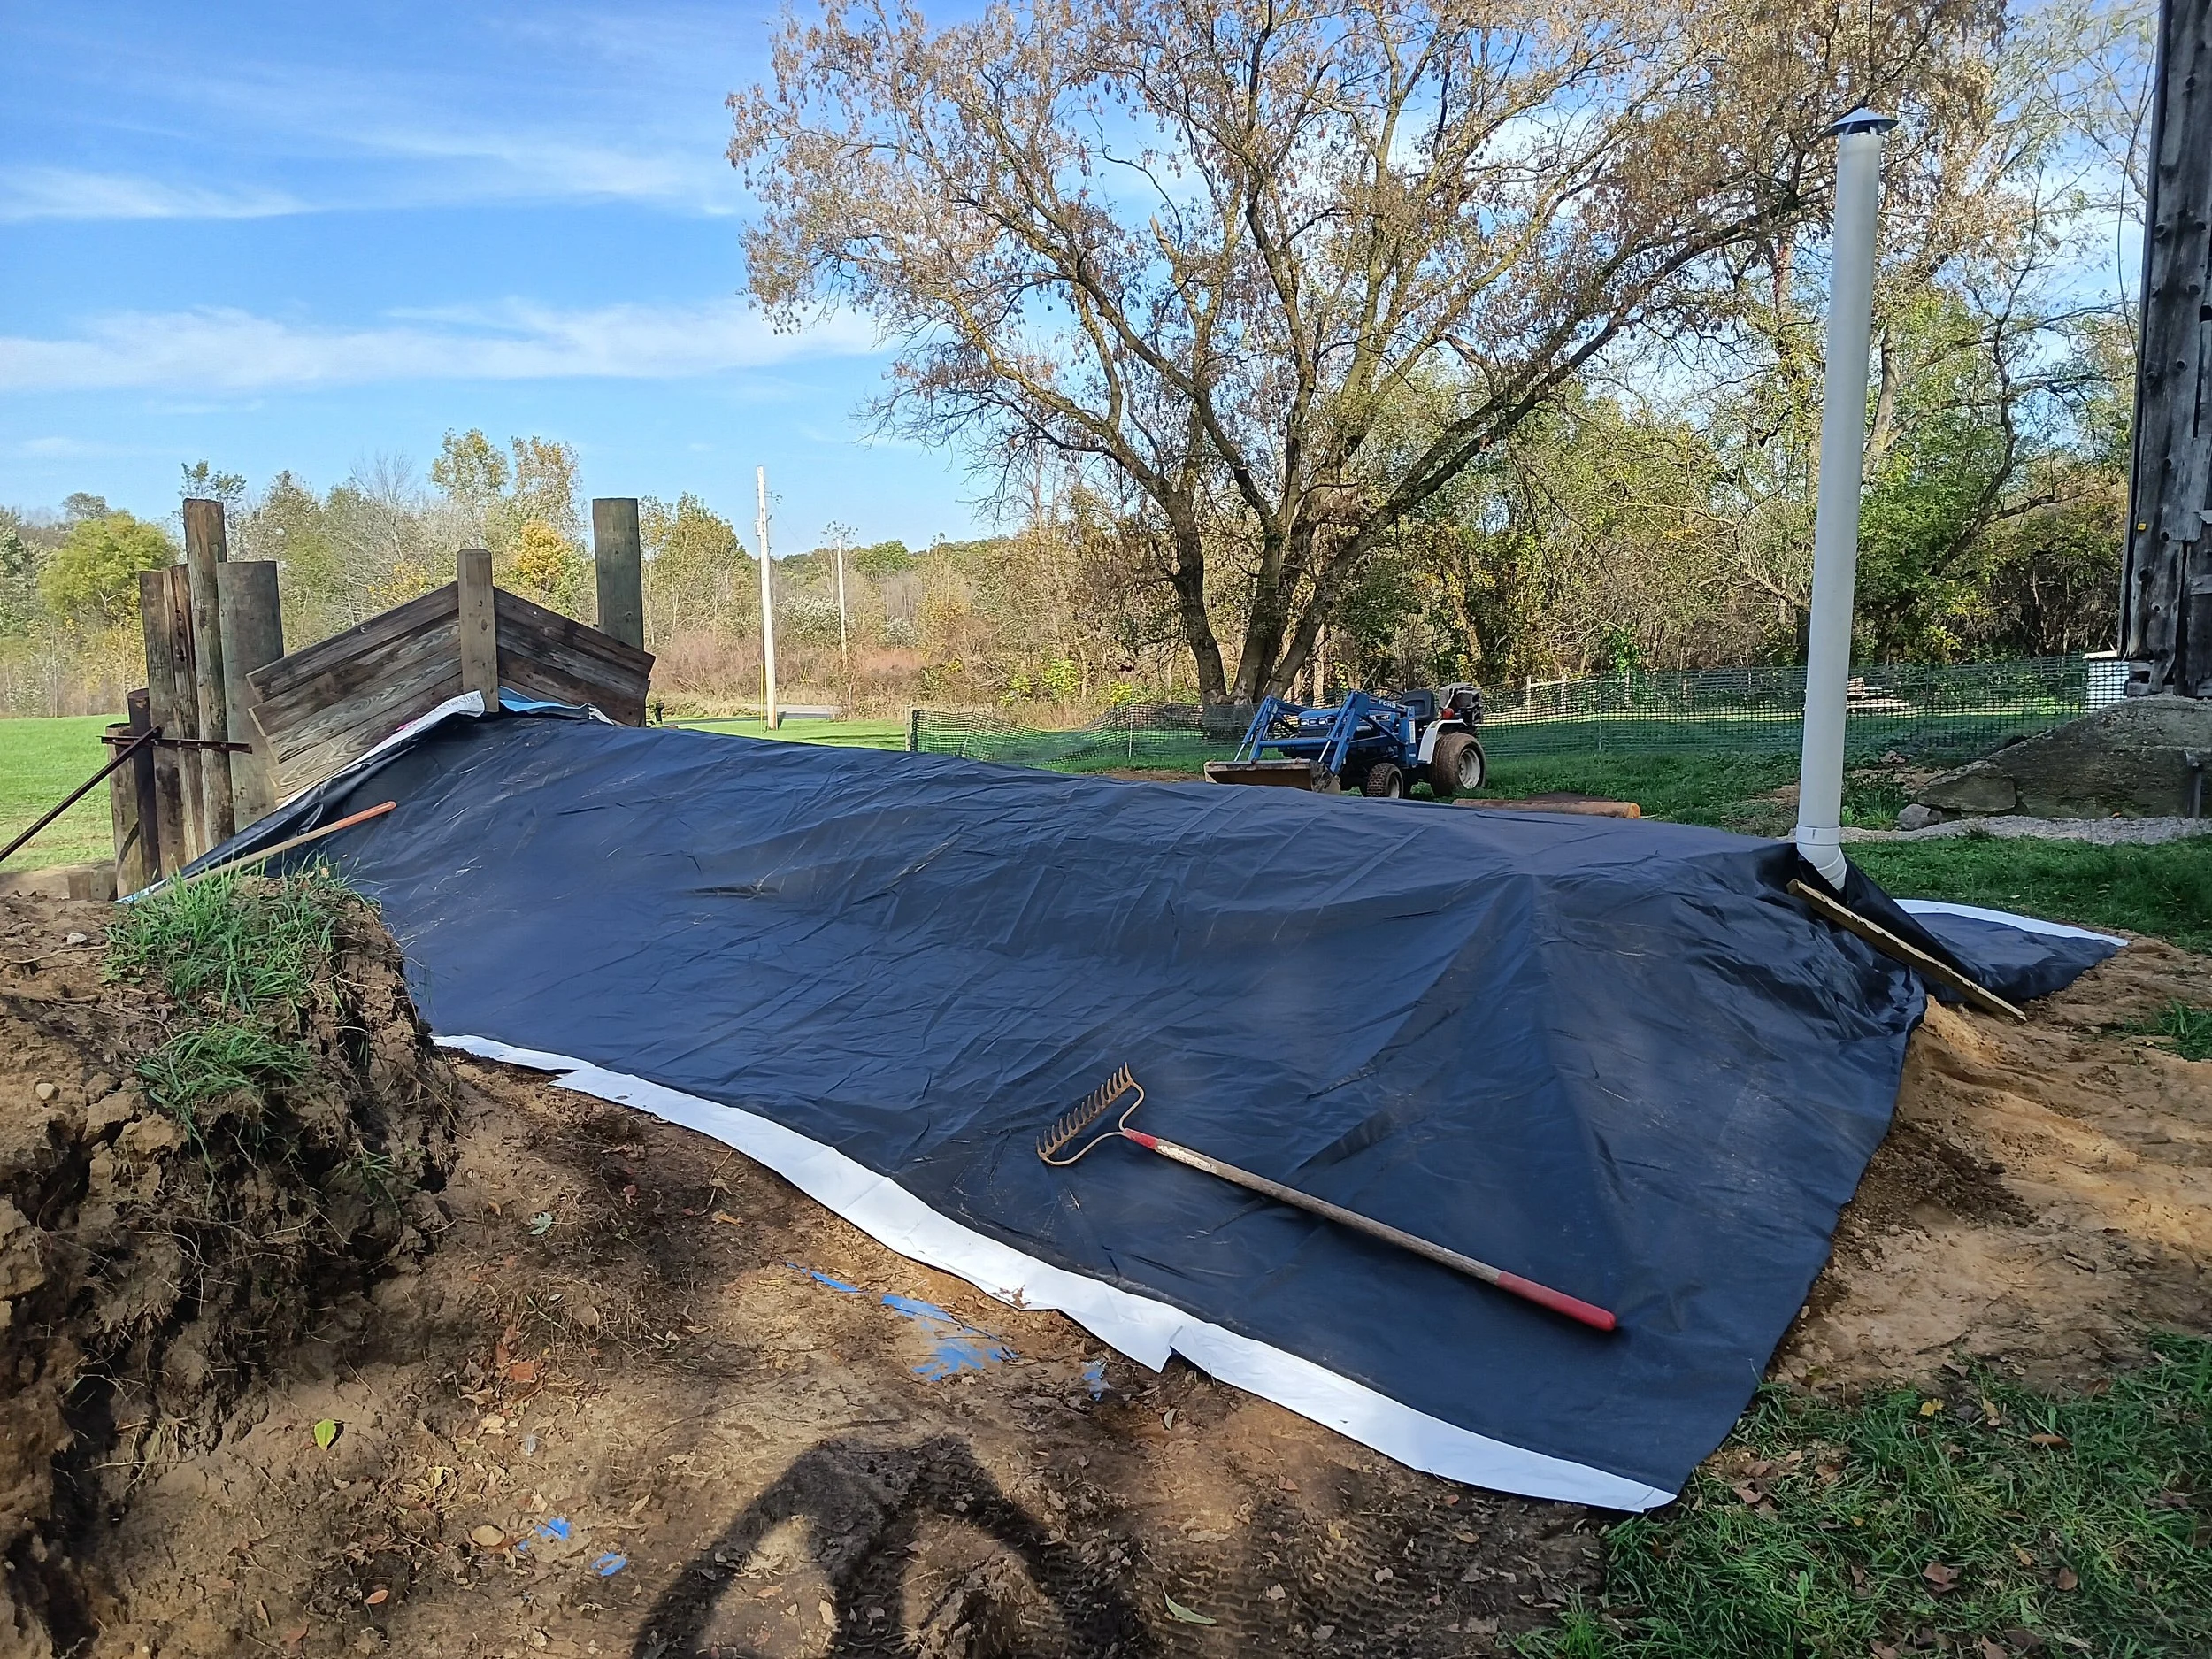
Ta da! Next season, my husband will do some ground-scaping around the entrance and clean things up a bit, but for now - IT WORKS!
John leveled off the floor with gravel, then laid a pallet wood floor overtop of the gravel.
For good measure, John installed a center beam with supports. Also. Light!!! Yay! And outlets for heaters, dehumidifiers, air purifiers, etc.
We slowly started moving the boxes of tuber to their winter storage…
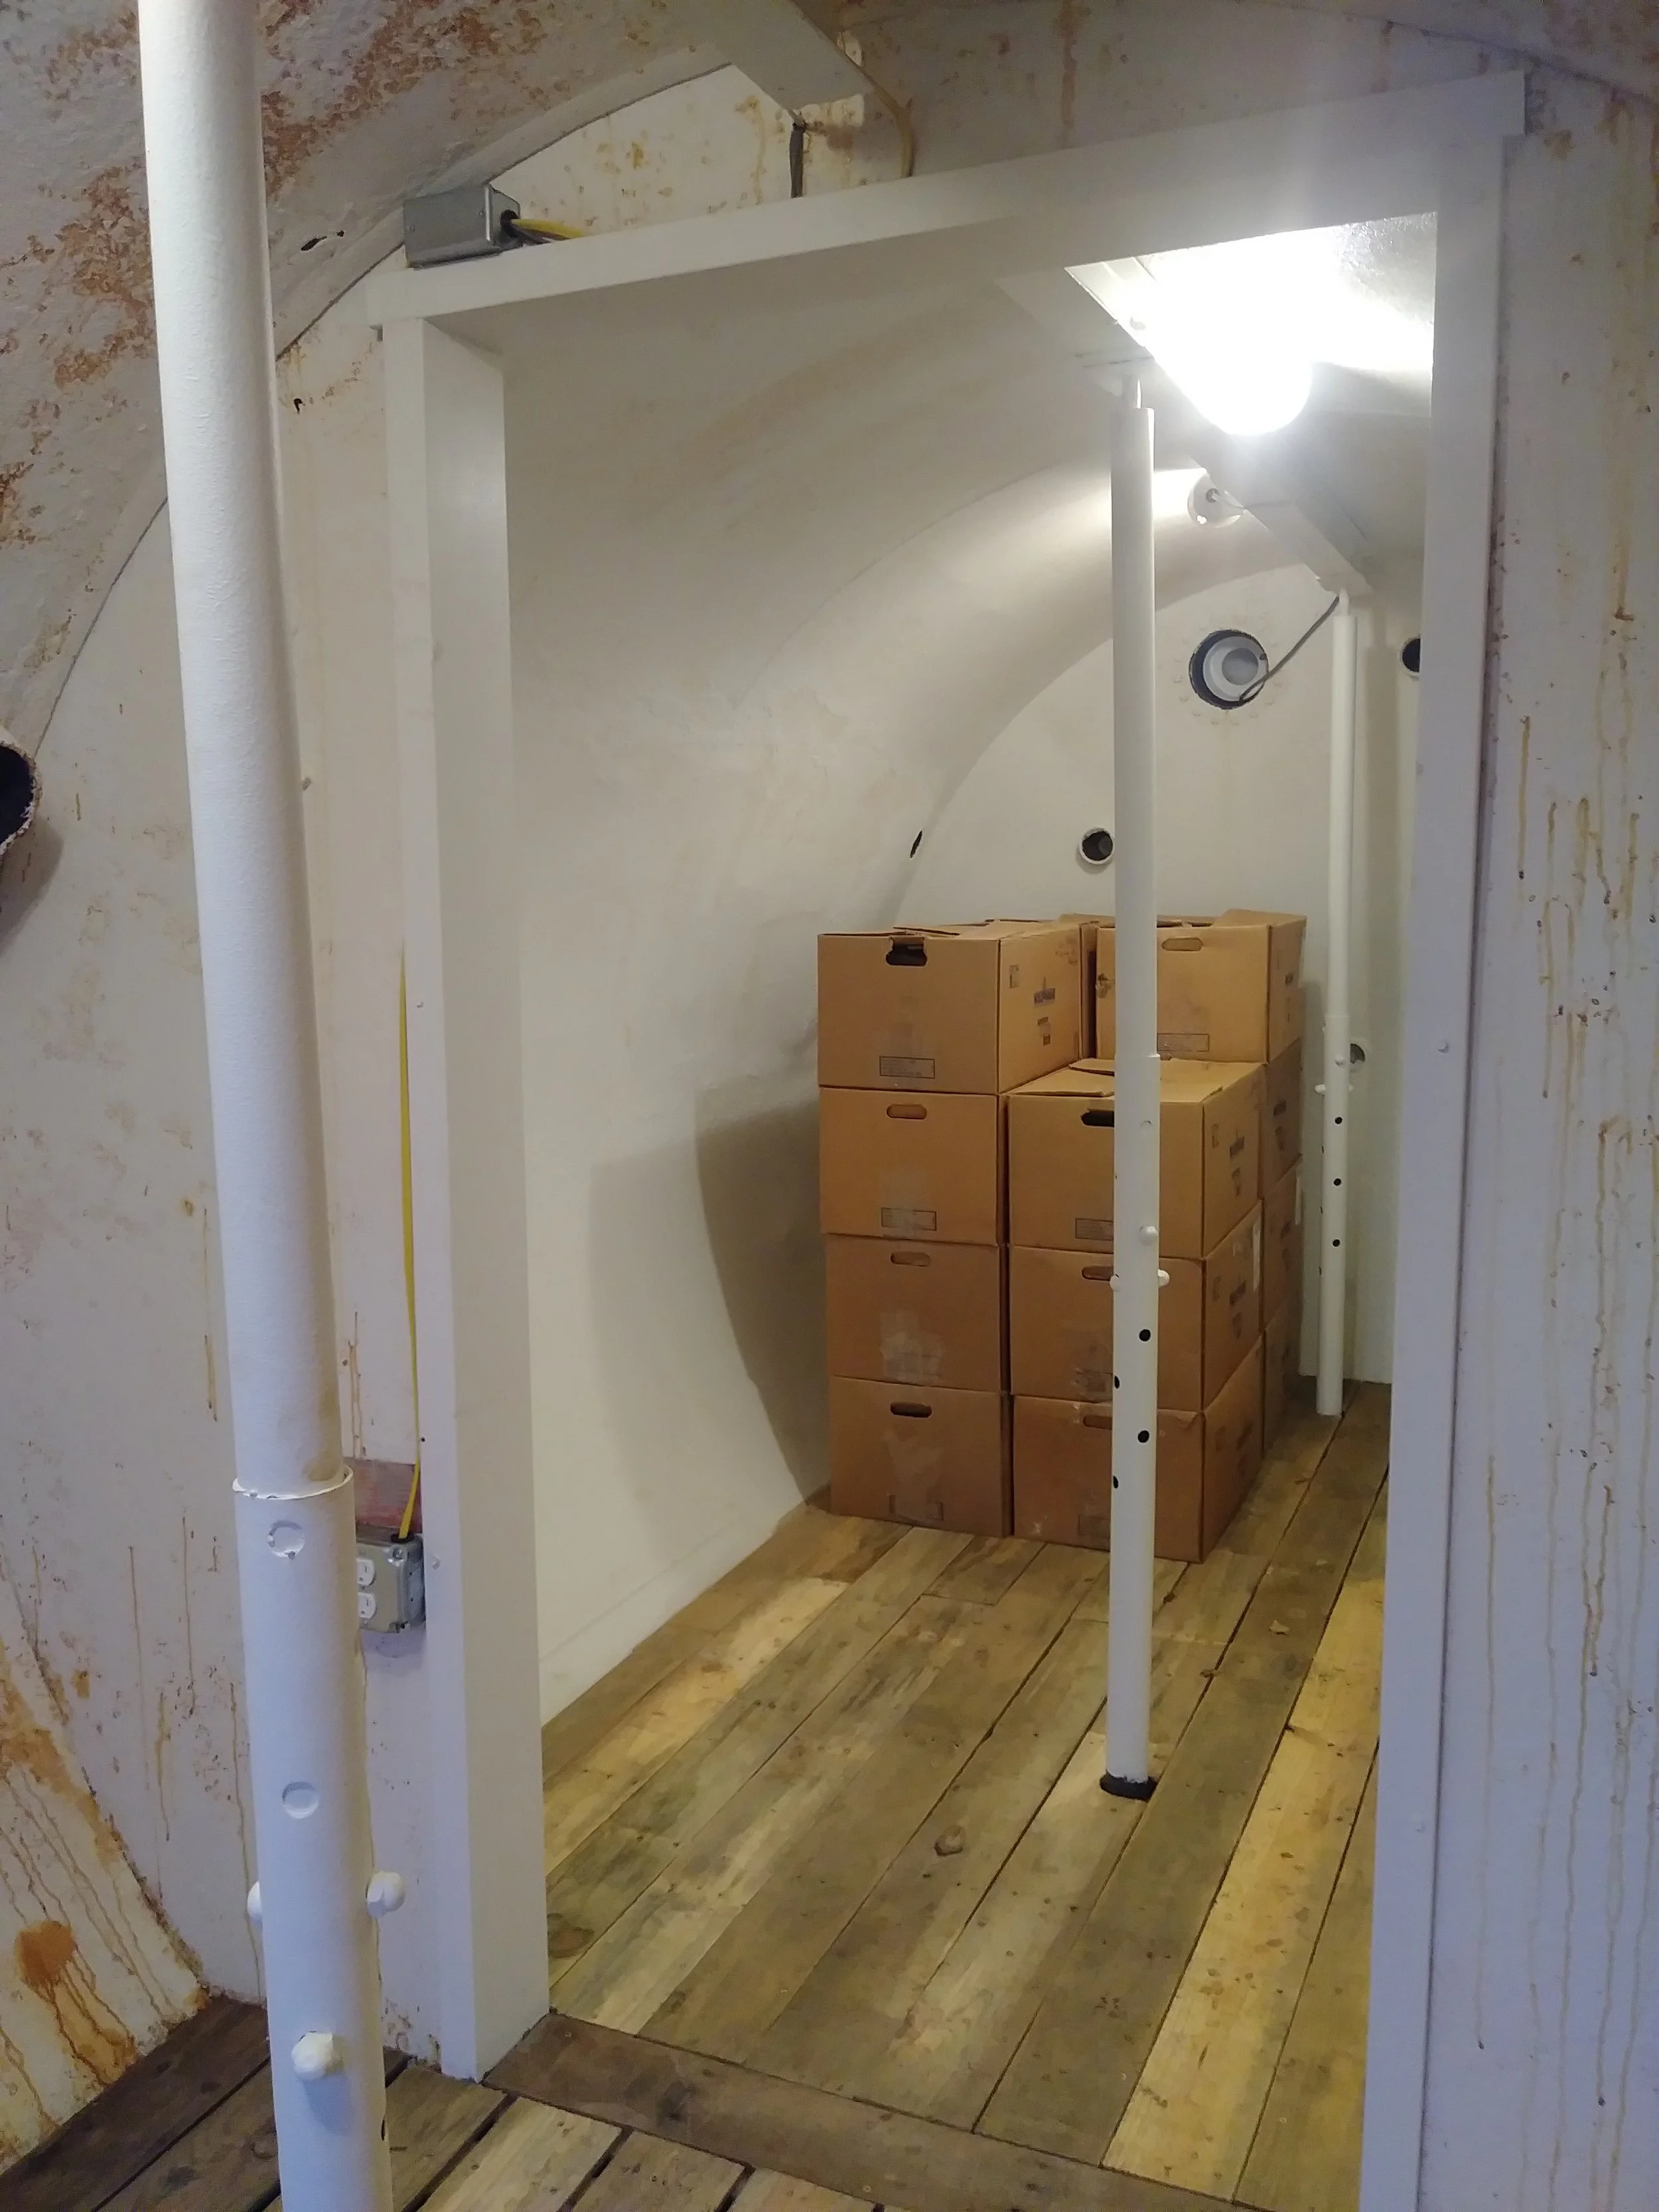
Unfortunately, we had a really warm November and December and the Hobbit Hole was too warm! I noticed some mold growth on some tubers, so we installed a dehumidifier and an air purifier with a mold filter to help keep things under control.

I pop in here a few times a week to inspect the tubers.

Time will tell how this giant experiment will work. While most of the tubers look pretty good, we’re experiencing some tuber rot. We’re guessing this was due to the warm fall temps and high humidity. While it’s been brutally cold recently, early winter was much too warm!
It’s a pretty nice space to work in, even in the middle of the winter. Here’s a video of me in February dividing a few tubers to potting up. Normally, we don’t start dividing the tubers until March, but I wanted to get a head start with a few of my favorite varieties!
Concluding Remarks…
-John has plans to add temperature controls to help us deal with warm temperatures. We thought cold would be the problem, but warmth has been most challenging!
-He also wishes he could have used 3 tanks, but couldn’t find more tanks.
Hope you enjoyed the tour of our Hobbit Hole Root Cellar!
P.S. In the spring, I hope to track down someone to paint the front to look like Bilbo’s door and make a sign that says “No Admittance Except on Dahlia Business”. It’s gonna be great!
READY FOR MORE?
If you’re serious about growing the garden of your dreams this year, register for my online course, “Backyard Cutting Garden 101”. You’ll find everything you need to plan, grow, harvest and arrange your stunning blooms. I can’t WAIT to help you grow! Click on the button below for all the details.

Spoon Butter Recipe
Wondering what “spoon butter” is and if you need it? Find out here!
Spoon Butter Recipe
Do you use wooden spoons, wooden cutting boards and other wooden utensils in your kitchen? I do!
These hardworking, classic tools have stood the test of time and can even become family heirlooms… if they are properly cared for.
You may have noticed that your wooden tools tend to get dried out over time and maybe you’ve wondered how to to condition them or revive them.

Many website sites suggest using mineral oil as a wood conditioner for cutting boards, spoons, etc. After doing a little research on mineral oil, I was NOT comfortable with the idea of using it in my kitchen.
Instead, I looked around my kitchen and pantry for all natural ingredients that I felt safe using on tools that would come into contact with our food.
This recipe is called “Spoon Butter”, because it’s like you’re buttering your spoons. I love knowing that this spoon butter will condition my wooden tools AND it’s 100% safe for human consumption.
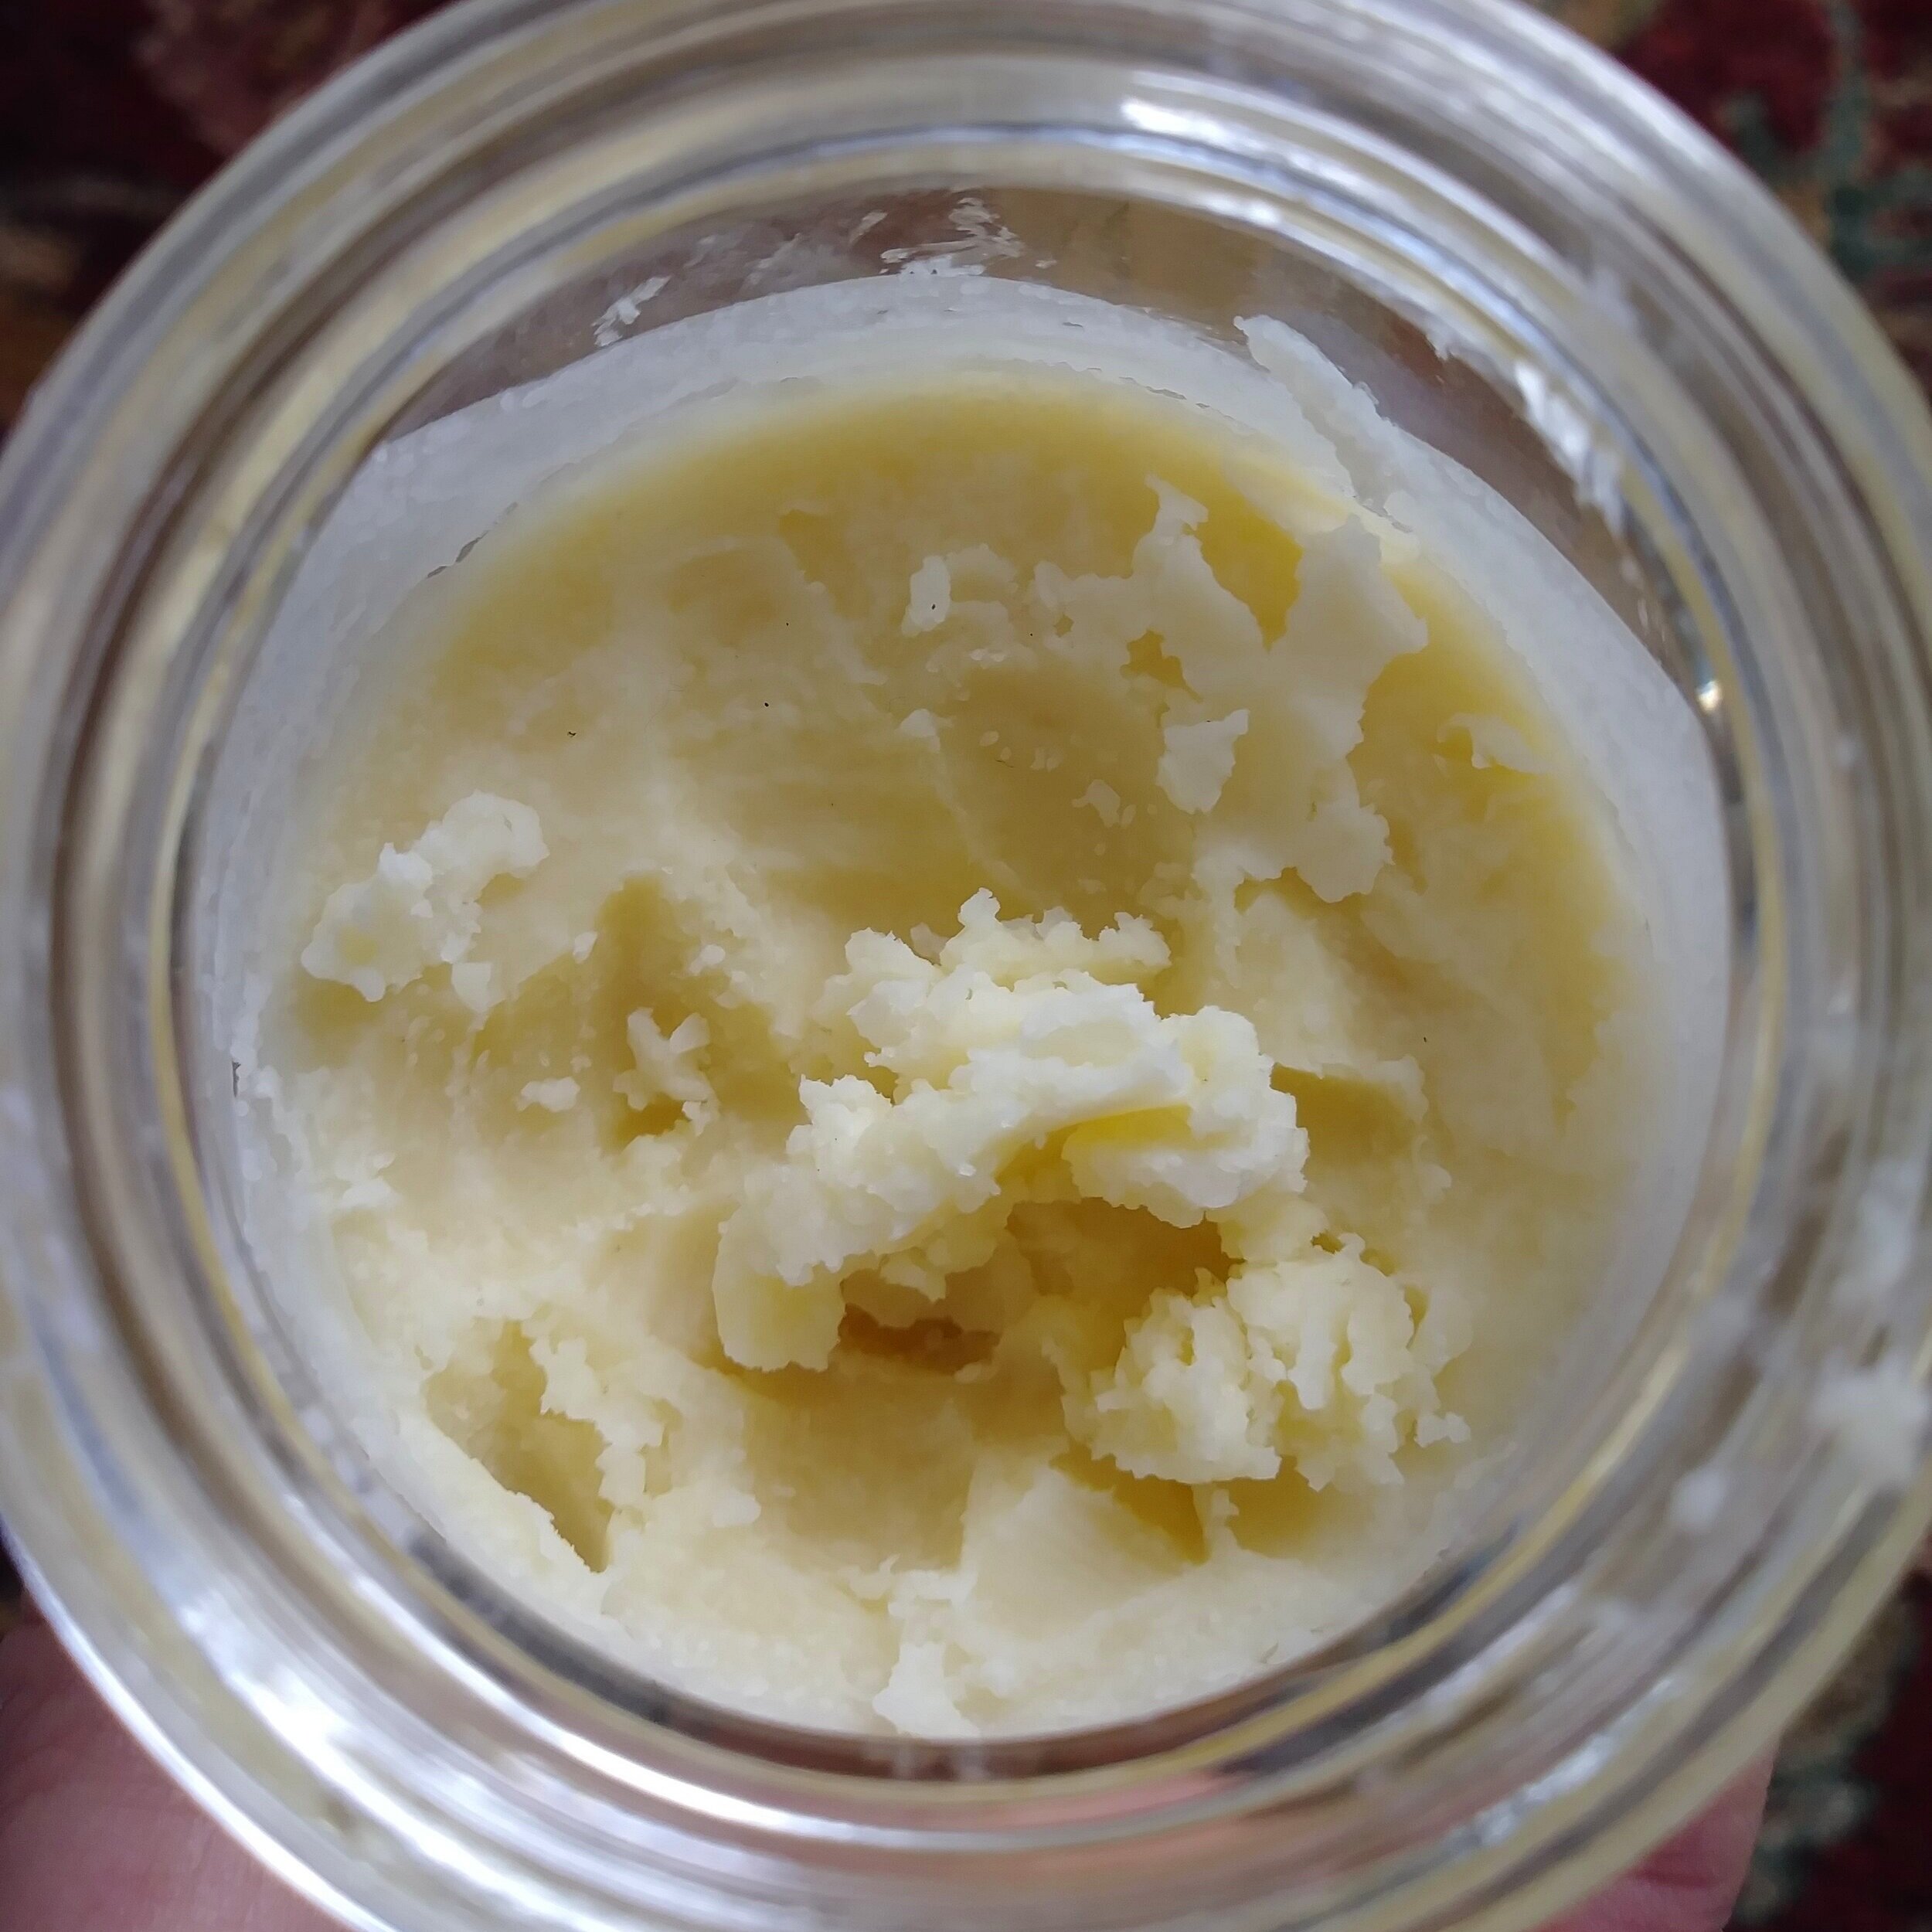
Here’s how to make it:
INGREDIENTS
3 ounces of coconut oil
1 ounce of beeswax (chunk or pastilles)
METHOD
Combine the 2 ingredients in a small glass jar. Place the glass jar in a pan filled with about 2 inches of warm water (do not get water in the jar). Slowly heat the pan of water. The hot water will melt the coconut oil and beeswax. Stir gently to combine ingredients.
HOW TO USE
Remove a small amount of spoon butter from jar and rub thoroughly on wooden spoon, cutting board, etc. Allow to sit for about an hour to fully penetrate wood. If desired, buff off excess with a clean cloth.

There! Now you have a beautiful, shiny spoon that looks like new! With proper care, these spoons and cutting boards can be handed down from generation to generation. How special is that? Enjoy!

Herb Salt Recipe
A quick, easy and elegant DIY gift idea for everyone on your list!
Ok, folks. Less than 2 weeks until Christmas!
If you’re anything like me, you probably JUST remembered about 5 people you want to get gifts for, but time and Christmas funds are running out. ;)
Never fear!
I’ve got the perfect solution: Herb Salt.
This gift is:
Inexpensive. Each jar costs less than $2, depending on where you buy your ingredients.
Easy and quick. You might even have all the ingredients in your house right now!
Elegant. This may be an inexpensive gift, but it looks so fancy!
Consumable (and practical)… because nobody needs more stuff cluttering up their house!
Appropriate for nearly everyone. No need to worry about food allergies!
What is Herb Salt?
Herb Salt is something I made up one December when I was trying to think of a consumable gift idea for my family members.
Years ago, our family decided that we would only buy gifts for the children in the family. The adults would exchange small consumable gifts, as all of us were trying to reduce clutter in our households.
I wanted something a little different than the usual jams and baked goods I usually made, so I looked in my pantry to see what I could find… and discovered I had LOTS of herbs that I had dried from my garden, along with some fancy sea salt.
So I started mixing… a little bit of this, a little bit of that… sample, taste….mmmmm… perfection!
When I gave it away that year, everyone LOVED it. The only complaint - they used it up too fast and wished they had more! Ha! This year I’ll be making larger batches.
This “recipe” (I use that term loosely) is easy, quick and fun. It’s a great recipe to make with kids!

How to Make Herb Salt
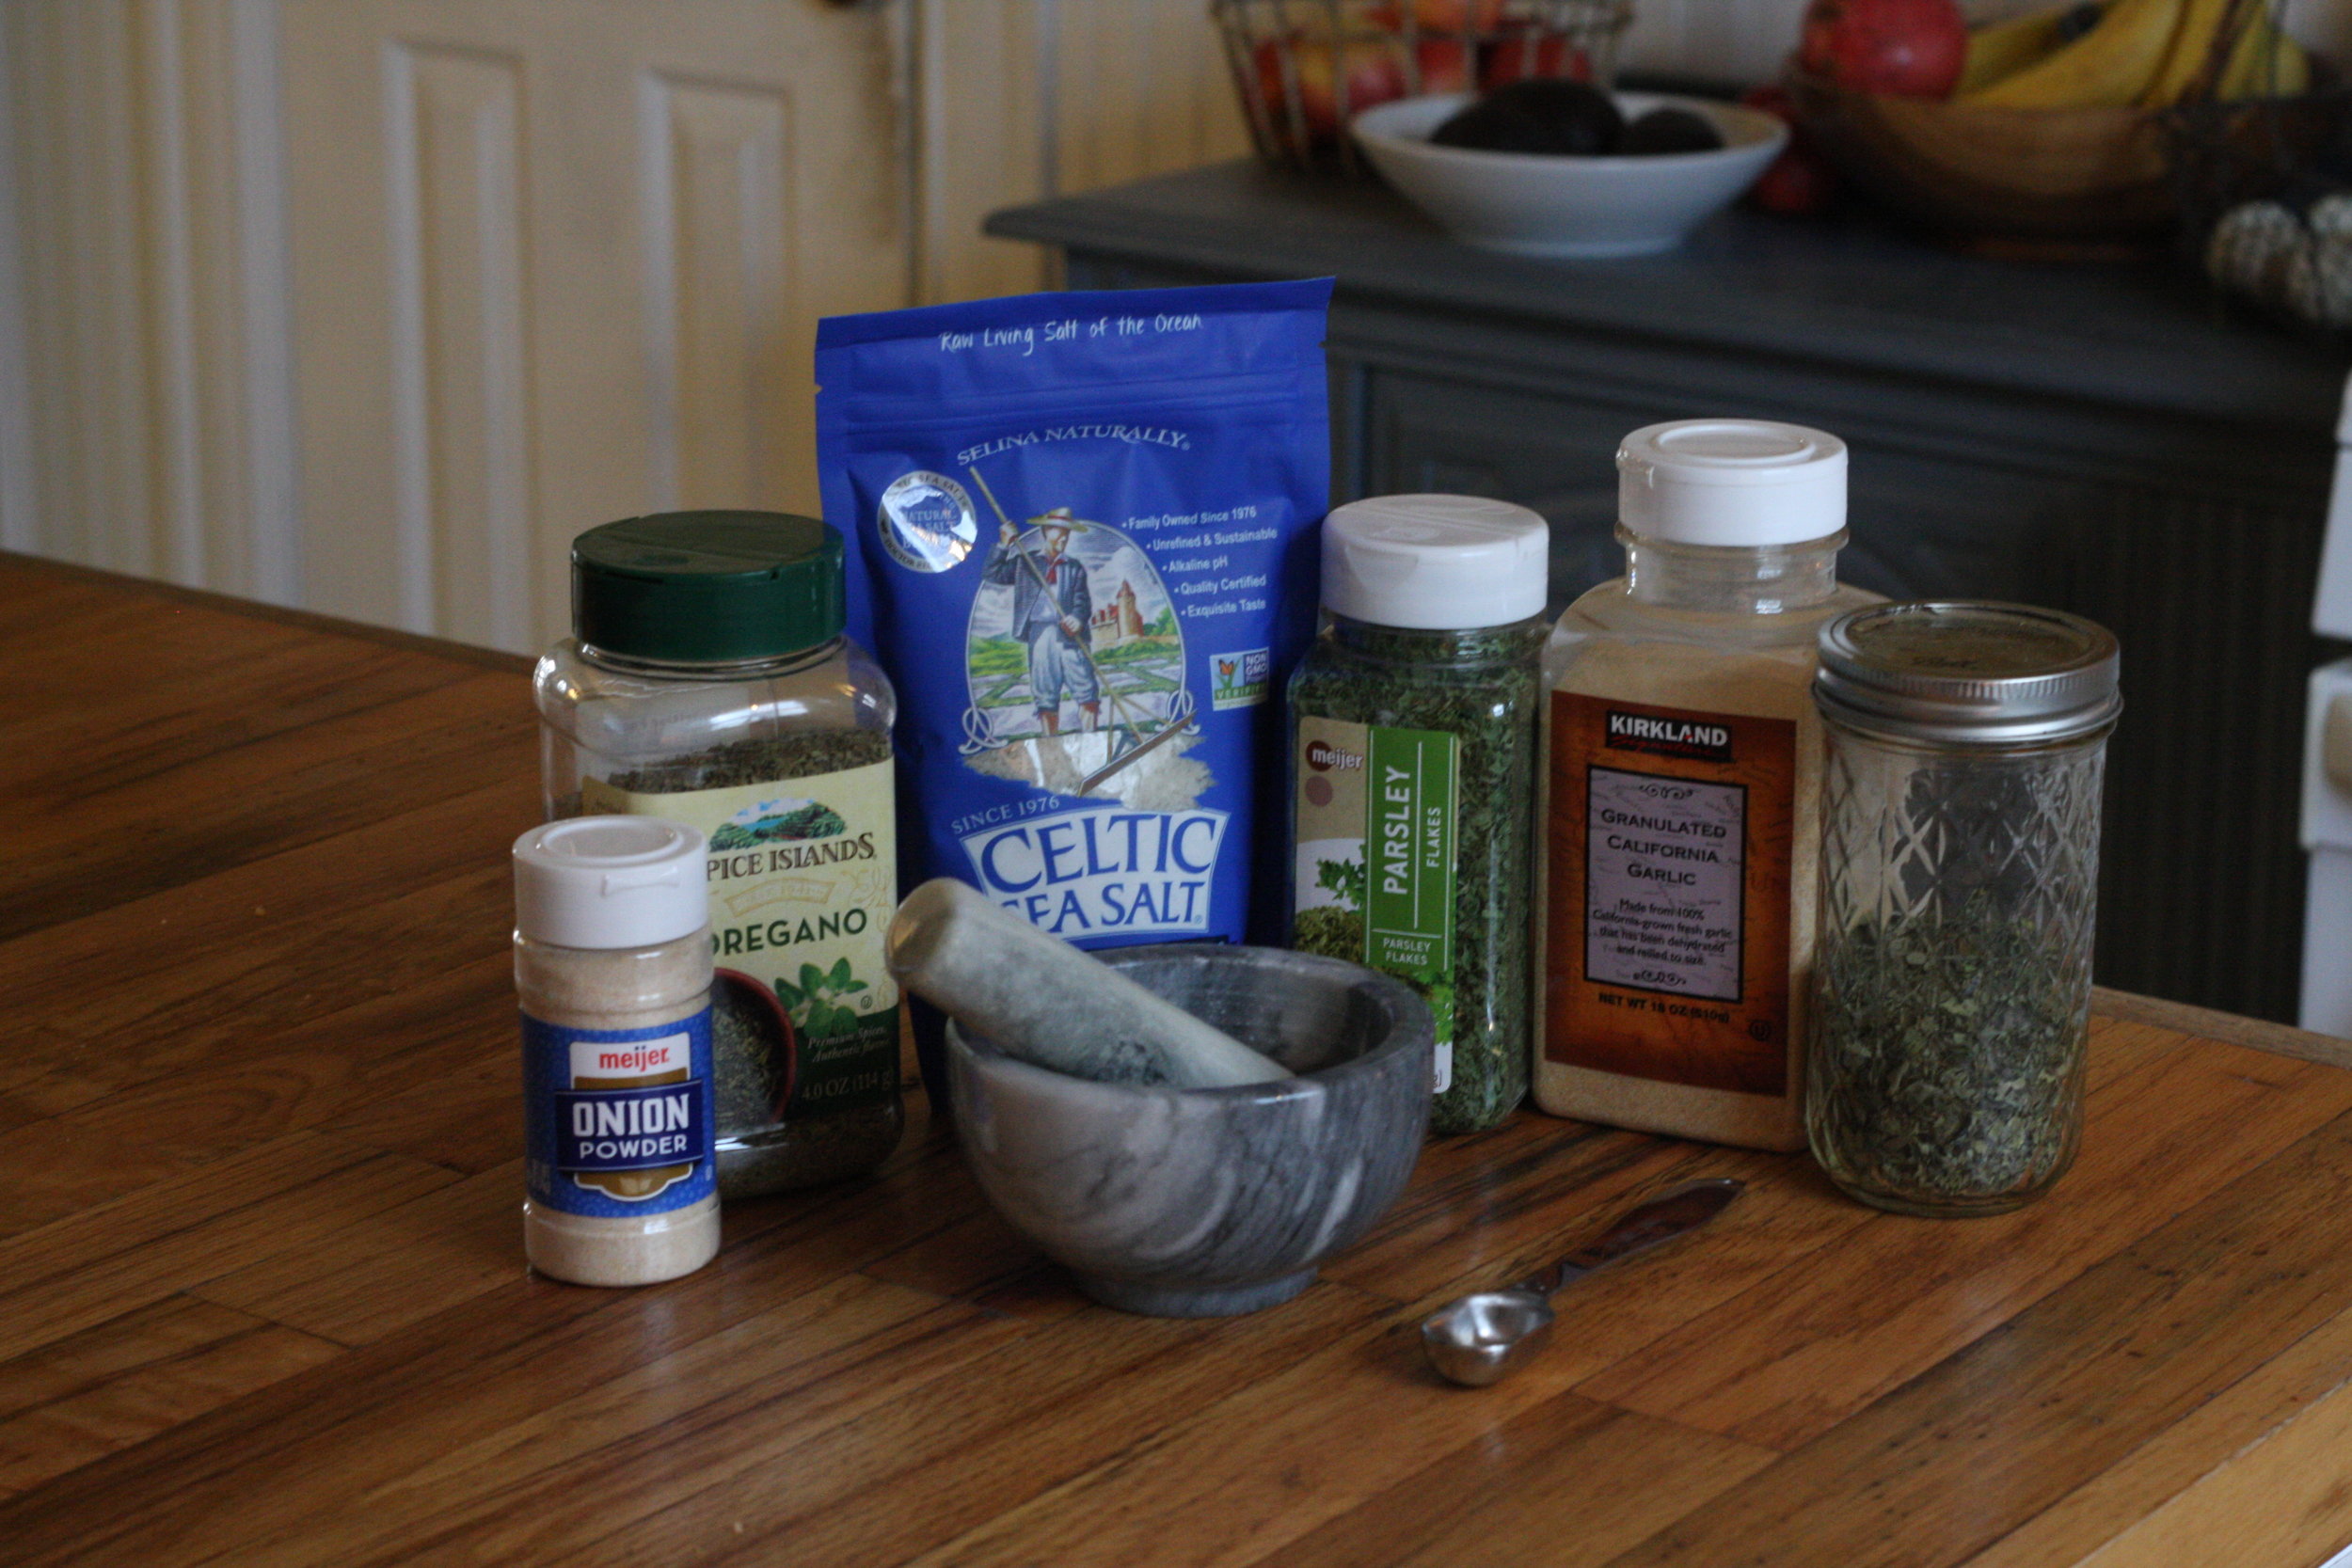
Here’s what you need:
4 TBSP of SEA SALT or KOSHER SALT: My favorite salt to use is “Light Gray Celtic Sea Salt” by Selina Naturally, since it is slightly damp and the herbs adhere well to the salt. Kosher Salt will work too, but you may need to stir in a few drops of water so the herbs will stick to the salt.
1 TSP of ONION POWDER
1 TSP of GARLIC POWDER
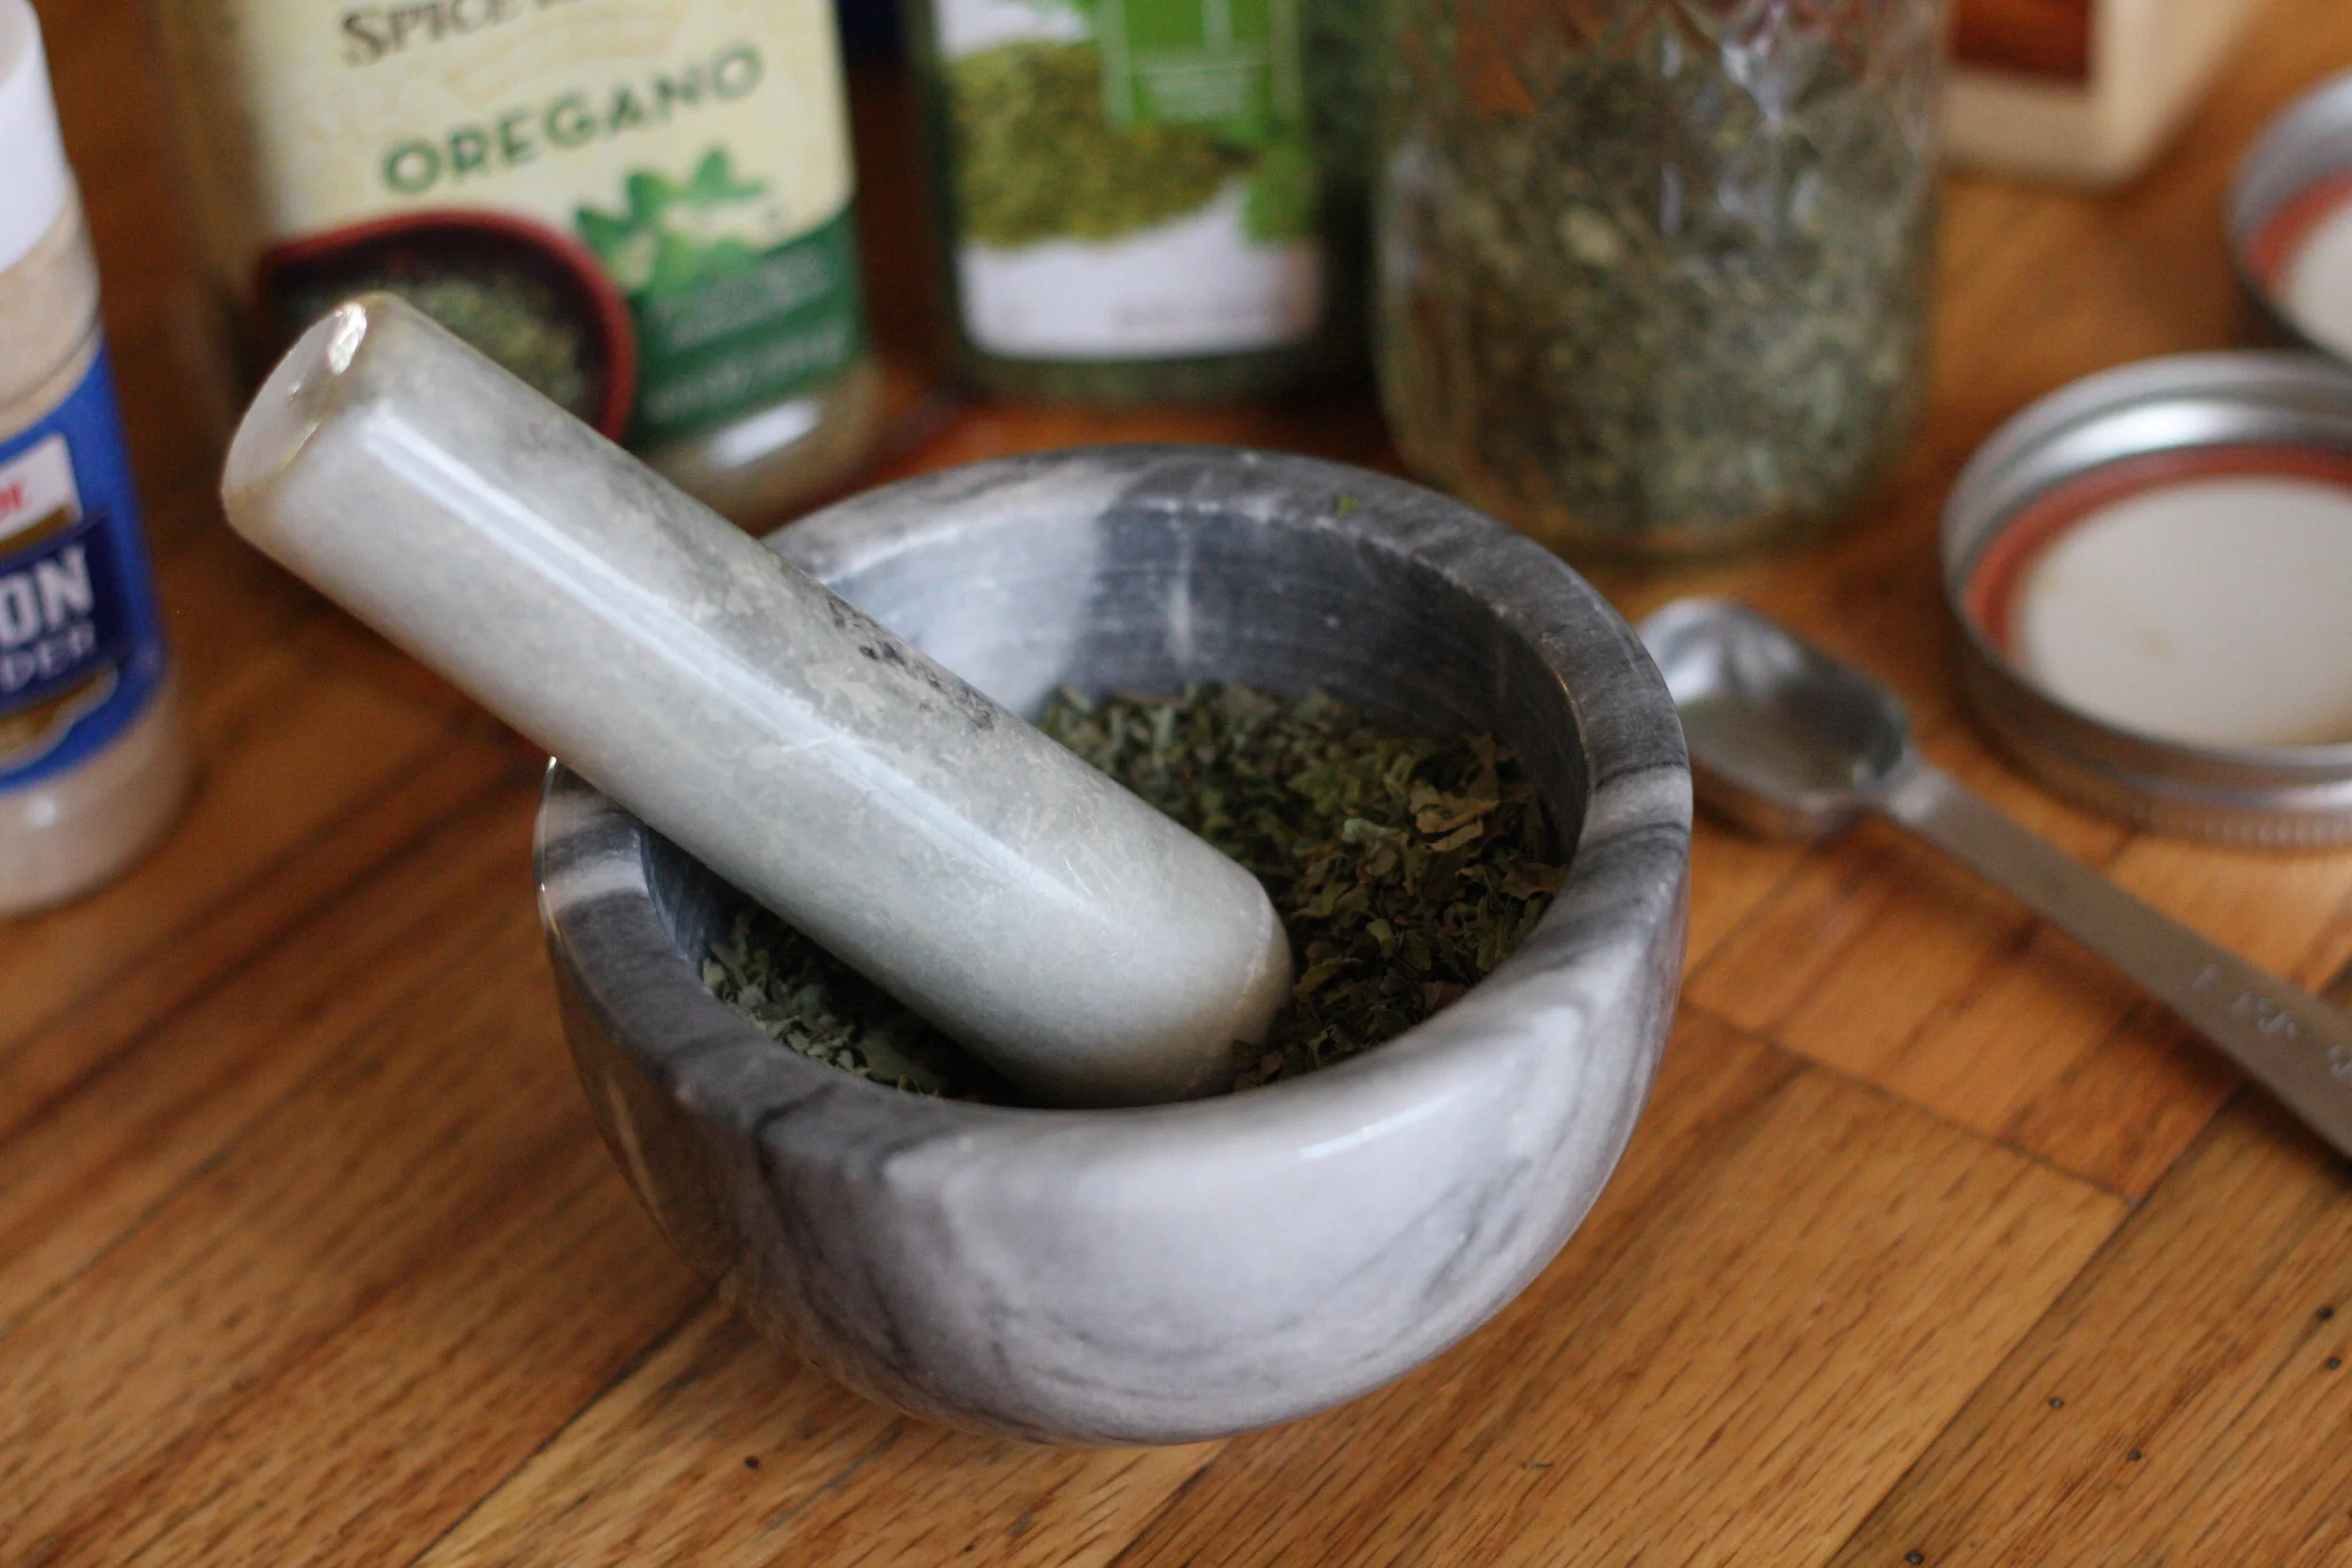
1 TSP of DRIED LEAFY HERBS, crushed into powder: Parsley, basil, sage, thyme, marjoram, chervil, rosemary, etc. are all great choices. Use what you have on hand!
MORTAR AND PESTLE: Use this to grind the herbs into powder. You could also use a clean coffee grinder or place the herbs in a bag and mash them with a rolling pin… but a mortar and pestle is the most fun, especially for kids.
4 OZ MASON JARS (with lids and rings) or similar sized jar
Method:
Scoop the salt into a 4oz Ball mason jar (the smallest size).
Add the Onion Powder and Garlic Powder.
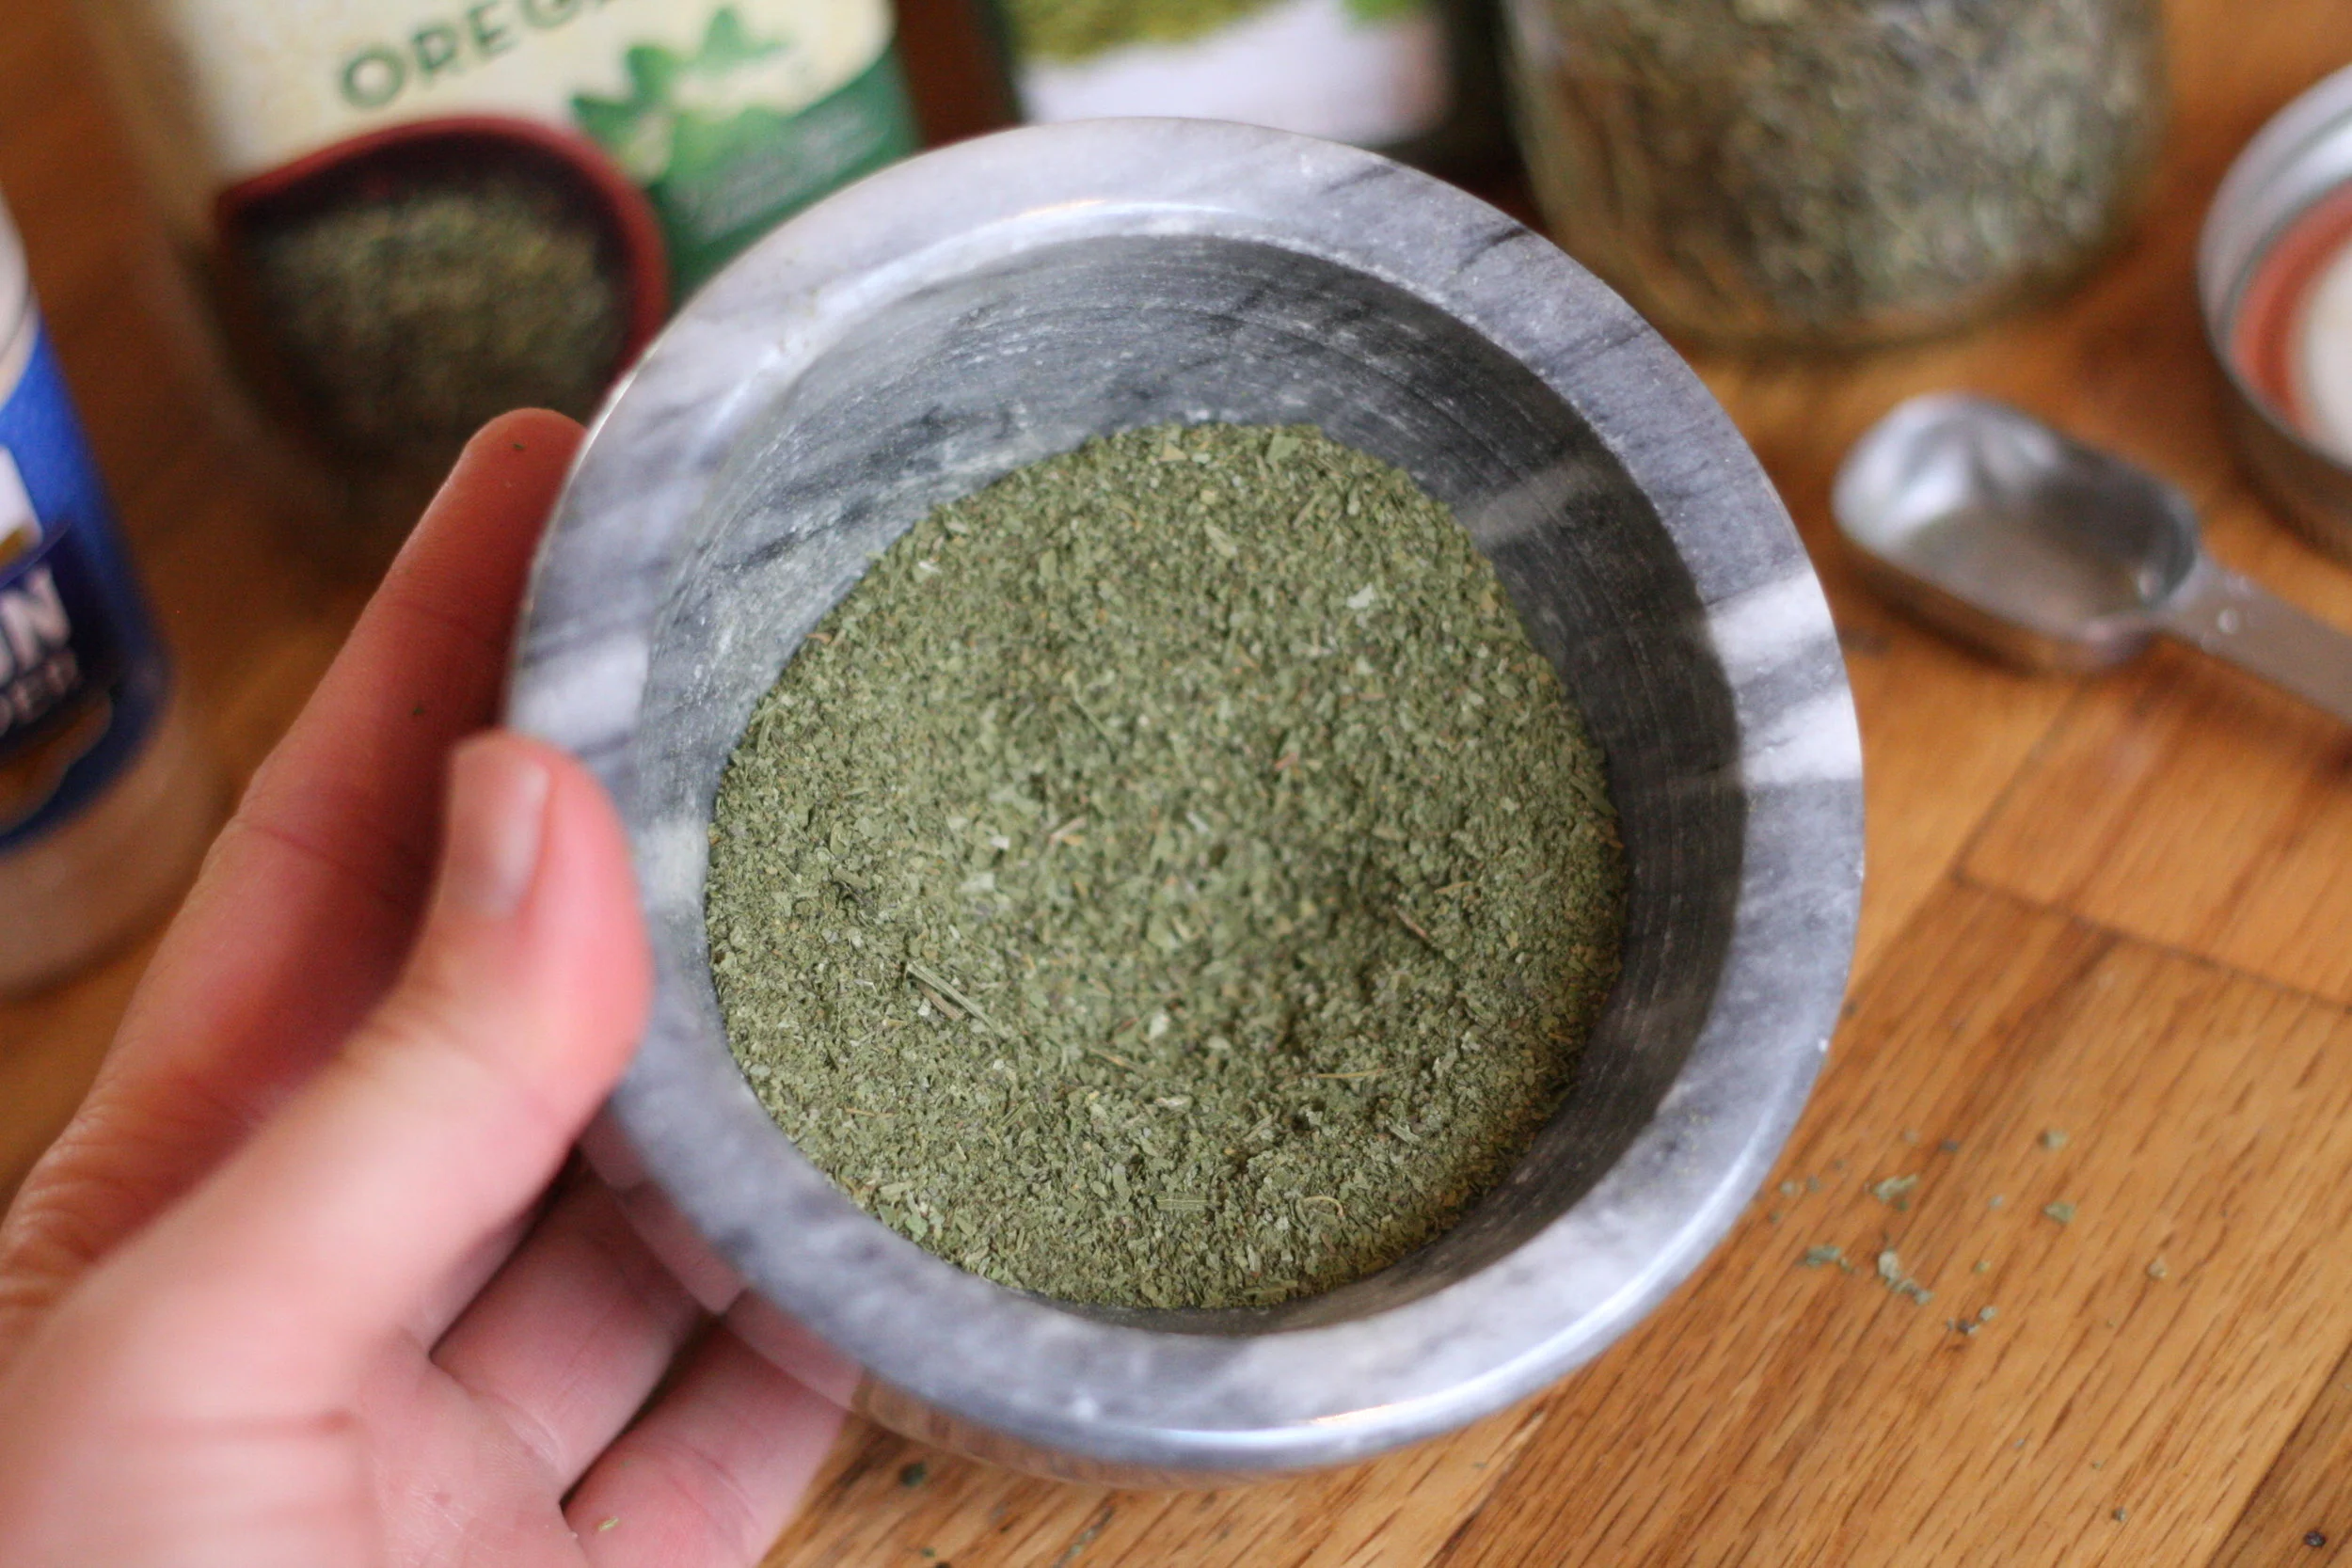
Combine a small amount of each type of herb (about a tsp of each). Using a mortar and pestle, grind the herbs as finely as possible. They should eventually turn into a green powder. You could also use a clean coffee grinder or put the herbs in a plastic baggie and roll over the bag repeatedly with a rolling pin.
Add 1 tsp of the powdered herbs to the jar.
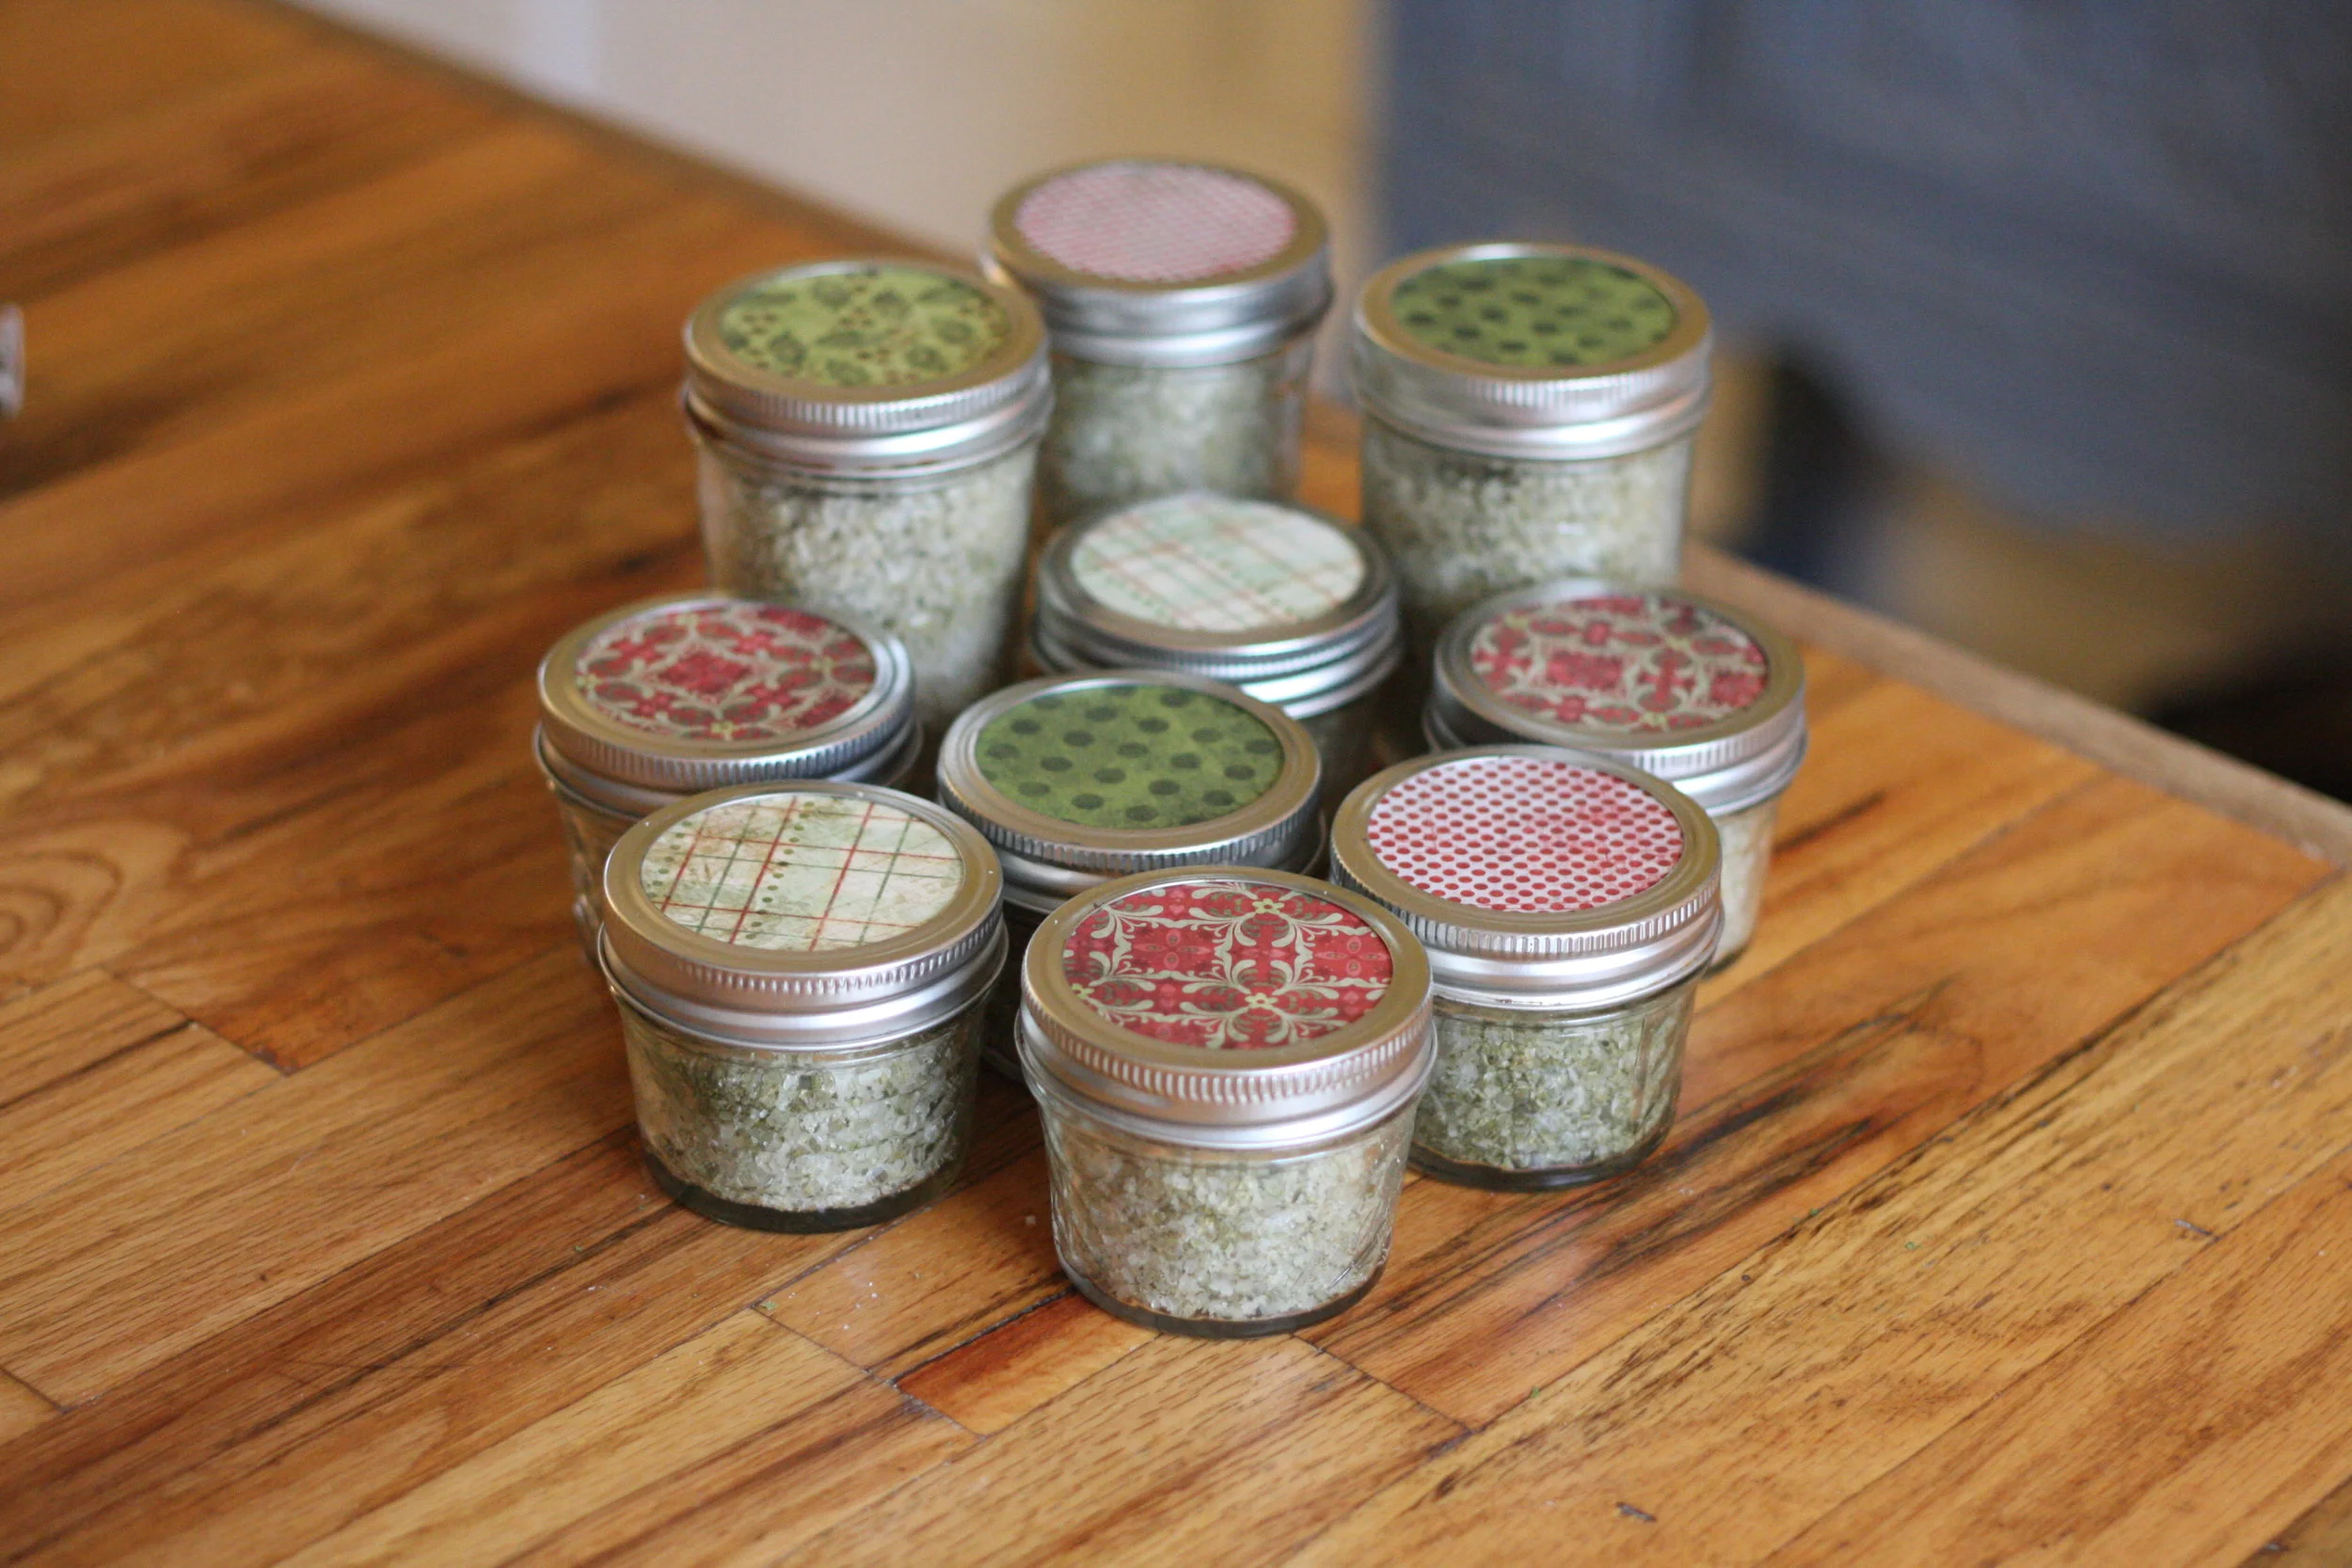
Place the lid and ring on the jar and shake until everything is thoroughly combined. The salt grains will be greenish colored.
Have extra powdered herbs? Store them in a jar and save them for the next batch of Herb Salt!
A Great Gift Idea
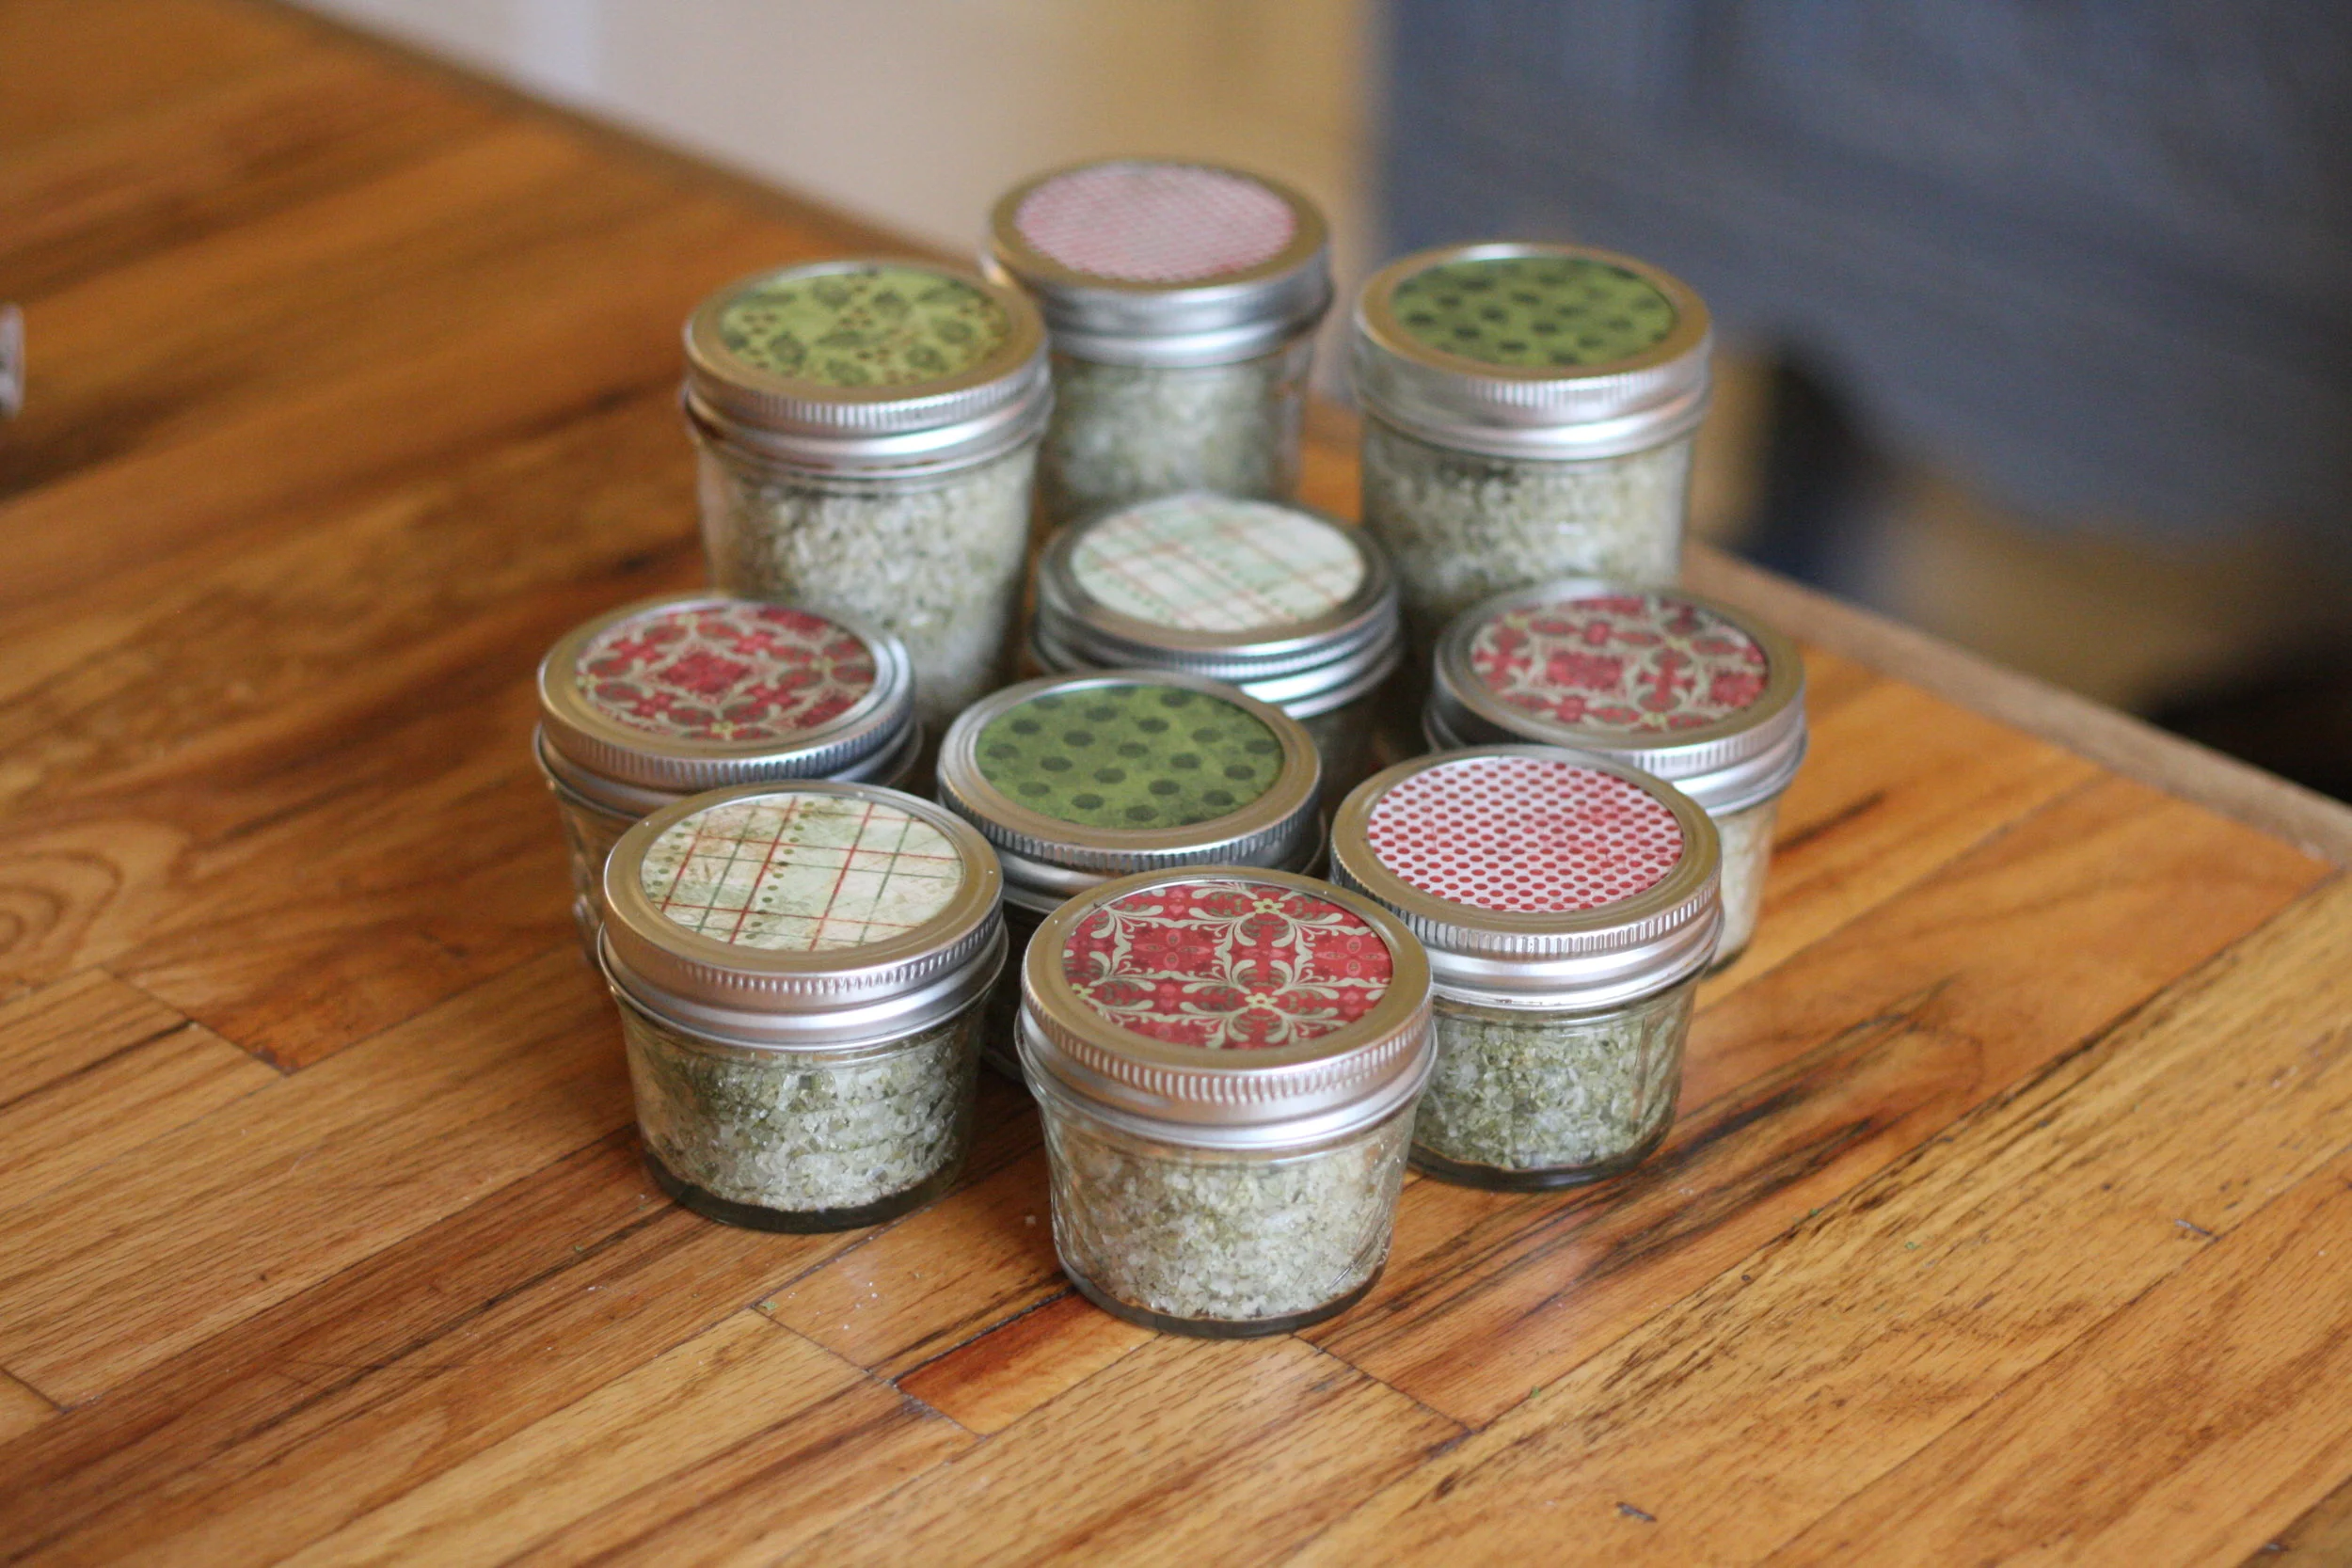
After you done making the herb salt, feel free to get a little fancy with the presentation!
You can keep it simple with mason jar labels or you can dress it up even more.
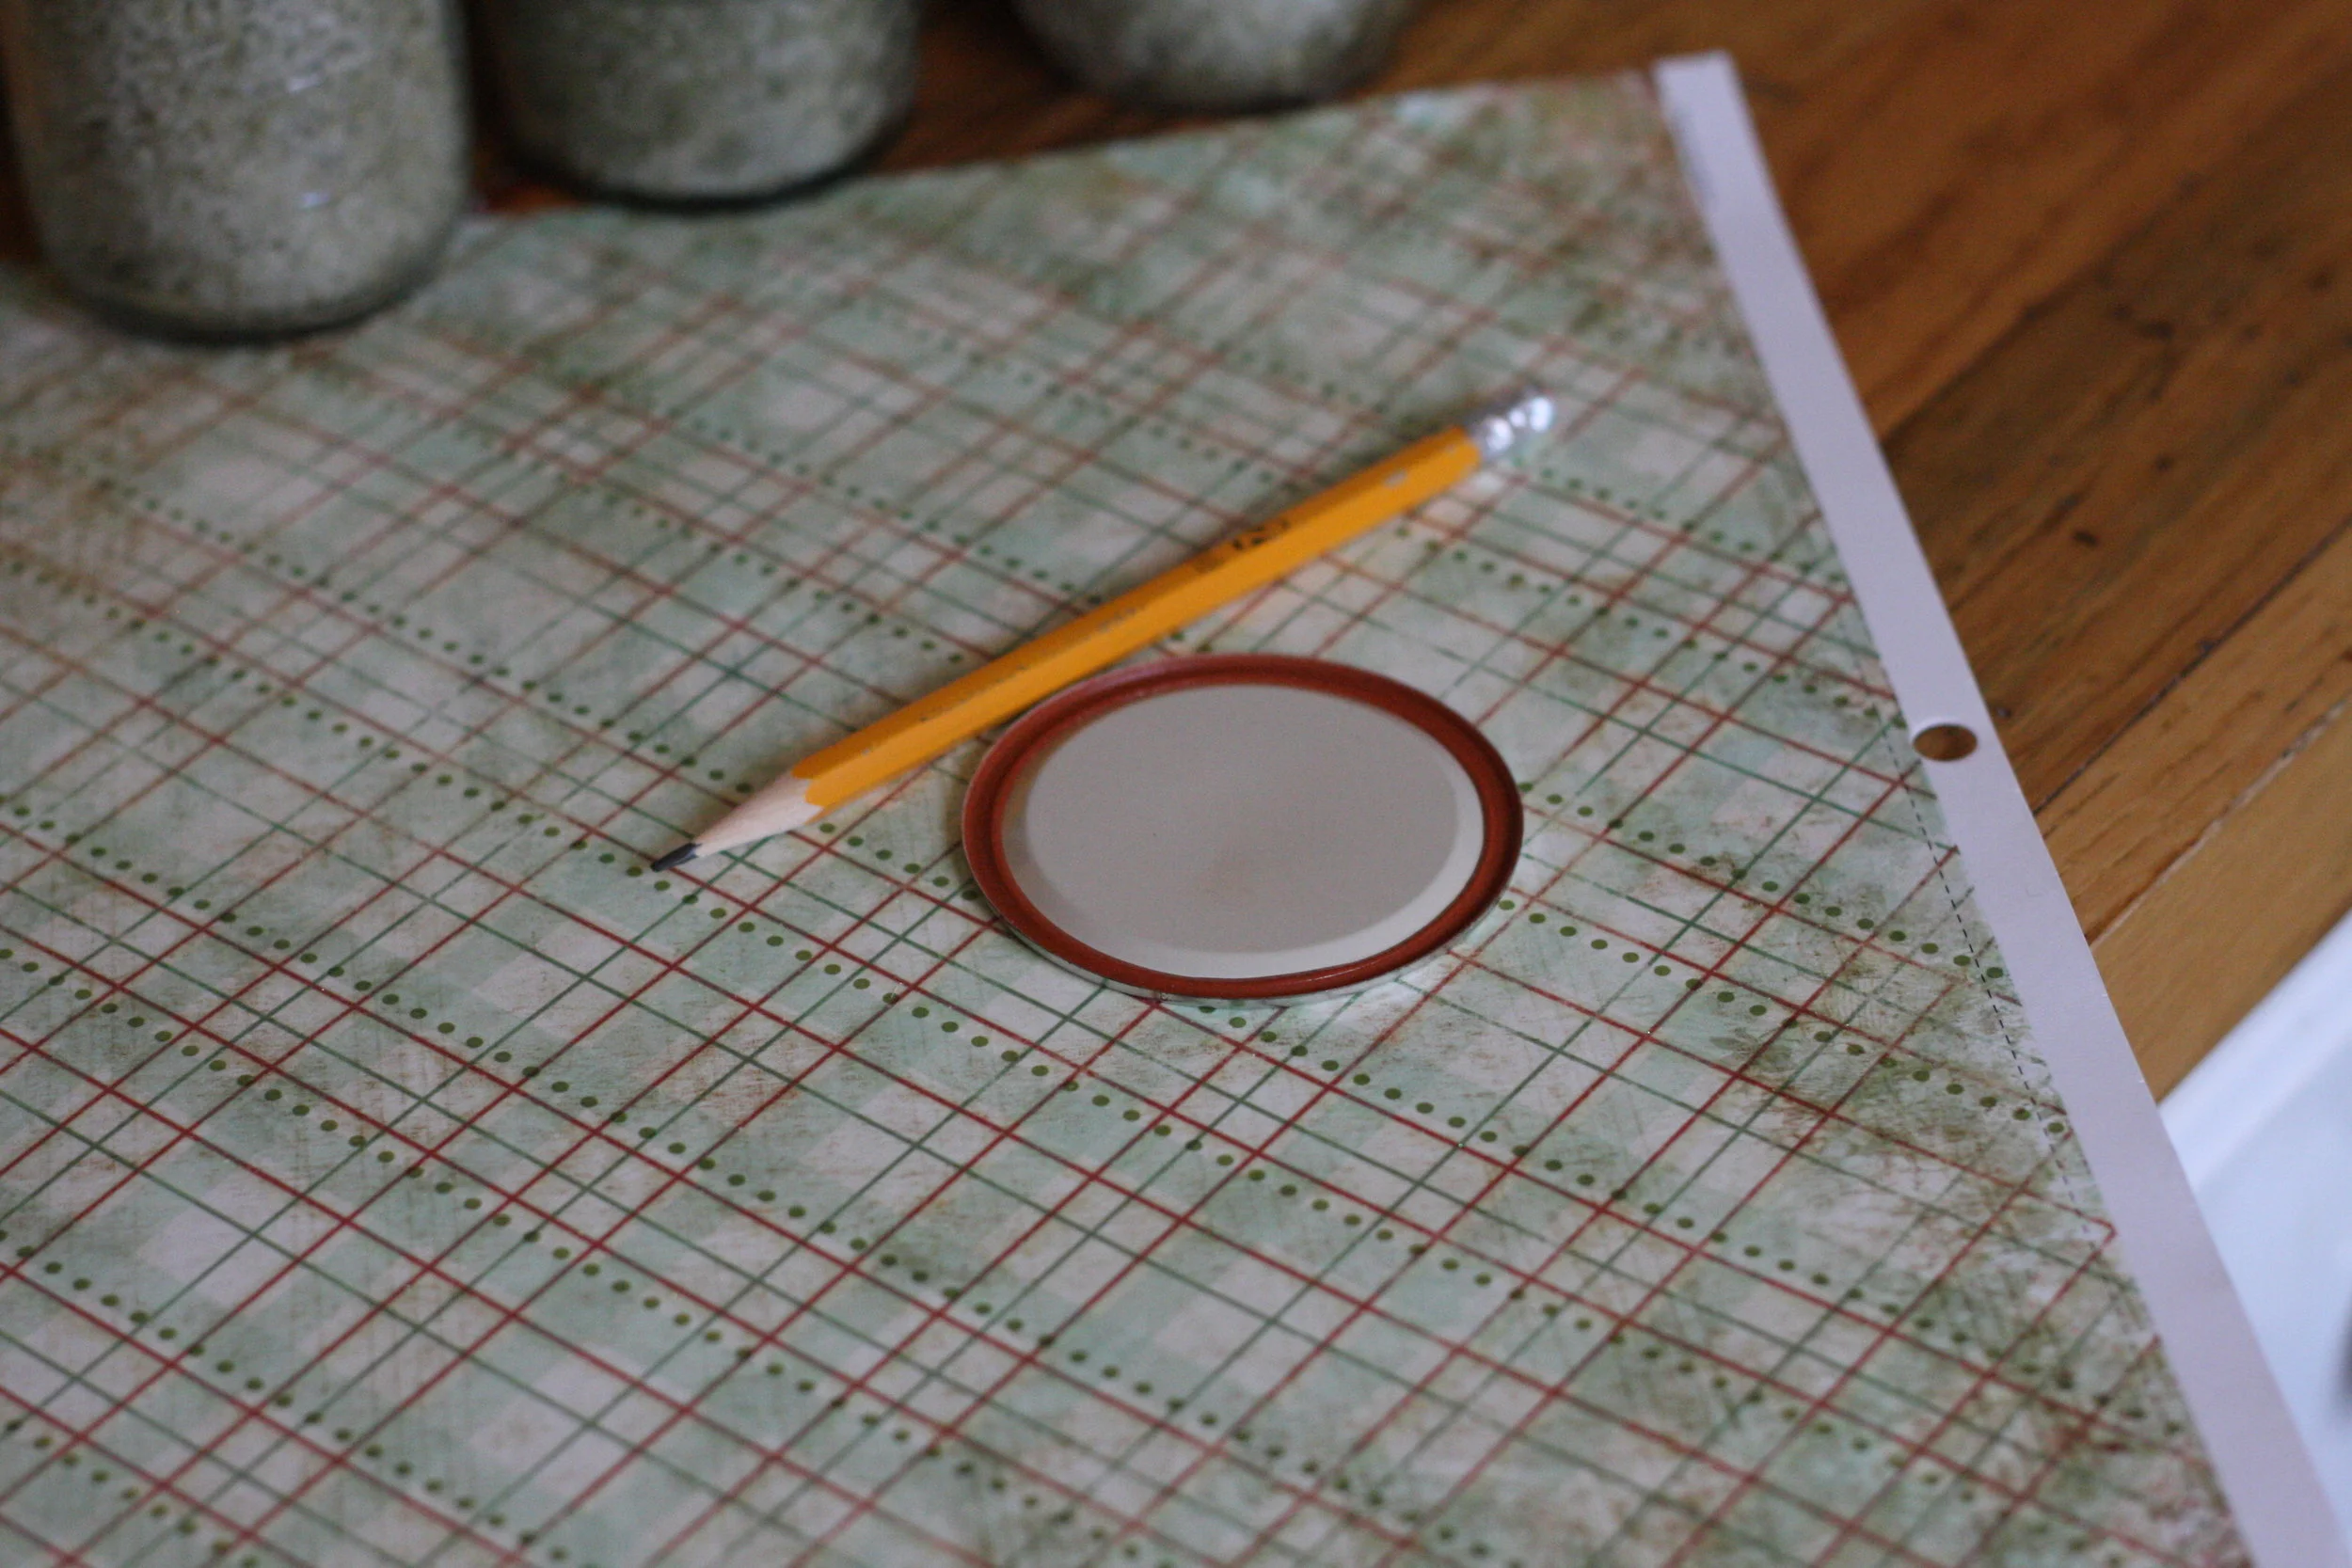
I like to use holiday themed paper to decorate the jars. It’s as simple as tracing the outline of the canning lid onto paper and cutting it out. Ta-da! Simple, easy and beautiful.
Now that you’ve made it, why not make a few more jars to keep on hand? This Herb Salt is the perfect gift any time of the year and your gift recipients will love it.
This herb salt makes a great gift for:
Bus Drivers
Teachers
Hair Dresser
Your mail carrier
Family
Friends
Myself… I love it too! Ha!
Anyone you want to make feel special.
How to Use the Herb Salt
Seriously, this stuff is so good, you’ll find yourself using it on everything! Here are a few suggestions to get you started:
Roasted or Grilled Meats
Marinades
Roasted Vegetables
Soups or stews
Dips
Casseroles
Scrambled eggs/quiche/frittata
Anything that needs a little extra flavor!
Hope you enjoy the recipe! Let me know if you try it!
Do you have any “go-to” last minute gift ideas? I’d love to hear them! I’m always trying to build my “Gift Idea” list.
If you haven’t checked out the recipe for my DIY Chocolate Peppermint Balm, be sure to take a peek. Everybody LOVES it.