
Hobbit Hole Root Cellar
Hobbit Hole Root Cellar
“In a hole in the ground there lived a hobbit. Not a nasty, dirty, wet hole, filled with the ends of worms and an oozy smell, nor yet a dry, bare, sandy hole with nothing in it to sit down on or to eat: it was a hobbit-hole, and that means comfort.” - J.R.R. Tolkien
Anyone who has grown Dahlias knows that storing the tubers over the winter is TRICKY BUSINESS. They can be quite finicky, and unfortunately, they can easily rot or dry out… which can mean losses of hundreds or even thousands of dollars. Eek!
For years, we stored our Dahlia tubers in my parent’s basement garage, where the conditions were perfect - cool, humid and never dipping below freezing, even the winters where there were lows around -20 F! We were grateful to have such an ideal storage space, despite having to box up and haul all the tubers back and forth each year (it took several trips!).
And then… my parents sold their house this summer. After a few weeks of fretting (“What are we going to do NOW?!?”), my husband decided to build a root cellar on our farm.
Historically, most farms had root cellars at one time. They were typically built into hillsides, with a door for access. The earth insulated the root cellar, keeping the contents cool and humid, but not freezing or wet.
Unfortunately, we don’t really have any hills on our little 3 acre farm… so my husband MADE one using our trusty little blue tractor.
When my husband told me he wanted to make root cellar, my one request was “Can we make it look like a Hobbit House?” Obviously, I have my priorities straight. Ha!
I may or may not be a WEE BIT obsessed with all things Middle Earth (the setting of the classic book “The Hobbit” and the “Lord of the Rings” series by J.R.R. Tolkien).
Let me tell you the story of how the Hobbit Hole Root Cellar came to be at Three Acre Farm. Ready to come on an Unexpected Journey? Sorry, I can’t help myself…
First order of business: Tracking down some really big steel tanks to bury underground. My husband, John, who is the REAL hero of this story, tracked them down on Facebook Marketplace.
These were tanks used in the natural gas extraction process and are about 8’ in diameter and 10’ long. So yeah. Big.
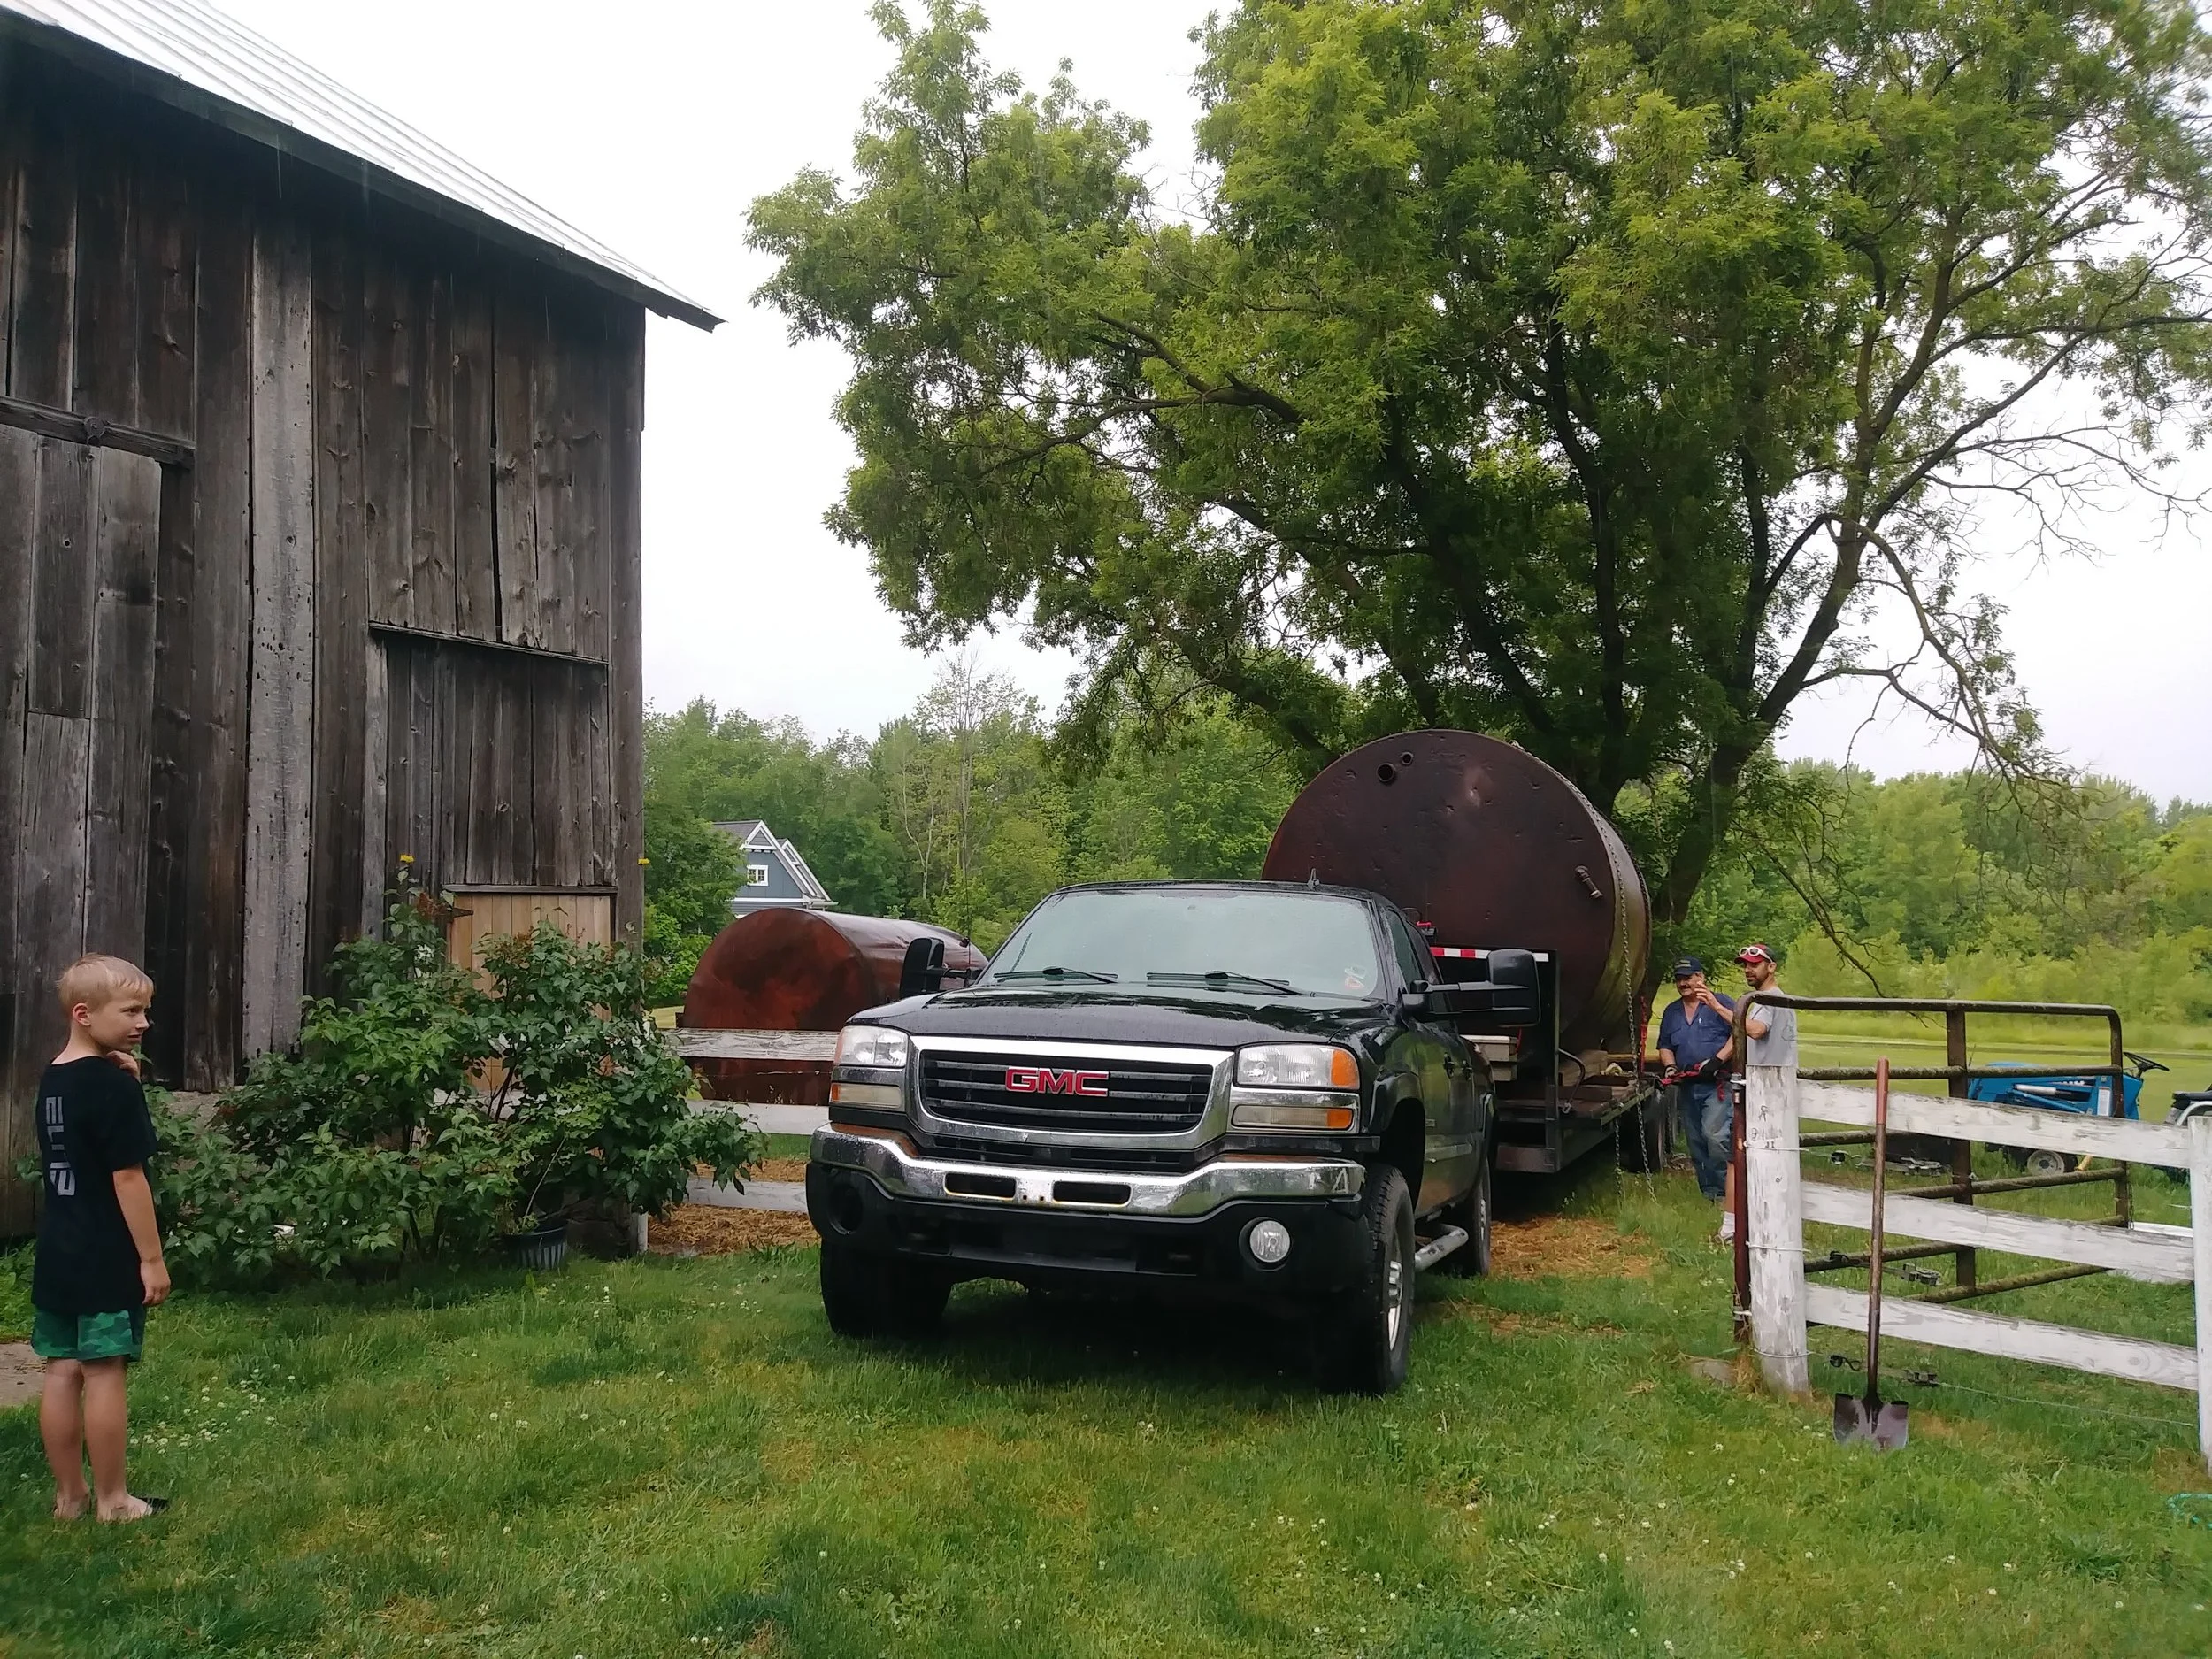
Once we had the tanks, it was time to cut doors in them. John designed the root cellar so that the tanks were end to end to create one long space… like a long tube.

Next up, he painted the outside of the tanks with foundation coating to help prevent further rusting.
Then it was time to dig.
So… digging the hole for the tanks was somewhat time consuming. Our tractor, trusty “Little Blue” was a bit undersized for the job, but she managed!
I took the photo below for scale, so you can see how deep the hole is. Also, have I mentioned that our farm is basically a sand dune?
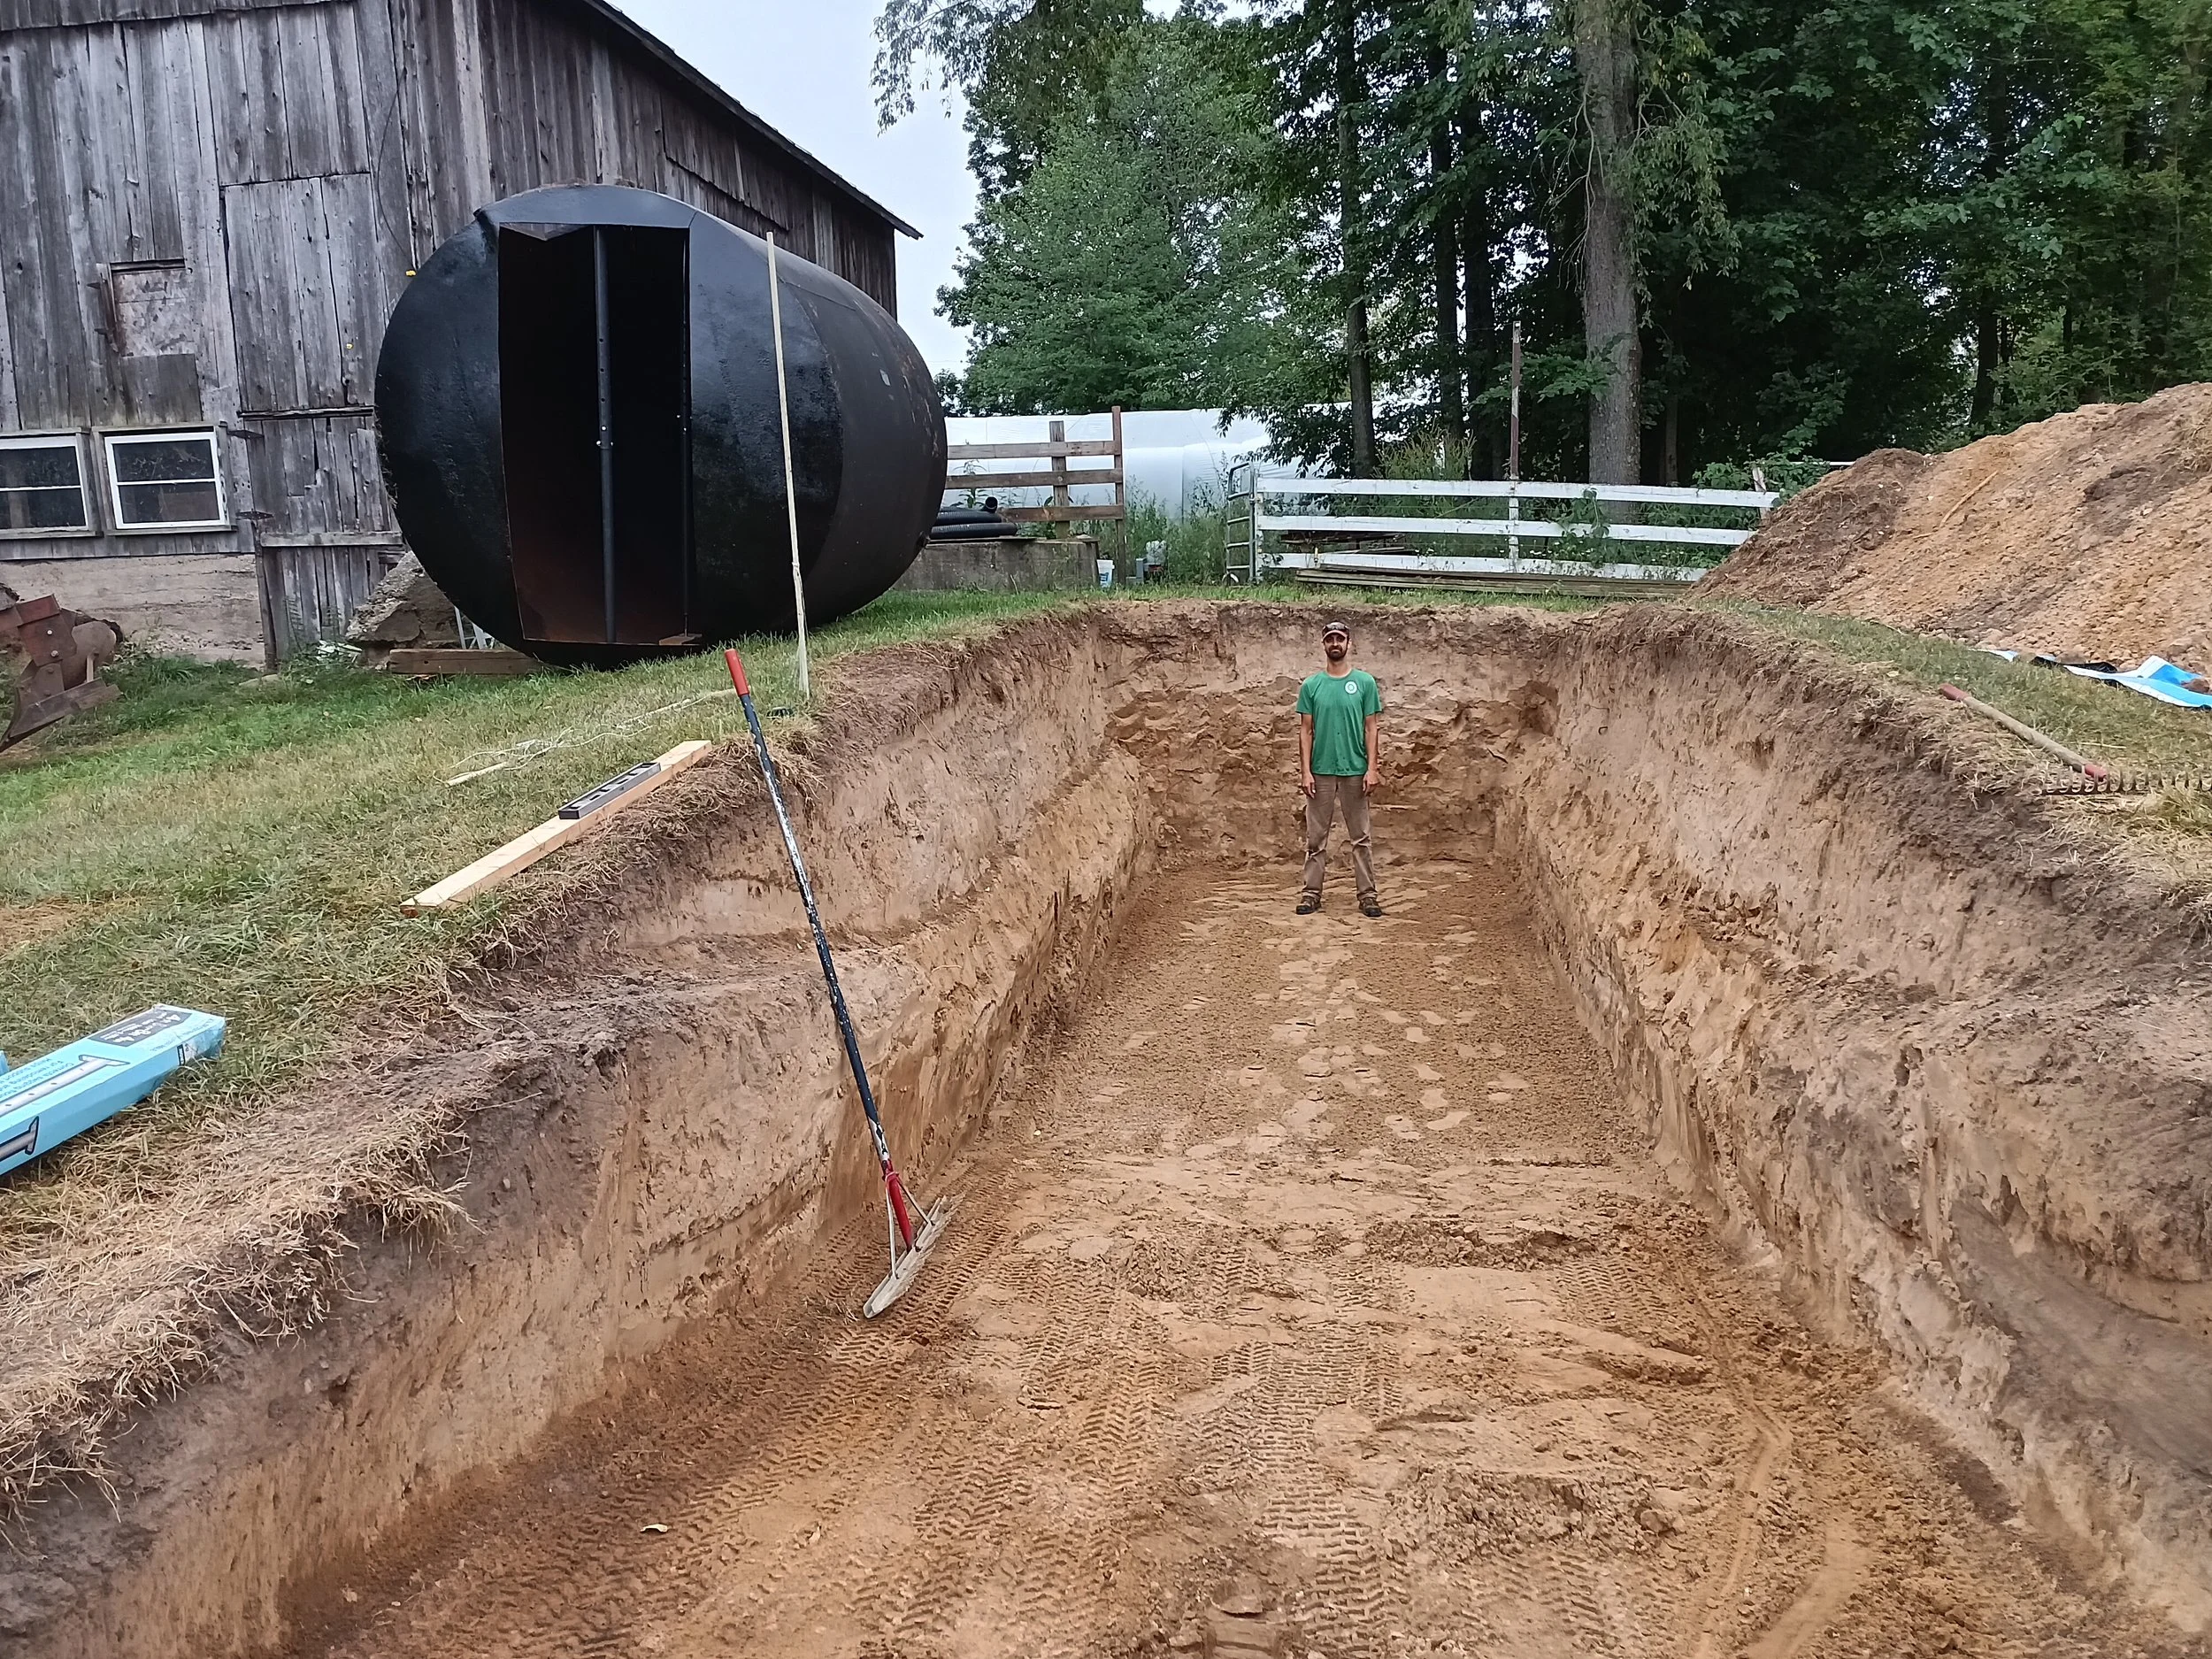
And then somehow (not quite sure how, but I was watching!), he managed to use “Little Blue” to push the tanks into the hole, making sure they rolled in at just the right angle that the door was in the proper place (well, they needed a tiny bit of adjustment). My husband is pure magic.

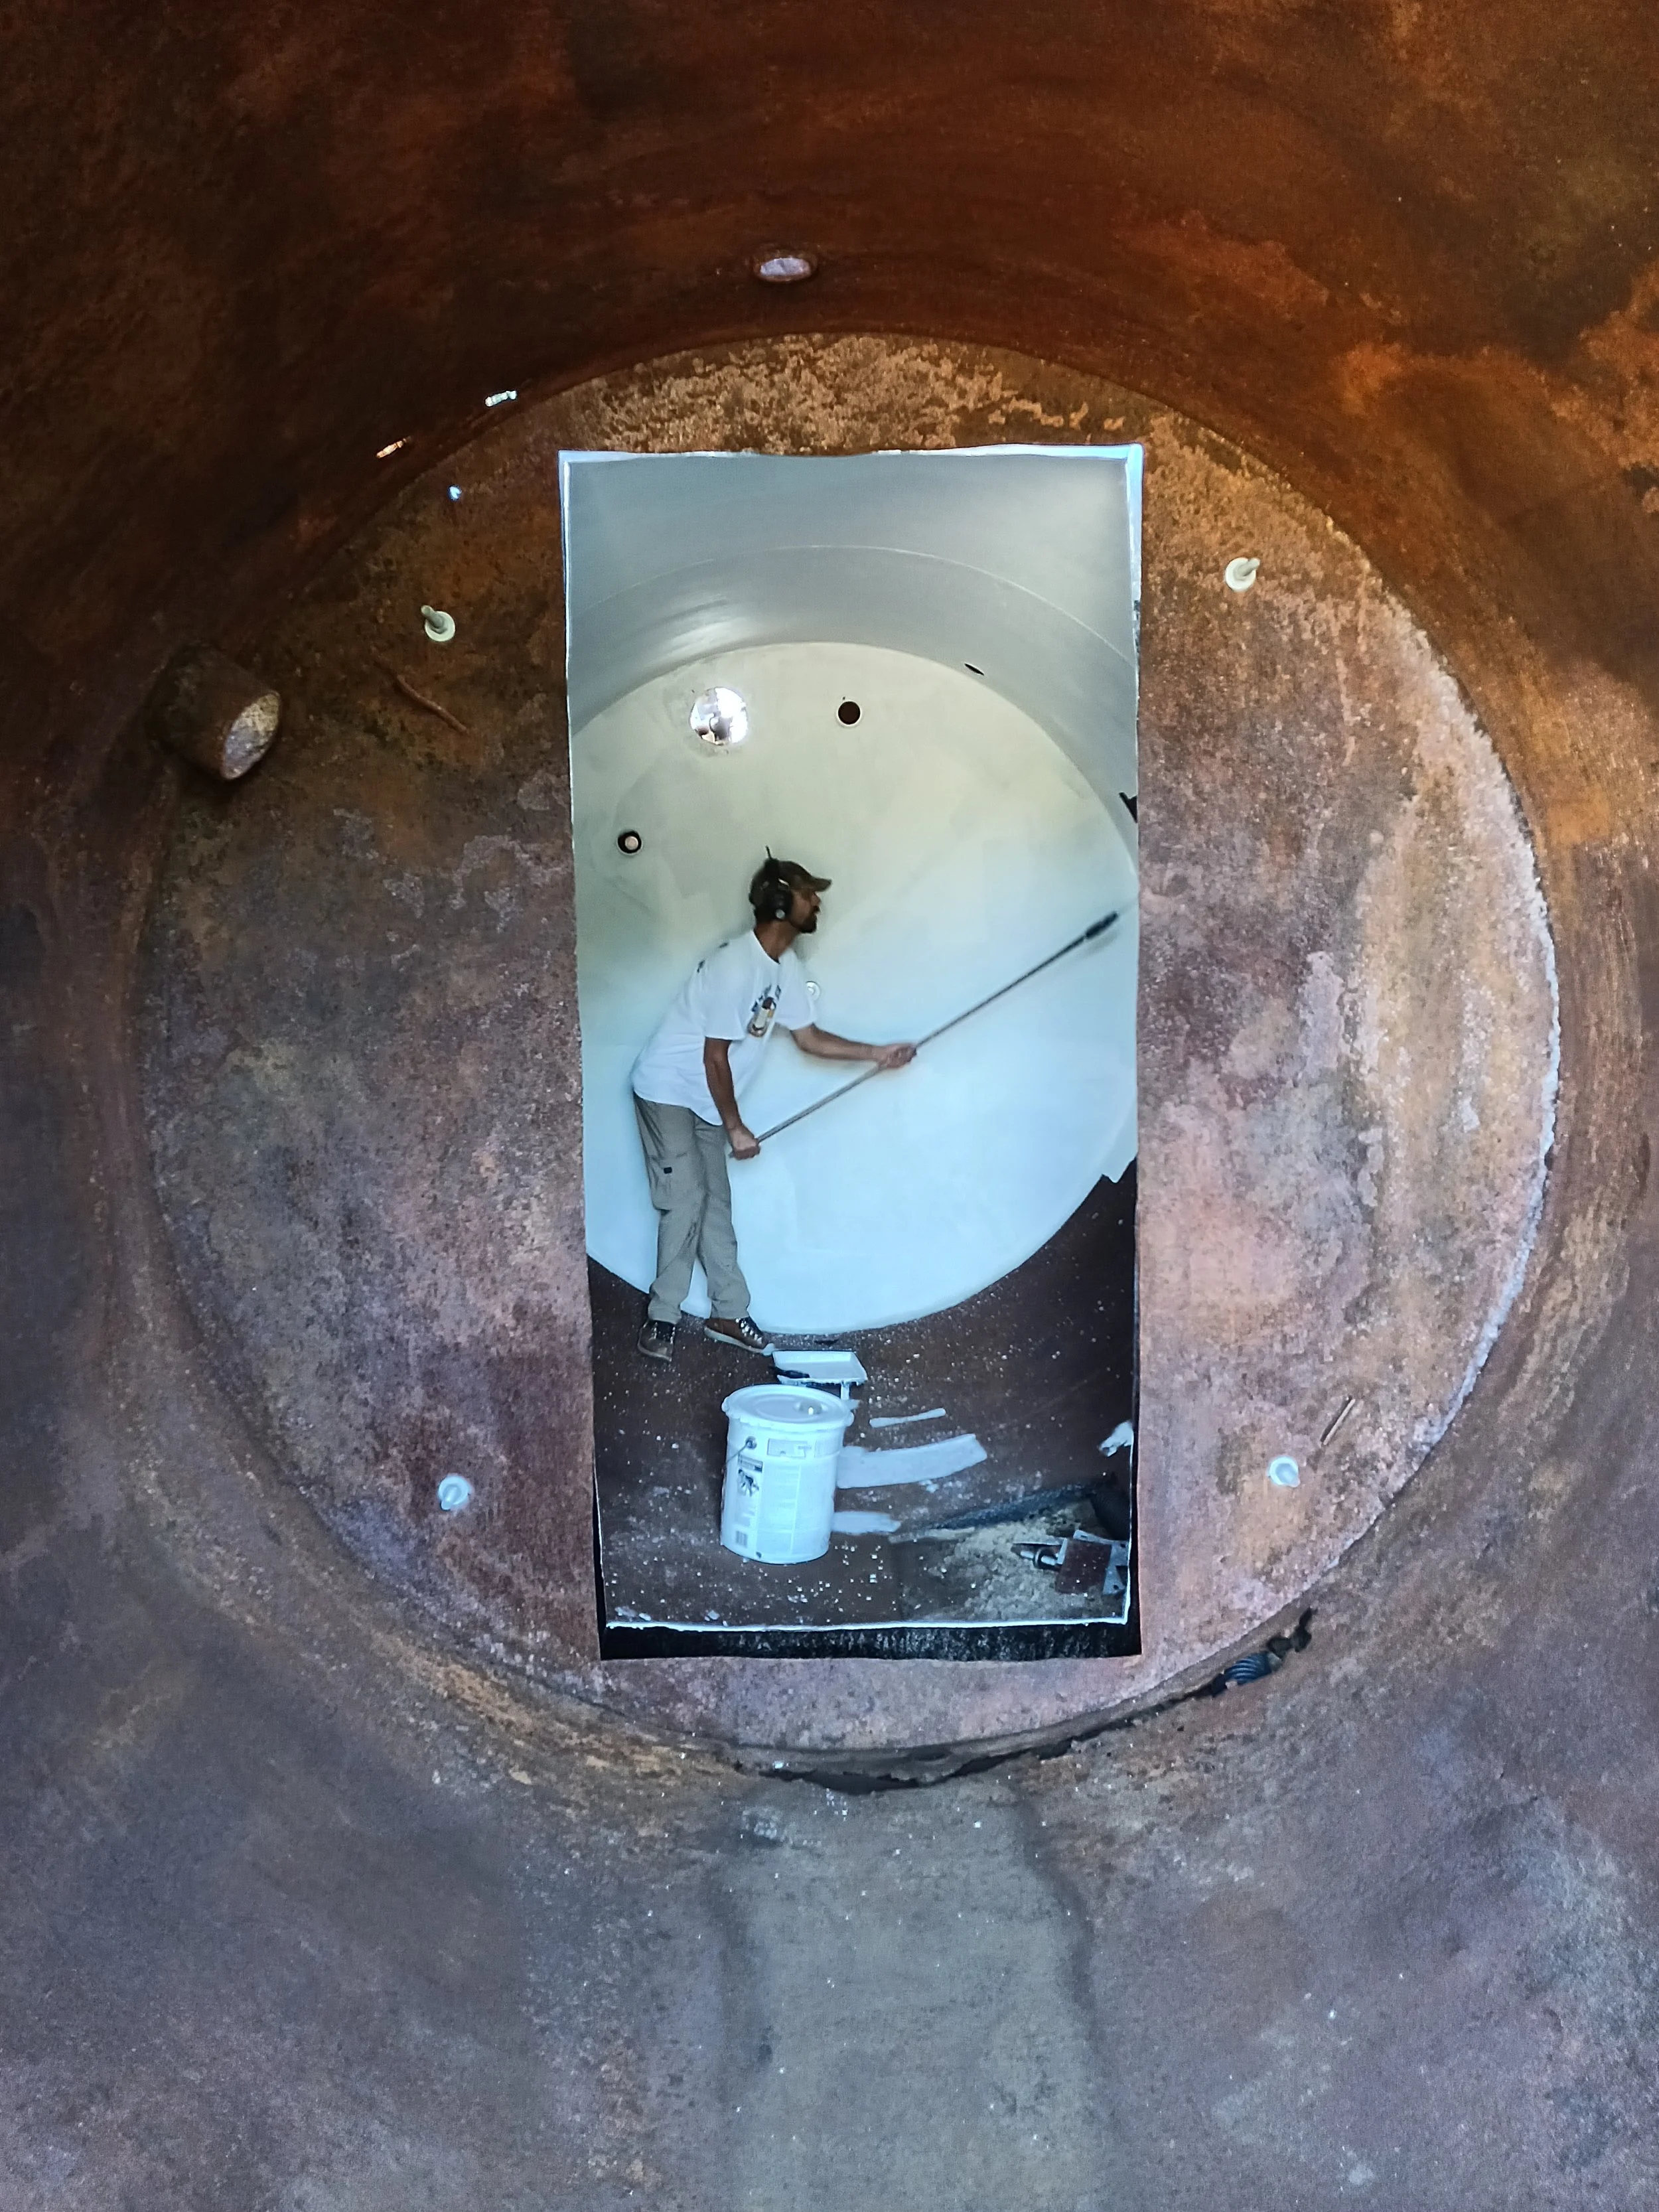
Then he painted the inside of the tanks so it didn’t feel quite so creepy. ;)
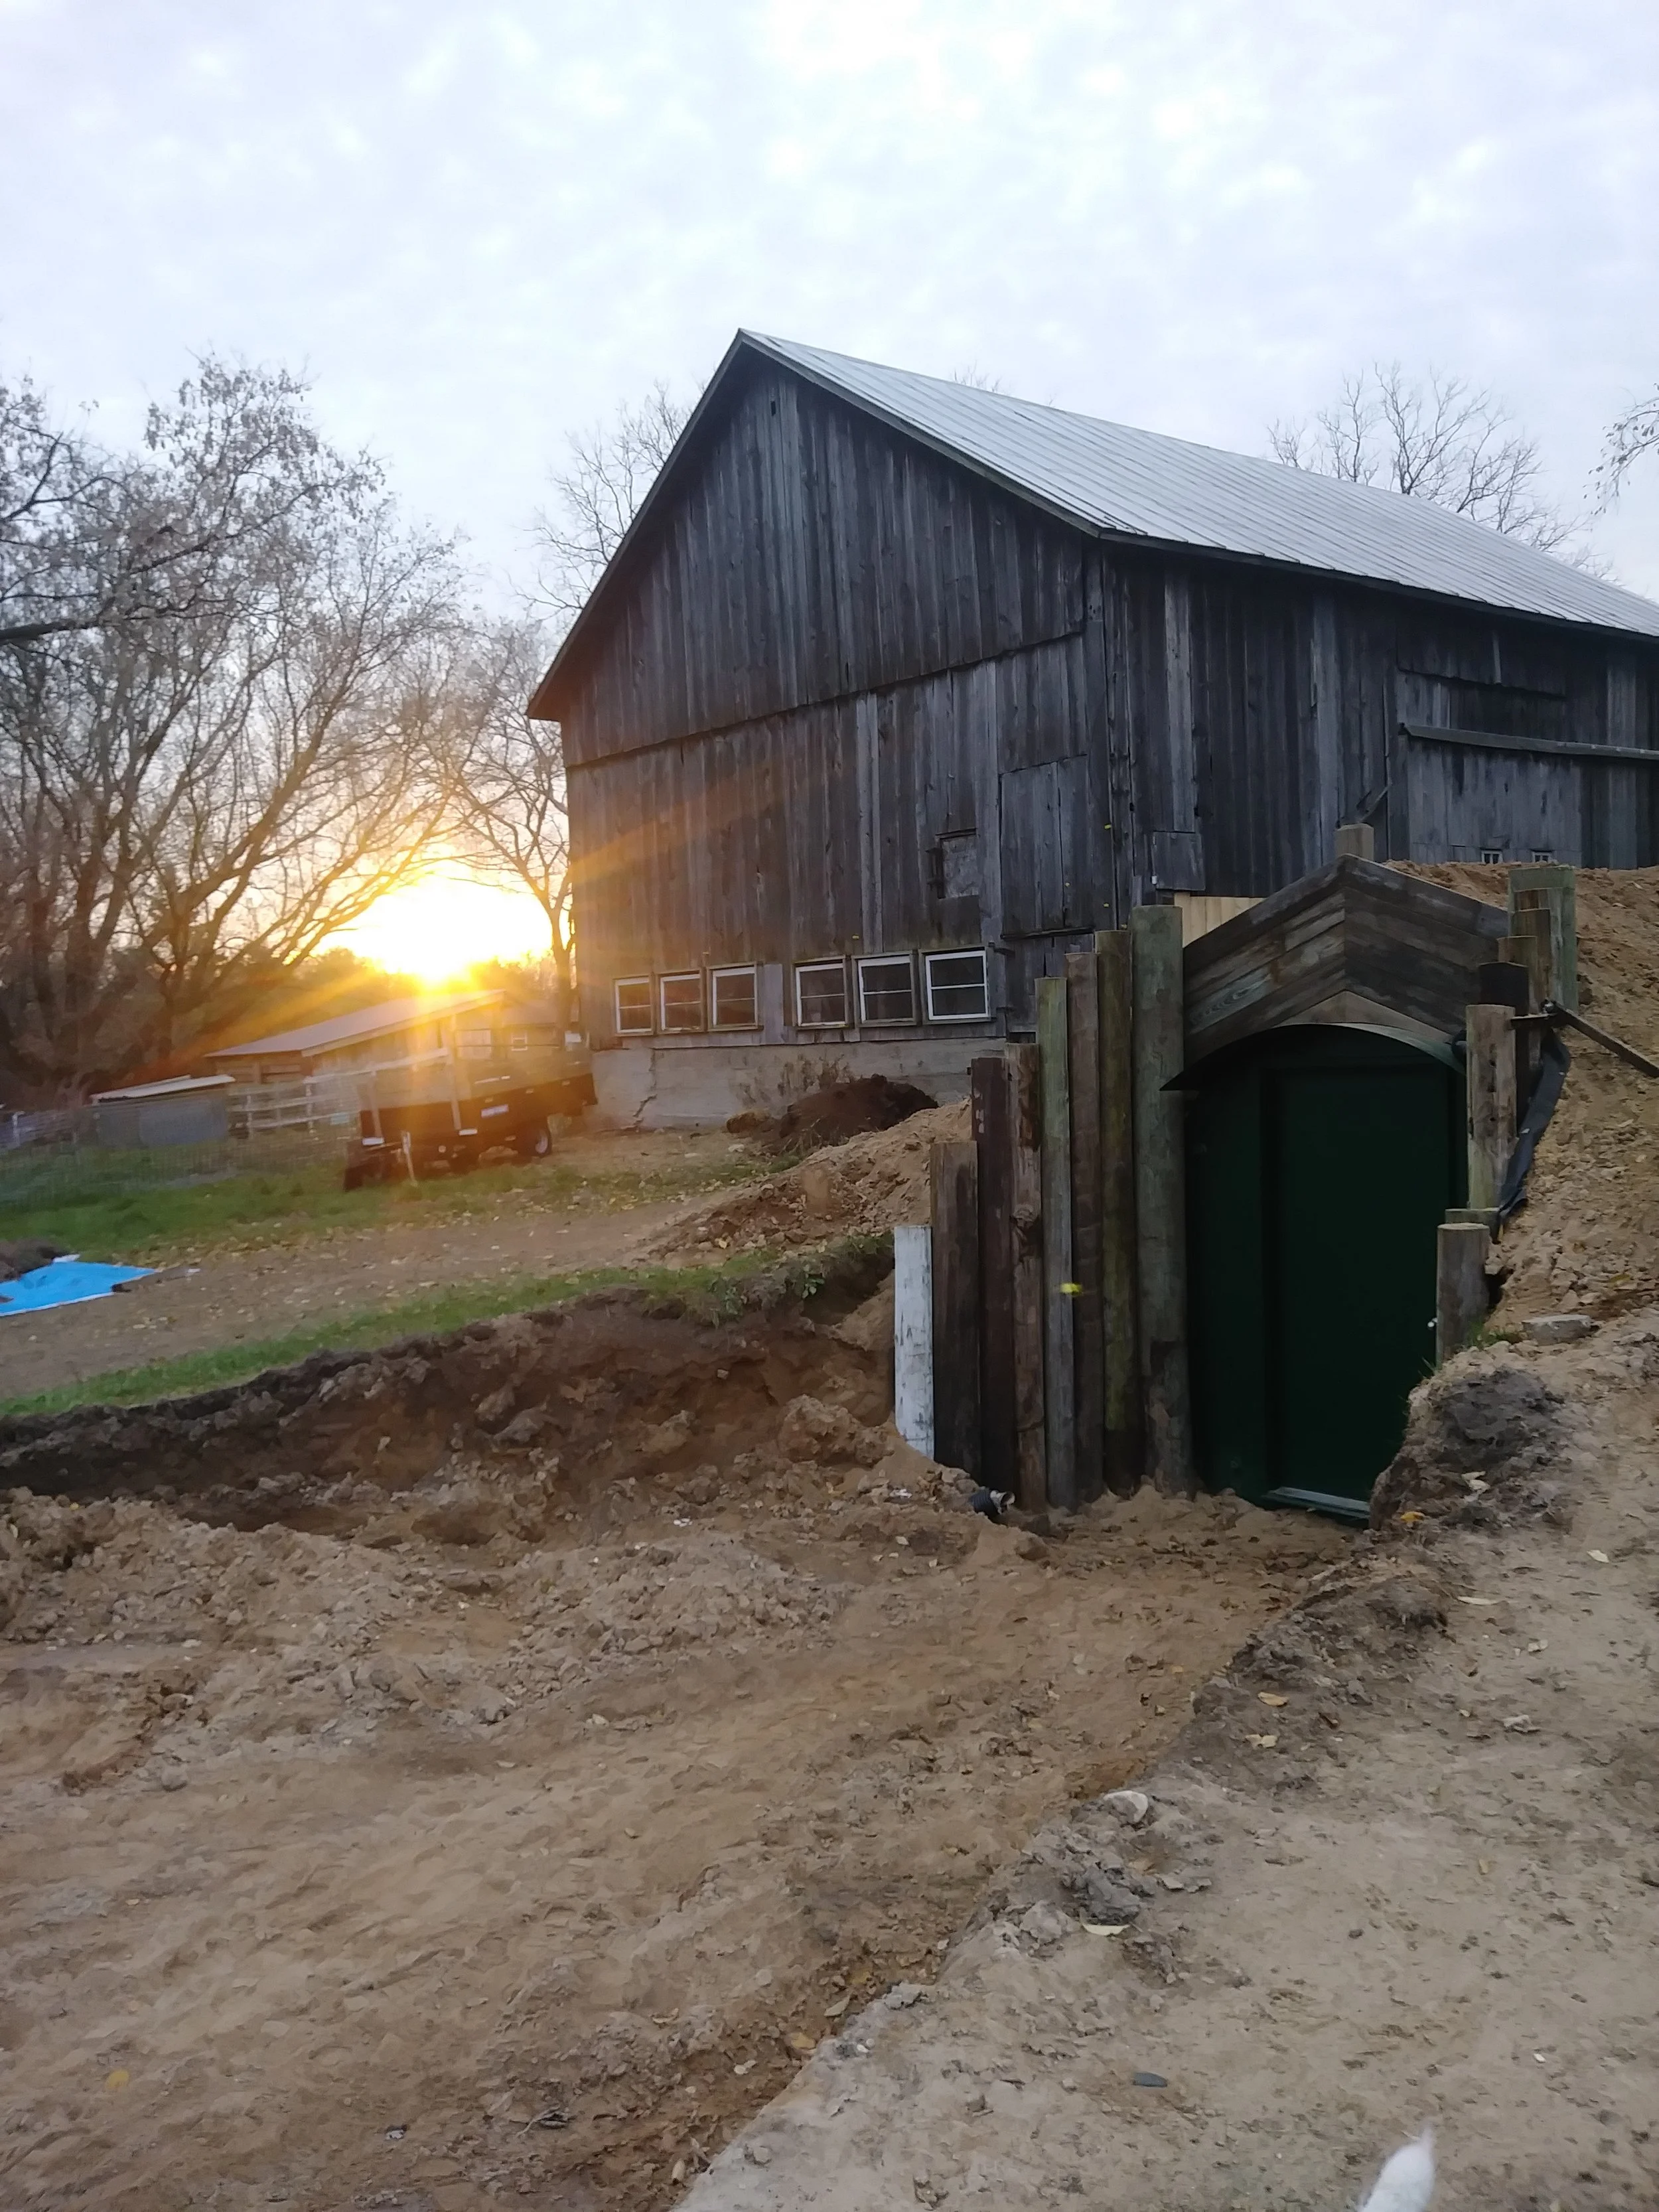
He laid a giant tarp over the whole thing, then heaped a crap load of dirt over top of it. The tanks are surrounded by earth to help keep the temperature above freezing (hopefully!).
Bonus! The kids finally have a sledding hill on the farm Ha!
He also built a retaining wall around the front door to keep the dirt from collapsing around the doorway.
You can also see the exhaust vent sticking out of the back. There is a fresh air vent in the front… in case we ever need to use it as a bomb/tornado shelter. ;) No, actually, it’s to help keep the air fresh in there.

Ta da! Next season, my husband will do some ground-scaping around the entrance and clean things up a bit, but for now - IT WORKS!
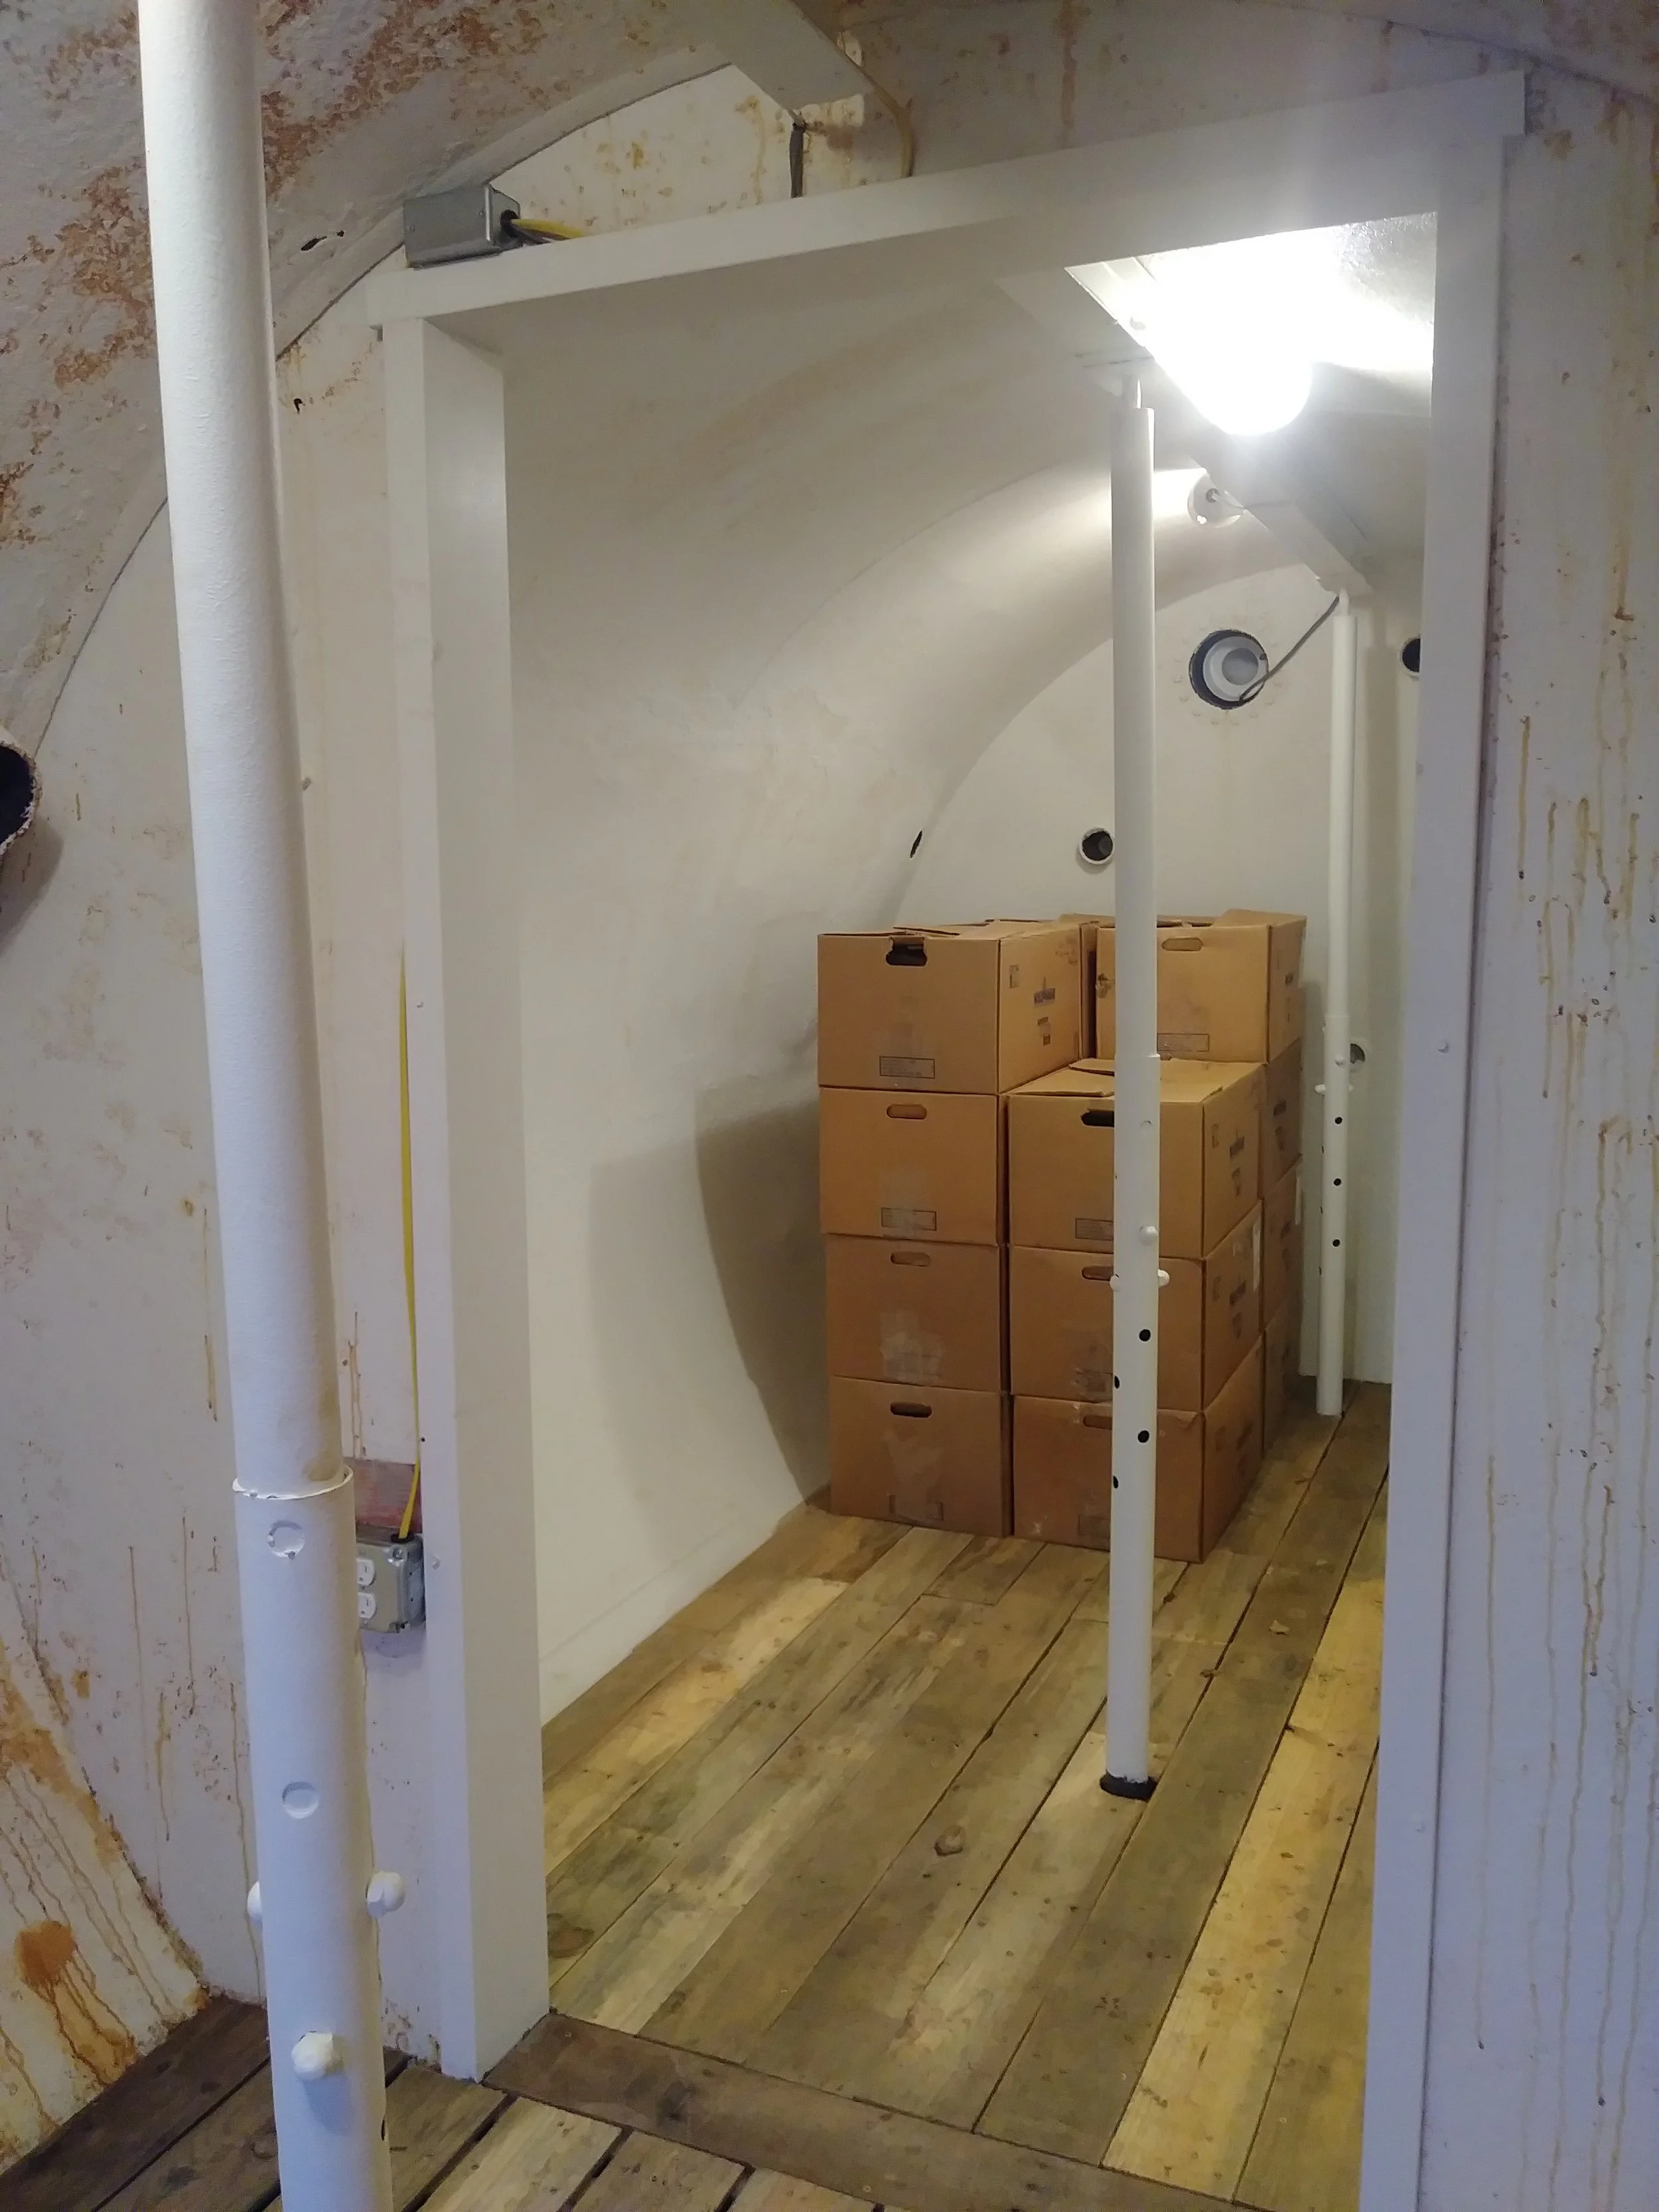
John leveled off the floor with gravel, then laid a pallet wood floor overtop of the gravel.
For good measure, John installed a center beam with supports. Also. Light!!! Yay! And outlets for heaters, dehumidifiers, air purifiers, etc.
We slowly started moving the boxes of tuber to their winter storage…
Unfortunately, we had a really warm November and December and the Hobbit Hole was too warm! I noticed some mold growth on some tubers, so we installed a dehumidifier and an air purifier with a mold filter to help keep things under control.

I pop in here a few times a week to inspect the tubers.

Time will tell how this giant experiment will work. While most of the tubers look pretty good, we’re experiencing some tuber rot. We’re guessing this was due to the warm fall temps and high humidity. While it’s been brutally cold recently, early winter was much too warm!
It’s a pretty nice space to work in, even in the middle of the winter. Here’s a video of me in February dividing a few tubers to potting up. Normally, we don’t start dividing the tubers until March, but I wanted to get a head start with a few of my favorite varieties!
Concluding Remarks…
-John has plans to add temperature controls to help us deal with warm temperatures. We thought cold would be the problem, but warmth has been most challenging!
-He also wishes he could have used 3 tanks, but couldn’t find more tanks.
Hope you enjoyed the tour of our Hobbit Hole Root Cellar!
P.S. In the spring, I hope to track down someone to paint the front to look like Bilbo’s door and make a sign that says “No Admittance Except on Dahlia Business”. It’s gonna be great!
READY FOR MORE?
If you’re serious about growing the garden of your dreams this year, register for my online course, “Backyard Cutting Garden 101”. You’ll find everything you need to plan, grow, harvest and arrange your stunning blooms. I can’t WAIT to help you grow! Click on the button below for all the details.