My Top 10 Favorite Cut Flowers
It was hard but I did it… here are my Top 10 Favorite Cut Flowers!
My Top 10 Favorite Cut Flowers
I was recently asked “If you could only grow 10 types of cut flowers, what would you grow?”
What a fun question! I looked at her and said “Wow, that sounds like a GREAT blog post idea!” ;) So here you go!
On our farm, I grow over 60 varieties of flowers and foliage (probably lots more than that, but who has time to count?!?). It was a real challenge to narrow down my list of favorites to 10.
If you grow cut flowers for arrangements, it’s helpful to know that a bouquet is generally made up of 3 basic parts:
1. Focal: This is your big flashy flower that sets the tone/feel for the whole bouquet.
2. Filler: These are all the other types of flowers that make the majority of the bouquet. They compliment and enhance the focal flower.
3. Foliage: These are the leafy greens that fill out the bouquet and make all the colors pop. I was once told that 1/3 of a cutting garden should be foliage. I thought that was extreme, but turns out I was DEAD WRONG. Don’t forget to grow enough foliage!
*Please note that these are loose categories and some flowers can fit into multiple categories. For example, a large Zinnia would make a great Focal, while small Zinnias are perfect Fillers.
For my Top 10 List, I made sure to choose a few from each category in order to have a well balanced bouquet.
1. Dahlia (Focal)
Dahlias are the flower that started it all at Three Acre Farm. There is no other flower that captivates me quite as much as the dahlia. Yes, they can be a bit temperamental. Yes, they are a TON of work for me to dig up every fall, store all winter and replant each spring.
But when I see their gorgeous blooms, I don’t care about all the work.
Dahlias are not the longest lasting flowers, averaging 3-5 days… but those 3-5 days are GLORIOUS.
Favorite Varieties: ”Jowey Winnie”, “Lovely Lana”, “Rosemary Webb”, “Prince Noir”, “Nicholas”, “ Alpen Diamond”, “Ferncliff Copper”, “Linda’s Baby”, “Woodland’s Wildthing”, “Bracken Sara”, “Bracken Rose”

2. Sunflower (Focal)
There is nothing quite as bright and cheery as a sunflower! They are easy to grow and come in a variety of shapes, sizes and colors.
Sunflowers fall into 2 categories: Single Stem or Branching. Single Stems produce one flowers per plant and can be planted close together (about 6” apart). Branching sunflowers produce multiple stems and should be planted about 18” apart.
Favorite Single Stem: “ProCut Gold Lite”, “Sunrich Summer Provence”
Favorite Branching: “Starburst Panache”, “Starburst Lemon Aura”, “Cherry Rose”, “Autumn Beauty”

3. Zinnia (Focal or Filler)
Ok, I must be honest. Zinnias are NOT actually one of my favorite flowers, so I almost didn’t add them. Not sure why… I think I’m just ruined by the dahlias and the zinnias simply can’t compete. Ha!
However, they are so versatile and easy to grow, it seems like a shame to leave them off the list. I’m well aware that most people simply adore Zinnias!
Large Zinnias are an excellent Focal flower (like “Uproar Rose” or “Benary’s Giant”), while smaller ones are perfect as Filler (like the “Oklahoma” series, “Jazzy Mix” and “Sunbow Mix”)
Favorite Varieties: “Uproar Rose”, “Queen Series”, “Oklahoma Salmon”, “Oklahoma Carmine Rose”, “Benary’s Giant Series”

4. Snapdragon (Filler)
These flowers are so underappreciated! I always wonder if it’s because they are “spike” shaped instead of round/disk, like so many other flowers. The spike shape add visual interest and height to bouquets.
Here in my garden, they bring me endless delight and I adore them. They make every bouquet pop and their sweet scent is lovely.
Favorite Variety: Any of the “Madame Butterfly” series, but especially “Bronze with White”, “Rocket Bronze”, “Rocket Rose Shades”

5. Ammi/Queen Anne’s Lace/Dara (Filler)
While it’s totally fine to use the wild Queen Anne’s Lace that grows as a ditch weed around here (a gorgeous ditch weed, I must add! And did you know it’s actually a wild carrot?!?), there are similar types of flowers that have been grown specifically for cut flower use.
Ammi makes every bouquet look lush, full and romantic. I feel lost without it!
Dara or Daucus (or Chocolate Lace Flower) is unique version of Queen Anne’s Lace that comes in shades of wine, deep pink, pale pink and white. It’s stunning!
Favorite Varieties: Ammi “Select White”, Ammi “Green Mist”, Daucus “Dara”

6.Cosmos (Filler)
Dreamy. Swoon worthy. Magical.
Cosmos are all of those and more… and they are easy to grow and produce like crazy. I’m in love. Grow some. You'll be in love too.
Flowers last longer if they are harvested before the bees pollinate them, so harvest them just as the buds are about to open up.
Favorite Varieties: “Double Click” Series (all the colors are beautiful!), “Versailles”, “Tip Top Picotee”, “Afternoon White”

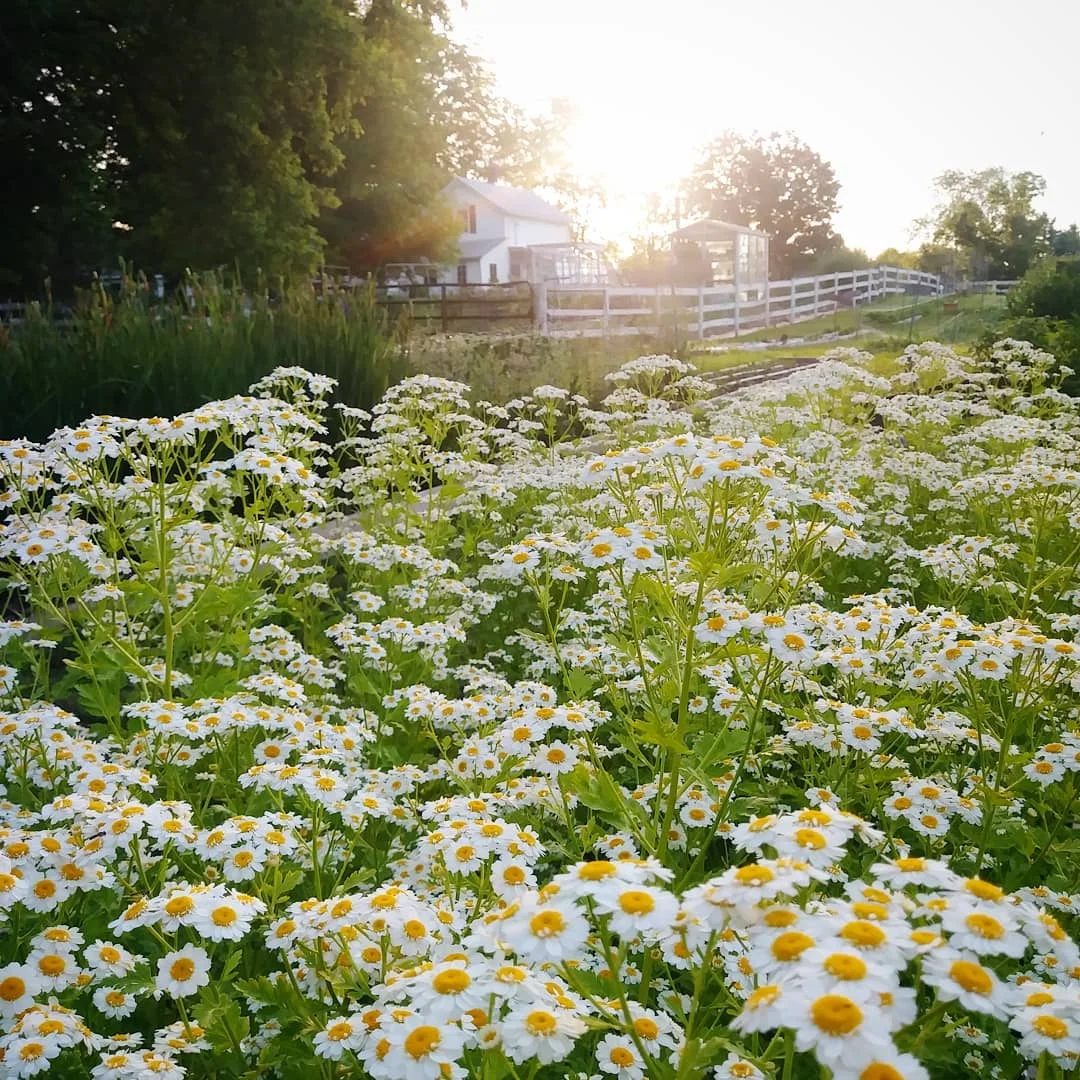
7. Feverfew (Filler)
These cheery little button flowers are one of the best Fillers out there. Bouquet looking a little drab? Add a stem of Feverfew. Boom. Instant fabulousness (is that a word?).
In some climates, Feverfew will act like a perennial and come back each year. Whoo hoo!
Favorite Varieties: “Magic Single”, “Magic Yellow”

8. Statice (Filler)
“The 90’s called and they want their Statice back.” ;)
Ok, bear with me. Statice reminds me of those stuffy dried flower arrangements you used to see in the late 80’s/early 90’s. When I first grew it, I thought it was horribly out of style and worthless.
And then I found a pack of “Apricot” Statice seeds… and I fell in love. It fills out a bouquet so nicely… and bonus! It’s an “Everlasting” flowers (read more about them HERE), which means it pretty much lasts forever if you dry it.
A few stems of Statice in each bouquet and you’re on the right track! It has a nice structure that supports other flowers and allows them to shine.
Favorite Varieties: “QIS Apricot”, “Seeker Rose Shades”, “Seeker White”,

9. Buplureum (Foliage)
I’ve been growing this flower/foliage for years now and still don’t know exactly how to say it. Ha!
Boo-plur-um? Bup-ler-um? Who knows… I wish someone would come up with a better name…
Anyway… this plant is incredibly unique and makes a FANTASTIC filler. When I’m making bouquets, I always reach for this first, as it creates a great structure/base to weave all the other flowers into.
I love the bright lime green leaves and cheery little yellow flowers but the plants even look beautiful as they start to fade and turn brown. Buplureum is self-seeding, meaning it will drop it’s seeds and keep coming back each year if you allow it (leaving the soil untilled).

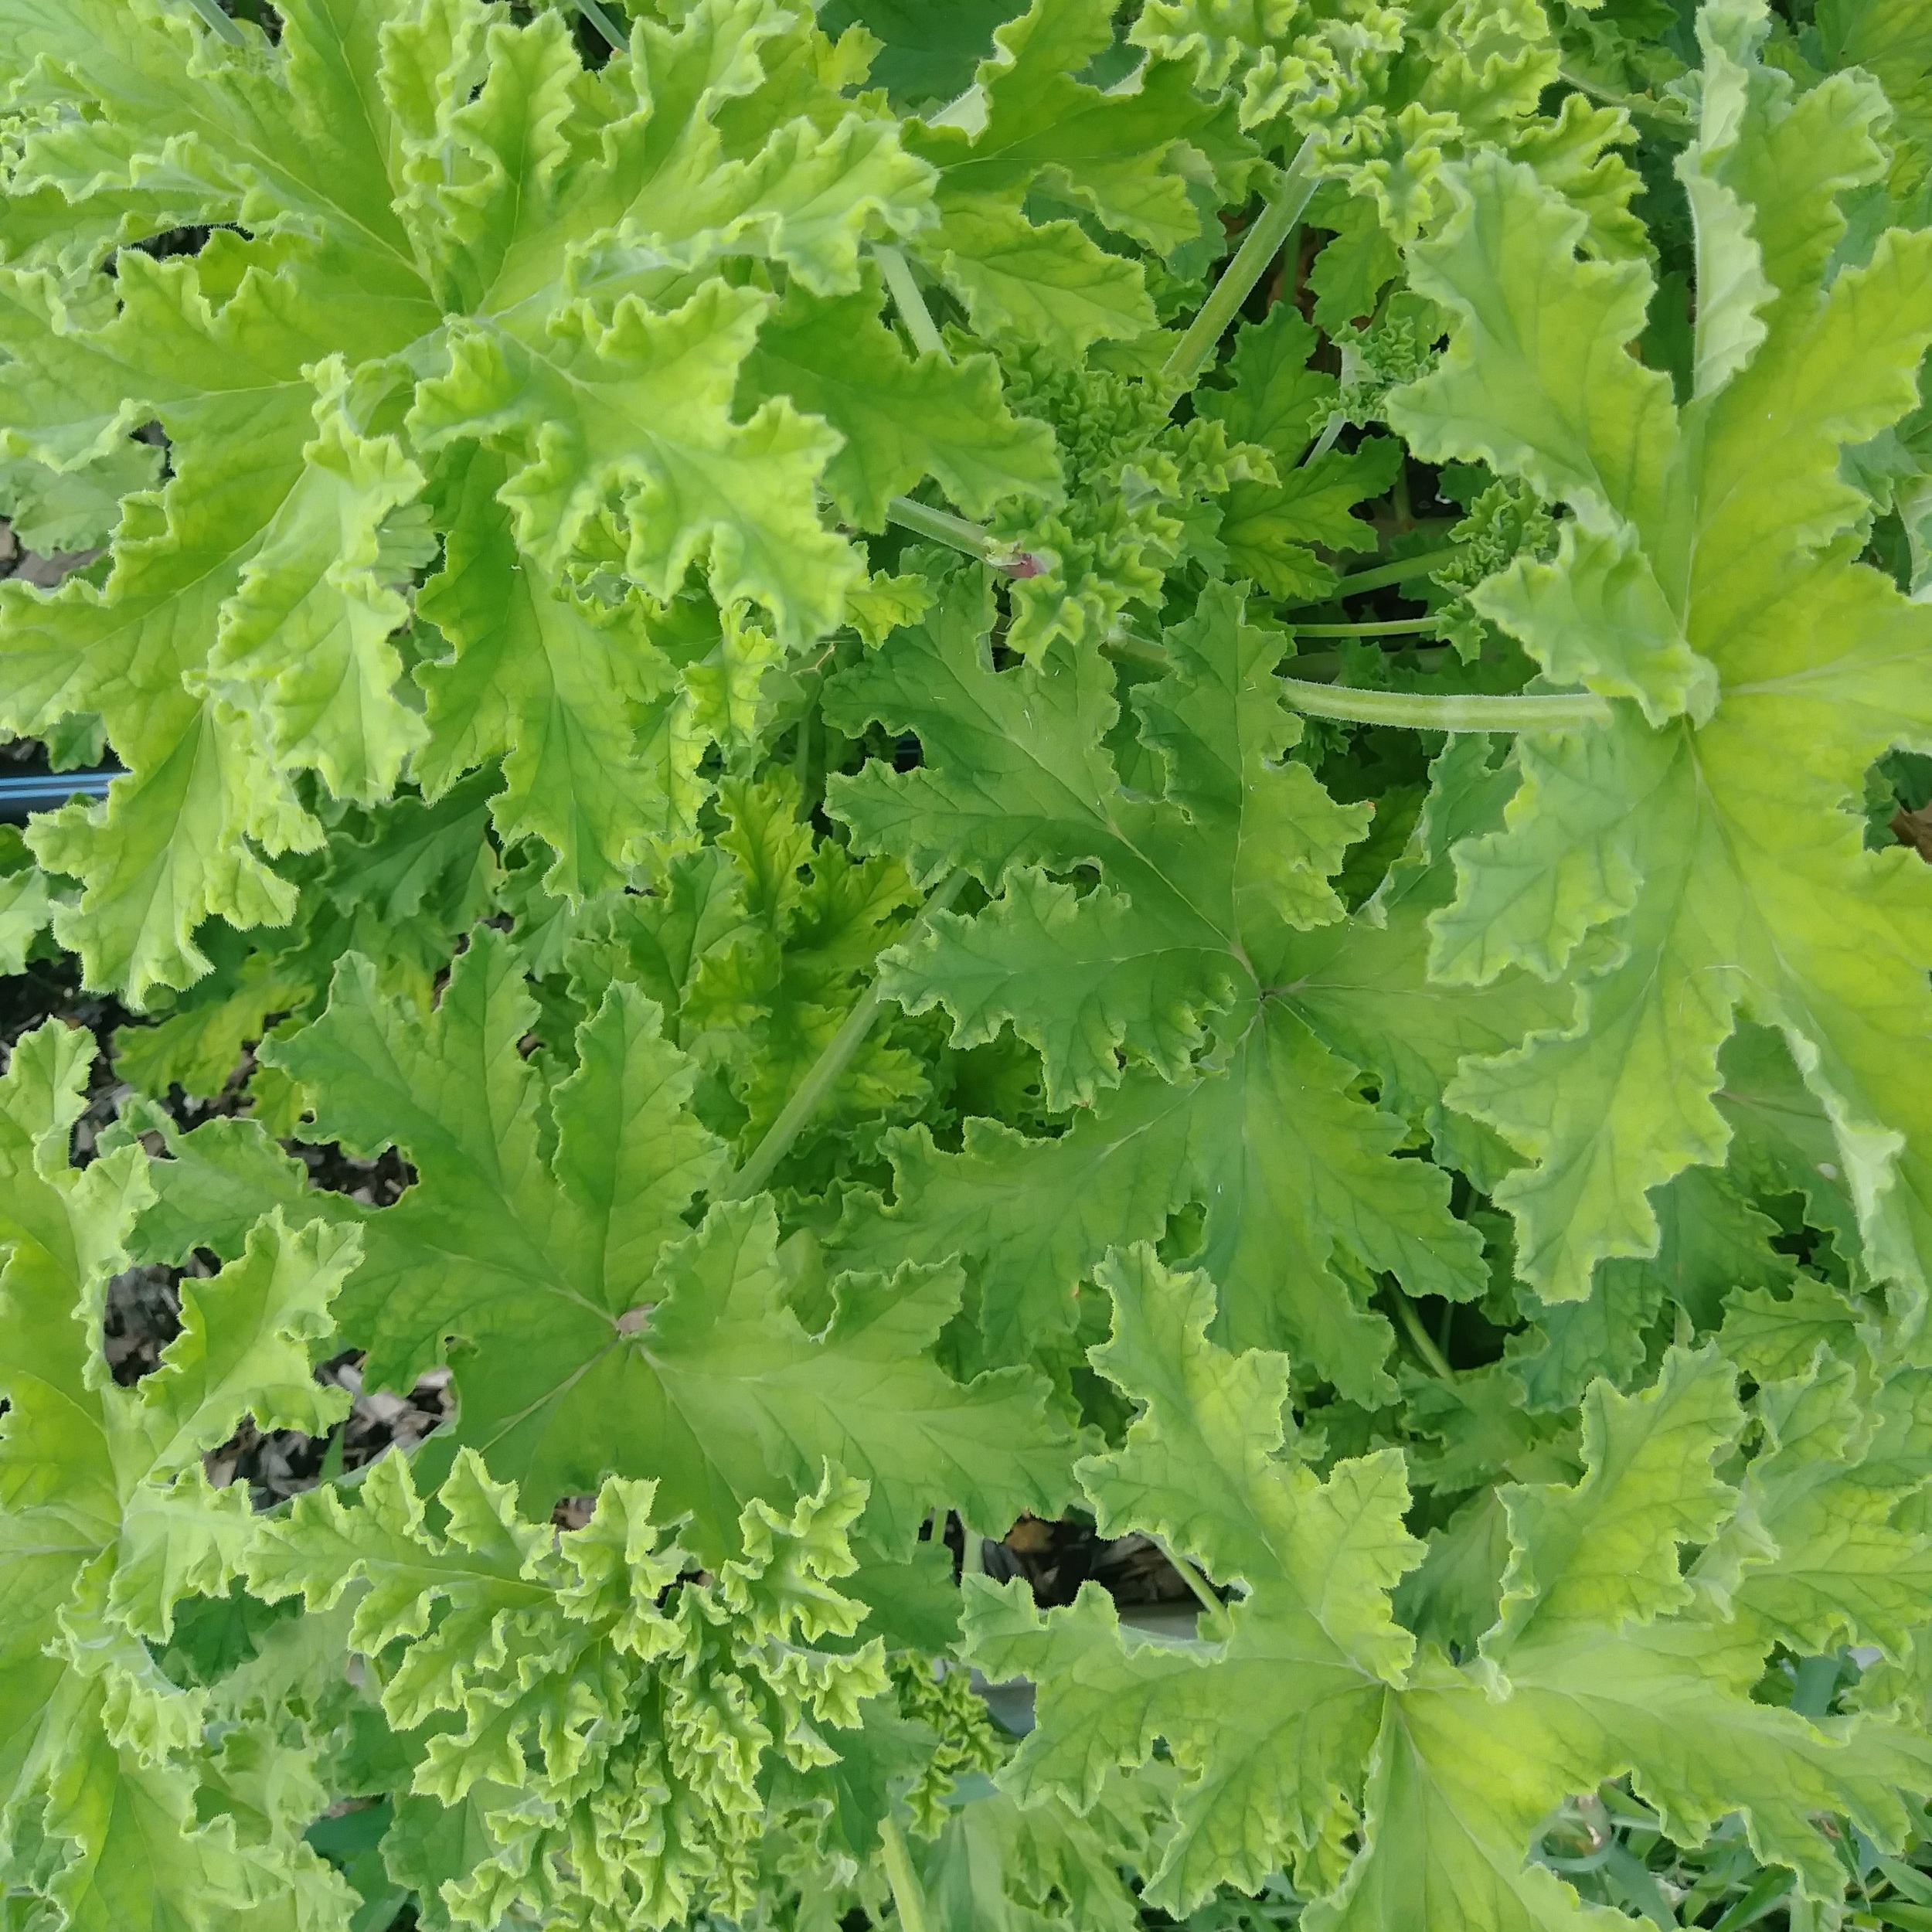
10. Scented Geranium
Last, but certainly NOT least… Scented Geranium is probably the most useful plant I grow on the farm. When it’s in season, pretty much every bouquet I make has Scented Geranium in it. ;)
Most cut flowers have no scent, which is a real bummer. We all want our fresh flowers to smell beautiful and floral… and Scented Geranium is how we achieve this on our farm It’s intoxicating scent is perfect!
There are many different varieties of Scented Geranium, including the most well known variety called “Citronella” (which I probably would NOT recommend using, unless you like bouquets that smell like bug spray!).
The thick leaves transform a bouquet from ho-hum to stunning. Scented Geranium is my “Go-To” foliage.
Scented Geranium is not grown from seed. Instead, it’s divided/propagated by making cuttings. The best way to get your hands on Scented Geranium is to purchase a plant at a garden center.
The stems will wilt if cut in the heat of the day, so be sure to harvest very early in the morning, or late in the day.
Favorite Varieties: “Attar of Rose”, “Sweet Mimosa”, “Orange Fizz”, “Apricot”
Not convinced? Here’s what it looks like in bouquets…


There you have it! My Top 10 Cut Flowers… although I’m sure this list will change over time!
Now I’d like to know… what are YOUR top 10 favorite cut flowers??? Or maybe just your top 5. ;)
Can’t wait to hear them!
Ready for more?
If you’re serious about growing the garden of your dreams this year, register for my online course, “Backyard Cutting Garden 101”. You’ll find everything you need to plan, grow, harvest and arrange your stunning blooms. I can’t WAIT to help you grow! Click on the button below for all the details.
Chocolate Peppermint Lip Balm/Lotion Bar
A perfect homemade gift that will have people asking for more!
Chocolate Peppermint Lip Balm/Lotion Bar
Today, I want to share one of my favorite body care products recipes! Years ago, I stumbled upon a recipe for lip balm/lotion bars* and I had to try it out. I loved it so much, I decided to make a batch for my family and friends for Christmas.
Let's just say gift funds were a bit tight that year, so I officially declared to my loved ones that this was going to be a "Homemade Gifts Only" Christmas. Much to my delight, everyone was thrilled with the idea!
*In case you are wondering "What is a lotion bar?", it's simply lotion in solid form. When you rub the bar on your skin, the heat of your body allows the lotion to spread.
Why I love this recipe:
1. It's simple. Only 4 ingredients (yay!!!!).
2. It's completely edible and contains 100% natural ingredients, so I don't have to worry about my kids eating it. Have you read the ingredient labels on other lip balms? Eek!
3. It smells AH-mazing. Men and women will enjoy the delicious scent and the pleasing tingle from the peppermint oil. True story - I gave this as a gift my son's kindergarten teacher and she raved it but only had one complaint... her husband stole it from her because he loved it so much. I gave her another container! Ha!
4. It's multipurpose. It's fantastic as a lip balm, but also can be used as lotion.
5. It WORKS. My hands get absolutely wrecked during the farming season and this the only product that heals my poor abused skin. I put it on every night.
6. It's a great way for me to use the beeswax I collect from our beehives each year!
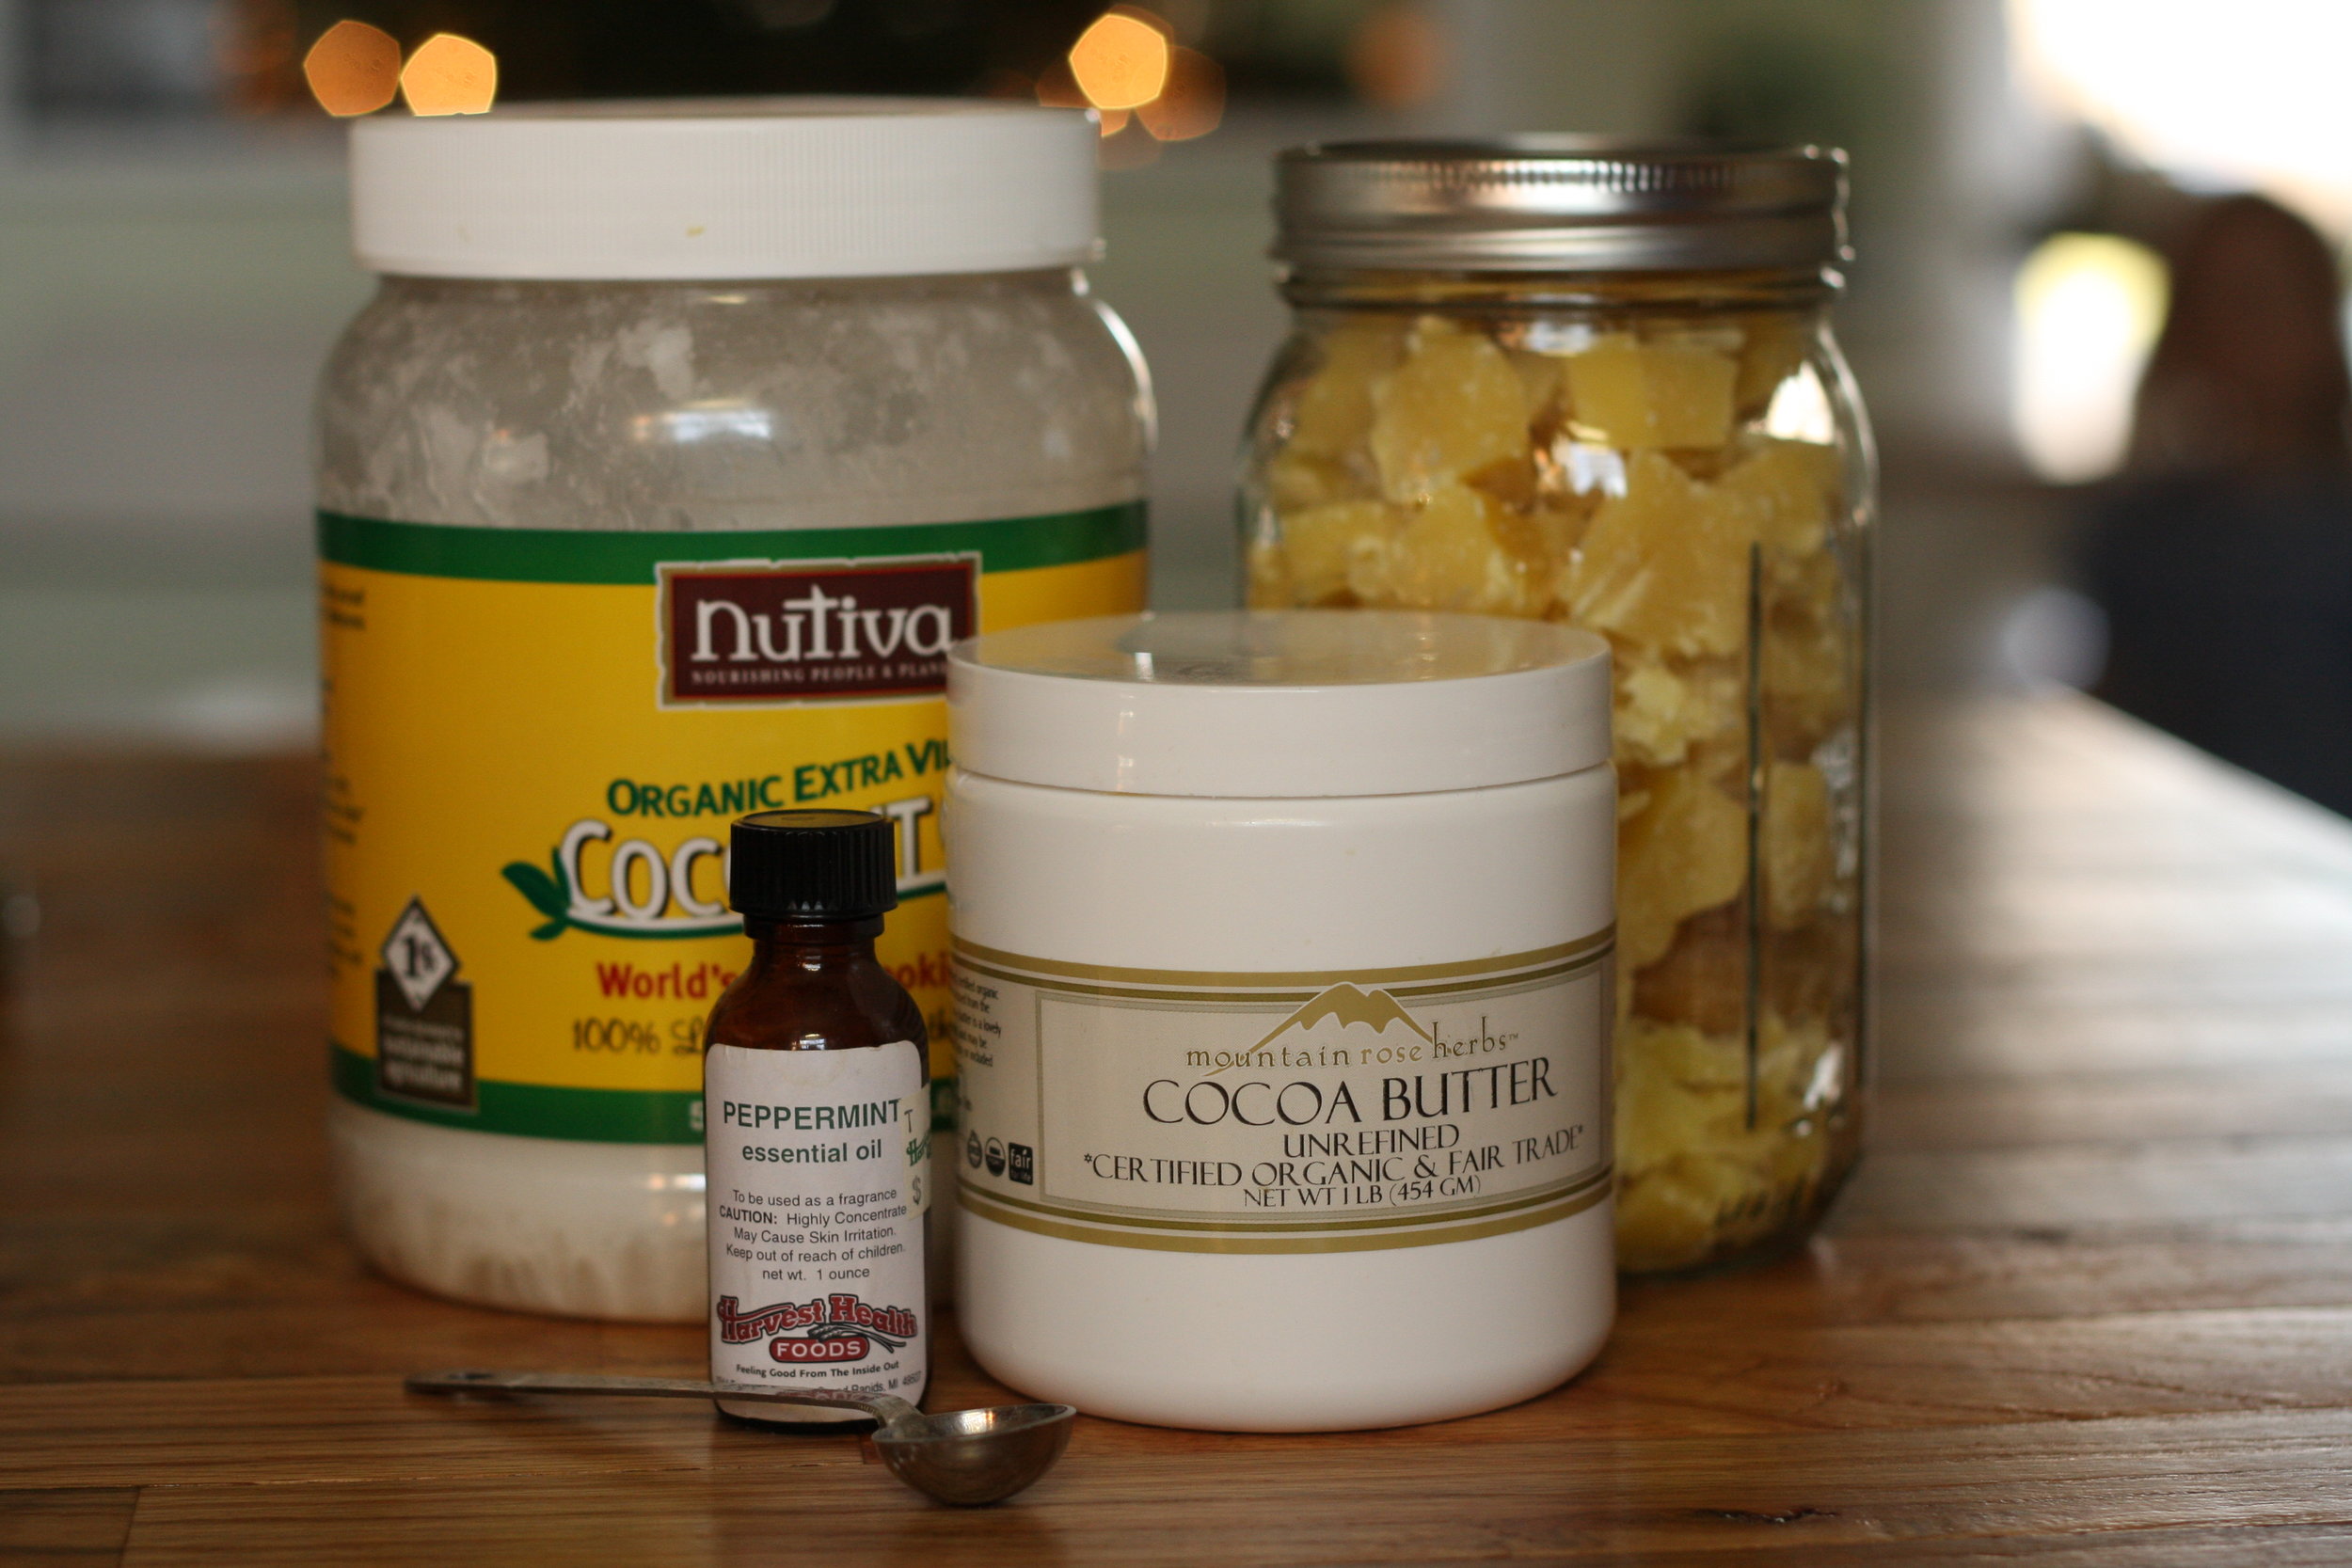
What You Will Need
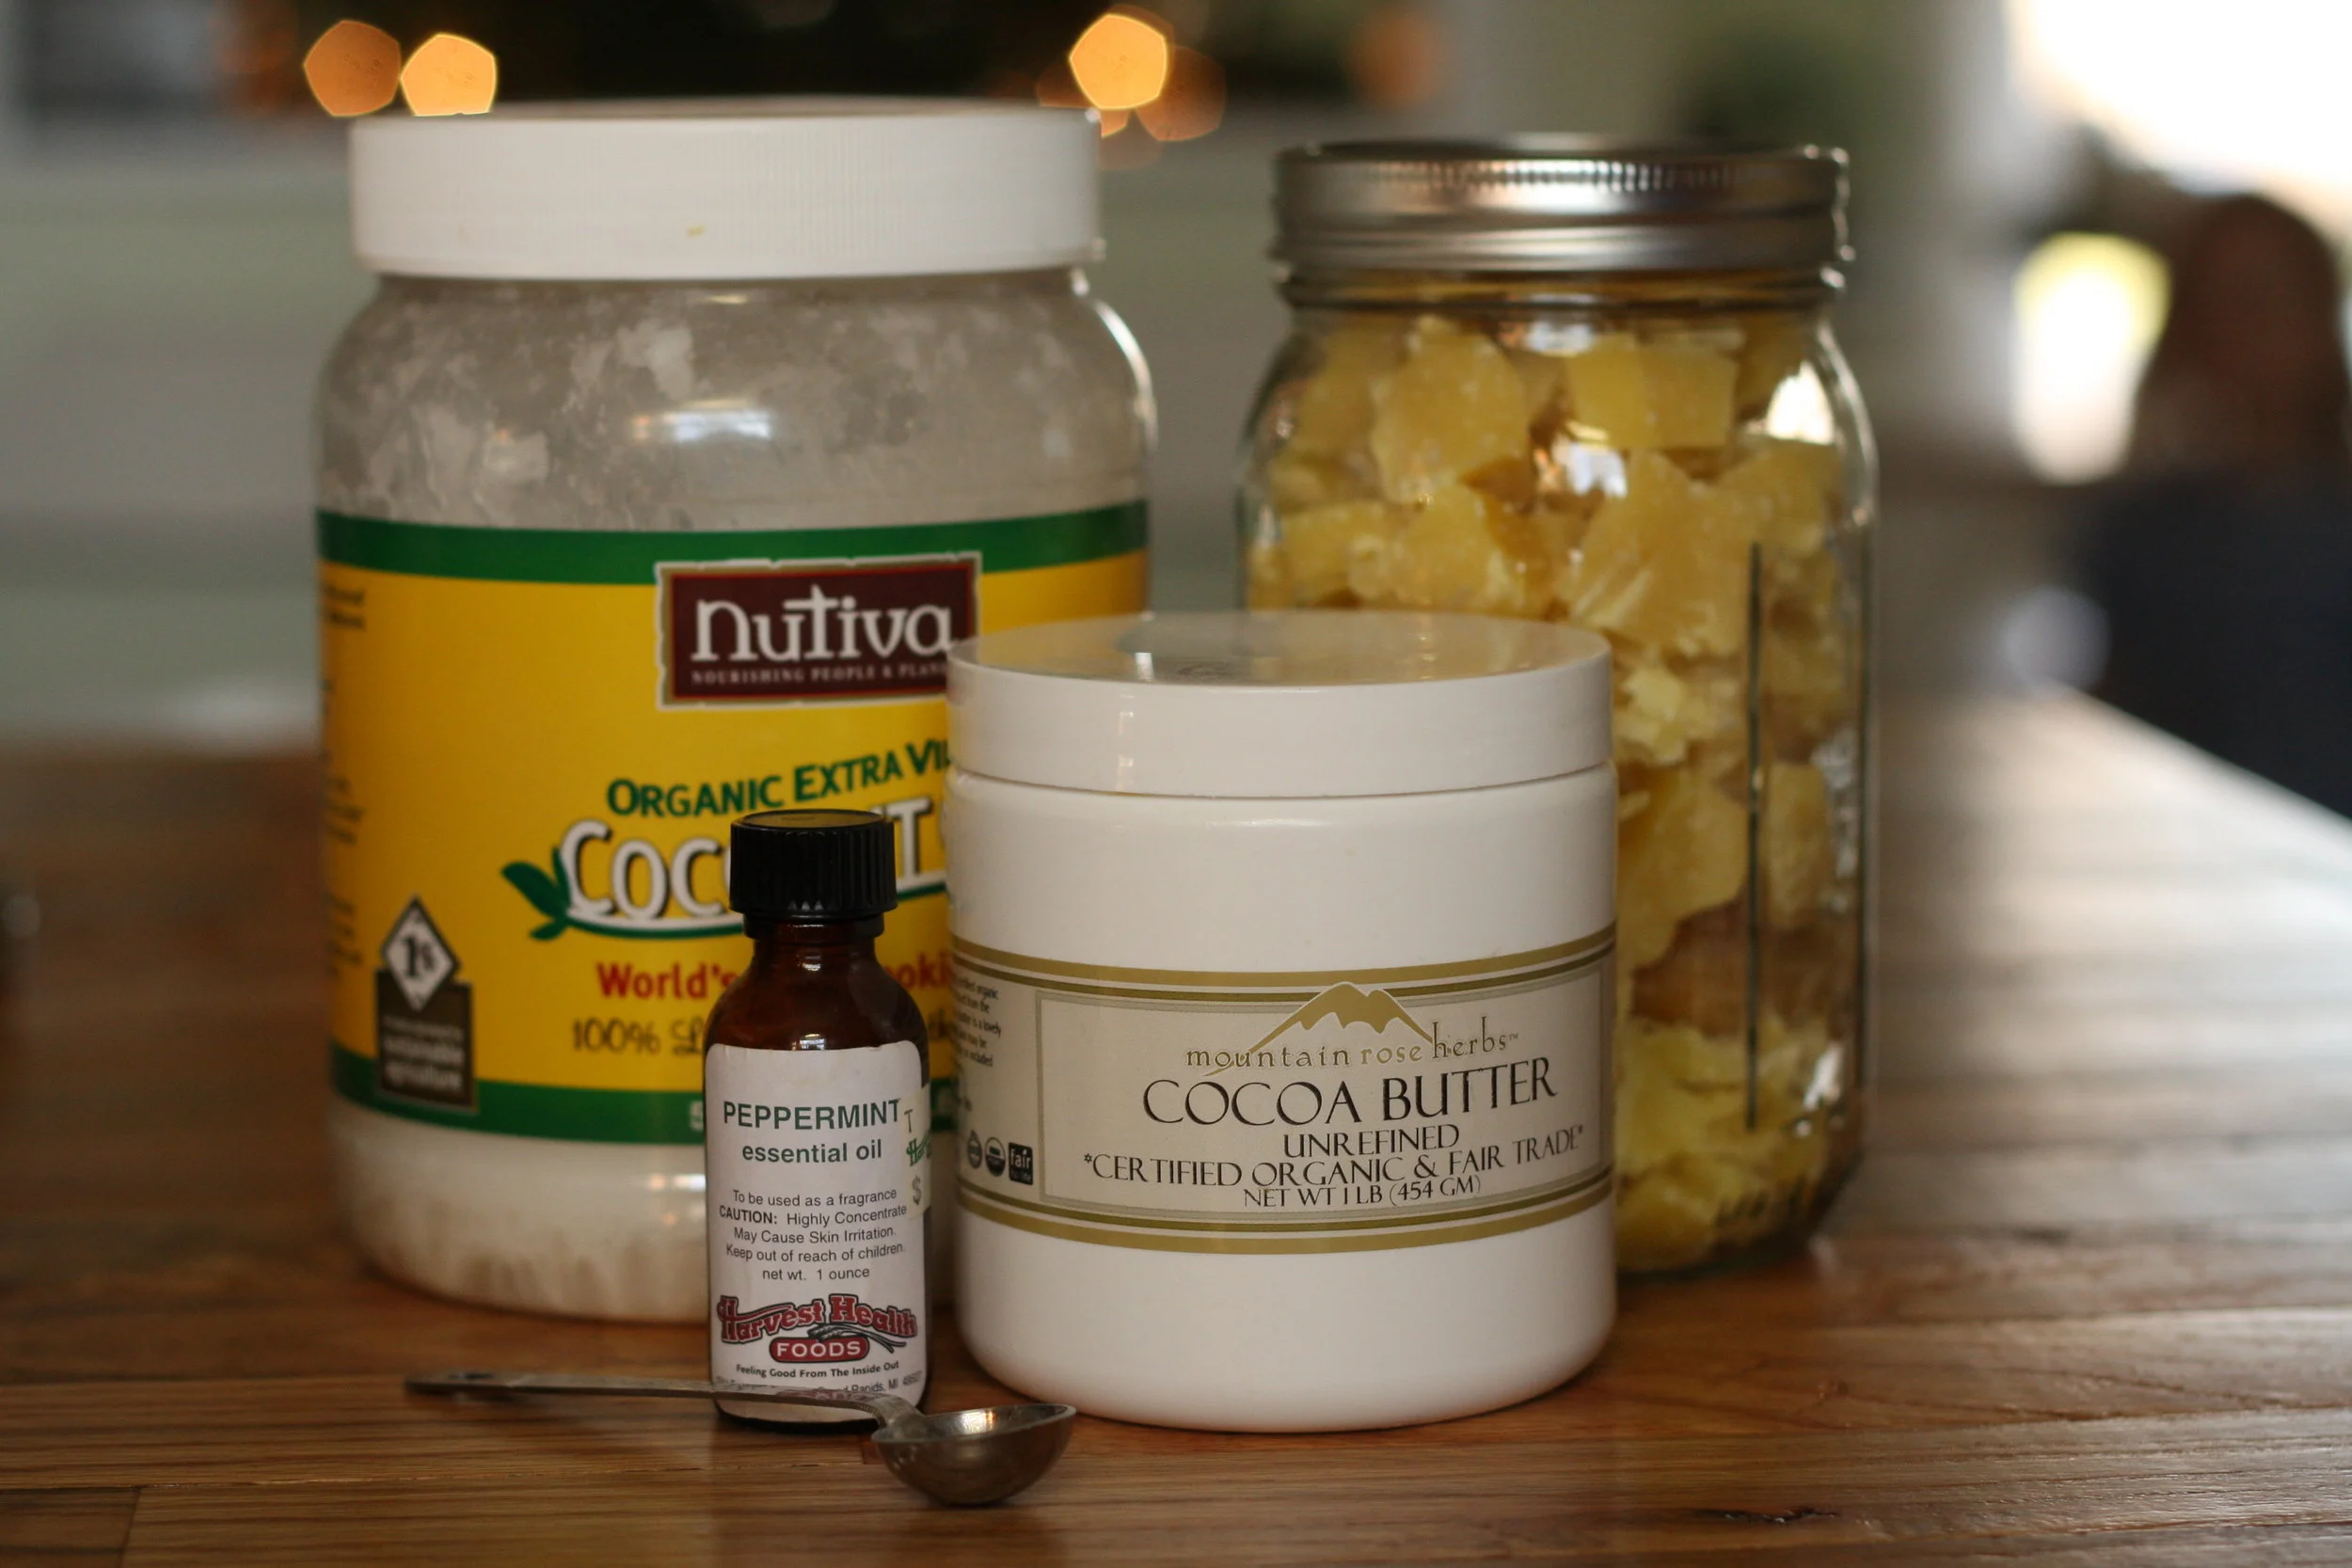
3 oz or 1/3 cup beeswax, in chunks or pastilles
3 oz or 1/3 cup cocoa butter
3 oz or 1/3 cup coconut oil
2 tsp peppermint essential oil
Scale for weighing the ingredients. If you don't have a kitchen scale, you can use measuring cups, but it's a little tricky because the beeswax and cocoa butter are hard. You'll have to find a way to chop them into small pieces so your measurements will be somewhat accurate.
Containers for the lotion bar/lip balm. If you are making lotion bars, look for candy molds at the craft store or you can pour into muffin tins. Lip balm can be poured into tubes, pots or tins.
A pint sized mason jar (or similar glass jar). You will melt the ingredients right in the jar.
Saucepan. For heating the mixture.
Method
1. Measure the beeswax, cocoa butter and coconut oil. Put them in the mason jar.
2. Put the mason jar inside a saucepan filled with a few inches of water. Turn heat on to begin warming the water, which will melt the mixture in the mason jar. Heat the beeswax, cocoa butter and coconut oil until melted. Stir with a bamboo skewer or Popsicle stick (something you can throw out or compost when you are done). While you are waiting, set out some paper on the counter (to protect surfaces from spills) and arrange your containers.
3. When completely melted, remove the mason jar from the heat. Stir in the 2 tsp of peppermint oil.
4. Quickly (and carefully!) pour the hot mixture into your waiting containers. The mixture will begin to harden up almost immediately. Use caution - hot wax will burn your skin!
5. If the mixture begins to harden in the jar before you use all of it, simply place it back in the saucepan of hot water to melt again.
6. Allow the balm to set up for about an hour before using. Any leftover balm can stay in the mason jar, covered with a lid. Simply store in your cupboard. Next time you need to refill your balm containers, just reheat and pour!
Want a printable recipe? Click on the button to download and print a copy!

Presentation
I pour the mixture into 3 different containers:
1. Lip balm tubes
2. Round lip balm tins
3. Muffin tins, to make bars ( I pop them in the freezer for a few minutes and they come out of the muffin tins easy as pie). The lotions bars fit nicely into the round tins as well, but can be removed and rubbed over the whole body, like a bar of soap.

You could have all sorts of fun giving this lotion/balm as gifts. The options for molds and containers are endless. If you are crafty like a fox, I'm sure you could figure out some way to decoupage some pretty fabric or paper onto the container. Get wild and crazy.
Enjoy the recipe and let me know how you like it! I love to hear your comments!
-Lori

"Beauty will save the world."
A true confession and transformation.
Beauty will save the world
Can I tell you a little secret?
I used to think that people who bought flowers were silly, shallow and frivolous.
"Why would they spend good money on something like that? Something that is going to die and they'll throw in the trash? Boy, it must be nice to be able to literally throw money away."
In my heart, I felt bitterness and distain toward "those people". I thought they were being irresponsible and impractical.
It was so strange. Here I was, an Art major who has an incredible appreciation for beauty, yet I couldn't get on board with flowers.
Oh, I grew them in my landscaping and even put some in my gardens, but they were practical, right? Their job was to make my landscaping look good. Or attract pollinators to the more important, more noble vegetable crops.
You know. The things you can actually eat, the things I thought would save the world.
For crying out loud, I thought, there are people STARVING and we're buying flowers?!? I began to look at all my purchases and feel guilty whenever I spent money on anything that I felt was an "indulgence" or something we didn't absolutely need for survival.
It was a hard way to live. I think I secretly wanted beauty, but felt guilty and shallow even admitting that I longed for it.
"We need more beauty in our lives."
Thank goodness for my dear husband. His crazy idea changed everything.
He came home from work one day and started searching on-line for these things called "dahlia tubers". At this time, neither one of us had ever heard of dahlias!
"What in the world are you doing?", I asked him.
"I'm going to buy some dahlia tubers. A friend at work showed me photos of the flowers and I want some." (Me thinking to myself: "Why are dudes talking about flowers at work?")
"What?!? You've never grown anything in your life! Why are you doing this? We don't have room for something silly like flowers - we need all our growing space for growing food. You know - stuff that is actually valuable."
He replied, "I know. But we need more beauty in our lives."
Those words have stuck with ever since. I couldn't deny that it was true.
For the past 5 years, we had been living in a construction zone of a house ("Oh, a fixer-upper farm house! That must be so fun!" No. It's not) and our slowly developing farm was always in a state of disarray. We had been living in ugliness for years and it was dragging us all down.
So, I reluctantly and grudgingly agreed to help him plant dahlias. Let's just say maybe I would have had a better attitude if he had decided to plant 10 dahlias... but noooooooooooo. He brought home 300 tubers ("I found a great deal at a garage sale!") and we proceeded with the labor intensive work of planting, me grumbling under my breath the whole time that I would rather be planting something we could eat (because we have to grow more food to save the world, right?).
The Transformation
Then late July rolled around and one day while I was surveying the dahlia patch, I saw a flash of color. I went over to investigate, and oh friends, I wish I had the words describe my reaction when I saw that first flower... but let's just say it was as if these hard scales fell away from my heart and underneath I discovered something soft, something tender, something vulnerable.
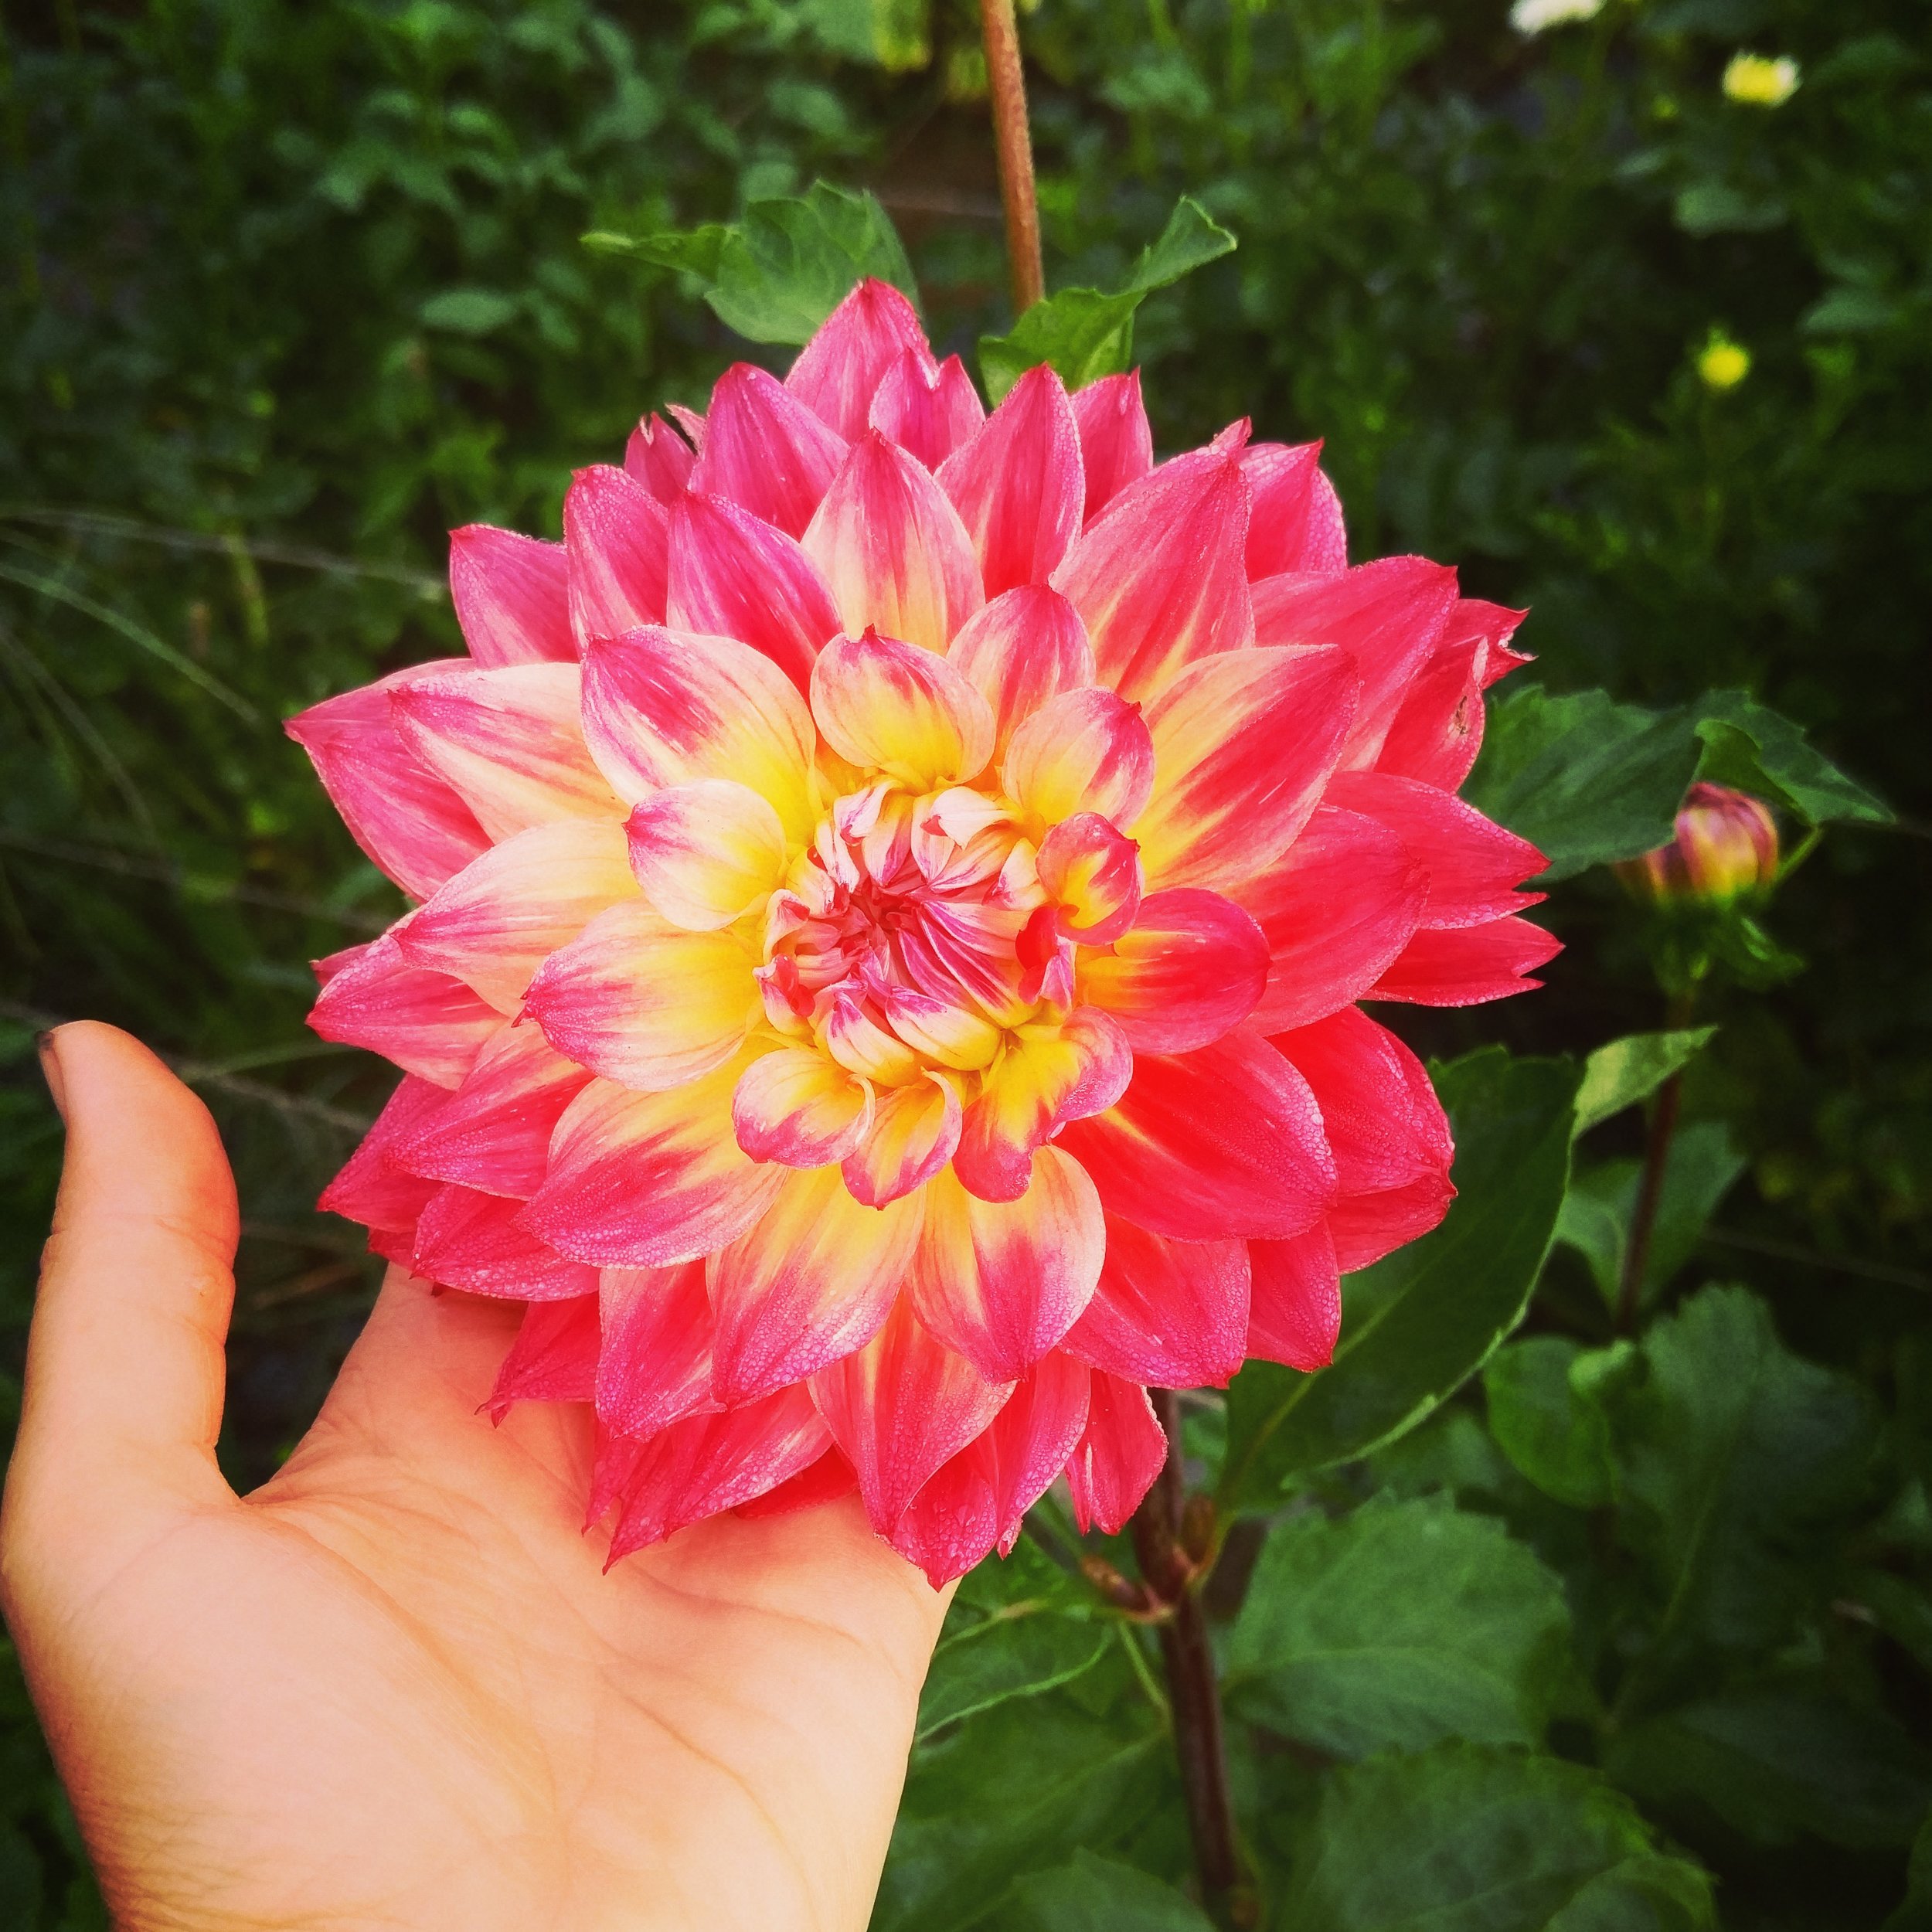
I actually gasped out loud and started crying looking at that beautiful flower. I felt so silly, but now I understood. I knew why people love flowers, why they need them like air. Why they have a desperate longing for beauty, goodness and wonder.
While it might sound dramatic to say that flowers changed my life, it's true.
I learned to slow down, to savor small joys and take the time to really "see".
I learned that my soul longs for beauty and goodness and wonder... and I should not be ashamed of that. God created me with those desires deep inside me and trying to fight against them was only making me miserable.
I learned that efficiency, productivity and achievement are not bad things, but they don't bring me true joy and contentment.
I learned to be more forgiving and gentle, and less judgmental and harsh. The flowers softened my rough edges, my hardness and created a new person.
They transformed me.
Sharing the Wonder
Imagine my joy and delight when people started stopping by our farm stand to buy the flowers and I discovered they felt the same way!
Friends, I don't know what it is, but strangers would tell me the most tender and heartbreaking stories while they were picking out their flowers. There is something about flowers that allows us to be open and real, to be vulnerable and soft.
I'm in awe of the power of beauty.
It fills me with such joy to know that the flowers we raise on our farm are helping others transform their lives as well. Whether they are buying for themselves or sharing them with a loved one, more and more lives are being blessed with beauty, goodness, love and wonder.

Beauty Will Save the World
Fyodor Dostoevsky said "Beauty will save the world" and after much thought and pondering, I think he's right.
Beauty is not shallow or frivolous, as I once thought. It has power to point us to goodness and truth, to compassion and tenderness.
We were specially designed to long for it, to desire it deep in our hearts. You know this. You've felt your heart literally ache at the sight of something beautiful, your chest swelling with tightness and that feeling like you might burst into a million pieces.
Beauty leads us toward it's ultimate source, our God, our Creator, who loved us SO MUCH that He gave us the gift of beauty. He didn't have to do that, but He did. It blows me away. It also speaks volumes about how God feels about beauty. If He thinks it's important, then we better pay attention.
Beauty fills us with a spirit of thankfulness, kindness, joy, love, peacefulness... all things this world desperately needs right now.
THAT is how beauty will save the world - by transforming us into people filled with compassion and love, people who will make this world a little kinder every day.
Go forth, friends, and make today a little bit brighter and more beautiful.
-Lori
"Always begin with the beautiful. It leads you to the good, which leads you to the truth."
- Father Robert Barron

Garlic Scape Pesto Recipe
Why you should harvest your garlic scapes... and what to do with them!
Garlic Scape Pesto
Garlic what? What in the world is a "scape"?
I get this question often this time of year. Maybe you've been wandering around the Farmer's Market and wondered what those crazy green curly-que thingies are. Or perhaps you've even noticed them in your garden!
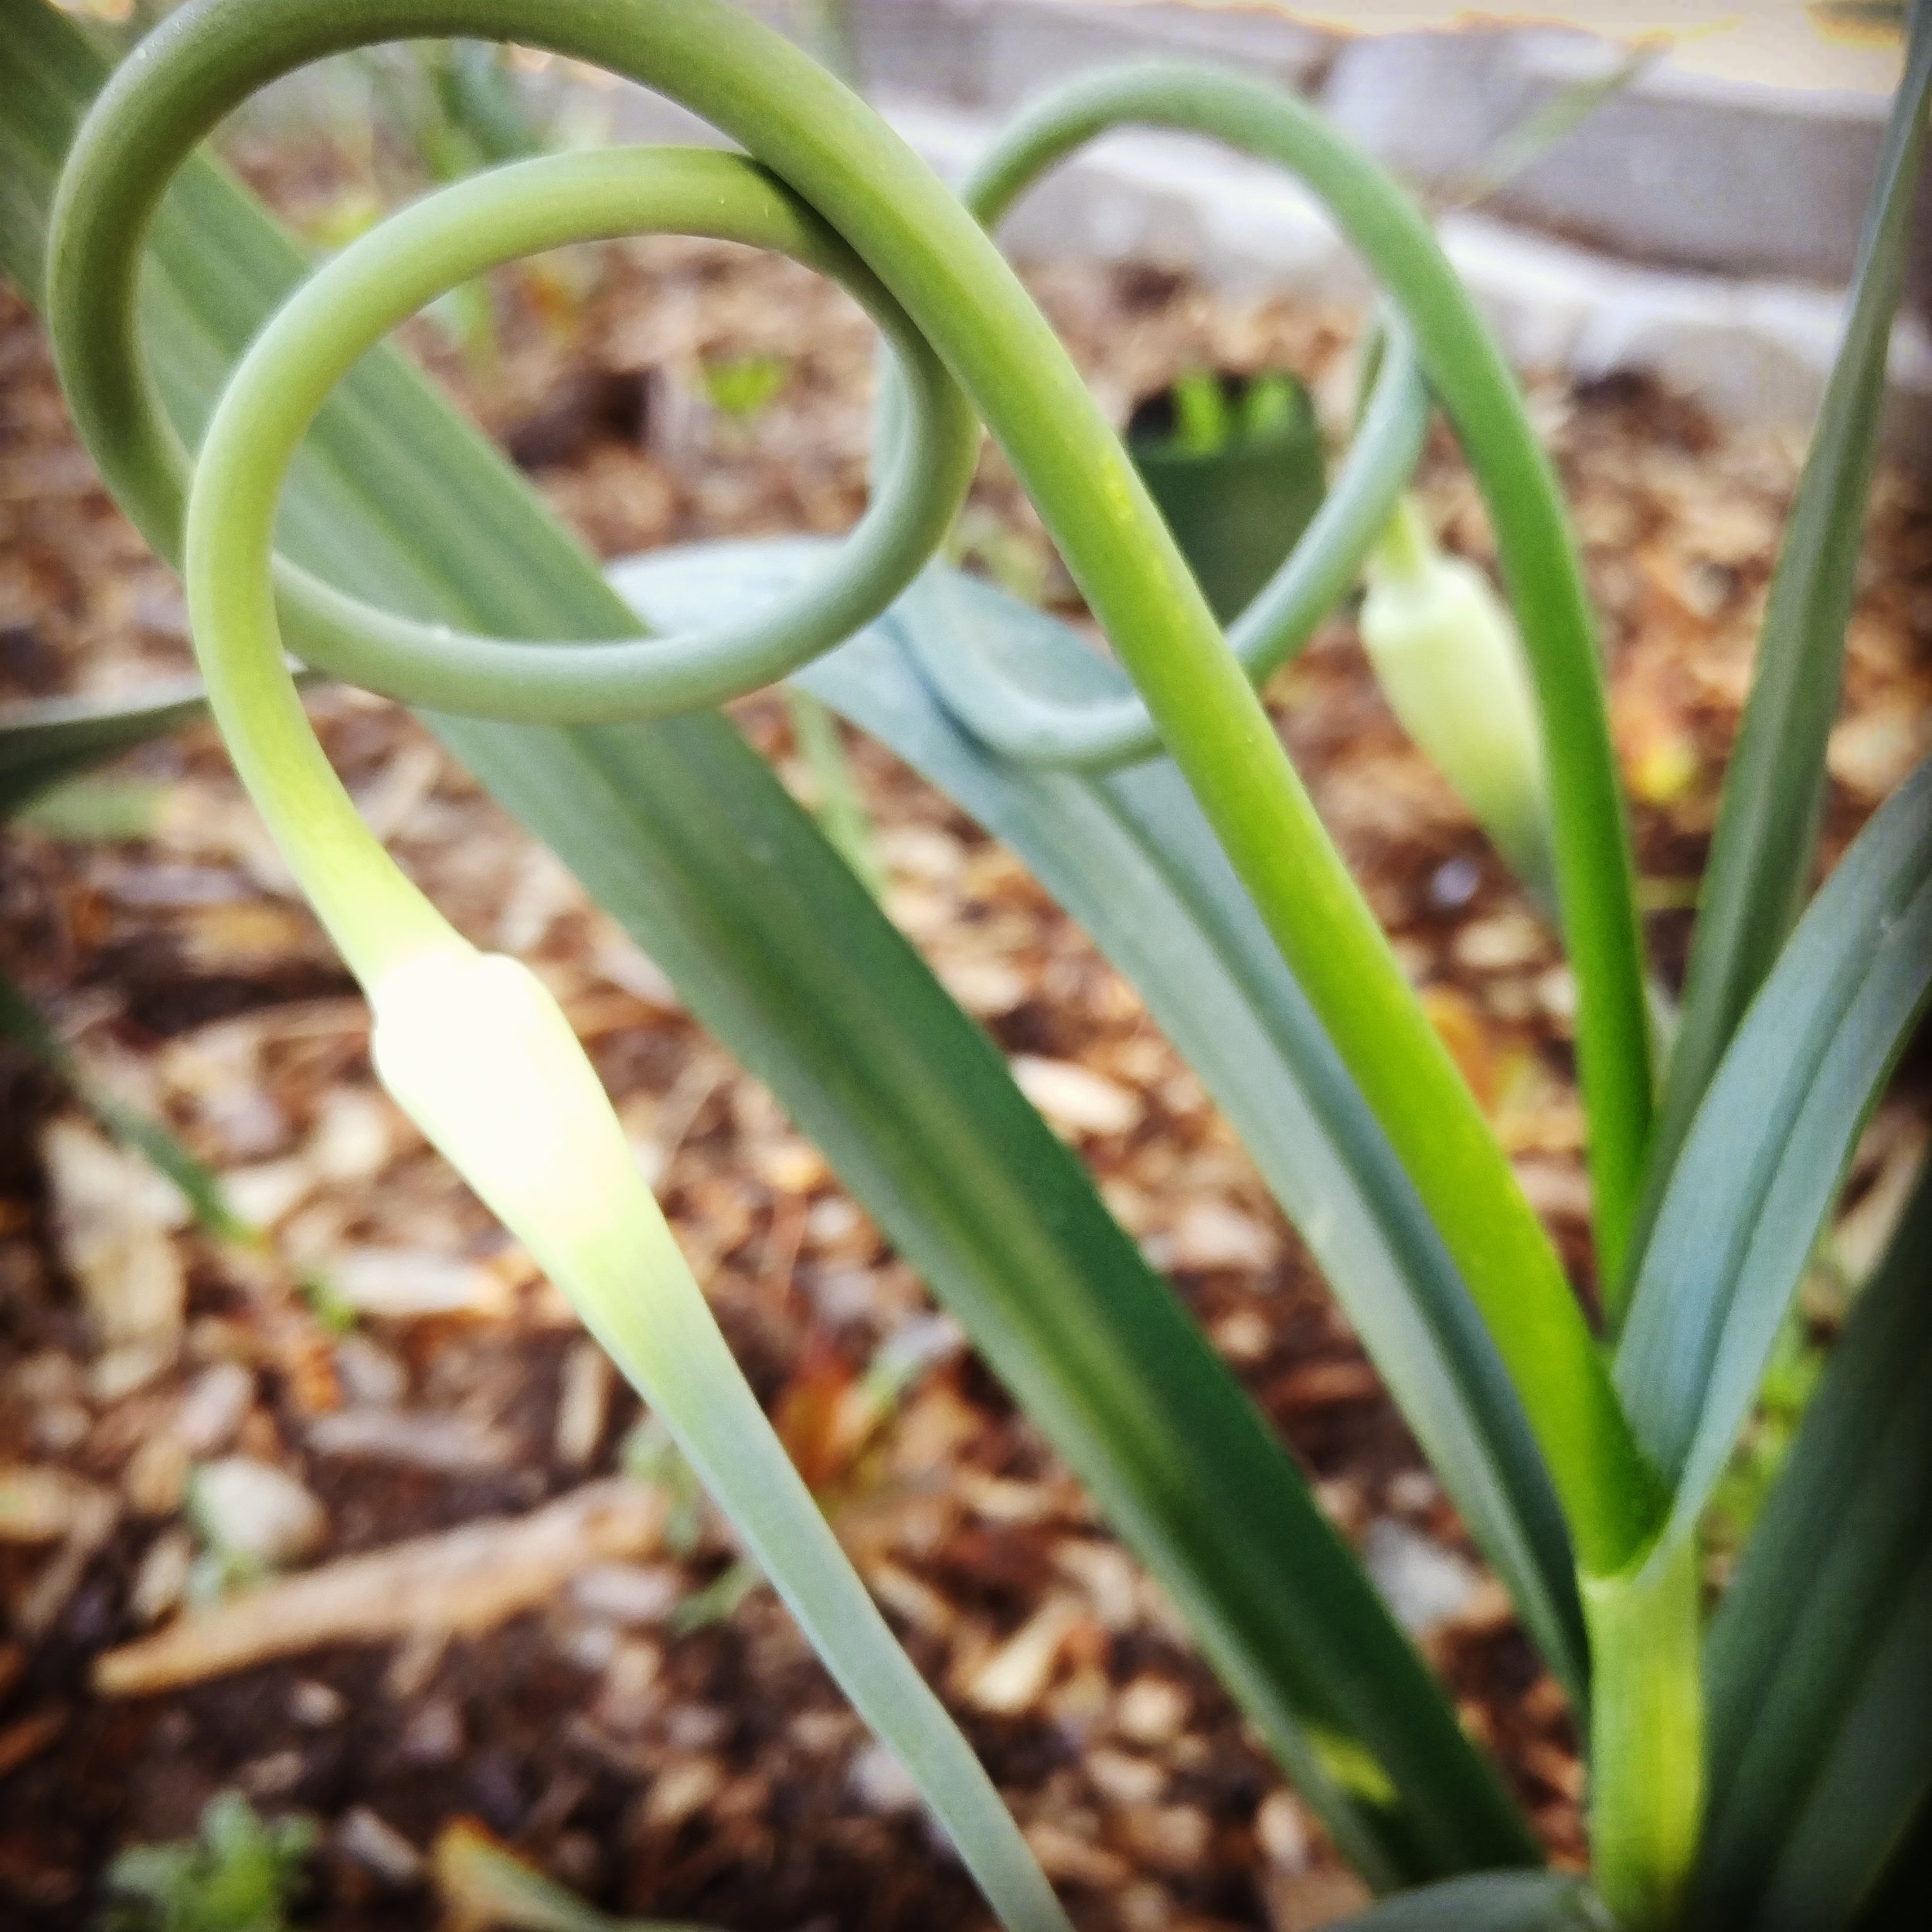
A "garlic scape" is actually the garlic plant sending up a flower (it's a long stem with a blossom on the end). Garlic is a biennial, which is a name for a plant that flowers in it's second year. Garlic cloves are usually planted in the fall (plant around the same time you would put in tulip bulbs), then harvested the following summer.
In order to grow the best garlic, you need to remove the scapes so the plant puts it's energy into producing a large bulb at the base, instead of flowering.
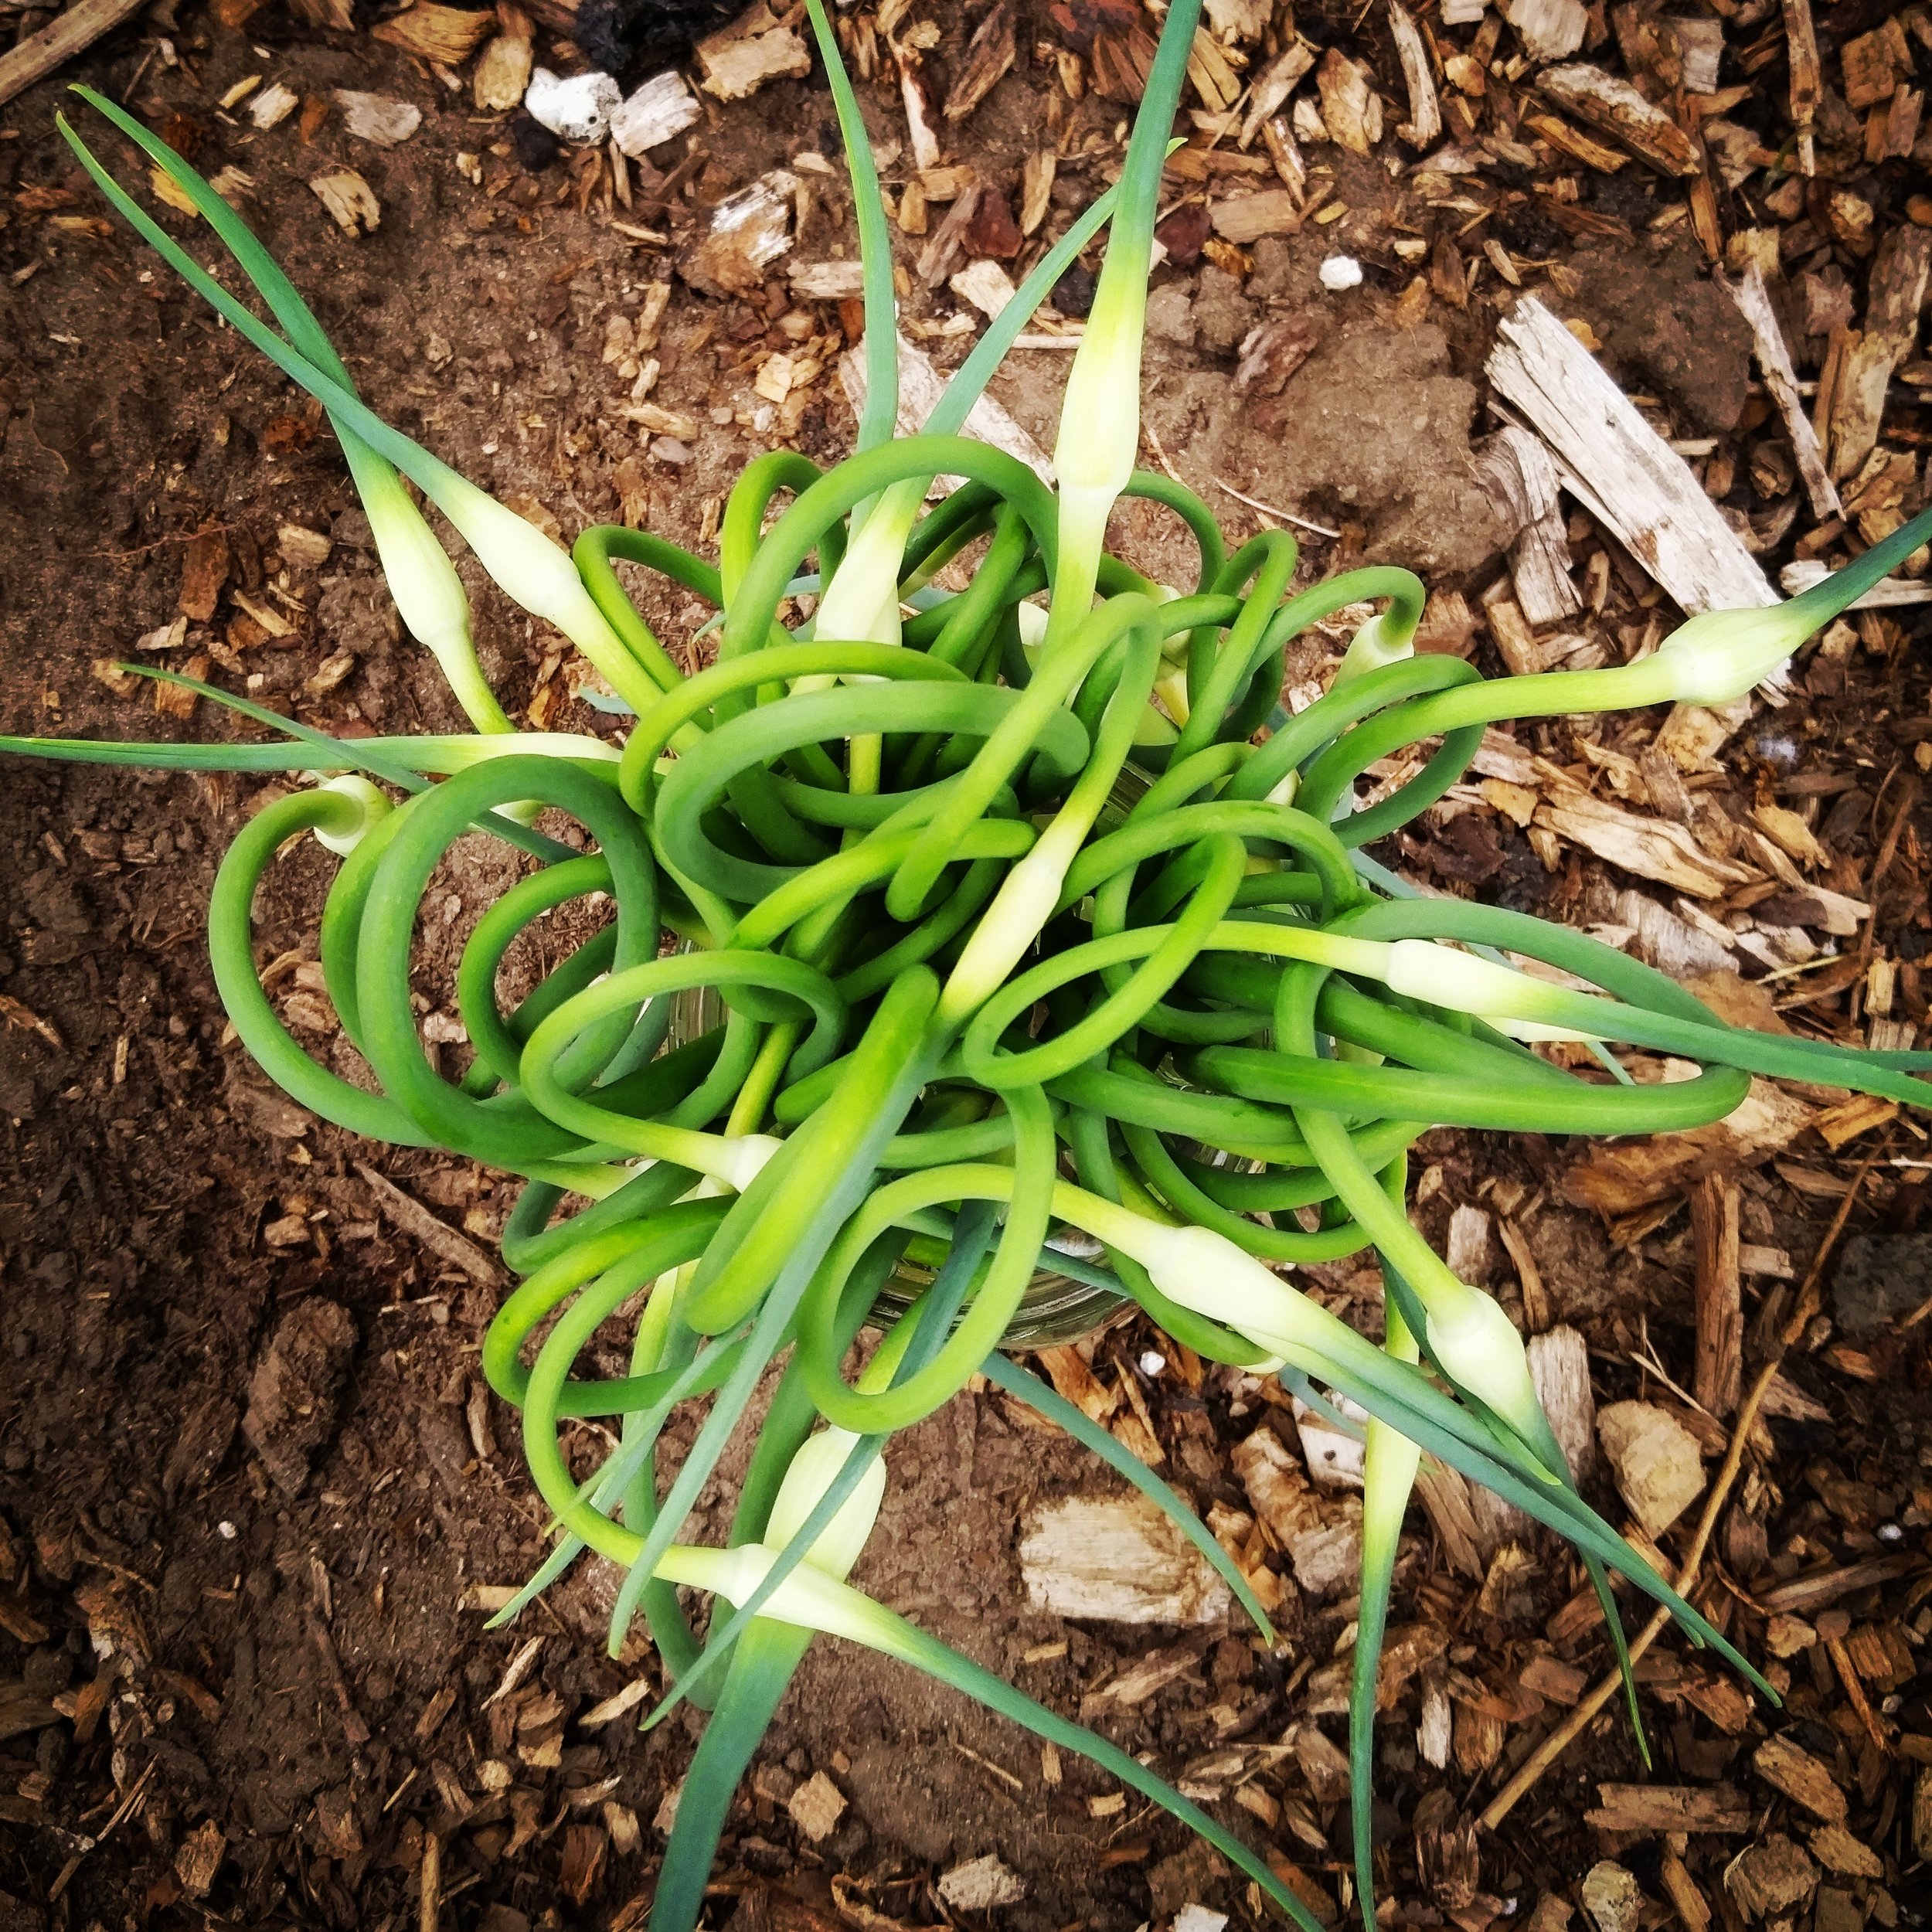
Here is the good news! Garlic scapes are edible and delicious. It's like you're getting 2 harvests from one plant!
Check out the video below to learn more about growing garlic and harvesting the scapes.
Ok, so now that you have you scapes picked, what do you do with them?
There are several options, including pickling, chopping and freezing, using them for garnish, pureeing into soup... but my favorite way to use them is to make a batch of Garlic Scape Pesto. The pesto has a wonderful garlicky flavor that compliments so many foods.
My daughter and I will show you how quick and easy it is!
Garlic Scape Pesto is fantastic in a variety of dishes and preparations, such as:
Pasta
Frittata or quiche
Roasted Chicken
Fish
On toast or crackers
Soup
Pasta sauce
Pizza
Marinades
Here is the recipe we use. Feel free to alter it to your taste. Some people even like to add herbs, like parsley or basil to the mix. Enjoy!
GARLIC SCAPE PESTO - Makes about 1 cup of pesto
3/4 to 1 cup roughly chopped garlic scapes (about 1/4 lb of scapes)
1/4 cup pine nuts or walnuts
1/2 tsp salt
Freshly ground black pepper
1/2 cup extra virgin olive oil
Optional: 1/4 cup grated Parmigiano - Reggiano cheese (or any other hard cheese)
Combine the scapes, nuts, salt and pepper in a food processor. Process until finely chopped.
Slowly add the olive oil while the food processor is running.
Stir in cheese (if using).
Store in the fridge for about 1 week.
*The pesto freezes beautifully in ice cube trays. If you plan on freezing the pesto, leave out the cheese. You can add cheese after you have thawed the pesto cubes.
Enjoy! Let me know if you tried the recipe! Or tell me YOUR favorite way to use garlic scapes!
How to Protect Your Plants from Cutworms
A quick and easy trick to protect your gardening investment.
How to Protect Your Plants from Cutworms
If you're a vegetable gardener, you know what I'm talking about. You've been there.
You spend hours at the garden center picking out the perfect plants, then hours in your garden lovingly planting your "babies". You're filled with hope, enthusiasm and excitement. This is going to be the best garden ever!
And then... the next morning... disaster! What just happened? Why are all your plants gone?
Check out the video below to find out what's happening and what you can do to prevent it!
Want to know what the little buggers look like? If you see them, destroy them!
![20160507_105239[1].jpg](https://images.squarespace-cdn.com/content/v1/582b872529687fd6acb7423d/1525358689189-WX8C0KHB17BYXVCWD77D/20160507_105239%5B1%5D.jpg)
I hope this helps! Let me know if it works for you!