
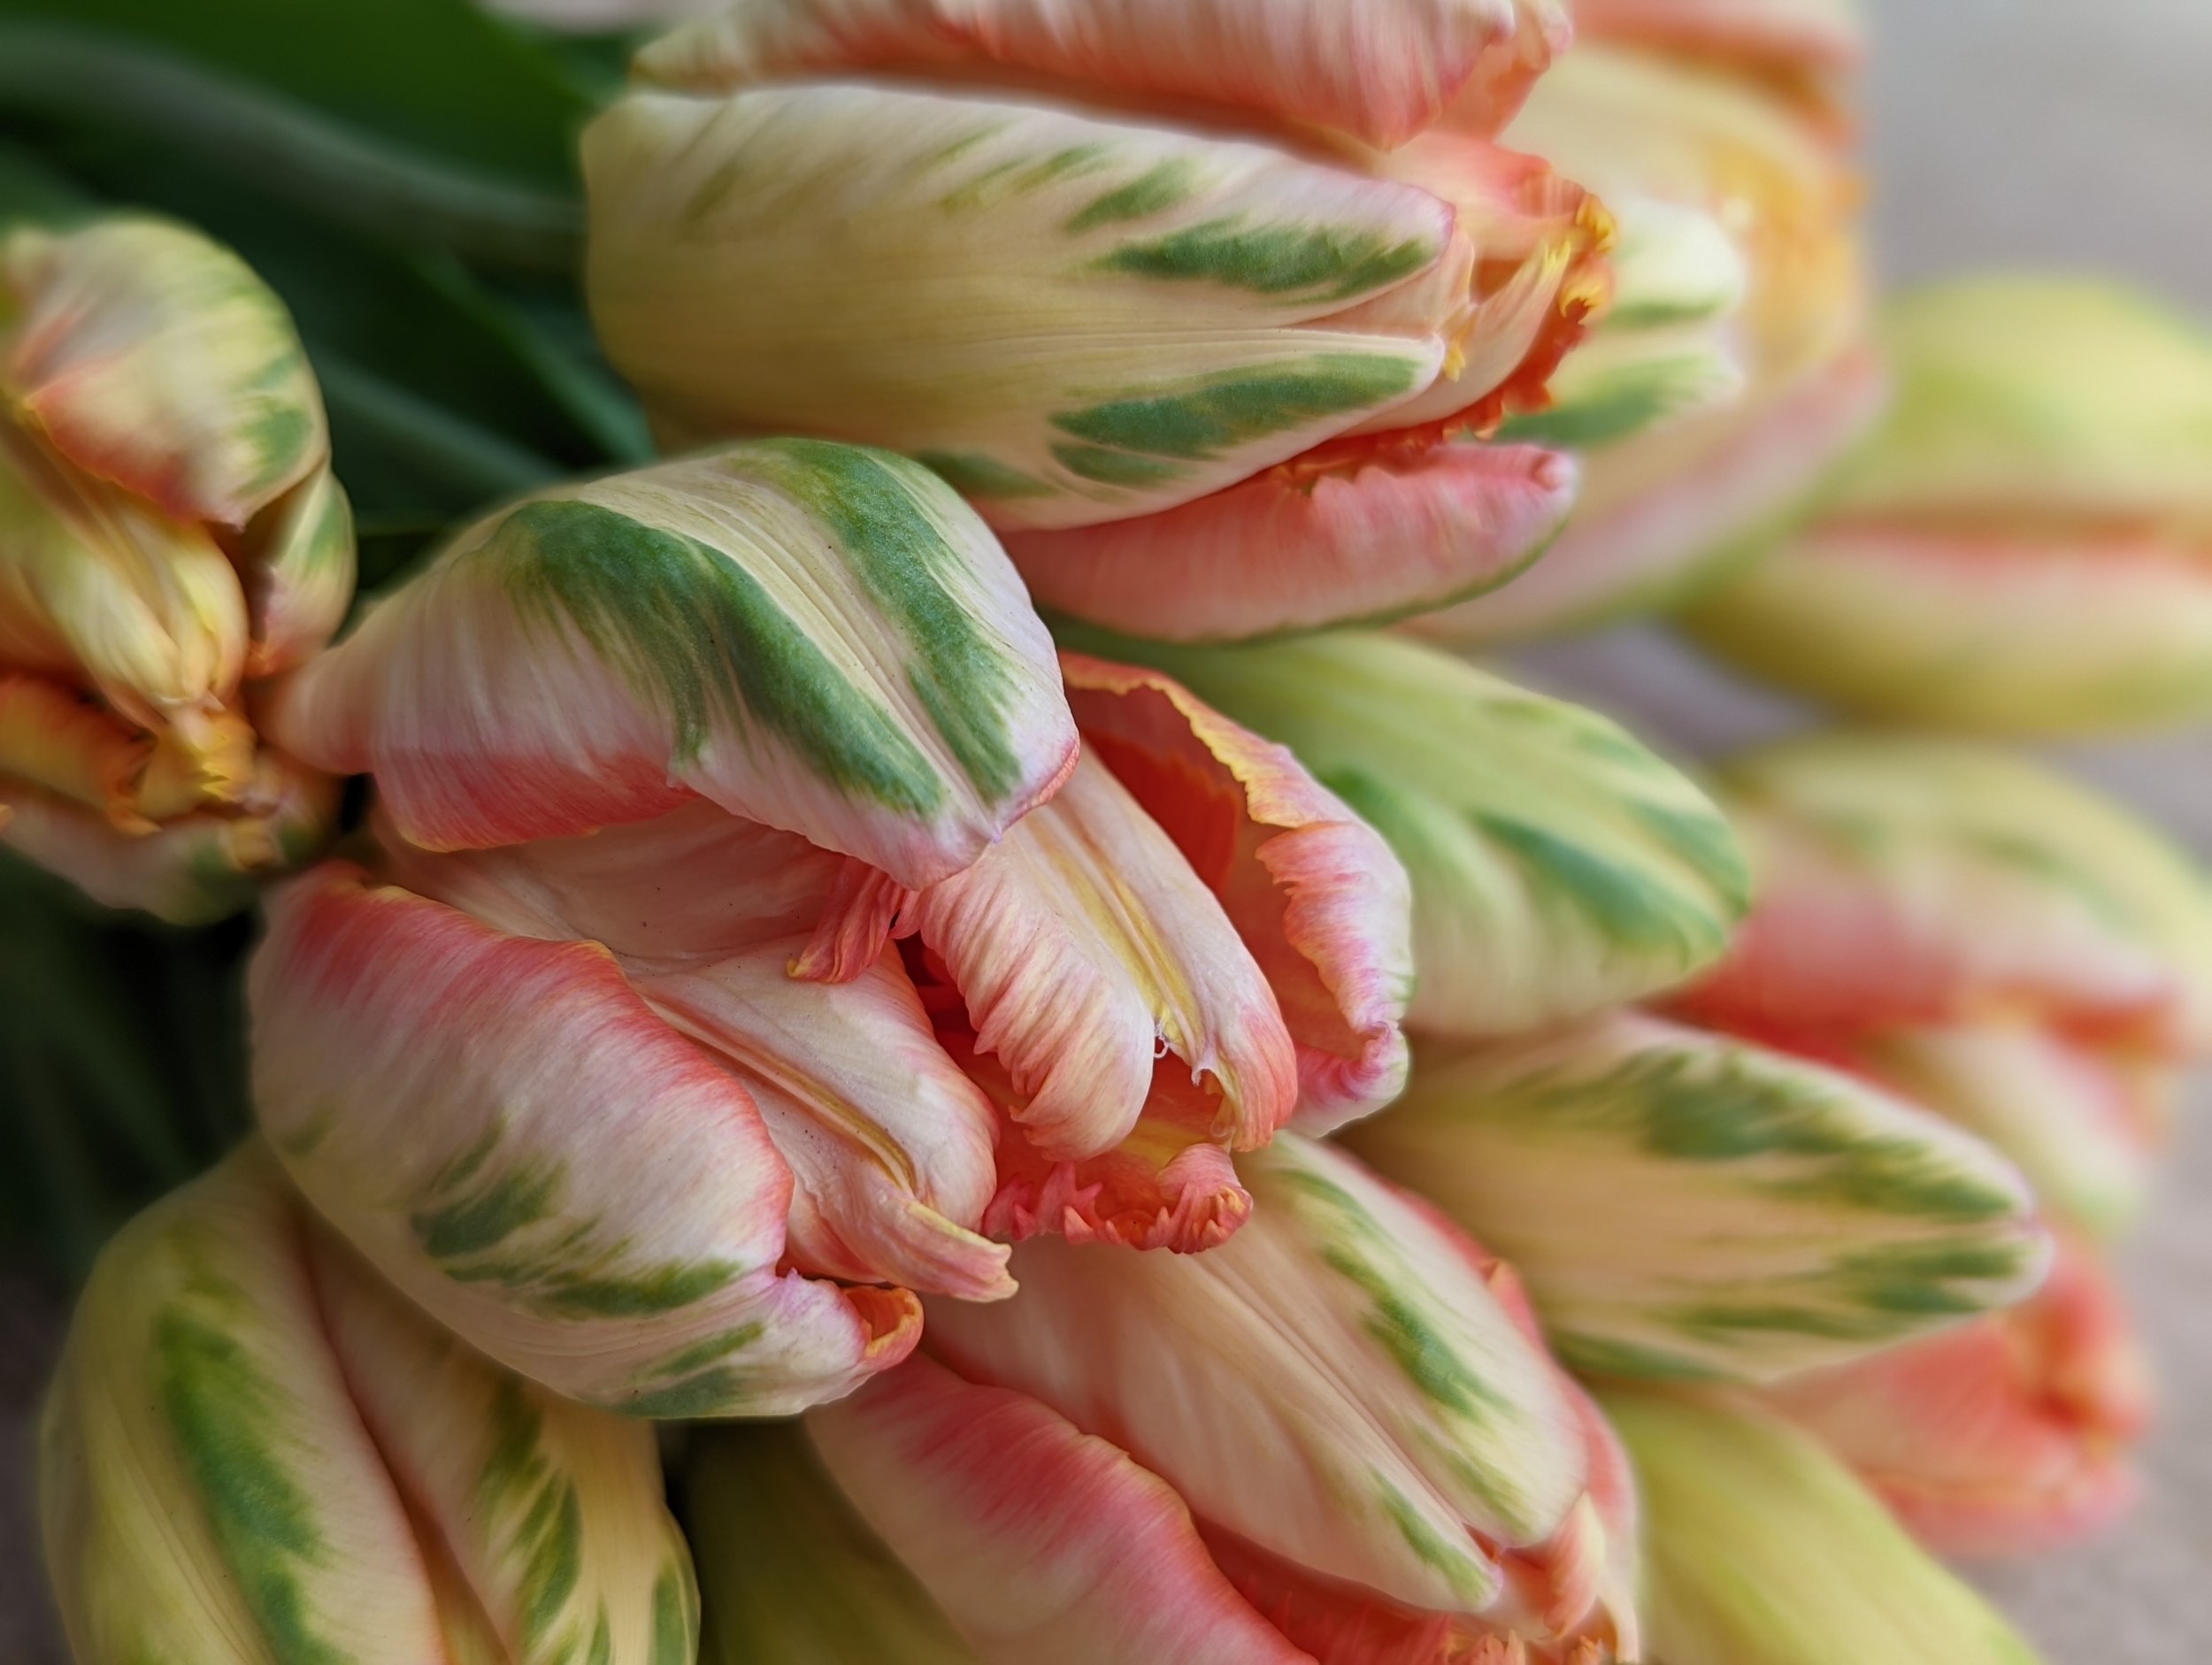
How to Grow Tulips as a Cut Flower
Learn the difference between growing Tulips for landscape vs cut flowers.
How to Grow Tulips as a Cut Flower
While many people are used to growing Tulips in their landscaping and flower beds, growing Tulips specifically as a cut flower to be displayed in a vase requires a completely different method and mindset!
What is the difference between growing Tulips for landscaping vs Tulips for cut flowers?
Great question! Let’s compare/contrast the two methods:
Landscape Use
Function = to look beautiful outdoors in the garden or landscape
Treated as a short lived Perennial
Bulbs are spaced 4-6 inches apart, usually using a bulb planter
Bulbs are replaced or refreshed every 2-3 years as they decline in quality and vigor
Plants are allowed to grow, bloom and fade away, with hopes they will rebloom the following year (but with awareness that most bulbs need to be replaced every 2-3 years).

Cut Flower Use
Function = to look beautiful in a vase or arrangement
Treated as an Annual
Bulbs are spaced tightly, like eggs in a carton
Bulbs are replaced every year
Entire plant is harvested before it blooms. Stem/bloom is removed from the bulb and placed in a vase. The bulb is discarded.

2. Why can’t I just cut the Tulips in my landscaping and use those in a vase?
You can… however, to get a long enough stem, you’ll likely need to cut the stem at ground level.
As you can see in the photo below, some Tulip types are naturally shorter and you’d have to cut them off at the bulb in order to get a usable stem.

When you cut the bloom and stem away from the bulb, the bulb has no way to photosynthesize and re-energize itself. While the bulb may produce leaves/foliage the following spring, it’s unlikely it will ever bloom again.
Trust me on this. I didn’t believe this was true and was determined to prove it wrong. After cutting 400 Tulip blooms off at the soil level, I left the bulbs in the ground to see if they would eventually rebloom. And they did… I finally got 2 tiny, pathetic blooms… 3 years later. 3 years!!!!
It’s usually a waste of time to try to replant bulbs that have been separated from the stem. It’s best to compost them.

3. WAIT! I thought Tulips were Perennials and came back every year?
Well, some do (sort of) and some don’t…
There are many different varieties of Tulips and some are better than others at naturalizing/perennializing.
Tulips are native to Central Asia (Turkey, Iraq, Russia) and thrive in climates that are similar - hot, dry summers and cold, wet winters. There are very few climates in North America that can mimic these conditions required for naturalization.
These 3 varieties are most likely (but not guaranteed) to naturalize if the climate is right:
Darwin Hybrid Tulips
Emperor Tulips
Triumph Tulips
It’s helpful to know that the Tulips grown for cut flower use are specifically bred to perform as an Annual - they bloom once, then the bulbs are discarded/composted.
Most botanical gardens replant their Tulips bulbs each year to achieve a stunning display each spring. Many parks/public spaces choose Darwin Hybrid, Emperor and Triumph Tulips, but replace the bulbs every 2-3 seasons as they decline in quality.
4. Can I grow Tulips in pots?
I find conflicting information about this. Many bulb suppliers strongly discourage growing them in pots, while others say it’s ok. However, most sources agree that bulbs grown in pots are subject to much more stress than bulbs planted in the ground (since they have less protection from the elements) and should be discarded after they bloom.
5. Are there any Tulips that will give me the best of both worlds? A landscape flower AND a cut flower?
Yes. Darwin Hybrid Tulips (like “Apricot Impression”, “Mystic Van Ejke”) and some Single Tulips often have very tall, long stems reaching over 24”. It’s possible to harvest a 10-12” stem for the vase while still leaving nearly all the foliage/leaves on the stem (which is required if you want the bulbs to rebloom the following year).

Most other Tulip varieties are too short to harvest a usable stem while also leaving enough foliage behind. Also remember, cut flower Tulip varieties are bred as Annuals, not Perennials, and will not reliably rebloom even if they are not harvested.
The photo below shows where the bloom would need to be cut in order to leave enough foliage on the stem for the bulb to generate. This short stem length is unacceptable for most growers.

6. How do I plant Tulip bulbs that I intend to harvest for cut flowers?
Let me show you! When you’re growing for cut flower use, you can plant Tulip bulbs MUCH closer together. We nestle them together closely, like eggs in a carton. This allows you to grow a lot of Tulips in a small space and the close spacing encourages the Tulips to grow long, straight stems.
The photo below is about 100 Tulips bulbs. You can see for yourself how many bulbs you can easily fit into a small space!

Most people use the “Trench Method” when growing Tulips as cut flowers, instead of digging a separate hole for each bulb.
Here’s how it works:
Dig a trench about 6 inches deep
Place the bulbs in the trench, spacing them like eggs in a carton
Cover the bulbs with the soil. Water in well.
If your climate receives sufficient rain and snow over the winter, no extra watering is necessary. If not, a few deep waterings over the winter/early spring will be required.
On our farm, we use the “Temporary Raised Bed Method”:
Rake the soil surface smooth
Build a temporary raised bed on top of the soil. Sides should be 6-12” high.
Place the Tulip bulbs in the raised bed, like eggs in a carton
Fill the raised bed with compost or compost/soil mix. Water in well.
If your climate receives sufficient rain and snow over the winter, no extra watering is necessary. If not, a few deep waterings over the winter/early spring will be required.
When Tulip harvest is over, disassemble the bed and spread out the compost/soil where needed.

Because of the extremely high vole pressure on our farm, we take extra steps to ensure that our bulbs are completely enclosed and protected from marauding rodents. You can read all about it HERE: How to Protect Your Tulips from Voles.
7. How do I harvest Tulips for cut flowers?
Ok, here is the strangest part about growing Tulips for cut flowers…
You don’t EVER want to see a single Tulip in bloom in the field! Yes, that’s right, your #1 goal is to harvest every bloom BEFORE they open.
Why?
Tulips that are already open will have a shorter vase life (3-5 days) Instead, you want to Tulip to open up AFTER it’s in the vase, not before. Tulips that open in the vase will have a 7+ day vase life.
Tulips that are harvested before they are open can be stored in a cooler or refrigerator for 1-2 weeks before being used. This is especially helpful when there is a heat wave and all the Tulips ripen in 1-2 days, instead of gradually ripening over 7-14 days. It happens. ;)

When the blooms are just starting to color up, but not open yet, it’s time to harvest. Pull the entire plant, bulb and all, out of the ground. With the food source still attached (the bulb), the blooms can be stored dry for about 2 weeks.
To store the blooms in your fridge or cooler, bundle the blooms in newspaper. Place them upright in a bucket (no water) or lay them flat (bundling helps keep the stems straight). Keep them in the dark to prevent bending toward light (“phototrophic”)!

When you’re ready to use the Tulips, snip off the bulb, strip off the lower leaves and wash the stem clean. Place the stem in clean water and it will gradually begin to open up.
If the stem feels floppy or limp, do not panic! Follow the instructions above, but also wrap the stems tightly in newspaper to keep them upright. Within a few hours, the stems will be straight and the paper can be removed.

Floppy Tulips that have been dry stored in the cooler for 2 weeks. The stems are limp as noodles!

Wrap the stems tightly in paper, recut the stem ends and place in cool water for at least 1 hour (or overnight).

Unwrap the paper. The stems are now fully hydrated and firm!
Fun fact! Tulip stems keep growing after they have been cut. If you notice your Tulips look taller in the vase than they did yesterday, you’re not crazy! They actually did grow. Simply give them a trim every few days.

TULIP PLANTING SUMMARY
WHEN TO PLANT: Plant Tulip bulbs in the fall when temperatures begin to drop (soil temperatures below 60 degrees F), usually late September to November.
PLANTING SITE: Tulips do best with full sun, but can tolerate partial shade. Tulips require well-draining soil. They may rot in wet, heavy soils.
WHEN TO WATER: Water deeply once after planting the bulbs. Water moderately in the spring if the soil is dry. During the blooming season, water every 3-5 days if there is no rainfall.
PLANTING WIDTH & DEPTH: Decide if you are going to plant the Tulips for landscape display OR cut flower use.
Landscape Display: If growing for landscape display, plant the bulbs 4-5” apart and about 5-7” deep. The rule of thumb is to plant the bulbs 3x as deep as the bulb is high. Plant the bulbs pointy side up.
Cut Flower Use: If growing for cut flower use (harvesting the blooms to display in a vase), plant the bulbs closely nestled together (but not touching) and about 5-7” deep. The rule of thumb is to plant the bulbs 3x as deep as the bulb is high. Plant the bulbs pointy side up.
AFTER BLOOMING (Landscape display Tulips only): After the Tulips have finished blooming, it’s important to allow the plants to die back naturally. This is how they gather energy to bloom again the following year. Allow the leaves/stems to completely die back and turn yellow before clearing away debris.
To summarize…
If you want to enjoy Tulips in your landscaping AND you want them to rebloom the next season, I don’t recommend harvesting them for cut flowers (unless you are growing Darwin hybrids and you want to sneak a few blooms for bouquets).
Instead, plant your cut flower Tulips in a dedicated area, treat them as an Annual flower and enjoy them in the vase!
Ready for more?
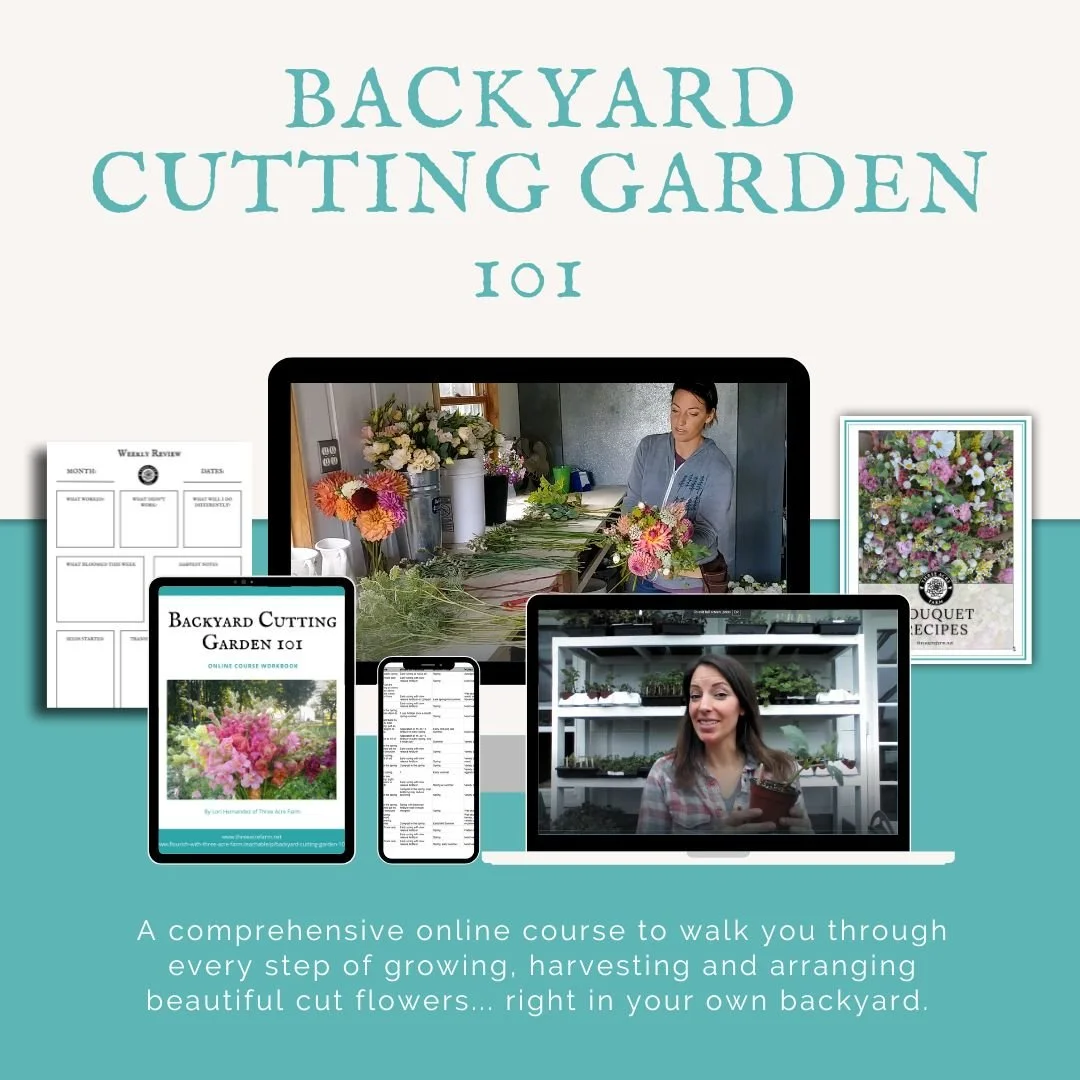
If you’re serious about growing the garden of your dreams this year, register for my online course, “Backyard Cutting Garden 101”. You’ll find everything you need to plan, grow, harvest, and arrange your stunning blooms. I can’t WAIT to help you grow! Click on the image below for all the details. 👇
How to Protect Tulips from Voles
A full report on my “No-Till Tulips” experiment.
How to Protect Tulips from Voles
If you’ve been following along for a while, you know that voles (small little mammals, similar to mice) are a huge problem on our farm. Voles love to eat all sorts of vegetations, but bulbs are their favorite food.
My first season on the farm, I planted 125 Tulips bulbs… and the voles ate 123 of them.
My second season, I planted about 500 bulbs… and the voles 2/3 of them.
I realized this was a SERIOUS problem and I would have to find ways to outsmart the voles.
In November of 2019, my husband and I drove all the way from Michigan to Philadelphia so I could spend a day learning from Jennie Love, of Love ‘n Fresh Flowers.
I’m grateful for Jennie’s wisdom, generosity and enthusiasm. She is an inspiration to me and I love learning from her, whether it’s in person, through one of her online courses or listening to her podcast, “The No-Till Flowers Podcast”.

When I saw her “No Till Tulips” planting method in person, I was fascinated and wanted to try it myself.
The method is brilliant. Instead of digging individual holes for each bulb or a giant trench, she creates a temporary raised bed on the surface of the soil. This makes harvesting the Tulips much faster and creating the beds is so simple.
On Jennie’s farm, they don’t get a lot of snow cover, so her two fierce barn cats can hunt all winter and keep the vole/critter population at a manageable level (side note: barn cats are MUST on any farm!).
In Michigan, we often have deep snow cover over the winter. The voles make their tunnels deep below the snow and our barn cats can’t catch them… so the voles basically have free run of the entire farm and can do massive amounts of damage.
I decided to try Jennie’s “No Till Tulips” planting method, but with a twist. I would line the BOTTOM and the TOP of the bed with wire mesh hardware cloth and staple it the sides of the beds.
Below, I’m going to walk you step by step though the process of how I did it. There are LOTS of photos, because I suspect you are a visual learner like me.
1. Rake planting area smooth and lay out the boards for the beds. These boards are 6” tall. I wish they were 8-12” but we worked with what free materials we had on hand.
This bed is 3’ x 50’ and I fit 4,200 Tulips bulbs in here.

2. Roll out wire mesh hardware cloth. I bought this from Home Depot and it’s the 1/4” mesh. 1/2” is too big - voles can fit through 1/2” spacing. I pinned it in place with landscape staples.

3. I started creating the sides of the beds. The boards are simply held in place with rebar stakes on either side of the boards.

4. I bent the wire mesh so it cradled the boards. Then I used a staple gun to staple the mesh to the boards.

5. I started filling the beds with about 2 inches of compost and a sprinkle of Bone Meal.

6. My farm hand, Kathryn, helped me plant the bulbs. This part goes really fast. We were able to plant over 4,200 bulbs in a couple hours.
We placed about 25-30 bulbs per square foot. They are nestled close together, like eggs in a crate.

7. After the bulbs were placed, we filled the beds all the way to the top with more compost.

8. Just for refence, this is what 100 Tulips bulbs looks like. They hardly take up any space at all.

9. After the bed was filled, I rolled out another layer of wire mesh hardware cloth over the top of the bed and stapled it to the boards. Now the Tulips bulbs were in a “cage”, completely encased in wood and wire mesh.

10. Over the winter, whenever there was a thaw, I’d see lots of vole tunnels all around the Tulip bed…

11. In March, I visited the Tulip bed every day to look for growth. As soon as they started poking up, I removed the wire mesh top.
By this time, most of the snow as gone and the barn cats were able to hunt again.

12. In April, the Tulips started to wake up.

13. Our spring was extremely cold and cloudy, which delayed Tulip growth. We hoped they would be ready in time for Mother’s Day, but alas, most were not.
We even tried covering the bed with hoops and plastic to warm them up faster, but it didn’t really work since it was so cloudy and windy in April (if you try this, be sure to keep the sides vented. When the sun comes out, it can heat up REALLY fast and cook the Tulips to death).

14. By the first week of May, a couple of the varieties were ALMOST ready to harvest.

15. When we harvest Tulips for cut flower use, we pull the entire plant, including the bulb. With the bulb still attached, they can be stored in a cooler for up to 4 weeks.

16. We harvest when the buds swell and begin to show their color. This allows the bud to open up in the vase and the customer get the best and longest vase life.

17. Tulips are harvested into crates or buckets and stored dry in the cooler. They don’t need to be in water.

18. After a cold cloudy spring, the temperatures soared (literally doubled in 2 days), the sun came out and all the Tulips were ready for harvest in a 3 day period, instead of a 3 week period.
We harvested up to 5 times a day to make sure we caught them before they opened. We had to scramble like crazy to harvest everything in time AND mash them all into our walk-in cooler.
19. After the harvest was over, I disassembled the raised bed. I pulled the sides off and raked the compost into the beds nearby to use for a new planting area.

20. And look what I found under the wire mesh! There are so many voles tunnels under the mesh.
I rejoiced that the mesh did it’s job and we didn’t lose a SINGLE BULB to those awful voles. Take THAT, voles!

I hope you enjoyed this step-by-step explanation of how I finally outsmarted the voles. If you struggle with voles too, use this as inspiration to find a solution that works for you!

READY FOR MORE?
If you’re serious about growing the garden of your dreams this year, join my online course and community, “Backyard Cutting Garden 101”. You’ll find everything you need to plan, grow, harvest and arrange your stunning blooms. I can’t WAIT to help you grow! Click on the button below for all the details.

Best Perennials for the Cut Flower Garden
Perennials are a great choice to fill the awkward space between Spring Blooming bulbs and Summer Blooming Annuals!
When we started our flower farm, we grew mostly Summer Blooming Annual flowers like Cosmos, Sunflowers and Zinnias. The seed is inexpensive and they grow quickly when planted from seed after the Average Last Spring Frost Date.
However, we soon noticed that we struggled with what I call “Awkward Gap Season”, which is the 6-8 weeks between when the Spring blooming bulbs die off (Daffodils, Tulips, etc) in mid May and the Summer Blooming Annuals begin in mid July.
What could we use to fill that “dead” space between mid-May to mid-July?
Perennials to the rescue!
Many types of Perennials bloom during the dreaded “Awkward Gap Season”.
I can’t tell you how much I’ve learned to love and appreciate our Perennials. Even though many Perennials are only in flower for about 2-6 weeks out of the year, many of them bloom right when I need them, when nothing else on the farm is in bloom!
Perennials do take a few years to establish before they are vigorous enough to harvest from, so I recommend planting as many as you can, as soon as you can.
While they may not bloom for a long length of time (many Perennials bloom for about 2-6 weeks out of the year), they are hardy, reliable and generally more drought tolerant than annual plants.
Some Perennials will give you a flush of blooms in early summer, then a second flush in late summer/early fall if cut back after the first blooming.
Fall is the BEST time to plant Perennials (about 4-6 weeks before your Average First Fall Frost), but they can also be planted in the spring.
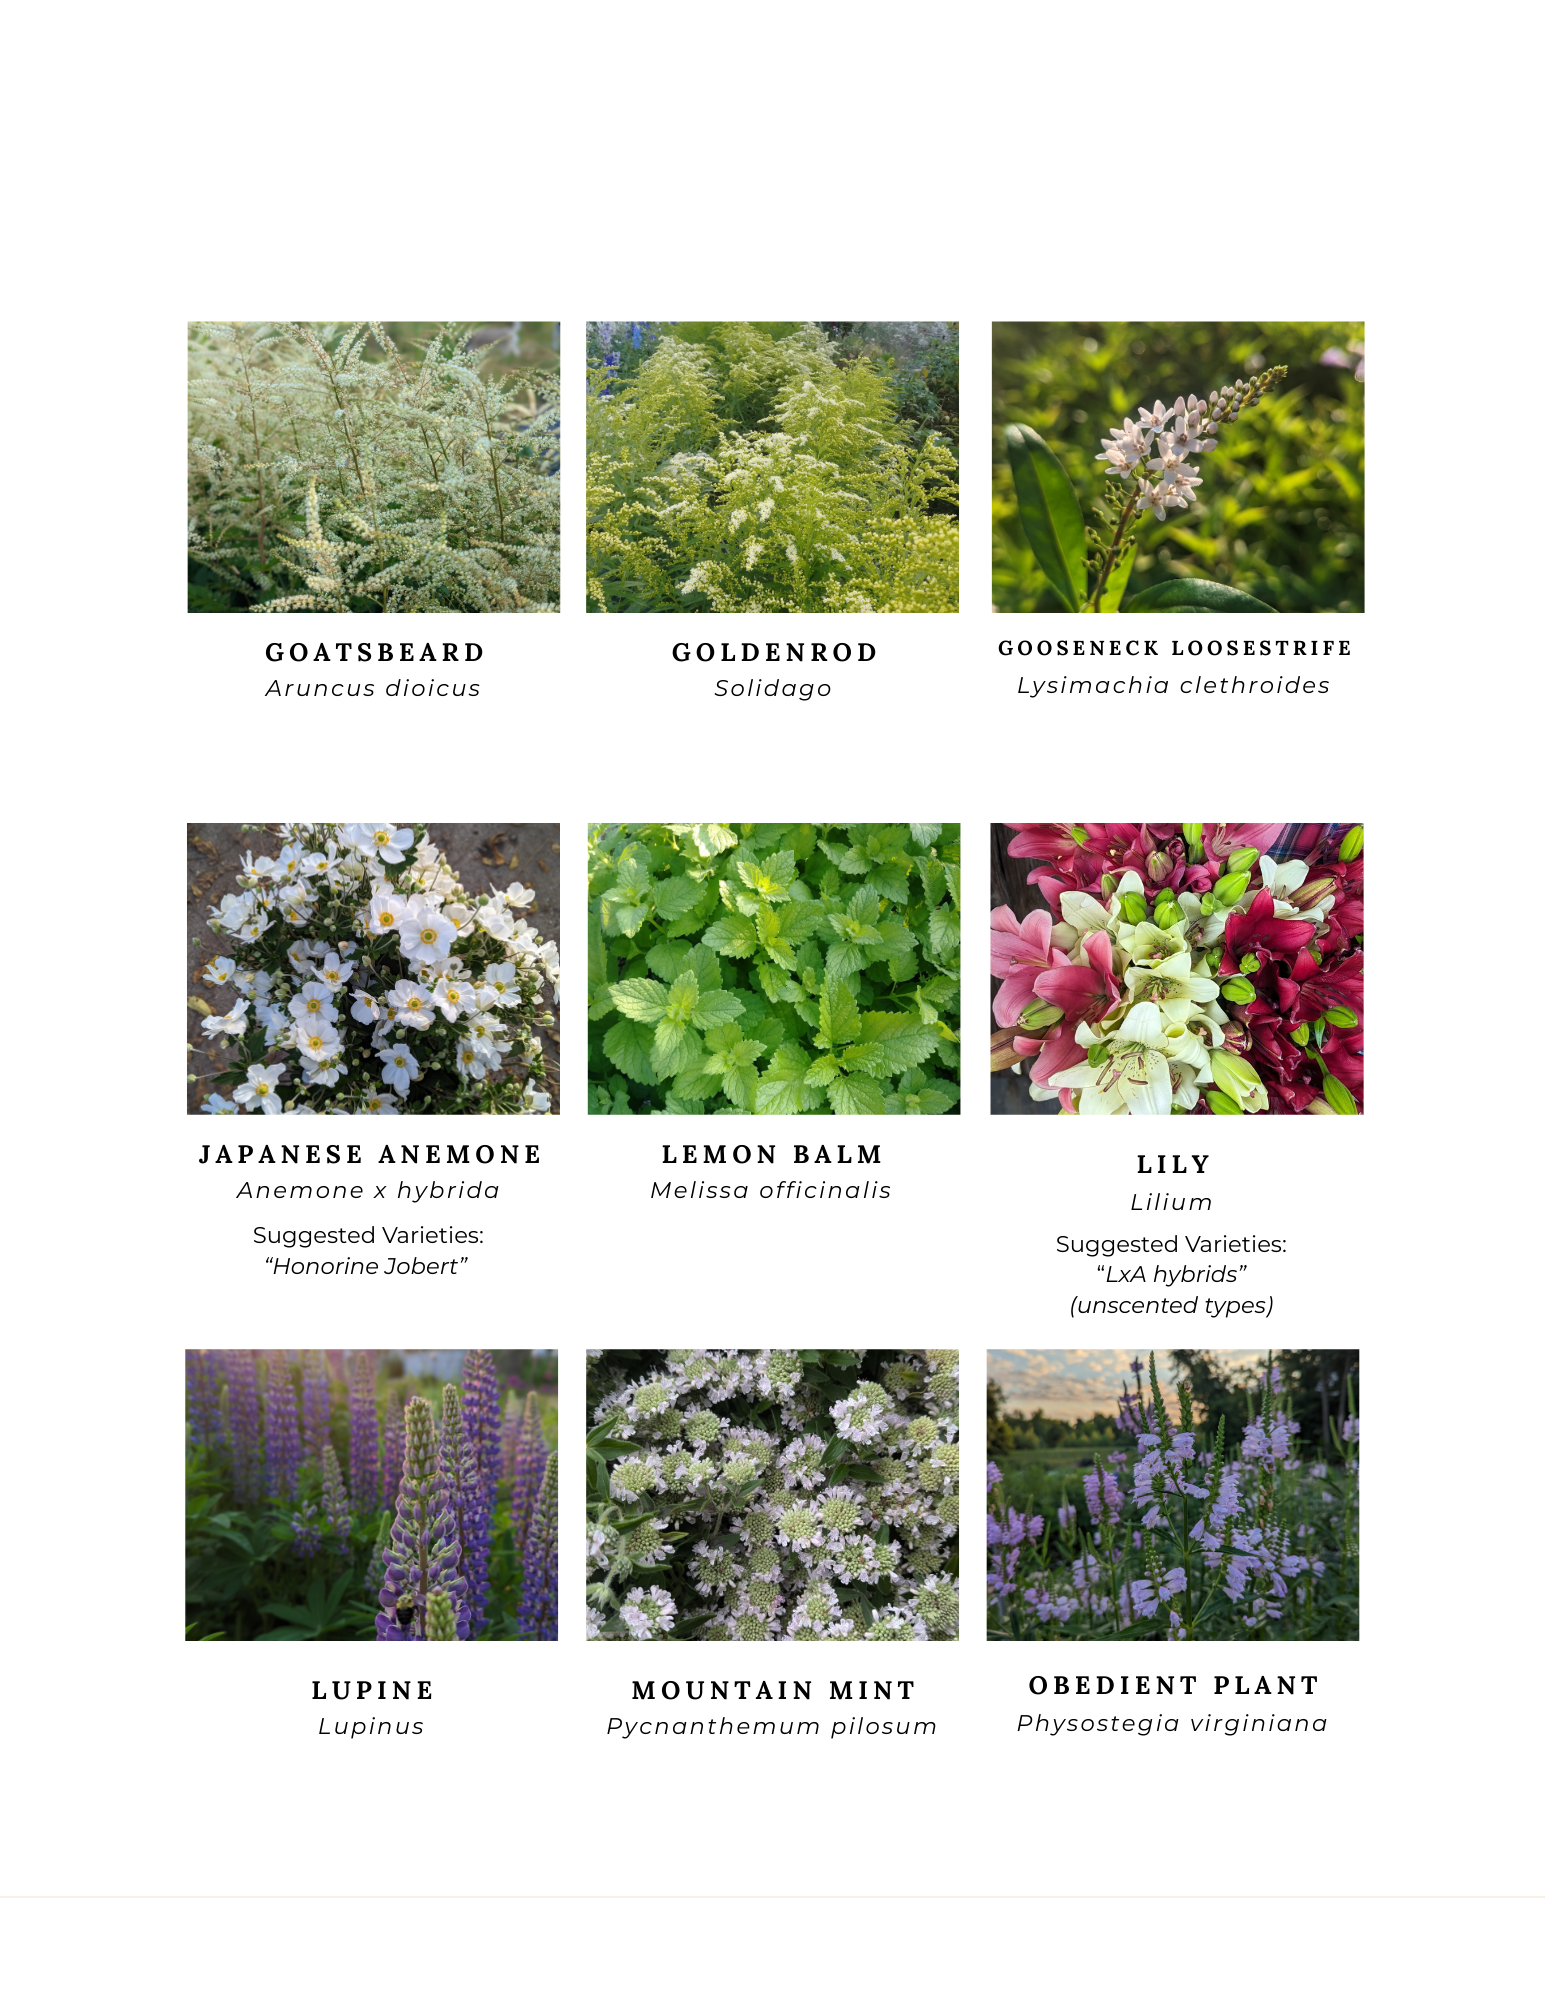
Here is a list of a Few of my favorite Perennials on our farm
Not all of these Perennials bloom in the spring/early summer… but many do!
* Please note that some crops we grow may be considered “invasive” in your area. Be sure to do your own research before planting!
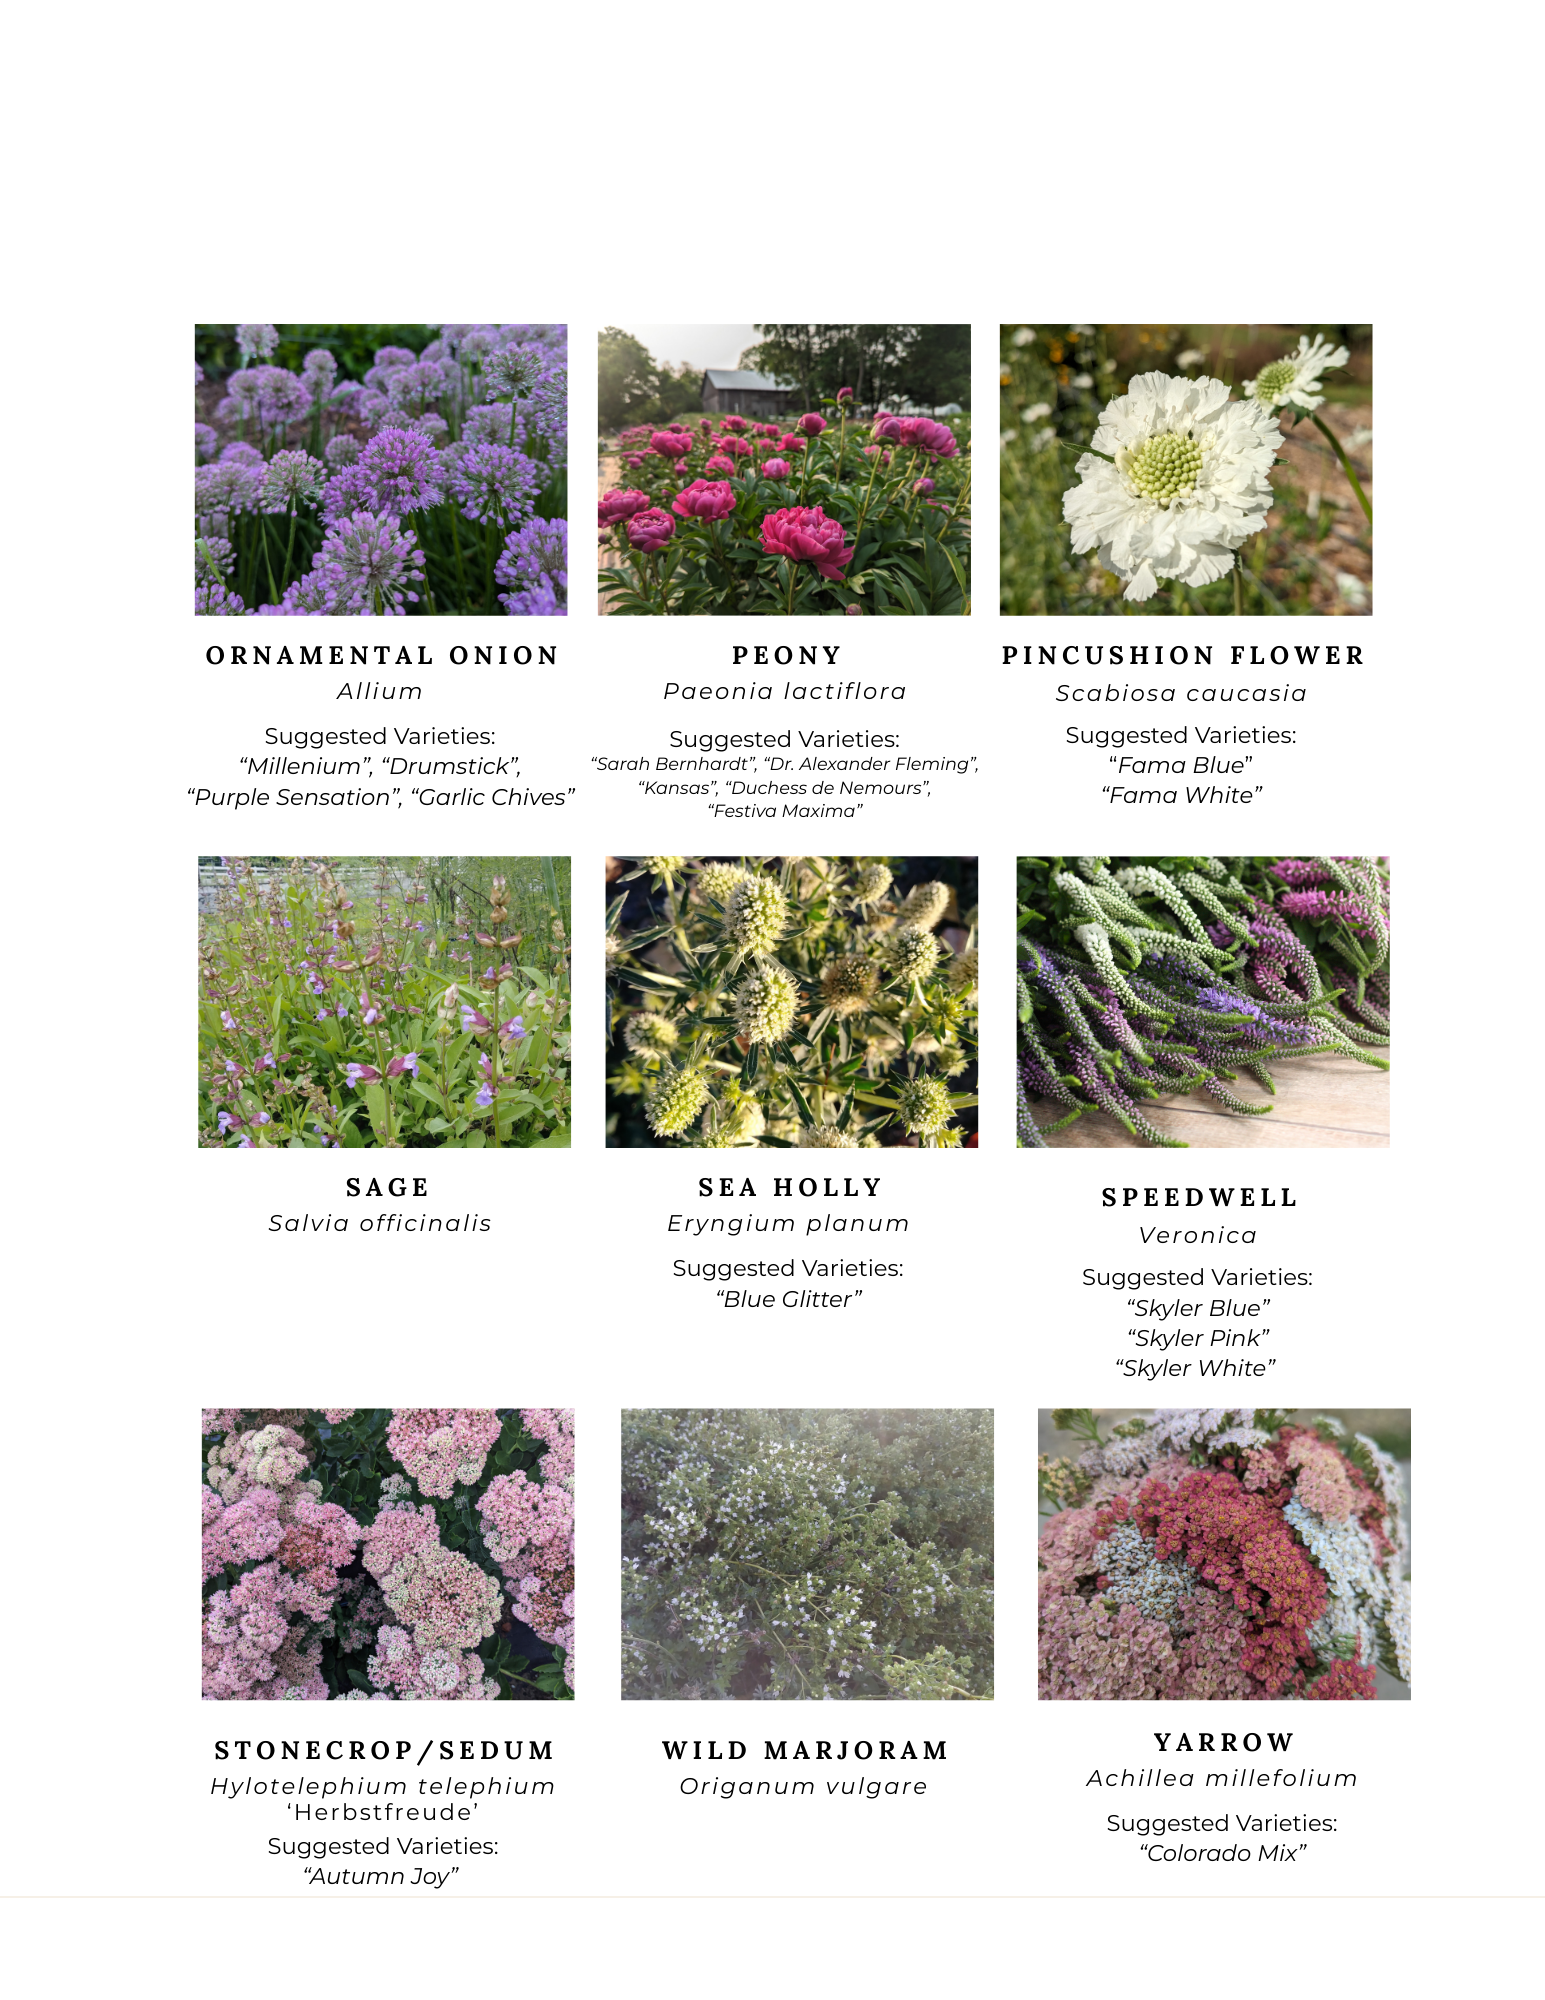
Achillea millefolium - Yarrow “Colorado Mix”
Allium - Ornamental Onion “Millennium”, “Purple Sensation”, “Drumstick”, “Garlic Chives”
Anemone x hybrida - Japanese Anemone “Honorine Jobert”
Aruncus dioicus - Goatsbeard
Baptisia hybrid - False Indigo “Decadence® Deluxe Pink Truffles”
Echinops bannaticus - Globe Thistle “Blue Glow”
Eryngium planum - Sea Holly “Blue Glitter”
Geum - Avens “Totally Tangerine”, “Tempo Rose”, “Pretticoats Peach”
Gypsophila - Baby's Breath “Million Star II”
Hylotelephium telephium 'Herbstfreude' - Stonecrop/Sedum “Autumn Joy”
Lilium Lily (prefer the LxA hybrid types, as they are unscented)
Lupinus - Lupine
Lysimachia clethroides - Gooseneck Loosestrife
Melissa officinalis - Lemon Balm
Nepeta mussinii - Catmint
Origanum vulgare - Wild Marjoram
Paeonia lactiflora - Peony “Sarah Berhardt”, “Kansas”, “Dr. Alexander Fleming”, Duchess de Nemours”, “Festiva Maxima”, etc
Phlox paniculata - Garden Phlox “David”
Physostegia virginiana - Obedient Plant
Pycnanthemum pilosum - Mountain Mint
Rudbeckia hirta - Black-Eyed Susan “Irish Spring”, “Moroccan Sun”
Rudbeckia Triloba - Brown-Eyed Susan “Filou”
Salvia officinalis - Sage
Scabiosa caucasia - Pincushion Flower “Fama Blue”, “Fama White”
Solidago - Goldenrod
Tanacetum parthenium - Feverfew/Matricaria “Magic Single”, “Magic Lime Green”, “Tetra White”
Veronica - Speedwell “Skyler Blue”, “Skyler Pink”, “Skyler White”

Show-Stopping Peonies for Cut Flowers
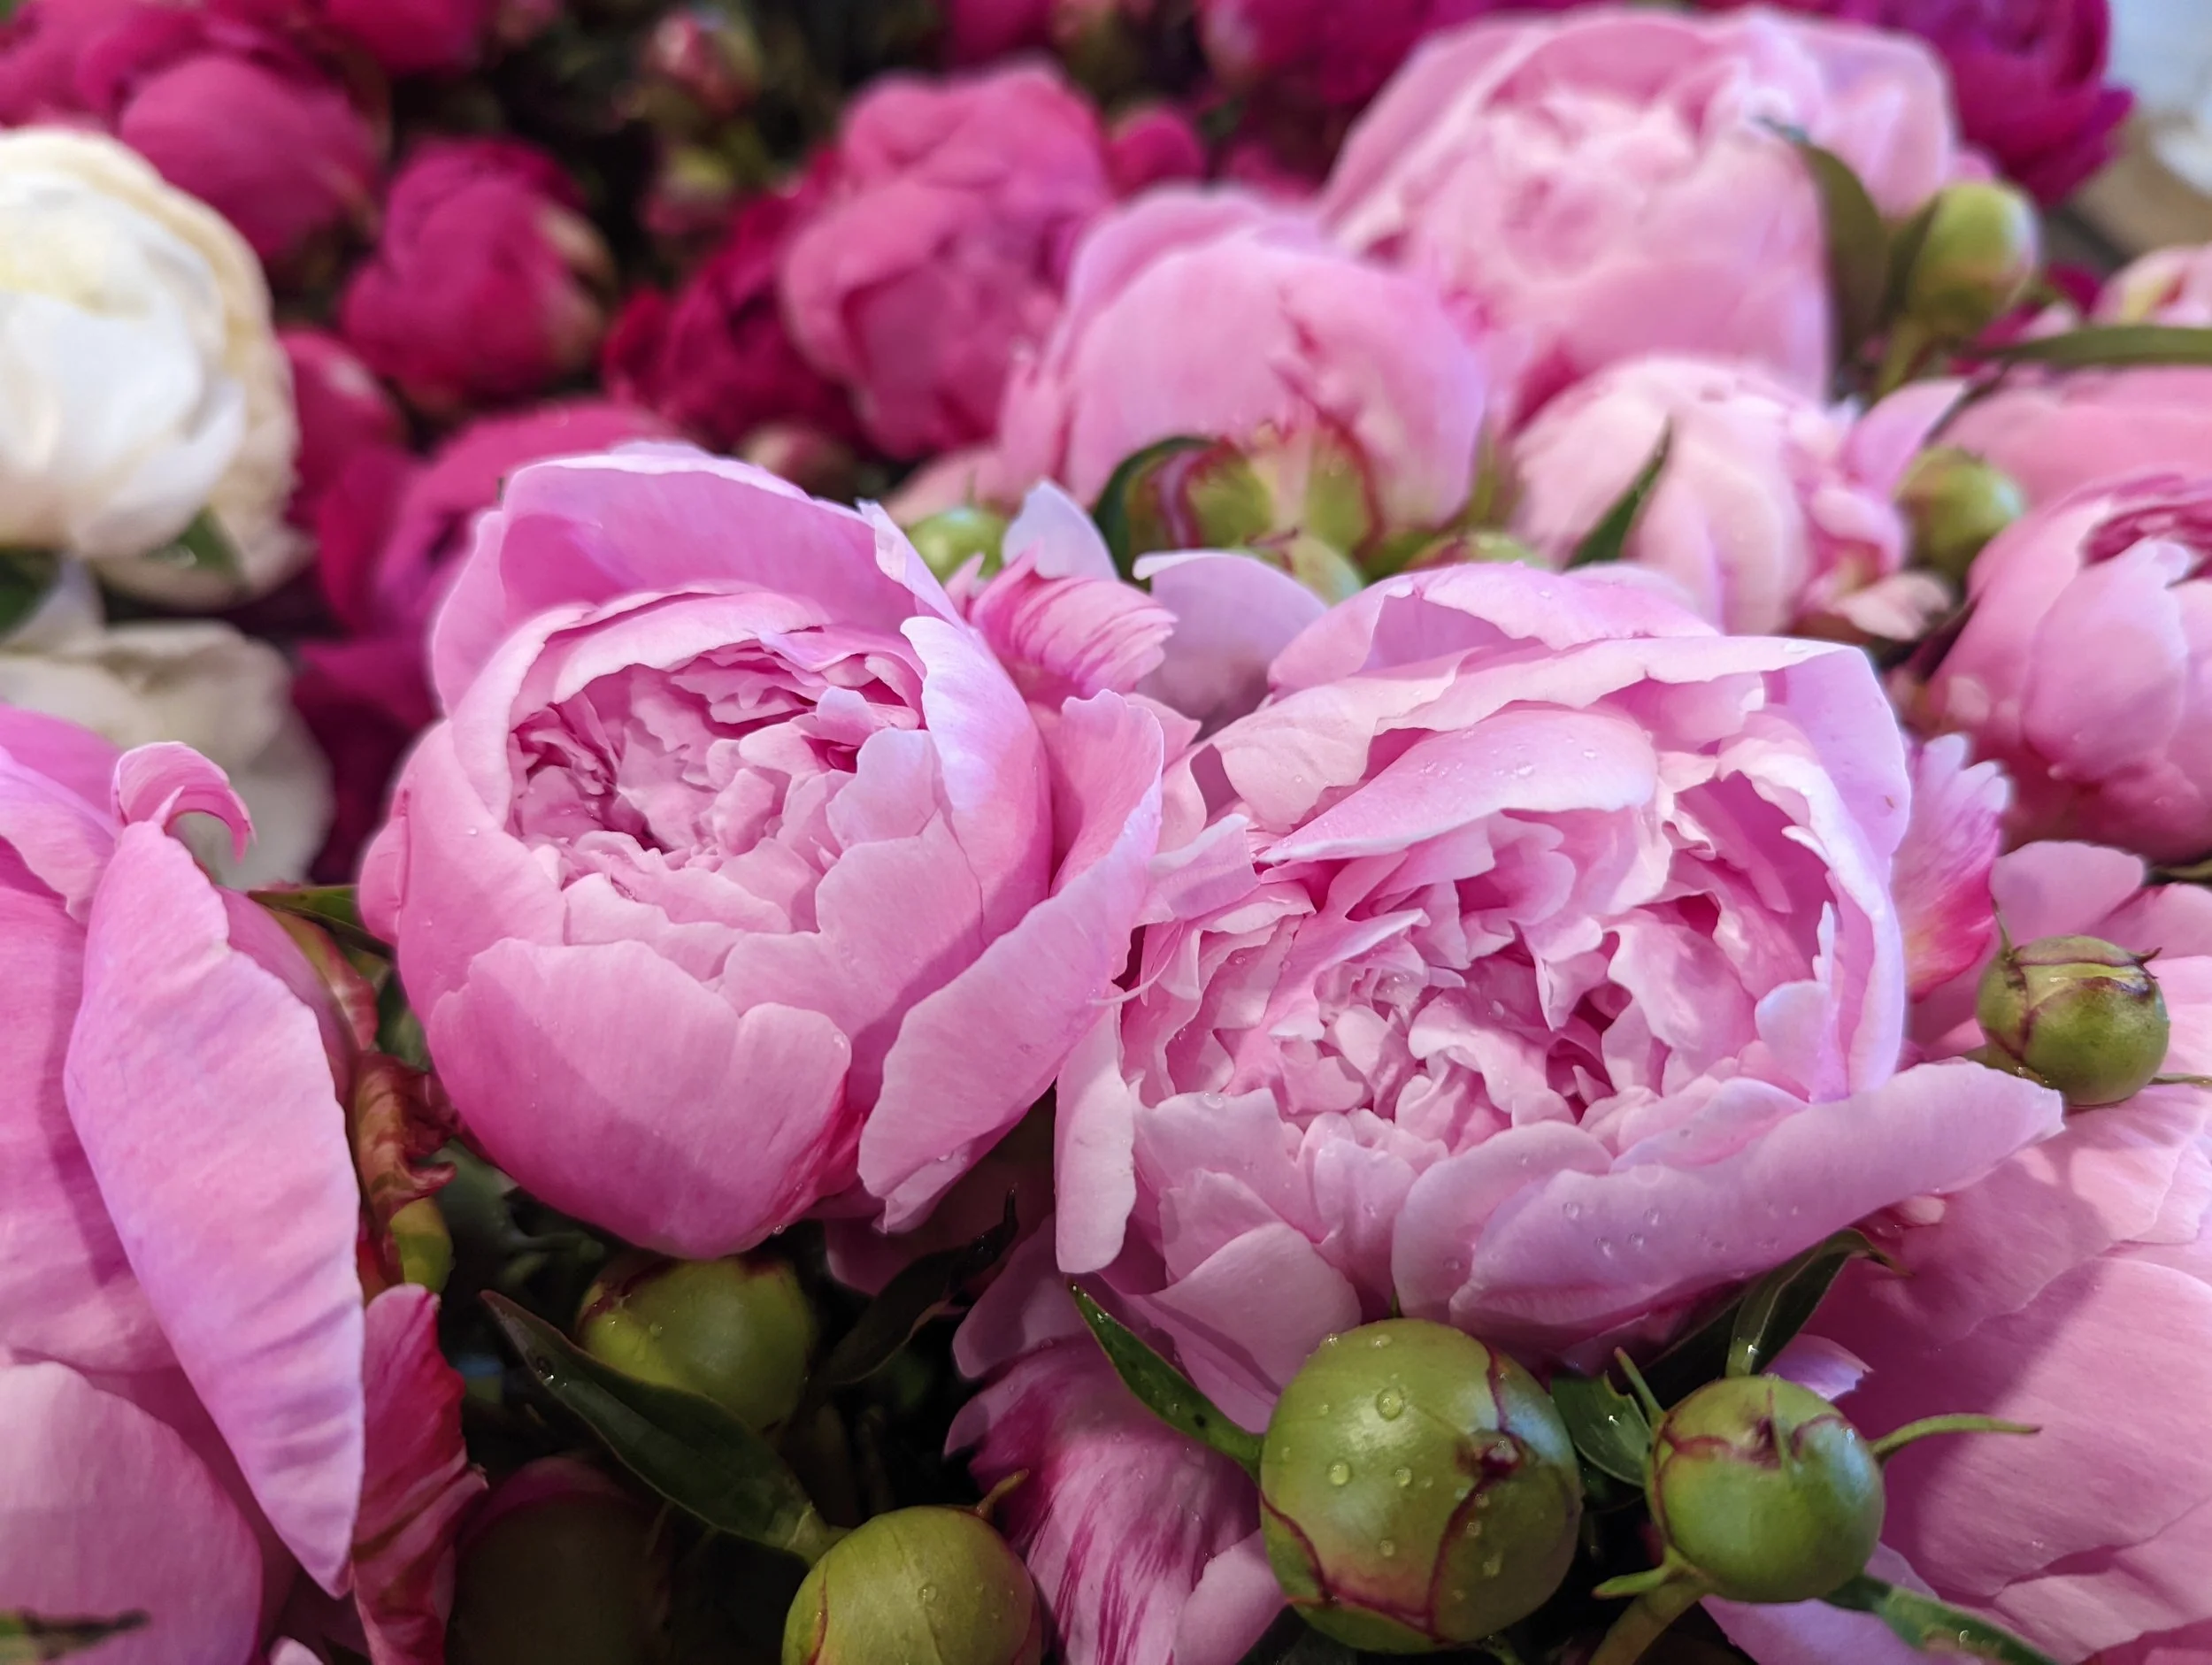
Imagine massive, ruffled blooms the size of dinner plates. Petals so lush and layered they seem almost too beautiful to be real. The air is thick with the intoxicating fragrance—a heady mix of rose and citrus that makes you close your eyes and breathe deeper.
Welcome to Peony season, friend.
But here's the bittersweet reality about Peonies: their incredible beauty is brief. Peonies remind us that the most treasured things in life are fleeting… which makes them even more precious.
Peonies for Extraordinary Cut Flowers
Not all Peonies are created equal when it comes to gracing your dining room table. The varieties that truly shine as cut flowers possess three qualities:
Stems that are strong enough to support those heavyweight blooms.
Robust plants that grow vigorously.
Blooms that look stunning in your vase for at least five days.
After nine years of trial and triumph (and lots of spectacular failures!) testing over 30 varieties on my Zone 6 Michigan farm, I've discovered which Peonies are the true champions of the cutting garden.
Growing Peonies with Patience
Here's where most growers get it wrong: they expect instant gratification from Peonies. But Peonies operate on their own timeline, and trust me, they are worth the wait.
The Foundation Years (Years 1-3)
Start with bare-root divisions planted in fall. We plant in November or even December, as long as the ground is not frozen.
Then comes the hardest part: for the following three growing seasons, you are going to remove/pinch off the buds. Yes, you read that right. Pinch them all off.
I know, I know. It feels like a cruel joke.
But here's why it’s important: Plants, much like overambitious humans (ahem, like me!), are terrible multitaskers. Ask a young Peony to produce those showstopping blooms and develop a robust root system simultaneously, and it'll do both jobs poorly. You end up with a mediocre plant with mediocre blooms.
Instead, be kind and loving to your Peony plant. Give it permission to focus solely on building strong roots, and I promise, you'll be rewarded with a plant that becomes incredibly productive in the future.
Pro tip from a trusted Peony farmer: Keep one bud per plant during those first seasons—just enough to confirm you actually planted what you thought you planted, AND to get a preview of the beauty to come.
Year 4: The Grand Reveal
By the fourth season, your Peonies will have transformed into strong plants with a robust root system. Now it's time to let them loose and harvest to your heart's content!

My 3 favorite Peony varieties! “Dr. Alexander Fleming” (pink), “Festiva Maxima” (white), and “Kansas” (magenta).
Choosing Varieties to Extend the Harvest
Peony season is short (usually less than 2 weeks), so to make it last as long as possible, we plant an assortment of “Early”, “Mid”, and “Late” blooming varieties to extend the harvest season.
I select varieties across three bloom periods:
Early season (first to bloom)
Midseason (blooms about 3-5 days later than early)
Late season (blooms about 7-10 days later than early)
This means we have a steady wave of Peonies coming into bloom over about 14 days, instead of having all of them bloom over 2-3 days.
Weather Warning: Mother Nature loves to throw curveballs. A sudden heatwave can cause all your carefully timed varieties to bloom at once. You’ll have to put all your other plans on hold while you harvest like a maniac. Cooler weather is your friend. The cooler the weather, the more slowly and evenly the blooms ripen.
Creating the Perfect Peony Palette
Peonies offer a range of colors. The classic palette includes:
Coral/Salmon
White
Blush
Pink
Red/Magenta
My strategy? I try to secure at least one variety in each color for each bloom time (Early, Mid, and Late). This way, I know I’ll have a good color mix of Peonies in bloom at the same time.

My Most Beloved Varieties Sorted by Color
After years of testing, some peonies have earned permanent places in my heart (and the farm).
Here are the stars of the show:
Coral/Salmon
“Coral Sunset”(Early-season): The crowd favorite that generates actual gasps from visitors. People go crazy over this flower! But if you have a super sensitive sniffer like I do, be warned that the fragrance can be unpleasant for some.


'Etched Salmon' (Mid-season): This color is so unique that it stops people in their tracks. Fair warning: coral/salmon Peonies tend to be divas with shorter vase lives, but these are a perfect “Event Flower”, meant to be displayed prominently in weddings or dinner party arrangements.


White
'Duchess de Nemours' (Mid-season): Looking for white wedding Peonies? Look no further! Elegant, dreamy, with touches of gold hidden in the heart of each bloom.


'Festiva Maxima' (Early-season): One of the most popular white Peonies and for good reason. The classic frilly blooms are delicately edged in magenta. They are incredibly productive and vigorous plants. This Peony is loaded with nostalgia and memories. If your Grandma had white Peonies, chances are she was growing “Festiva Maxima”, as it’s been a favorite for over 150 years!


“Gardenia” (Mid-season): Massive blooms that are to die for. SO fluffy! These jaw-dropping blooms are so full and soft you'll want to bury your entire face in them. The blooms are pure white, with occasional pink edging on the petals
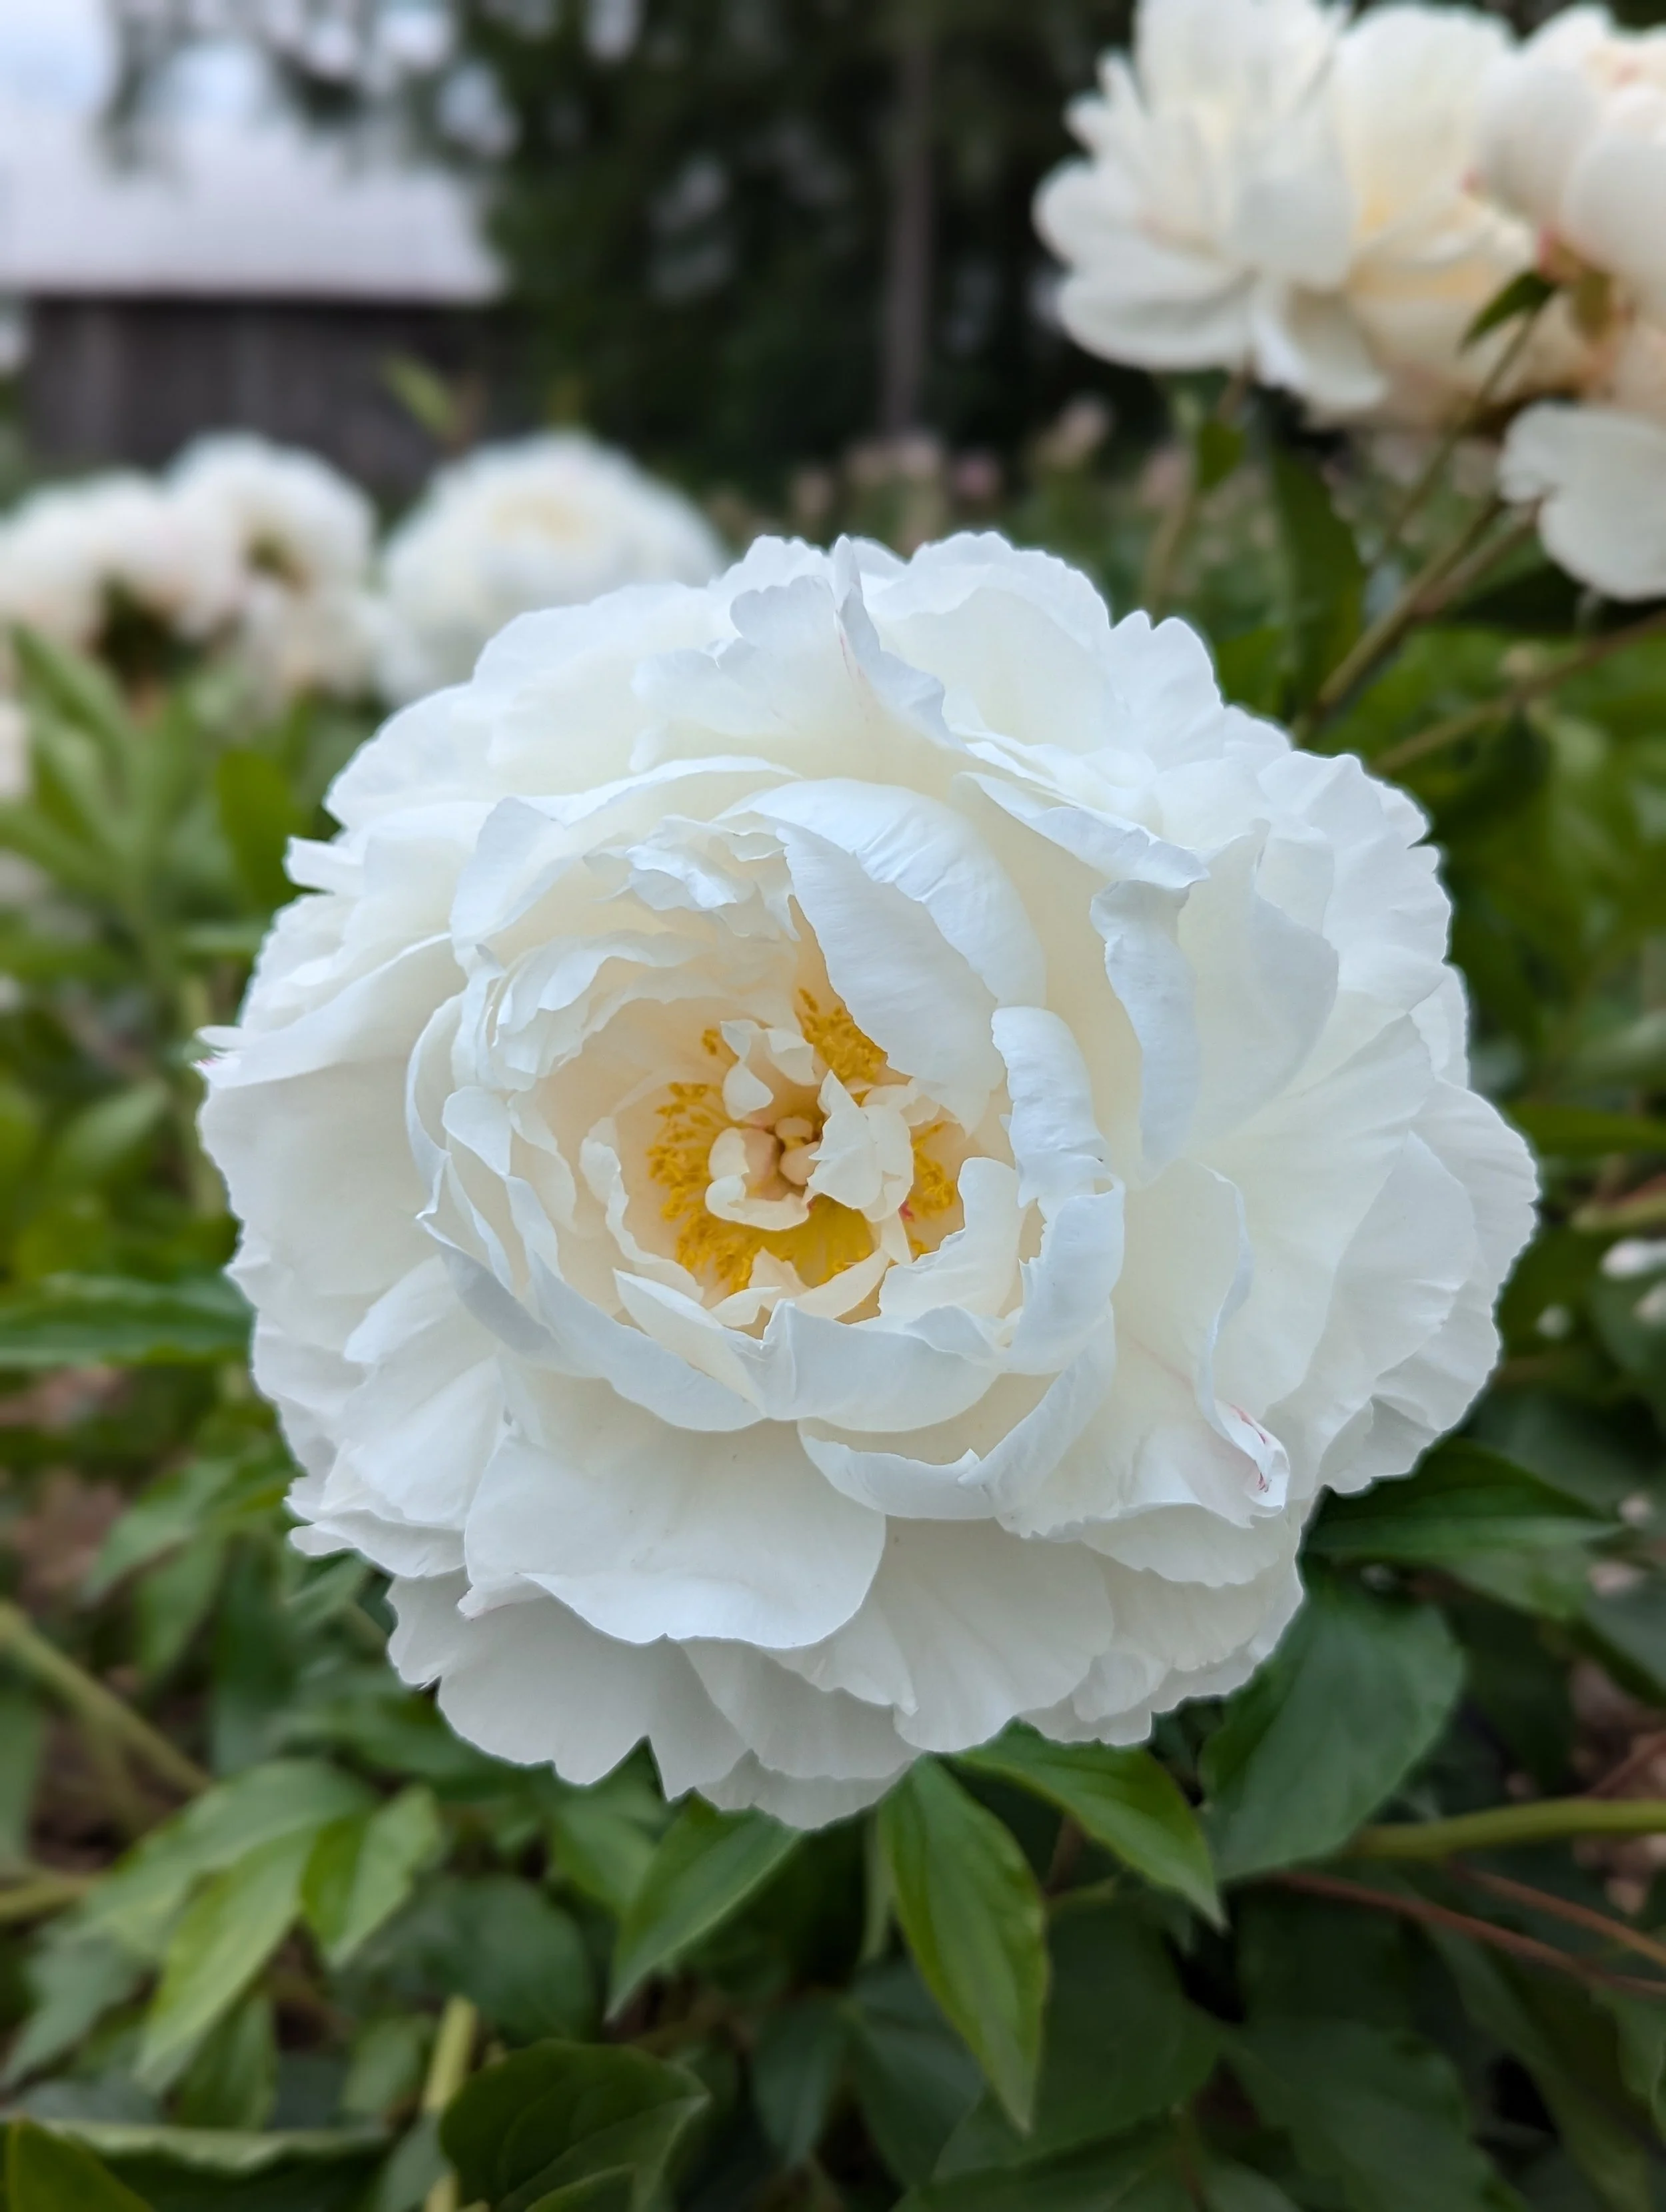

'Mary E. Nicholls' (Late-season): The newcomer that stole my heart completely. Elegant white petals kissed with the faintest blush of pink—subtle sophistication at its finest.


Blush
'Florence Nicholls' (Early/Mid-season): This color-shifter begins as soft blush pink, then performs the most graceful transition to nearly white as it opens. It's like watching magic in slow motion.


'Pillow Talk' (Mid-season): Don't let the soft name fool you—this variety is tough and durable. The massive blooms grow on sturdy, robust stems. The perfect blush pink Peony.


“Sarah Bernhardt” (Late-season): One of the most popular Peonies of all time. The delicate, blush blooms are simply swoon-worthy. She’s the grand finale of Peony season.


Pink
‘Dr. Alexander Fleming” (Mid/Late-season): This is one of my personal favorites, as well as one of the most productive Peonies on the farm. The elegant cool pink tones are perfect in bunches or mixed wth other spring blooms.


'Monsieur Jules Elie' (Early-season): An explosion of joy in your garden! These "bomb-type" blooms literally burst open to reveal their fluffy petals, like nature's own fireworks display.


Red/Magenta
'Kansas' (Early-season): The undisputed champion and MVP Peony of the farm. These are ridiculously productive plants with robust stems and petals tough enough to weather any storm. These blooms last longer than any other Peony I grow.


The Payoff: Blooms for Decades to Come
Yes, Peonies demand patience.
Yes, they require a leap of faith and three years of delayed gratification.
But when that first armload of blooms finally makes it to your kitchen counter, when your entire house fills with their perfume and friends show up unannounced just to see them… you'll understand why we’re so obsessed with Peonies!
Peony Season is an annual celebration, a reward for patience, a reminder that some of life's greatest pleasures are worth waiting for.
In a world of instant gratification, Peonies teach us the profound satisfaction of delayed gratification.
I trust that this blog post will help you choose which Peonies you want to grow in your garden! You have plenty of time to start researching Peony farms to purchase from, since it’s best to plant the bare roots in the fall.
Yes, the roots may “seem” expensive, but Peonies can be productive for decades. It’s not uncommon for them to be handed down from generation to generation. Think of each root as an investment in your future joy and delight!
Here are a couple of farms I can recommend:
Mountain Flower Farm in Vermont
Hollingsworth Peonies in Missouri
Ready for More?
If you’re serious about growing the garden of your dreams this year, register for my online course, “Backyard Cutting Garden 101”. You’ll find everything you need to plan, grow, harvest and arrange your stunning blooms. I can’t WAIT to help you grow! Click on the button below for all the details.

How to Eliminate Weeds in Your Garden
Tired of constant weeding? Transform the way you garden and set yourself free from weeds!
How to Eliminate Weeds in Your Garden
Every year about this time, I get desperate messages like the following:
”Help! I planted my garden 3 weeks ago, but now it’s a sea of green and I can’t tell what are weeds and what are plants! What do I do?”
Unfortunately, once the garden gets to this point, it’s really hard to reverse it. I’m sorry to say that there is not much to do other than hand weed relentlessly.
Like many areas in life, PREVENTION is key. A little bit of forethought and effort goes a loooooong way. Think of it as investing in your future self!
Eliminating weeds in your garden requires a new way of thinking that may seem foreign to you at first.
Here is the main idea I want you to remember:
BARE SOIL IS AN INVITATION FOR WEEDS
Yup, any time you leave soil bare, you are rolling out the welcome mat for weeds to invade and take over.
Let’s take a look at nature and the purpose of weeds.
Soil erosion is bad. We all know this. So does nature. To prevent soil erosion, nature came up a brilliant defense: Weeds.
Weeds are designed to grow quickly and completely cover areas to prevent soil erosion. They do their job incredibly well and honestly they deserve a standing ovation. Weeds DO have a purpose! And no, it’s not to make your life miserable ;)
Think about it. When was the last time you walked around nature and saw a giant bare spot of soil? Never? Yeah, that’s right. You’ve probably never encountered truly bare soil in nature. It generally doesn’t exist.
Everywhere you look, you’ll see something covering the soil, be it grasses, weeds, dead leaves, pine needles, etc.
Your job as a gardener: Mimic nature and COVER THE SOIL. If you don’t cover it, weeds will come and do the job for you.
COVER THE SOIL.
COVER THE SOIL.
COVER THE SOIL.
Got it? ;)
If you drive around a neighborhood, you’re likely to see houses with beautiful landscaping in the front yards. Do people plant their landscaping plants and leave bare soil exposed around them? NO!!!! They cover the soil with mulch… to prevent weeds.
YOU CAN DO THE SAME THING WITH YOUR GARDEN!
Yes, you should mulch your garden, just like you would mulch your landscaping.
Mulch does 3 things:
1. Prevents weeds. Mulch does the job of covering the soil, so weeds are not needed.
2. Retains moisture. Mulch helps hold in water and keeps the soil from drying out, so you can water less often and conserve resources.
3. Fertilizes the plants and improves soil structure. As the mulch slowly breaks down, it’s adds nutrients and organic matter to the soil. Your soil will get better and better each year!

So, what is “mulch”? Mulch has a very broad definition and basically refers to any organic (nature based) material that is used to cover the soil. Depending on where you live, you could use the following materials for mulch:
Straw
Grass Clippings (if you have a mower with a grass clippings attachment, be sure to collect these and use them. CAUTION: Only use clippings from lawns that are NOT treated with herbicides or other chemicals.)
Pine needles
Dried leaves (especially if you can run them through a shredder first)
Tree trimmings/chips from an arborist/tree trimming company (usually a mixture of chipped branches, limbs and leaves)
Shredded bark mulch from a landscape supply company (do NOT use treated or colored mulch around vegetable plants)
Cardboard or newspaper
Sawdust/wood shavings
Gravel or Pea Stone
Inorganic mulch can also be used. This usually refers to landscape plastics or fabrics that are used to suppress weeds. These are very helpful, but generally do not help to improve soil structure, like organic mulches do.
Inorganic mulch:
Landscape Fabric
Plastic Ground Cover
Tarps (yup, you could lay down a tarp and simply poke holes in it where you want to plant. Works best if you install soaker hoses UNDER the tarp before planting, since you won’t be able to water from above effectively)
On our farm, we use organic mulch and inorganic mulch.
For our flower/non-food crops, we generally use landscape fabric.
For food crops, we use tree trimmings/chips.
Our vegetable garden is comprised of several raised beds that are never roto-tilled. Instead, we simply add more mulch each year as needed.
After 8 years of gardening this way, our soil has become rich, productive and nearly weed-free. When we plant tomatoes, we generally throw a scoop a composted goat/chicken manure in the hole. This year, my husband and I realized that our existing garden soil is even better than the compost!
Because we have built up such rich soil and cover it with a thick layer of mulch, we generally only water the vegetable garden at planting time, then maybe once a month during the summer, only if there is drought. Generally, rain fall is sufficient. Even if we haven’t had rain in 2-3 weeks, the soil is still damp under the layer of mulch.

We keep a giant pile of tree trimmings/chips on the farm at all time, so we always have material on hand to cover the soil. You can sign up for Chip Drop online, or just do what we do… run out into the street and wave down any tree trimming trucks that drive by house. Ha! ;)
Here is our chip pile/heap, affectionately called “Mount Chipmore”.

In our flower garden, we mostly use landscape fabric with holes burned into it for proper plant spacing. The fabric is called DeWitt Sunbelt Ground Cover/Weed Barrier and it comes in several different sizes.
My husband bought pieces of sheet steel and made templates with different plant spacing:
6” x 4” (single stem sunflowers, cress, flax, stock, etc.)
9” x 9” (pretty much everything else…)
12” x 12” (cosmos, amaranth, etc.)
18” x 18” (branching sunflowers, dahlias, etc.)
We lay down the sections of fabric in our raised beds, pin them in place with landscape staples, then plant the seedlings/direct sow into the holes.
While we still have to do some weeding in the holes when the plants are tiny, eventually the flowers get so big they take over and weeds become a non-issue.
Below is a photo of what the flower garden looks like in the spring as we are preparing, amending the soil and covering beds with fabric….

… and here is what it looks like 2-3 months later. Lots of flowers with very few weeds.

So there you have it! Yes, eliminating weeds from your garden requires some up front work and dedication… but the results are worth it! Imagine having a garden you ENJOY being in, instead of feeling stressed out and upset every time you look at it.
Repeat after me: BARE SOIL IS AN INVITATION FOR WEEDS.
COVER THE SOIL.
Got it??? Good. Now get out there and cover your soil… and start creating the garden of your dreams!