

How to Grow: Celosia
A “must-have” for your cutting garden!
How to Grow: Celosia
Pronunciation: sel-oh-see-ah
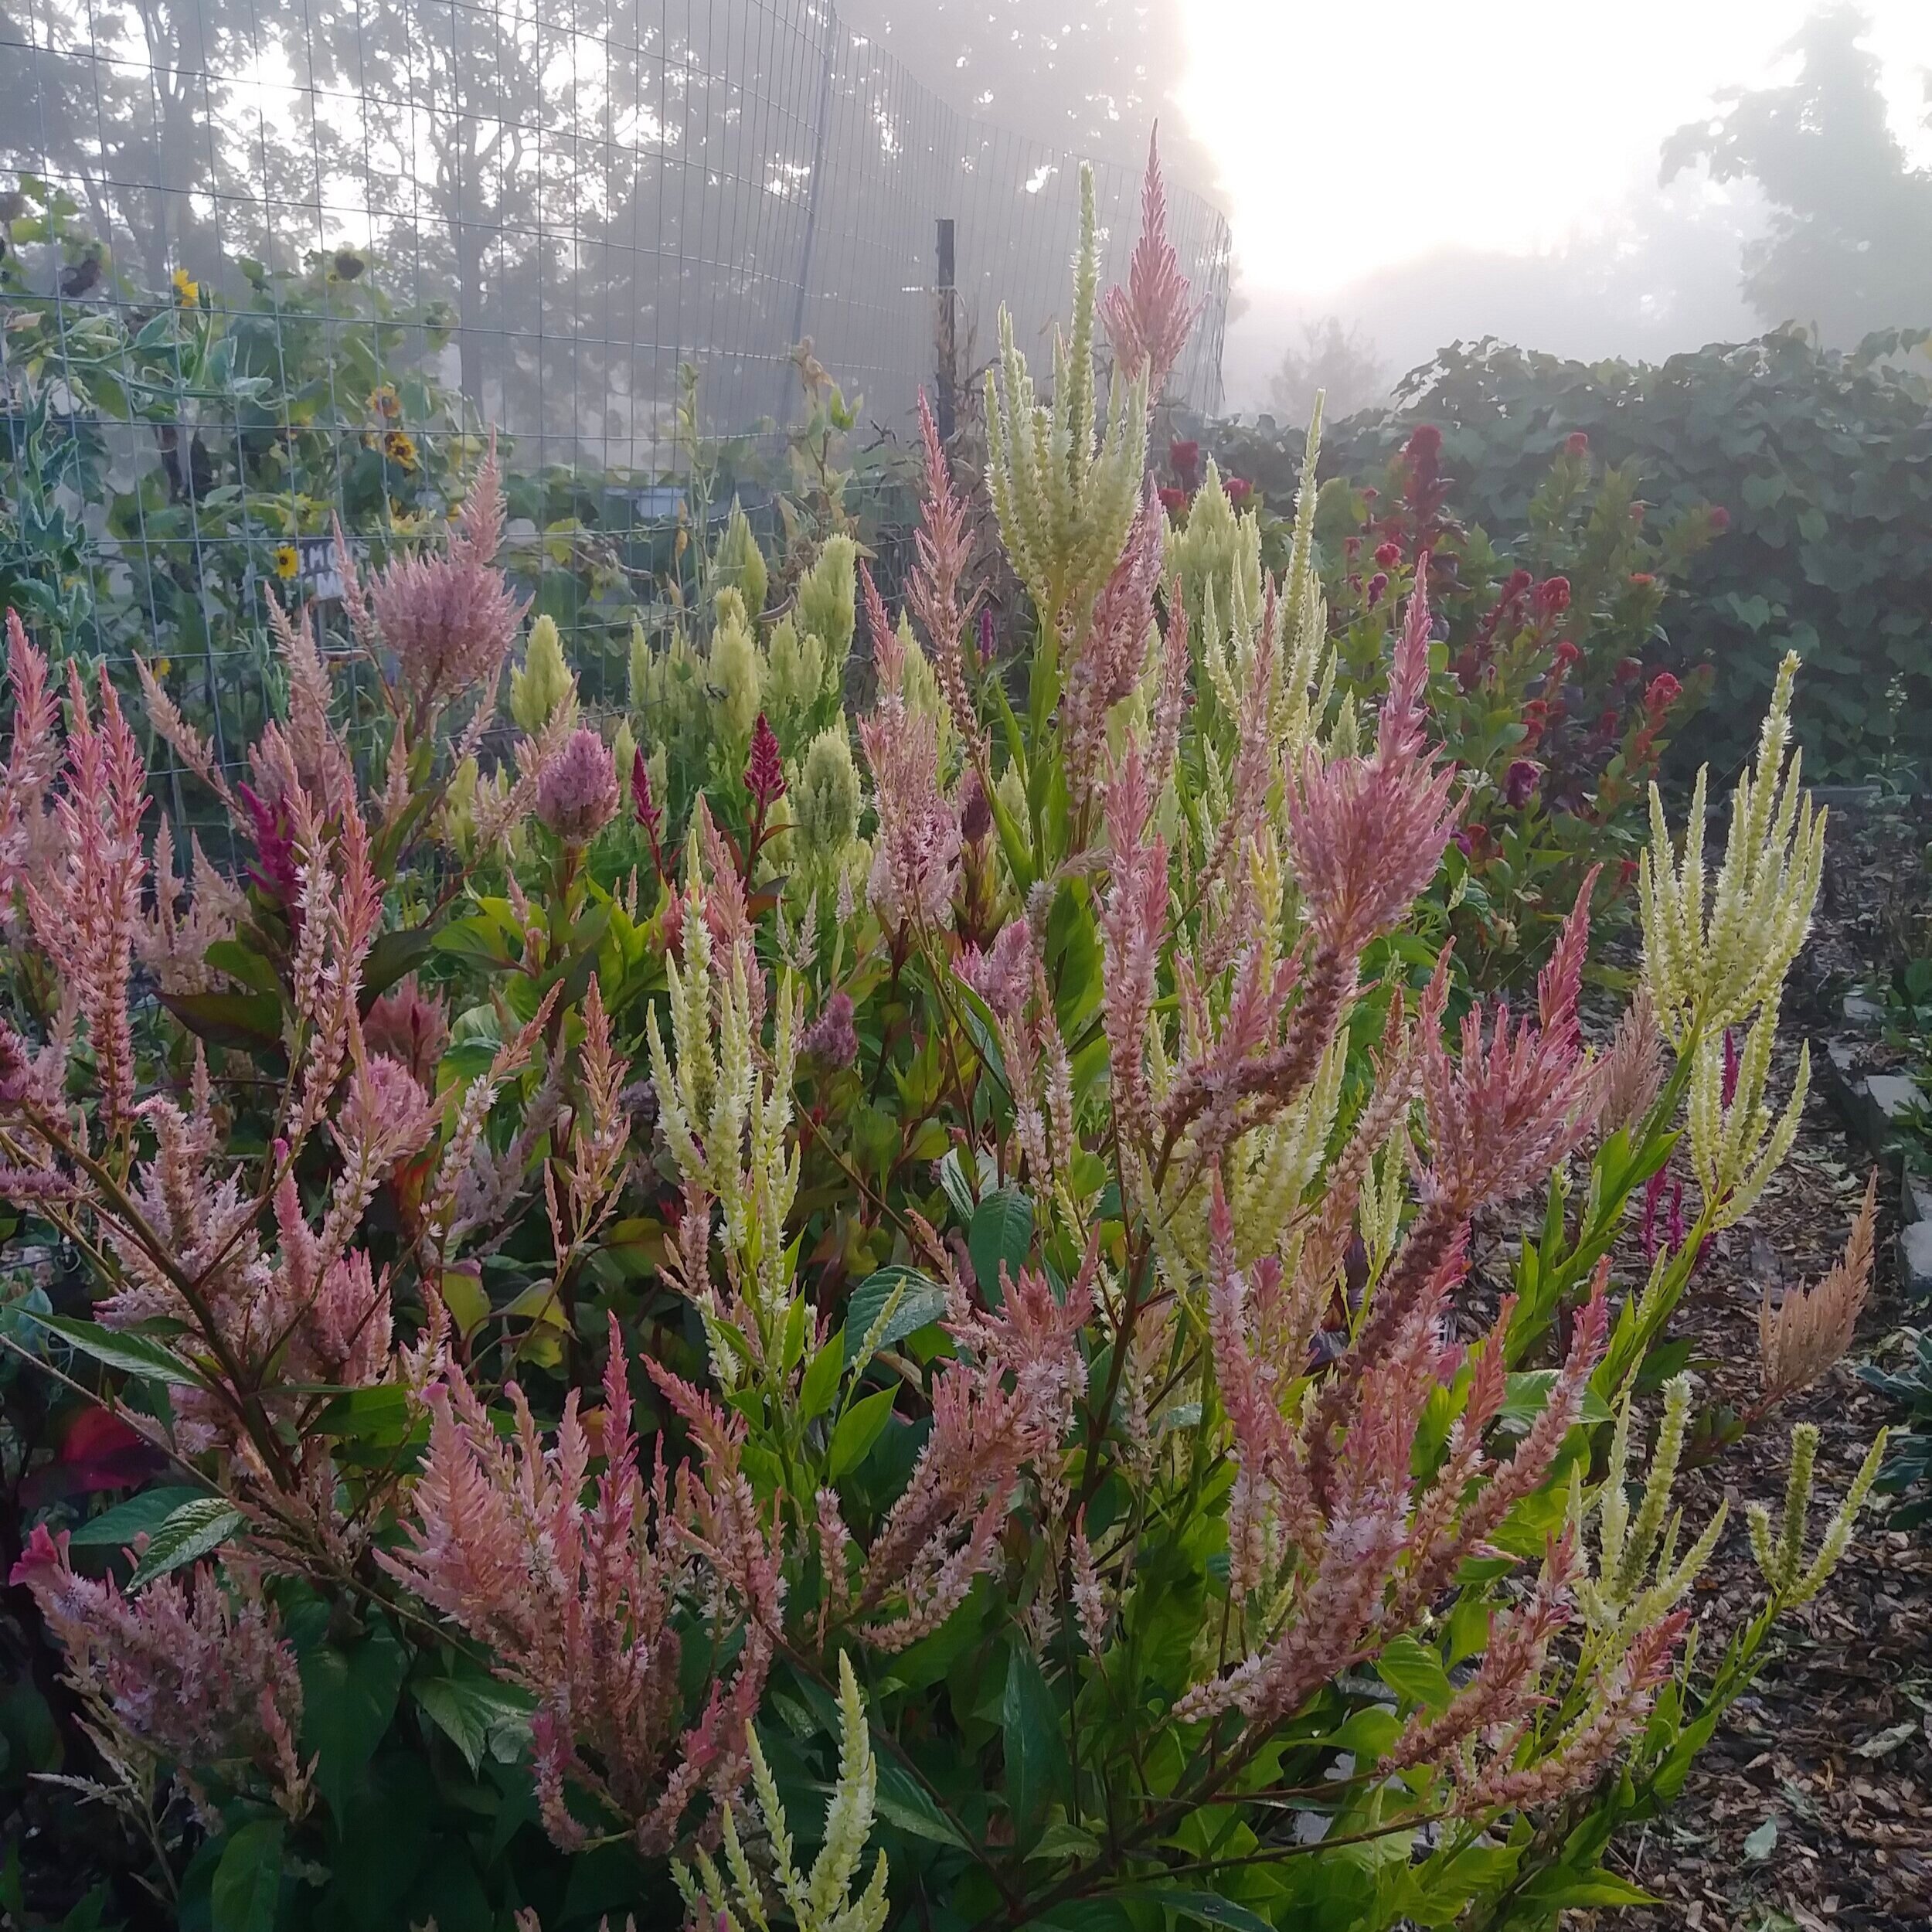
Celosia is another underappreciated and overlooked cut flower. It’s unfortunate, because Celosia is beautiful, long lasting and comes in a wide variety of shapes and colors! It also makes an excellent “Everlasting Flower”.
While they are not a flower you would likely display on their own, they compliment other flowers so nicely and shine in bouquets, adding much needed texture and shape.


“Delhi Pearl” Celosia
The types of Celosia grown for cut flower use are different than the types you normally find at a garden center. This means you’ll likely have to start your own Celosia from seed.
Let’s look at the Pros and Cons of growing Celosia for cut flower use.
PROS
They come in a multitude of colors, sizes and types.
They are easy to grow.
The plants are productive for a long period of time.
They are bright and cheerful in bouquets.
They love hot weather and thrive in the summer.
They have an excellent life of up to 2 weeks or longer, with proper harvest and care.
They make a great dried (“Everlasting”) flower.
CONS
They like hot weather and won’t do well in places with cool, wet summers.
The seedlings can succumb to “damping-off” disease in cool moist conditions. Keep those babies warm!
CHOOSING SEEDS
Since most of the Celosia varieties offered at garden centers will not grow tall enough for cut flower use, you’ll probably have to start your Celosia from seed. Thankfully, they are easy to grow from seed. Even if you are not able to start transplants indoors, you can still direct sow them in some climates.
Be sure to look for varieties that reach a minimum of 24” tall.
Celosia is divided into 3 main types:
1. Crested Type (Celosia argentea cristata): These are the “Cock’s Comb”/ “Brain Coral” types.
2. Plume Type (Celosia argentea plumosa): These are feathery and wispy looking.
3. Spike Type (Celosia argentea spicata): These have an upright, spike shape.
Plume Type: “Texas Plume”
Here are a few of my favorite Celosias to grow for cut flower use:
“Chief Series” (Crested Type)
“Cramer’s Series” (Crested Type)
“Sylphid” (Plume Type)
“Pampas Plume” (Plume Type)
“Texas Plume” (Plume Type)

“Celway Salmon” Celosia
HOW TO SOW
Celosias are heat loving, summer blooming flowers. They do not like cold temperatures and can’t handle frost, so do not try to plant them too early in the season.
Transplants or Direct Sow?
Celosias can be transplanted or direct sown, but transplants are recommended for most climates.
Sow seeds indoors 6-8 weeks before your Average Last Spring Frost. Be sure to keep them in a warm place as they are growing. They can be transplanted out after the threat of frost.
The seeds can also be direct sowed into the garden well after the threat of frost has passed. Celosia will not germinate or grow well in cool weather.
Seeds are tiny and I recommend sowing them using the “toothpick method.” Pour the seeds into a container, lick the end of toothpick and use the toothpick to remove seeds one a time. Sow 1-2 seeds per cell.

PLANT SPACING
Most varieties can be pinched to encourage branching and should be spaced at 9”-18”, depending on type. I grow most Celosia at 9” spacing.
GROWING ON
After the transplants are established and growing, it’s helpful to “pinch back” the plants when they are less than 8” tall. To pinch, simply use clippers to remove the top of the plant, only leaving 2-3 sets of leaves behind. I know this seems counter-intuitive and you probably just freaked out, but trust me!
Plants that are pinched are more productive than plants that are not. Experiment for yourself - pinch half the plants and leave the other half alone. The un-pinched plants will bloom earlier, but the pinched plants will produce WAAAAAY more blooms.
Pinching signals the plant to go into overdrive and send out multiple branches, with multiple blooms.

“Ruby Parfait” Celosia

“Ruby Parfait” Celosia that has been pinched back to produce multiple stems per plant
STAGE OF HARVEST
Unlike other flowers, Celosia has a long “harvest window”, so there is no rush to harvest them. In fact, the will continue to get bigger, so harvest when they are the size you want, but before the florets on the bottom start to look dry and form seeds (like the one in the photo below - you can see how dry and “tired” it looks, and it is dropping seeds).

POST HARVEST CARE
Celosia requires no special treatment after harvest.
All types of Celosia can be dried and used as an “Everlasting Flower”. Be sure to dry/store them out of direct light to help retain color.
QUESTIONS?
Ask them here and I’ll get back to you!
Ready for more?
If you’re serious about growing the garden of your dreams this year, register for my online course, “Backyard Cutting Garden 101”. You’ll find everything you need to plan, grow, harvest and arrange your stunning blooms. I can’t WAIT to help you grow! Click on the button below for all the details.

How to Grow: China Asters
How to Grow: China Asters
Pronunciation: ka-LIS-te-fus chin-EN-sis
China Asters (Callistephus chinensis) are a lovely addition to the cutting garden.
There are many types of Asters, including popular cultivated and wild native Perennial types. However, here we are going to discuss only the Annual blooming China Asters (Callistephus chinensis).

“Optimo Alpha Light Blue” and “Optimo Red”
There’s a reason why China Asters are so popular as a cut flower. They are sturdy, tough and long-lasting in the vase. They also come in wide range of colors and shapes. Some of them even resemble fluffy Peonies!
However, China Asters can be a bit tricky to grow, since they are “day length” sensitive and must be planted at juuuuust the right time to achieve good stem length (more about that later).
They also can be susceptible to some difficult disease issues, depending on where you live.
Because of these challenges, I categorize China Asters as best for “Experienced Growers”.
On our farm, we love growing a variety of China Asters as both a Focal Flower (large flower that is the focus of a bouquet) and Filler Flower (medium-sized flowers that complement the Focal Flowers).
Some China Asters will produce 8-12 large flowers on long stems, while others may produce dozens of smaller flowers on a “spray” type stem (one main stem with multiple flowers).

“Optimo Red” and “Optimo Alpha Light Blue”
Let’s look at the Pros and Cons of growing China Asters for cut flower use.
PROS
They come in a multitude of colors, sizes and types.
They are very sturdy plants.
The flowers are durable and not easily damaged by handling.
The flowers “hold” for a long time in the field, giving you a long window of opportunity to harvest the blooms.
They often produce multiple blooms per plant.
They have an excellent vase life of 7-10 days with proper harvest and care.
CONS
They must be planted at a specific time due to day-length sensitivity. If this “window of opportunity” is missed, the plants will likely bloom on short, unusable stems.
They are not a good candidate for “succession planting” since they perform best when planted at a specific time.
They are very susceptible to Aster Yellows disease, which is spread by leafhoppers and thrips. If you live in an area where Aster Yellows disease is common, you may have a difficult time growing healthy plants (this is a BIG challenge for us!).
They can experience “Aster Rot”, a fungal infection that causes the plant to rapidly wilt and rot.
CHOOSING SEEDS
There are lots of different types of China Asters you can try, so choose ones that have colors and shapes that please you.
Be sure to look for varieties that reach a minimum of 24” tall. Many China Asters are sold for bedding plant/landscape use and won’t be tall enough for cut flower use.
The following China Aster series are a great choice for cut flower use:
Azumi X
Bonita
Matsumoto
Optimo
Tower

“Optimo Red”
Here are a few of my favorite China Asters to grow for cut flower use:
Azumi X “Rose”
Tower “Chamois”

“Optimo Alpha Light Blue”
HOW TO SOW
China Asters are easy to grow from seed in trays. Bury seeds about ⅛ deep and keep seeds moist and warm until germination occurs in 10-14 days.
Transplants or Direct Sow?
China Asters should be transplanted. Direct sowing is not recommended.
Sow seeds indoors 6-8 weeks before your Average Last Spring Frost. They should be transplanted out after the threat of frost when the soil is warm.
It’s important to transplant the seedlings promptly so they can grow as much as possible before the Summer Solstice occurring around June 21(ish) in the Northern Hemisphere. As the days shorten after the Solstice, the plants begin to set their blooms and the stems will not grow much taller.
Ideally, you want the plants to grow as tall as possible before the Summer Solstice to get the longest stems possible.
“Succession Planting” is not recommended for China Asters, since transplanting additional successions later in the season will result in short, unusable stems.

“Optimo Alpha Light Blue”
PLANT SPACING
Most varieties can be grown at 6-12” spacing. We usually grow at 9” spacing, but could grow most varieties closer for more efficient use of space. Closer spacing will encourage longer stems as the plants compete for light.

“Bonita Shell Pink”
GROWING ON
If you live in an area where Aster Yellows disease is a problem, I recommend covering the seedling with insect netting IMMEDIATELY after transplanting. You can find my favorite insect netting and clamps HERE. This will help to protect the plants from leafhoppers and thrips.
If the plants DO show signs of Aster Yellows or Aster Rot, remove them immediately and throw them away (do not compost). Be sure to rotate where you plant China Asters each year to help prevent disease issues.
To reiterate, it’s important to transplant the seedlings promptly so they can grow as much as possible before the Summer Solstice occurring around June 21(ish) in the Northern Hemisphere. As the days shorten after the Solstice, the plants begin to set their blooms and the stems will not grow much taller.
Ideally, you want the plants to grow as tall as possible before the Summer Solstice to get the longest stems possible.
Fertilize and water the plants regularly when the plants are young and actively growing. Once the buds begin to form, back off on feeding but continue watering.
The plants are sturdy but still benefit from netting or support to keep the stems straight.
Pinching is generally not necessary or recommended, however some types may benefit from it. If desired, you could experiment by pinching a few plants and comparing them to unpinched plants. Note: This is how I discovered Optimo series does NOT like to be pinched! ;)
STAGE OF HARVEST
China Asters bloom in mid to late summer (usually around mid-August on our farm in Michigan). Unlike other flowers, China Asters have a long “harvest window”, so there is no rush to harvest them.
Harvest when the outside florets begin to open. Single stem types can be harvested one stem at a time, while spray types do best as a whole plant harvest (cut the entire plant off at the ground).

“Tower Chamois”
POST-HARVEST CARE
China Asters require no special treatment after harvest.
QUESTIONS?
Ask them here and I’ll get back to you!
Ready for more?
If you’re serious about growing the garden of your dreams this year, register for my online course, “Backyard Cutting Garden 101”. You’ll find everything you need to plan, grow, harvest and arrange your stunning blooms. I can’t WAIT to help you grow! Click on the button below for all the details.

How to Grow: Cosmos
Dreamy. Whimsical. Romantic. Swoon-worthy. Delightful.
How to Grow: Cosmos
Pronunciation: koz-mose
Dreamy. Whimsical. Romantic. Swoon-worthy. Delightful.
Cosmos are all this and more. Because they are such a common and easily grown flower, I think they are often overlooked and underestimated for their value as a cut flower. They are not necessarily big or bold or flashy… but they are still one of my favorites!
They are reliable, productive and simple to grow. The more you cut them, the more they produce. As a bonus, they really shine in late summer, when some of the other flowers are starting to get tired. Every cutting garden should have some Cosmos!

PROS
They come in a variety of colors and sizes.
They are very easy to grow.
The plants are productive for a long period of time (if harvested regularly).
They are a beautiful addition to bouquets.
They have a good vase life of about 5 days, if harvested at the proper stage.
CONS
They are susceptible to Powdery Mildew. This usually does not affect the blooms, but eventually the plant will die.
Deadheading (removing old blooms) can be difficult to keep up with! If plants are not regularly harvested or deadheaded, they will stop blooming.

“Afternoon White” Cosmos

“Kiiro” Cosmos
CHOOSING SEEDS
Nearly every type of Cosmos can be used to cut flower use, but there are some varieties that have been bred specifically for cut flower use, rather than ornamental use.
Some Cosmos have “single” petals, while other are “double” petals. Some Cosmos even have petals that look like cupcake liners!
Most Cosmos grow quite tall, often reaching 4’ tall, but recently new shorter varieties have been introduced as well. Make sure you purchase varieties that reach at least 24” tall.
Cosmos bipinnatus is the class of Cosmos that includes the Cosmos you are likely familiar with, in shades of pink, white, magenta and burgundy. However, Cosmos sulphureus, know as “Sulfer Cosmos”, are another great addition to the cutting garden. They come in shades of bright yellow and orange.


Here are a few of my favorite Cosmos to grow for cut flower use:
“Bright Lights” (Sulfer Comsos)
“Double Click” Series (all the colors are beautiful, but I especially like the “Double Click Bicolor Pink”)
“Tip Top Picotee” (beautiful bicolor blooms)
“Xsenia” (gorgeous color, stems are short)
“Versailles” (classic, sturdy variety bred specifically for cut flower use)
HOW TO SOW
Cosmos are a summer-blooming flowers. They should be planted after your last spring frost.
Transplants or Direct Sow?
Cosmos are versatile and can be transplanted or direct sown.
Transplants are fine, but make sure to start the transplants only about 3-4 weeks before planting outside. Larger, older transplants tend to be “root bound” and may be permanently stunted in their growth and vigor.
Personally, I find Cosmos grow faster, are more productive and healthier when they are direct sown. You might as well save yourself some time and space, and simply direct sow the seeds!
Transplants/seeds should be spaced at about 12” apart.


GROWING ON
After the transplants are established and growing, it’s helpful to “pinch back” the plants when they are about 8”-10” tall. To pinch, simply use clippers to remove the top of the plant, only leaving 2-3 sets of leaves behind. I know this seems counterintuitive and you probably just freaked out, but trust me!
Plants that are pinched are more productive than plants that are not. Experiment for yourself - pinch half the plants and leave the other half alone. The unpinched plants will bloom earlier, but the pinched plants will produce more branches.
If flowers are harvested and spent blooms are “deadheaded” (removed), the plants will continue to send up blooms until frost or cold weather arrives.


“Apricotta” Cosmos
STAGE OF HARVEST
Many people say that Cosmos don’t last in the vase… but this is because they are harvesting the blooms too late.
Once a Cosmos bloom opens, it is immediately pollinated by bees. Once pollinated, the flower quickly drops its petals so it can begin its next stage of life - forming seeds.

In order to have long lasting blooms, you must cut Cosmos BEFORE the blooms have been pollinated, looking for buds that are cracking open or just opened. The flower will open up in the vase over the next few days. When harvested at this stage, you can expect them to last about 5 days.
Below, you can see the difference between an “Unpollinated” bloom and a “Pollinated” bloom. If the bloom has been pollinated, you might as well leave it in the garden, as the petals will quickly fall off in the vase.

“Unpollinated” bloom

“Pollinated” bloom - notice the pollen scattered on the petals
Cut deeply into the plant between 2 sets of leaves, cutting stems at least 18” long. Each stem should have multiple blooms/buds, a “spray” of flowers. Deep cuts are especially important with Cosmos, as they tend to become a tangled mess if you don’t make deep cuts!
POST HARVEST CARE
Cosmos require no special treatment.

Questions?
Questions or comments? Leave them below and I’ll get back to you!
ready for more?
If you’re serious about growing the garden of your dreams this year, register for my online course, “Backyard Cutting Garden 101”. You’ll find everything you need to plan, grow, harvest and arrange your stunning blooms. I can’t WAIT to help you grow! Click on the button below for all the details.
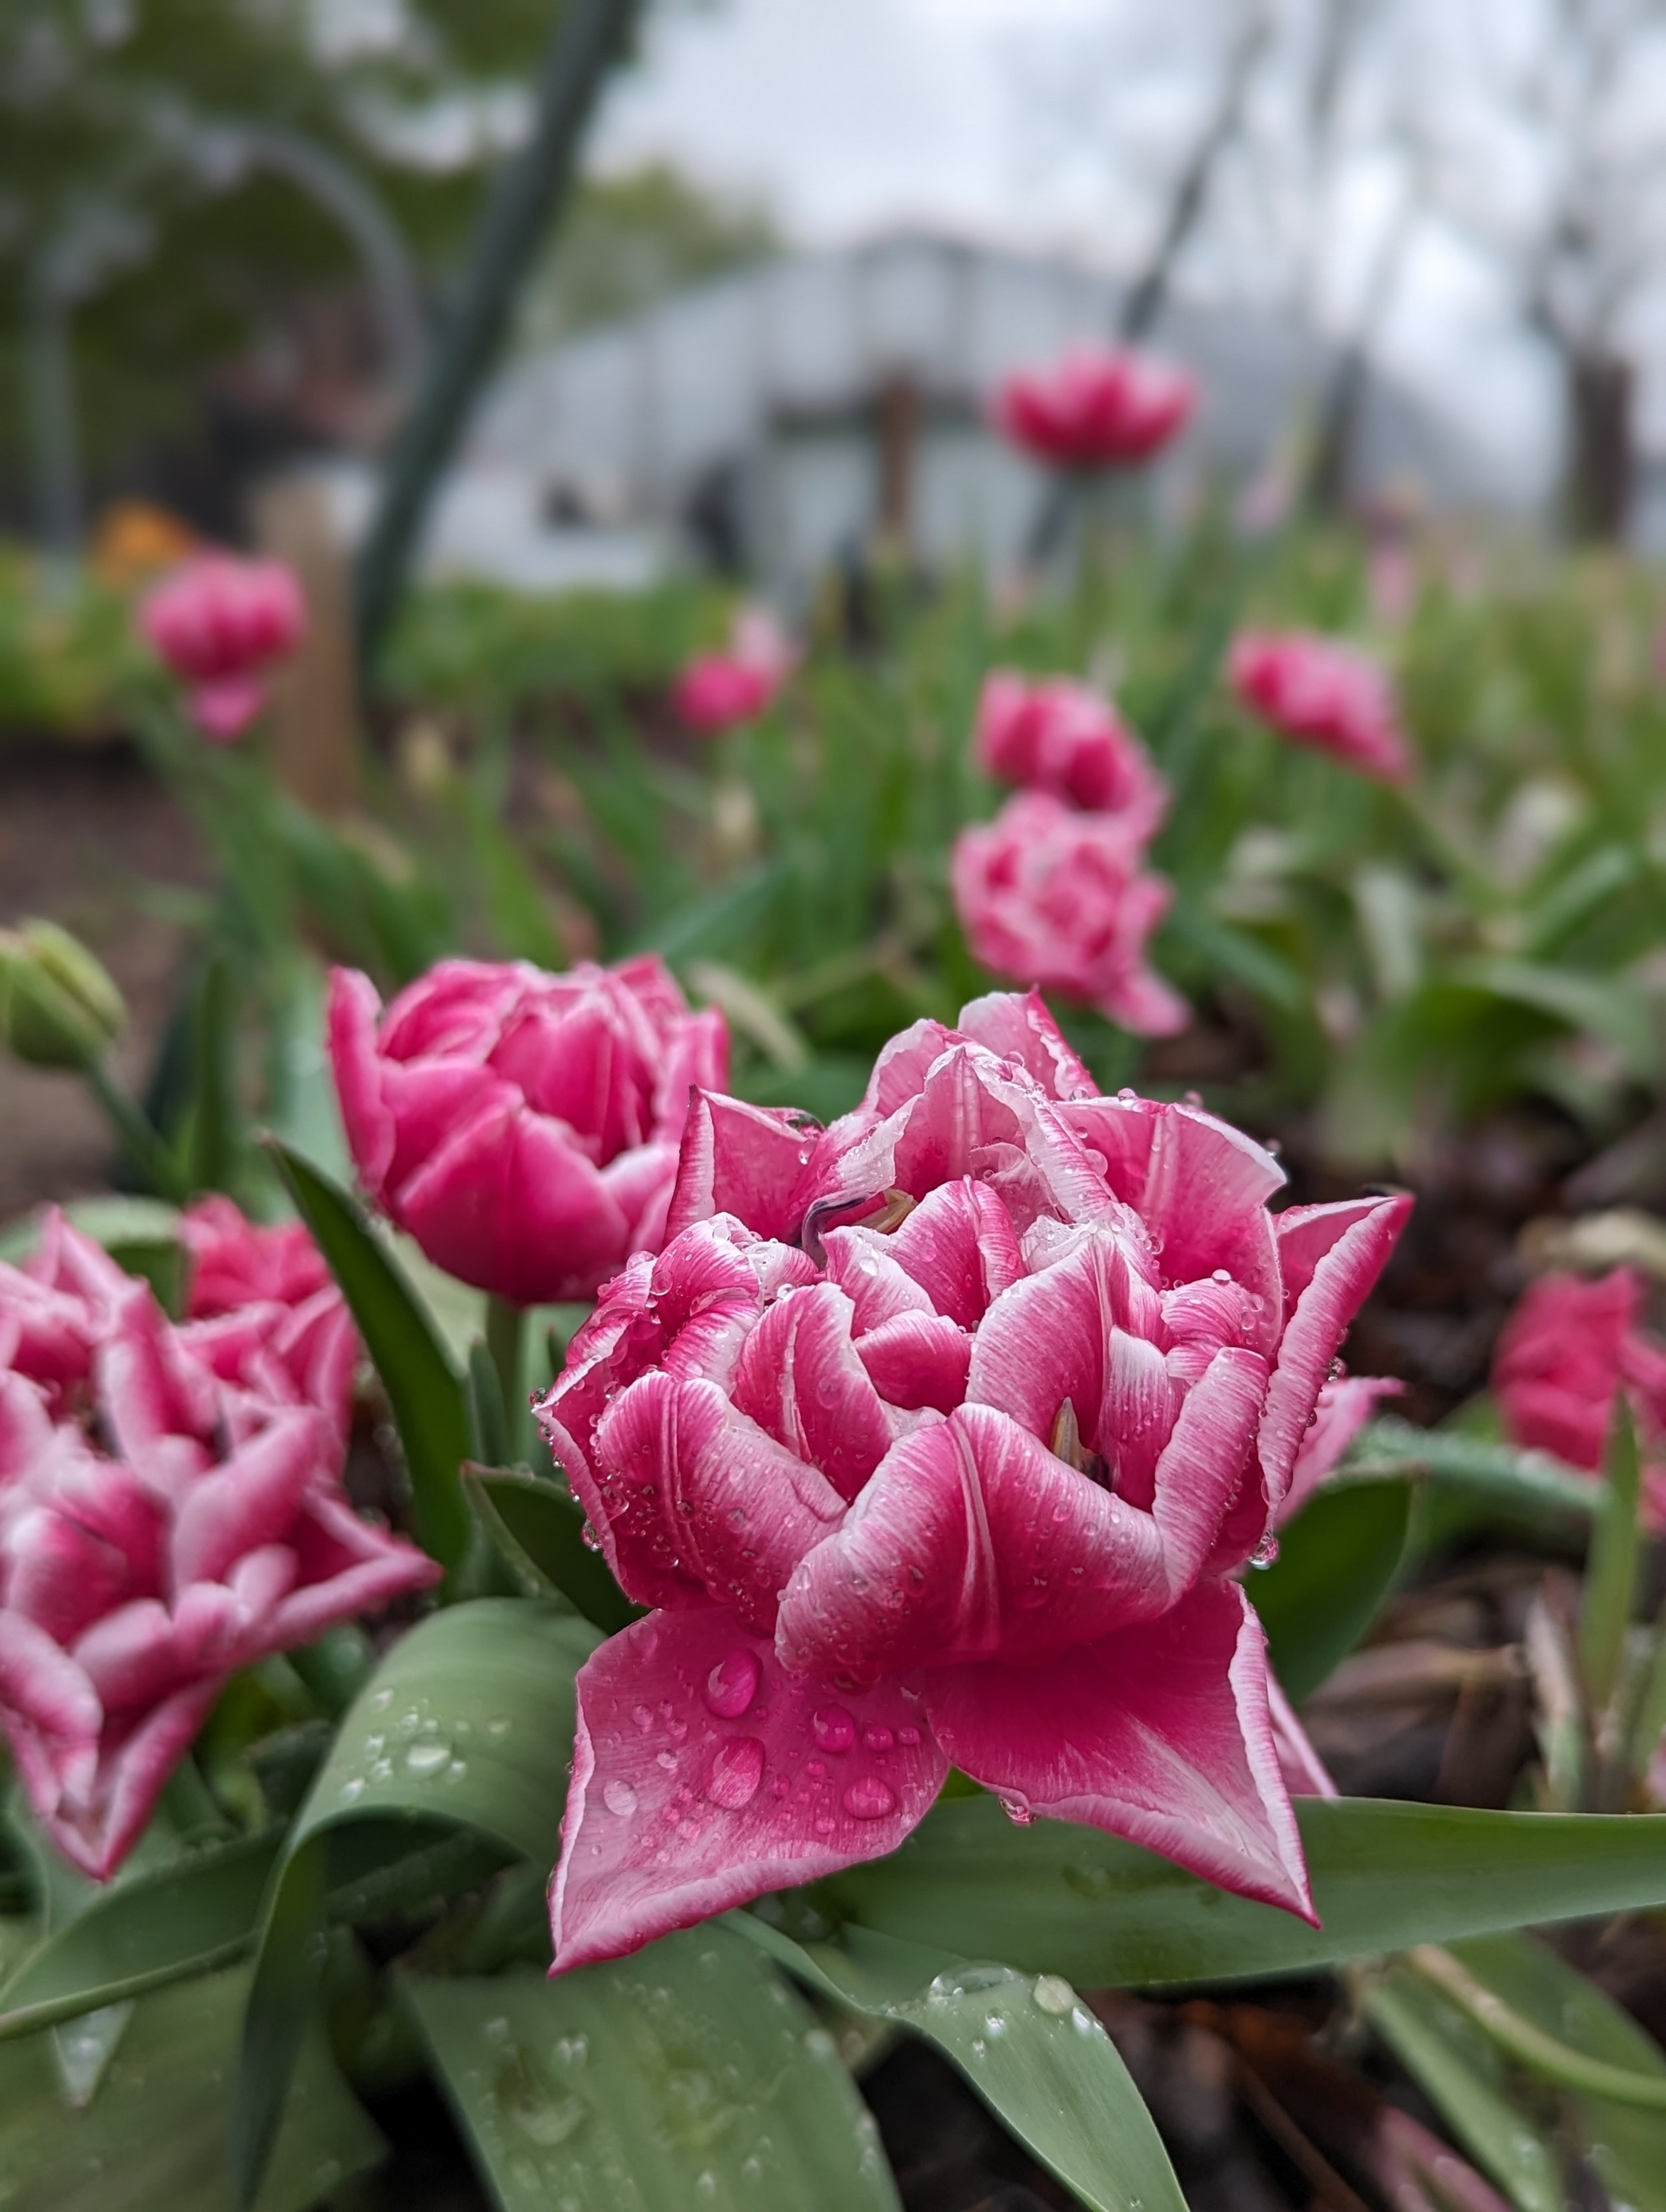
10 Great Tulips for Cut Flower Use
Tulips are an exceptional cut flower.
10 Great Tulips for Cut Flower Use
There’s nothing quite like Tulips in the spring. After the long dreary months of winter, they are a healing balm to soul and delight to behold.
For most us, fall is the time to plant Tulips for blooms the following spring. Here on our farm, we usually try to get all our Tulips planted before Thanksgiving.
We grow our Tulips in temporary raised beds that are disassembled after the Tulip harvest is over. You can learn more about why we grow this way HERE.
When we harvest Tulips for cut flower use, we treat them as an Annual flower, not a Perennial. We harvest the entire plant, bulb and all.
They can be stored dry (with no water) in buckets or crates for about 2 weeks in our walk-in cooler before being bunched and wrapped. When we’re ready to use them, the bulbs are removed from the stems and discarded. The freshly cut stems go into cold water and they are ready to go.
It may seem odd to throw away the bulbs, but once the stem/foliage is removed from the bulb, the bulb has no way of regenerating itself.


If you want your Tulips to come back, don’t harvest the blooms. Enjoy the blooms in the garden, instead of the vase. It’s also VITAL to allow the foliage to die back naturally on your landscape Tulips. If you remove the spent flowers/foliage too early, they cannot perennialize properly.
To summarize:
1.If you want your Tulips to behave like a Perennial, DO NOT HARVEST the blooms. Allow them to grow, bloom, and die back in the garden (but please note that many Tulip varieties only bloom reliably for 2-3 seasons).
2.If you want to harvest Tulips for bouquets, treat them as an ANNUAL. You will get one bloom per bulb, per season. The bulbs are discarded/composted after harvest. New bulbs are planted each fall.
If you want to grow Tulips for cut flower use, here are a few I’ve trialed over the years and can heartily recommend!

Apricot Impression
Type: Darwin Hybrid
Height: 24 inches
Bloom Time: Mid/Late
These Darwin Hybrid-type Tulips grow impressively long stems! A classic single Tulip with clean lines and form. They bloom early and often overlap with the Daffodil season.

“Apricot Impression”

“Apricot Impression”
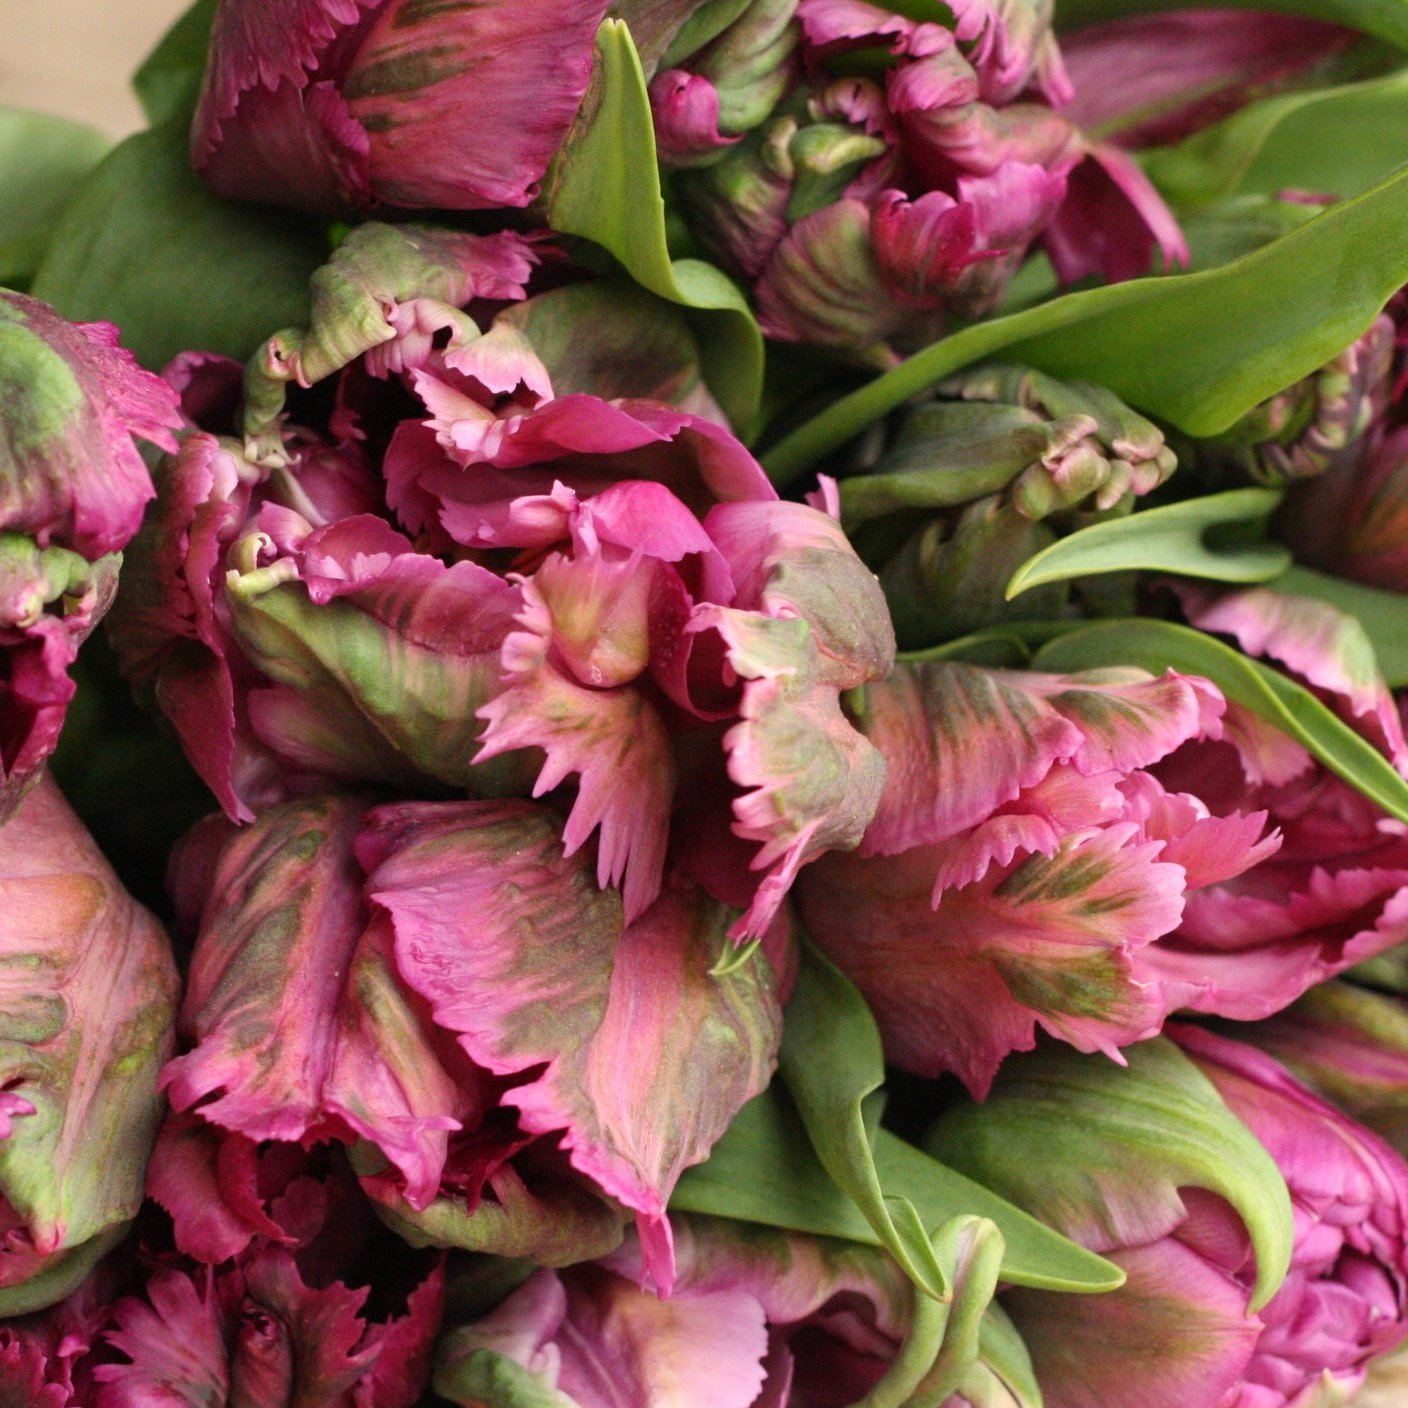
Apricot Parrot
Type: Parrot
Height: 20 inches
Bloom Time: Late
Parrot Tulips are fascinatingly beautiful. I love the contrasting colors on these Tulips. They’re decadent, luxurious, and unique. Many people have never seen Tulips like these before!

“Apricot Parrot”
“Apricot Parrot”
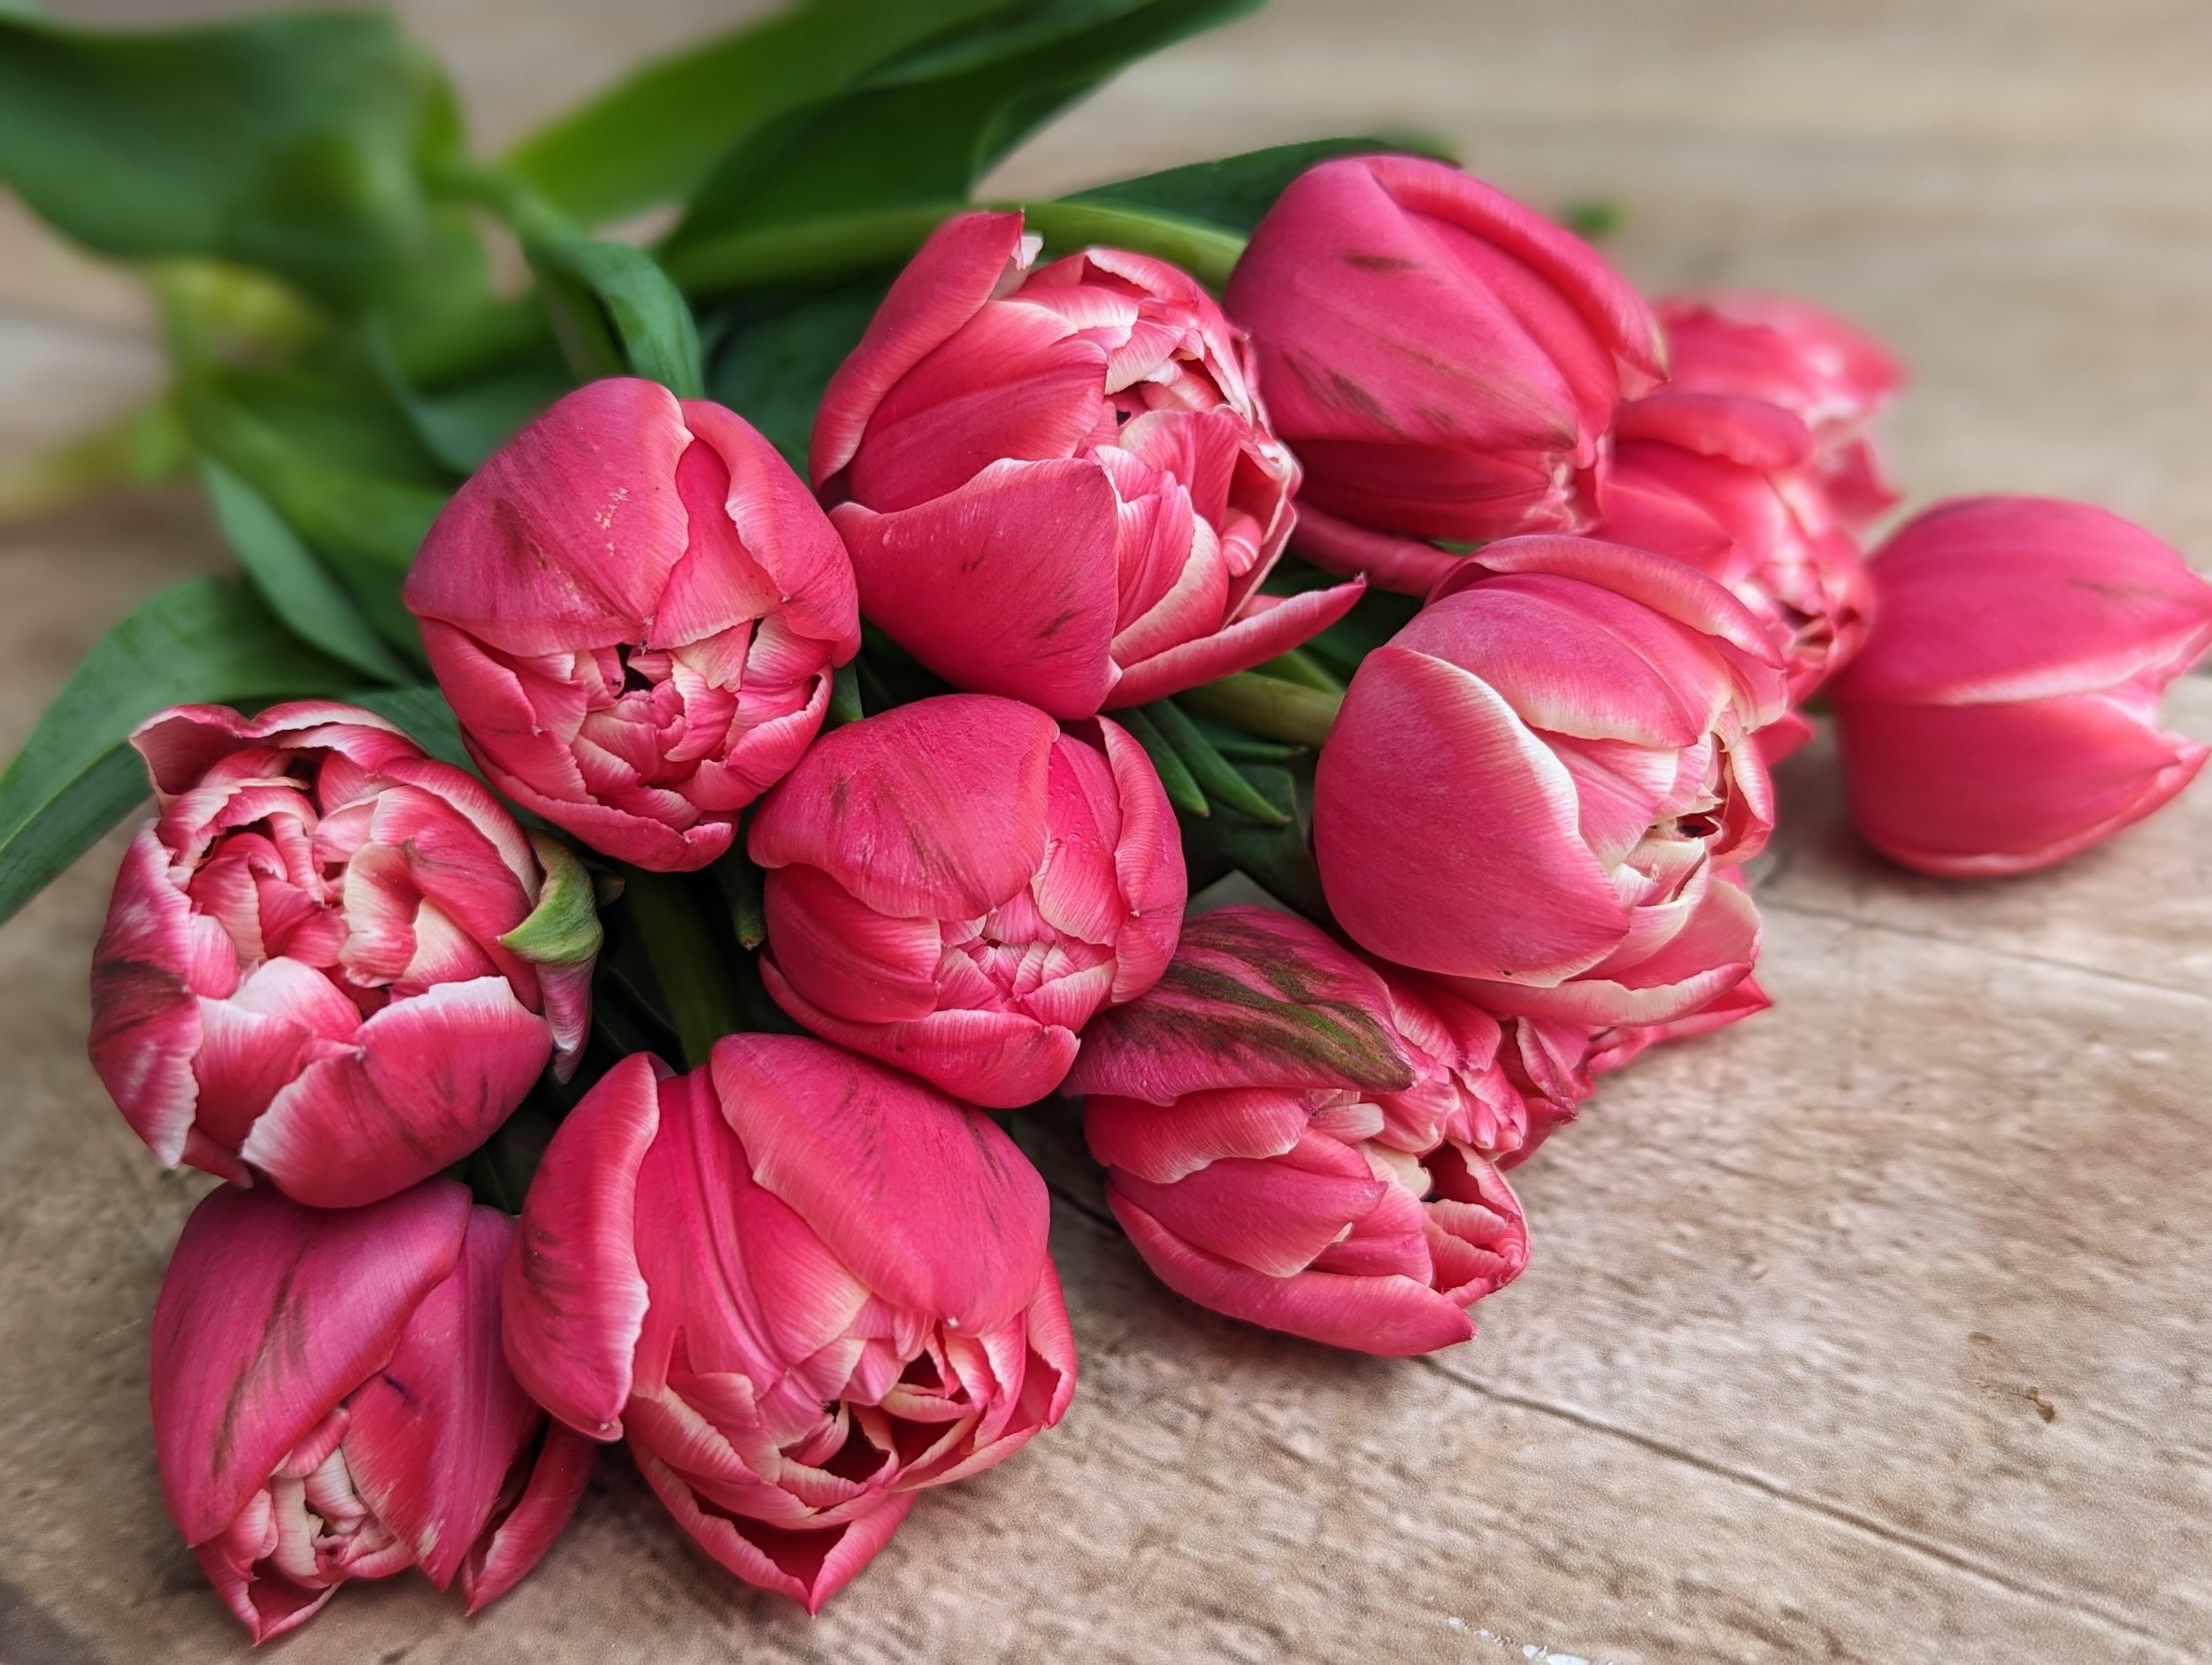
Columbus
Type: Double Early (Peony flowering)
Height: 14 inches
Bloom Time: Early/Mid
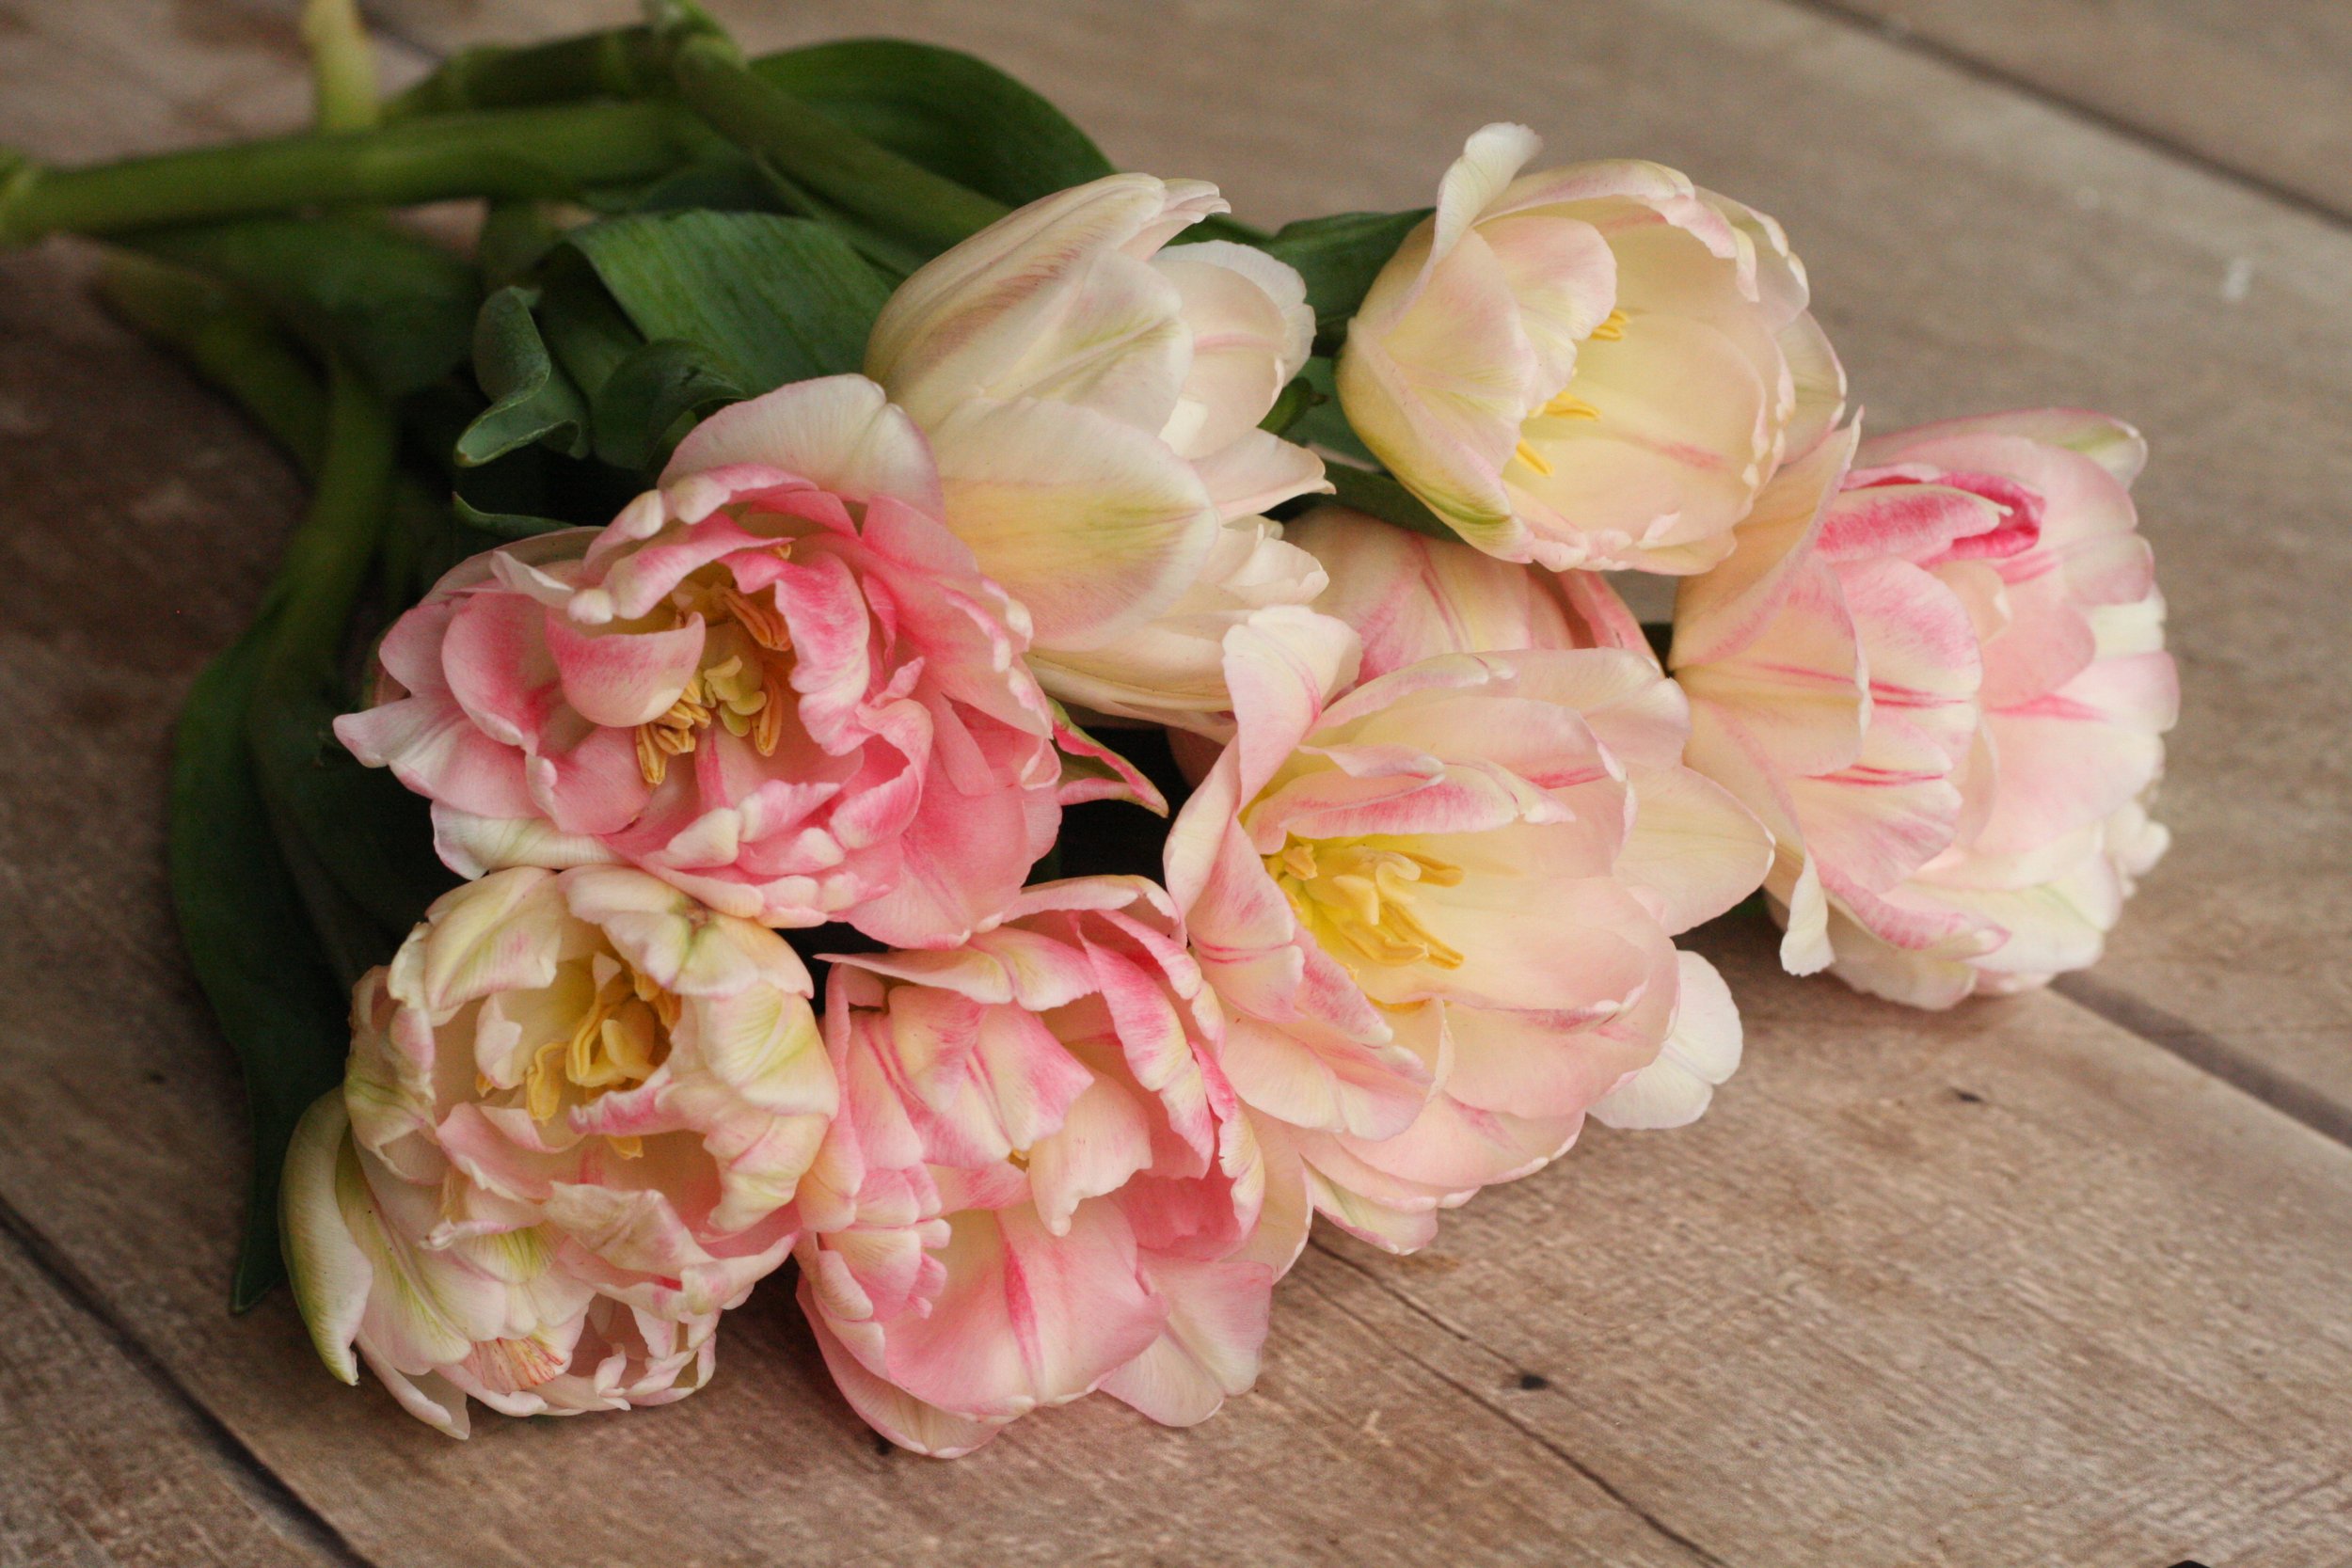
One of the earliest “Peony” type Tulips to bloom. The bright raspberry-pink blooms with white edging are a welcome treat after a long, dreary winter.
“Columbus”
“Columbus”
Foxtrot
Type: Double Mid (Peony flowering)
Height: 14 inches
Bloom Time: Early/Mid
A dreamy pale pink Tulip that pairs perfectly with “Foxy Foxtrot”. They are similar in size, height and bloom time. “Foxtrot” and “Foxy Foxtrot” complement each other beautifully (see image below)!
CLICK HERE TO PURCHASE
“Foxtrot”

“Foxtrot”

“Foxtrot” (pink) and “Foxy Foxtrot” (yellow)
Foxy Foxtrot
Type: Double Mid (Peony flowering)
Height: 14 inches
Bloom Time: Early/Mid
Foxy Foxtrot is sturdy, reliable, and long-lasting in the vase. The delicious buttery-yellow blooms, painted with streaks of warm pink, are a pure delight.
CLICK HERE TO PURCHASE
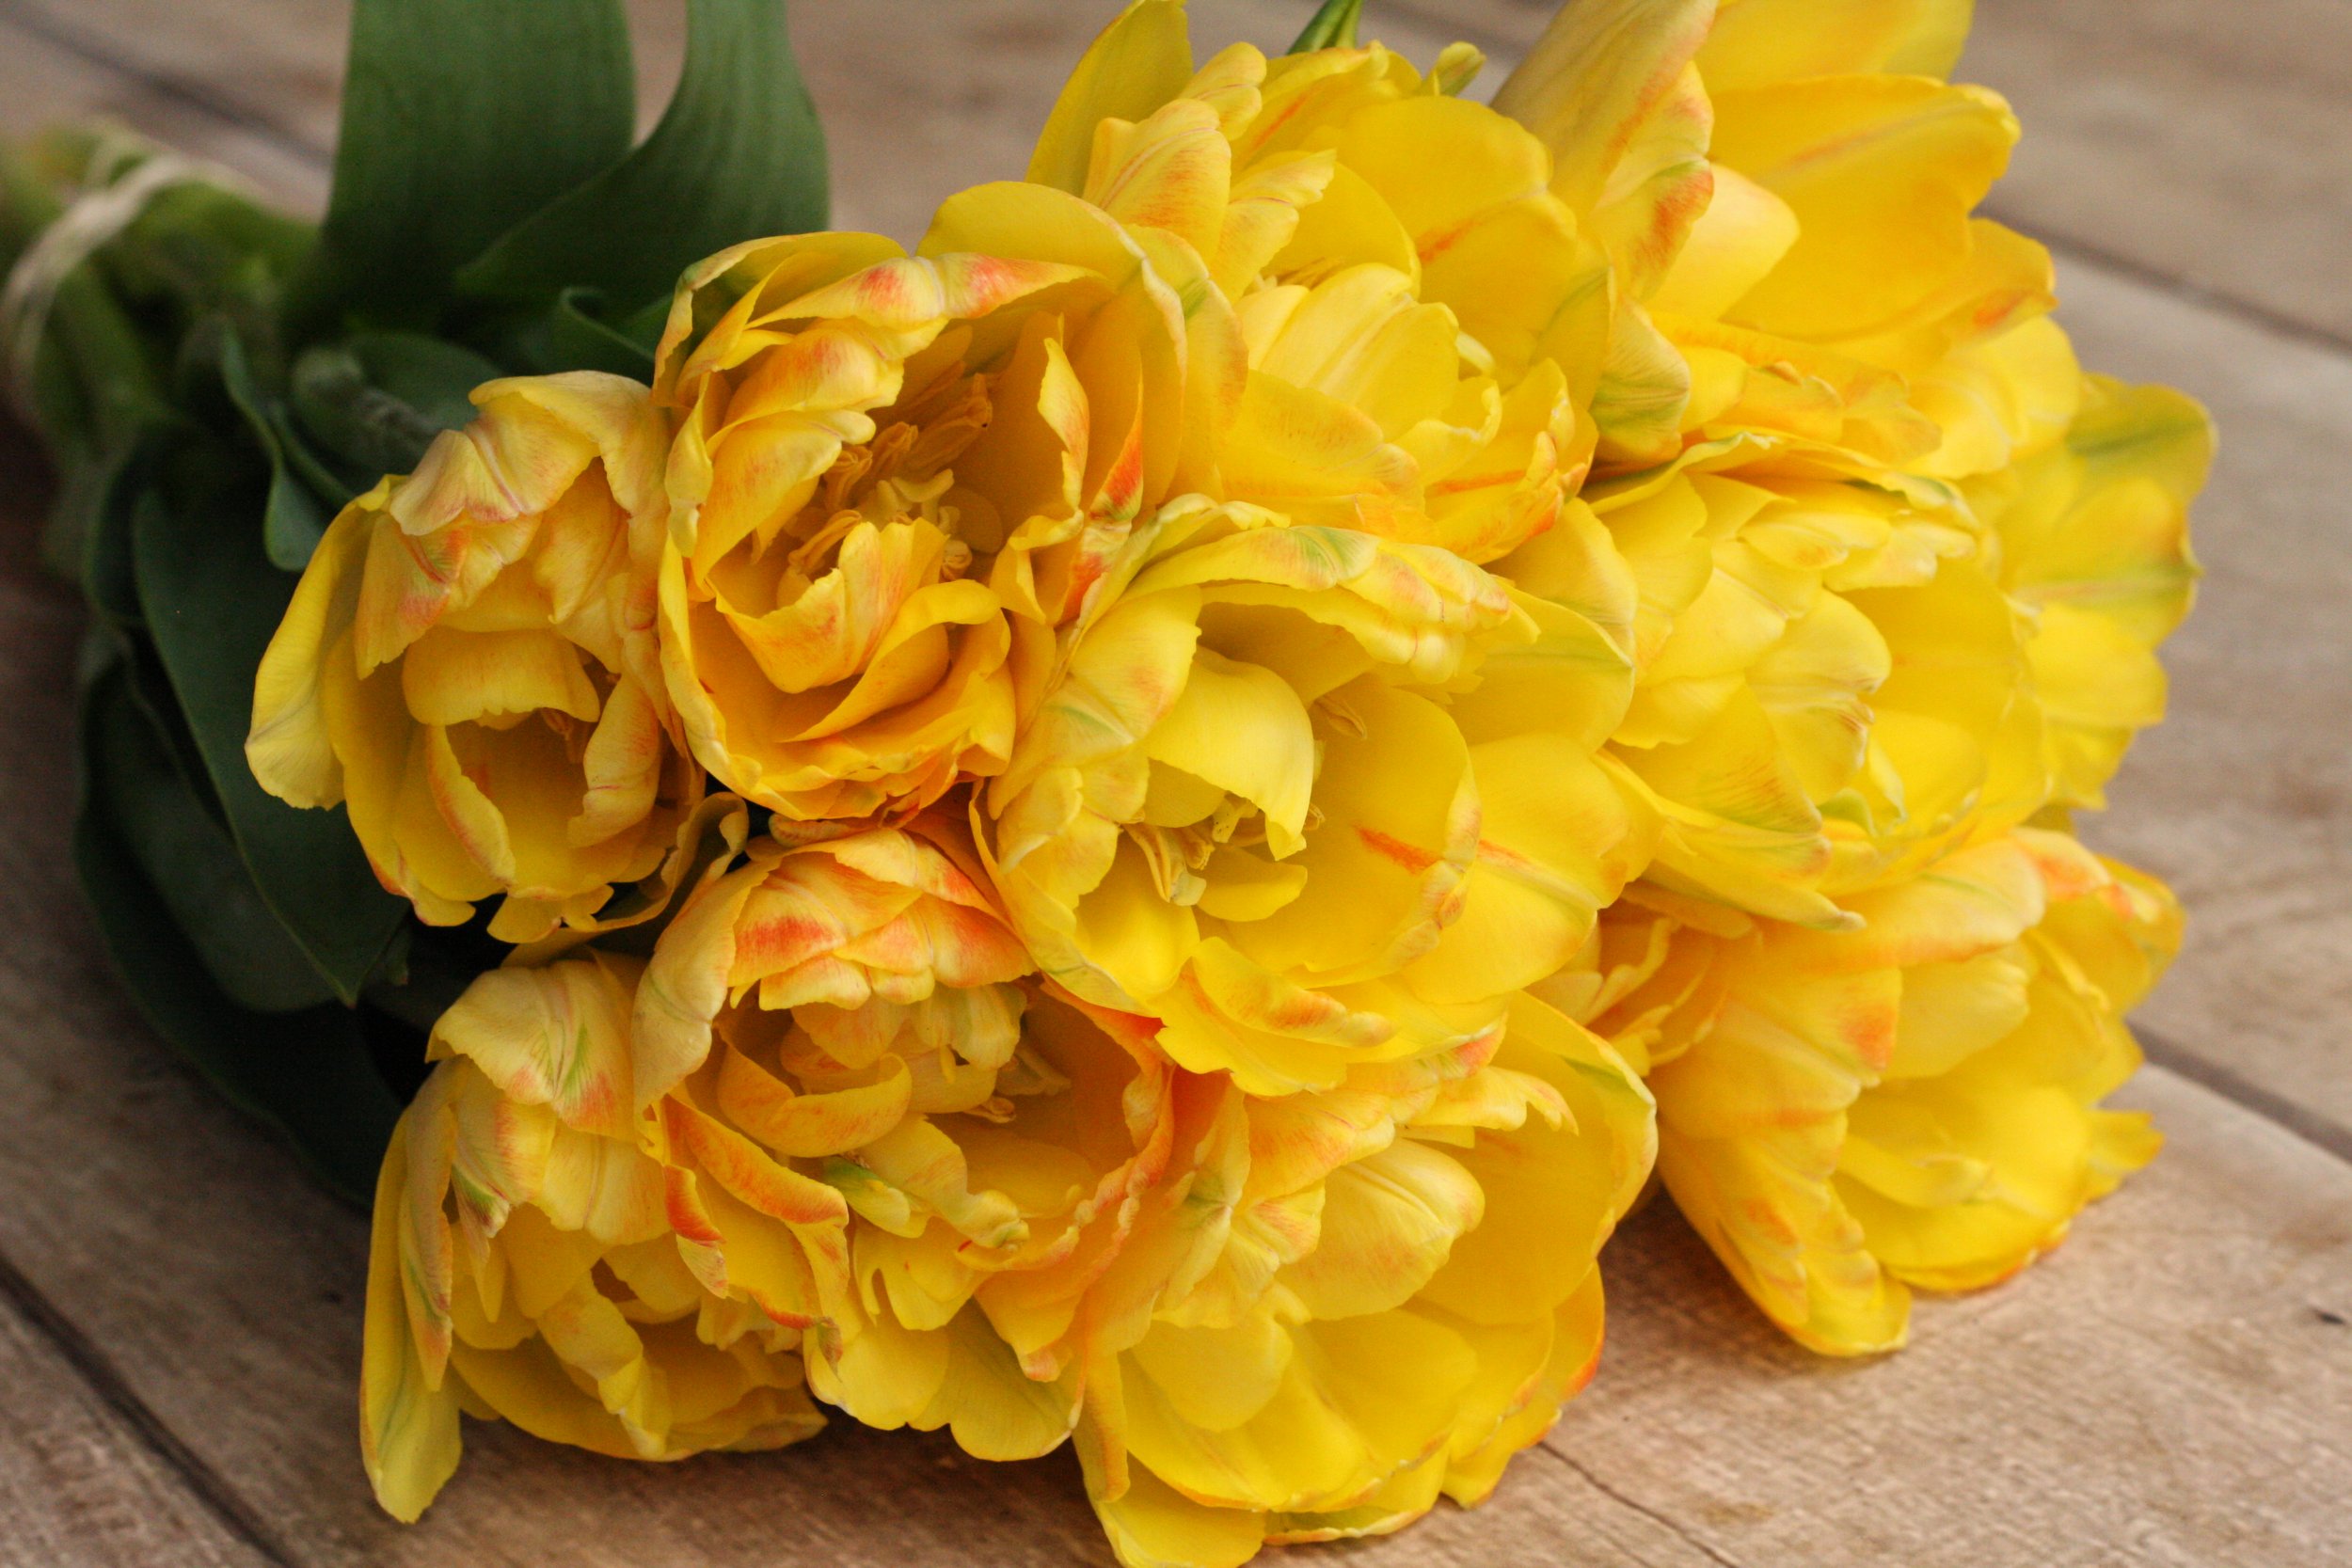
“Foxy Foxtrot”

“Foxy Foxtrot”
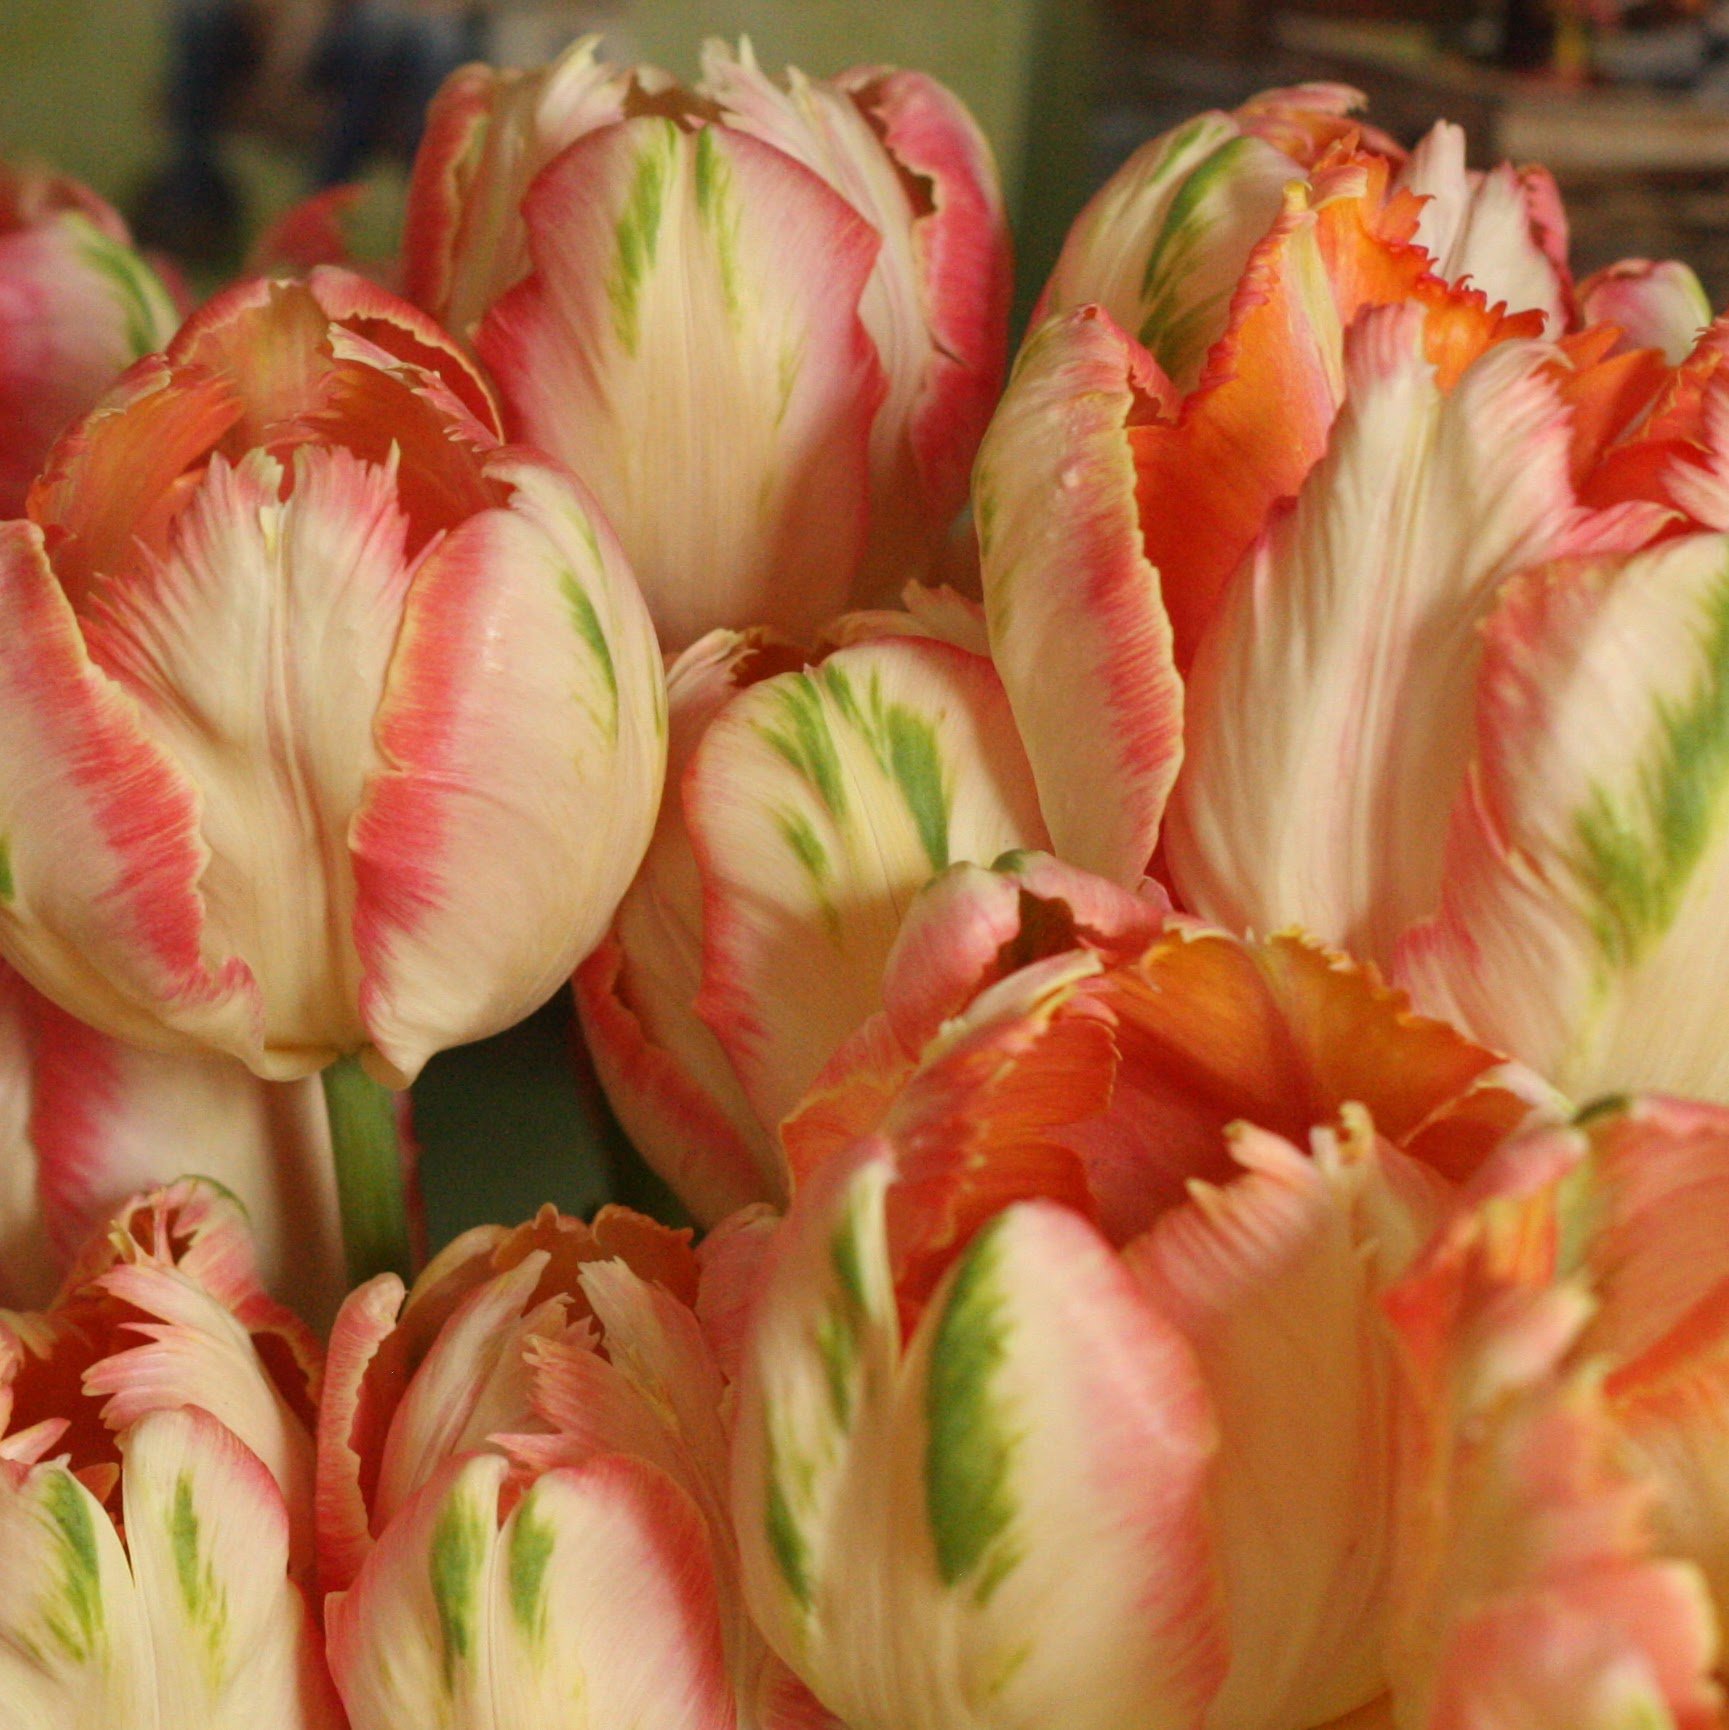
Tulip "Gudoshnik Double"
Type: Double Mid (Peony flowering)
Height: 24 inches
Bloom Time: Early
Each Peony-like bloom is a symphony of shades of red, coral, orange, yellow, and cream. These Tulips are exceptionally tall and attention-grabbing, in the garden or the vase.
CLICK HERE TO PURCHASE

"Gudoshnik Double"

"Gudoshnik Double"
"Mystic Van Eijk"
Type: Darwin Hybrid
Height: 22 inches
Bloom Time: Mid
The gorgeous shimmering coral pink tones are mesmerizing, like a spring sunrise. A charming Tulip, perfect for the garden or spring arrangements.
CLICK HERE TO PURCHASE
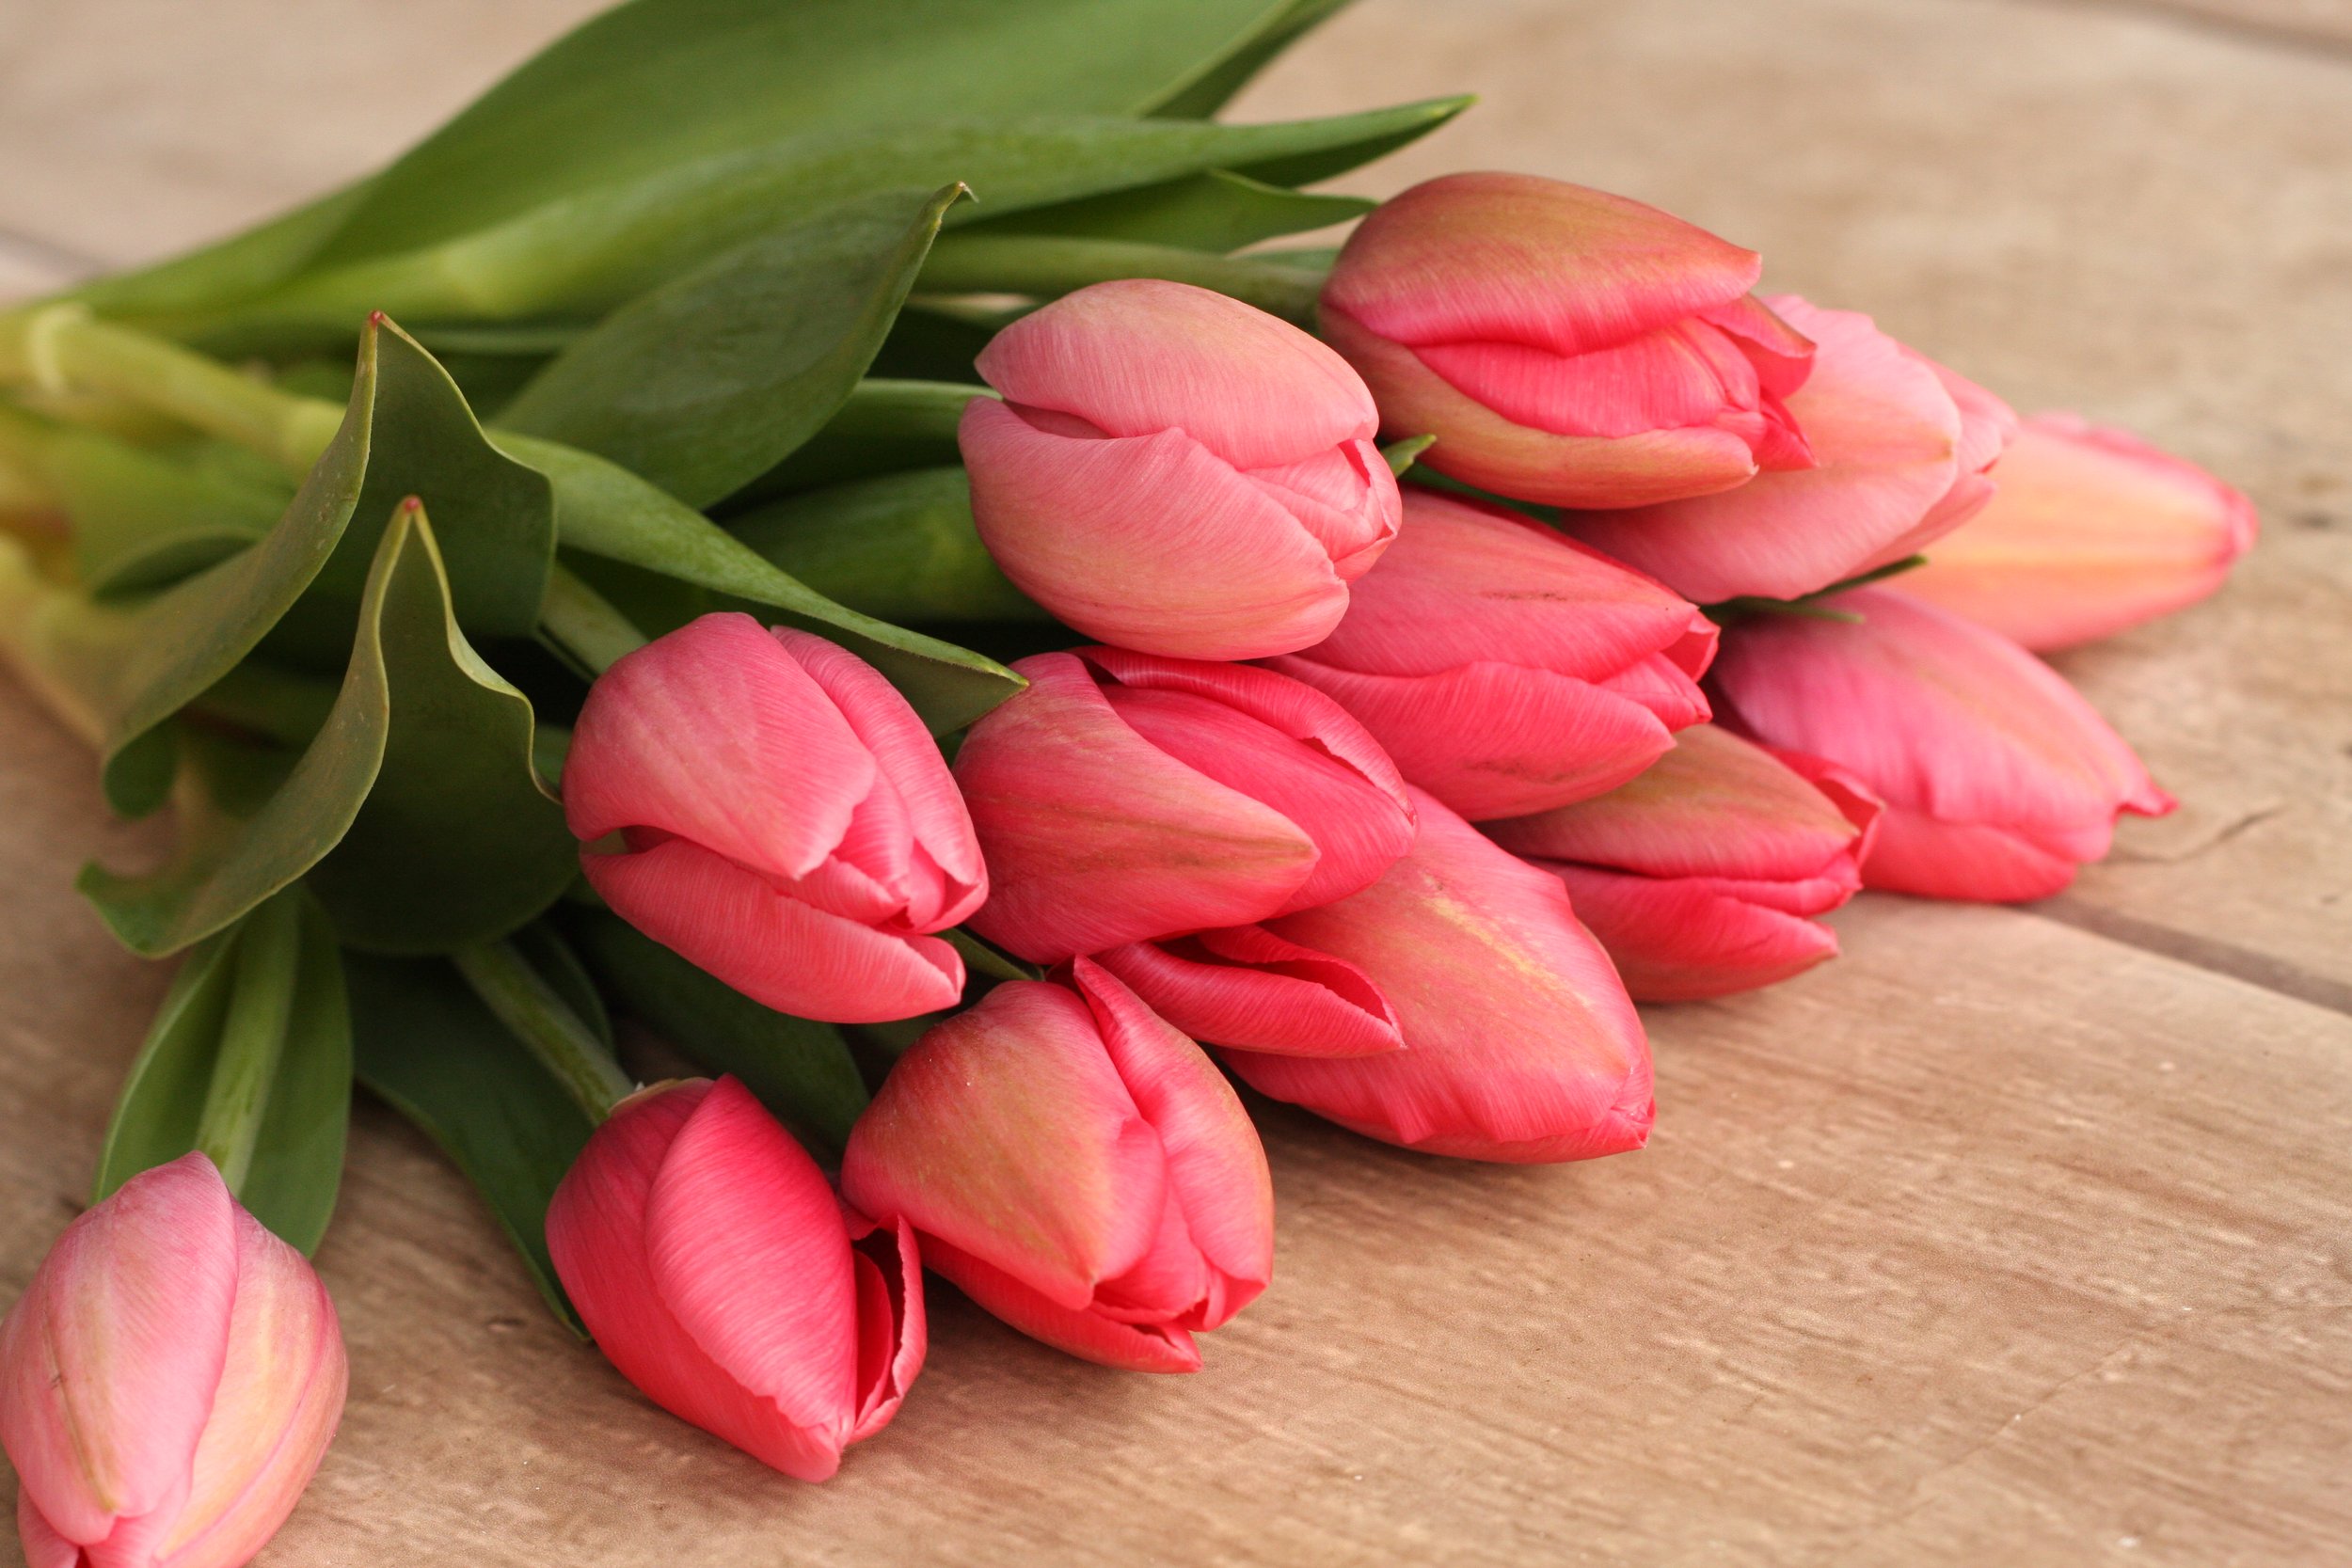
“Mystic Van Eijk”

“Mystic Van Eijk”
Parrot Negrita
Type: Parrot
Height: 18 inches
Bloom Time: Mid
If I could only grow one Tulip for the rest of my life, it would be “Parrot Negrita”. The color, the contrast, the form…. They are quite possibly the most elegant Tulip I’ve ever seen. They look as if they are straight out of a Baroque-era painting (psst… I was a Studio Art and Art History teacher before I became a farmer!).
They may look oddly shaped as they are forming buds, but trust the process. Harvest when the buds begin to swell open (pictured below). The blooms become even more stunning as they open up and age in the vase.
CLICK HERE TO PURCHASE

“Parrot Negrita”

“Parrot Negrita”

“Parrot Negrita”, ready for harvest
Sunlover
Type: Double Mid (Peony flowering)
Height: 22 inches
Bloom Time: Mid
A dose of cheery bright sunshine after the long dark winter. These huge blooms are sure to make you smile. The Peony-like blooms are a mix of assorted shades of sunny yellow and orange, with occasional streaks of glowing red.
CLICK HERE TO PURCHASE

“Sunlover”

“Sunlover”
Super Parrot
Type: Parrot
Height: 16 inches
Bloom Time: Mid
These elegant Tulips are breathtaking on their own or paired with other Parrot Tulips (I love to mix them with “Parrot Negrita” for a particularly stunning presentation). This variety has quickly become an MVP on the farm. White Tulips complement any color scheme. I can never grow enough!
CLICK HERE TO PURCHASE

“Super Parrot”

“Super Parrot”

“Super Parrot” (white) and “Parrot Negrita” (purple)

How to Grow Foxglove
How to Grow: Foxglove (Digitalis purpurea)
INTRODUCTION
Whimsical, magical and enchanting. Foxglove is all that and more!
The mere sight of them evokes visions of mythical lands and I always expect to see fairies flitting about them (but it’s usually just bumblebees! Ha!).
Foxglove stems look incredible in arrangements.
When crafting bouquets, it’s helpful to incorporate “line” or “spike” shaped flowers, such as Snapdragon, Veronica, Larkspur, Delphinium or Foxglove, to add interest and height to the arrangement.
Foxglove is a fabulous addition to the cutting garden… or to simply grow for the pollinators (and fairies).

Camelot Mix
Let’s look at the Pros and Cons of growing Foxglove for cut flower use.
PROS
Their “spike” shape adds drama, movement and visual interest to bouquets. There’s nothing else quite like them!
They are long-lasting in the vase when harvested at the proper stage (more about that later!)
They are magical. I think that’s reason enough to grow them. ;)
They usually provide 2 flushes of blooms - one in late spring/early summer and another about a month or two later.
CONS
Warning: All parts of the plant are toxic if ingested. If you have curious children or pets that could eat the flowers or leaves, it’s best to skip growing Foxglove. Touching the plants/flowers is perfectly safe. While I don’t want to downplay their toxicity, I do want to point out that many common flowers (and houseplants, too!) are toxic if ingested, including Morning Glory, Delphinium, Larkspur, Tulips, Lilies, Hyacinths, Hydrangea, Lily of the Valley, Poinsettias, Clematis, Alstroemeria, Sweet Peas and more.
Most varieties are Biennial, which means they produce foliage their first year, overwinter in the garden, then bloom in their second year. That’s a long time to wait to see blooms! In order to have some plants in bloom each year, it’s important to start more plants from seed each year.

Camelot Mix
CHOOSING SEEDS
Depending on where you live (your climate) and what variety of Foxglove you grow, they may perform as:
an Annual (1 year life cycle),
a Biennial (2 year life cycle), or
a short-lived Perennial (2-3 years)
Some Foxglove varieties have been bred to be FYF (First Year Flowering). This means they will grow like an Annual flower and bloom in their first season. They may flower in their second year, but not reliably.
Most Foxglove varieties are Biennials (if the seed pack does not indicate they are FYF, you can assume they are Biennial).
It usually takes about 360 days from sowing the seeds until they bloom. If you sow the seeds in May, you can expect them to bloom the FOLLOWING year in May. In the first season, they will only grow foliage. Leave them in the garden over the winter (they are tough!) and they will bloom the following spring. After they bloom in their second season, they drop their seeds and the plant dies.
If you allow the plants to drop their seeds and grow in an undisturbed area, they may “self-sow” the following spring and create a “Perennial” patch of Foxglove, with some new plants establishing every year.
Note: If you buy a Foxglove plant at a Plant Nursery and it’s in full bloom, the plant is in its second season. It will die after its blooming is complete. Do not expect it to come back the next season (although it may! Foxglove can be unpredictable like that!).

Camelot Mix
The following Foxglove series are a great choice for cut flower use, since they are FYF:
“Camelot” series (FYF - first year flowering)
“Dalmation” series (FYF - first year flowering)
Here are a few of my favorite Foxglove varieties to grow for cut flower use:
“Camelot Rose” (FYF - first year flowering)
“Gloxiniaeflora Mix” (Biennial)

Camelot Mix
HOW TO SOW
Foxglove is quite easy to grow from seed, although it can take up to 3 weeks for seeds to germinate… so be patient! Foxglove prefers cool weather, so keep the seedlings on the cooler side (unlike Agertum, Celosia, and Zinnias, which like it HOT!).
Transplants or Direct Sow?
It’s best to start Foxglove from seed indoors or in Winter Sowing containers to be transplanted into the garden.
They can be Direct Sown, but this can be difficult since the seeds are tiny.
Start seeds in trays about 6-8 weeks before your Average Last Spring Frost Date. Transplant the seedlings after your Average Last Spring Frost Date.
If you want to speed up the process of growing Biennial Foxglove (and not have the plants taking up valuable space in your garden all summer long), you can try this “Fall Planting” trick.
Start the Foxglove seeds in trays in mid-summer.
When the seedlings are 6-8 weeks old, transplant them into your garden beds. By this time, it’s early fall and you likely have some Annual flowers that are spent anyway. Remove them and put the Foxglove seedling in that space instead.
Allow the young plants to establish and grow a strong root system before the ground freezes.
The following spring, they will bloom!
PLANT SPACING
9-12 inch spacing is appropriate for cut flower use.

Dalmatian Peach
GROWING ON
Like most cut flowers, Foxglove appreciates consistent feeding and watering. They perform best in fertile soil.
Plants can be netted or supported to prevent them from falling over. They can grow quite tall! I usually don’t net them, but other people choose to.
Pinching is not required. Most plants that have a “rosette” type growth habit (low-growing leaves radiating from the center of the plant, like Foxglove and Statice) do not require pinching.
Foxglove does not have many issues with pests or diseases.

Dalmatian Peach
STAGE OF HARVEST
Remember when I mentioned bumblebees earlier?
I have a bit of a complicated relationship with bumblebees.
On one hand, I love to watch them bumble around in the flowers. It’s so fun and relaxing to be around those adorable “Flying Pandas” (that’s what I call them).
On the other hand, I know that as soon as they pollinate a floret on the Foxglove, that floret will turn brown and ugly and fall off the stem.
This is true for nearly all cut flowers - once the flower has been pollinated, it has fulfilled its mission in life and it immediately moves onto the next phase - dying and going to seed.
If you harvest a stem of florets that have been pollinated, they will all look brown and ugly within a day or two.
The solution? Harvest BEFORE they are pollinated. Check the bottom florets on each stem. When 1 or 2 florets are open, it’s time to harvest before the bumblebees get to them! I like to harvest early in the morning before the bumblebees are awake.
The remaining florets on the stem will gradually open up in the vase over the next week.
P.S. It’s completely acceptable to leave a few stems for the bumblebees. That’s what I do ;)

Dalmatian Peach
POST-HARVEST CARE
Like most cut flowers, always harvest in the cool of the day and allow the flowers to rehydrate in water in a cool location overnight before arranging.
Foxglove is ethylene gas sensitive (gas released from ripening fruit which causes flowers to ripen and expire very quickly), so be sure to display them away from fruit.
QUESTIONS?
Ask them here and I’ll get back to you!
Ready for more?
If you’re serious about growing the garden of your dreams this year, register for my online course, “Backyard Cutting Garden 101”. You’ll find everything you need to plan, grow, harvest and arrange your stunning blooms. I can’t WAIT to help you grow! Click on the button below for all the details.