

How to Grow Frosted Explosion Grass
How to Grow Frosted Explosion Grass
INTRODUCTION
If you’re going to plant a cutting garden, then Frosted Explosion Grass is a “must-grow” plant!
The gorgeous seed heads add irresistible sparkle, texture and elegance to bouquets and arrangements. It can be harvested and utilized at various stages, which makes it extremely versatile.
When the stems are young, the decorative seeds are a mix of lime green and red-brown. As the stems age, the seeds turn rich red-brown, and when the stems dry on the plant, they turn a dusky wheat color.
Frosted Explosion Grass is easy to grow, incredibly prolific, long-lasting in the vase AND it’s a great dried flower option.

What’s not to love?!?
Anytime you make a bouquet and think “Hmmm… it’s missing something…”, just grab a few stems of Frosted Explosion Grass and you’ll be shocked to see what a difference it makes!

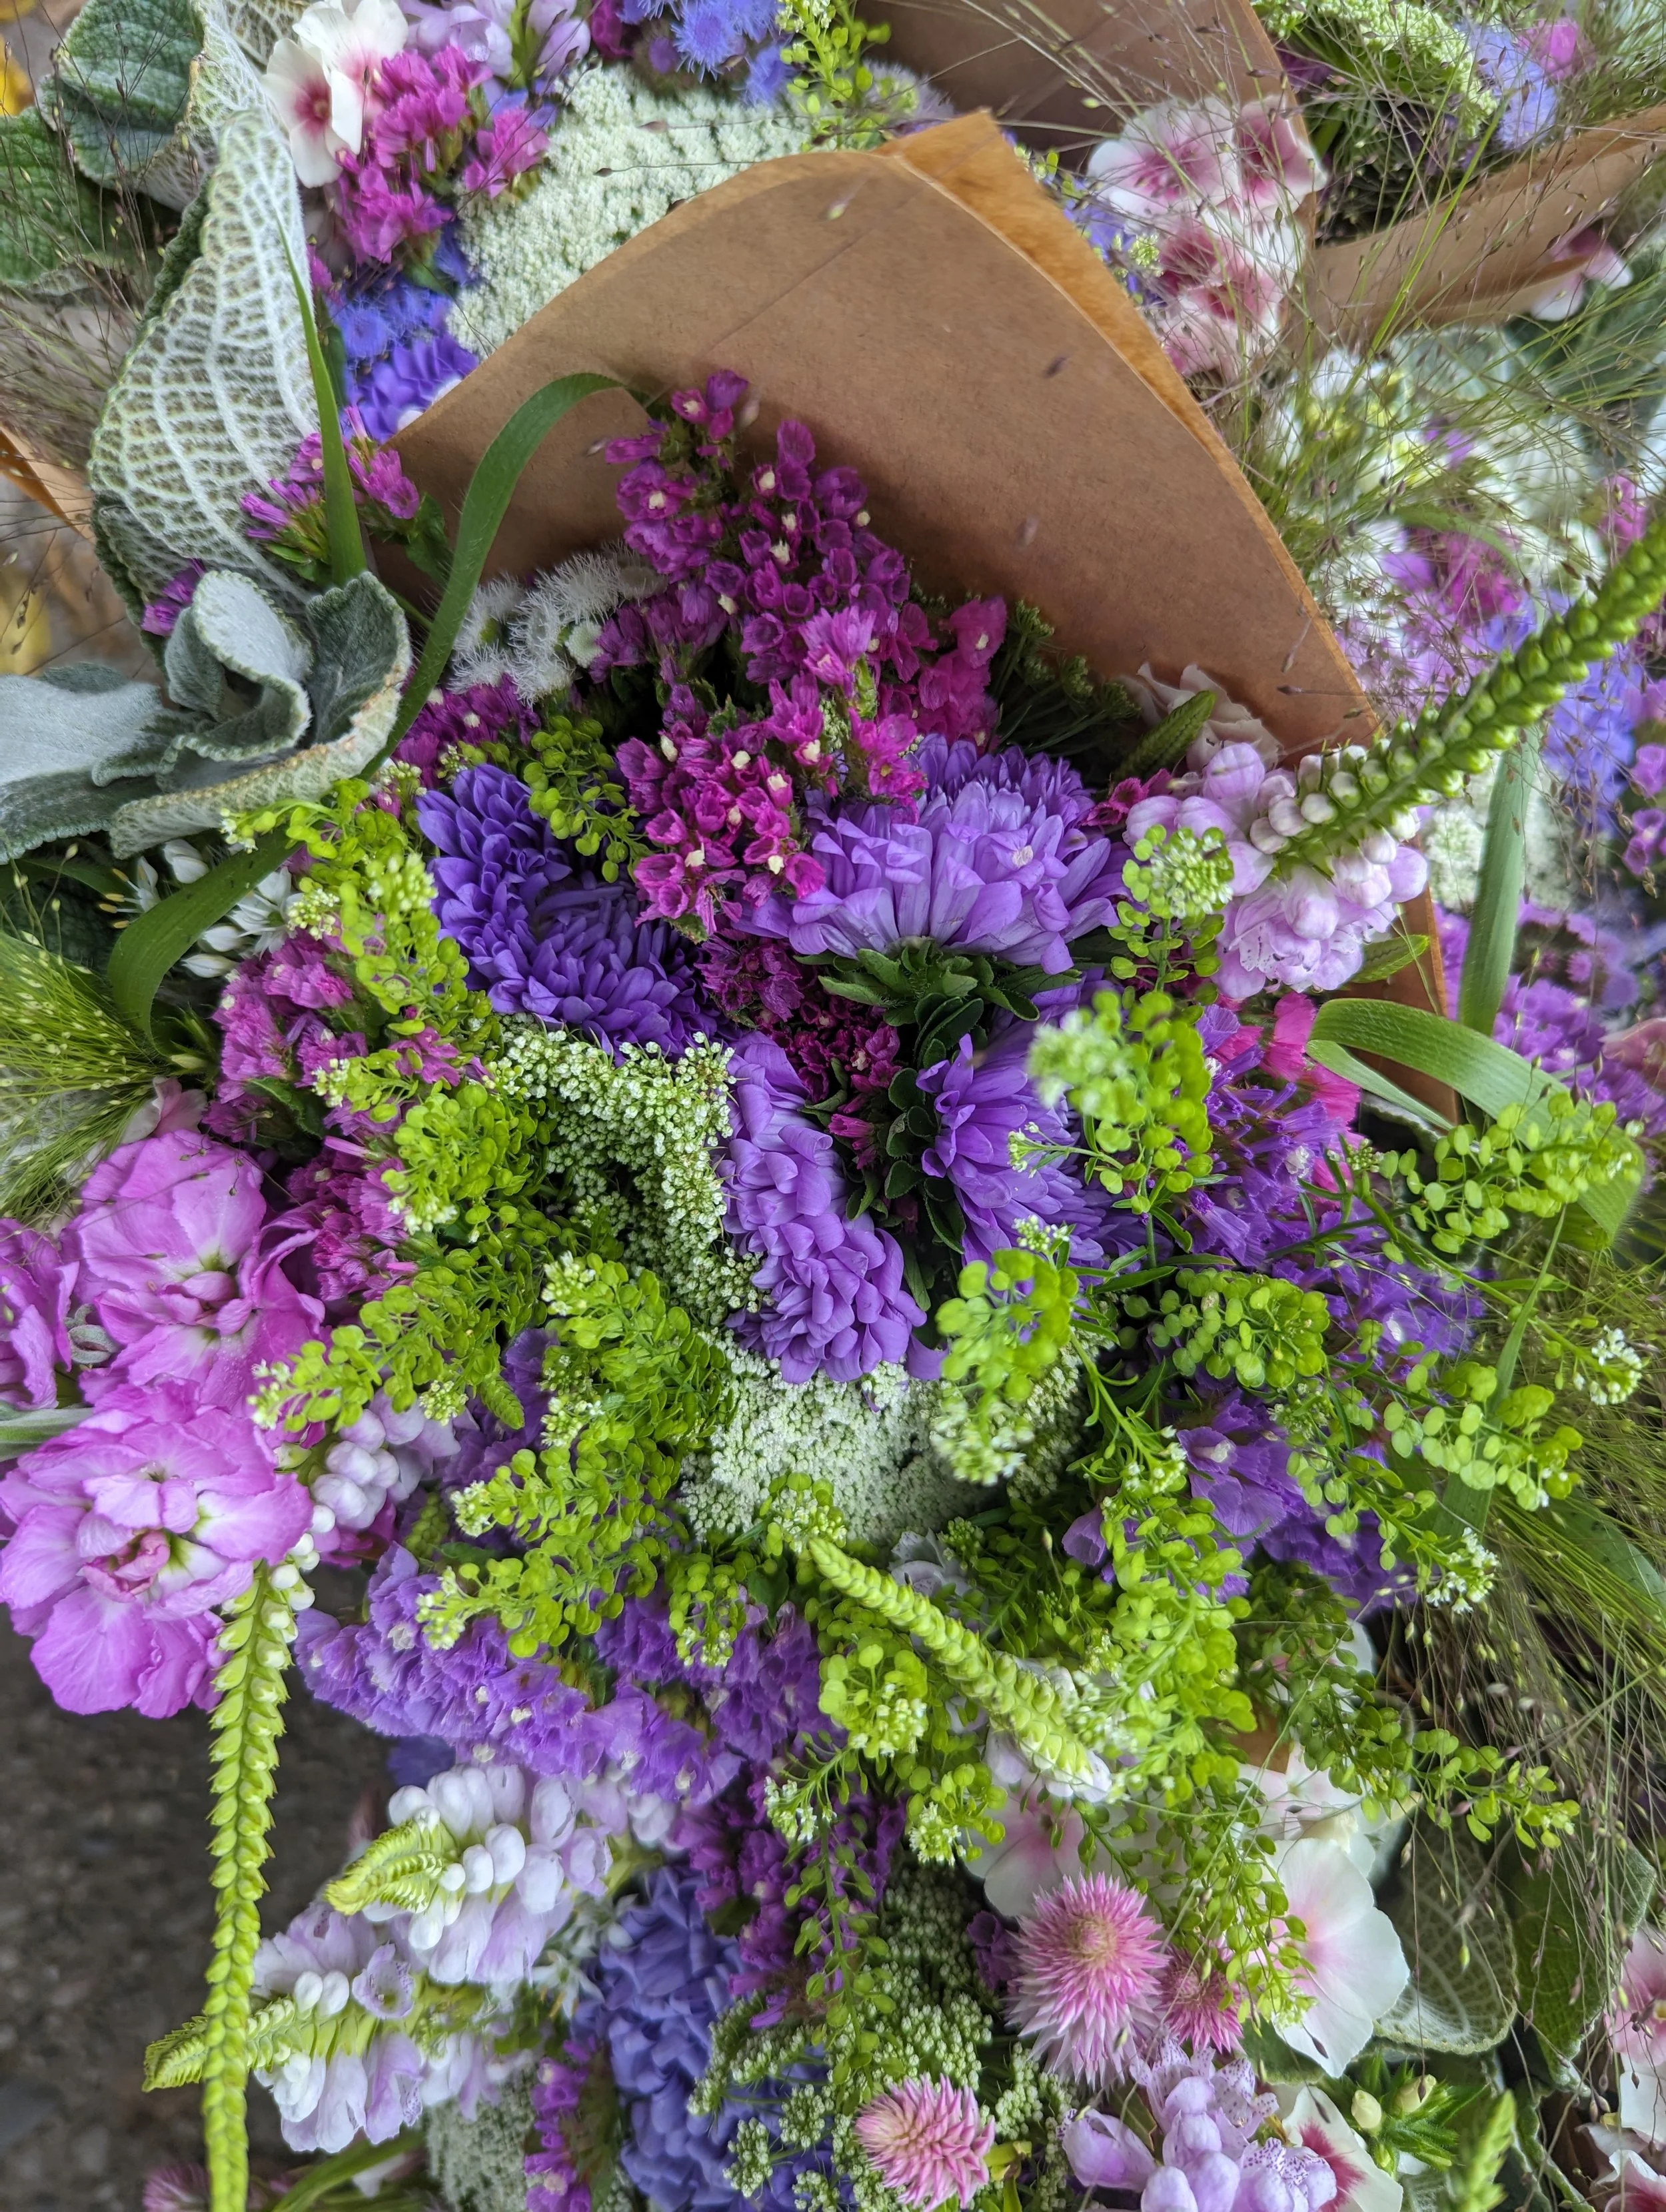
Frosted Explosion Grass in bouquets
Let’s look at the Pros and Cons of growing Frosted Explosion Grass for cut flower use.
PROS
It’s easy to grow. It’s grass seed, after all!
It looks beautiful in nearly all bouquets and arrangements.
It’s an excellent “filler” that adds mass and volume to your bouquets with just a few stems (Translation: If you’re running short on flowers, the Frosted Explosion Grass will help make the bouquet look full and lush).
It’s long-lasting in the vase.
It looks beautiful when dried (either allow it to dry on the plant or hang fresh cut stems upside down to dry).
It’s “cut-and-come-again”. The more stems you harvest, the more stems it will grow.
CONS
It can be too productive! We can never keep up with harvesting all the stems! Do your best to harvest on a regular basis to keep the plants productive. If you stop harvesting, the plants will go completely to seed and stop growing new stems.
It can be a bit tricky to harvest as the plants can get unruly.

HOW TO SOW
Frosted Explosion Grass is easy to start from seed.
Transplants or Direct Sow?
I do not recommend direct sowing Frosted Explosion Grass, simply because it’s too easily mistaken as a weed when it's a small seedling.
Start the seeds indoors 4-6 weeks before planting out. Drop 2-3 seeds per cell, press down into the seed starting mix, then cover lightly with vermiculite or seed starting mix. Seeds germinate in 7-14 days.
Transplant the seedlings after the threat of frost.
For best results, I recommend planting 2-3 successions of Frosted Explosion Grass, about 2-3 weeks apart.
This will ensure you have a steady supply of stems for months.
PLANT SPACING
9-12 spacing works best for most growers.

Ethereal looking Frosted Explosion Grass in a centerpiece arrangement
GROWING ON
This grass is easygoing and undemanding. Once the seedlings are established, they need average amounts of water.
I do not recommend pinching or netting Frosted Explosion Grass.
About 6 weeks after the plants begin producing their beautiful seeded stems, they begin to fade and die back. This is why it’s useful to plant several successions, so you can abandon the old plants and harvest from the “fresher” ones.
This year, we experimented with “cutting back” the old plants with a weed whipper to see if they would re-bloom. We cut them back on August 14 and they DID rebloom about a month later, but the stems were much shorter… which makes sense because the plants need about 14 hours of light to produce long stems and we only have 13 hours of light in mid-September.
We may try it again, but cut back earlier in the season so the new stems can grow back when we have more daylight!

STAGE OF HARVEST
You can harvest Frosted Explosion Grass at any stage, from barely open to fully blown open. It all depends on personal preference.
Seeds emerge green, then fade to reddish brown.
Sometimes we want lime green seeds, sometimes we want reddish brown seeds and sometimes we want the ethereal faded wheat-colored stems. It just depends on what kind of bouquets and arrangements we are making!
Harvest regularly to encourage new growth.
However, if you plan on using them for dried flowers, allow stems to completely mature and dry on the plant before harvesting. This produces extra full and airy dried material.

Frosted Explosion Grass in bouquets

Frosted Explosion Grass in bouquets
POST-HARVEST CARE
Frosted Explosion Grass requires no special post-harvest care.
QUESTIONS?
Ask them here and I’ll get back to you!
Ready for more?
If you’re serious about growing the garden of your dreams this year, register for my online course, “Backyard Cutting Garden 101”. You’ll find everything you need to plan, grow, harvest and arrange your stunning blooms. I can’t WAIT to help you grow! Click on the button below for all the details.

How to Grow: Globe Amaranth
How to Grow: Globe Amaranth (Gomphrena)
Pronunciation: glowb am-ah-ranth or gaam-free-nuh
INTRODUCTION
Cute. Adorable. Sweet.
Gomphrena (or Globe Amaranth - I use the two names interchangeably) is not the flashiest flower in the cutting garden, but they are useful, versatile and playful. Every garden should have some!
They can be tucked into bouquets or even better, displayed on their own in bunches.
But here’s the best part - Gomphrena is a wonderful “Everlasting” (dried) flower that retains its color and form for years. During the long winter months, I have dried Gomphrena bunches scattered around, bringing brightness and beauty to our home.
Gomphrena is a heat-loving flower and thrives in hot climates.

Brilliant Mix
Let’s look at the Pros and Cons of growing Globe Amaranth for cut flower use.
PROS
They come in a variety of colors (mostly pinks, reds, violets and white)
They are a playful addition to bouquets.
They are very heat tolerant.
They have a good vase life of about 7 days.
They are an excellent “Everlasting” flower.
They are great for floral “wearables”, such as flower crowns, corsages, boutonnieres, etc.

Audray Pastel Mix
CONS
They can be somewhat tricky to harvest.
They need heat to thrive.

Audray White
CHOOSING SEEDS
There are 2 main types of Gomphrena, so pay attention while choosing seed.
Gomphrena globosa has a more branching type of growth habit. I find the stems a bit knobby and cumbersome to harvest at times, although they DO fill out a bouquet quickly. It comes in a variety of beautiful violets, pinks, and whites. The plants have broad, thick leaves. Harvestable stems have multiple blooms per stem.
Gomphrena haageana has more upright stems and harvesting is a breeze. The plants have narrow leaves that are easy to strip off. It comes in shades of red and orange, much bolder than the Gomphrena globosa colors. Harvestable stems have only one bloom per stem, so while they are easier to harvest, they are time-consuming.
Oh, how I wish these came in pastel shades too! I would probably grow only the Gomphrena haageana type if they came in more colors!
Here are a few of my favorite Gomphrena to grow for cut flower use:
“Bicolor Rose“ (globosa type)
“QIS Orange” (haageana type)
“Strawberry Fields” (haageana type)
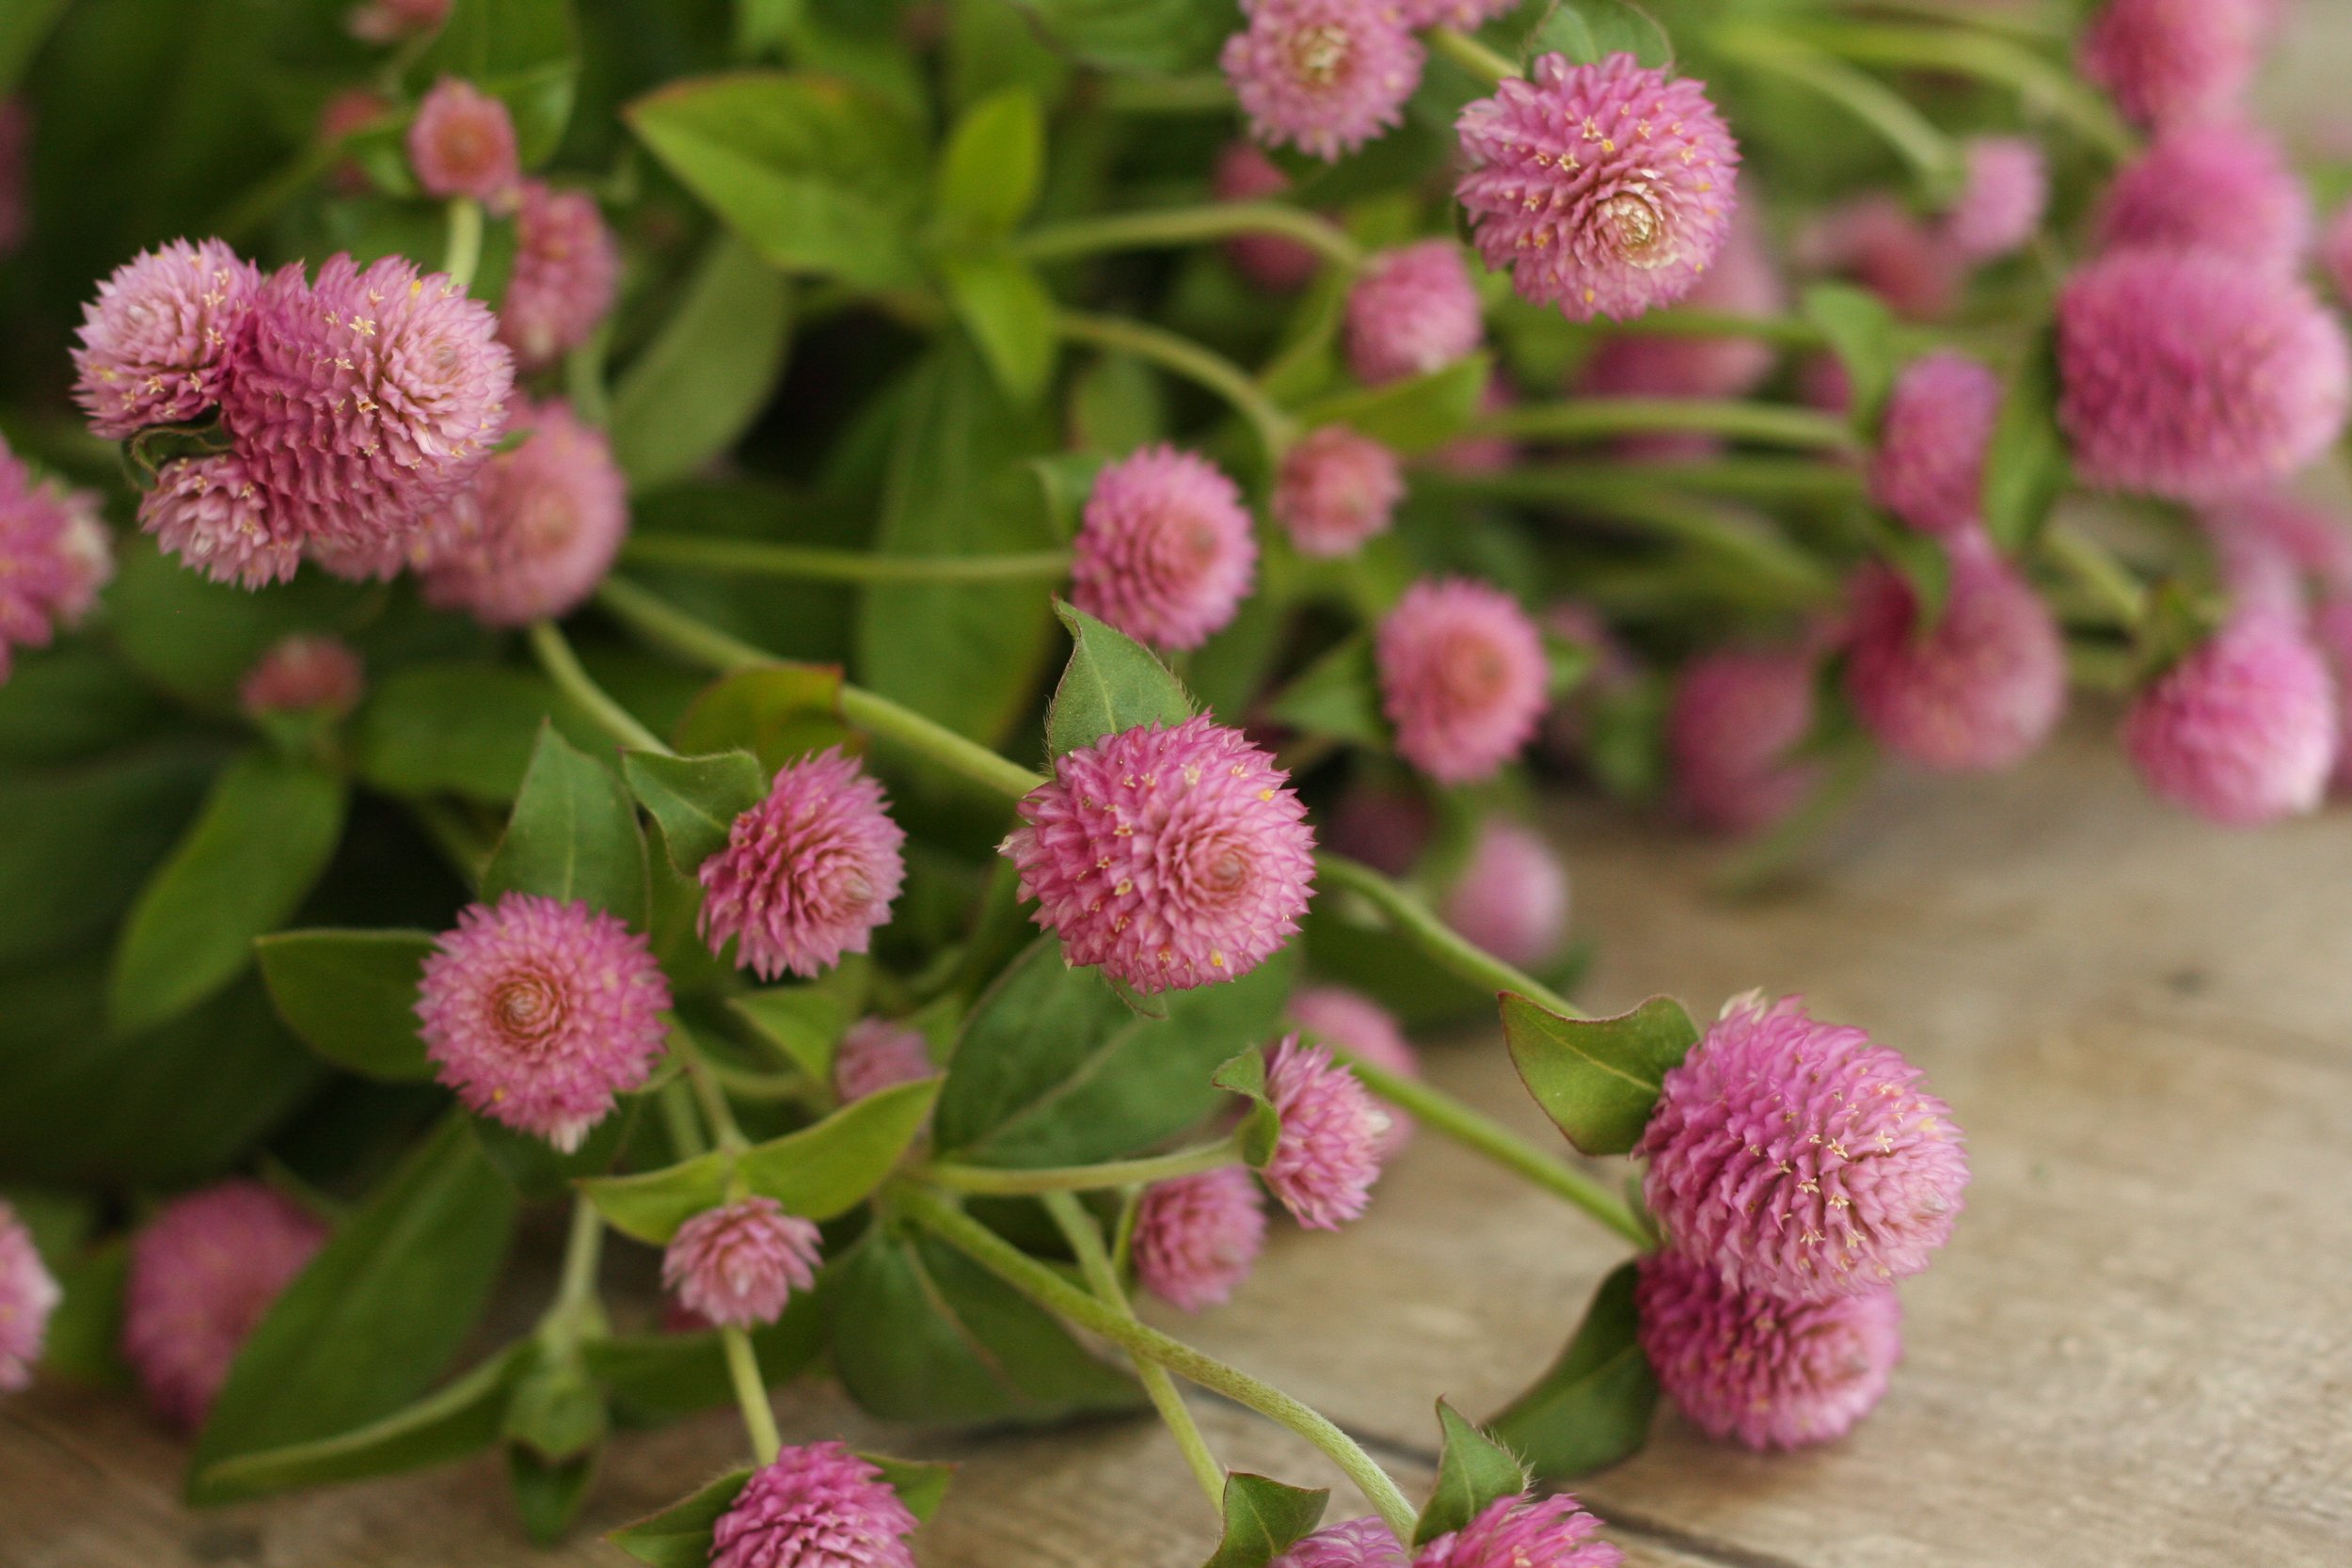
Salmon Pastel
HOW TO SOW
Gomphrena is a late summer blooming flower and loves heat. They should be planted after the last spring frost (for us, it’s about May 15).
Transplants or Direct Sow?
Transplants are recommended, as germination can be erratic (and seedlings look like weeds!).
Transplants should be started indoors 6-8 weeks before the last spring frost. They like heat, so place the trays on a heat mat to germinate. After germination, keep the seedlings growing in a warm place.

QIS Carmine
PLANT SPACING
Spacing varies depending on what type you’re growing.
Globosa types are best at 9-12 inch spacing.
Haageana types can grow at 6-9 inch spacing.

Salmon Pastel

Audray White
By the time the plants are large enough to bloom, they are quite self-reliant. Deep watering once a week should be sufficient (water until soil is saturated as far down as you can stick your finger in the soil).
If flowers are harvested and spent blooms are “deadheaded” (removed), the plants will continue to send up blooms until frost or cold weather arrives.
We do not use netting or support with Gomphrena, since it would make harvesting difficult. If the plants are planted close enough together, they will support each other.

Audray White
STAGE OF HARVEST
Harvest when the blooms are in full color, but not “tired” and faded. Gomphrena has a long “harvest window”, which means you will have a couple of weeks where they are at the ideal stage before they start to fade (unlike some flowers that have a harvest window of just mere hours!).
Harvest deep into the plant, down to 1-2 sets of leaves from the bottom, to stimulate more growth. If you’re growing lots of them or it’s the end of your growing season, it might be easier to harvest the entire plant at once, as harvesting individual stems can be time-consuming.
We have started using this “whole plant harvest” method on our farm, instead of treating the plants as “cut-and-come again”. We succession plant Gomphrena 3-4 times over the season about 2-3 weeks apart, so we always have some plants ready to be harvested.
Salmon Pastel
POST-HARVEST CARE
As always, harvest flowers in the cool of the day (morning or evening).
Gomphrena requires no special care if being used fresh.
For dried flowers, hang small bunches upside down in a warm, dry, well-ventilated location out of the direct sun (a garage, closet or even kitchen pantry could work). Once dry, flowers hold indefinitely.

Dried Gomphrena - QIS Carmine, QIS Orange
QUESTIONS?
Ask them here and I’ll get back to you!
Ready for more?
If you’re serious about growing the garden of your dreams this year, register for my online course, “Backyard Cutting Garden 101”. You’ll find everything you need to plan, grow, harvest, and arrange your stunning blooms. I can’t WAIT to help you grow! Click on the button below for all the details.

“Everlasting Flowers”: How to Dry Flowers
How to dry flowers… so you can enjoy them year round!
Ahhhh, summer.... some days I wish I could hold onto you forever. But alas, I've discovered it's your fleeting nature that makes you oh so sweet.
I must confess. I adore winter and look forward to that time of quiet restoration after the insanity of summer.
But I miss my flowers.
Imagine my delight when I discovered that some of the flowers we grow are considered "Everlasting" flowers.
"Everlasting" flowers are a category of cut flowers that are easy to dry and will last for years with proper handling.
Drying flowers is a fun project to do with kids... and a great way to create a year round reminder of summer fun.
Last fall, I dried bunches and bunches of flowers, then used them to decorate my home during the long winter months.

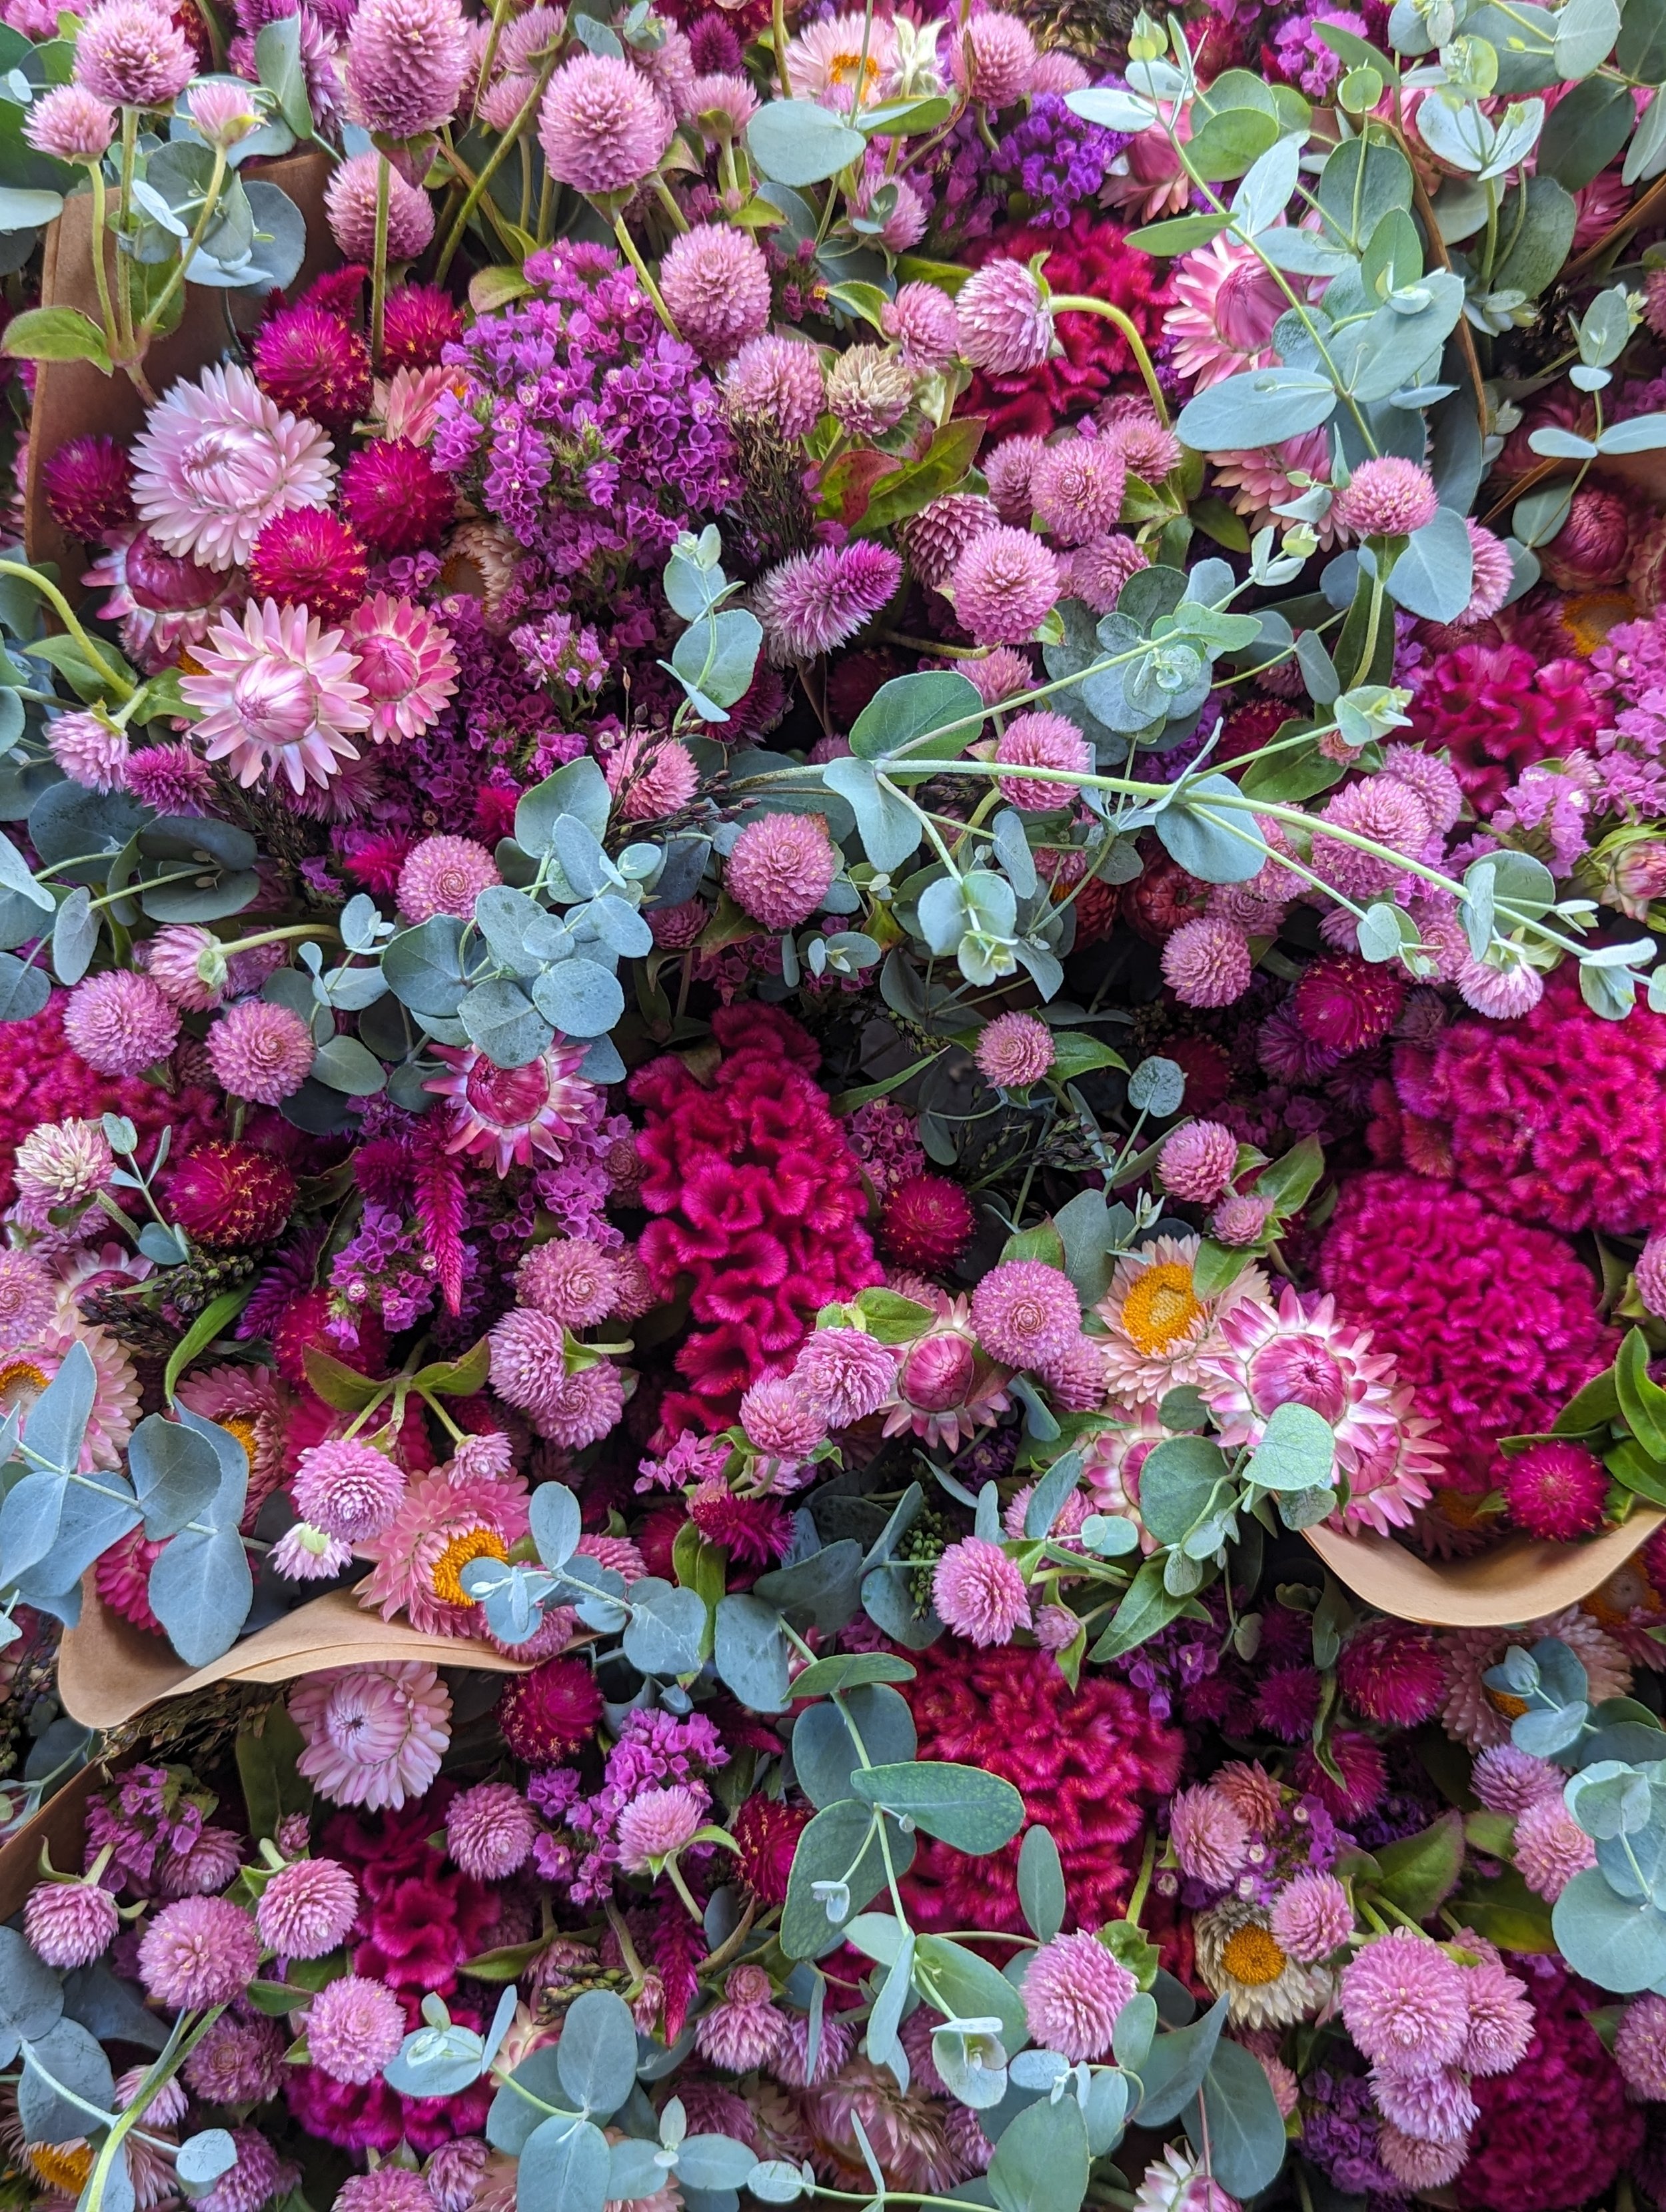
“Everlasting Bouquets” of flowers for drying: Celosia, Eucalyptus, Globe Amaranth, Green Drops Grass, Statice, Strawflower
How to Dry Flowers
It's a simple, easy process!
1. Cut flowers in the morning, after the dew has dried but before the day is too hot (usually before 11am).
*Each flower has it's own unique "ideal stage of harvest", which can make things tricky... but as a general rule, cut the flowers early while they are still opening up, not completely in bloom. You may have to do some experimenting to determine the "ideal stage of harvest".
2. Strip the foliage off the stem. (Note: Strawflower stems are notoriously fragile. It's recommended that the flower heads are gently popped off the stem and replaced with a piece of floral wire instead).
3. Create bundles of about 10-12 stems and secure the stem ends with a rubber band or string.
4. Hang the bundles upside down (flowers facing the floor) in a dry, dark place, out of direct sunlight (sun makes the colors fade). An attic or closet would be good. A basement probably too damp. I've had good luck drying in our garage and kitchen pantry.
5. In 2-3 weeks, the flowers should be fully dry and ready to use in Everlasting arrangements.
![20180813_112449[1].jpg](https://images.squarespace-cdn.com/content/v1/582b872529687fd6acb7423d/1534278199691-6I9QVX7APYHSJOFZAIGS/20180813_112449%5B1%5D.jpg)
Statice “QIS Apricot”
Alternative Method for Drying Flowers
This method works best for: Bells of Ireland, Celosia, Hydrangea and Yarrow
1. Place flowers with stems in a jar filled halfway with water.
2. Place jar in a warm, dry, dark place (a kitchen pantry or attic would be ideal).
3. Allow water to evaporate naturally. Once water is completely gone, the flowers should be dry and ready to use.
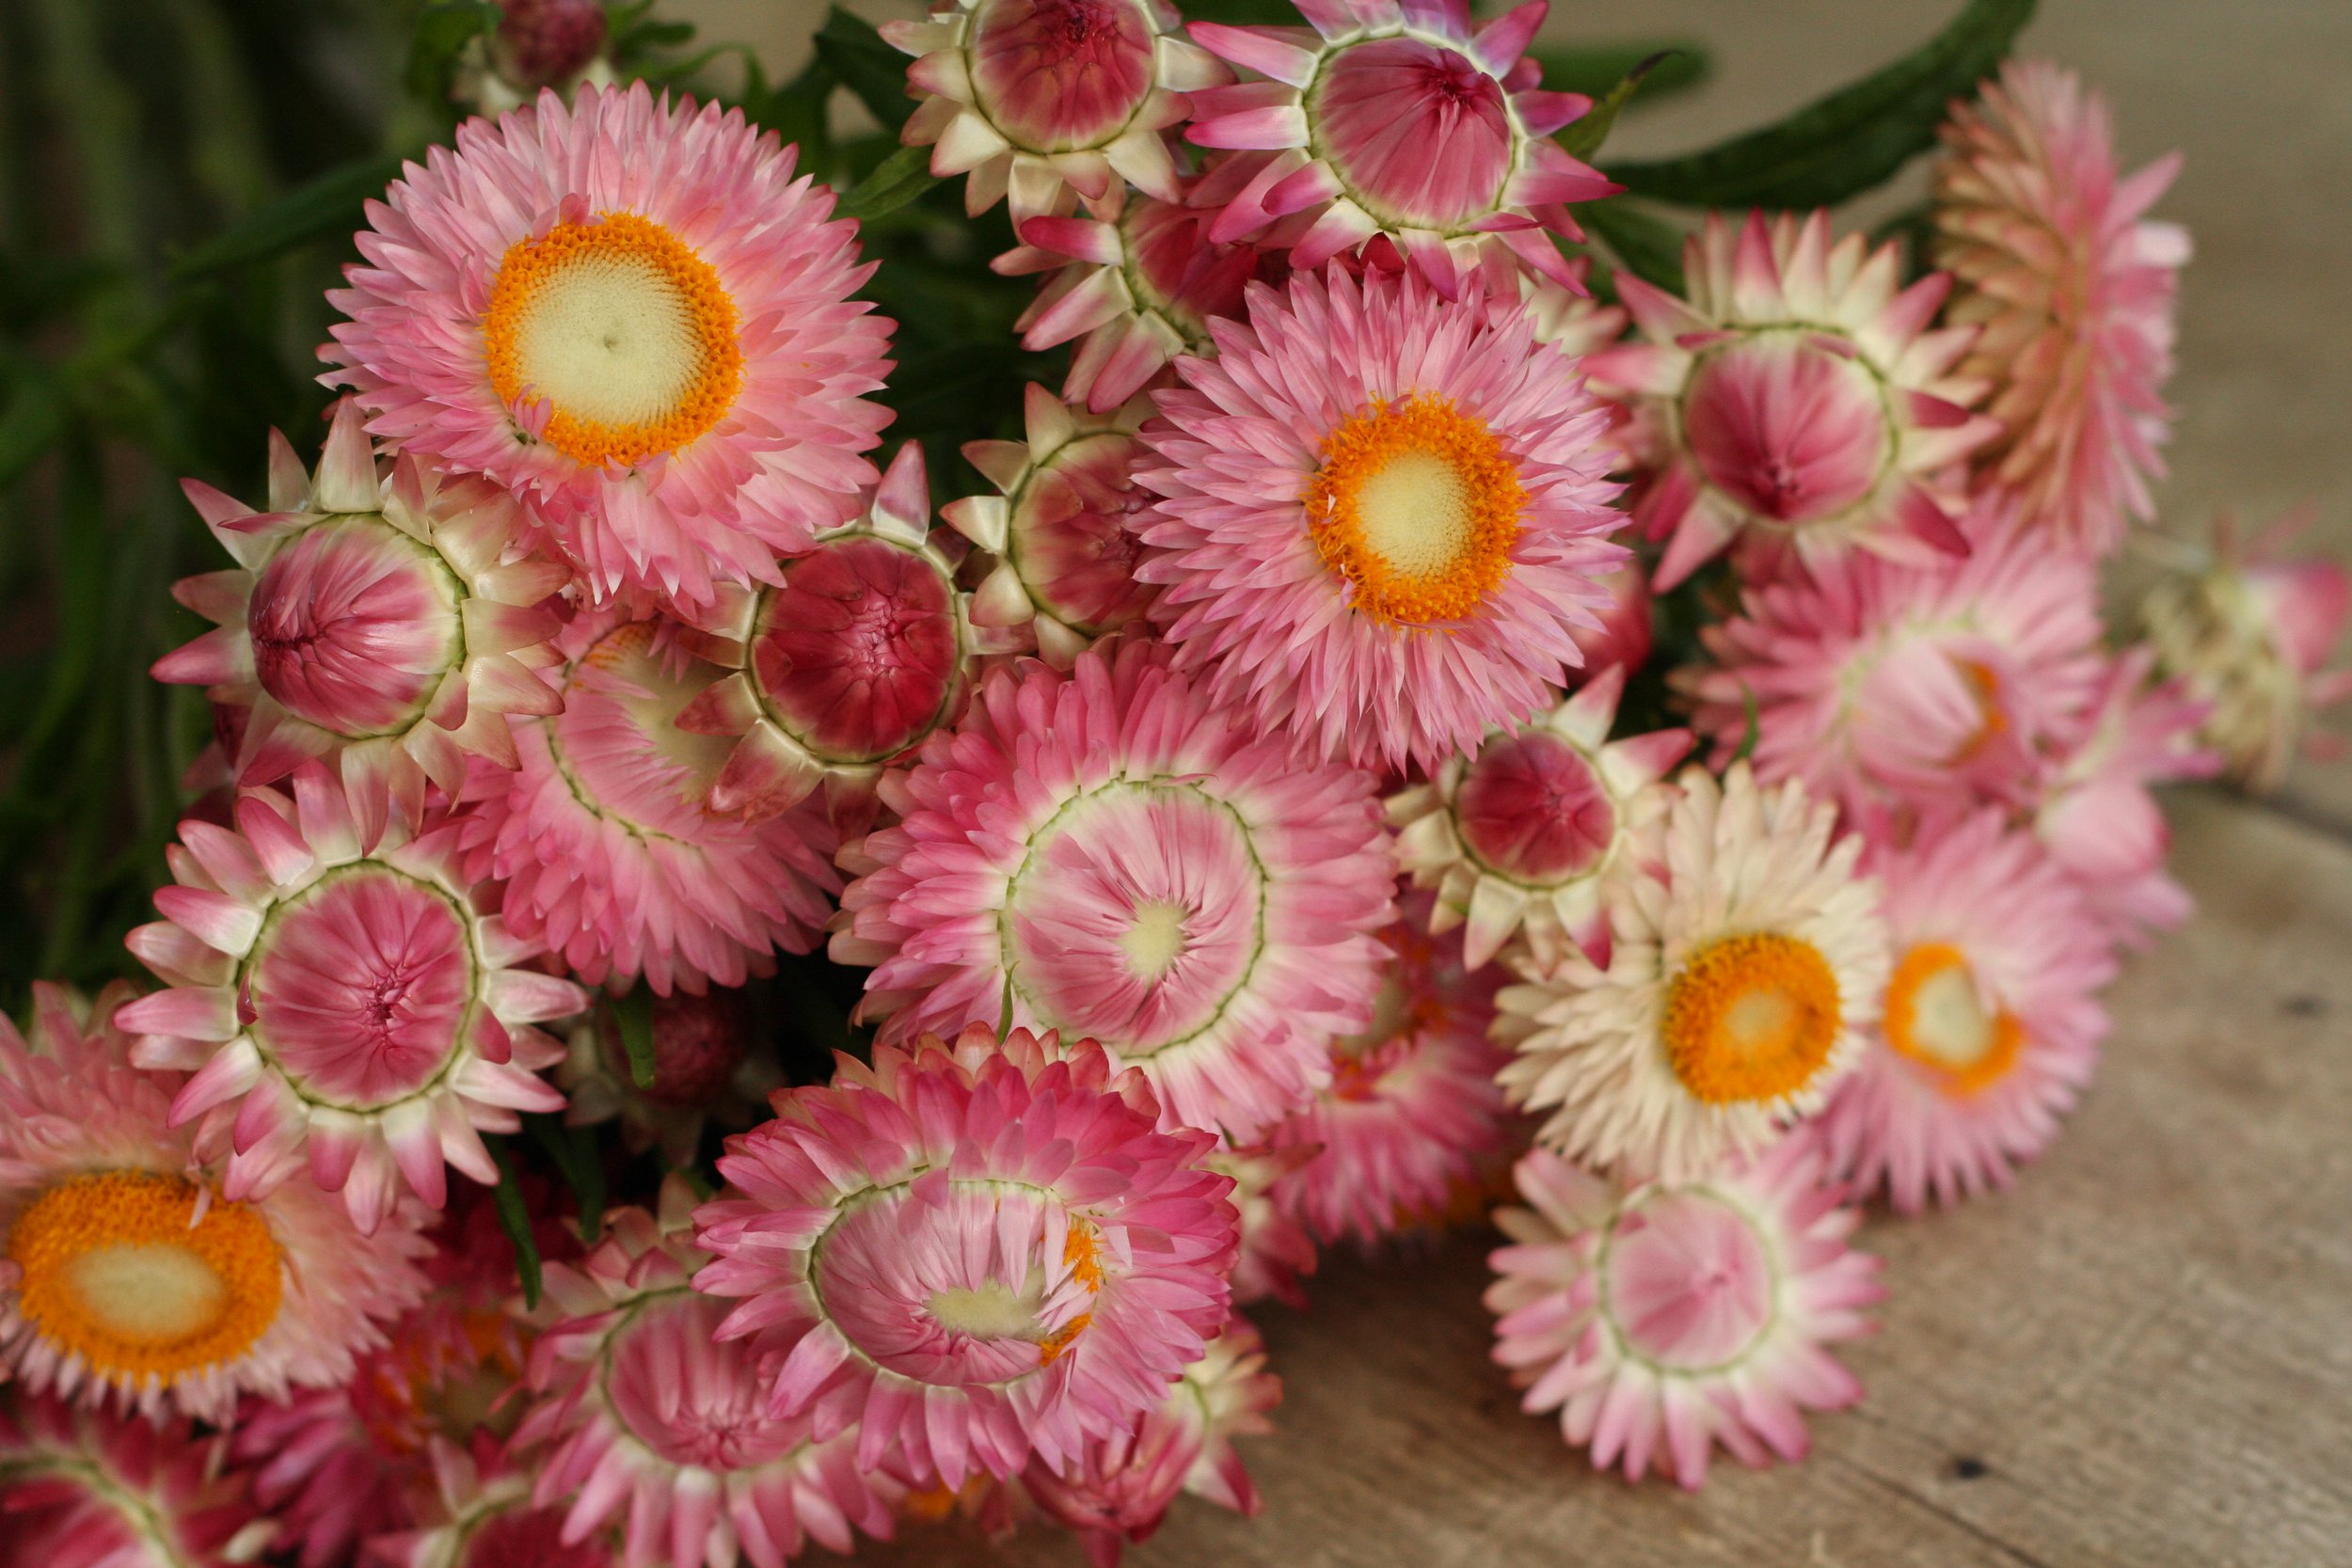
Strawflower “Bright Rose”
Flowers Suitable for Drying
Almost every flowers CAN be dried... but not all of them will actually look nice. Ha!
When in doubt, you can always try it out... but as a general rule, look for flowers/foliage that feel "papery" or stiff.
Here are a few that are good candidates for drying. Of course, this is by no means an exhaustive list!
Amaranth
Artemisia
Baby's Breath
Bells of Ireland
Celosia
Craspedia (Drumstick Flower, Billy Buttons)
Dusty Miller
Eryngium (Sea Holly)
Grasses - Pods/Seed heads
Gomphrena (Globe Amaranth)
Hydrangea
Lavender
Money Plant (Lunaria)
Nigella (Love in a Mist) - Pods
Poppy - Pods
Queen Anne's Lace (Ammi or Daucus)
Starflower (Scabiosa) - Pods
Statice
Strawflower
Wheat
Yarrow
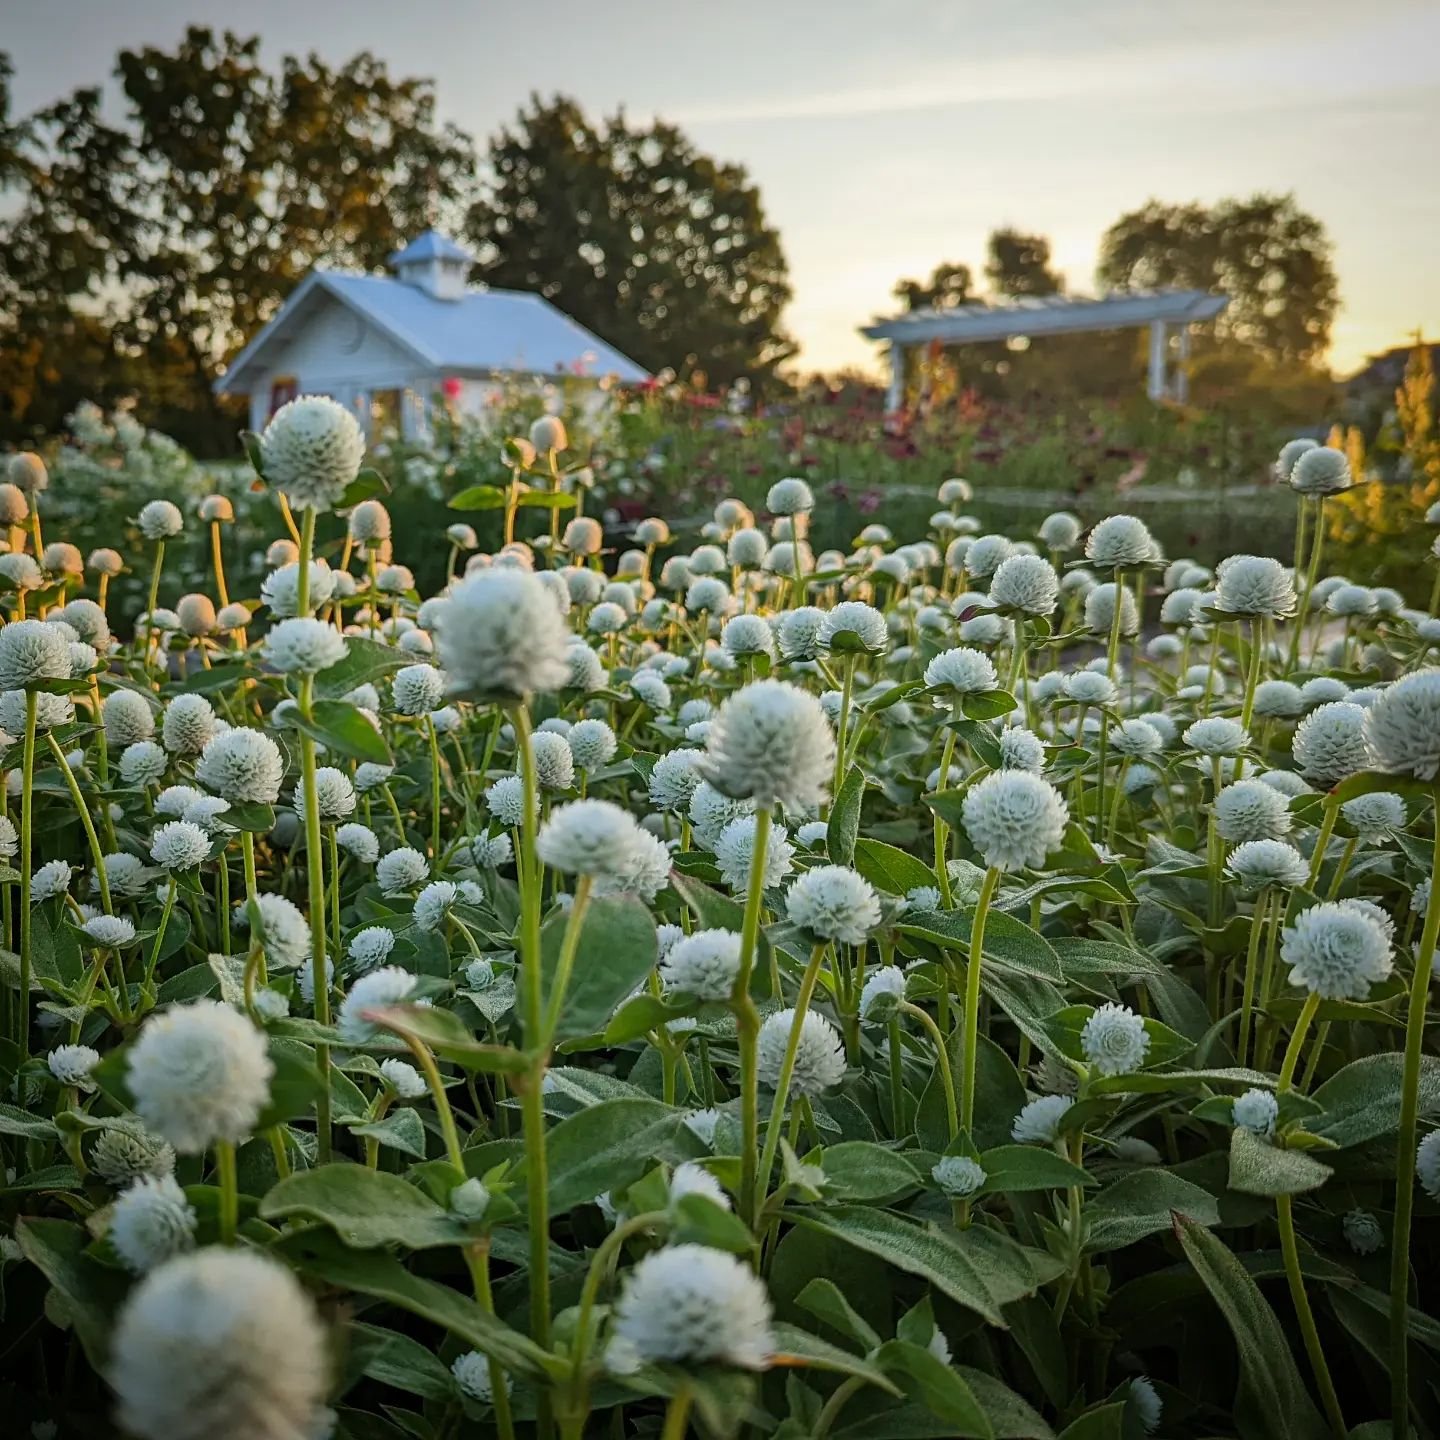
Globe Amaranth “Audray White”
Right now is a GREAT time to start drying flowers for your fall and winter decorating.
Please be sure to comment or share with me if you try this fun project. Enjoy these last few weeks of summer :)
-Lori
READY FOR MORE?
If you’re serious about growing the garden of your dreams this year, and want me to answer all your burning questions, register for my online course, “Backyard Cutting Garden 101”.
You’ll find everything you need to plan, grow, harvest and arrange your stunning blooms. I can’t WAIT to help you grow! Click on the button below for all the details.

How to Grow Peppergrass
How to Grow Peppergrass
How to Grow: Peppergrass (Lepidium ruderale)
INTRODUCTION
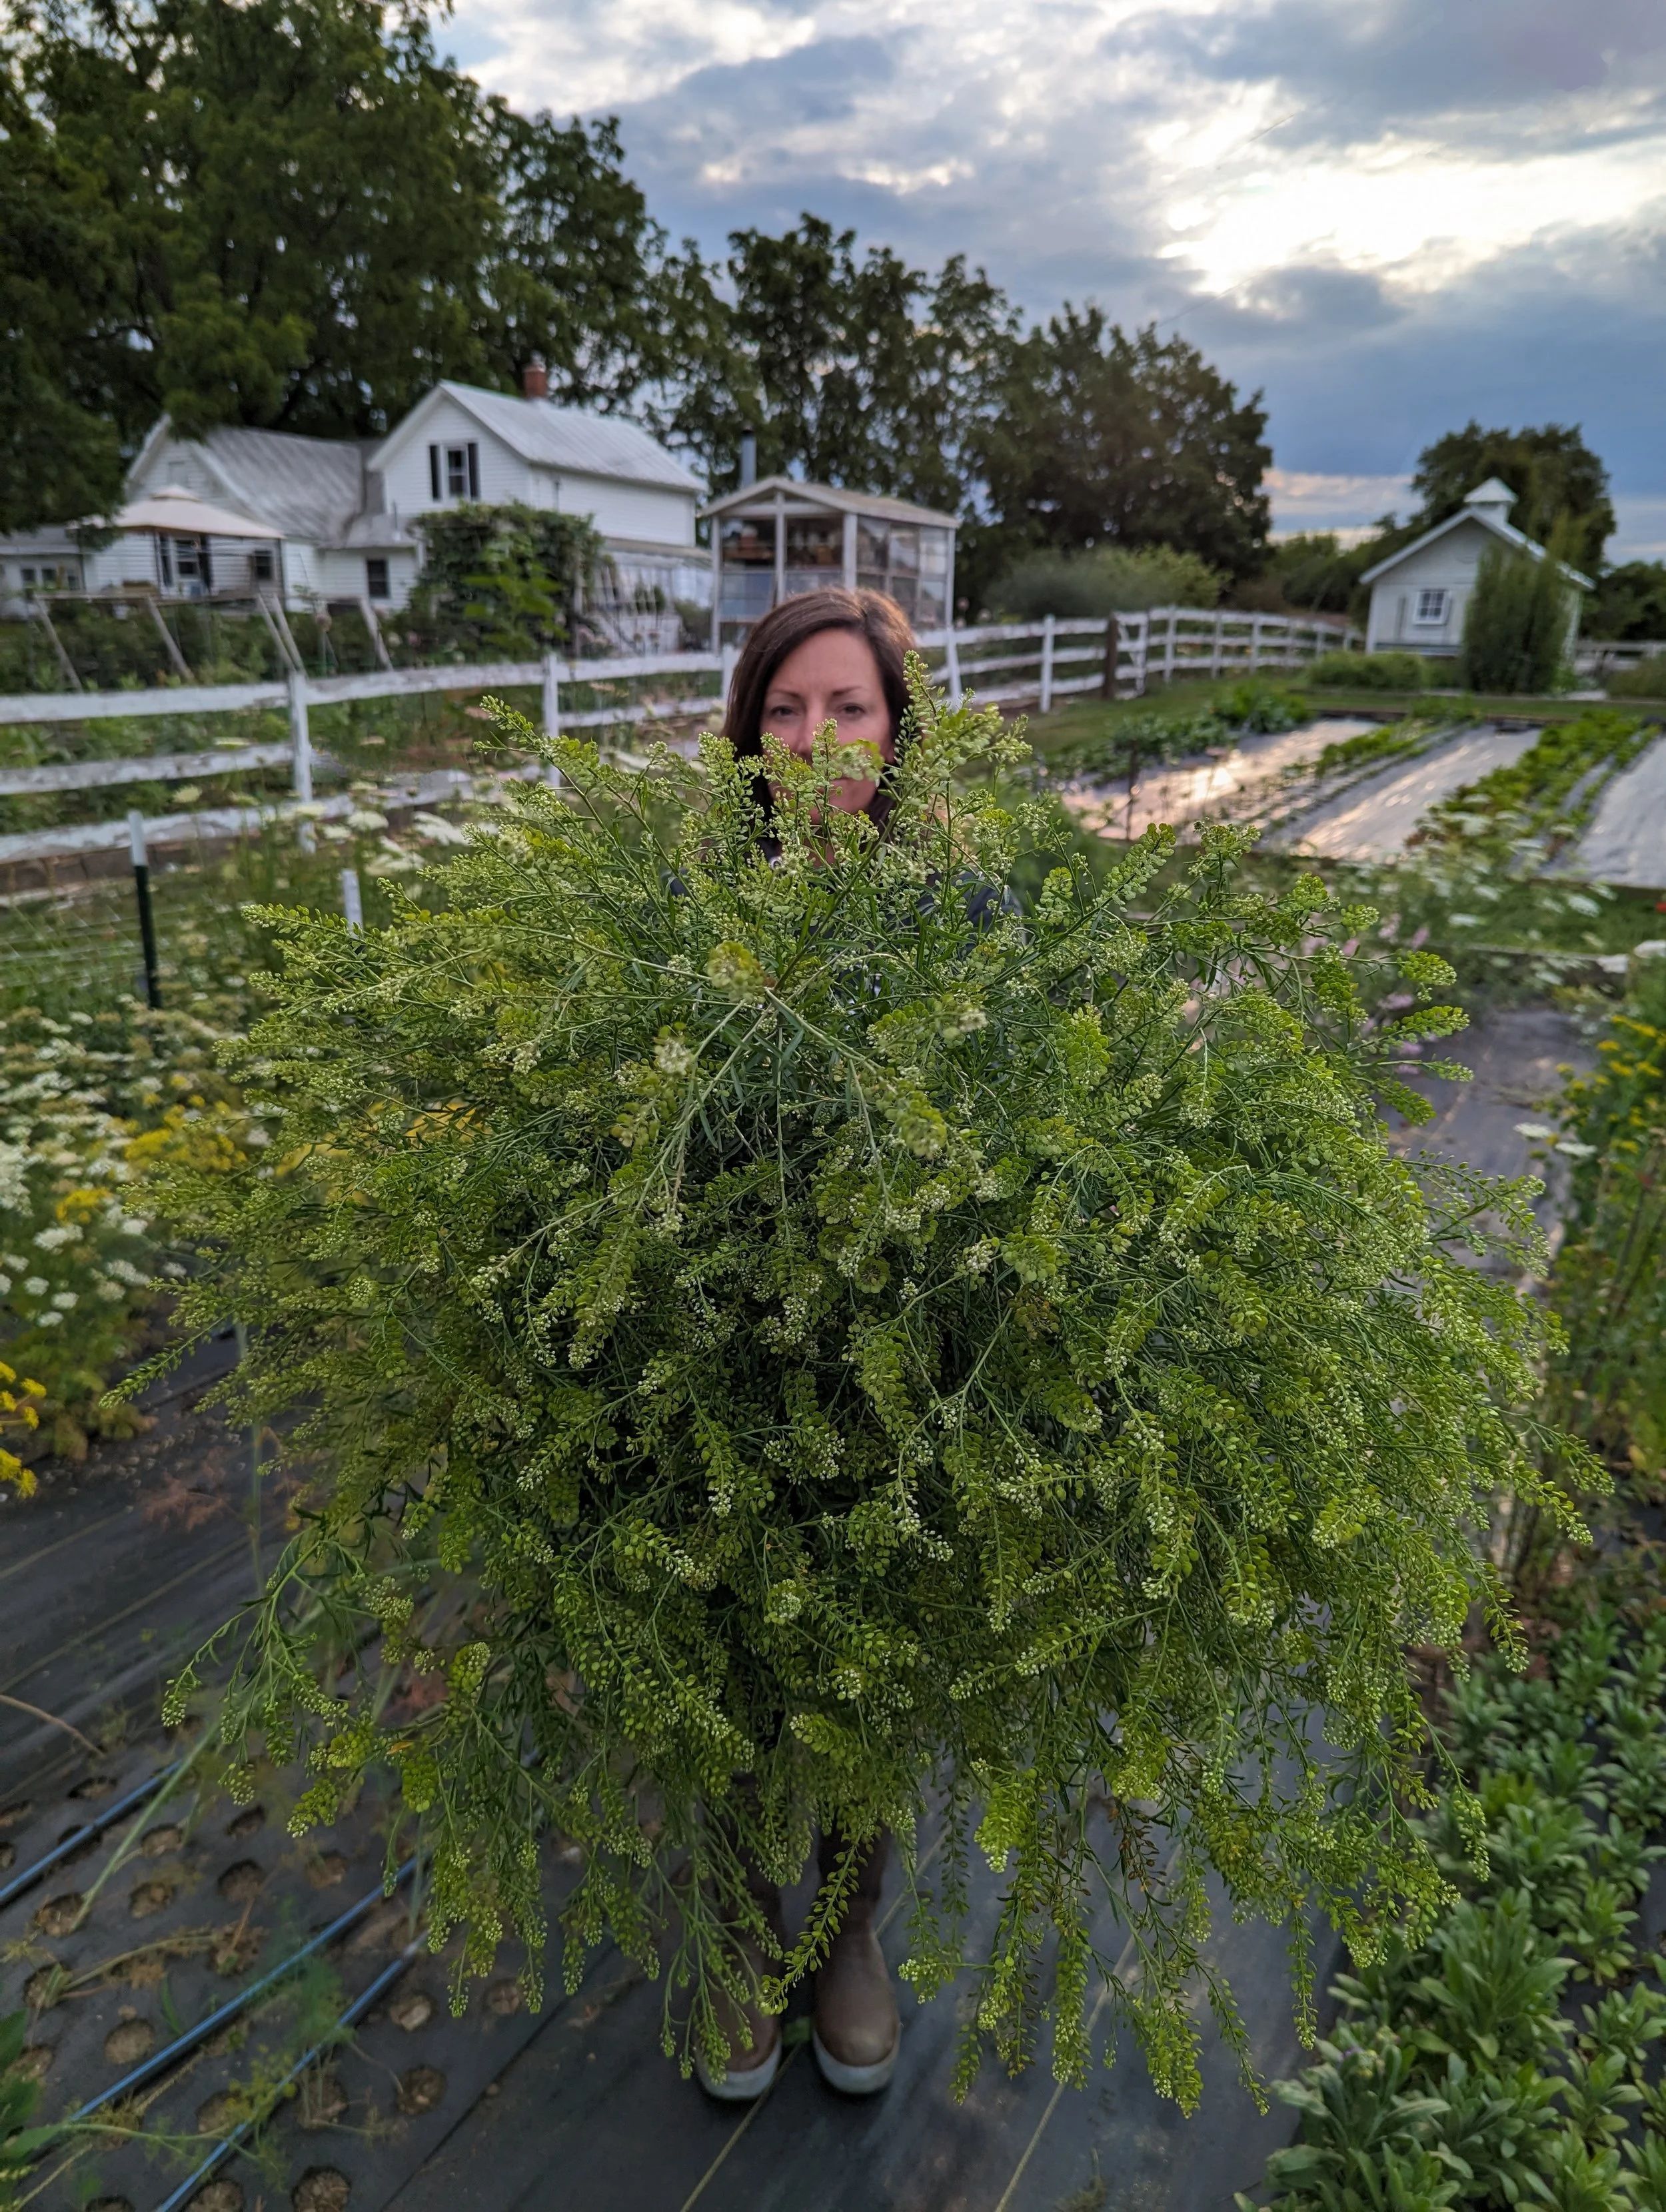
Of all the plants we grow on the farm, Peppergrass might be my absolute favorite.
Just a few stems in a bouquet add sparkle, texture and delight.

The emerald-colored “beads” (seed pods) work in a wide variety of arrangements, from fun and playful to elegant and sophisticated.
Peppergrass is the common name for this lovely plant in the Cress (Lepidium) family.
Several similar-looking plants are useful for floral design, including:
Persian Cress (Lepidium sativum),
Pennycress (Thlaspi arvense) and
Peppergrass (Lepidium rulerale).
I find Peppergrass to be the most versatile of these three plants.

Peppergrass is useful at 3 different stages:
Fresh, bright green
Fresh, ripened to rose gold
Dried
Peppergrass performs best as a Hardy Annual, planted in the cool weather of spring. We’ve experimented with succession planting it every 2-3 weeks to have a continuous supply, but it does not grow well in the heat of summer (plants grow short and stunted).
This year, we experimented with direct sowing seeds in July for a fall harvest (October). It was somewhat successful, but we need to do more trials before I can recommend it.

Peppergrass, ripening to rose gold
Let’s look at the Pros and Cons of growing Peppergrass for cut flower use.
PROS
It’s one of the best textural filler/foliage you can grow. We use every stem we can grow.
The plants have a long harvest window, which means you have a 7-14 day opportunity to harvest them (unlike some flowers that have a harvest window of a few hours!).
They are tough and durable.
They are long-lasting in the vase.
They have a sturdy stem with a branching habit. One stem can have up to 12-15 branches.
Did I mention that texture?!? They make your bouquets absolutely sparkle!
CONS
They are a “one and done” crop. Once the stem has been harvested, it’s done.
They don’t grow well in hot summer weather. Oh, how I wish I could get Peppergrass to grow all season long!
They can be a bit tedious to harvest. I recommend removing as many of the leaves as possible, as they expire quickly. The stems and “beads” will stay good for weeks.

HOW TO SOW
Some types of plants respond best to the S.T.U.N. growing technique. Peppergrass, along with many Hardy Annual plants, is one of them.
S.T.U.N. is a method I read about in the book “Restoration Agriculture” by Mark Shepherd.
It stands for:
S - Sheer
T - Total
U - Utter
N - Neglect
Ha! Isn’t that the BEST growing technique you’ve ever heard of?
Yup. Some plants THRIVE on neglect. The harder you TRY to grow them, the more they die. These plants do not like to be fussed over.
So here is how I grow Peppergrass.
I fill a seed tray with moist seed starting mix. I casually drop 1-2 seeds per cell, then casually sprinkle a bit of vermiculite on top. It’s important to do this casually - if you’re too careful, the plants will sense it and not grow. Ok, I’m kind of joking… but kind of not ;)
Give the seed trays a quick sprinkle of water to help activate the germination process and then (this is important!), tuck the seed tray in a cool dark place for a week and COMPLETELY IGNORE IT.
No heat mat, no grow lights, no fussing. Just leave it alone.
Set a note on your phone or calendar to check on the tray in about a week.
If they haven’t germinated yet, sprinkle again and check back in a few days.
Once they have germinated, you can remove the trays from the cool dark place and put them in a bright location. Grow the seedlings for about 4-6 weeks before hardening them off and transplanting.
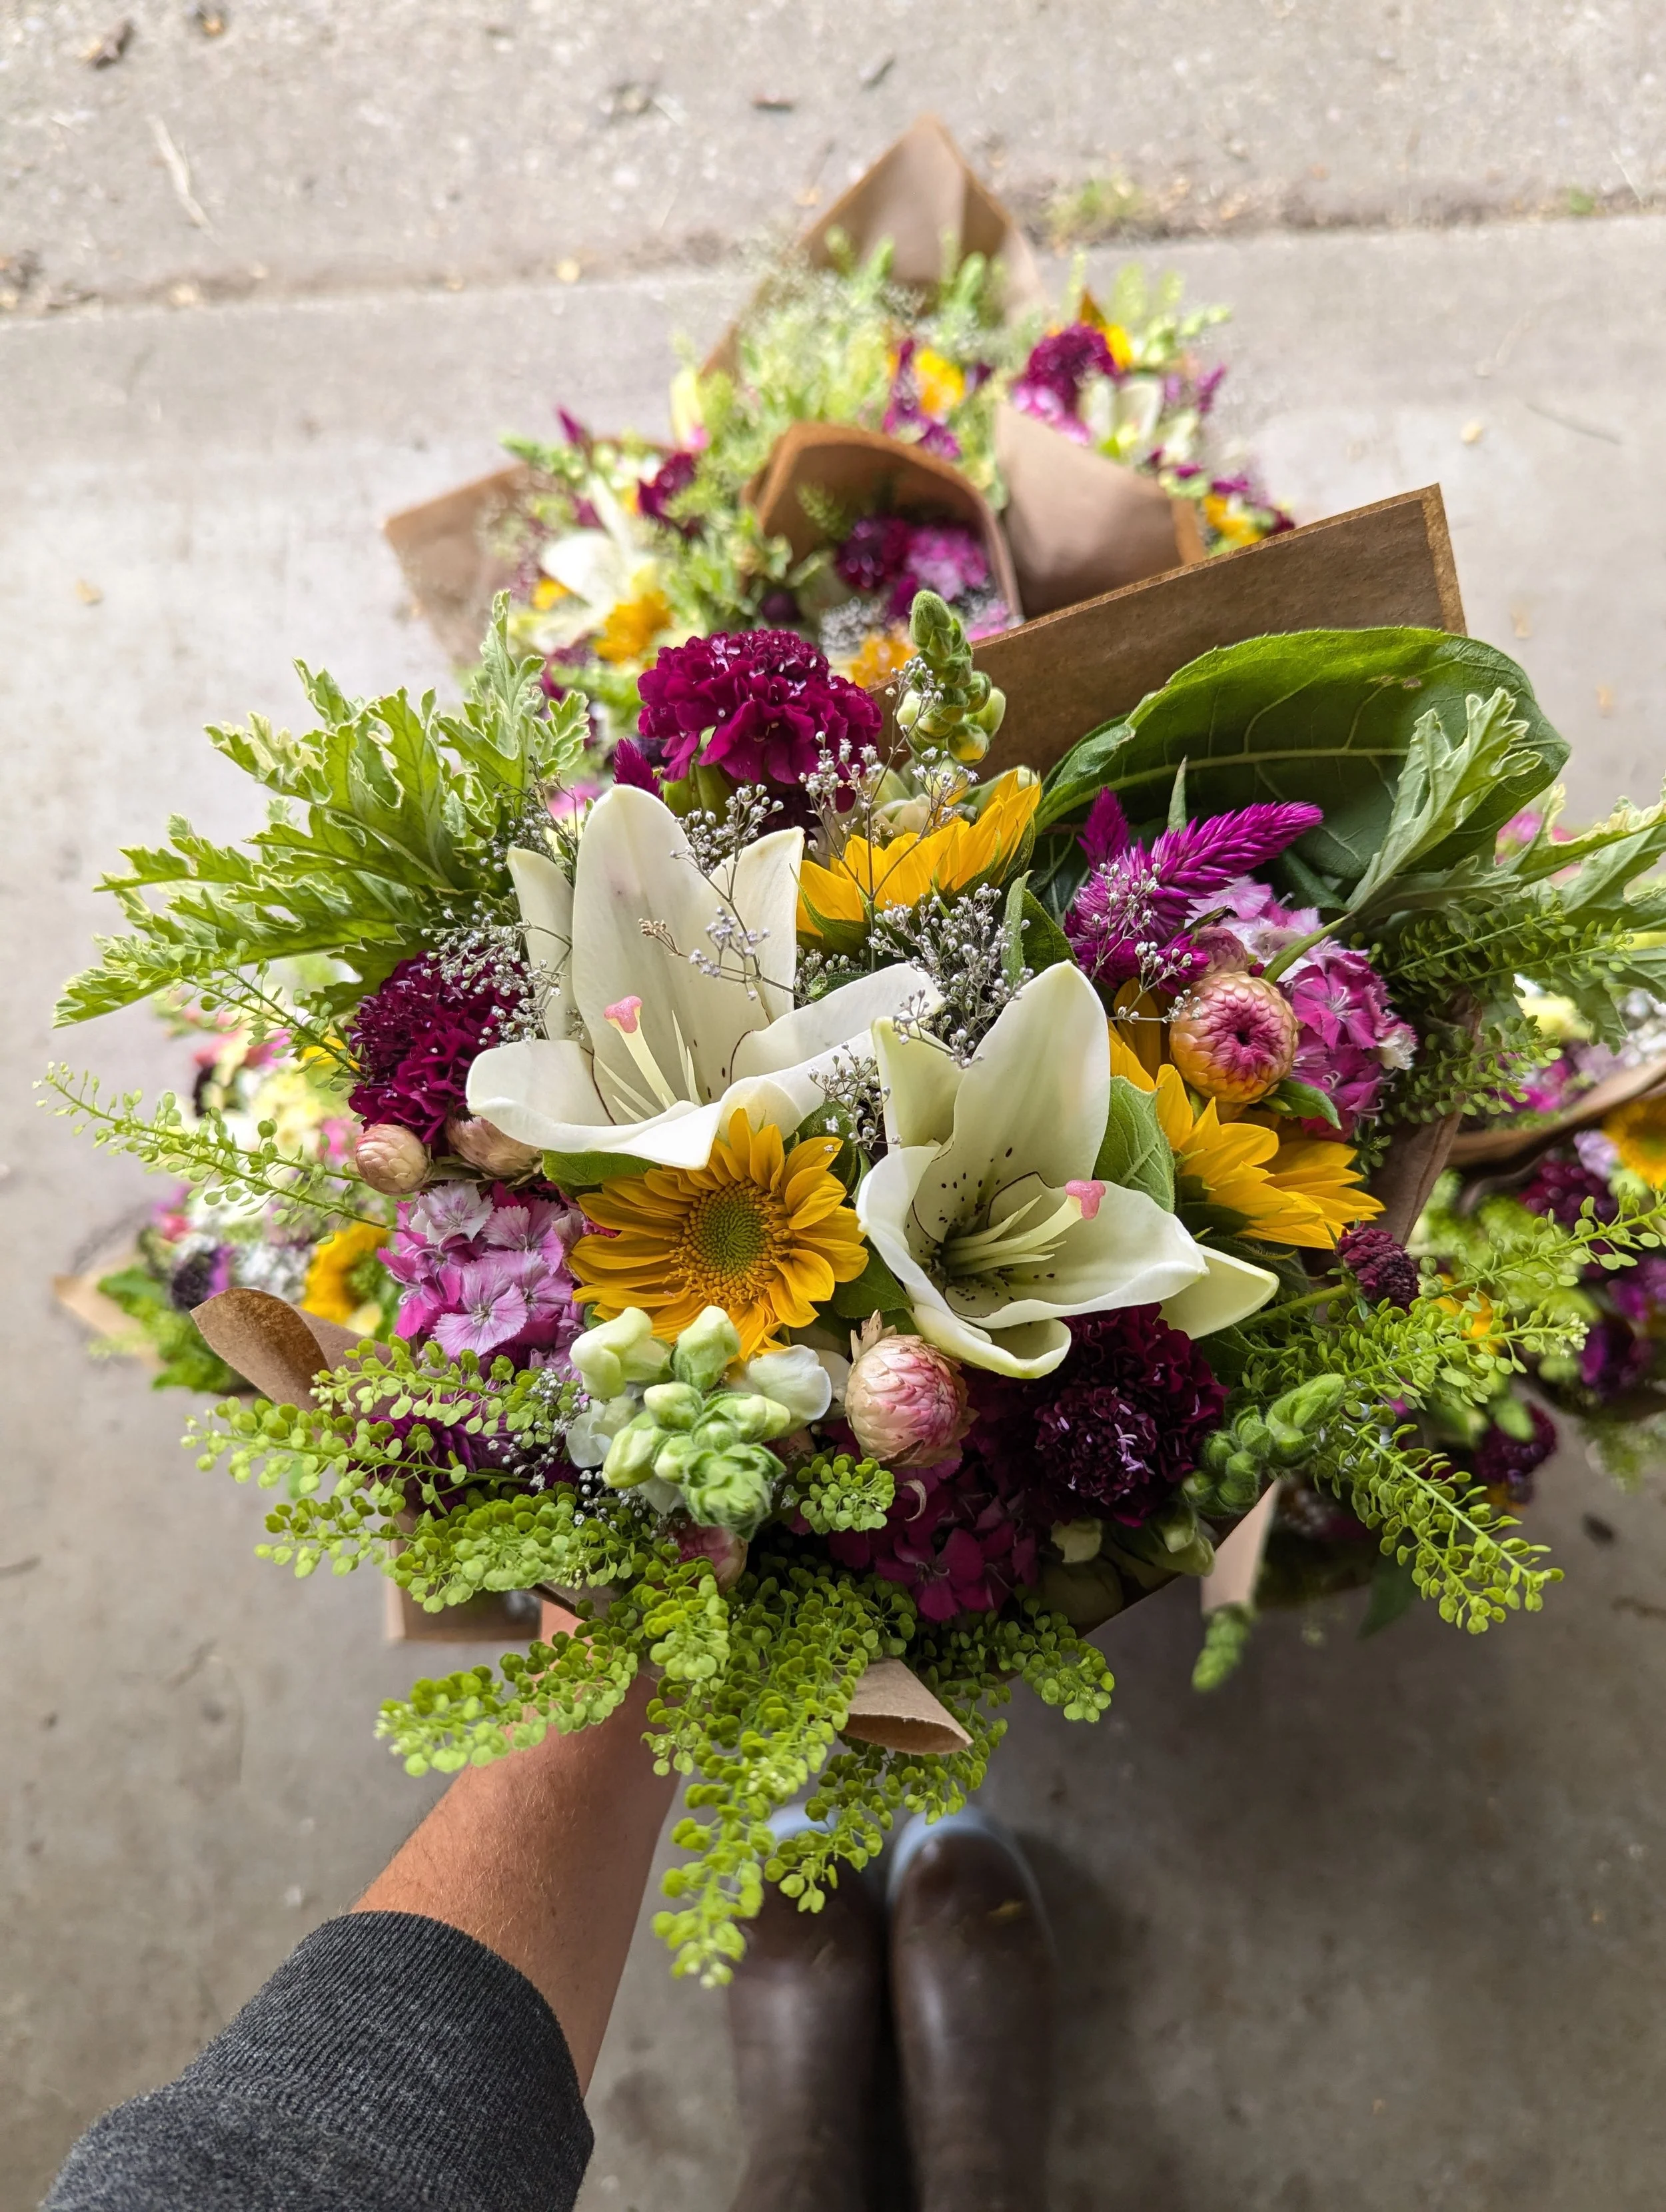
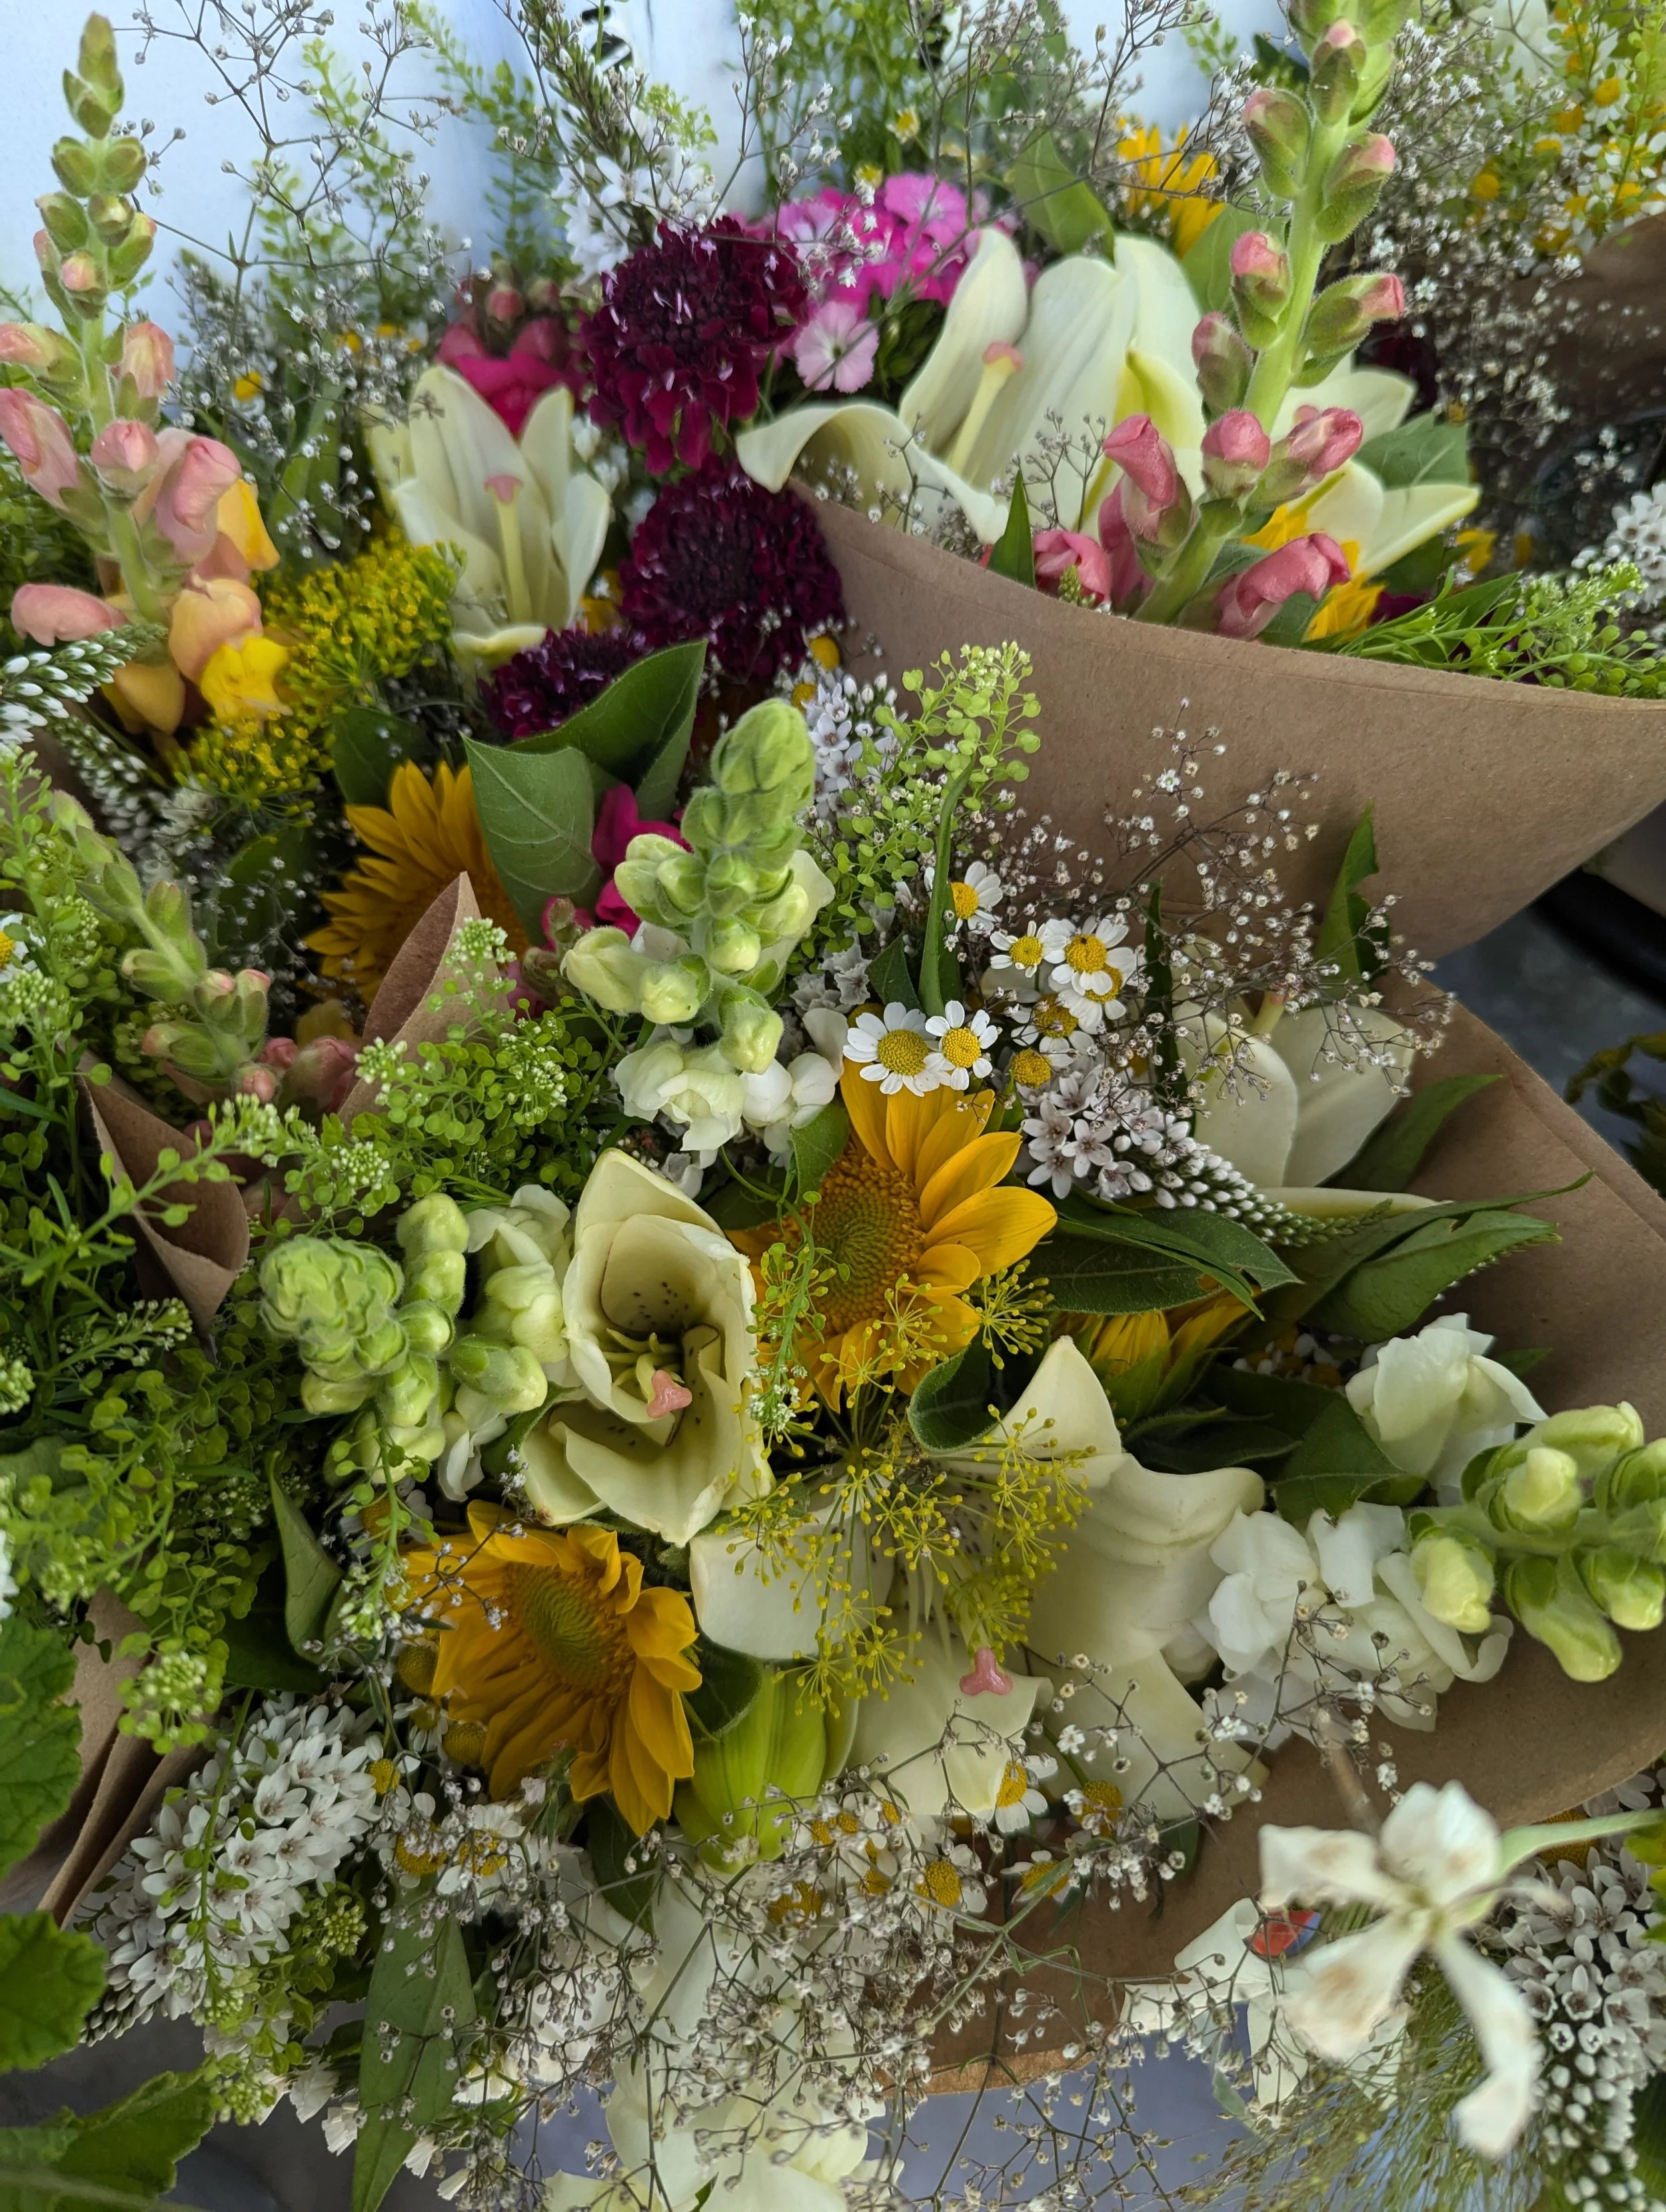
Peppergrass in bouquets
Transplants or Direct Sow?
Peppergrass can be transplanted or directly sown. I recommend transplants since the Peppergrass seedlings resemble weeds and it may be difficult to distinguish them from weed seedlings.
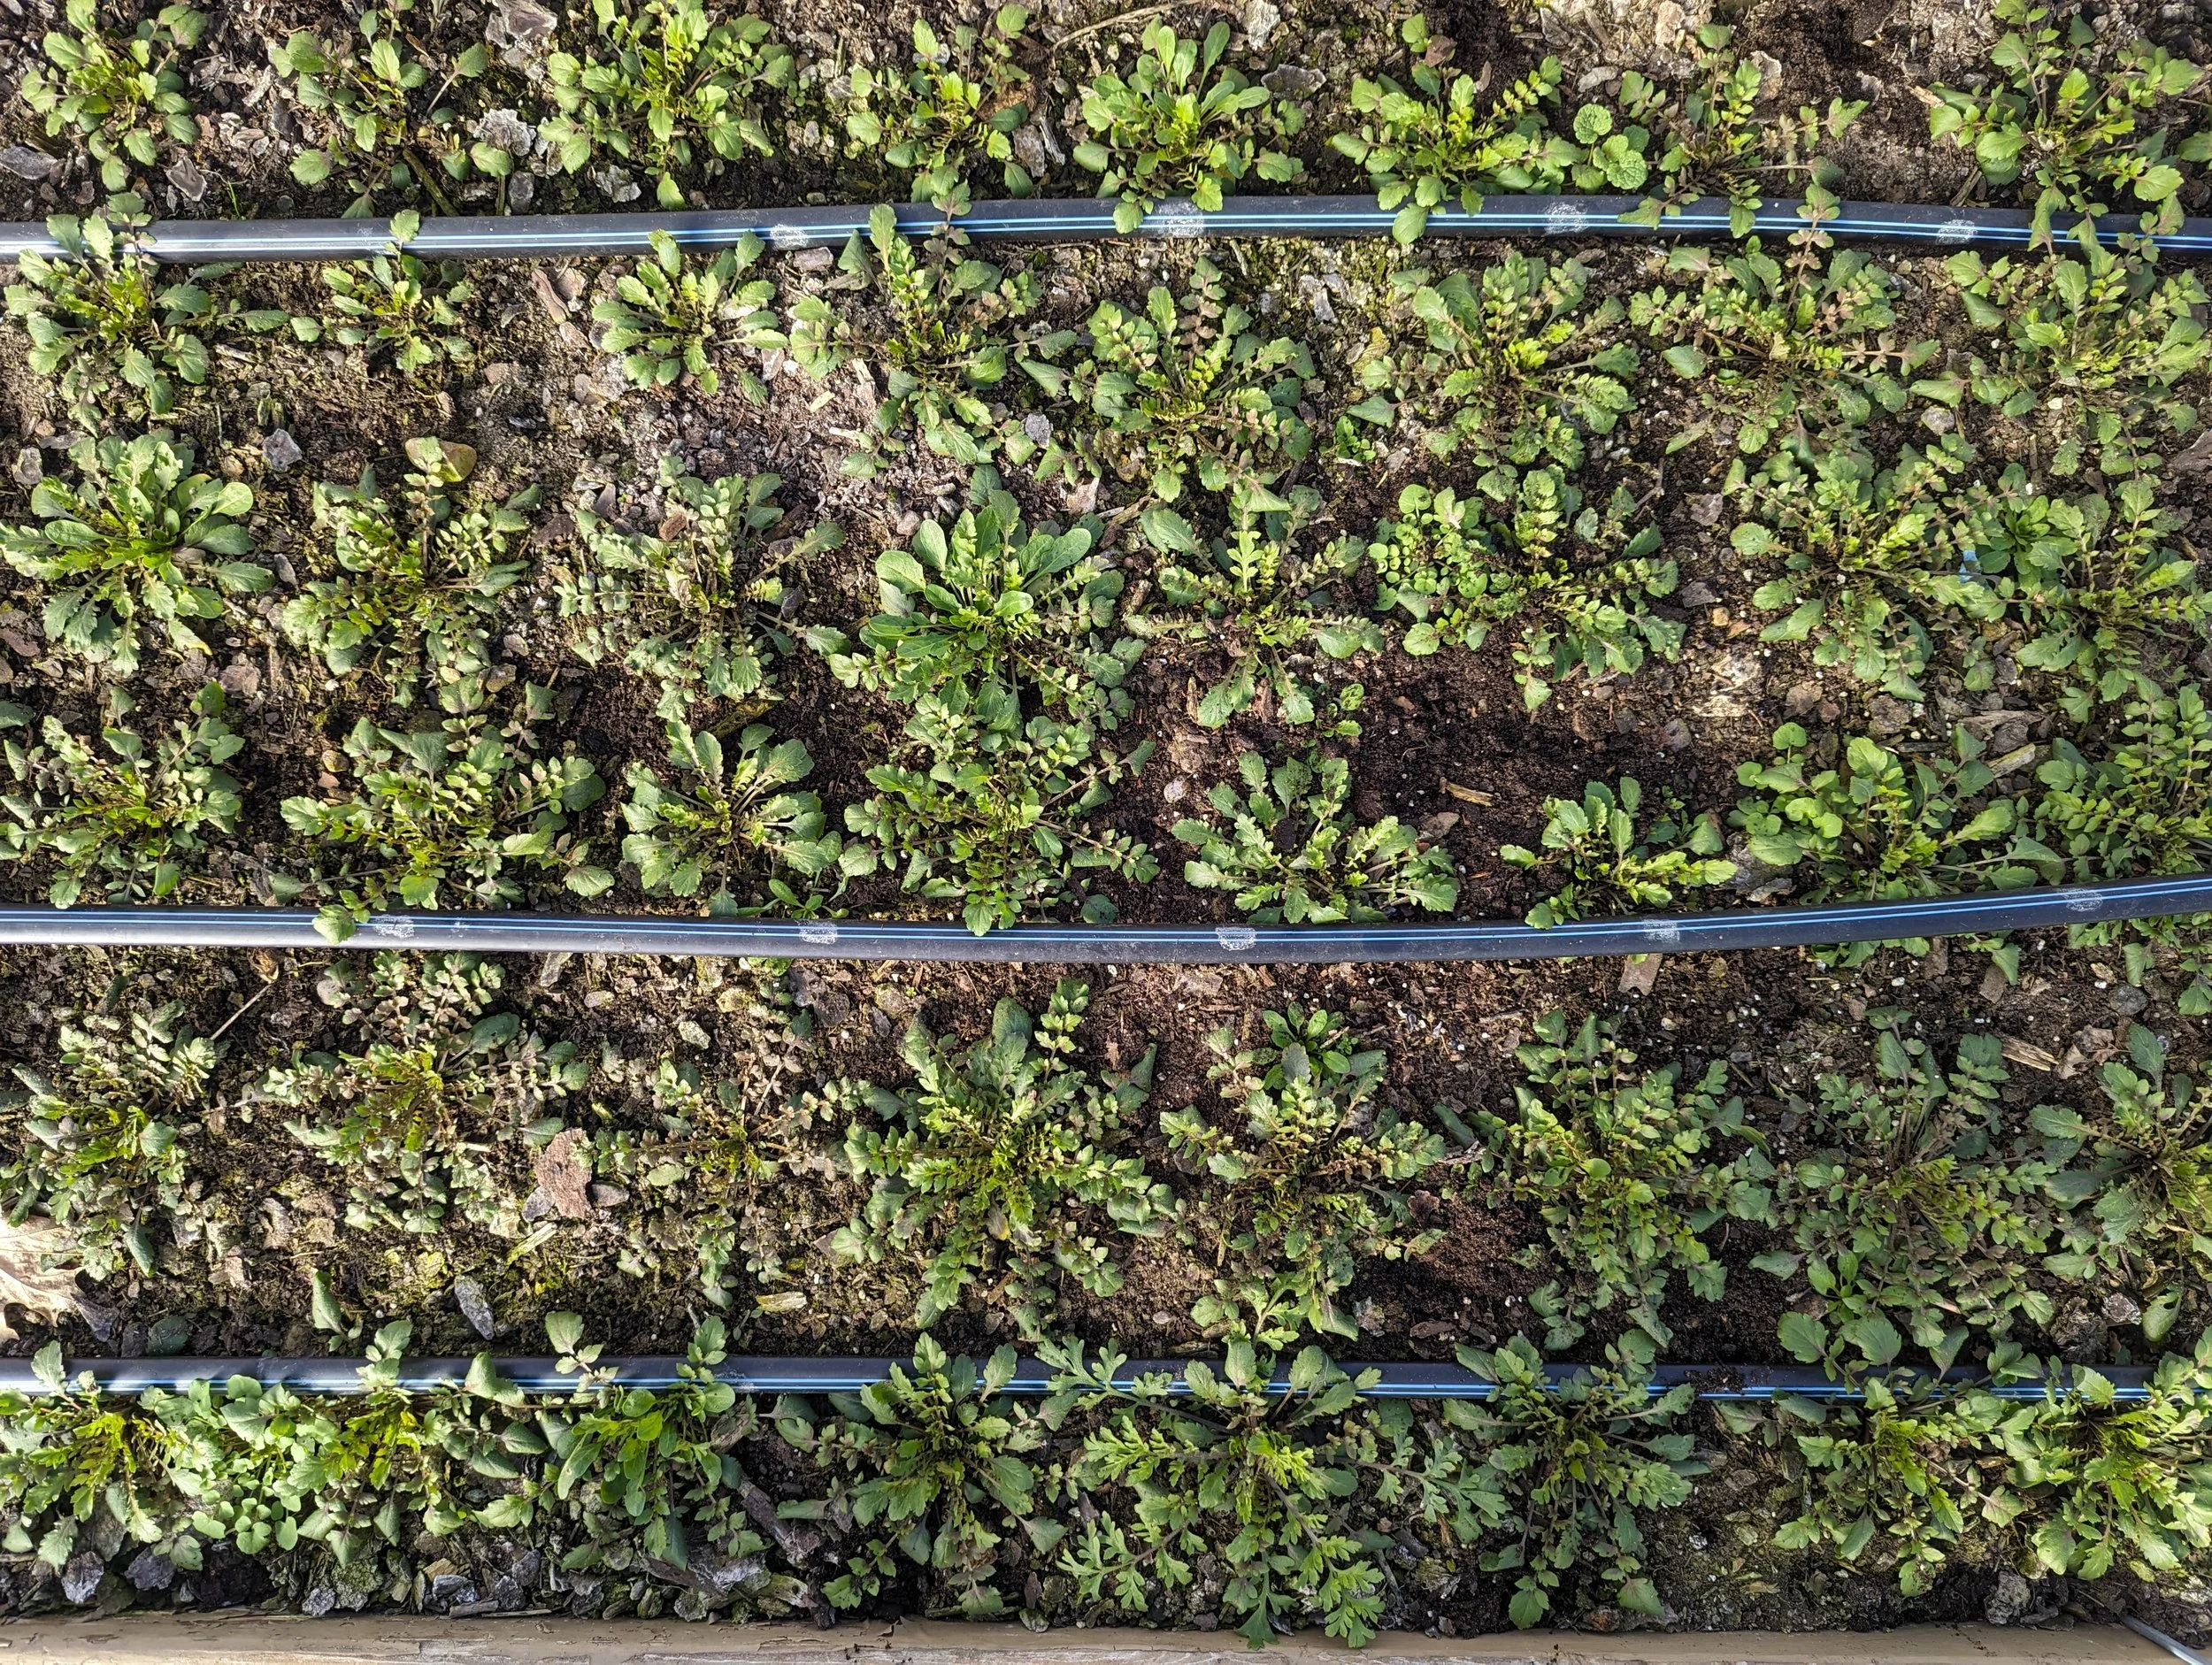
Peppergrass seedlings
As mentioned earlier, we’ve experimented with succession planting Peppergrass 2-3 times in the spring, as well as direct sowing in mid-summer for a fall harvest. The earliest sown succession always performs best. Subsequent successions are shorter and stunted.
Depending on where you live, you may have the best success sowing the seeds in the fall, 4-6 weeks before your Average First Fall Frost Date. The plants are tough and will “overwinter” in the garden, then bloom the following spring. This option may be best for people growing in hot climates.
P.S. If you have a hoophouse or caterpillar tunnel, you can plant Peppergrass in the fall and overwinter it for an early spring harvest. Don’t forget to also plant seeds in early spring too. This will give you a second succession after the hoophouse crop is finished.
PLANT SPACING
3-6 inch spacing is best. This will encourage the plants to grow taller, longer, straighter stems.
GROWING ON
Peppergrass has average fertility and water needs. Avoid overhead watering as it can cause mildew on the leaves.
Plants naturally branch and do not need to be pinched.
Netting or support is recommended but not completely necessary.
STAGE OF HARVEST
Harvest when the small white flowers have completely shed. Peppergrass is grown for its seed pods, not its flowers. You can harvest the stems when they are bright green or you can wait for them to fade to rose gold.
Harvest the entire stem at the base of the plant. You can use the entire stem in a bouquet or break the branches off from the main stem.
POST-HARVEST CARE
Remove as many leaves from the stem as possible. The leaves expire and rot quickly, but the stems and beads will last for weeks.
Peppergrass is a wonderful dried flower as well. Simply hang bunches upside down in a warm dry place for about 3 weeks until brown and dry.


Peppergrass hanging to dry in our barn

Dried Peppergrass lasts for years
QUESTIONS?
Ask them here and I’ll get back to you!
Ready for more?
If you’re serious about growing the garden of your dreams this year, register for my online course, “Backyard Cutting Garden 101”. You’ll find everything you need to plan, grow, harvest and arrange your stunning blooms. I can’t WAIT to help you grow! Click on the button below for all the details.

How to Grow Phlox
How to Grow Phlox
How to Grow: Phlox (Phlox drummondii)
Pronunciation: flaaks
INTRODUCTION
Many people are familiar with the Perennial “Garden Phlox” (Phlox paniculata), but in this blog post, we’ll be discussing Annual Phlox (Phlox drummondii). Both can be used as a cut flower, but I find the Annual Phlox to be much more useful in bouquets (especially as Garden Phlox can be susceptible to Powdery Mildew).
Annual Phlox can be a lovely addition to the cutting garden. Personally, I find harvesting them to be a bit cumbersome and I often mutter and complain the whole time… but once I weave the stems into mixed bouquets, I remember why I love them.
As a bonus, most Annual Phlox varieties have a delightful, delicate scent. Many cut flowers do not have a scent, so I’m always looking for beautiful sweetly scented flowers to mix into my bouquets.

Grandiflora Tapestry Mix
Let’s look at the Pros and Cons of growing Phlox for cut flower use.
PROS
They come in a wide variety of colors, from muted tones to bright hues.
They have a sweet scent.
They fill out a bouquet beautifully.
They are quick to flower, taking only 60-65 days.
They are very productive and abundant.
They have a good vase life of 7 days when harvested at the proper stage.
CONS
They tend to bloom early on stems that are too short for bouquets. The plants may require multiple “pinches” (pruning) before they begin blooming on longer stems. Pinching is not difficult, however, you have to remember to do it! I often pinch them 3x before they finally begin sending up 18-inch stems.
The stems can become tangled and difficult to harvest.

Cherry Carmel
CHOOSING SEEDS
When choosing seeds, the most important consideration is height. Look for varieties that will reach 18 inches.
Here are a few of my favorite Phlox to grow for cut flower use:
“Cherry Carmel”
“Creme Brulee”
“Sugar Stars”

Grandiflora Tapestry Mix
HOW TO SOW
Phlox can be a little fussy to start from seed. The trick is darkness - once sown, the seeds need to be kept in the dark until they germinate.
You’ve got a few options:
Sow seeds in trays and stick the trays somewhere dark and warm.
Cover the seeds completely with soil or vermiculite.
Cover the seed tray with another tray on top of it.
Once the seeds have germinated, you can move them into a bright location (under grow lights or a greenhouse). Seeds should germinate in about 10-21 days.
Transplants or Direct Sow?
Phlox can be direct sown or transplanted. I recommend transplanting since germination can be a bit tricky.
Start Phlox from seed indoors about 6 weeks before your Average Last Spring Frost.
Seedlings can be transplanted after the frost date. If the seedlings are starting to bloom in the trays, simply pinch off the blooms.
If you want blooms all summer, consider planting 2-3 successions of Phlox, about 3 weeks apart.
Phlox is considered an Annual, but I consider them a “Hardy Annual” since they can tolerate frost when the plants are mature. Annual Phlox is often one of the last flowers standing in the field after frost arrives.

Blushing Bride
Speaking of frost…
Side note: My neighbor hired a photographer to take photos of her beloved dog on our flower farm in early October. The night before the photo shoot, our farm was hit by a killing frost and all the flowers turned brown and dead… except for the Phlox! The Phlox was unscathed by the frost and the photographer managed to capture some beautiful images of the dog surrounded by the Phlox!

Phlox after a frost!
PLANT SPACING
Plants can be spaced 6-9 inches apart. I recommend close spacing to encourage the plants to grow taller.
GROWING ON
Phlox has average water and fertilizer requirements. Drip irrigation or soaker hoses are recommended as too much water on the plants can cause disease issues.
Now let's talk about pinching (pruning or cutting back the plant).
Phlox has a very odd, rambling growth habit and without some pinching, the plants be quite unruly.
They often try to start blooming when they are only 2-3 inches tall. While these are cute, they are not usable in bouquets, where I need 18” stems.

Needs to be pinched!
The solution? I simply go in with a pair of snips, cut off the blooms and tell the plant “Nice try, but I know you can do better. Let’s try again.”
After 2-3 rounds of this treatment, the plants start sending up lovely 18” long stems.
I don’t recommend netting Phlox, because the stems would be a tangled mess in the netting.

Blushing Bride - Long stems after being pinched a few times!
STAGE OF HARVEST
Harvest the stems when about ½ of the blooms on the stem are open. The remaining blooms will slowly open up in the vase. If all of the blooms are fully open (fully ripe or over ripe), the flowers will not last as long in the vase.

Grandiflora Tapestry Mix
POST-HARVEST CARE
Phlox requires no special post-harvest care.
QUESTIONS?
Ask them here and I’ll get back to you!
Ready for more?
If you’re serious about growing the garden of your dreams this year, register for my online course, “Backyard Cutting Garden 101”. You’ll find everything you need to plan, grow, harvest and arrange your stunning blooms. I can’t WAIT to help you grow! Click on the button below for all the details.