

Herb Salt Recipe
A quick, easy and elegant DIY gift idea for everyone on your list!
Ok, folks. Less than 2 weeks until Christmas!
If you’re anything like me, you probably JUST remembered about 5 people you want to get gifts for, but time and Christmas funds are running out. ;)
Never fear!
I’ve got the perfect solution: Herb Salt.
This gift is:
Inexpensive. Each jar costs less than $2, depending on where you buy your ingredients.
Easy and quick. You might even have all the ingredients in your house right now!
Elegant. This may be an inexpensive gift, but it looks so fancy!
Consumable (and practical)… because nobody needs more stuff cluttering up their house!
Appropriate for nearly everyone. No need to worry about food allergies!
What is Herb Salt?
Herb Salt is something I made up one December when I was trying to think of a consumable gift idea for my family members.
Years ago, our family decided that we would only buy gifts for the children in the family. The adults would exchange small consumable gifts, as all of us were trying to reduce clutter in our households.
I wanted something a little different than the usual jams and baked goods I usually made, so I looked in my pantry to see what I could find… and discovered I had LOTS of herbs that I had dried from my garden, along with some fancy sea salt.
So I started mixing… a little bit of this, a little bit of that… sample, taste….mmmmm… perfection!
When I gave it away that year, everyone LOVED it. The only complaint - they used it up too fast and wished they had more! Ha! This year I’ll be making larger batches.
This “recipe” (I use that term loosely) is easy, quick and fun. It’s a great recipe to make with kids!

How to Make Herb Salt
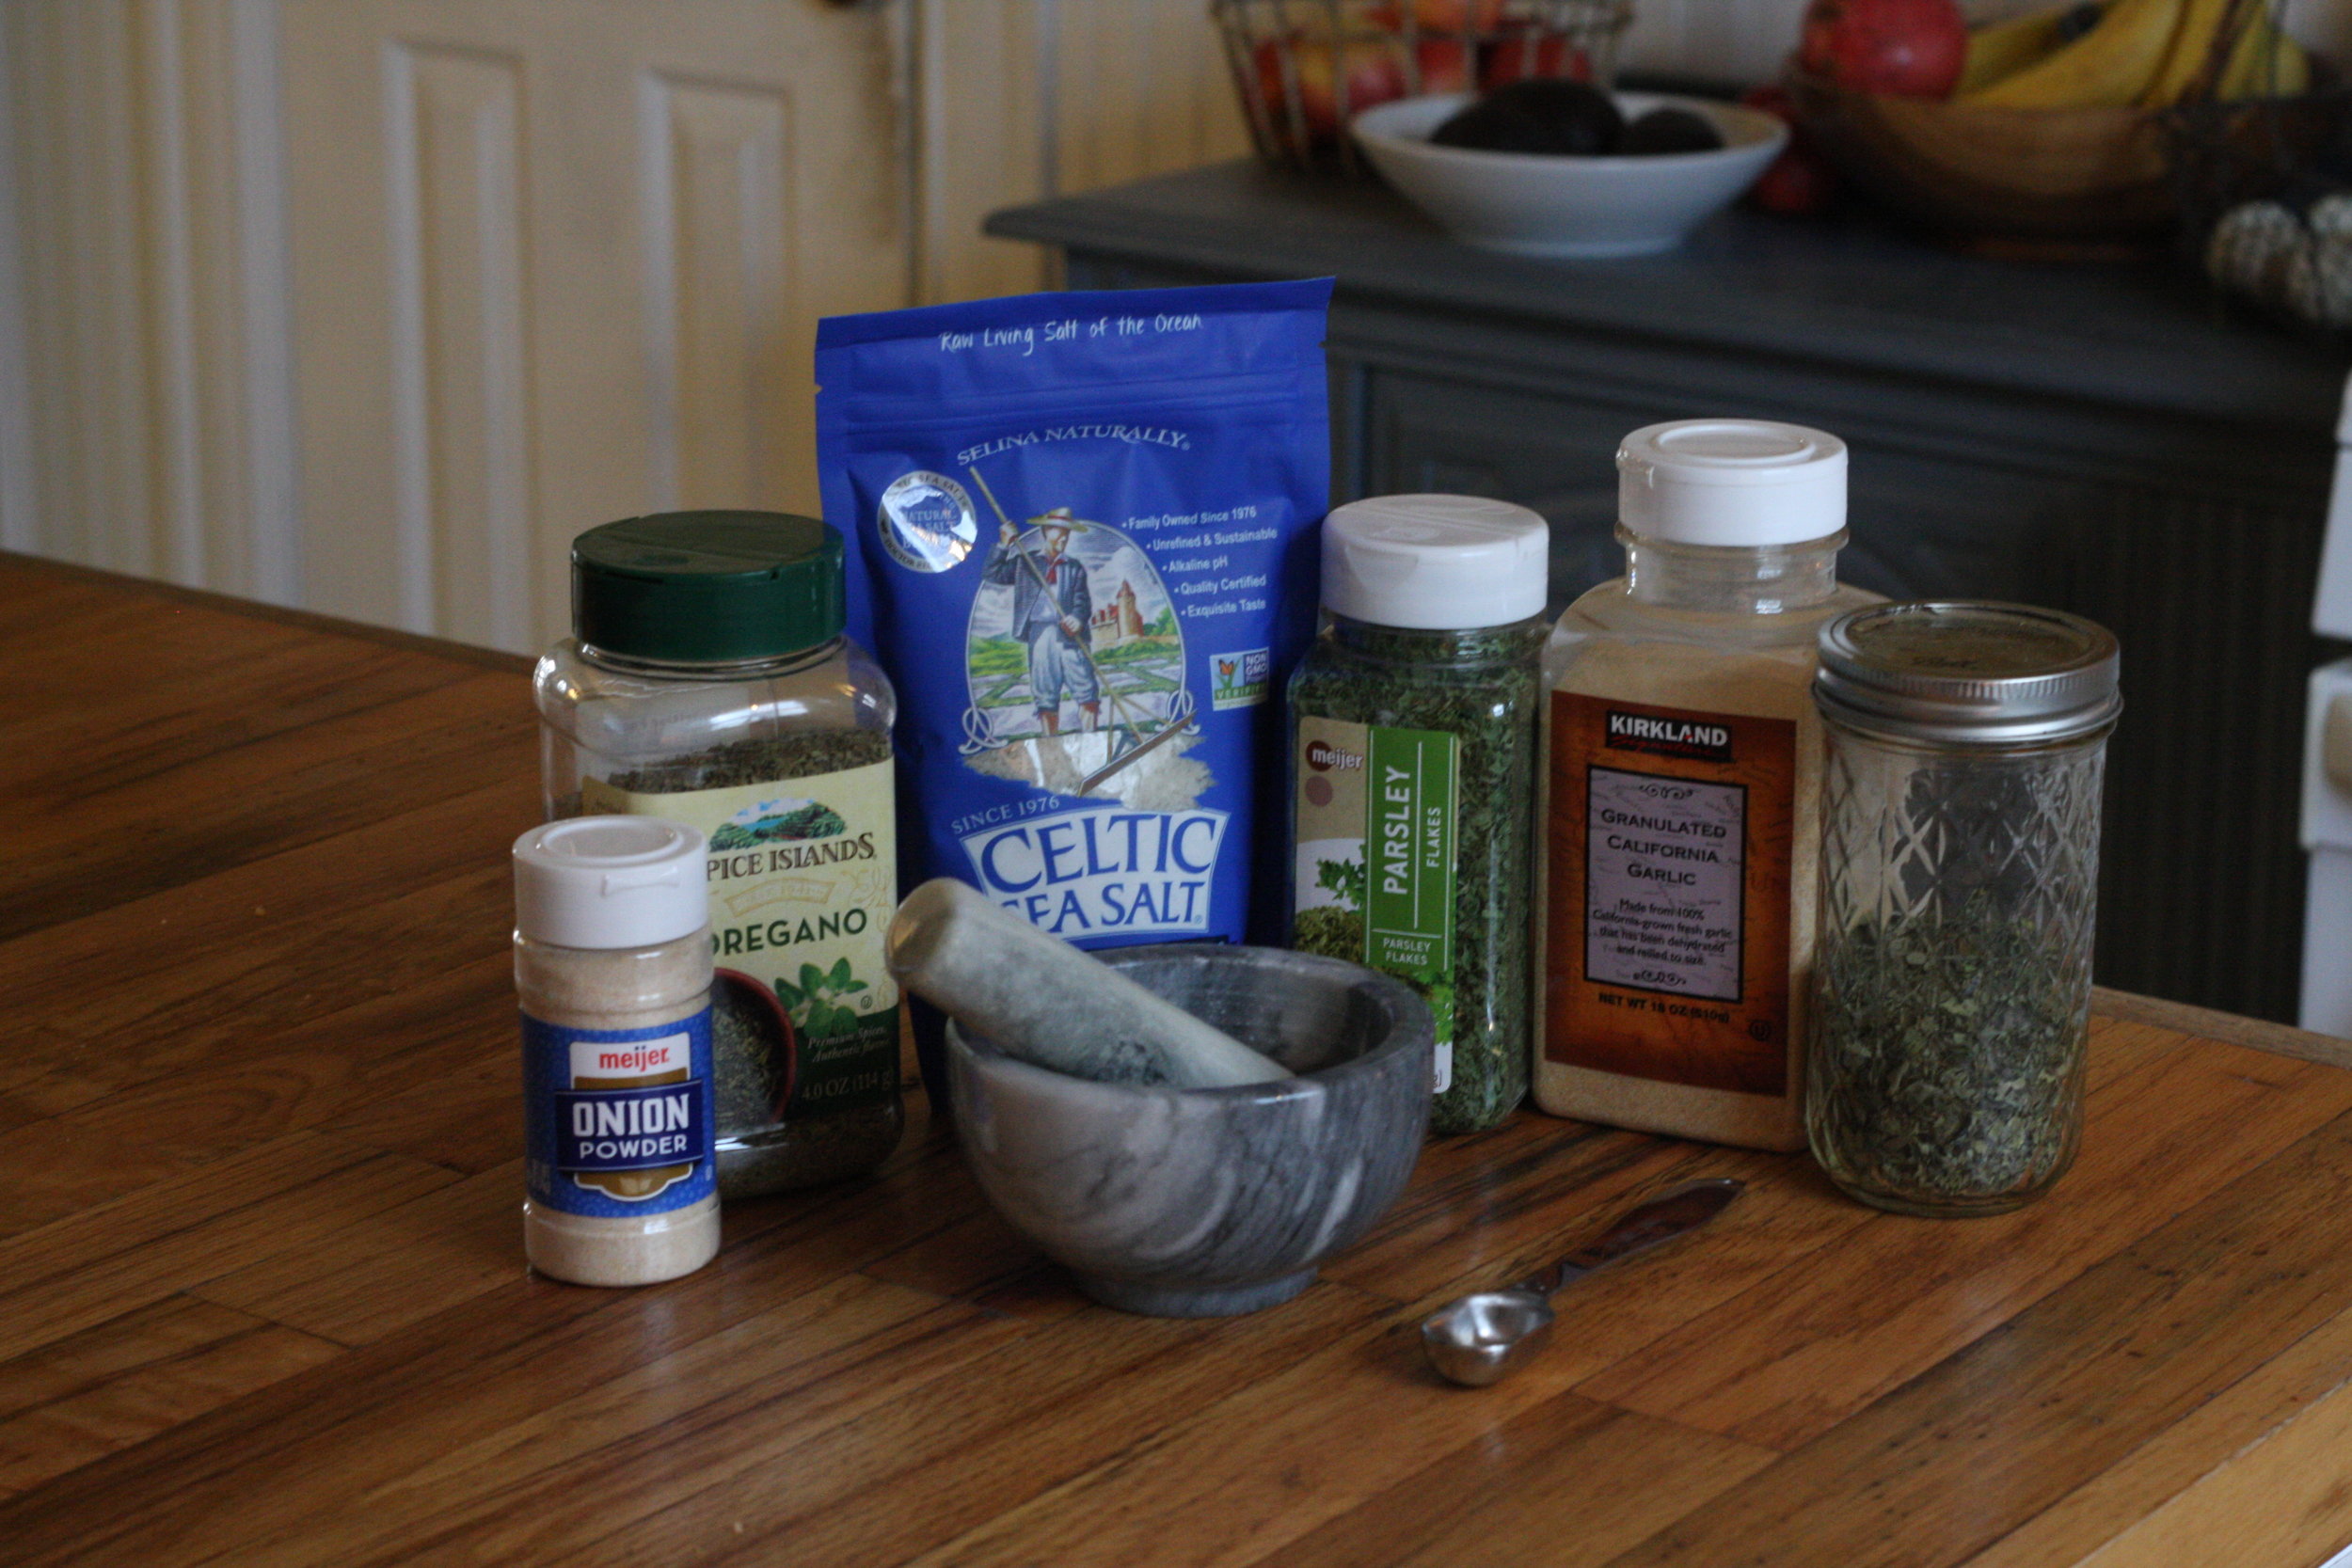
Here’s what you need:
4 TBSP of SEA SALT or KOSHER SALT: My favorite salt to use is “Light Gray Celtic Sea Salt” by Selina Naturally, since it is slightly damp and the herbs adhere well to the salt. Kosher Salt will work too, but you may need to stir in a few drops of water so the herbs will stick to the salt.
1 TSP of ONION POWDER
1 TSP of GARLIC POWDER
1 TSP of DRIED LEAFY HERBS, crushed into powder: Parsley, basil, sage, thyme, marjoram, chervil, rosemary, etc. are all great choices. Use what you have on hand!
MORTAR AND PESTLE: Use this to grind the herbs into powder. You could also use a clean coffee grinder or place the herbs in a bag and mash them with a rolling pin… but a mortar and pestle is the most fun, especially for kids.
4 OZ MASON JARS (with lids and rings) or similar sized jar
Method:
Scoop the salt into a 4oz Ball mason jar (the smallest size).
Add the Onion Powder and Garlic Powder.
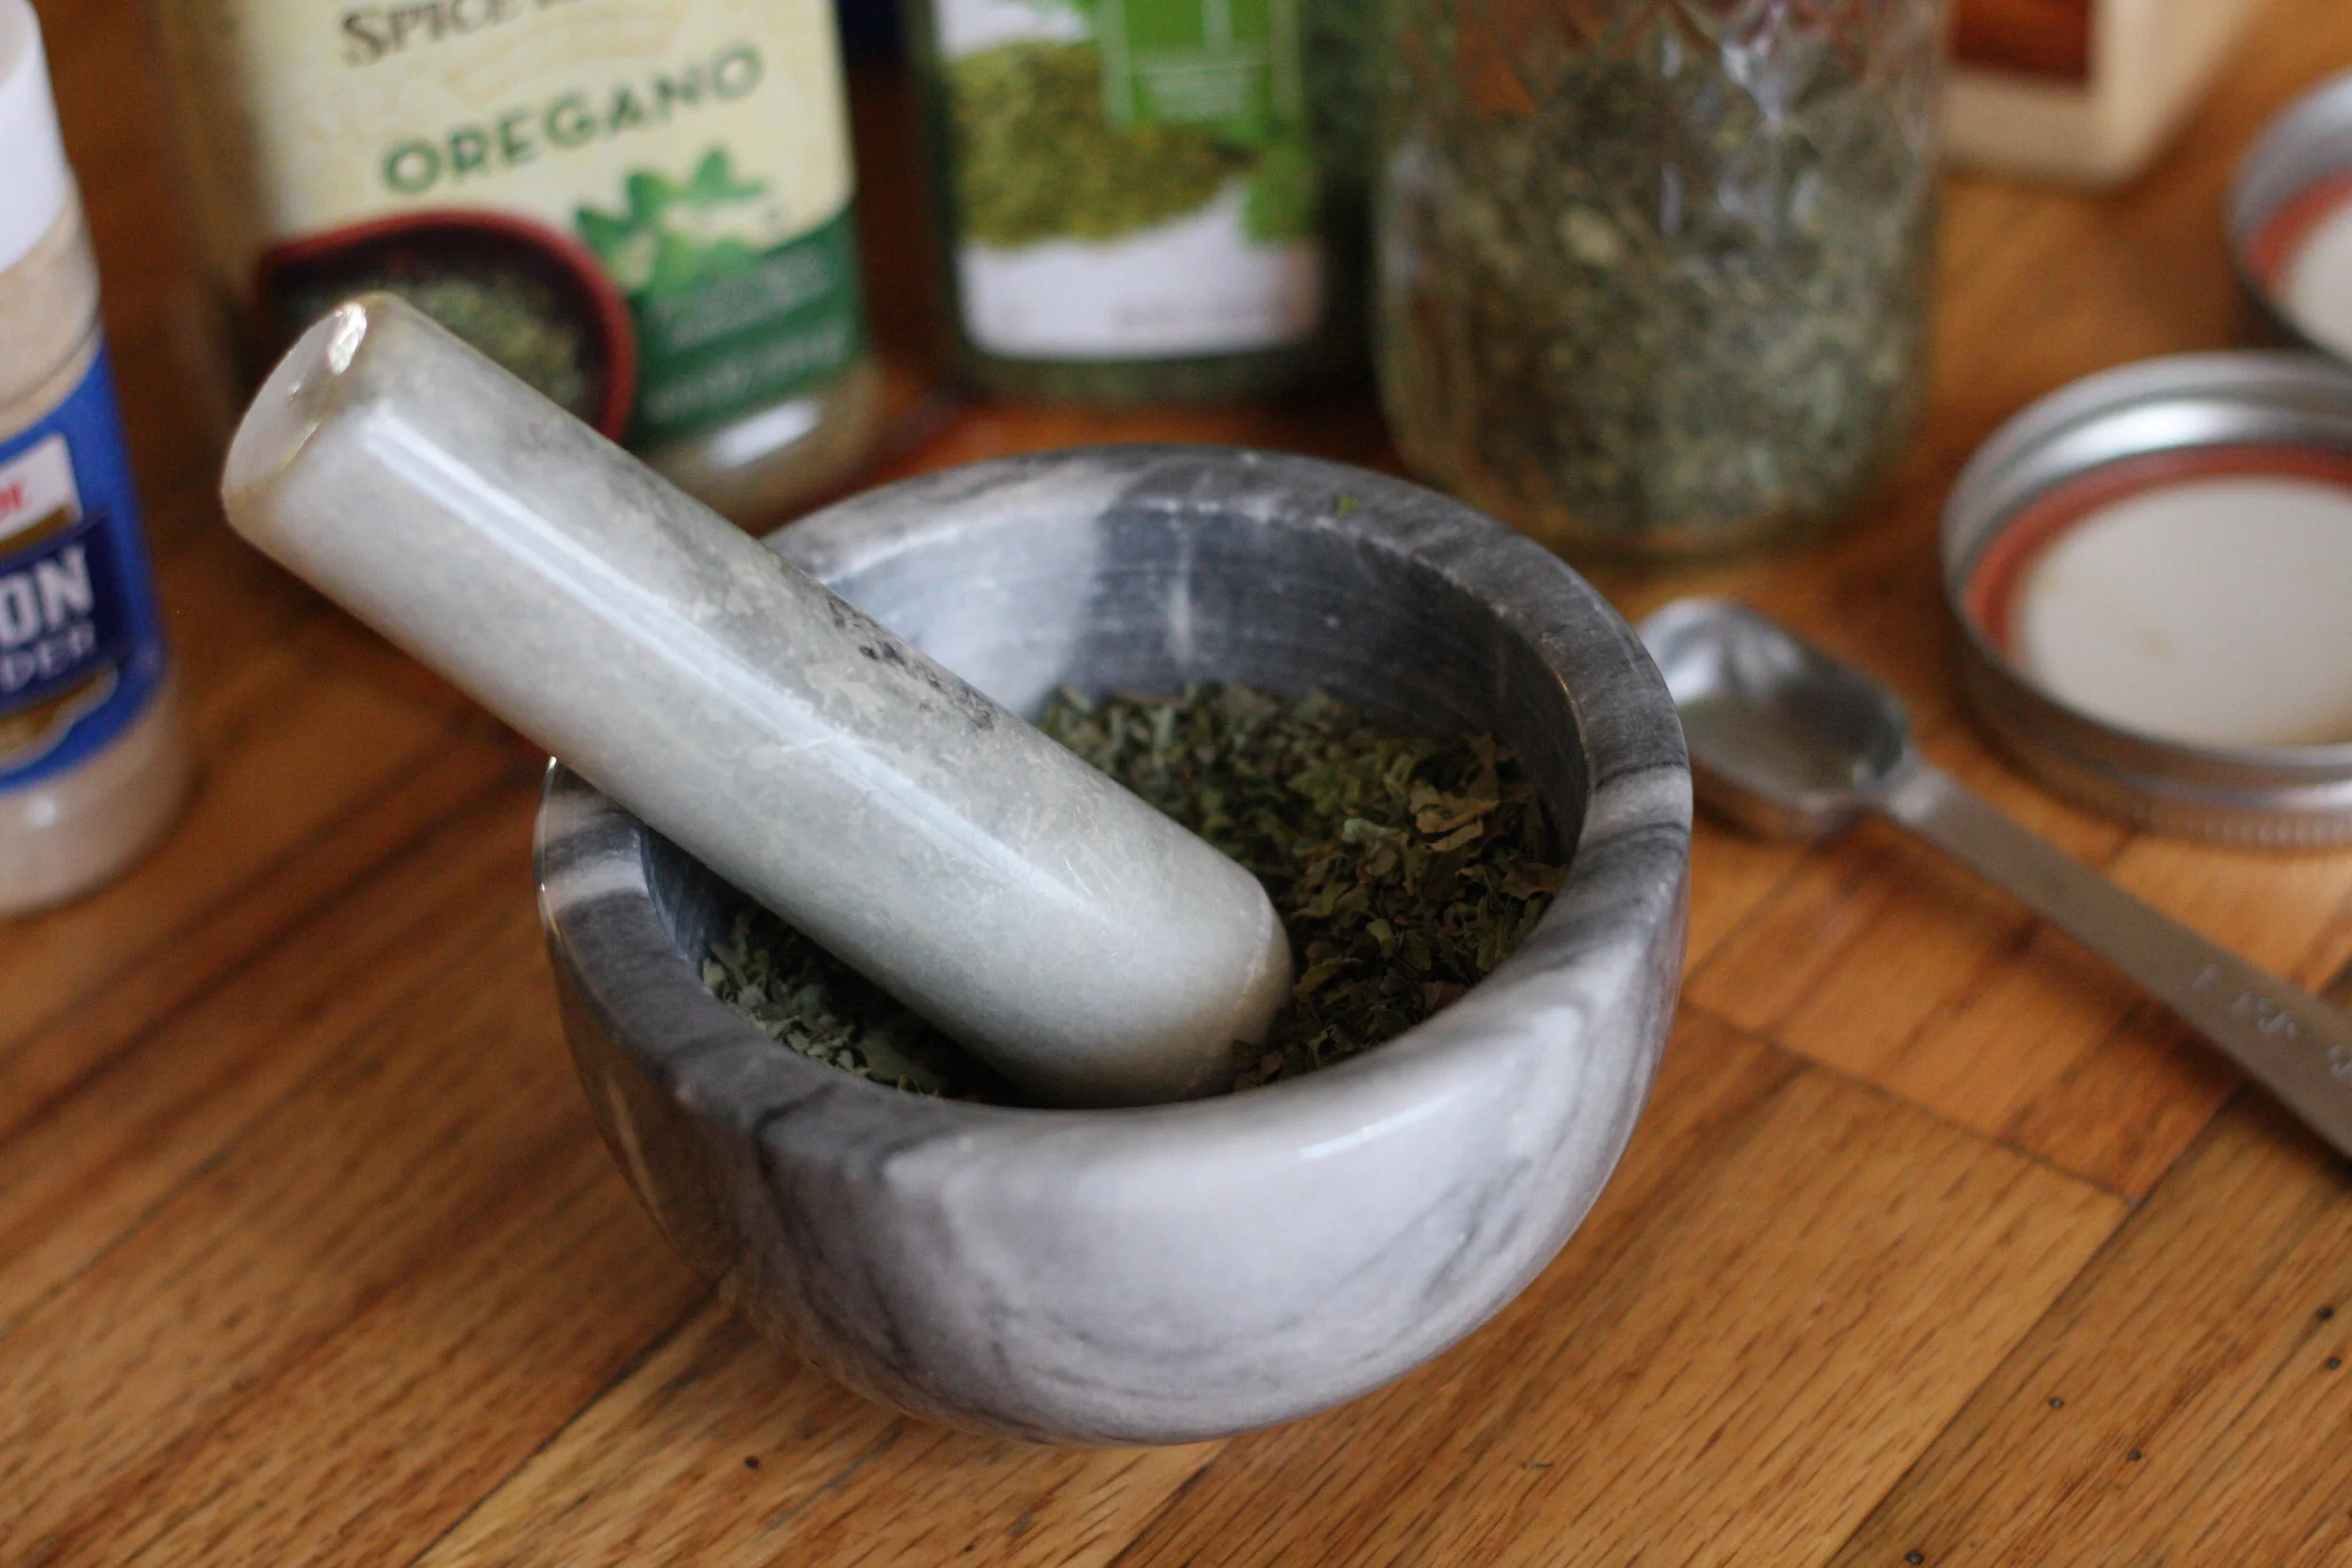
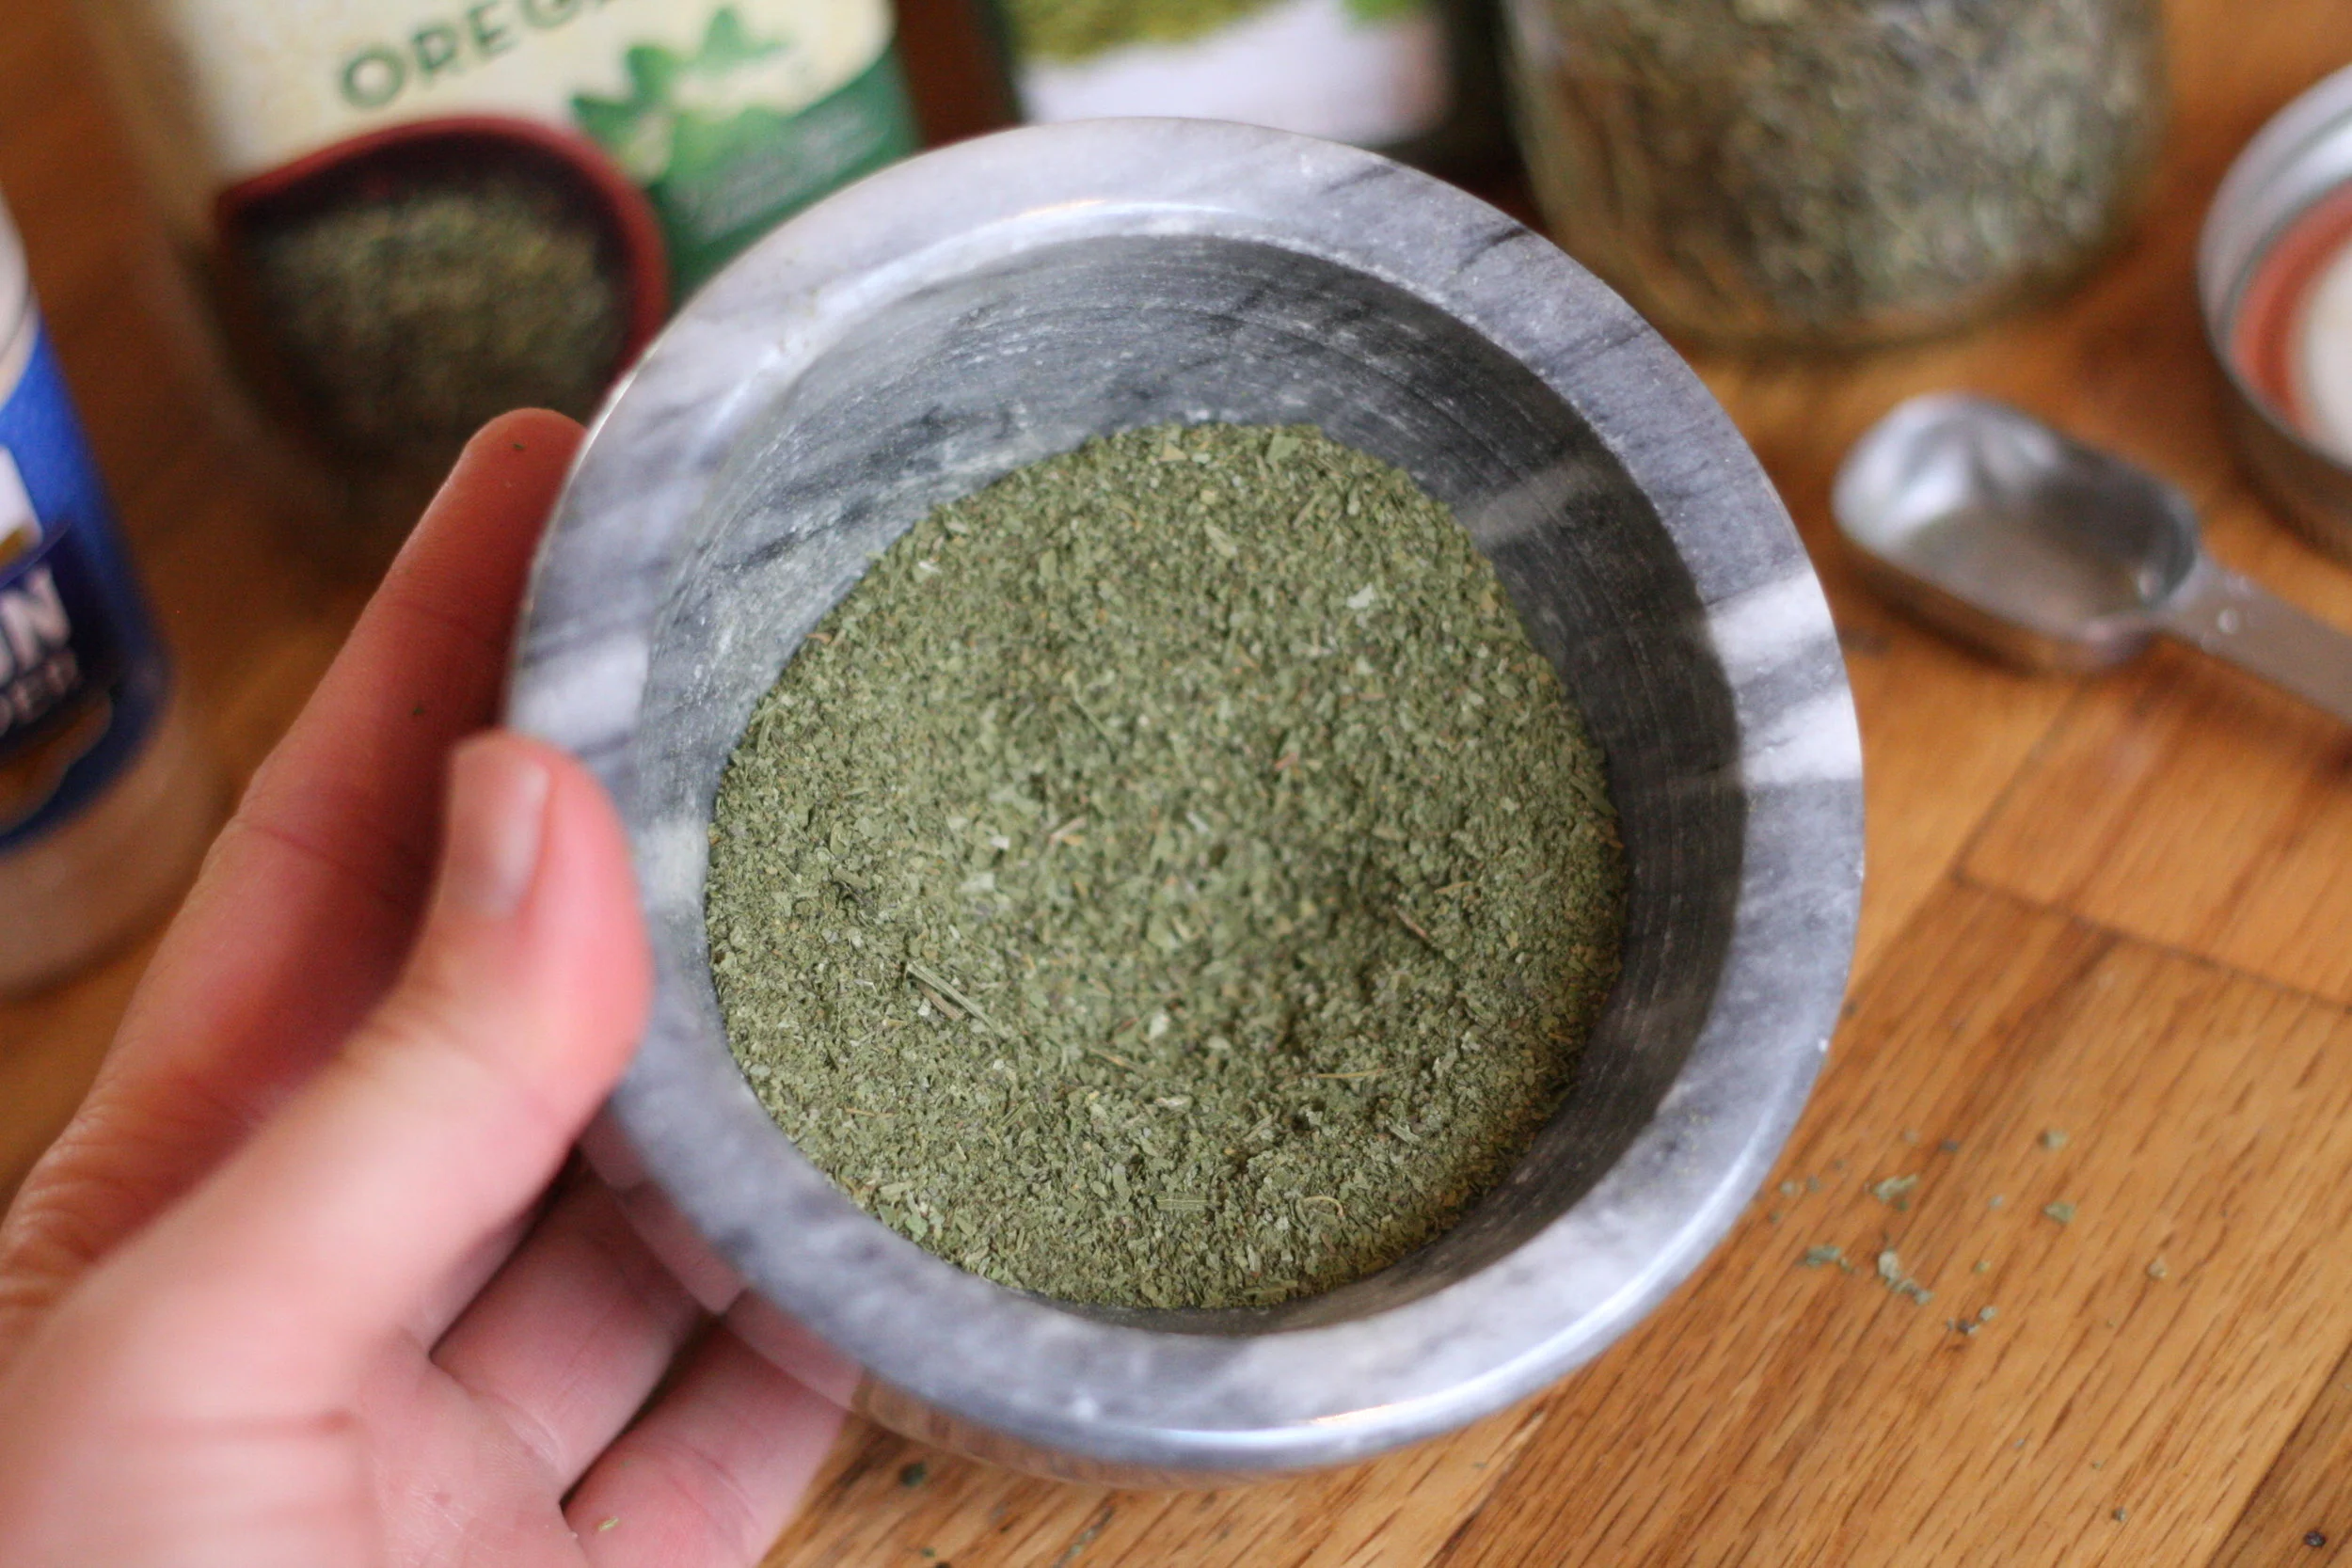
Combine a small amount of each type of herb (about a tsp of each). Using a mortar and pestle, grind the herbs as finely as possible. They should eventually turn into a green powder. You could also use a clean coffee grinder or put the herbs in a plastic baggie and roll over the bag repeatedly with a rolling pin.
Add 1 tsp of the powdered herbs to the jar.
Place the lid and ring on the jar and shake until everything is thoroughly combined. The salt grains will be greenish colored.
Have extra powdered herbs? Store them in a jar and save them for the next batch of Herb Salt!
A Great Gift Idea
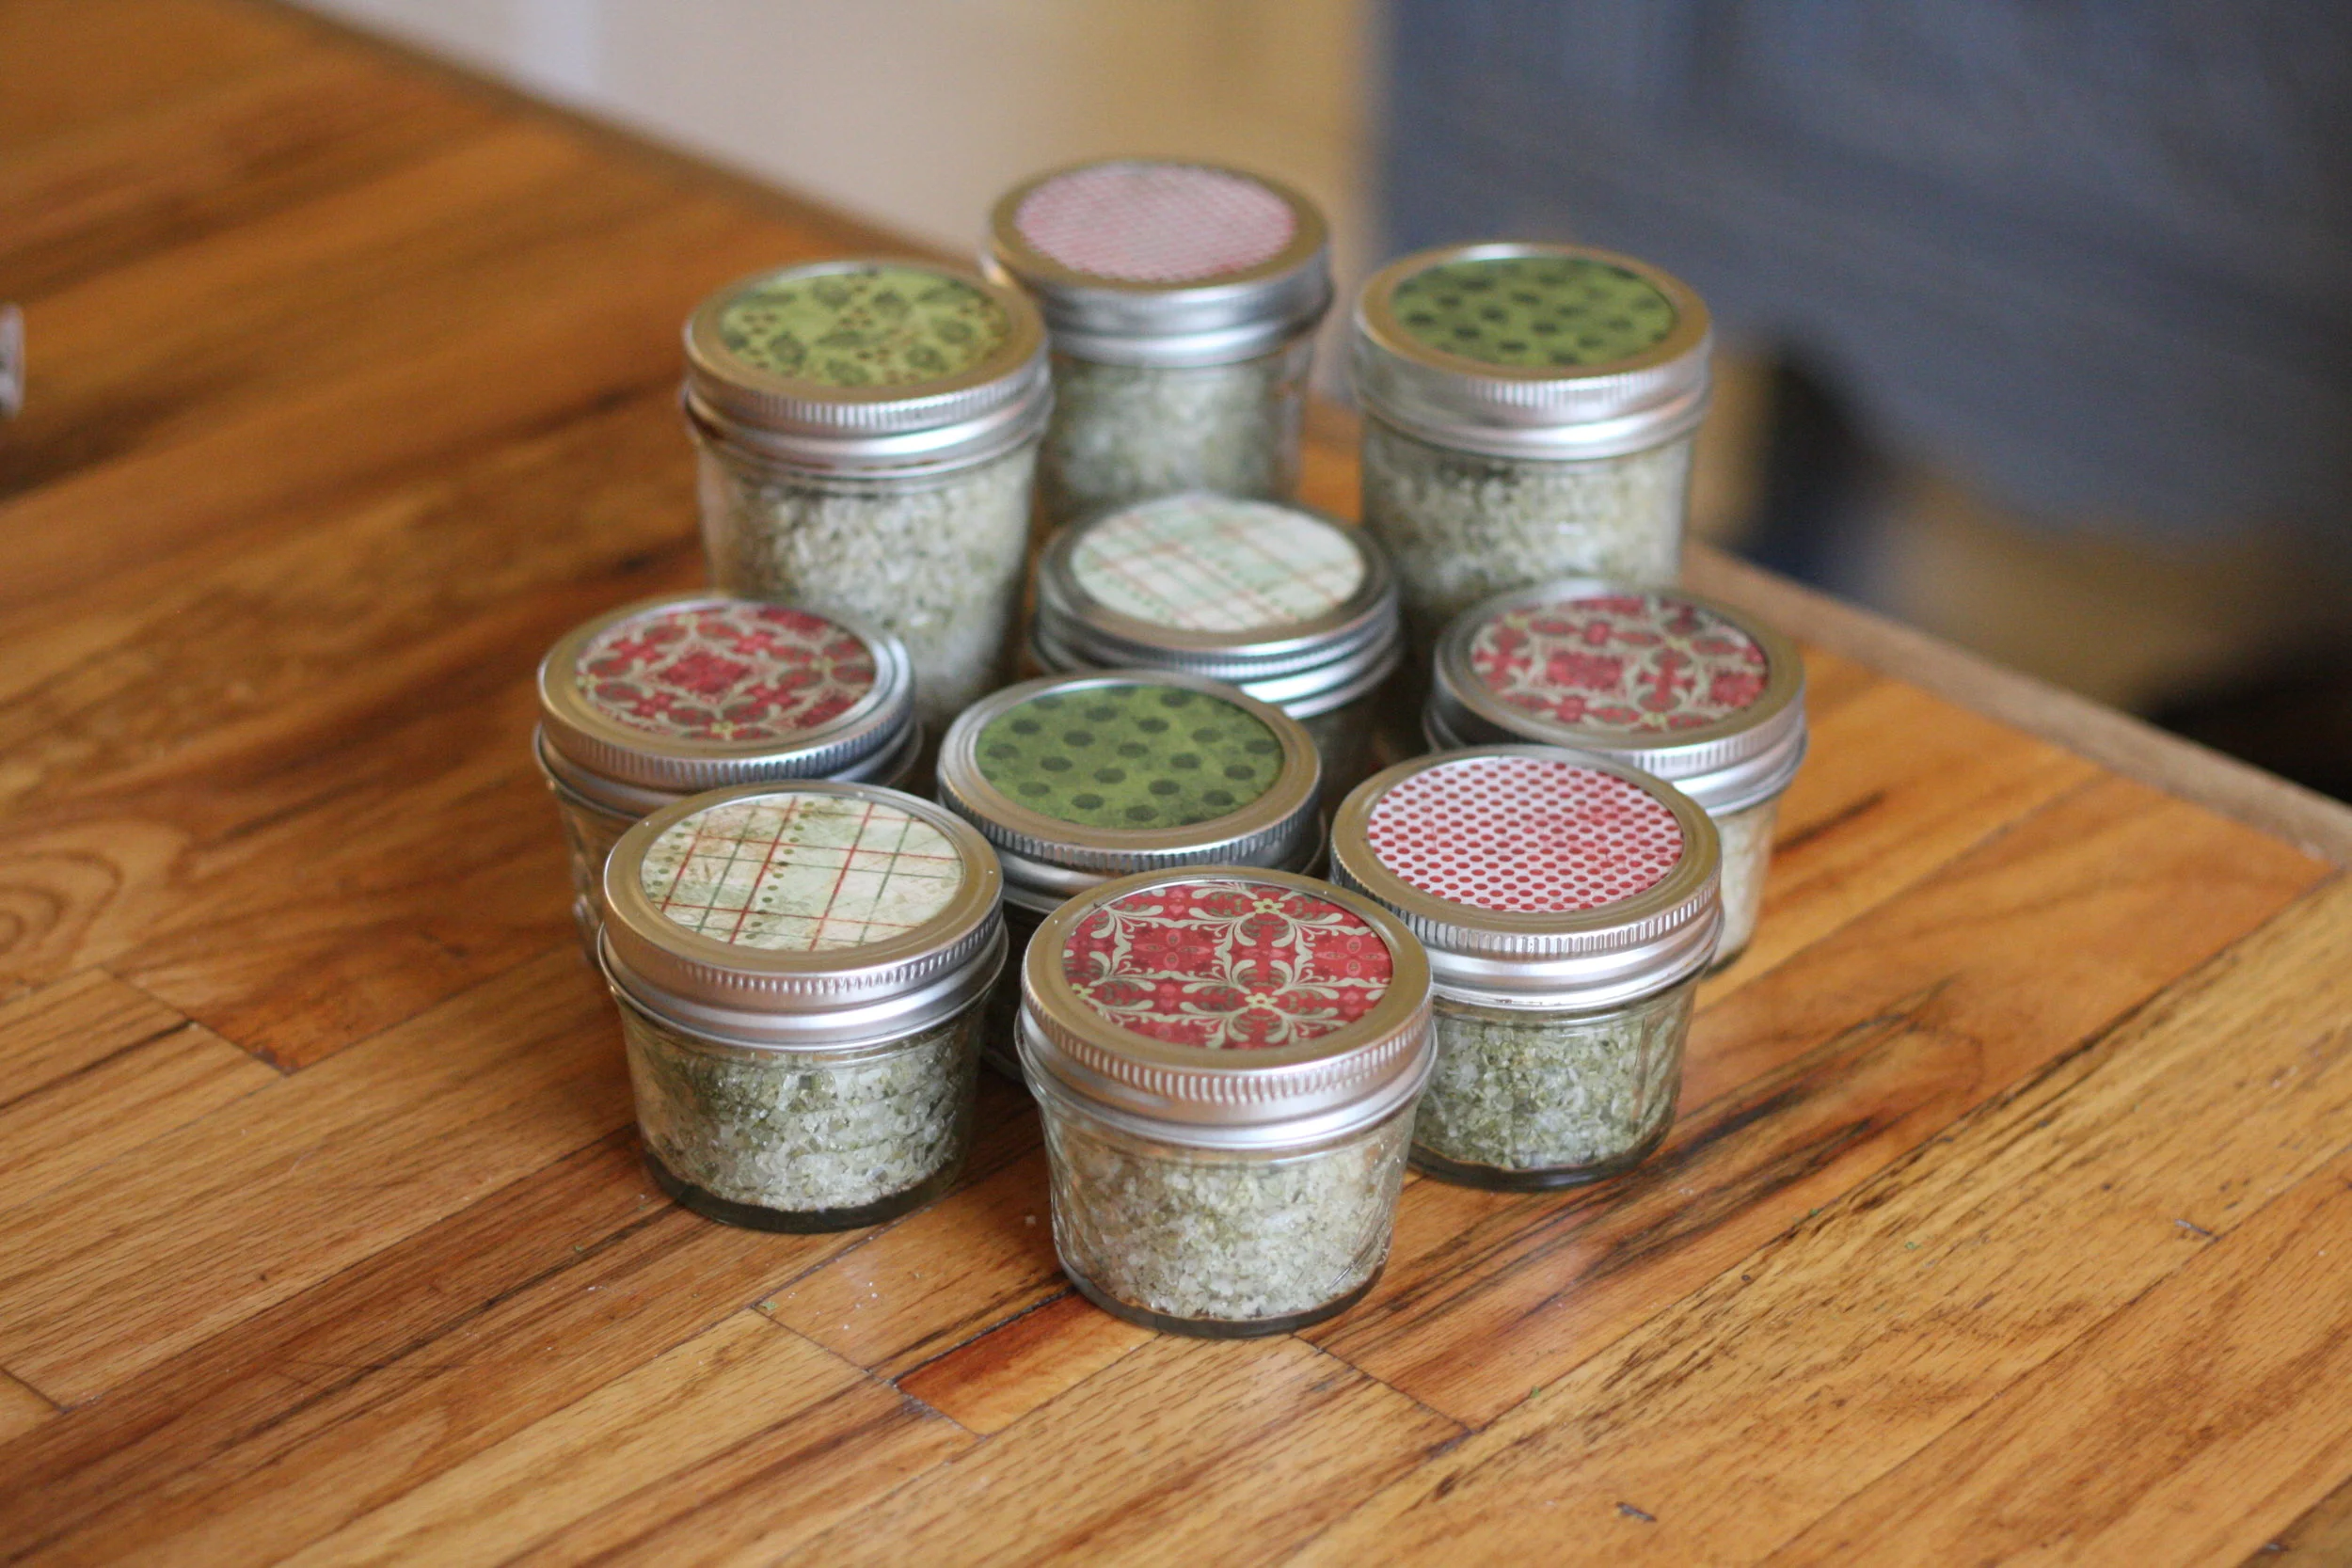
After you done making the herb salt, feel free to get a little fancy with the presentation!
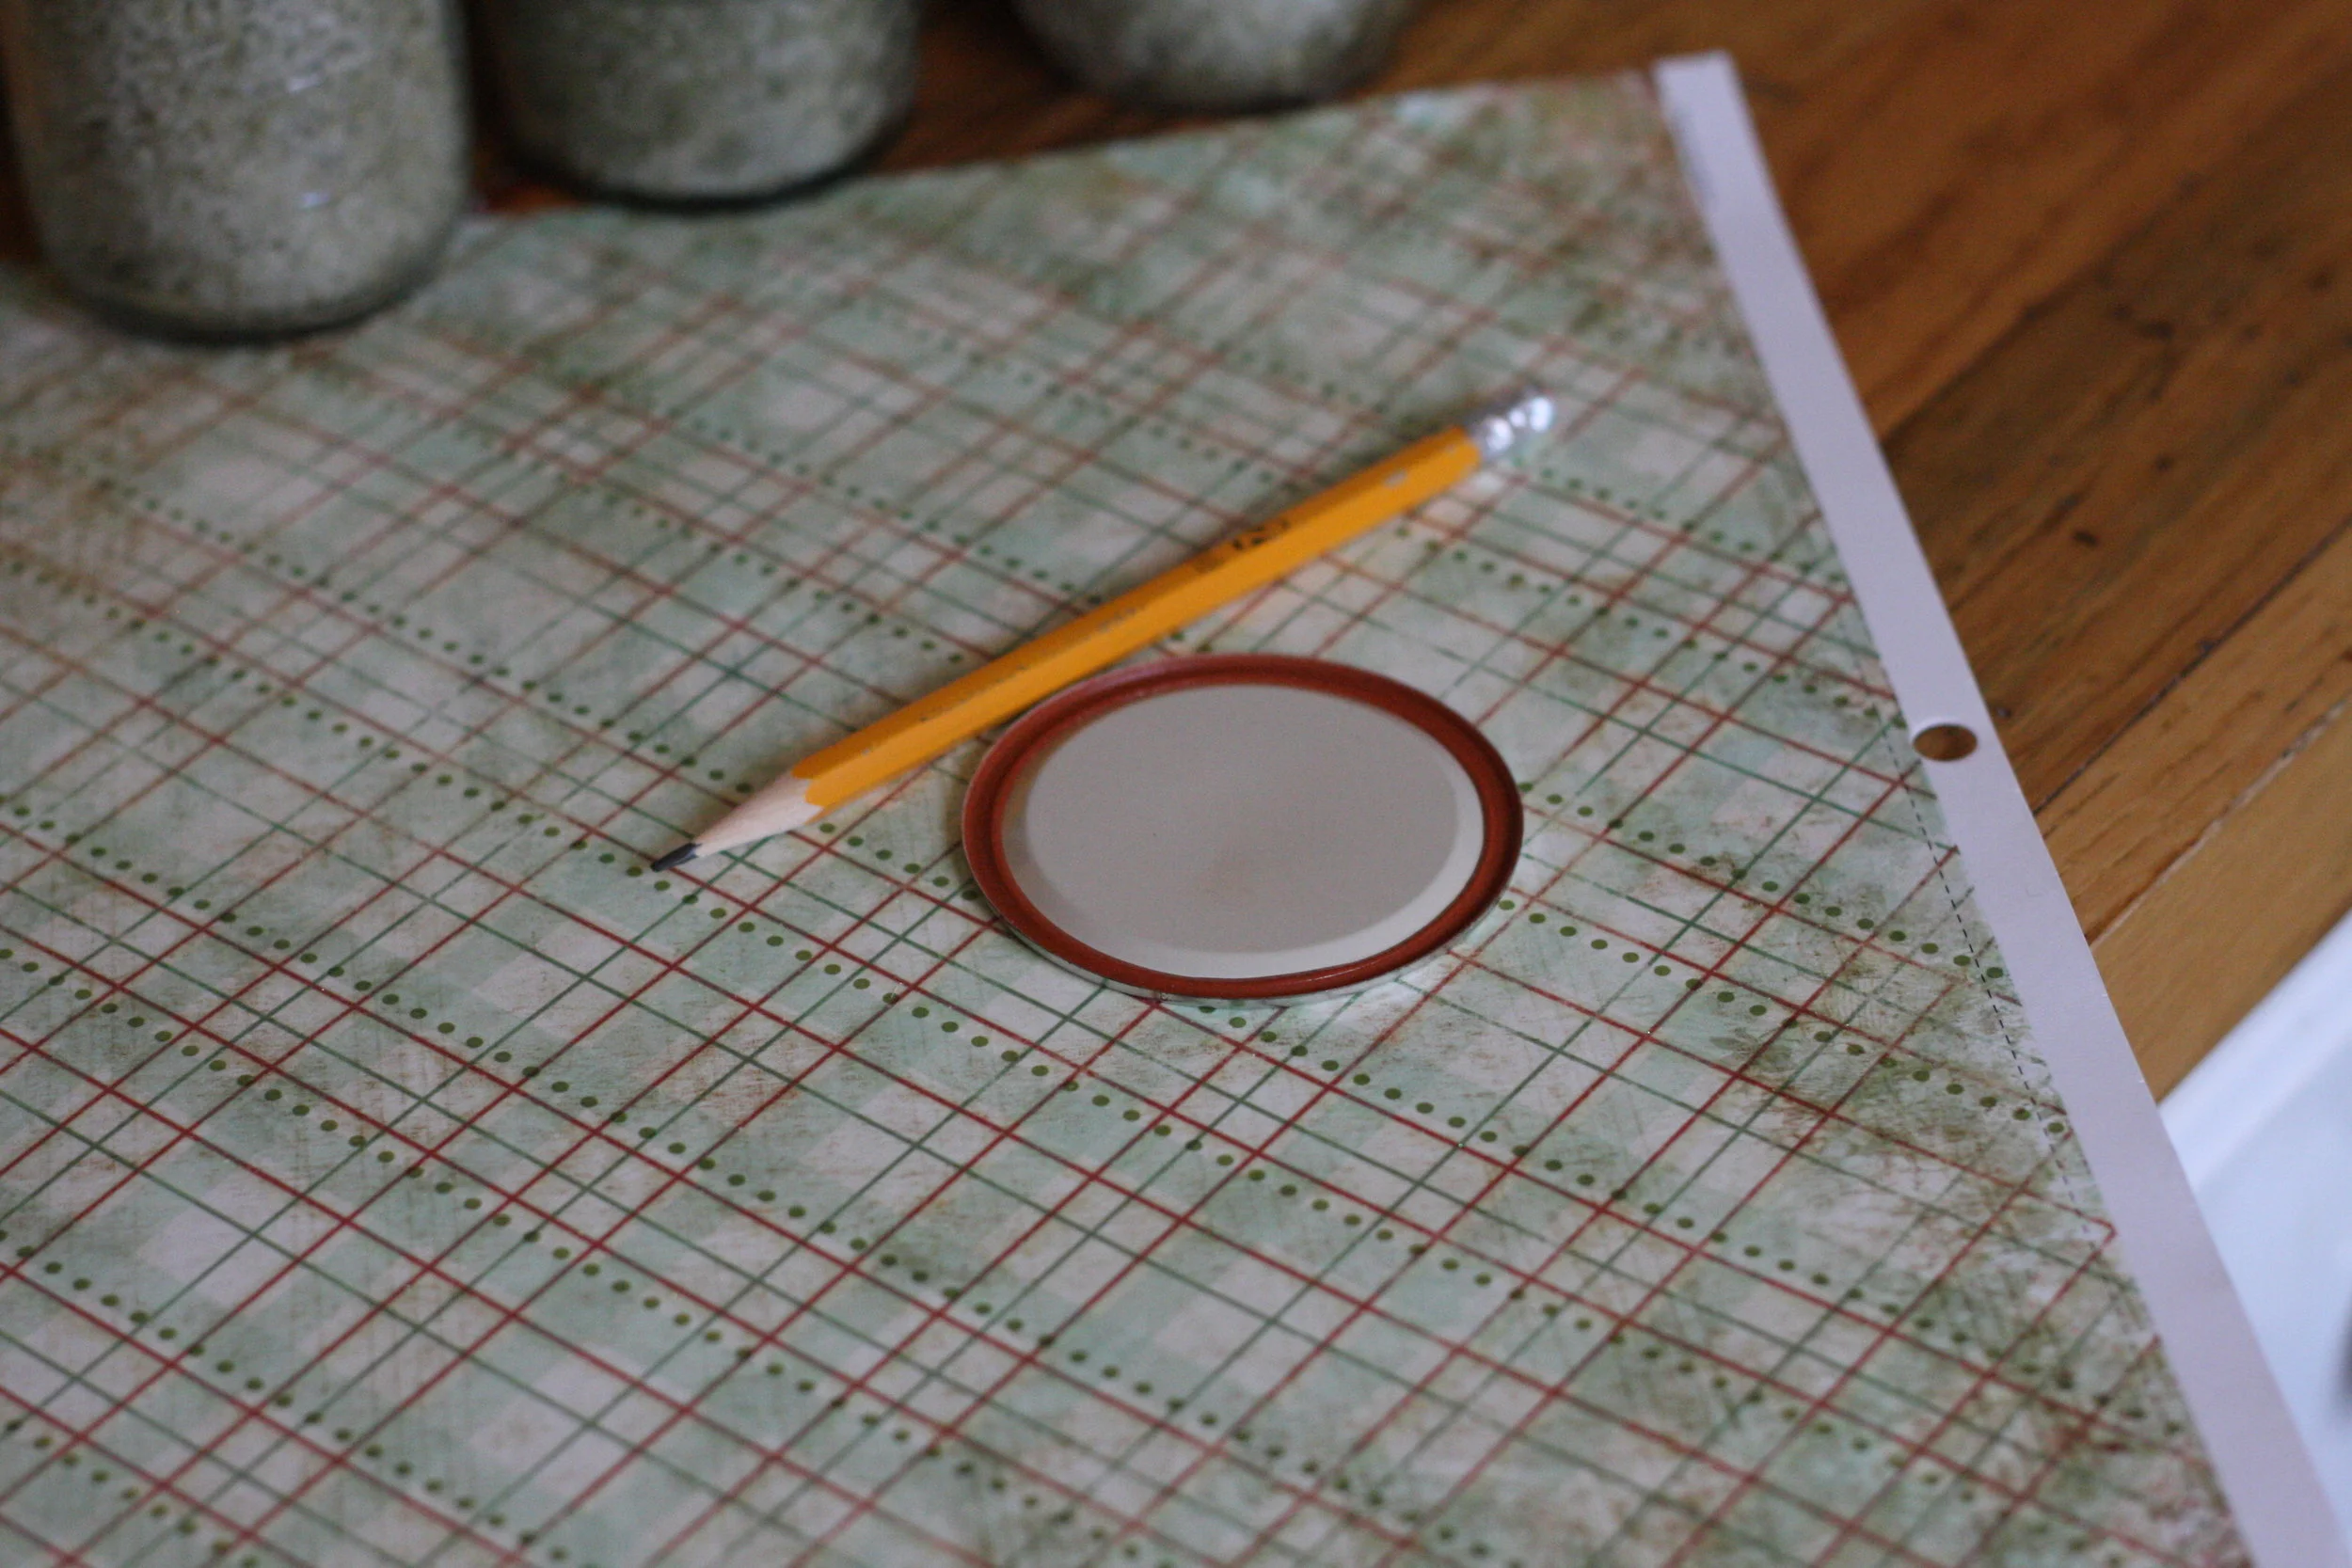
You can keep it simple with mason jar labels or you can dress it up even more.
I like to use holiday themed paper to decorate the jars. It’s as simple as tracing the outline of the canning lid onto paper and cutting it out. Ta-da! Simple, easy and beautiful.
Now that you’ve made it, why not make a few more jars to keep on hand? This Herb Salt is the perfect gift any time of the year and your gift recipients will love it.
This herb salt makes a great gift for:
Bus Drivers
Teachers
Hair Dresser
Your mail carrier
Family
Friends
Myself… I love it too! Ha!
Anyone you want to make feel special.
How to Use the Herb Salt
Seriously, this stuff is so good, you’ll find yourself using it on everything! Here are a few suggestions to get you started:
Roasted or Grilled Meats
Marinades
Roasted Vegetables
Soups or stews
Dips
Casseroles
Scrambled eggs/quiche/frittata
Anything that needs a little extra flavor!
Hope you enjoy the recipe! Let me know if you try it!
Do you have any “go-to” last minute gift ideas? I’d love to hear them! I’m always trying to build my “Gift Idea” list.
If you haven’t checked out the recipe for my DIY Chocolate Peppermint Balm, be sure to take a peek. Everybody LOVES it.

DIY Gardening Hand Scrub Recipe
Perfect for the gardeners in your life!
DIY Gardening Hand Scrub Recipe
Years ago, a friend gave me a jar of homemade hand scrub as a Christmas gift. In the shuffle of holiday busyness, the jar was shoved into a cupboard and forgotten.
The following spring, I came inside after a long day of working in the garden. My hands were filthy, dirt caked in every crease, fingernails blackened. I stood at the sink, scrubbing for at least 5 minutes, but my hands were still stained... and now rough and dried out from using harsh soap and a nail brush.

I suddenly remembered the hand scrub stuffed in the cupboard. Might as well give it a shot, I thought.
It was amazing! Not only did the scrub remove the dirt and stains, it also soothed my damaged skin, leaving them clean and smooth.
I love this hand scrub so much, I just had to share it with you!
Make a batch for yourself and another to share with a friend (I've included the recipe to make 3 different batch sizes). I promise they will appreciate it!
This hand scrub also makes a fantastic gift for the gardeners you love.
Even if you are not the DIY type, I encourage you to give it a try. The recipe is simple and easy. It takes less than 5 minutes to make a batch.
A couple of notes:
You can use zested citrus or citrus essential oils. I prefer the zested citrus, but the essential oils version will have a longer shelf life.
The hand scrub should last a few months. Do your best to keep water out of the jar. You could use a spoon to scoop the scrub out of the jar, so the contents stay clean and water-free.
Want to add fresh herbs? Go for it! Finely chopped Rosemary, Thyme, Basil and Mint are lovely choices. Feel free to play around with different combinations of citrus zest/oil and herbs. I can't wait to try lemon/mint!
Coconut oil turns to liquid above 76 degrees. Depending on where you live and time of year, you may want to store the hand scrub in the fridge.
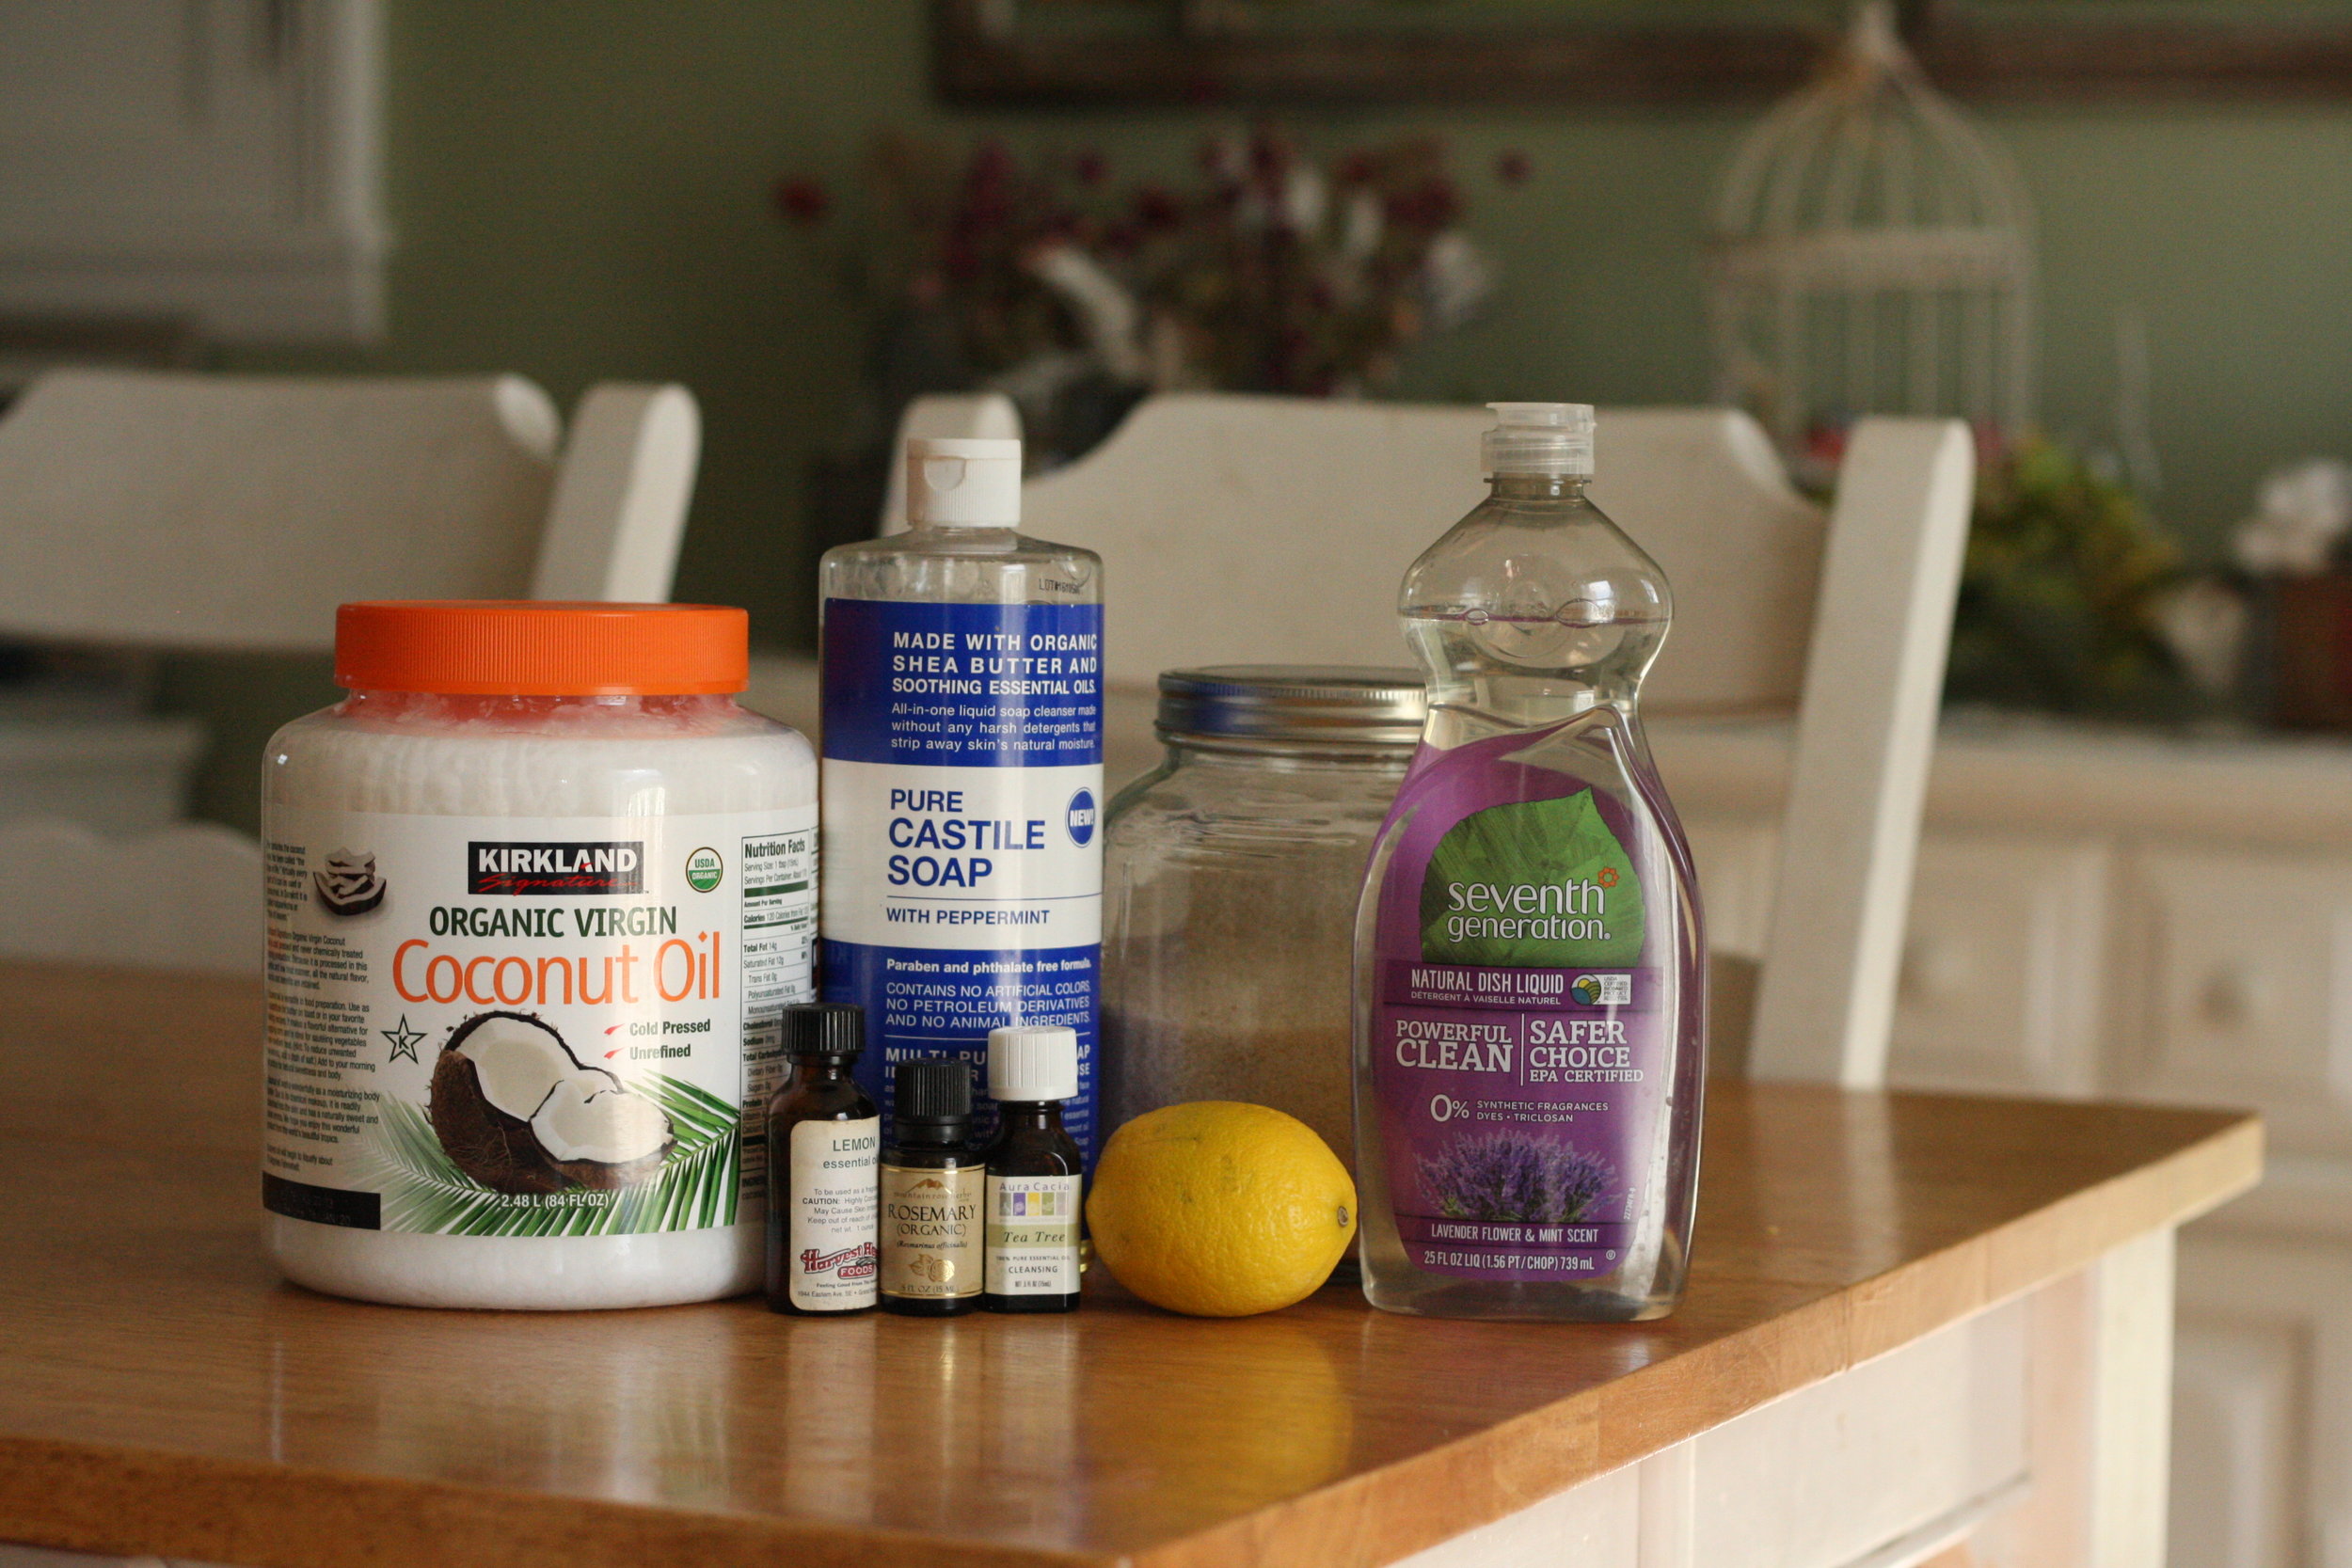
Ingredients to yield 3 cups of hand scrub:
1/2 cup coconut oil
1/2 cup mild soap (like Dr. Bronner's or mild dish soap)
2 cups sugar
20 drops rosemary essential oil (optional)
4 drops tea tree oil (optional)
Lemon Zest or 10 drops Lemon essential oil (optional)
Ingredients to yield 1 ½ cups of hand scrub:
1/4 cup coconut oil
1/4 cup mild soap (like Dr. Bronner's or mild dish soap)
1 cup sugar
10 drops rosemary essential oil (optional)
2 drops tea tree oil (optional)
Lemon Zest or 5 drops Lemon essential oil (optional)
Ingredients to yield ¾ cup of hand scrub:
1/8 cup coconut oil
1/8 cup mild soap (like Dr. Bronner's or mild dish soap)
1/2 cup sugar
5 drops rosemary essential oil (optional)
1 drops tea tree oil (optional)
Lemon Zest or 3 drops Lemon essential oil (optional)
Method:
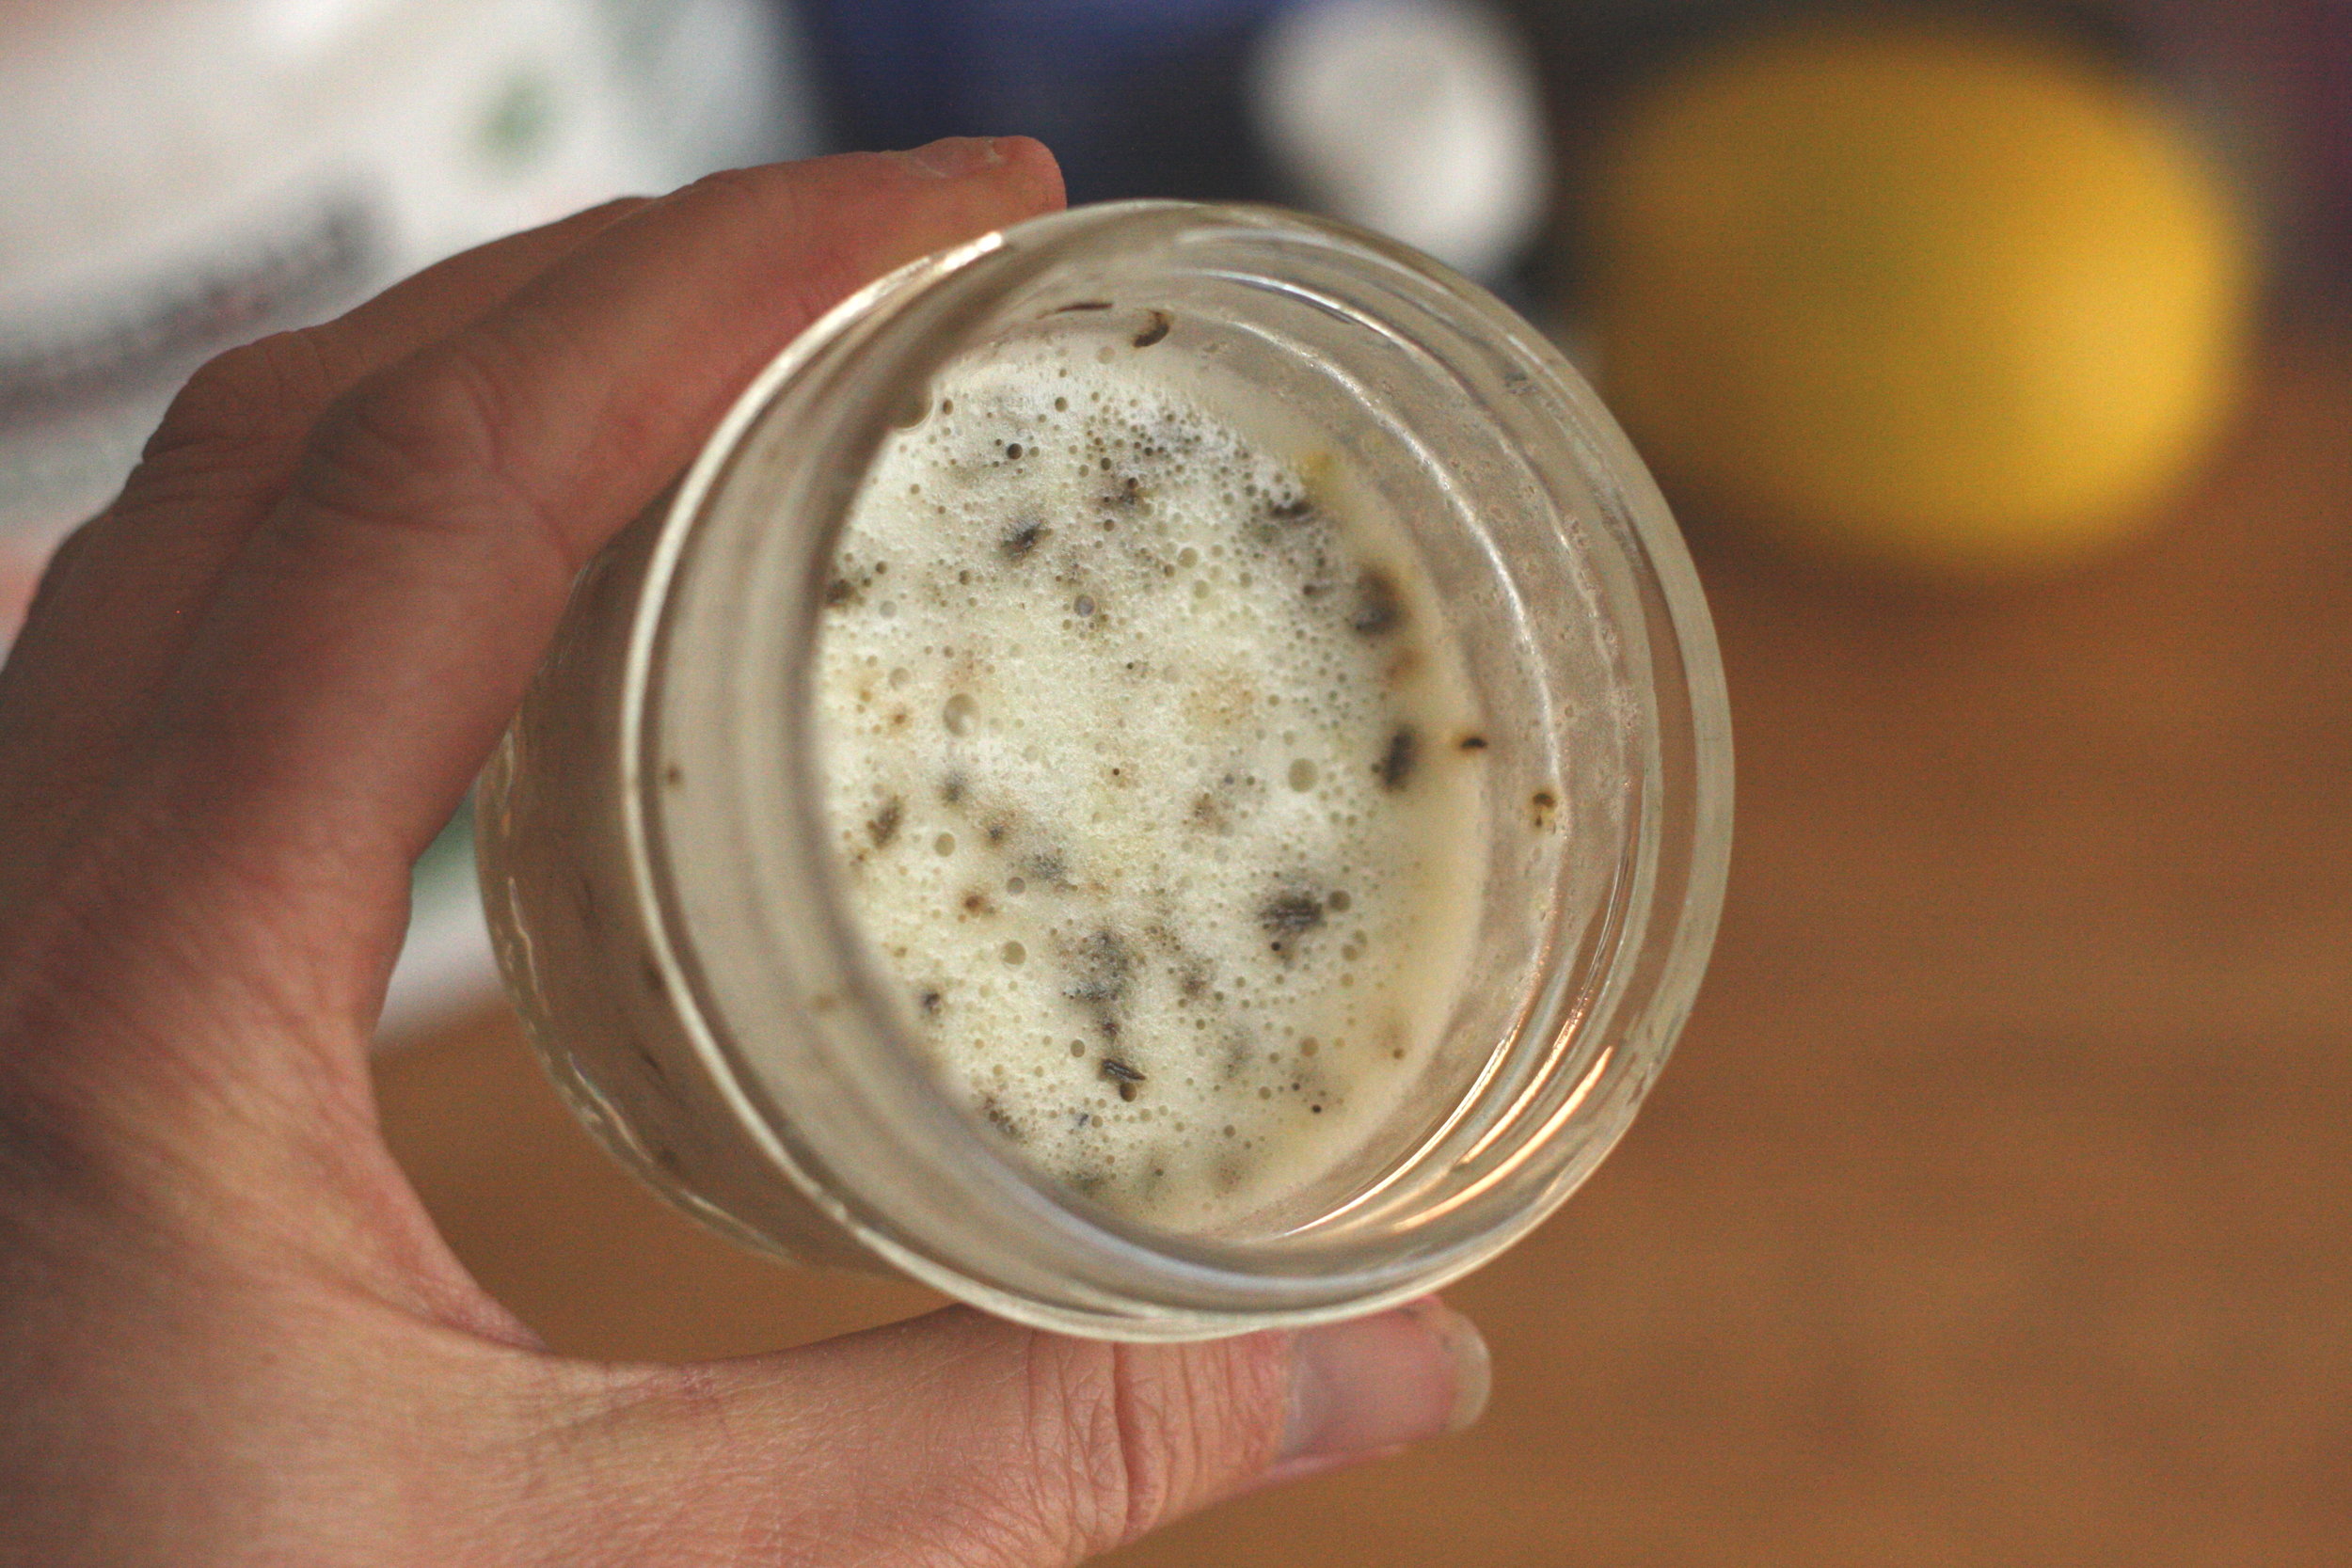
Soften or melt the coconut oil in a measuring cup or bowl. Mix with soap.
Add sugar and stir vigorously to “whip” it.
Add essential oils, if desired.
Add zest of lemon, if desired.
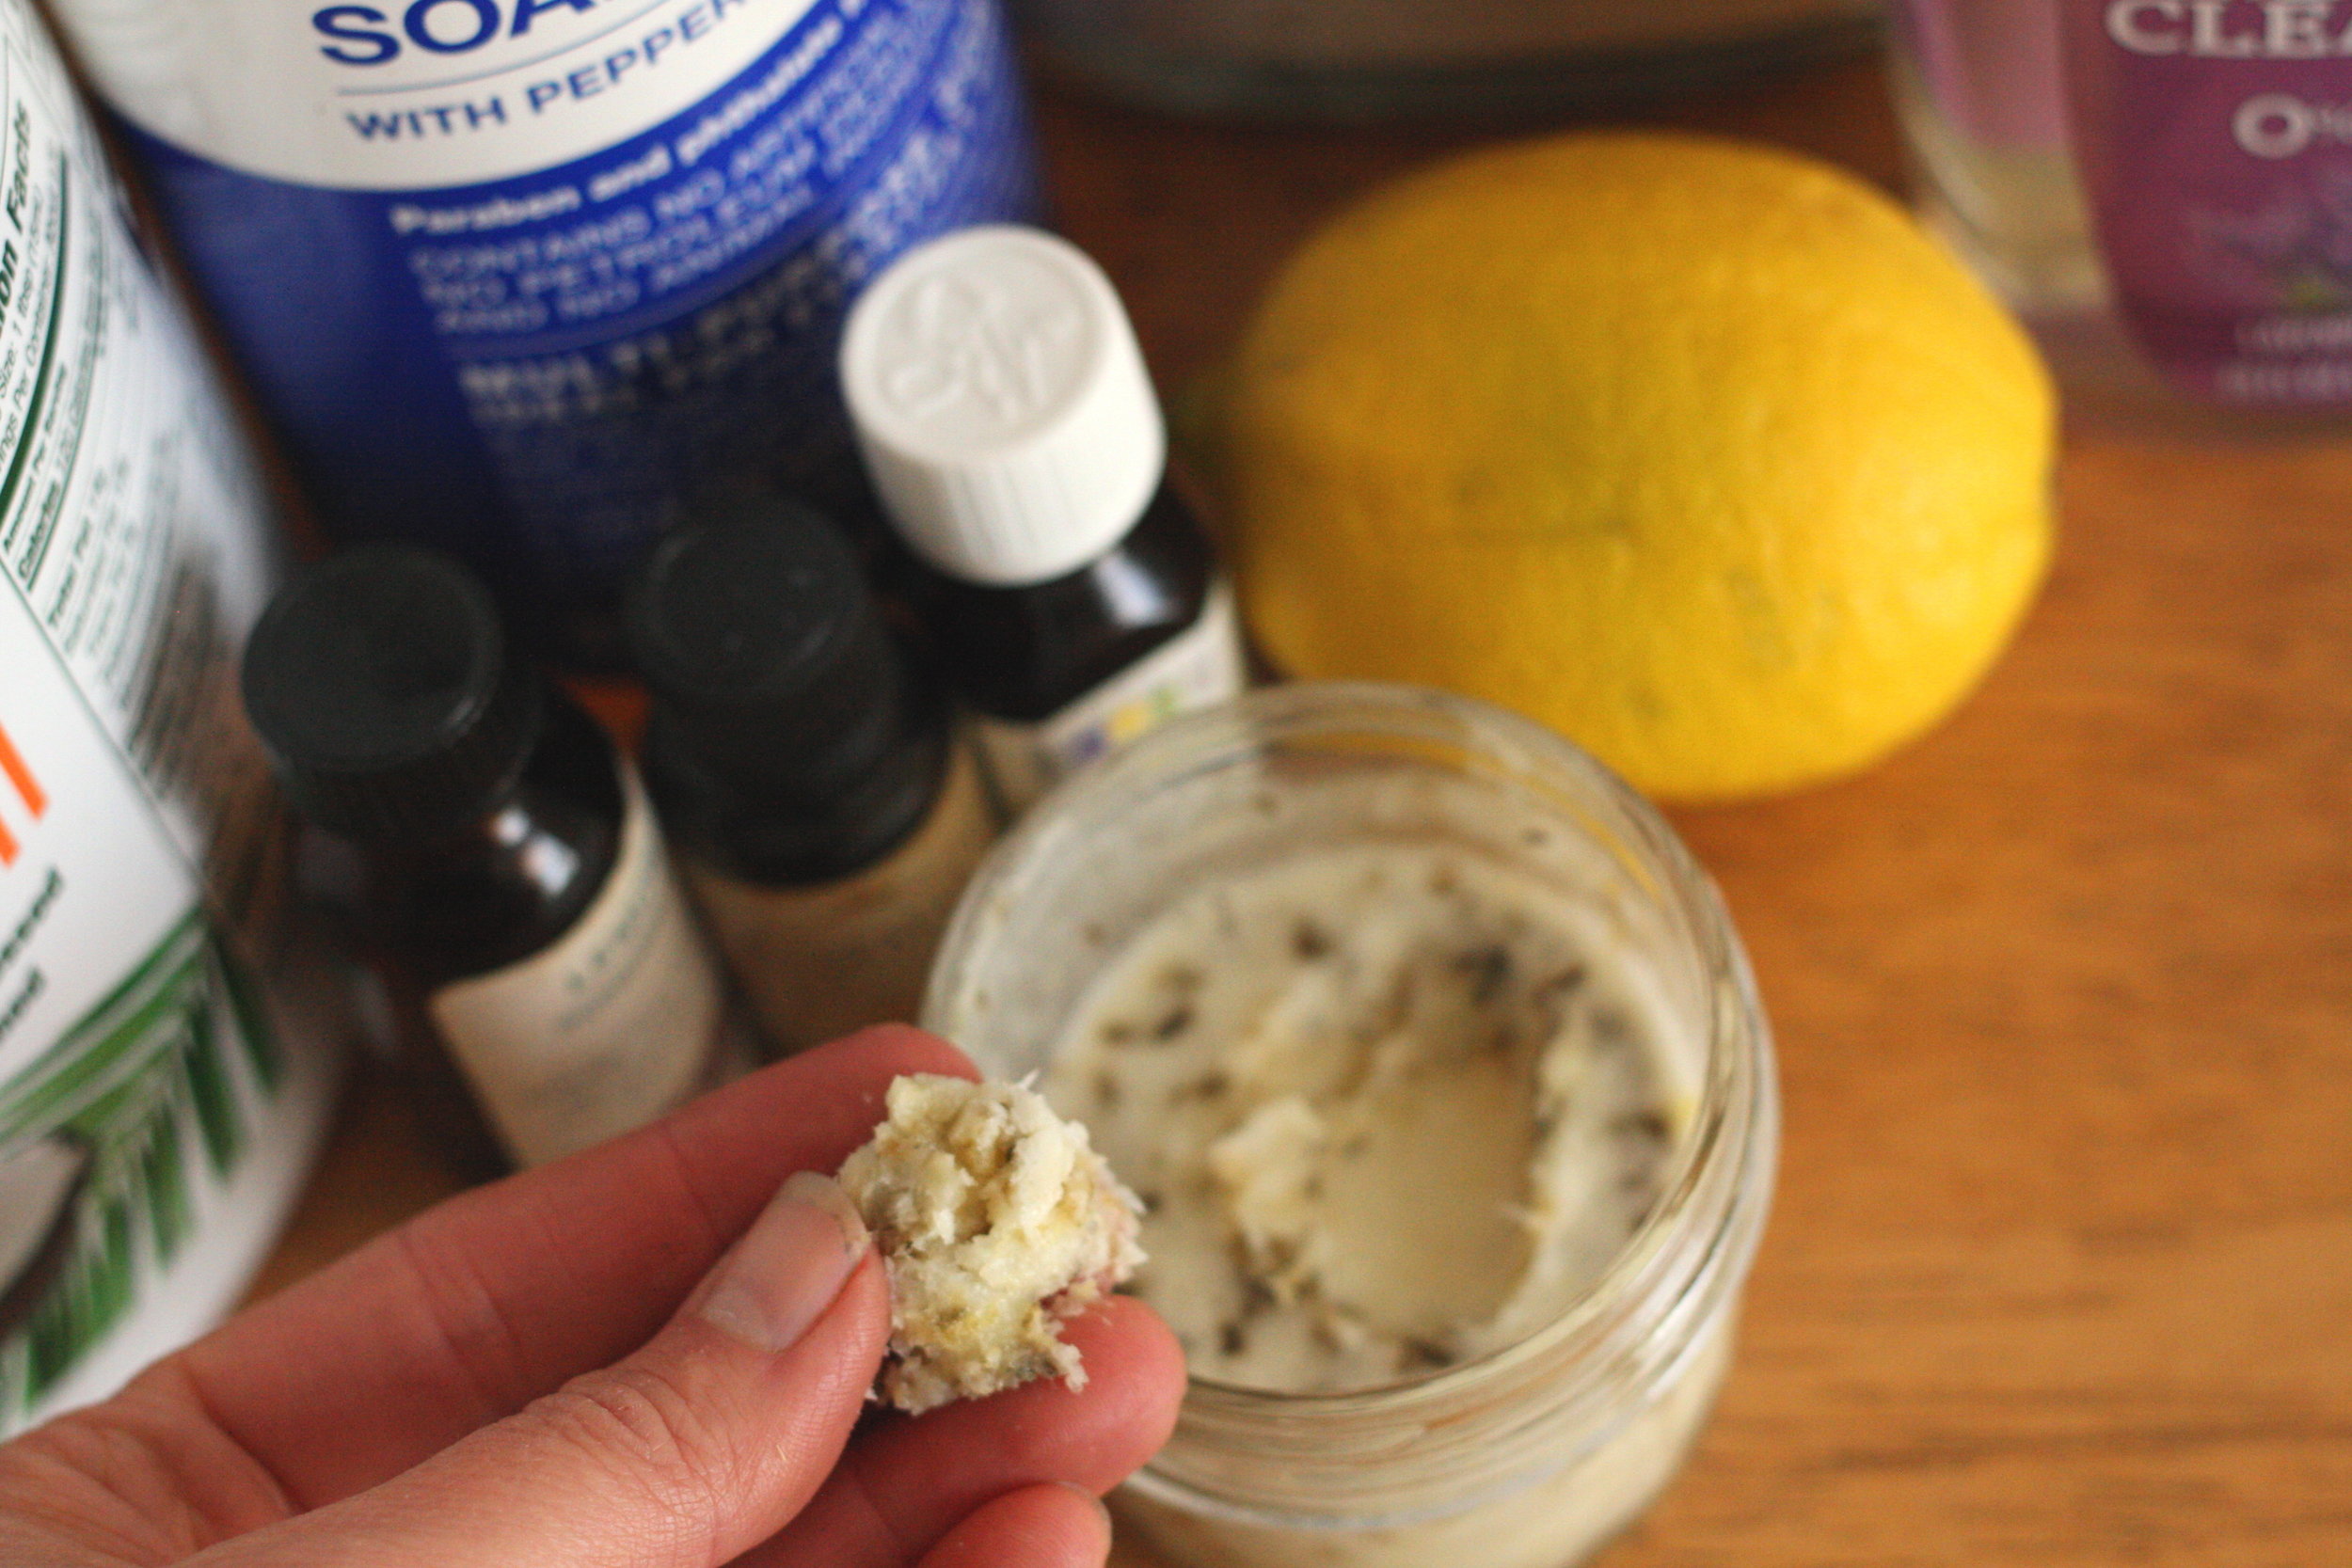
To Use:
Scoop dollop into hands using fingers or a spoon.
Scrub away!
Happy planting and I hope you enjoy the hand scrub!
What are you planting in YOUR garden right now?
-Lori
How to Grow: Zinnias
A classic cut flower!
How to Grow: Zinnias
Pronunciation: zinn-ee-ah
Ah, Zinnias… if I had a dollar for every time someone told me “I love Zinnias!”, I would be a rich woman. ;)
Zinnias are a well known, well loved, classic summer blooming flower. Their cheery faces are sure to brighten your day.
There is a lot to love about Zinnias… but unfortunately, they have a few strikes against them too.

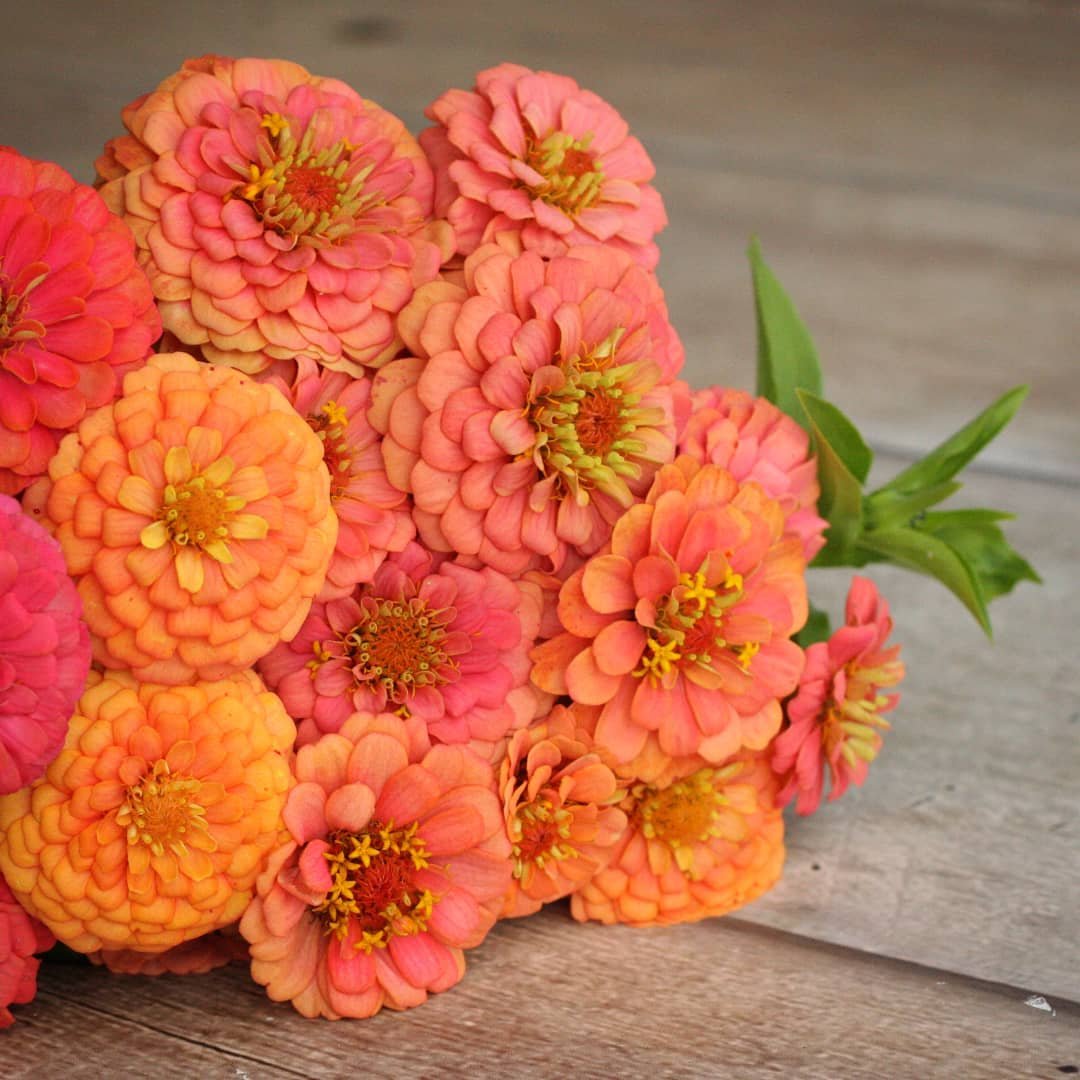
“Uproar Rose” Zinnia
Let’s look at the Pros and Cons of growing Zinnias for cut flower use.
PROS
They come in a multitude of colors and sizes (see photo below!).
They are easy to grow.
They grow from seed to bloom in about 80 days, which means you can direct sow them instead of having to grow transplants.
The plants are productive for a long period of time.
They are bright and cheerful in bouquets.
They have a good vase life of 5 -7 days, with proper harvest and care.
CONS
They are susceptible to Powdery Mildew and leaf spot (fungal and bacterial), which doesn’t always affect the flowers but leaves the plants looking nasty and unsightly.
They are a “dirty cut flower”, which means the stems will muck up the water in the vase in hours and shorten the vase life of all the flowers, unless preventative measures are taken (this is such a “con” for me that I don’t like to incorporate them into bouquets, as I feel they ruin the other flowers).
They are highly susceptible to Japanese Beetle damage.

“Benary’s Giants” Zinnias are truly giants!
CHOOSING SEEDS
Zinnias often come in bright, bold colors, but these days you can also find muted or dusky colors, which I appreciate. Some of those Zinnia colors are a little too intense for me!
Zinnias also come in a variety of flower sizes, ranging from the large “dahlia flowered” types (which I call “the poor man’s dahlia”. Ha!), to cute little button-like blooms. When choosing Zinnia seeds, be sure to choose varieties that will grow to at least 18” tall.
Here are a few of my favorite Zinnias to grow for cut flower use:
“Benary’s Giant” series (come in various colors - you can find my favorites here)
“Queen Red Lime”
“Oklahoma” series (cute little button blooms - you can find my favorites here)
“Uproar Rose” (expensive seed, but worth it for the disease resistance)
Our custom-blended cut flower Zinnia mixes, available only from Three Acre Farm:


“Queen Lime Orange” Zinnia
HOW TO SOW
Zinnias are heat loving, summer blooming flowers.
They do not like cold temperatures and can’t handle frost, so do not try to plant them too early in the season. They grow quickly when the soil warms up and begin to bloom around early/mid July.
Transplants or Direct Sow?
Zinnias are versatile and can be transplanted or direct sown.
Transplants are fine, but make sure the transplants are only a few weeks old (3-4 weeks). Larger, older transplants tend to be “root bound” and will be permanently stunted in their growth and vigor.
Personally, I find Zinnias grow faster, and are more productive and healthier when they are direct sown.
I’ve done trials, planting 4 week old transplants on the same day as direct sowing seeds. Within 2 months, the direct sown plants were BETTER than the transplanted plants.
You might as well save yourself some time and space, and simply direct sow the seeds!
To ensure I have blooms all summer, I usually so 2-3 sowings in the spring, spaced 2-3 weeks apart. For example, I start some seeds indoors in the spring. When they are ready to be transplanted out into the beds, I will also direct sow some seeds in another bed at the some time. 2-3 weeks later, I will direct sow more seeds.

PLANT SPACING
For cut flower use, Zinnias can be grown anywhere from 6-12” apart.
Closer spacing encourages longer, straighter stems… but too close and you risk increased disease problems. You’ll have to experiment and find out what works in your area!
GROWING ON
If flowers are harvested and spent blooms are “deadheaded” (removed), the plants will continue to send up blooms until frost or cold weather arrives (or Powdery Mildew takes them out!).
Remember: The whole point of growing flowers for cutting is to CUT ALL THE BLOOMS! ;) Keep cutting or the plants will stop producing.

STAGE OF HARVEST
Zinnias should be harvested when they are fully open. They will not continue to open after being cut.
It’s VERY IMPORTANT the bloom passes “The Wiggle Test”. Blooms that don’t pass the test will not hold up well.
To perform the test, grasp the stem about 8” below the bloom and wiggle the stem. If the bloom flops around, it’s not ready to harvest. If the stem remains rigid, the bloom is ready to be harvested.
As with all cut flowers, be sure to cut deeply into the plant between 2 sets of leaves, cutting stems at least 18” long. Deep cuts signal the plants to produce MORE flowers to replace the one you cut.

POST HARVEST CARE
Zinnias do NOT like to be placed in a cooler. After harvesting, allow them to rest in a clean bucket in a cool, dark spot, like a basement.
Zinnias are a “dirty flower” that will muck up the vase water unbelievably fast. Dirty water breeds bacteria, the enemy of cut flowers. Bacteria significantly reduces vase life.
To combat this, it’s important to use commercial flower food (easily found on Amazon - I like “Floralife”) or add 1-2 drops of bleach to the bucket or vase. Just a few drops, not an entire teaspoon. Too much bleach will actually bleach the color from the flowers! I know this from experience ;)
QUESTIONS?
Questions or comments? Leave them below and I’ll get back to you!
READY FOR MORE?
If you’re serious about growing the garden of your dreams this year, register for my online course, “Backyard Cutting Garden 101”. You’ll find everything you need to plan, grow, harvest and arrange your stunning blooms. I can’t WAIT to help you grow! Click on the button below for all the details.
How to Create a New Growing Area
My step-by-step guide to creating new growing areas!
How to Create a New Growing Area
Did you know fall is the perfect time to prepare a new growing area for the following year? It’s true!
A little forethought and cleverness can save you hours, days and weeks of backbreaking work in the future.
Today, I’m going to show you how we transformed an utterly barren, unproductive area of our farm into a wonderland, bursting with blooms.
Before I show you the Step-By-Step process we used, I want to give you a bit of the back story.
The back corner of our farm was part of a crop field that was used to grow Round-up Ready corn/soybeans for 30+ years. Over those years, the sandy soil became depleted and by the time we moved here, it was dead. No matter how much I dug, I could not find a single earthworm or creepy crawly. No signs of life. We could not even get weeds to grow for the first couple of years.
Here’s what it looked like:

We called it “The Barren Wasteland”. We knew it was going to take a LOT of time and work to bring this land back to life... but we DID IT!!! Let me show you how.
Step One: Cover the Ground to Kill the Weeds
If you want to plant a garden next year, RIGHT NOW is the time to start preparing that area!
On our farm, we avoid tilling as much as possible. While there is a time and place for tilling the ground, over time, it damages the soil structure… and this soil was already so damaged.
Instead, we use a method called “Occulation”, which involves covering the desired area with an opaque covering, such as a tarp. This method is easy and effective. First, mow/brushhog the area as short as possible. Then it takes only a few minutes to spread a tarp and weigh it down with rocks or sandbags. Then you simply leave it in place for a couple weeks or months until the vegetation underneath is dead.

We often spread the tarps in the late summer/early fall over spaces we want to plant the FOLLOWING spring. When you pull back the tarp in the spring, you have a growing area that is ready to go, no tilling needed! You can see what it looks like in the photo below, after we pulled back the tarps.

Step Two: Lay Down Cardboard Over the Growing Area
Please tell me I’m not the only one with a basement full of boxes! Ha! But seriously, we stash cardboard in our barn for projects like this. I had 4 years worth of stashed cardboard at my disposal and we used all of it.
A thick layer of cardboard helps to create a weed barrier so your desired plants can get established and not have to battle weed pressure. The cardboard eventually breaks down and turns into a highly desirable habitat for earthworms and other beneficial critters.
It took a couple hours, but we completely covered this area with cardboard. Hot tip: Don’t attempt this on a windy day ;) We had to weigh it down as we worked to keep it from flying away. Also, it’s helpful if you can wet down the cardboard with a hose while you’re working. But don’t worry if you can’t.

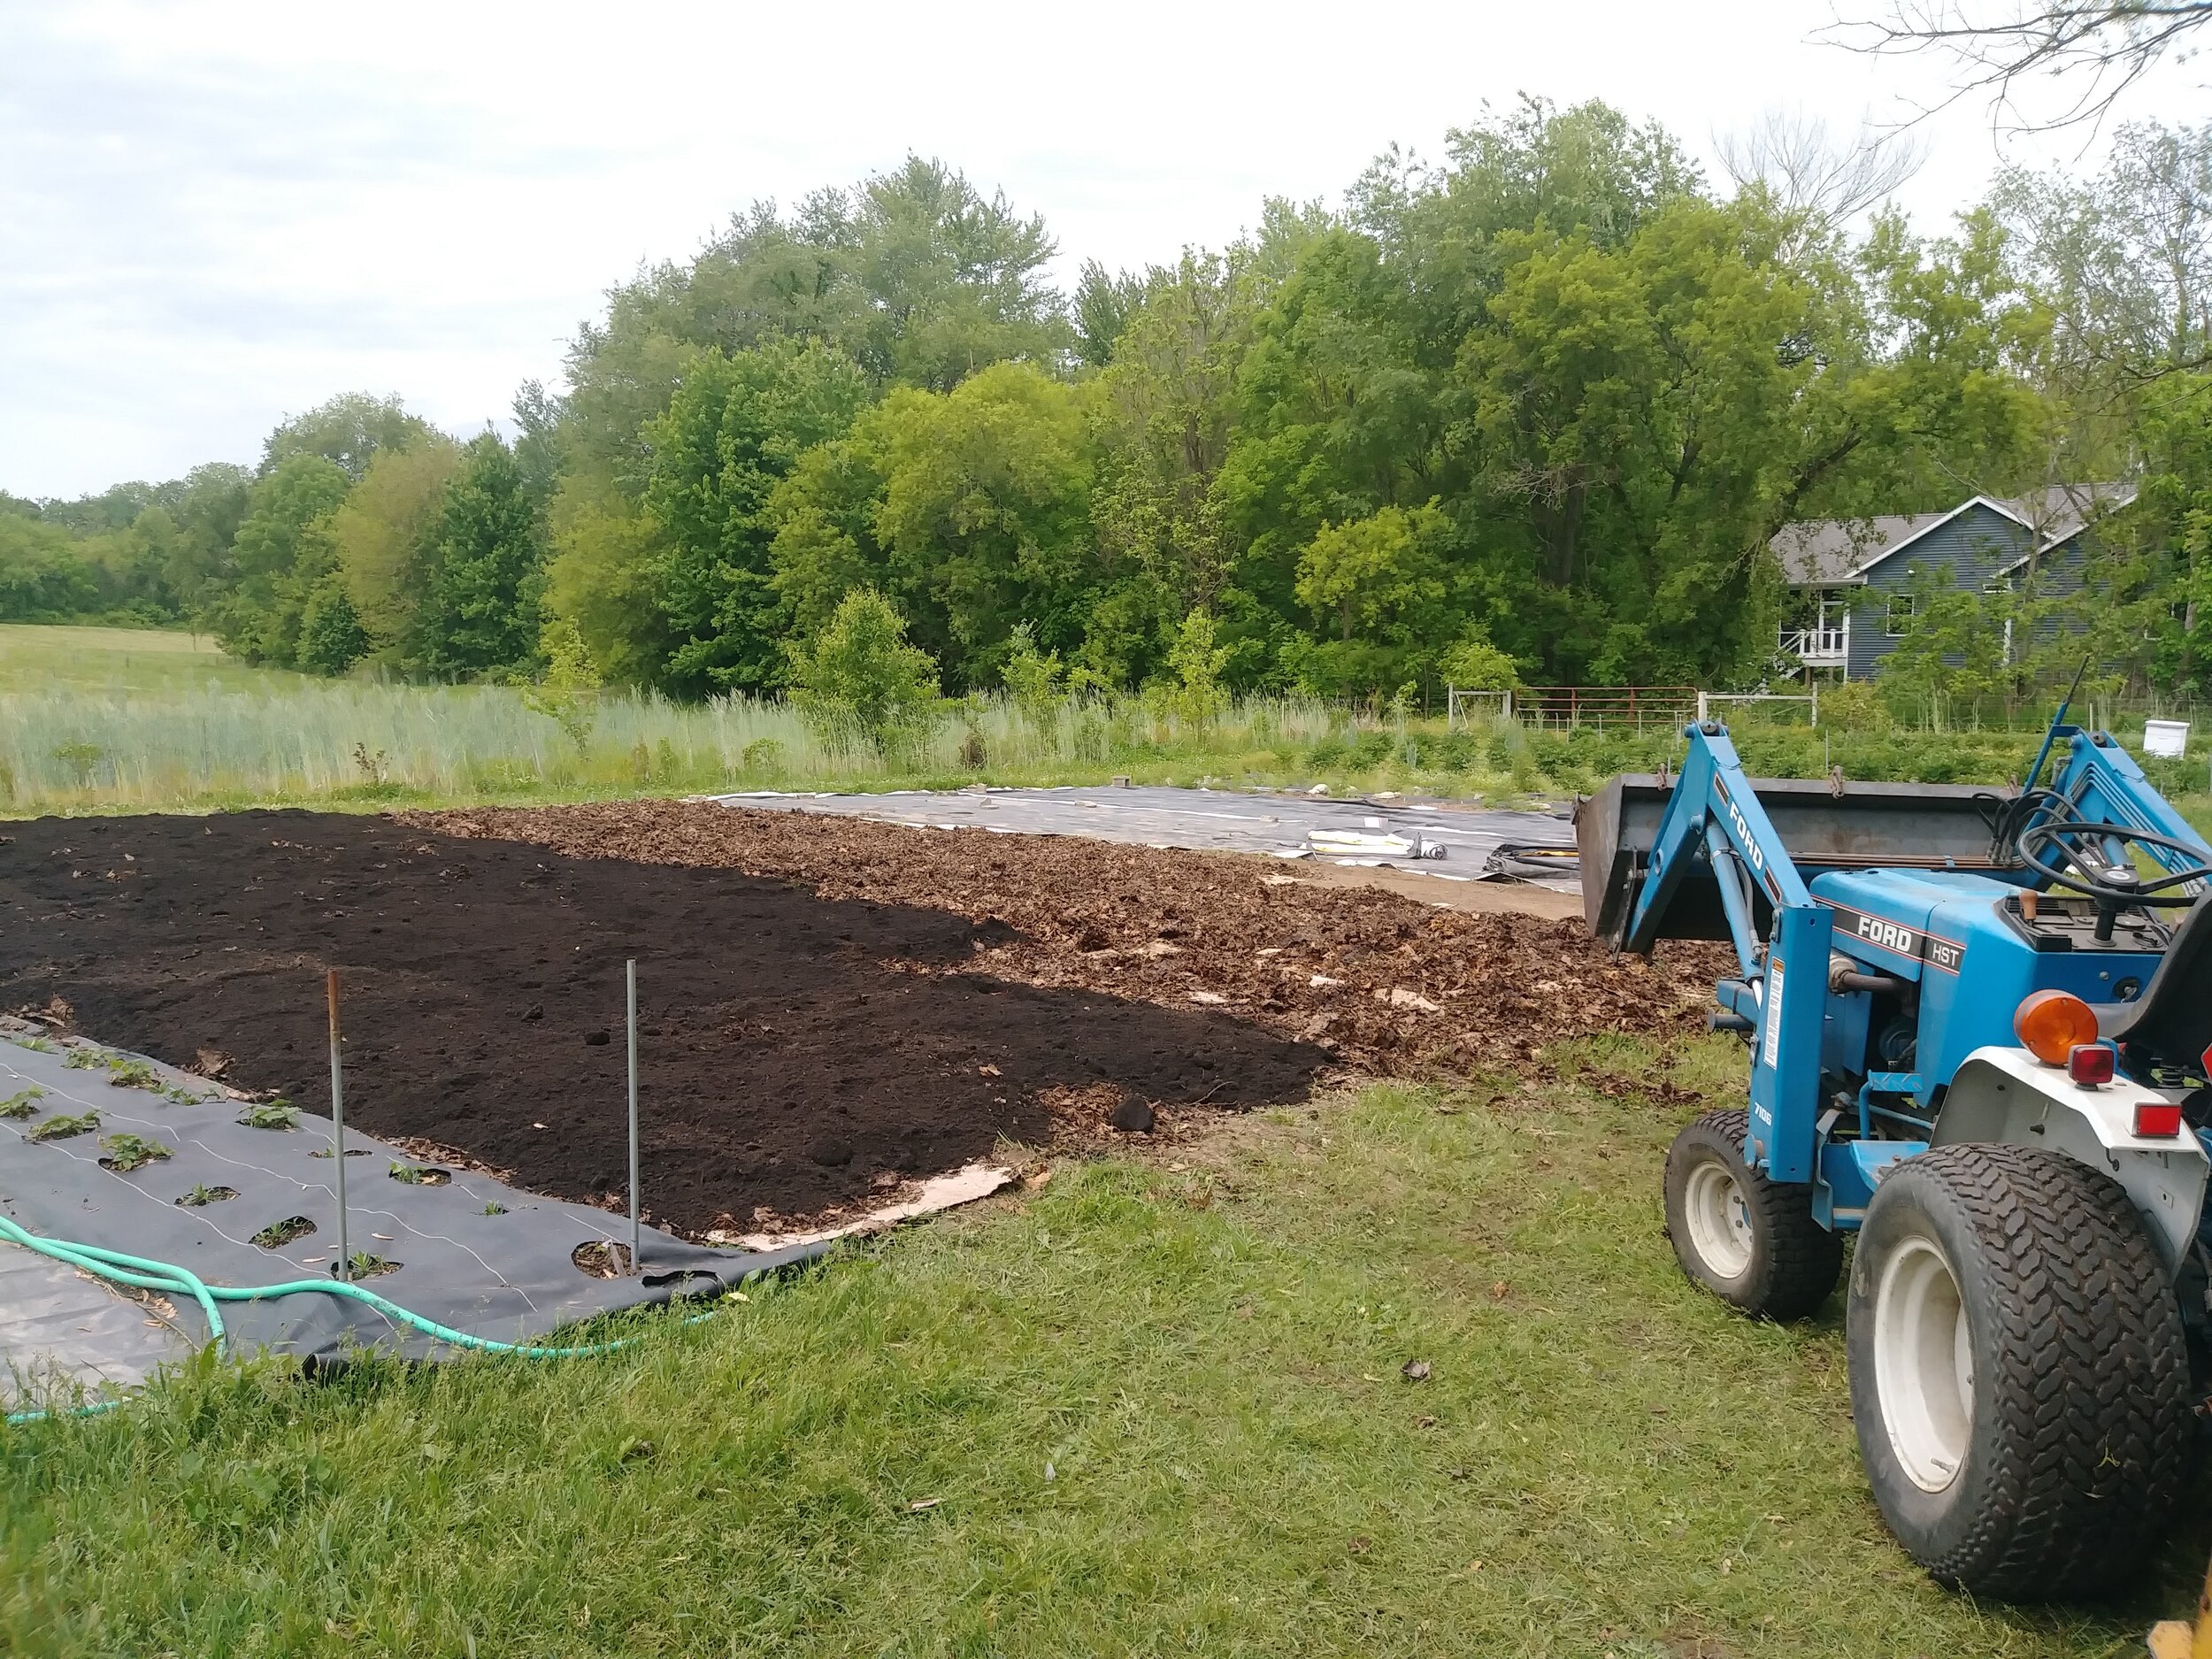
Step 3: Cover Cardboard with Composted/Old Leaves
If you have access to leaves in the fall… DON’T GET RID OF THEM! Composted, broken down leaves are perhaps nature’s most perfect FREE fertilizer. Our neighbors have several large maple trees, and the previous fall, we gladly (and eagerly!) took ALL of their leaves and made a massive leaf pile to use in our growing beds… and had tons of fun playing in it for a few weeks. Remember how much fun it was to play in a leaf pile?!? Still fun when when you’re 40+ years old ;)
The trick is to turn the leaf pile a few times over the months to encourage them to begin breaking down and decomposing. Otherwise, the leaves can begin to form an impenetrable mat that repels water.
By the following spring, the leaf pile was absolutely crawling with earthworms and other beneficial organisms. When we spread the leaves over the cardboard, we were actually importing new life into the growing area!


Step 4: Cover Leaves with Compost
Next, we covered the leaves with a 6 inch layer of compost. “Compost” is a loose term and can mean many different things, so I will point out that this was well aged and broken down compost made from mostly vegetative matter, NOT animal manures.

We planted our seeds and seedling directly into this compost. If you are using composted animal manures, you may need to add some soil to the mix, as the compost may be too rich or “hot” and kill your seedlings. (We do use composted animal animal manure on our farm (goat and chicken), but always age it for a minimum of 2 years before using it)
I have a simple test for knowing when compost is ready to be used in a garden. If you would be willing to stick your hands in it and bring it up to your nose to smell it’s sweet earthy scent… then it’s ready. If not (or smells gross!), it’s too fresh and needs more time to break down.

Step 5: Plant Your Seedlings and Be Proactive About Weeds
Here is an infallible truth: If you leave soil exposed, it WILL grow weeds. Nature loathes bare soil , which causes erosion, so nature created the perfect solution to combat erosion: Weeds. Yup, that’s right. Weeds DO serve a purpose ;)
If you don’t want your growing area to be overrun with weeds, YOU HAVE GOT TO COVER THE SOIL. You can cover the soil with straw mulch, woodchip mulch, grass clippings, pine needles, or whatever you have handy in your growing area. Or you can use landscape fabric like we did, with holes for the seedlings. Yes, some weeds will also grow in those little holes, but it makes things much more manageable.
Want to see how we make the holes in the landscape fabric? You can see a video in this blog post.
You can plant seedlings/plugs in the growing area or simply direct sow the seeds.
We also laid drip tape for irrigation in the growing area. You can put the drip tape UNDER or OVER the landscape fabric. UNDER is preferable, but the timing didn’t work out and I needed to get the seedlings in the ground before we had a chance to run the drip tape under the fabric. It still works great, since the fabric is water permeable.

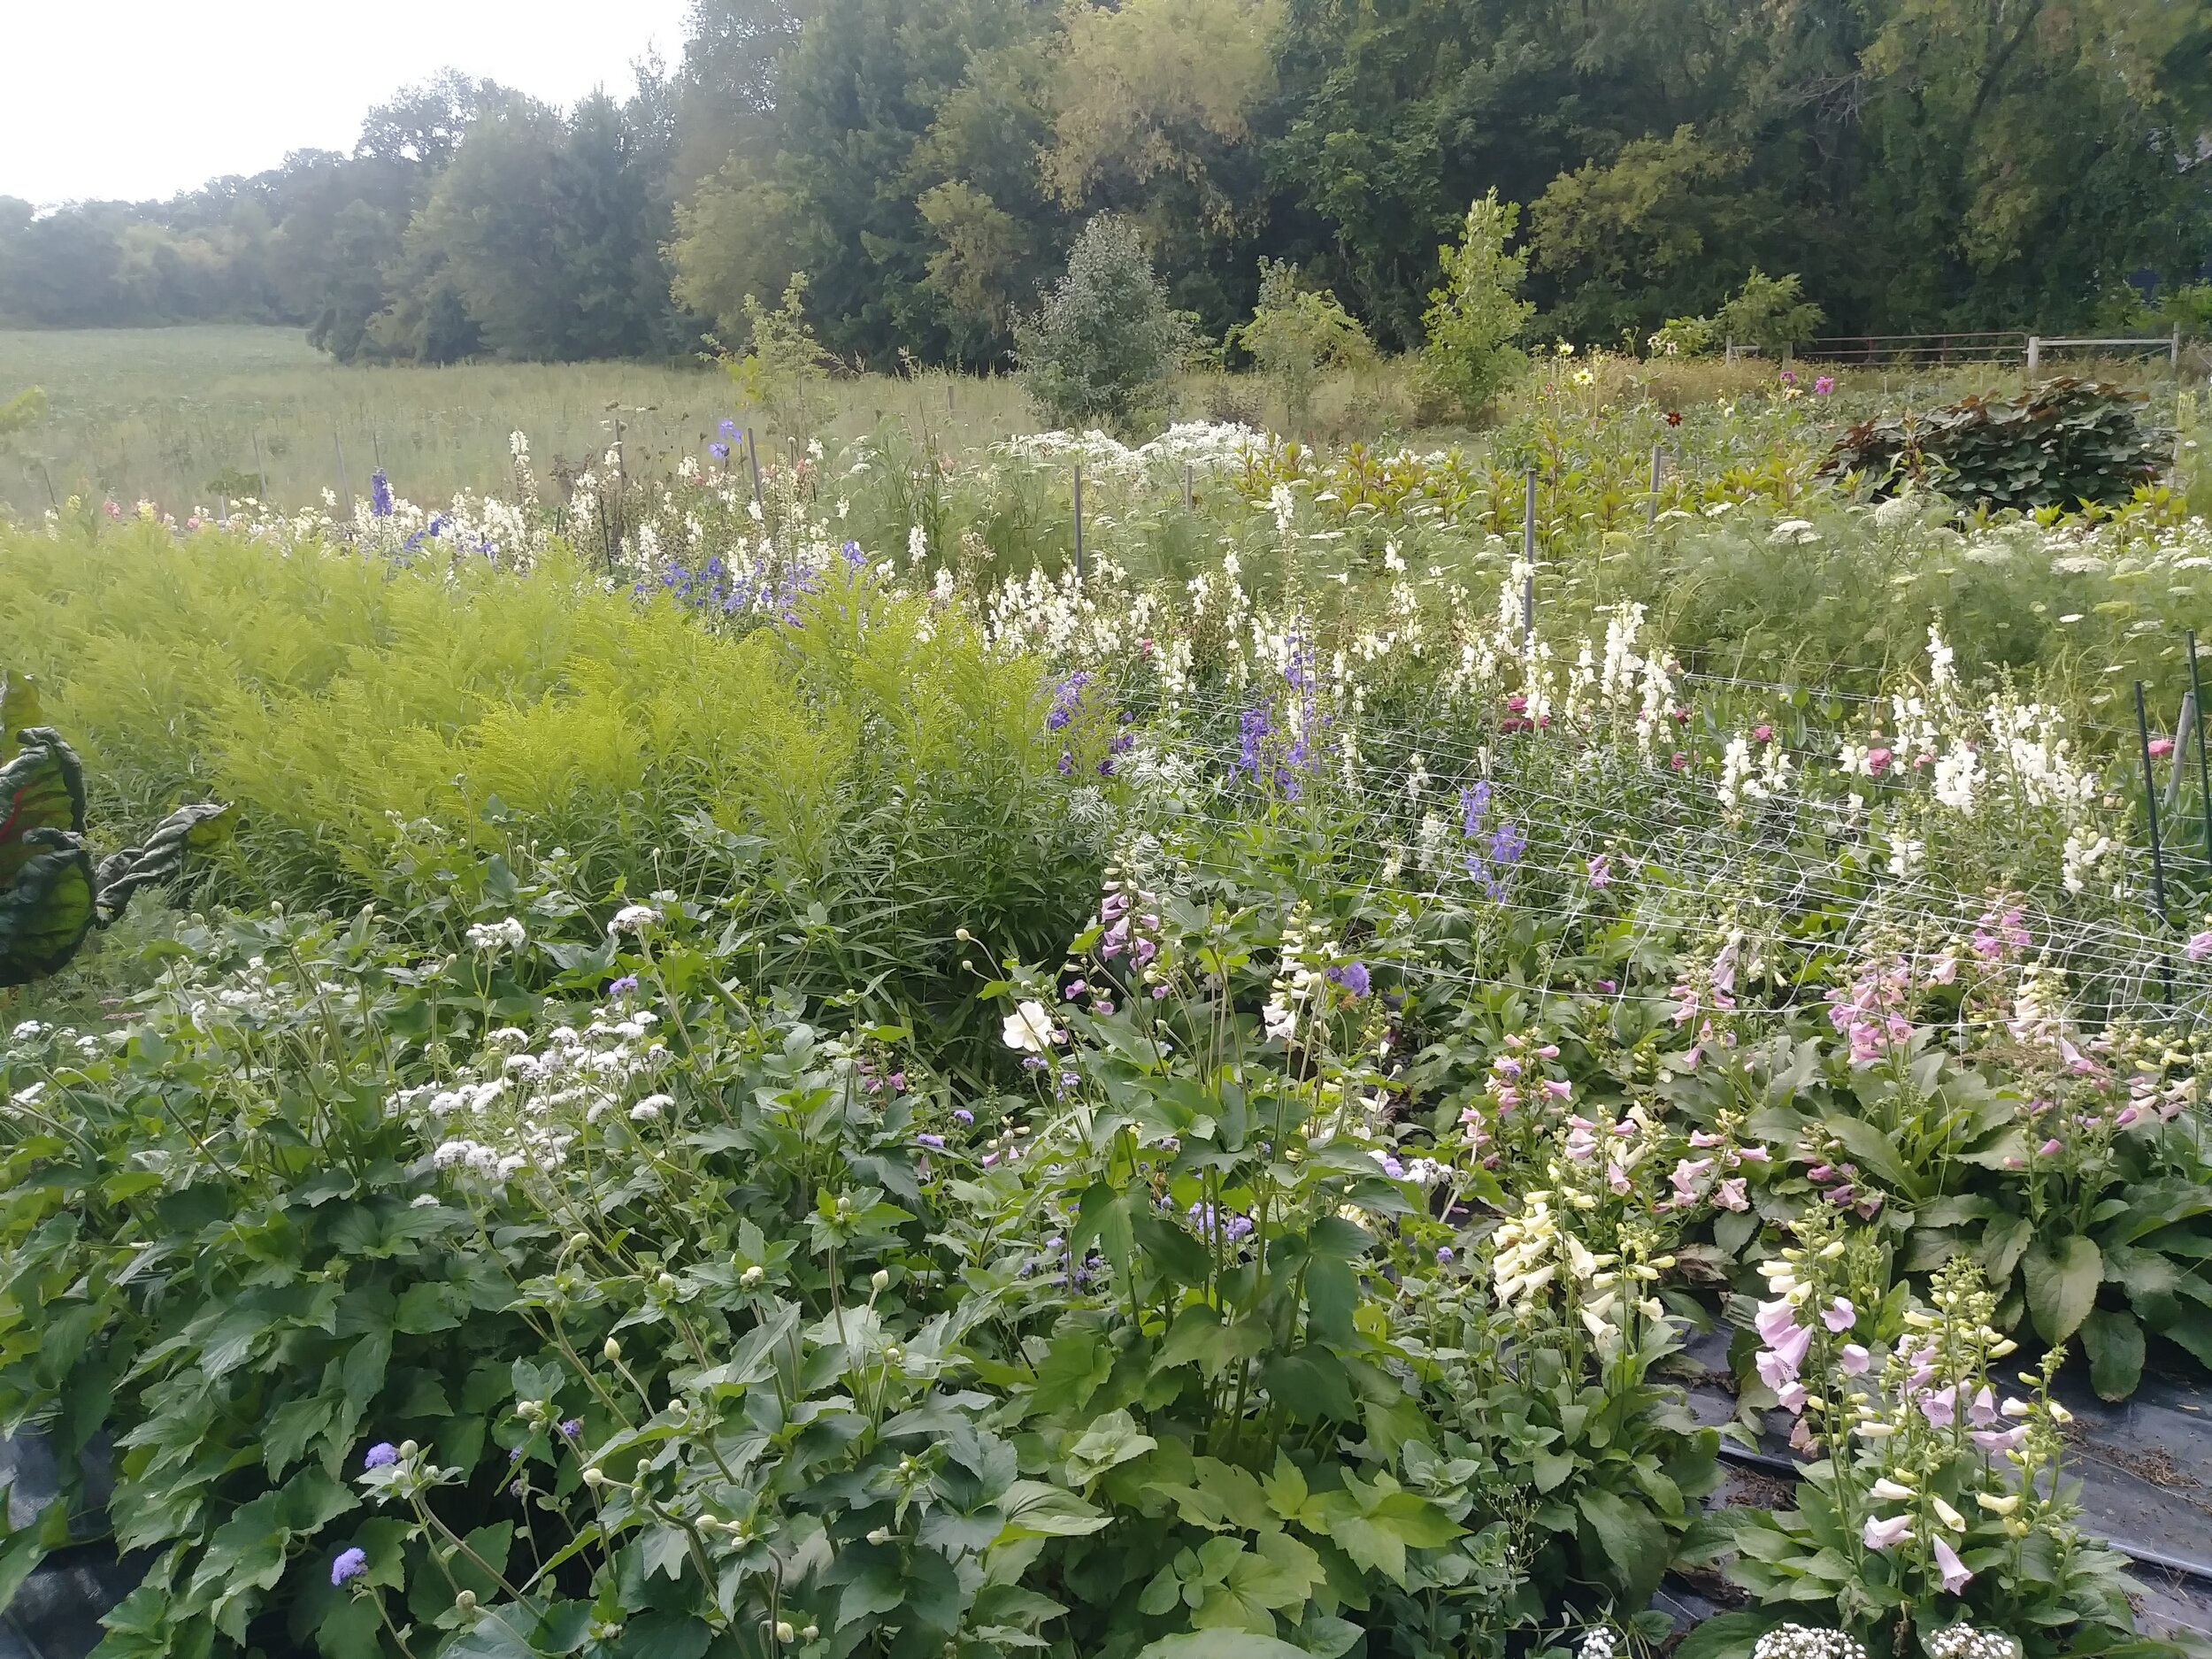
The End Result….
Here is a photo taken from the same spot as the one above, 2 months apart…

Eventually, I’d like to transform this area into a perennial garden, but right now, it’s an eclectic mix of annuals, biennials and perennials.
Instead of calling this area “The Barren Wasteland”, like we did for years, we now call it “The Secret Garden”, as it’s a growing space just for me to play and experiment.
It’s been incredibly productive and keeps cranking out more blooms than I can possibly use!
Here’s what I’ve got growing in the Secret Garden, in no particular order ;)
Rudbeckia (several kinds)
Gypsophila (“Million Star”)
Japanese Anenome (“Honorine Jobert”)
New England Aster
Obedient Plant
Lisianthus (several kinds)
Feverfew (several kinds)
Echinacea (several kinds)
Euphorbia (“Snow on the Mountain”)
Goldenrod (“Moonlight Glory” and “Romantic Glory”)
Delphinium (several kinds)
Aruncus
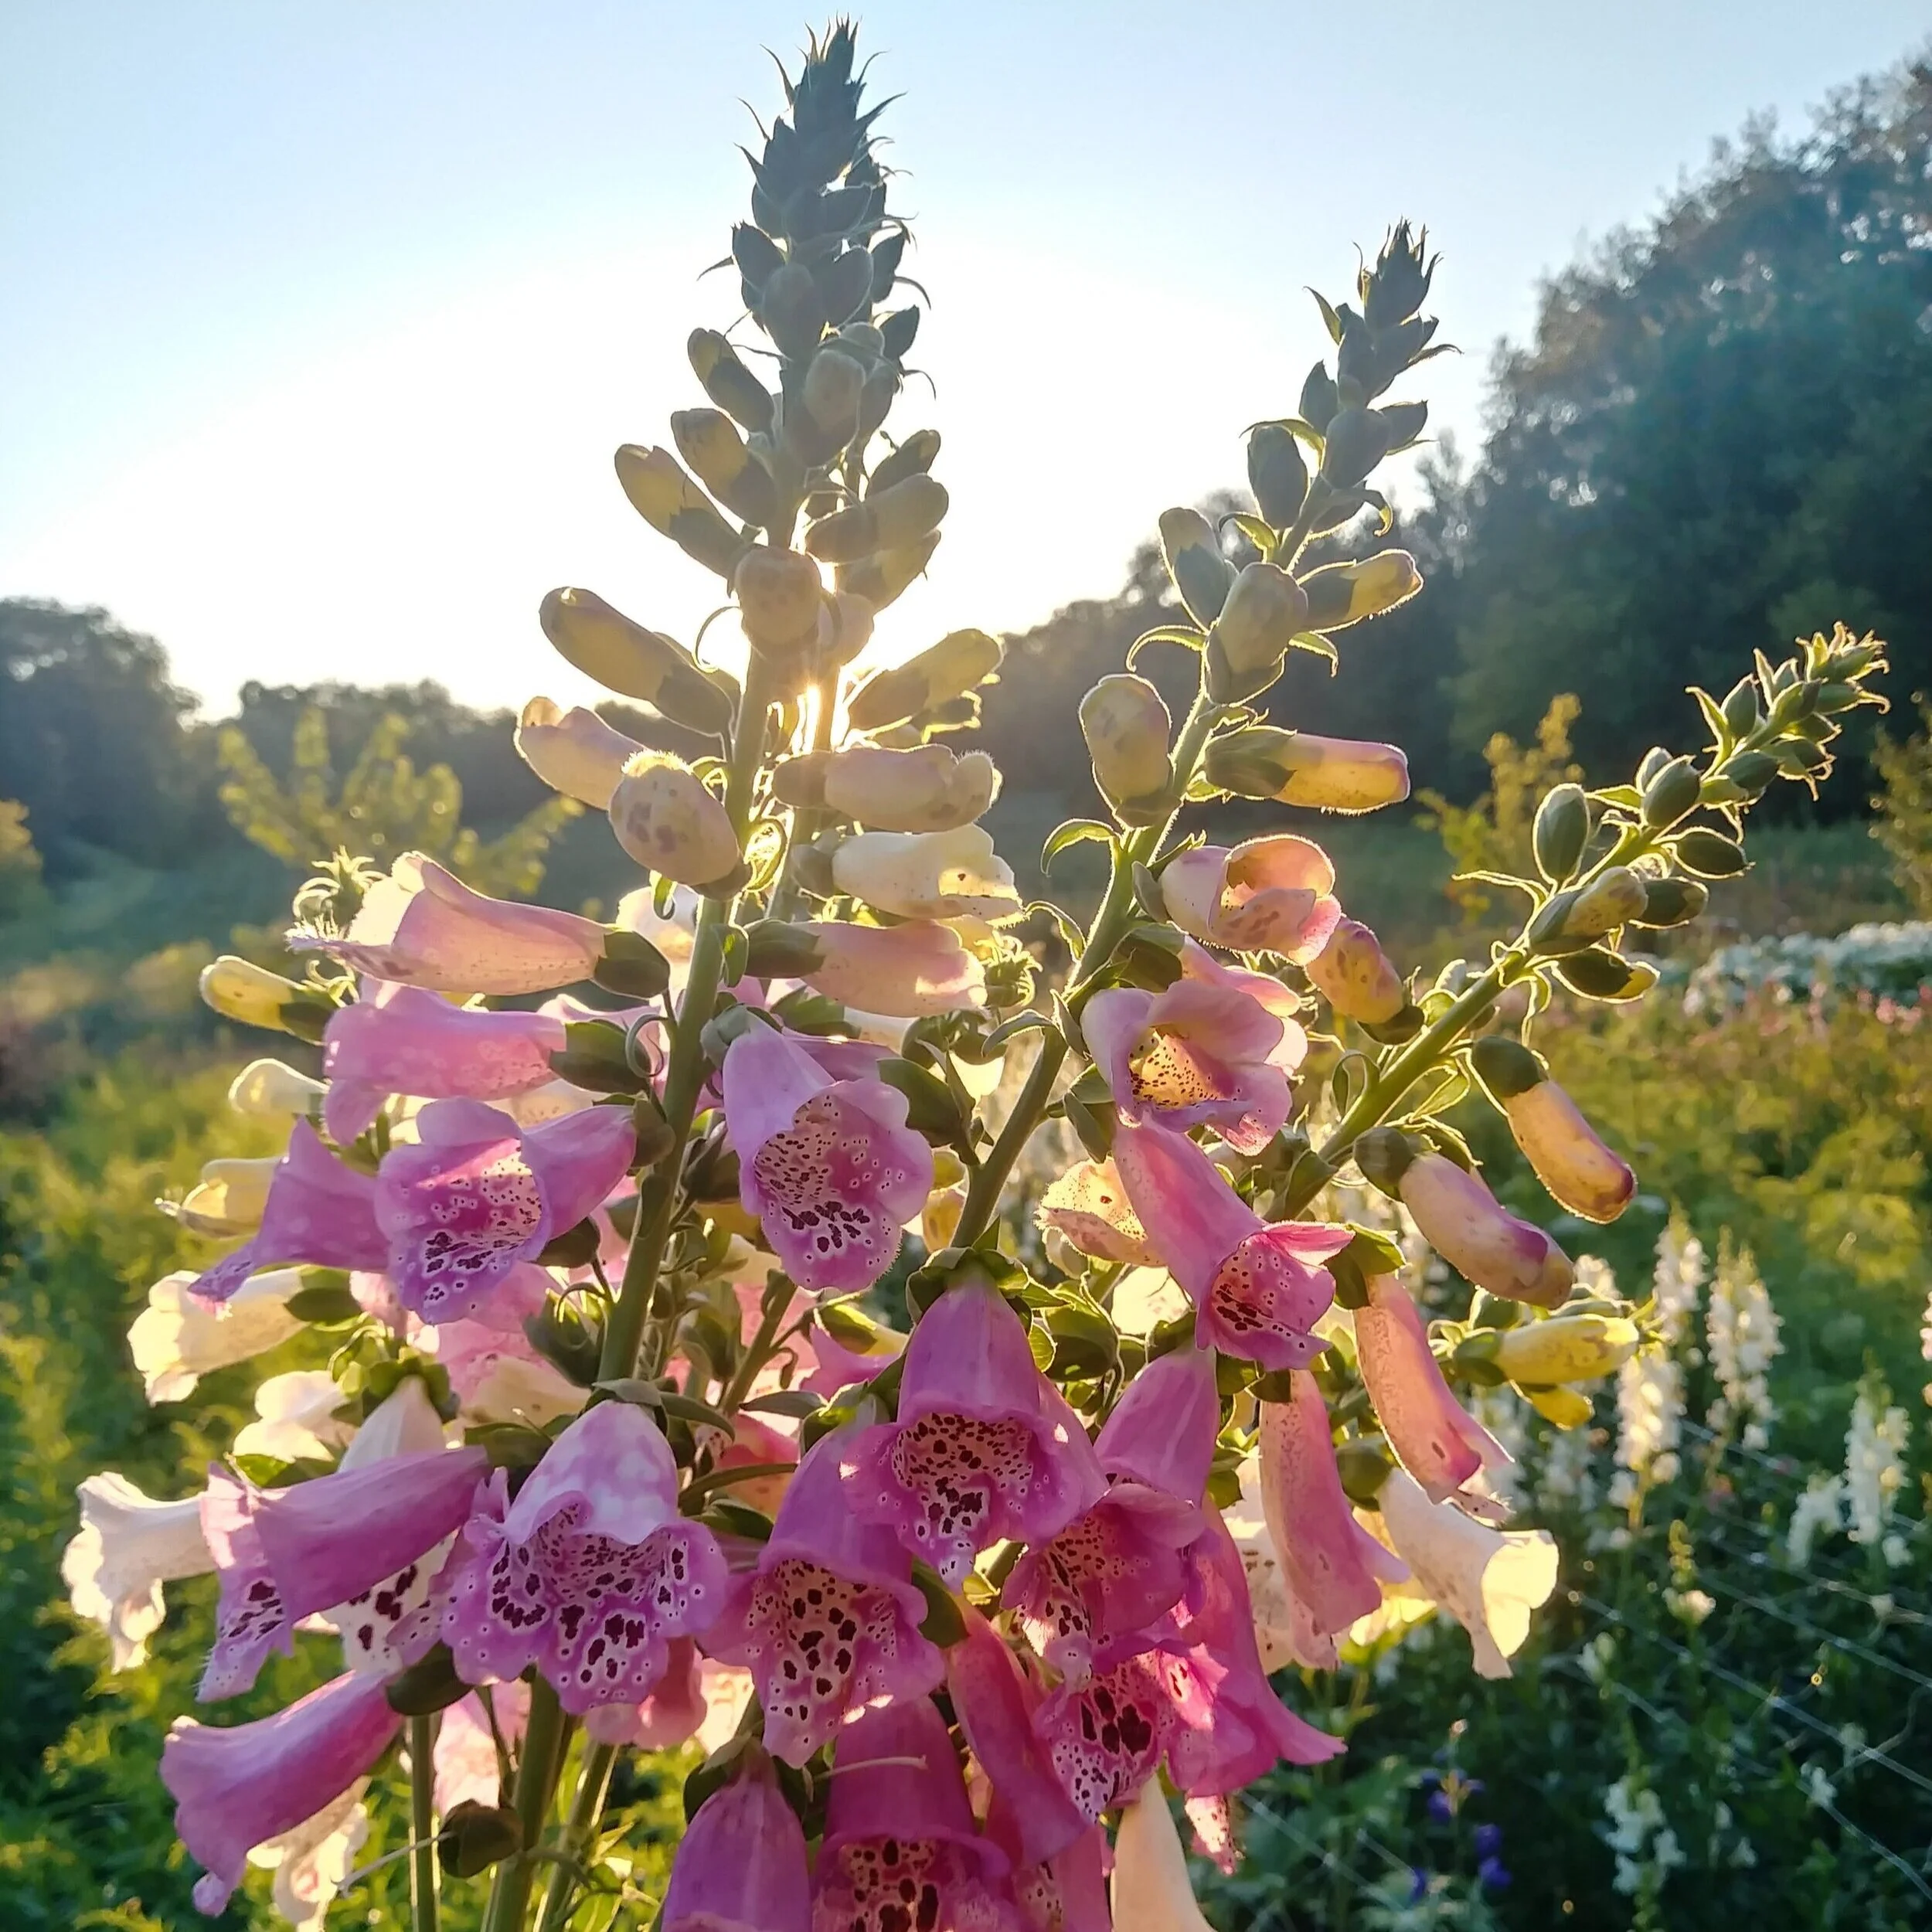
Foxglove
Lace Flower
Ammi (“Green Mist”, “Select White” and “Dara”)
Snapdragon (several kinds)
Sweet William
Scabiosia (several kinds)
Cosmos (several kinds)
Statice (several kinds)
Gomphrena (several kinds)
Celosia (several kinds)
Shiso/Perilla
Strawflower (several kinds)
Trachelium
Sea Holly
Dahlias (grown from seed, not tubers)


I hope this post inspires you to get out there and prepare your own growing area. Remember, fall is the PERFECT TIME to start planning and preparing for next season!
The Great "Kiddie Pool" Tulip Experiment (A.K.A. "Lori vs Voles: Part 3")
The results of my tulip planting experiment!
The Great “Kiddie Pool” Tulip Experiment
***This is my original social media post I published on November 26, 2019.***
***Read all the way to the bottom to see the results of the experiment!***
Welcome to another episode of “Lori vs. Voles”. 😂👊
Don’t know what voles are? Lucky you.🐁 They are mouse-like critters that tunnel around under the snow all winter long (where the barn cats can’t find them), decimating everything in their path.
One of their favorite foods? Tulip bulbs.🌷
We have a TERRIBLE time with voles around here. I’m about to give up on planting them altogether, but my Dutch blood wants tulips SO BAD.
Here's my track record for "Lori vs. Voles".
1st Cut Flower Tulip Planting Attempt: 125 bulbs planted. Voles ate 122 bulbs. 😭
2nd Cut Flower Tulip Planting Attempt: 500 bulbs planted. Covered with wire mesh to prevent voles. Voles still managed to eat 250 of them. 😭
This year, I’m trying ONE LAST TIME. This method will prove to be either a brilliant success 🙌🙌🙌🙌... or a spectacular failure 💥💥💥. Tune in next spring to find out! 😂
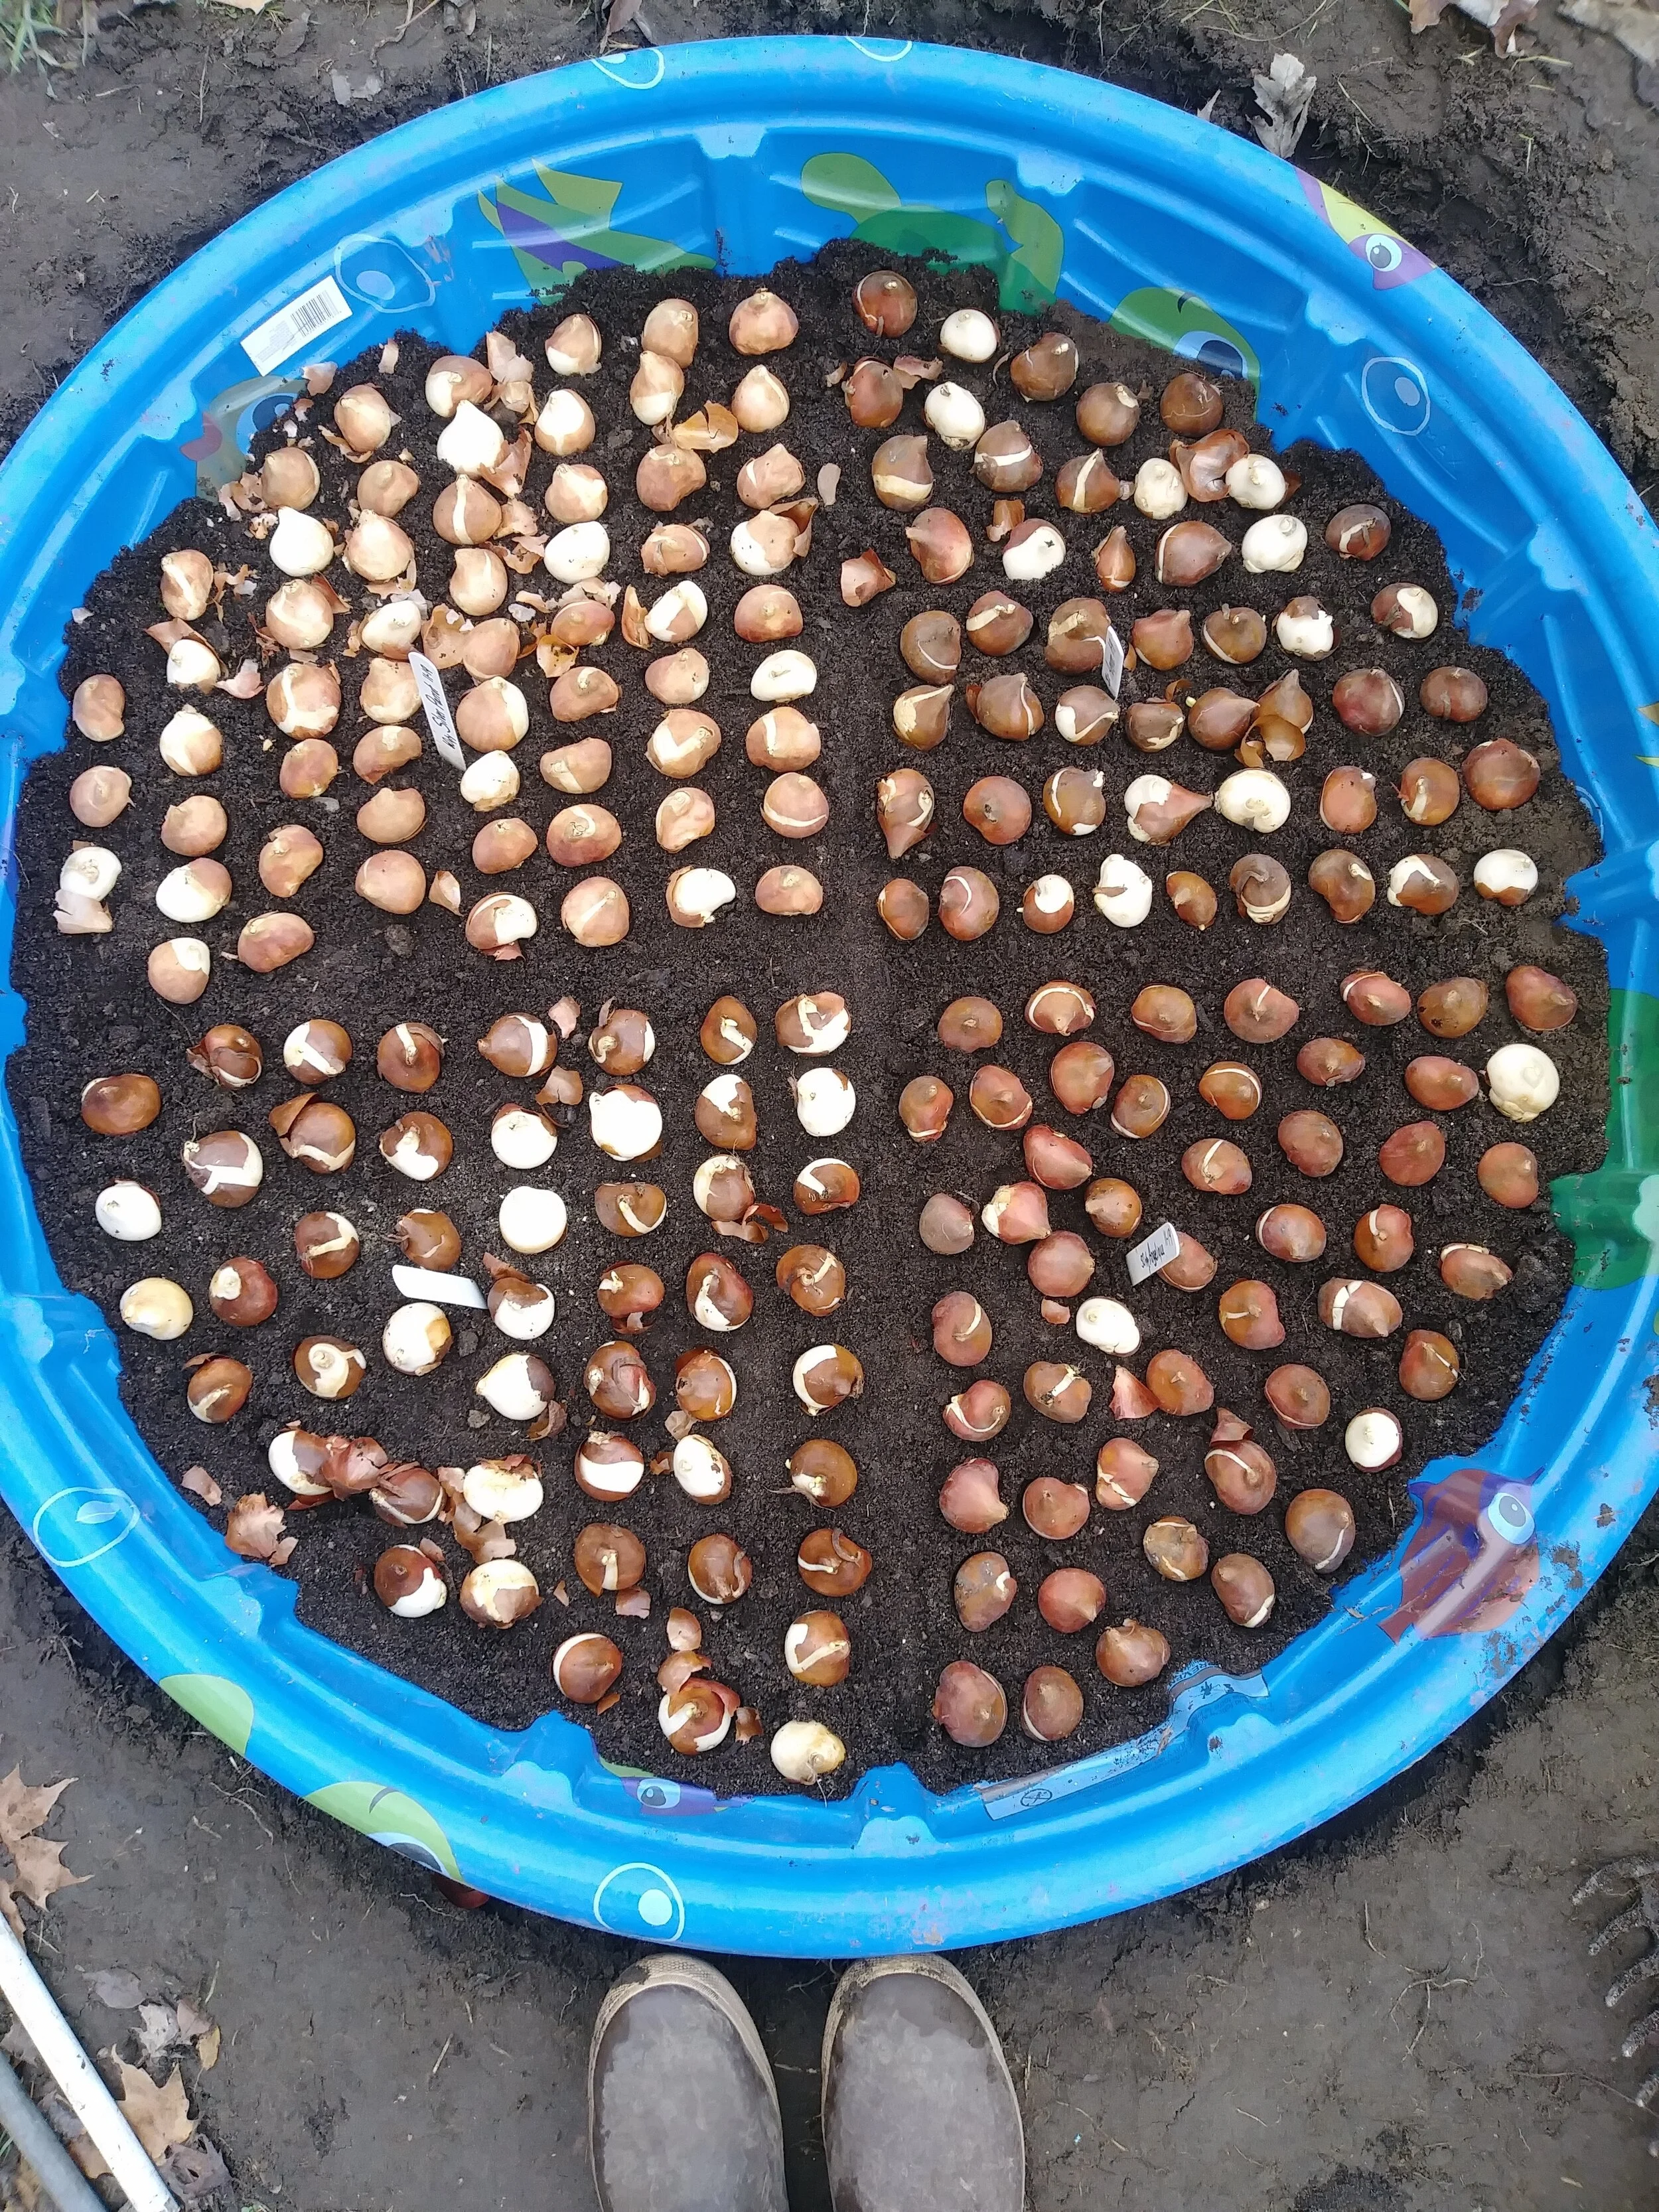
I’m trying the “Kiddie Pool Method”. Actually, it’s not a method. It’s just something I made up. 😉 The tulips will be completely protected on the top, sides and bottom.
Here’s what I did:
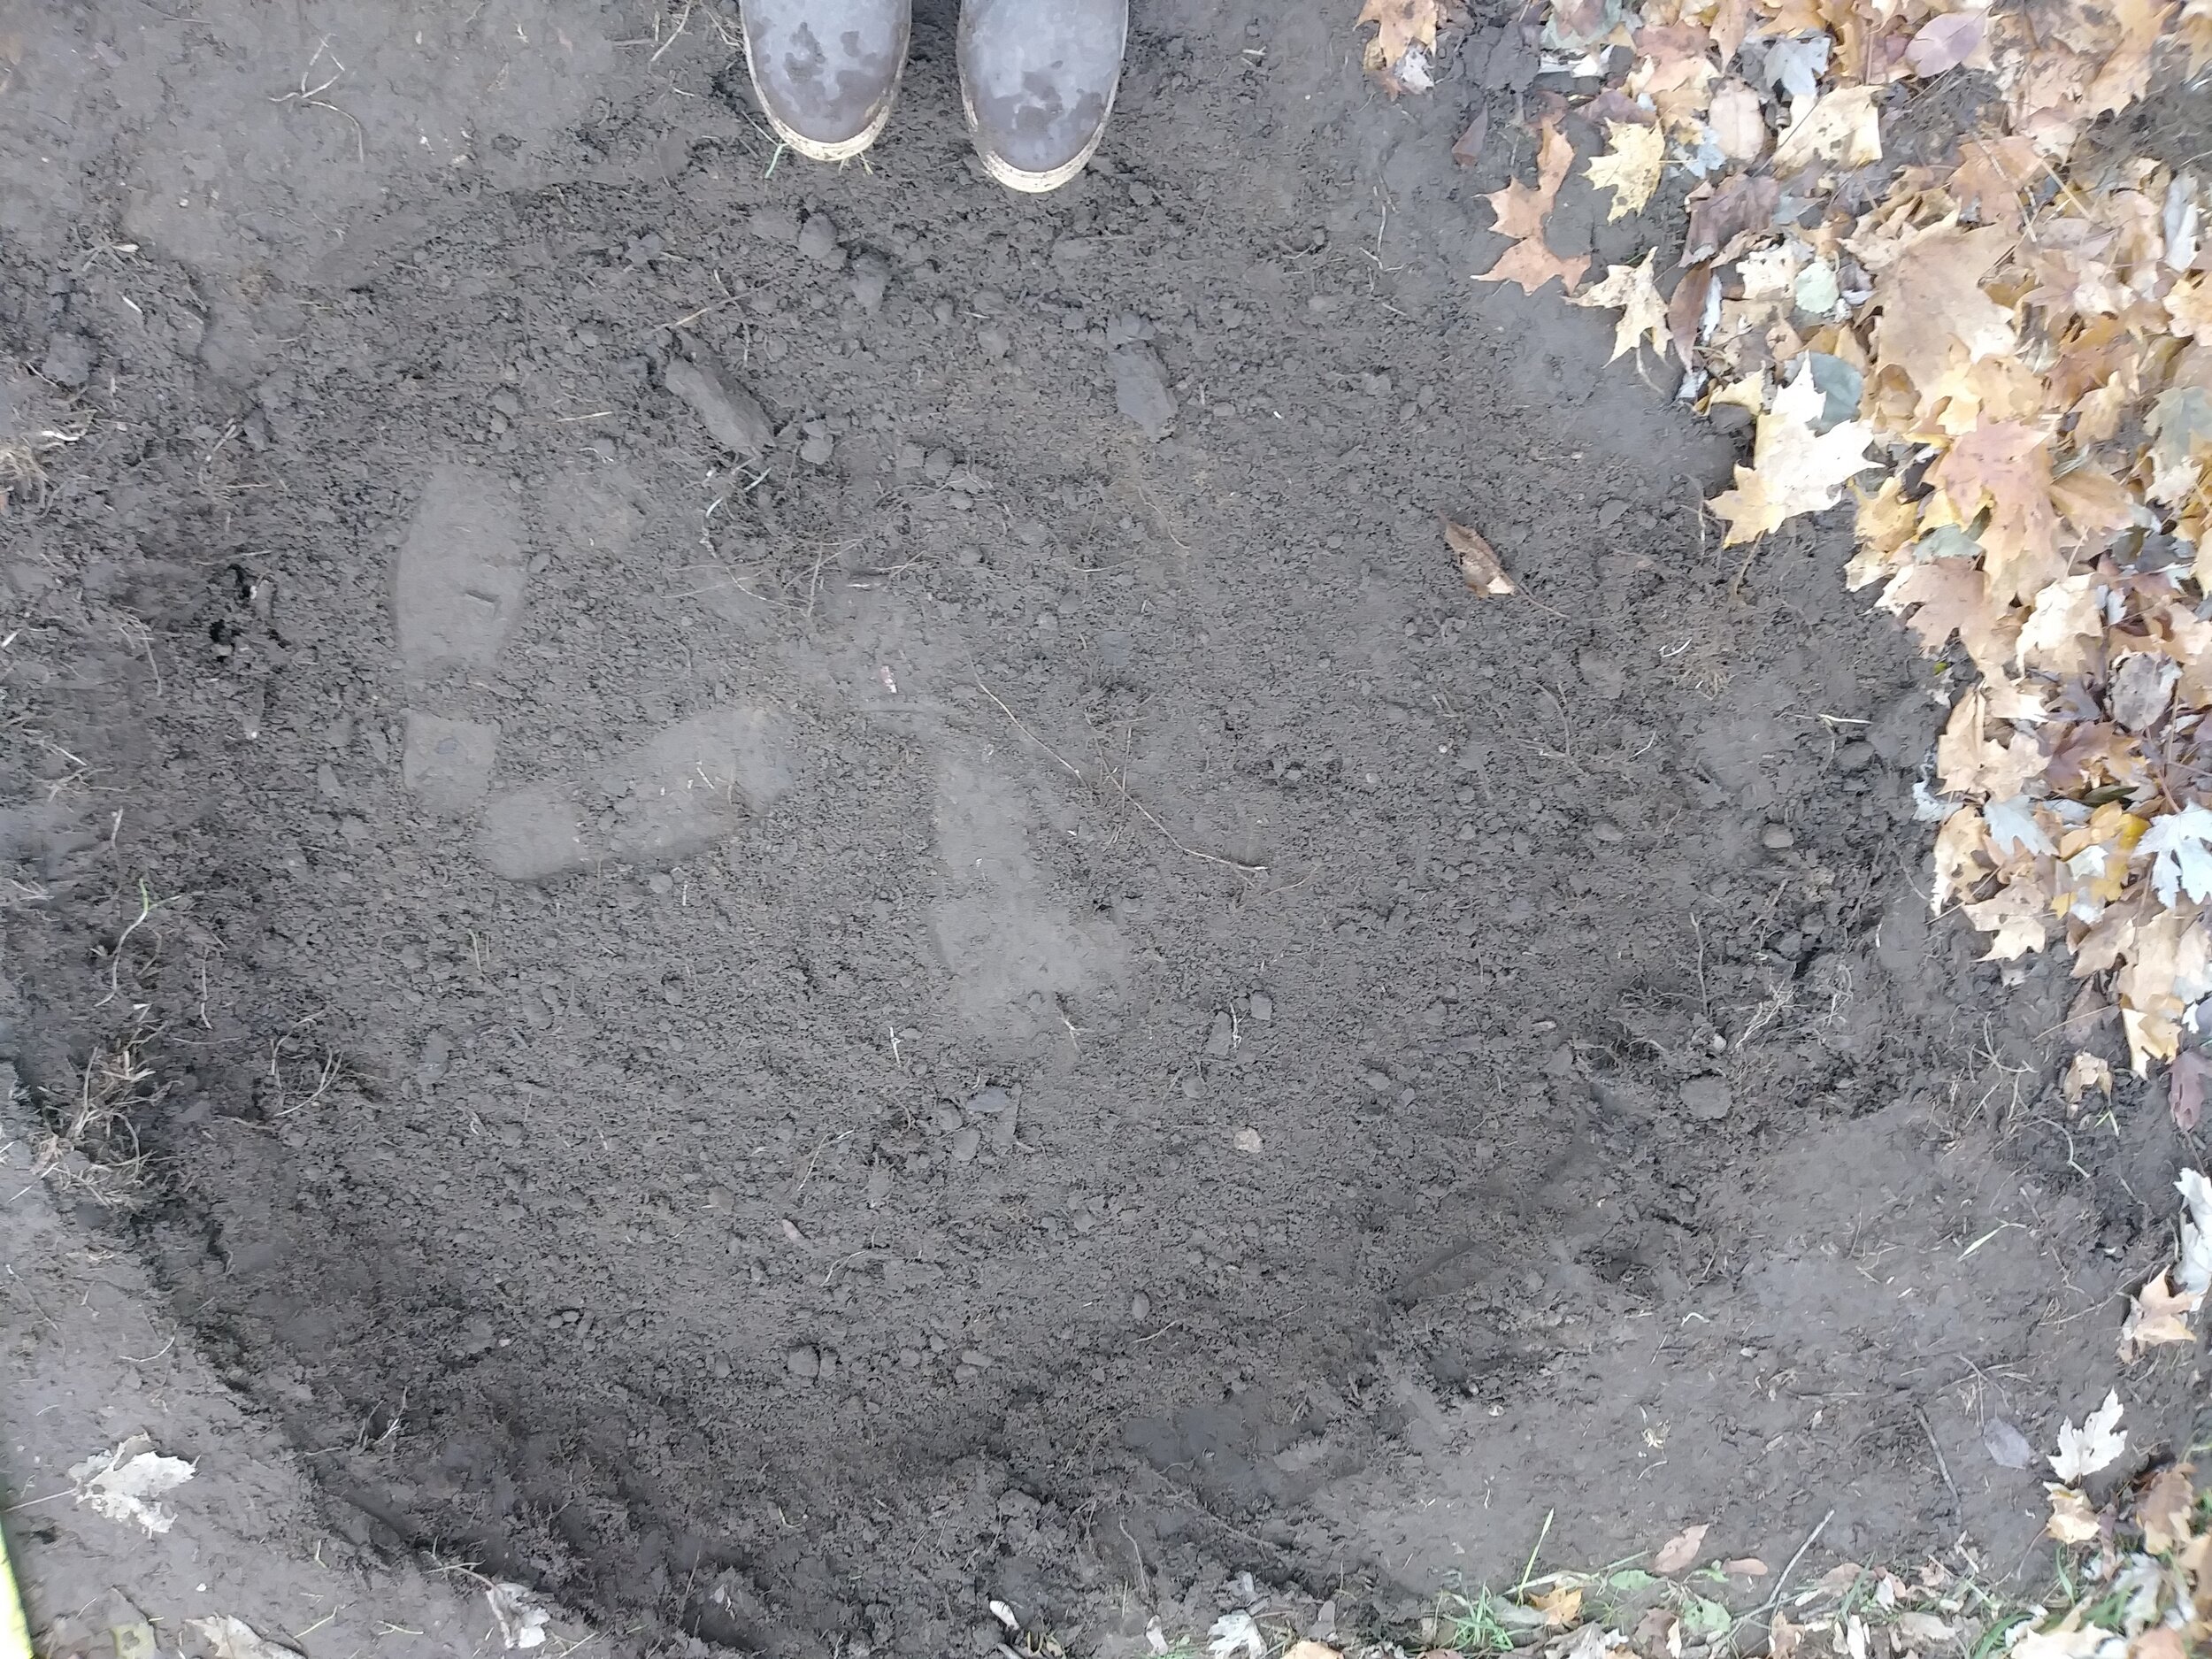
🌷Dug a shallow hole for the kiddie pool, so I could sink it to ground level.

🌷Drilled drainage holes in the bottom of the pool.

🌷Filled the pool with a few inches of soil.
🌷Added a bucket of compost and some bone meal fertilizer. Mixed it all up.

🌷Planted the bulbs (they are planted close, like eggs in a carton).

🌷Backfilled the pools with remaining soil until bulbs were covered with a few inches of soil.

🌷Mulched with leaves.
🌷Drilled holes on the edges of the pool and zip-tied wire mesh “hardware cloth” on top of the pools.

Early next spring, I will remove the wire mesh hardware cloth so the tulips can emerge (once the snow is gone, the barn cats can patrol for me 🐱🐱🐱).
Oh, my goodness people. This is a lot of work for tulips and I’m not recommending you try this. 😵 I hope I actually have something to show for all this work!
I keep muttering “I WILL outsmart you, stupid voles….”
Did I mention that not only do Dutch people have incredible love for tulips, but they are also incredibly stubborn? ;)
And the final results in the spring of 2020…..
NOT A SINGLE BULB LOST TO THOSE BLASTED VOLES!!!!
But I do wonder…. was it the kiddie pool method? Or was it the fact we barely had any snow this winter and our barn cats were able to hunt all winter? Usually, we have about a foot of snow and the voles hide under the snow cover, safe from the kitties.
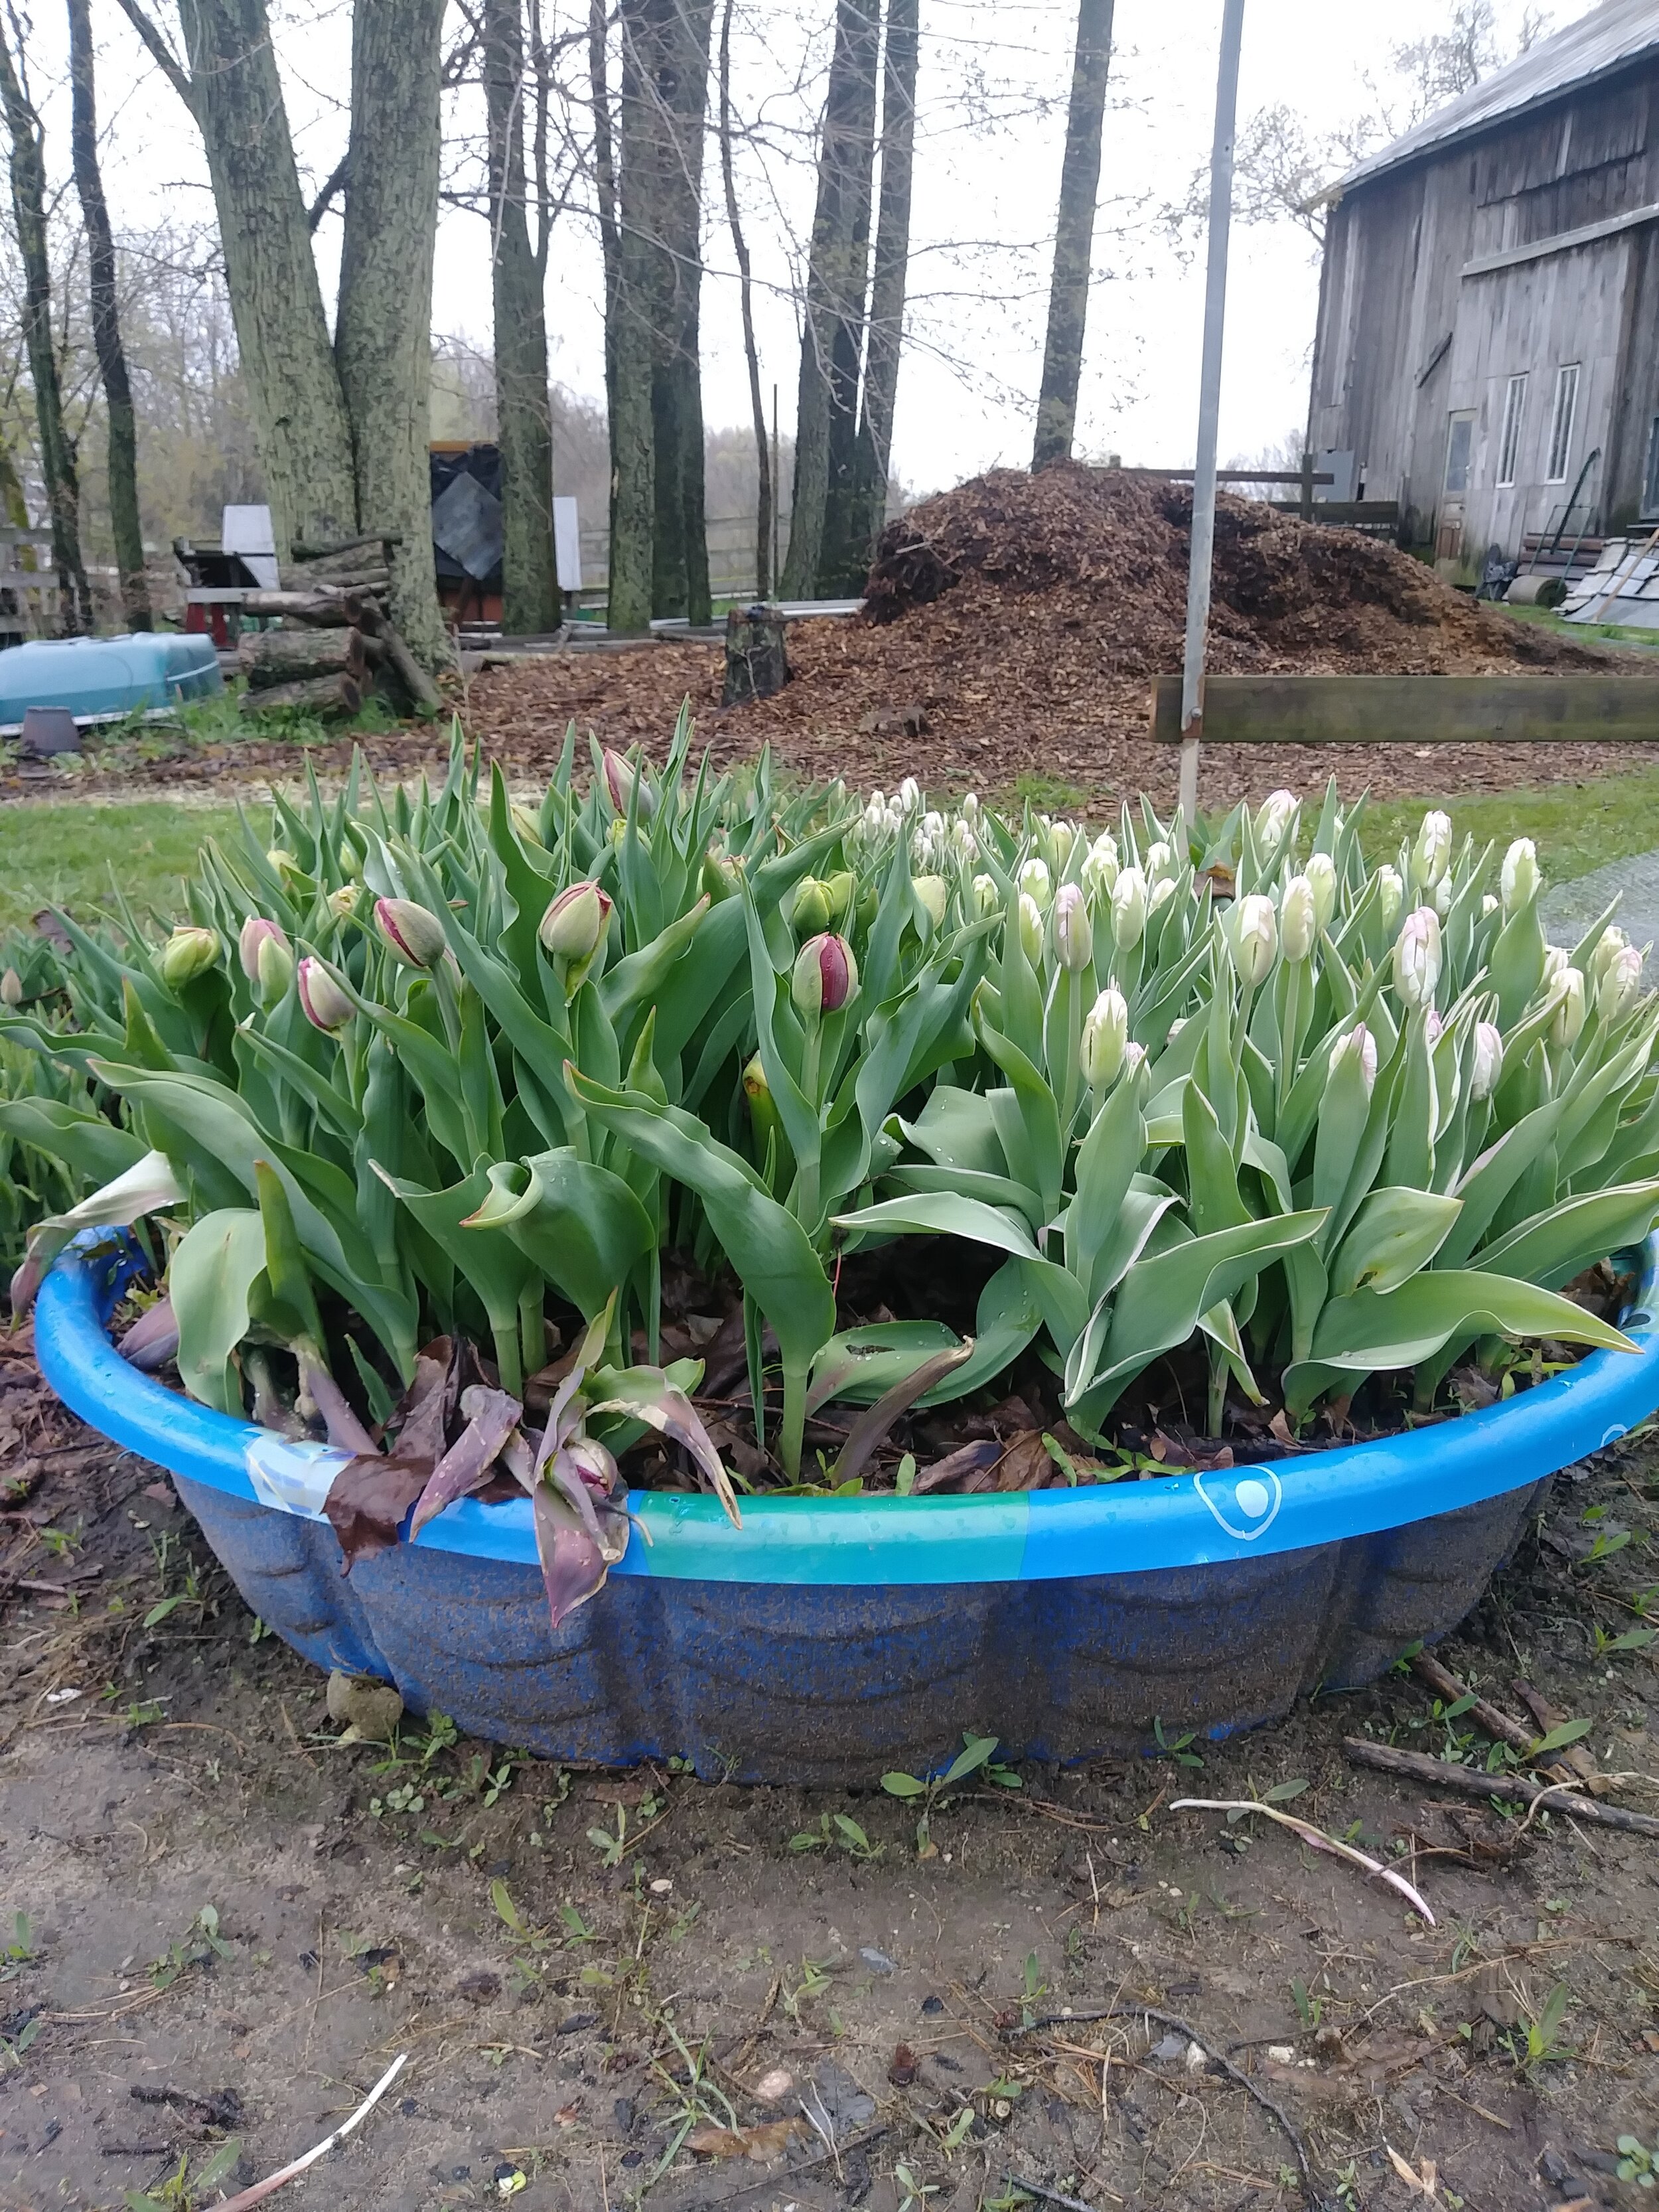
Just for fun, I sunk 1 pool in the ground and left other other ABOVE the ground. I planted the same exact types of bulbs in the 2 beds, hoping to compare them side by side (which one blooms earliest, which one has the longest stems, etc.)

There really was no huge difference. The tulips in the “sunk in the ground “ pool had slightly longer stems, likely because they were colder (tulips need cold temperatures in order to create long stems).

Hope you enjoyed reading about The Great “Kiddie Pool” Experiment!
Would I do it again? Maybe… ;)