
How to Start Seeds
How to Start Seeds
Ready to take your gardening to the next level?
Learning how to grow your own plants from seed is fun, rewarding and great therapy during the cold winter/spring months! Green growth is good for soul!
At first, growing your own seedlings may seem intimidating and difficult. Let’s face the harsh reality:
You WILL kill some plants.
Plan on it.
Expect it.
And when it happens… try again!
Don’t feel bad - it happens to everyone.
In this blog post, I’ll help set you up for success. You’ll stumble along the way and make mistakes, but it’s ok. This is how we learn!
We’re going to cover 4 main topics in the blog post:
Supplies You’ll Need (What)
Location Requirements (Where)
Timing of Sowing (When)
Method for Seed Sowing (How)

It never ceases to amaze me that that these tiny seeds turn into….

…. these incredible blooms!
Supplies You’ll need
Seeds: you can find some great cut flower options HERE.
Seed trays or “cell packs”: something to grow the seeds in. You can purchase new trays or reuse “cell packs” from plants you’ve purchased at a nursery.
Tray: to hold the seed trays or cell packs and prevent water spills. “1020” trays work great.
Dome lid: to help retain moisture and aid germination
Seed Starting Mix: “Potting soil” is ok, but try to find something specifically for seed starting. It’s finer and easier to work with. Scroll down to see some suggestions in the photos.
Plant ID marker/stick and Sharpie marker: so you don’t forget what you planted! I use wooden craft sticks and write the name and date with my trusty Sharpie.
Heat mat: to aid germination.
Light: a bright, south-facing window or artificial light, like a shop light with fluorescent or LED bulbs. PLEASE do not overcomplicate this part. People get all in a tizzy about having the “right” lights! If you are growing the plant for its ENTIRE LIFE CYCLE under artificial lights, of course, you’d want to invest in top-quality lights. But your seedling will only spend a few weeks under lights… so just get some lights. It really doesn’t matter what kind!


Location Requirements
It can be tricky to find the right place to start your seeds, but most people are able to find small space that can be used for a couple of weeks.
Please don’t overthink this or feel like it needs to perfect or pretty. Just take a look at my seed starting space! It works, despite crumbling stone walls, stink bugs and spiders. ;) Can you find all 3 of my seed starting buddies in the photo?
We start nearly all our seedlings in our basement under grow lights. When the weather begins to warm up (mid April), we begin transferring the trays to our solarium attached to the south side of our house, where the seedling will live for another month until it’s warm enough to plant outdoors (mid/late May).

Here are some things to look for:
Adequate Light: If you can’t use a south-facing window, or don’t get enough natural light in your climate (a real problem here in cloudy Michigan!), you will need to use artificial lights. Insufficient light will produce leggy, weak plants. The plants need about 16 hours of strong light each day. Again, do not overcomplicate this part. If you are growing the plant for its ENTIRE LIFE CYCLE under artificial lights, of course, you’d want to invest in top-quality lights. But your seedling will only spend a few weeks under lights… so just get some lights. It really doesn’t matter what kind!
Warmth: Many seedlings want to grow in conditions between 65-75 degrees Fahrenheit. While the basement may seem like a good space, many basements are too cold and the plants will grow very slowly. This can be overcome by leaving the plants on a heat mat to provide supplemental warmth.
Air Flow: If the space does not have good air flow, a small fan can provide the necessary air movement to prevent disease problems.
Safe from Pets: This can be a real issue! Cats love to lay on heat mats and flatten your tender seedlings (ask me how I know this. Ha!). They might even think your seed trays are litter boxes. Eek! Dogs may like to eat the soil.
Proximity to Water Sources: You will need to water your babies frequently, so be sure they are in a location that has easy access to water… or else you’ll get lazy and won’t water them enough (oh, is that just me?).
Timing of Sowing
It’s important to know your Average Last Spring Frost Date. Do a simple web search to find the Average Last Spring Frost Date in your area.
This is the date when it’s safe to plant most flowers, veggies and herbs outdoors. If you plant outdoors before this date, you risk losing your plants to a late spring frost. (There are some plants that are “hardy” or “frost tolerant” that can be planted out before this date. Check the seed packet to be sure.)
While it seems counterintuitive, err on the side of sowing seeds a bit later rather than earlier. Seeds that are sown too early can result in plants that are rootbound and stunted or may try to bloom at 2 inches tall. Eek!
Here are some rough guidelines/suggestions for commonly grown flowers, veggies and herbs. You may need to experiment to find the correct timing for your climate.
8-10 Weeks before Average Last Spring Frost
Carnation
Feverfew
Onion/Leek
Pepper (Hot or sweet)
Sweet William
Yarrow
6-8 Weeks before Last Average Spring Frost
Bells of Ireland
Delphinium
Herbs (perennial types, like chives, oregano, sage, thyme, etc)
Poppy
Sweet Annie
4-6 Weeks before Last Average Frost
Ammi (False Queen Anne’s Lace)
Bachelor’s Button
Basil
Broccoli
Cabbage
Cauliflower
Forget-Me-Not
Kale
Lettuce
Marigold
Morning Glory
Sweet Pea
Tomato
2-4 Weeks before Average Last Spring Frost
Cucumber
Melon
Nasturtium
Pumpkin
Squash
Watermelon

A mid-April view of our solarium attached to the south side of our house. Most seedlings are started in the basement, then transferred here to grow for another month before being transplanted outside in mid/late May.
Method for Seed sowing
Moisten seed starting mix until it’s damp but not soaking wet. I like to pour mine into a big Rubbermaid tote and mix it with water in the tote.
Fill your seed trays or cell packs with the seed starting mix. Tap it gently on the ground a few times to make sure it settles. Add more, if needed.
Carefully sow 1-2 seeds per cell, paying attention to the instructions on the seed pack. As a general rule, most seeds are buried twice as deep as they are in size. So for example, a tiny seed like Snapdragon will be barely covered by a sprinkle of soil, while a larger seed, like a Zinnia will be buried about 1/4 inch deep.
Gently tamp down the soil, to make sure the seeds are in contact with the soil.
Place the seed tray or cell pack in a tray and cover with a dome lid.
Place tray on a heat mat… then wait! Seeds can take 3-28 days to germinate, depending on type. Be sure the soil never dries out by using a spray bottle or “bottom watering”. Here’s how to do it: Fill the tray with water every other day (or as needed) and allow the seed tray/cell pack to wick up water for a few hours, then remove and discard the extra water. Do not leave the seed trays/cell packs in standing water.
When most of the seeds have germinated, move the tray to a warm, brightly lit place (window or artificial light). Seedlings need 16 hours of light to grow properly. If using lights, be sure to lower the light (or raise the tray) so the lights are hovering 2-3 inches above the seedlings. This helps prevent “leggy”, stretching seedlings.
Monitor your seedling every single day. The soil should never dry out completely. You’ll likely need to continue bottom watering until the seedlings are sturdy enough to handle overhead watering from a watering can.
About 2 weeks before planting your babies outdoors, begin “hardening them off”. This is the process of acclimatizing your seedlings to a new environment. On day 1, bring them outside for 1 hour, then bring them back inside. On day 2, bring them outside for 2 hours, then bring them back in. Continue this pattern, increasing the time they spend outdoors each day for about 2 weeks.
Now they are ready to plant! Tuck those babies into the ground, preferably on a cloudy cool day to minimize “transplant shock”. Be sure to water them thoroughly after planting and keep them well watered for the next 2 weeks while they establish a robust root system.

These tiny seedlings transplanted in mid May turn into….
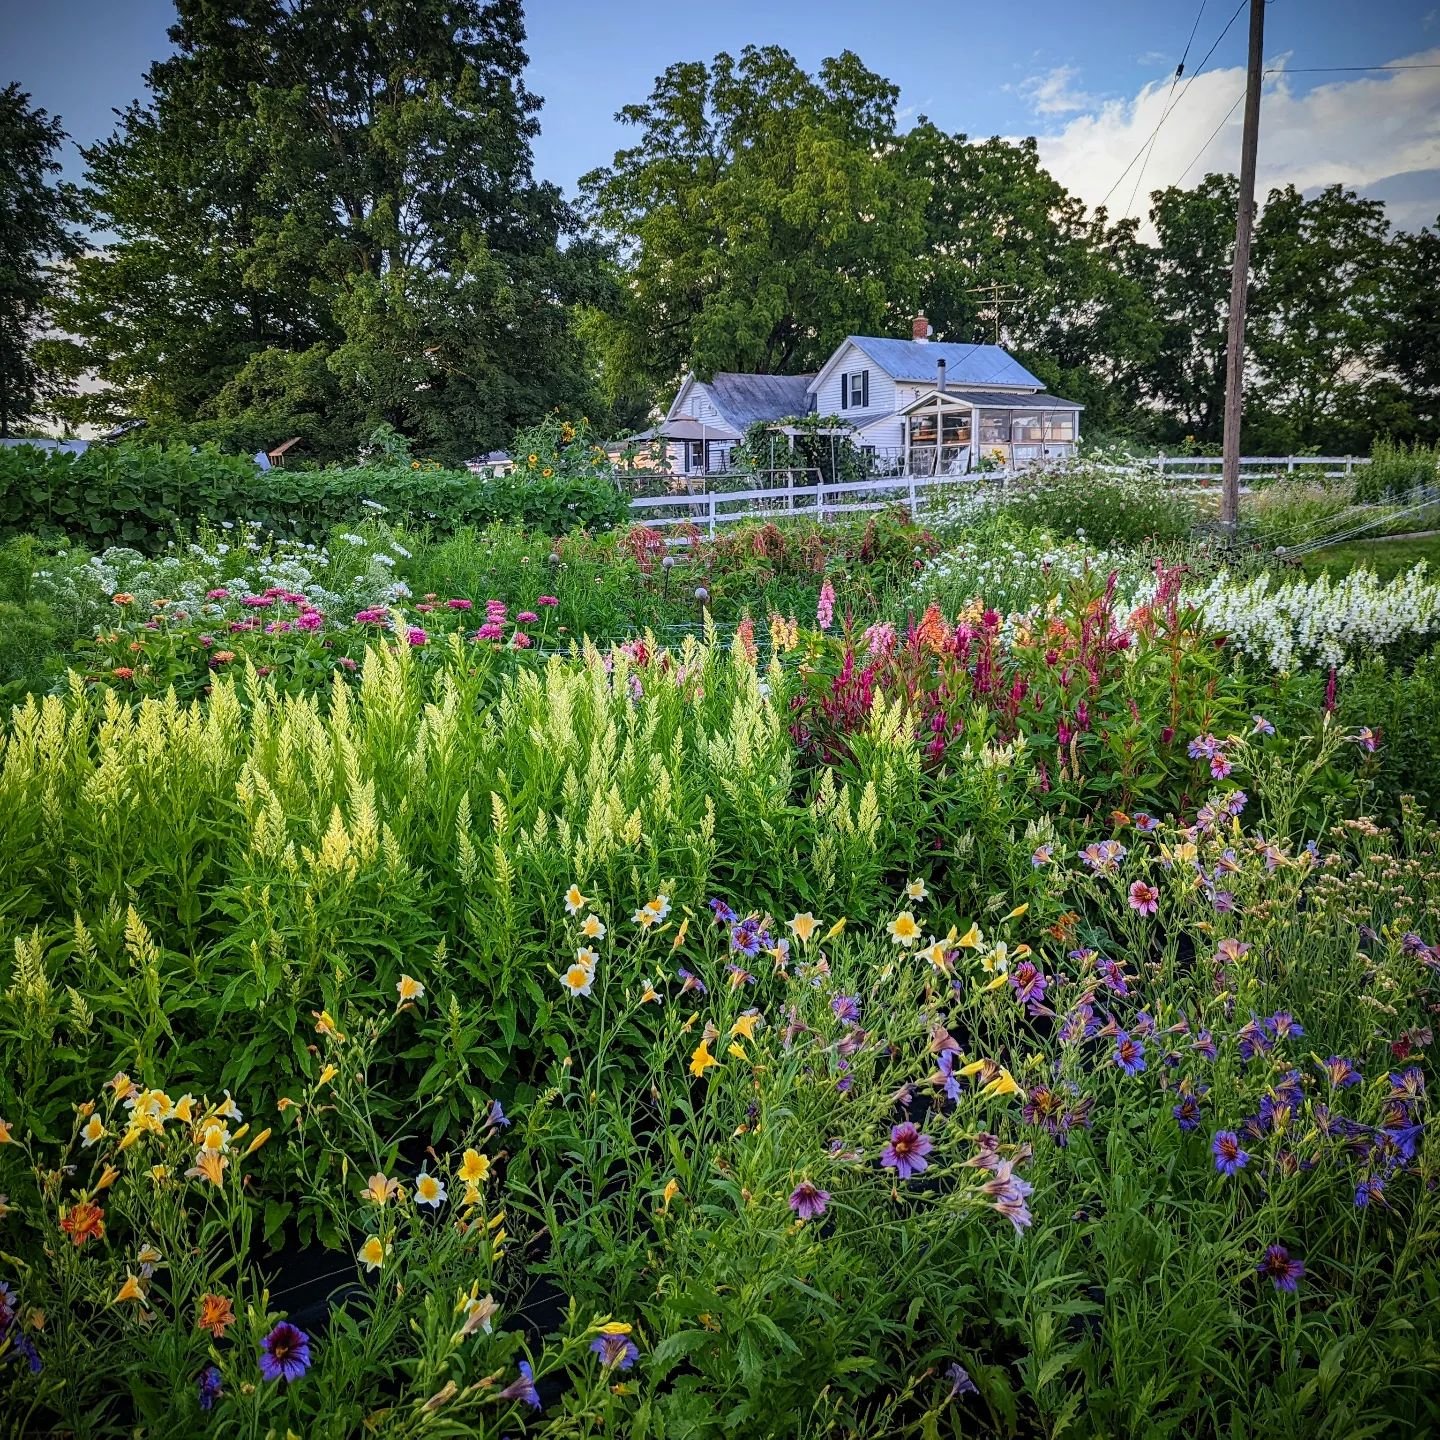
… this in mid July!
Not sure WHAT plants to grow in your Cut Flower Garden?
There are so many choices!
And what if you choose the wrong ones and waste your precious time, energy and MONEY?!?
Imagine if:
You could follow a simple, step-by-step process to determine exactly what to grow.
You didn't have to wallow in overwhelm and indecision.
You could feel confident about your flower choices and have everything you need for beautiful bouquets.
With Cut Flower Conference, you’ll learn how to create your custom Growing Plan. You’ll conquer the overwhelm so you can get growing!
Each lesson in Cut Flower Confidence contains a powerful worksheet, guide or template to help you choose the best flowers for YOU.
