

How to Revive Floppy Flowers
Drooping flowers? Don’t throw them out! Try this quick, simple fix first!
How to Revive Floppy Flowers
You've had it happen before.
The bloom looked perfect on the plant but within minutes of cutting, the whole stem is looking a little droopy. In fact, it looks downright sad!
What is going on?!?
Usually it's one of 3 things:
1. The flower was cut at the wrong time of the day.
Many flowers will immediately wilt if cut during the heat of the day.
Here’s why. Flowers are the most hydrated and firm in the morning, when the stems are filled with water.
As the day progresses and the heat rises , the water flows down the stems into the base of the plants and the flowers begin to dehydrate, which means the stems can get floppy and wilty.
Flowers that are harvested in the heat of the day are wilty, floppy and expire faster.
This is why we ONLY harvest flowers in the cool of the day, either early in the morning or late in the evening. On our farm, we start cutting as soon as it's light enough (around 6:00 am) and stop as soon as the sun is up over the tree line and it starts to heat up (about 10:00 am).
If the day is cool or cloudy, we can get away with cutting later in the day... but if the sun is out, forget about cutting in the middle of the day.
Evening is another good option for cutting. Start when the sun is far on the horizon and the day has cooled.
2. The plant was harvested at the wrong stage.
Every single flower has it’s own “Ideal Stage of Harvest”, which refers to how open or mature the bloom should be for optimal vase life.
Some flowers need to mature a bit more before being cut or they will flop. Really, the best way to figure this out is simply experimenting.
If the stem feels floppy on the plant before you even cut it, that is likely a clue that the stem needs to mature a few more days. Wait until the stem feels more rigid.
For example, Zinnias are easy to test. Simply grasp the stem about 9 inches below the bloom and give it a shake. If the stem flops or bends, it's not mature enough. If the stem is stiff, it's ready.
3. The plant DOESN’T hydrate easily.
Some plants simply do not respond well to being cut and have a hard time "rehydrating" and getting water flowing in the stems.
If you can manage to get these stems “drinking” water again, they will make a great cut flower and last for days. If not, they are basically worthless.
A Simple Trick for Reviving Wilted Stems
In my reading and research about post-harvest care for flowers, I came across something called the "Boiling Water Method" for reviving wilted stems.
I was truly skeptical because the idea of placing stems in boiling water seems insane. In my experiments, I was attempting the opposite - recutting the stems and placing them into cold water. It didn't work.
I decided to give the "Boiling Water Method" a shot on some stems that I was about to throw out. I had cut the stems early in the morning, but they still wilted immediately... and a day later, even after being stored in my floral cooler overnight, they still looked terrible.
![20180720_154342[1].jpg](https://images.squarespace-cdn.com/content/v1/582b872529687fd6acb7423d/1533153748180-HR5FLUZTXWSKPVBAWZ4N/20180720_154342%5B1%5D.jpg)
Time to try the "Boiling Water Method". This is what I did:
1. Boiled water on the stove and poured it into a jar.
2. Re-cut the stems at an angle with clean, sharp flower clippers.
3. Immediately plunged the stem end into the boiling water, angling the blooms out the jar to avoid "steaming" the blooms.
4. Set a timer for 1 hour and walked away (I wanted to watch, but I had work to do!)
*NOTE: This was my first attempt. I learned that it's probably best to fill the jar with about 1 inch of water, so only a small part of the stem is "cooked". That part of the stem can be cut off later.
Also, one hour is probably unnecessary - I was headed out to work and wasn't able to check back earlier.
If you are concerned about "cooking" the stems, try dipping for 10 seconds for soft stemmed flowers and up to a few minutes for "woody" stemmed flowers like hydrangeas. After "searing" in the boiling water, place the stems in cool water.
When I returned, the water was cool and this is what the stems looked like:
![20180720_173433[1].jpg](https://images.squarespace-cdn.com/content/v1/582b872529687fd6acb7423d/1533154042034-LO3T16VSTU6L95BLEXEO/20180720_173433%5B1%5D.jpg)
AMAZING. I was in shock. 2 minutes of work and these flowers were back in business!
I removed the stems from the jar and added them to an arrangement in my dining room. 6 days later, the stems were still looking GREAT.
Now obviously, if your blooms are 5-7 days old and they start wilting, you need to simply accept that they are dying a natural death. Flowers don't last forever.
However, if your blooms are freshly cut and wilting, then you can certainly give the "Boiling Water Method" a try. What do you have to lose? It's better than your other option - throwing them out.
Flowers/Foliage That Might Need a Little Help
Here are a few flower/foliage varieties that respond well to this hydration method:
Artemisia
Basil
Chinese Forget-Me-Not
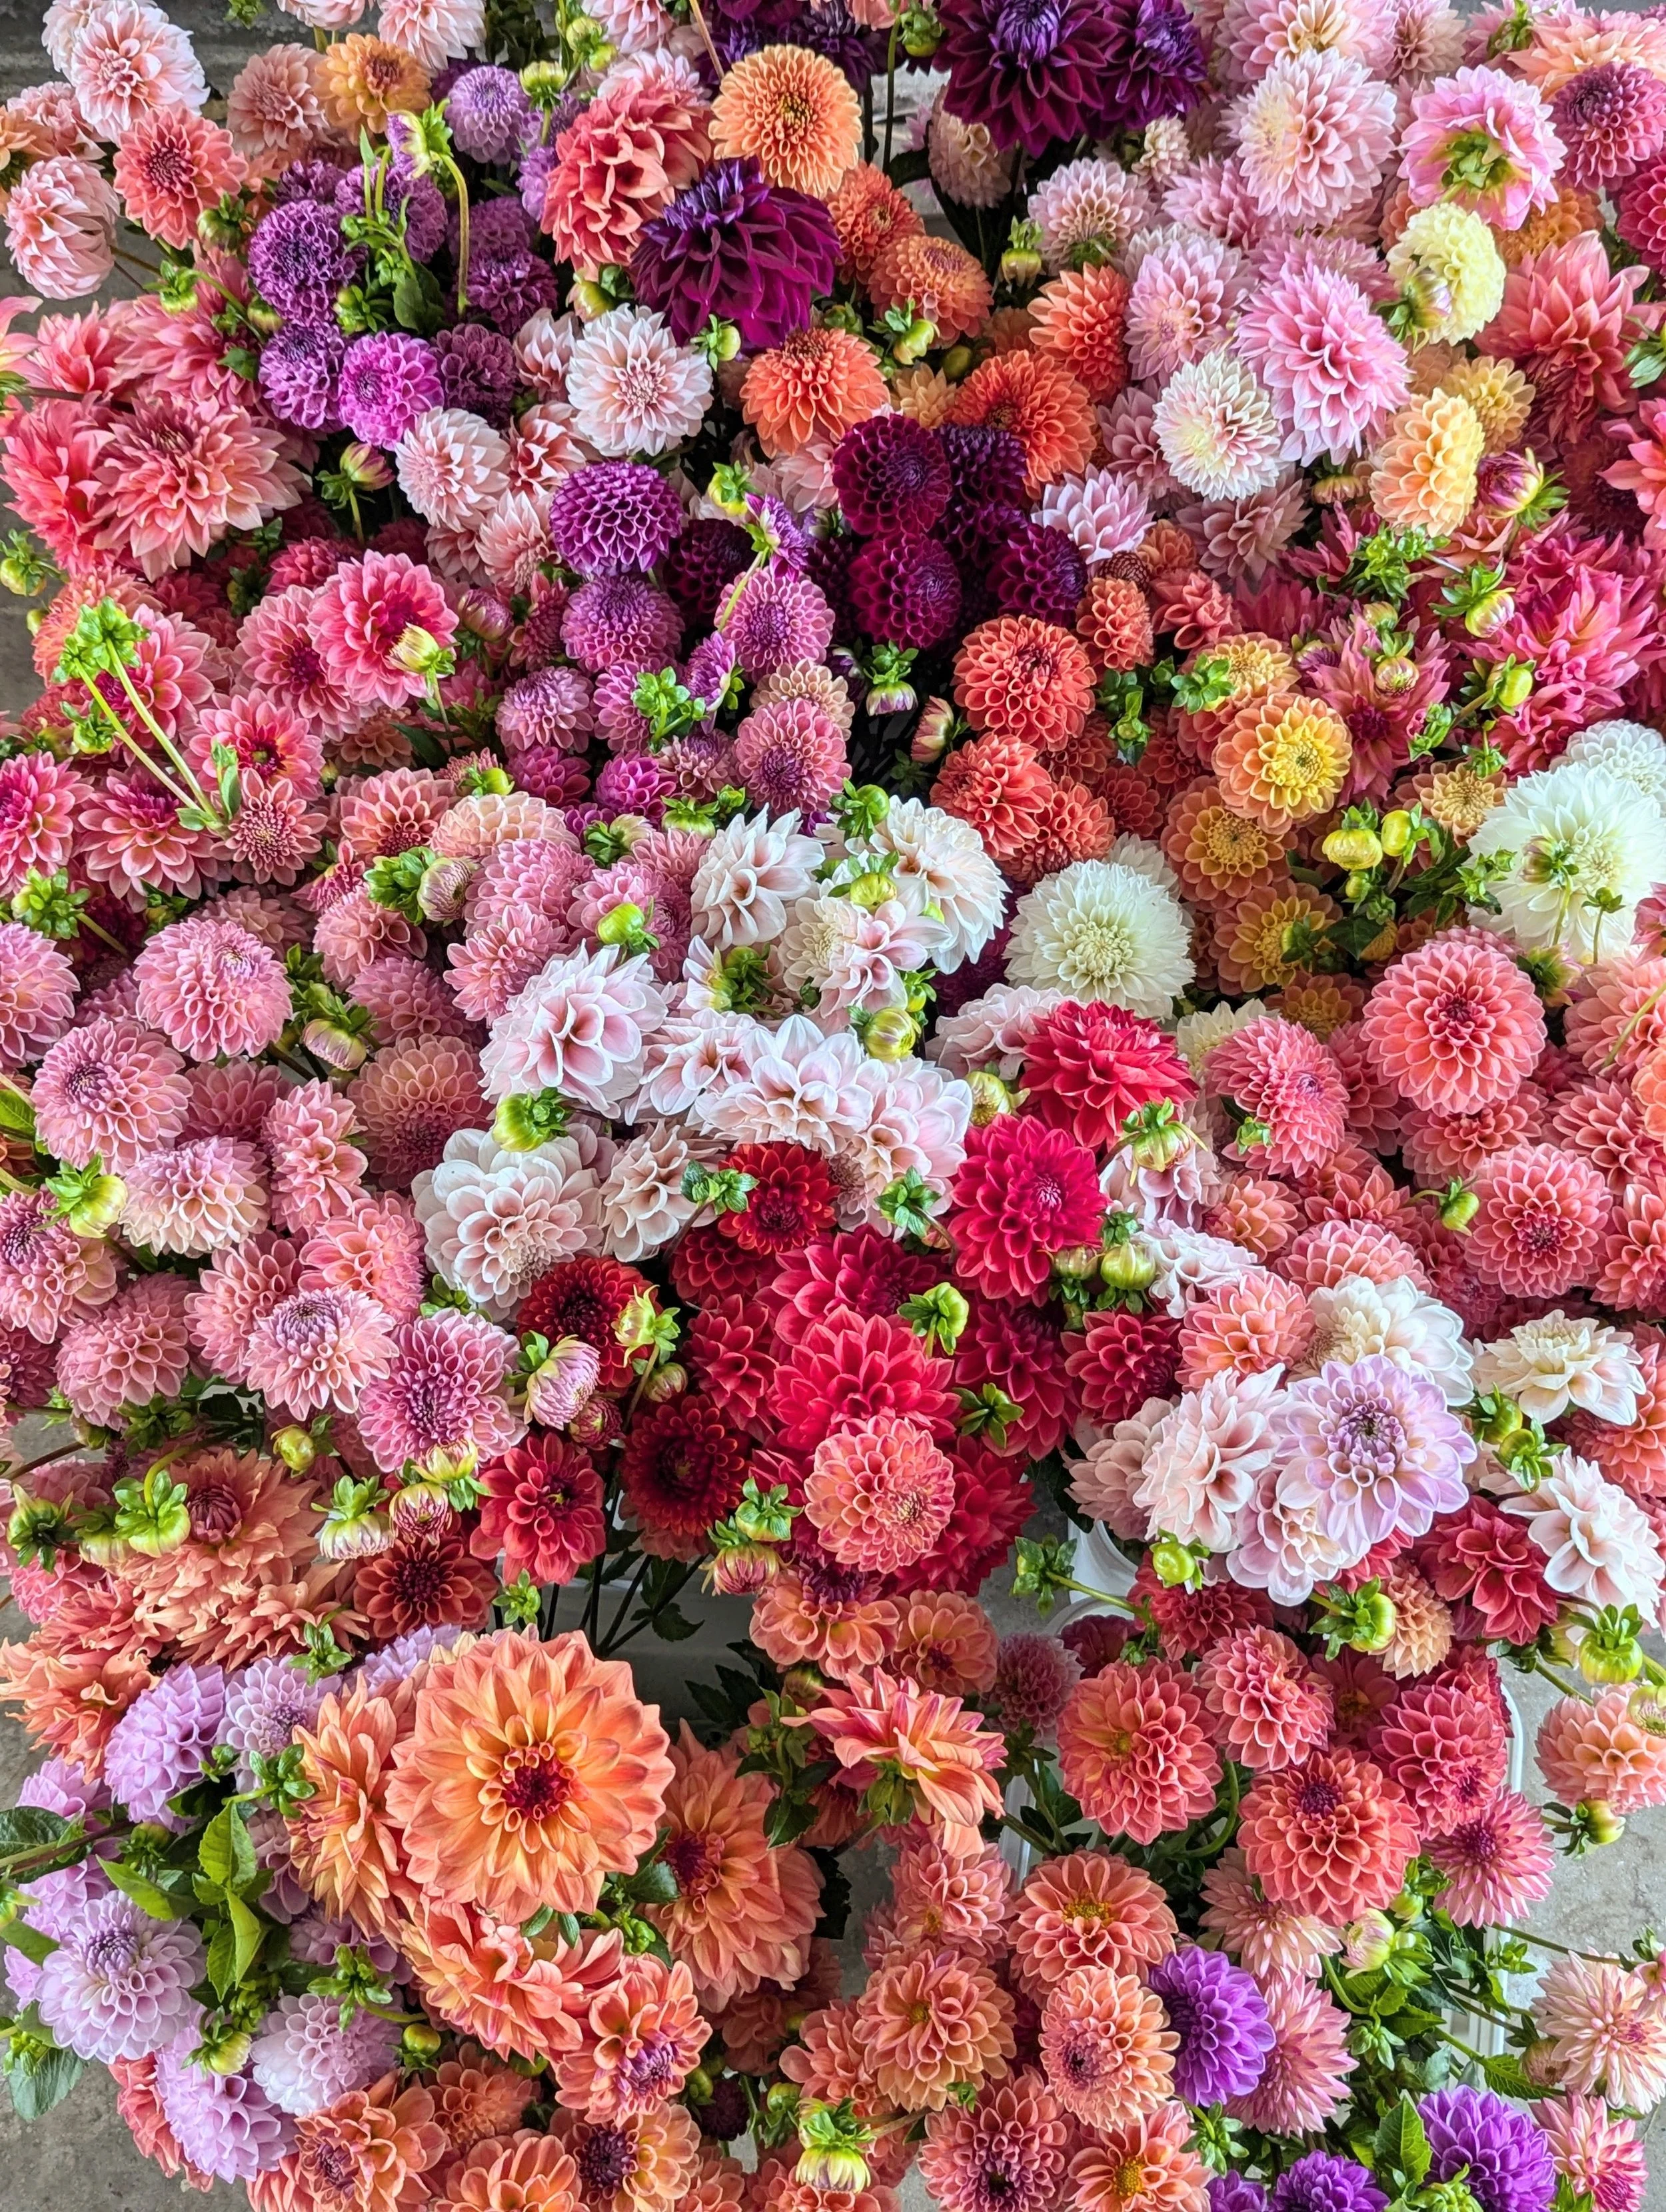
Dahlias
Dusty Miller
Hollyhock
Honeywort
Hydrangea
Lilac
Mint
Scented Geranium
Shiso/Perilla
Obviously, flowers are not "one size fits all", so this method will not work on all flower varieties.
I highly encourage you to do your own experiments. Have fun with it and set up your own control group and experimental groups.
For example, label several jars - one is the control (you do nothing), one is a stem seared for 10 seconds, one is a stem seared for 2 minutes, 10 minutes, etc. Be sure to analyze and compare your results. This is the best way to learn!
If you consistently have an issue with a flower wilting, first you should make sure you are harvesting at the correct time of day and the correct stage of harvest.
If this does not help (or if you simply cannot cut that early in the day), the "Boiling Water Method" is a good option to try out.
I hope this information is helpful. Give it a try next time you encounter a floppy, sad looking stem... and let me know how it worked!
Trust the Process: Why Pinching Your Dahlias Means MORE Abundant Blooms
For armloads of blooms and not a just a handful.
The first time I showed someone how we "pinch" our Dahlia plants, they nearly swooned and fell over (true story!).
Once they recovered, they sputtered: "Why did you cut off the bud? You just ruined the plant!"
I get it. It seems SO counterintuitive to cut something back to make it grow more.
But trust me. This isn't my first rodeo… and I do this for a living. I've seen firsthand the power of pinching, and I can't wait to share it with you.
First, the WHY. It’s important to know the reasoning behind pinching.
Once you know the why, I’ll show you the HOW.

Why Pinching Works
Every plant has a lifecycle: grow, bloom, get pollinated, make seeds, drop seeds, die.
If you leave your Dahlias alone and let them do their thing, they'll race right through that lifecycle and stop blooming.
Want them to bloom longer and more abundantly? Of course you do!
So here’s what you’re going to do: You’re going to interrupt that cycle by:
1. Pinching the plants early in the season
2. And harvesting or deadheading the blooms throughout the season.
Dahlias tend to naturally grow in the shape of a Christmas tree. One central stem, one big bloom at the top.
That's... fine. But I'm guessing you want ARMLOADS of blooms from your Dahlias, not just a handful of blooms. (Same, friend. Same.)
Pinching redirects the plant's energy. Instead of focusing all its energy on that one big flower, it branches out, giving you multiple stems and multiple blooms, instead of just one.
There's also a practical reason for pinching: sometimes Dahlias start blooming on stems that are way too short and chunky for bouquets. For cut flower use, we need slim stems that are 18–24" long. An 8” stem will never work in a bouquet, so we pinch it off to send a clear message: "Nice try. Send up something longer."
And they will. After we’ve pinched back the Dahlia field, I can practically hear those plants talking back to me: “Challenge accepted. 👊 You just wait and see what we can do!”

Dahlia that was pinched (left) vs unpinched Dahlia (right). The stem on the right is too chunky and bulky to use in a bouquet!
The Secret Multiplier: Dahlia Math
Here's where it gets really fun.
Pinching is just the beginning. Once your Dahlias start producing, it’s your job to keep harvesting the blooms because the more you cut, the more they grow.
I call it Dahlia Math, and it's my favorite kind of math.
✂️ Cut one stem → the plant sends up two or more stems to replace it
✂️ Cut those → you get even more
✂️ Keep going all season long
The flip side is also true. If you don't cut:
❌ The blooms go to seed
❌ The plant thinks its job is done
❌ Production stops (cue the sad trombone)
Pinching is what causes the plants to branch and send up tons of blooms.
Harvesting is what keeps the blooms coming for months rather than just weeks.

Dahlia Nicholas
How to Pinch Your Dahlias (It's Easier Than You Think)
Step 1: Wait until the plant is 8–18" tall.
My personal measuring system? "Less than knee-high." I just measured my knee, and it's 18 inches. Turns out I've had a built-in measuring stick this whole time.

Step 2: Find the leaf sets.
Look for pairs of leaves growing opposite each other. Start from the bottom and count up 3–4 sets.
Step 3: Make the cut. *
Using sharp snips or pruning shears, cut off the top of the plant just above those 3–4 leaf sets. You're likely removing a few inches of growth — maybe 2–3 sets of leaves.
*Note: We do recommend sanitizing your snips between each plant with a 10% bleach solution. This helps to prevent spreading potential disease from plant to plant.


Step 4: Allow yourself to freak out and question everything.
It's okay. We all do this at first. It’s normal to feel a little sick to your stomach! But pretty soon you'll be gleefully chopping away, because you'll know that every pinch means more flowers.
Step 5: Wait two weeks and watch.
Where you made one cut, two (or more) stems will emerge. That's the plant branching out and getting ready to grow multiple blooms, instead of one.
Bushier plant = more stems = more blooms = happier YOU!
Still Skeptical? Try This Experiment
Don’t believe me? No worries.
Seeing is believing, so I want you to experiment. Pinch one plant. Leave another unpinched. Then compare them in late summer.
I promise the pinched plant will produce more blooms.
The Bottom Line
So many beginners are afraid they'll ruin their Dahlias by pinching them. But the reality is the opposite is true. NOT pinching is what limits your blooms.
Pinching makes plants more vigorous, more productive, and sturdier.
Your Dahlias can’t wait to show you what they can do!
Now, go grab your snips and pinch away. 🌸

Need more help with your Dahlias?
The Dahlia Quick-start Handbook is your go-to source for all things Dahlias!
It’s full of helpful instructions, tutorials, video guides, and more.

Top Tips for Longer Lasting Flowers
Want to make your bouquets last longer? Read this!
Top Tips for Longer Lasting Flowers
When people visit our farm, they often ask “How do I make these flowers last the longest?”
I can’t wait to share some great tips with you, but first… let’s talk about expectations.
With proper care and cutting techniques, flowers can be be expected to last anywhere from 3-21 days in a vase. Yup, I know that’s a HUGE range!
In the flower farming world, we use the term “vase life” to describe how long a flower should last. Vase life differs for EVERY. SINGLE. TYPE. OF. FLOWER (and even amongst one type of flower, different varieties might last longer than others).
For example, a Dahlia typically has a vase life of 3-5 days, while I’ve had Snapdragons, Feverfew and Lisianthus that still look acceptable after 21 days.
5-7 days is considered a “good vase life”, so if you notice flowers beginning to decline after 5 days, this is totally normal.
Now that we have realistic expectations, here are some helpful techniques to tip the odds in your favor and make those blooms last as long as possible!

1. Cut Early or Late in the Day
I know it sounds dreamy to wander around in a field of flowers on a bright sunny summer afternoon, cutting a bouquet... but don't.
JUST DON'T. A hot sunny afternoon is pretty much the worst time to cut flowers, so avoid it as much as possible! Flowers cut in the heat of the day expire MUCH FASTER than those cut in the cool parts of the day.
Dawn and dusk are the best times to cut, preferably before the sun is up or after it has set.
If you are having problems with a certain flower wilting immediately and never recovering, or flowers that don't last long, I would suspect you are not cutting at the correct time of day.
Certain flowers/foliage need to be cut earlier than others. For example, if I try to cut Lemon Basil after the sun has risen over the horizon, it will immediately wilt. I know I need to get out there early and cut before sunrise. You will need to do some trial and error to figure out what works!
Moral of the Story: Get your buns out of bed before the sun is up. ;) It's truly the VERY best way to start your day and the flowers will thank you with days of beautiful blooms!
2. Keep It Clean
Cleanliness is VITAL. Bacteria is often what causes cut flowers to wilt and wither prematurely.
Your clippers/scissors/shears should be clean and sharp. Wash or wipe down your clippers with rubbing alcohol periodically, ideally before every cutting session.
Your buckets and vases also need to be sparkling clean. No nasty gunk or dust or dirt.
If you wouldn't drink out of it, then it's not clean enough! This is not a joke.
Yup, I’m going to say it again. Your bucket MUST be clean enough to drink out of. Trust me. It makes a big difference (and yes, we spend a TON of time scrubbing buckets in hot soapy water and yes, I would drink out of them. Ha!).
If you put those freshly cut stems into dirty water in a dirty bucket, you’ve pretty much guaranteed the stems are going to get clogged up with gunk and expire way faster.
KEEP YOUR BUCKETS AND CLIPPERS IMMACULATE. Got it? ;)
3. Cut at the Correct Stage
“Stage of cutting” refers to how open the flower should be at harvest time.
Should it be fully open? Barely open? Halfway open?
Lots of people are cutting flowers way too late (too open) and naturally, not getting the longest vase life.
Unfortunately, there is no “one-size-fits-all” rule for the ideal stage of cutting. It varies with EVERY. SINGLE. TYPE of flower. Again, there is going to be some trial and error here!
With some flowers, such as Poppies, Sunflowers and Cosmos, you want to cut them right when they are beginning to open/bloom, in order to have the longest vase life. Cut these flowers earlier than you think and enjoy watching the flowers open up in the vase!
On the opposite spectrum, Dahlias and Zinnias don’t open much after being cut, so they must be allowed to bloom fully on the plant before being cut.
Most flowers are somewhere in between. Foxglove, Snapdragons and Delphinium, for example, are best harvested when the bottom 2-3 blooms on the stem have opened up.
For some flowers, especially Zinnias and Black-Eyed Susans, it's helpful to perform "The Wiggle Test". Grasp the stem about 8" below the flower and wiggle it. If the flower flops around, it's not ready to be cut. If the stem remains firm, cut away!
4. Make Deep Cuts and Remove Foliage
When you are out in the field, be sure to make "deep cuts" - that is, cut your stems at least 12"-18”.
Elbow to fingertip length is perfect. You can always cut them shorter later!
Cutting deeply will actually signal the plant to produce even MORE long stems, so don't be shy about cutting deeper than you think. As long as you leave 2-3 sets of leaves near the base of the plant, you should be good!
Immediately after cutting, gently strip or cut off all the foliage from the bottom 2/3 of the stem. Leaves/foliage will muck up the water quickly, so get rid of any leaves that will touch water.
I repeat - NEVER, EVER allow leaves/foliage in the water!
5. Hydrate Properly
After cutting and stripping off the foliage, immediately place the stems in cool, CLEAN water in a CLEAN bucket or vase.
It's best to cut stems at an angle, so they don't sit flush with the bottom of the bucket. An angled cut also creates a larger surface area for the stem to draw up water.
If possible, it's best to allow the flowers to rest in a cool place out of the sun for a few hours (or overnight) before arranging. Some flowers need a few hours to "re-hydrate" and perk up. They just went through a lot of stress, so give them some time to literally “chill out”.
(If you find the water in your bucket is dirty after harvesting your flowers, I recommend transferring the flowers to a new clean bucket with clean water when it’s time for them to rest and rehydrate.)
Give those flowers plenty of time to rest before trying to arrange them into bouquets. Here’s a sample cutting schedule if I need some arrangements for a Friday evening:
Thursday - cut in the evening
Thursday overnight - allow flowers to rest and rehydrate in CLEAN water in a cool location
Friday morning - arrange flowers and store in a cool location until event time
Friday evening - display flowers
6. Avoid Sun and Heat
After you’ve arranged your flowers and want to display them, DO NOT set your bouquet in direct sun. While sun is necessary for flowers to grow, once they are cut, they need to be kept AWAY from the sun. A windowsill might not be the best location!
Heat also causes flowers to expire more quickly, so be aware that a bouquet picked and displayed in the heat of the summer will not last as long as a spring or fall bouquet... unless you keep your house very cold with air conditioning!
7. Keep Flowers Away from Fruit
Ripening fruit, like bananas, apples, avocados, peaches and pears, produce ethylene gas, which causes flowers to expire and wilt prematurely. If you have fresh fruit on your kitchen counters, the kitchen is not a great place to display your flowers.
Some flowers, like Sweet Peas and Dahlias, are particularly sensitive and can expire nearly overnight if subjected to ethylene gas.
8. Change Water Daily and Re-cut Stems
Fresh, clean water and a sparkling clean vase will significantly extend the life of your bouquet. Dirty water breeds bacteria and clogs the stem end of the flower, reducing water intake.
Again, make sure there are no leaves/foliage in the water!
Re-cutting the stems every few days will also allow the flowers to keep "drinking" properly.
There are a few types of flowers that make the water murky almost immediately. If any of these are in your arrangement, you’ll likely need to change the water every single day and possibly even add a drop of bleach to the water. Just a drop! Not a teaspoon. Ask me how I know this ;)
Flowers that muck up water:
-Zinnias, Black-Eyed Susans, Yarrow, Stock, Ornamental Kale/Cabbage, Oregano
9. Choose Water Wisely
Depending on where you live and what type of water you have, it might be helpful to use filtered water for your bouquets.
If you have softened well water, the salts in the water could cause your flowers to expire faster. Try filtered water instead. I don’t have scientific evidence to prove this, but I’ve noticed my bouquets in softened water don’t last as long.
10. Use Flower Food
Search the internet and you will find about a bazillion different “Awesome hacks!” for keeping your flowers fresh. Some work, some don't. Take everything with a grain of salt or do like I do… just skip this part ;)
Yup, I hardly ever use flower food. But if you want to, I recommend a commercial flower food like FloraLife, because it contains:
Sugar (to feed the flowers)
Acid (to maintain correct pH)
Bleach (to kill bacteria)
Soda (like Sprite) comes in a close second to flower food. The sugar and acid in the soda mimic the effects of flower food. Choose a clear soda to keep the water looking clean. Add a few tablespoons each time you change the water.

There you have it! With these tips and techniques, you’ll be equipped to get the best and longest vase life out of your flowers!
Now get out there and go cut some blooms!
-Lori

When (and How) to Harvest and Store Your Peony Blooms
My best tips for making your Peony blooms last as long as possible!
There is NOTHING better than vases of gorgeous, lush Peonies covering every flat surface of your home. Peony season is short and sweet… and if you’re like me, you want to make it last as long as possible!
Today, I’m going to share my best tips for harvesting (and storing) your Peony blooms to squeeze every last bit of joy out of Peony season.
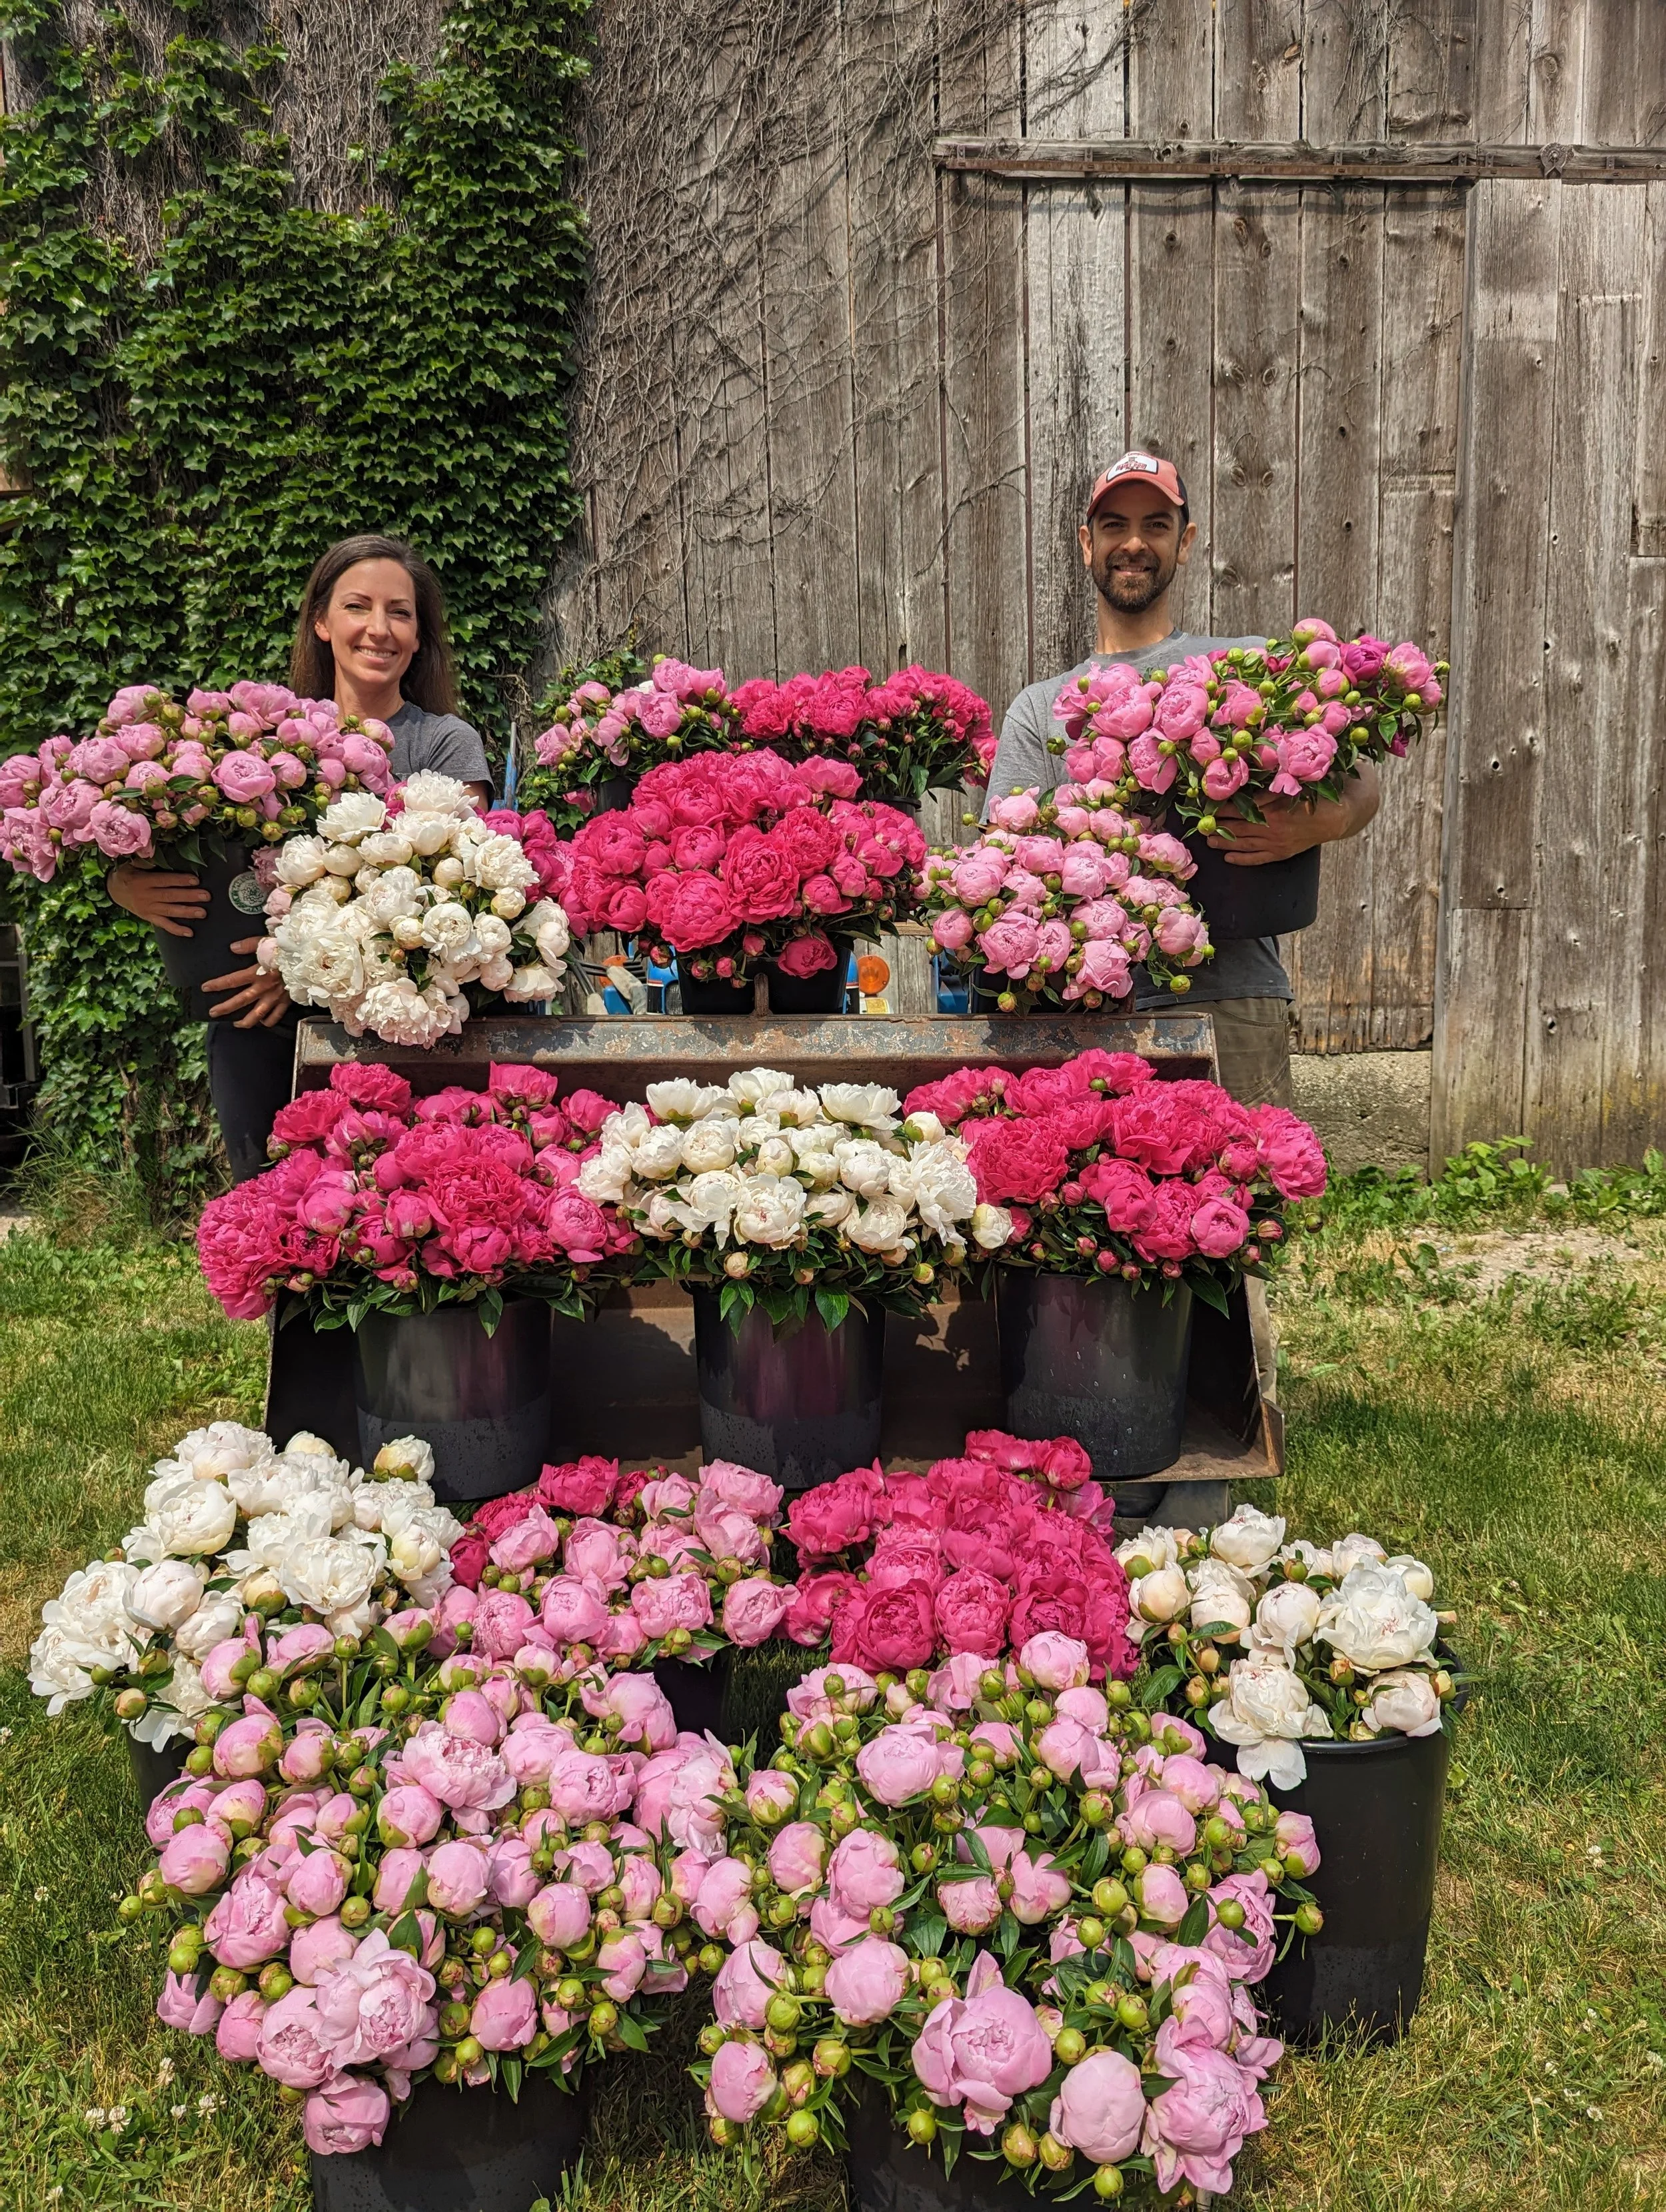
With 450 Peony plants on our farm, Peony season is a delight!
The #1 mistake I see new growers make
The best time to harvest a Peony is before it opens. I know that sounds odd, but trust me on this one.
I often see people wait until the bloom is fully open, with all the petals extended back, before they harvest the blooms.
Friend, I understand. You want to see what it looks like before you harvest it. But if you want your Peonies to last as long as possible in the vase, it’s best to harvest them right before the petals unfurl.
When you harvest at the correct stage and let the bloom open in a vase, you can expect 7-10 days of vase life.
If you wait until the bloom is already open in the garden? You're looking at 3-5 days. That's a significant difference!
There are two more reasons to harvest early:
🐜Ants. Peony buds produce a sweet, sticky sap that ants absolutely love. They're not harming your plant, but if you harvest wide-open blooms, you’re probably going to find a bunch of ants crawling around in them. Harvesting before the bloom opens makes it much easier to get rid of them. Simply hold the stem upside down and smack it against your leg. The ants will fall off (and the bloom won’t be damaged, because it’s not open yet). Or you can swish the stem in a bucket of water to rinse the ants off.
❄️Storage. Ok, this part feels like pure magic. Peony buds harvested before they are open can be stored dry (no water needed) in a cool space, like a cooler or your fridge veggie crisper drawer for up to four weeks (or even longer!). That means if you have a wedding, a party, or any special event on the calendar, you can harvest your Peonies when they are ready… and hold them until you need them. This is an absolute GAMECHANGER.
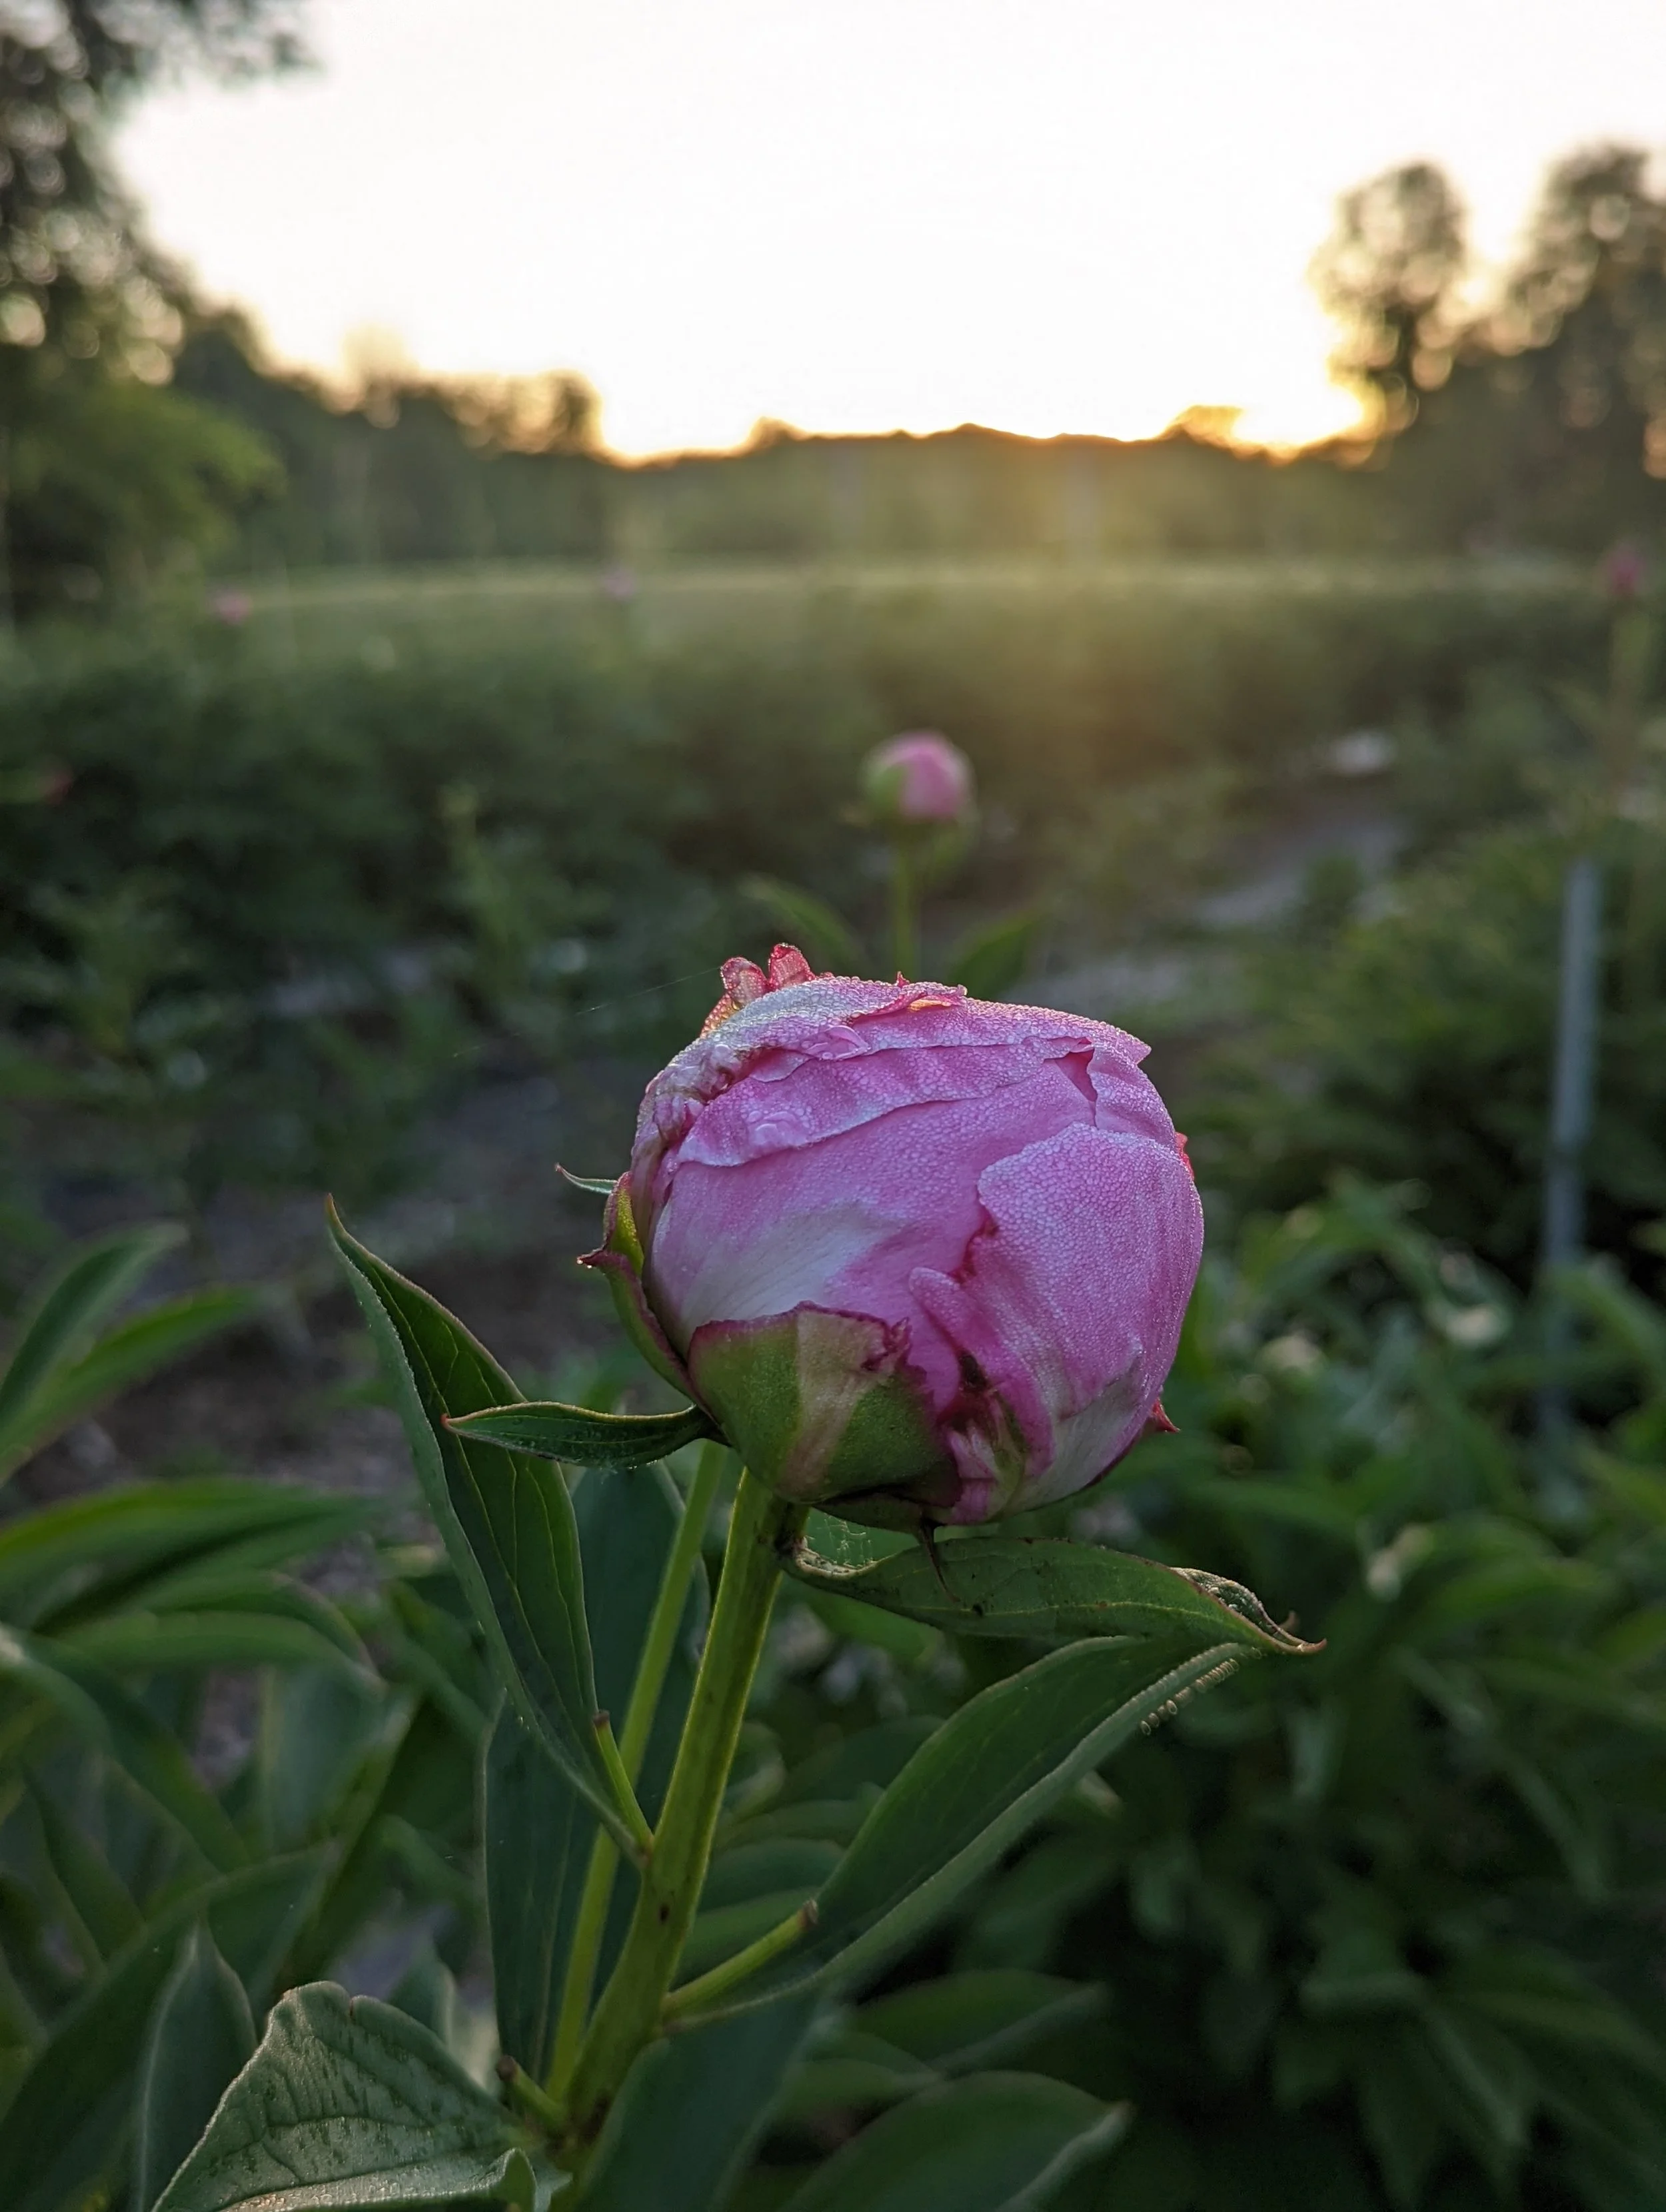
“Dr. Alexander Fleming” Peony at the correct stage of harvest.

“Dr. Alexander Fleming” Peony at open stage. When harvested at this stage, the vase life will be much shorter… and the bloom will likely be full of ants. 🙃🐜
The Soft Marshmallow Test
So, how do you know when a bud is ready to cut? You squeeze it.
I'm serious. Give the bud a gentle squeeze. What you're looking for is what I call the Soft Marshmallow Stage: the bud is still fully closed, but it yields slightly under your fingers… soft and a little squishy.
Watch the video below to see what I’m talking about!
If the bud feels hard and firm (like a marble), it's not ready yet. Come back later and check again.
Peonies, like fruit, ripen faster in hot weather. On warm days (80°F and above), we walk through the Peony field 2-3x per day, squeezing buds to check for ripeness. A few hours can make a huge difference. Buds that were not ready at breakfast time might be ripe by lunch time!
Pro tip: As a general rule, red/magenta Peonies take longer to reach the Soft Marshmallow Stage than pink or white varieties. If your reds still feel firm while your pinks are ready to go, that's normal. Just keep checking them every day.
How to Store Your Peonies to Use Later
Once you've cut your stems at the right stage, here's how to keep them fresh until you need them.
✅For short-term storage (1-2 weeks), wrap the stems loosely in newprint or paper, then place them in a plastic bag, but don’t seal it. Keep them dry (no water) in the refrigerator at 40-42°F.
✅For longer storage (up to 4 weeks), follow the instructions above, but aim for a colder temp of 32-36°F if you have that option. The colder you can keep them, the longer they will last.
When you're ready to use them, pull the stems out of the fridge about 8 hours ahead of time.
They might look a little sad, but don’t panic. Give each stem a fresh cut at the bottom of the stem (so it can start drinking water) and place them in a vase of clean water to rehydrate.
It’s so magical watching them open up and bloom! You truly have to see it to believe it.
Vase life for Peonies will vary, depending on when they were cut and how they were stored.
Fresh from the field, at the correct stage of harvest: 7-10 days
Stored for 1-2 weeks in a fridge: 3-6 days
Stored for 4+ weeks in a cooler at 32-36°: 1-4 days
As you can see, the longer they are stored, the shorter the vase life. But that’s ok… because most of the stored Peonies are intended for weddings or events, where they only need to look good for one day. We call these “Event Flowers”.
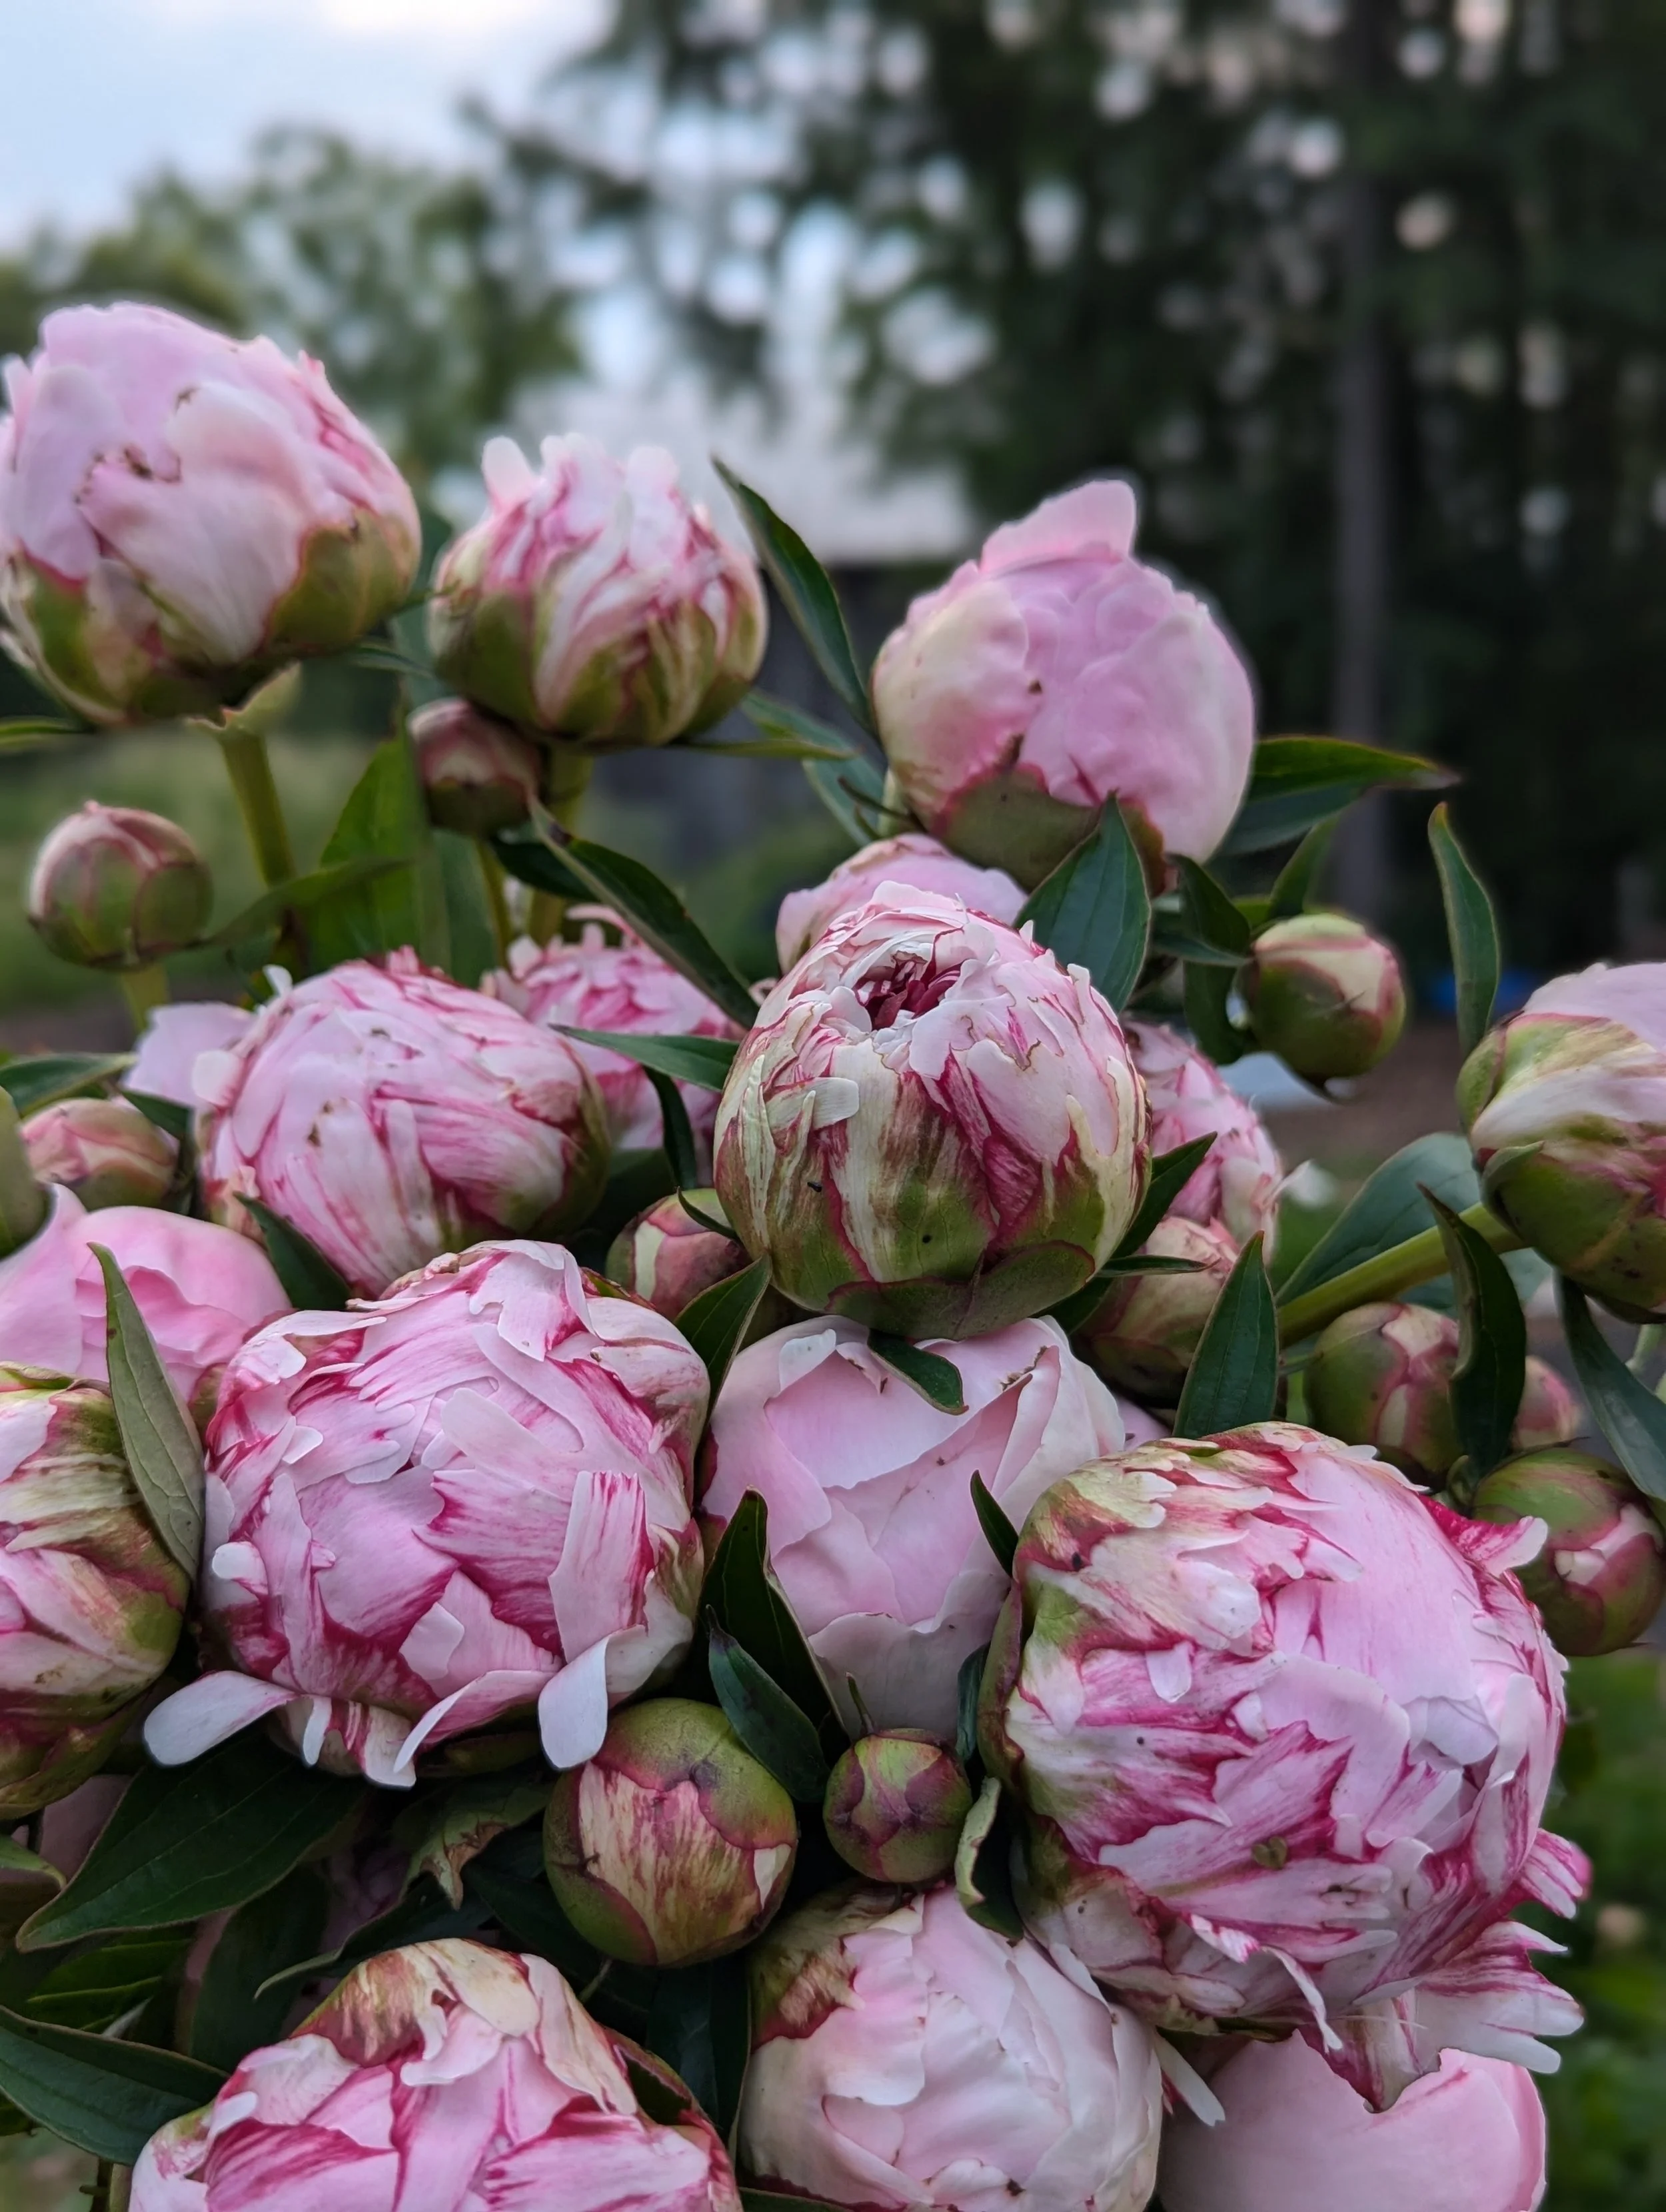
“Sarah Bernhardt” Peonies, ready to be wrapped in paper and stored in the cooler for a few weeks!
Harvesting and storing Peonies is one of those skills that feels a little mysterious at first, but once you see how it works for yourself, you’ll be a believer!
Trust the process, trust the squeeze test, and you'll be rewarded with armloads of blooms that exceed your expectations
Now go enjoy those Peonies! You've earned it!
How to Plan a Cutting Garden Layout (Without Overthinking It)
You've been dreaming about it for years. Rows of beautiful blooms, armloads of Cosmos and Zinnias, mason jars overflowing with cheery Sunflowers on every surface of your house.
So why haven’t you planted your garden yet?
Let me guess.
Every time you sit down to plan it, you end up in a rabbit hole of Pinterest boards, YouTube videos, and dreamy Instagram reels… and three hours later you're more confused than when you started.
Sound familiar? I’ve done it too, friend!
Here's the good news: Your cutting garden does NOT need to be fancy or Instagram perfect. In fact, planning a cutting garden layout can be simple when you have some guidelines.
And in this post, I'm going to give you some of my best suggestions for getting your garden planted THIS year, not “someday”.
Let's do this!
The One Thing Your Cutting Garden Can't Live Without: 6 Hours of Sun
Let’s start with the most important thing. Before we talk about rows, pathways, and any of the fun stuff, we have to talk about the sun.
Your cutting garden needs a minimum of 6 hours of direct sunlight per day. Full sun is even better. This is truly a non-negotiable when it comes to cut flowers.
Too shady? You'll get leggy, floppy plants with few blooms. [Insert sad trombone noise]
Everything else in this post is a suggestion… but adequate sunlight is not.
So before you do anything else, walk your property and find your sunniest spot.
You might have to get creative. I know plenty of dedicated growers who only get sun in their driveway, so they build garden beds in their driveway! Others may need to ask a friend, family member, or neighbor if they can use part of their yard. Or maybe you rent a plot at a community garden. There are endless options!

Full sun = happy cut flowers
How Big Should My Garden Be?
Great question.
I always recommend starting small and expanding the following year, if you feel ready.
Why? I see lots of people with ambitious plans in the spring… but by early summer, they are drowning in weeds and give up on their dream garden.
You can grow a ridiculous amount of flowers in a small space. Start with a few rows/beds that are roughly 3ft x 12ft and see how it works for you.
I’d rather you have a beautiful, enjoyable, and manageable space than burn yourself out in less than 2 months.
Which Direction Should Your Cutting Garden Rows Run?
Okay, I get this question all the time.
Should my rows run north to south? East to west? Does it even matter?
Here's my answer: it doesn't really matter.
I know, I know. You were expecting a definitive answer… but there isn’t one. Every grower is working with a different space and has to figure out what works best for them.
One thing you can consider is how much wind your plants will be exposed to.
For example, our fields are very windy, and the wind usually comes from the west, so we plant our rows east to west, so the wind can blow along the rows, instead of blowing the rows over.
But in the end, the direction of your rows is far less important than simply getting them in the ground. Work with the shape of your space, and don't let this one detail hold you back.
How Wide Should Cutting Garden Rows Be?
Three feet. That's our magic number.
Three-foot-wide rows are the sweet spot for a cutting garden. This width is wide enough to fit a LOT of plants in a small space, while also narrow enough that you can reach the center from either side without throwing out your back (please trust me on this one. I grow flowers for a living, and it’s important to have good posture and body mechanics when you’re harvesting to prevent injuries!).
If you're working with raised beds, aim for the same. 3 feet across is the ideal working width for most gardeners.
Don't Skip the Pathways in Your Cut Flower Garden
When you’re short on space, it can be tempting to skimp on pathway space.
I’ve made this mistake before. I wanted to dedicate as much space to flowers as possible and figured I could “cheat” with an 18” wide pathway.
Disaster.
By mid-summer, it was impossible to navigate the pathways without damaging the plants and blooms. There was no room to move, weeding was a nightmare, and every time I bent over to harvest flowers, I ended up knocking over plants in the row behind me... with my butt. How embarrassing. Ha!
Your cutting garden pathways should also be 3 feet wide. Yes, 3 full feet. And no, that's not wasted space.
Listen, you're going to be out in that garden a lot. Harvesting, weeding, watering, and admiring your hard work. You need room to move around comfortably with a harvest bucket in one hand and your clippers in the other. A 3-foot-wide pathway also accommodates most wheelbarrows or garden carts.
Wide pathways = a garden you actually enjoy working in.
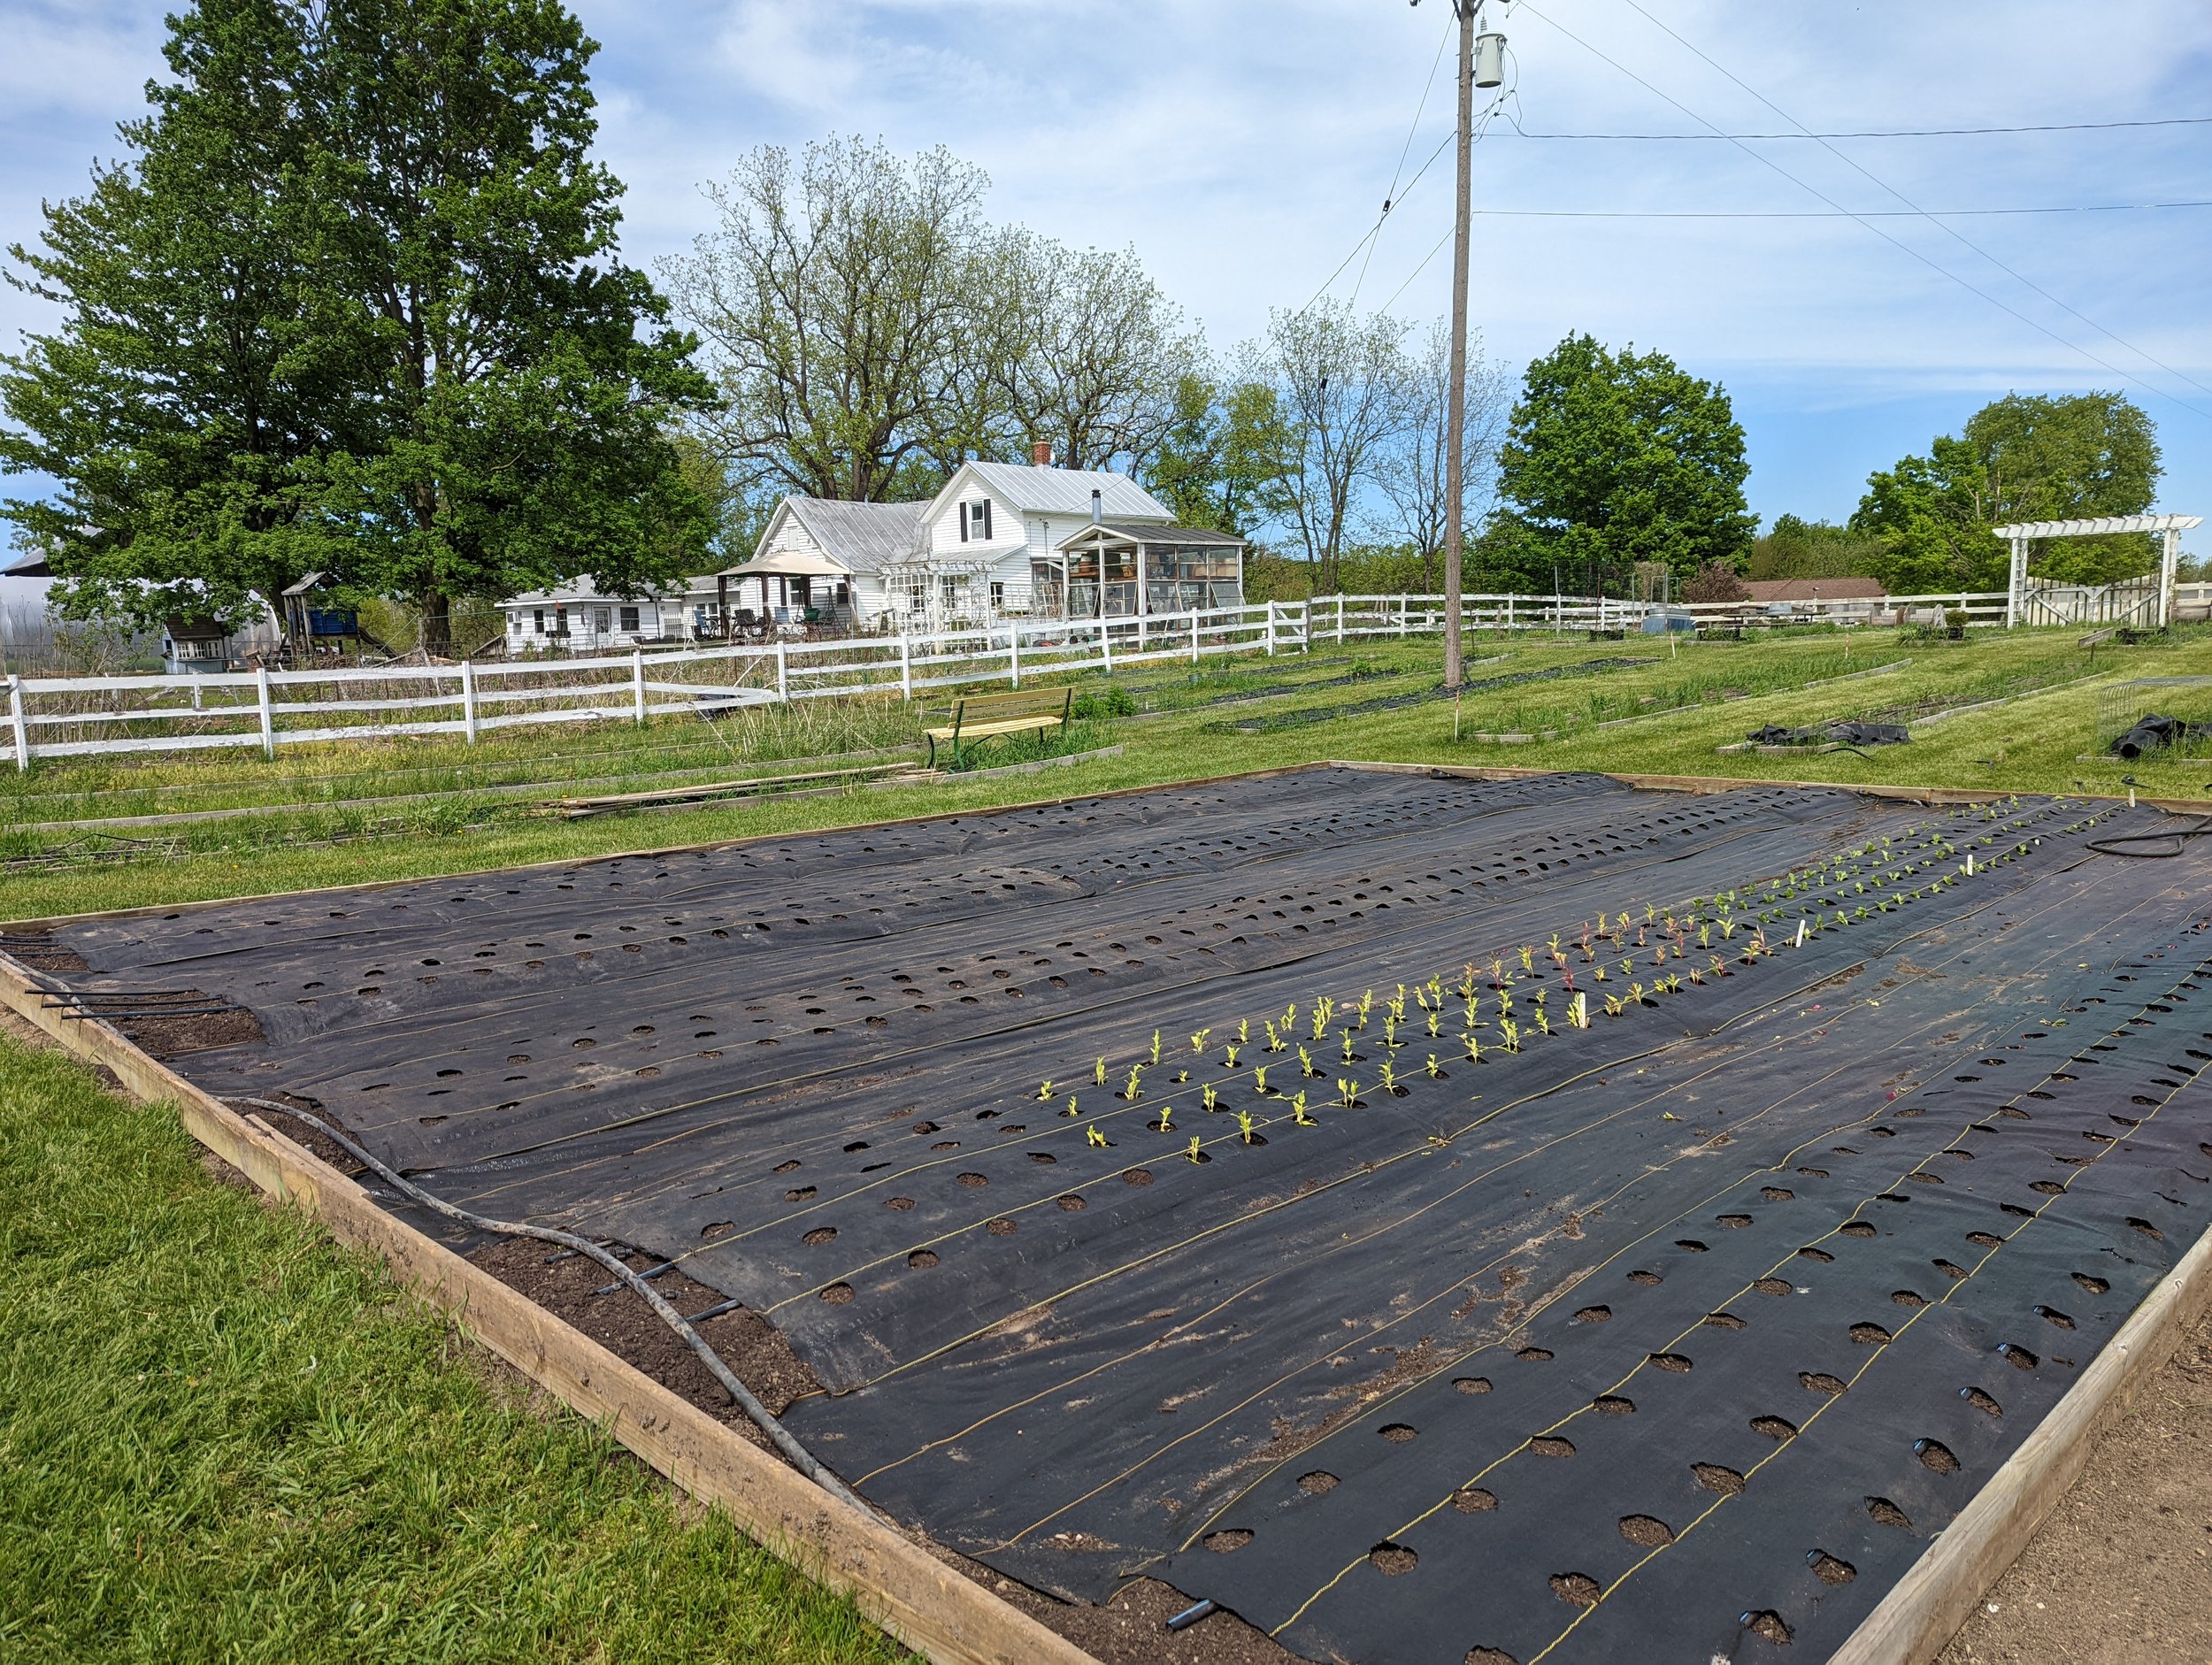
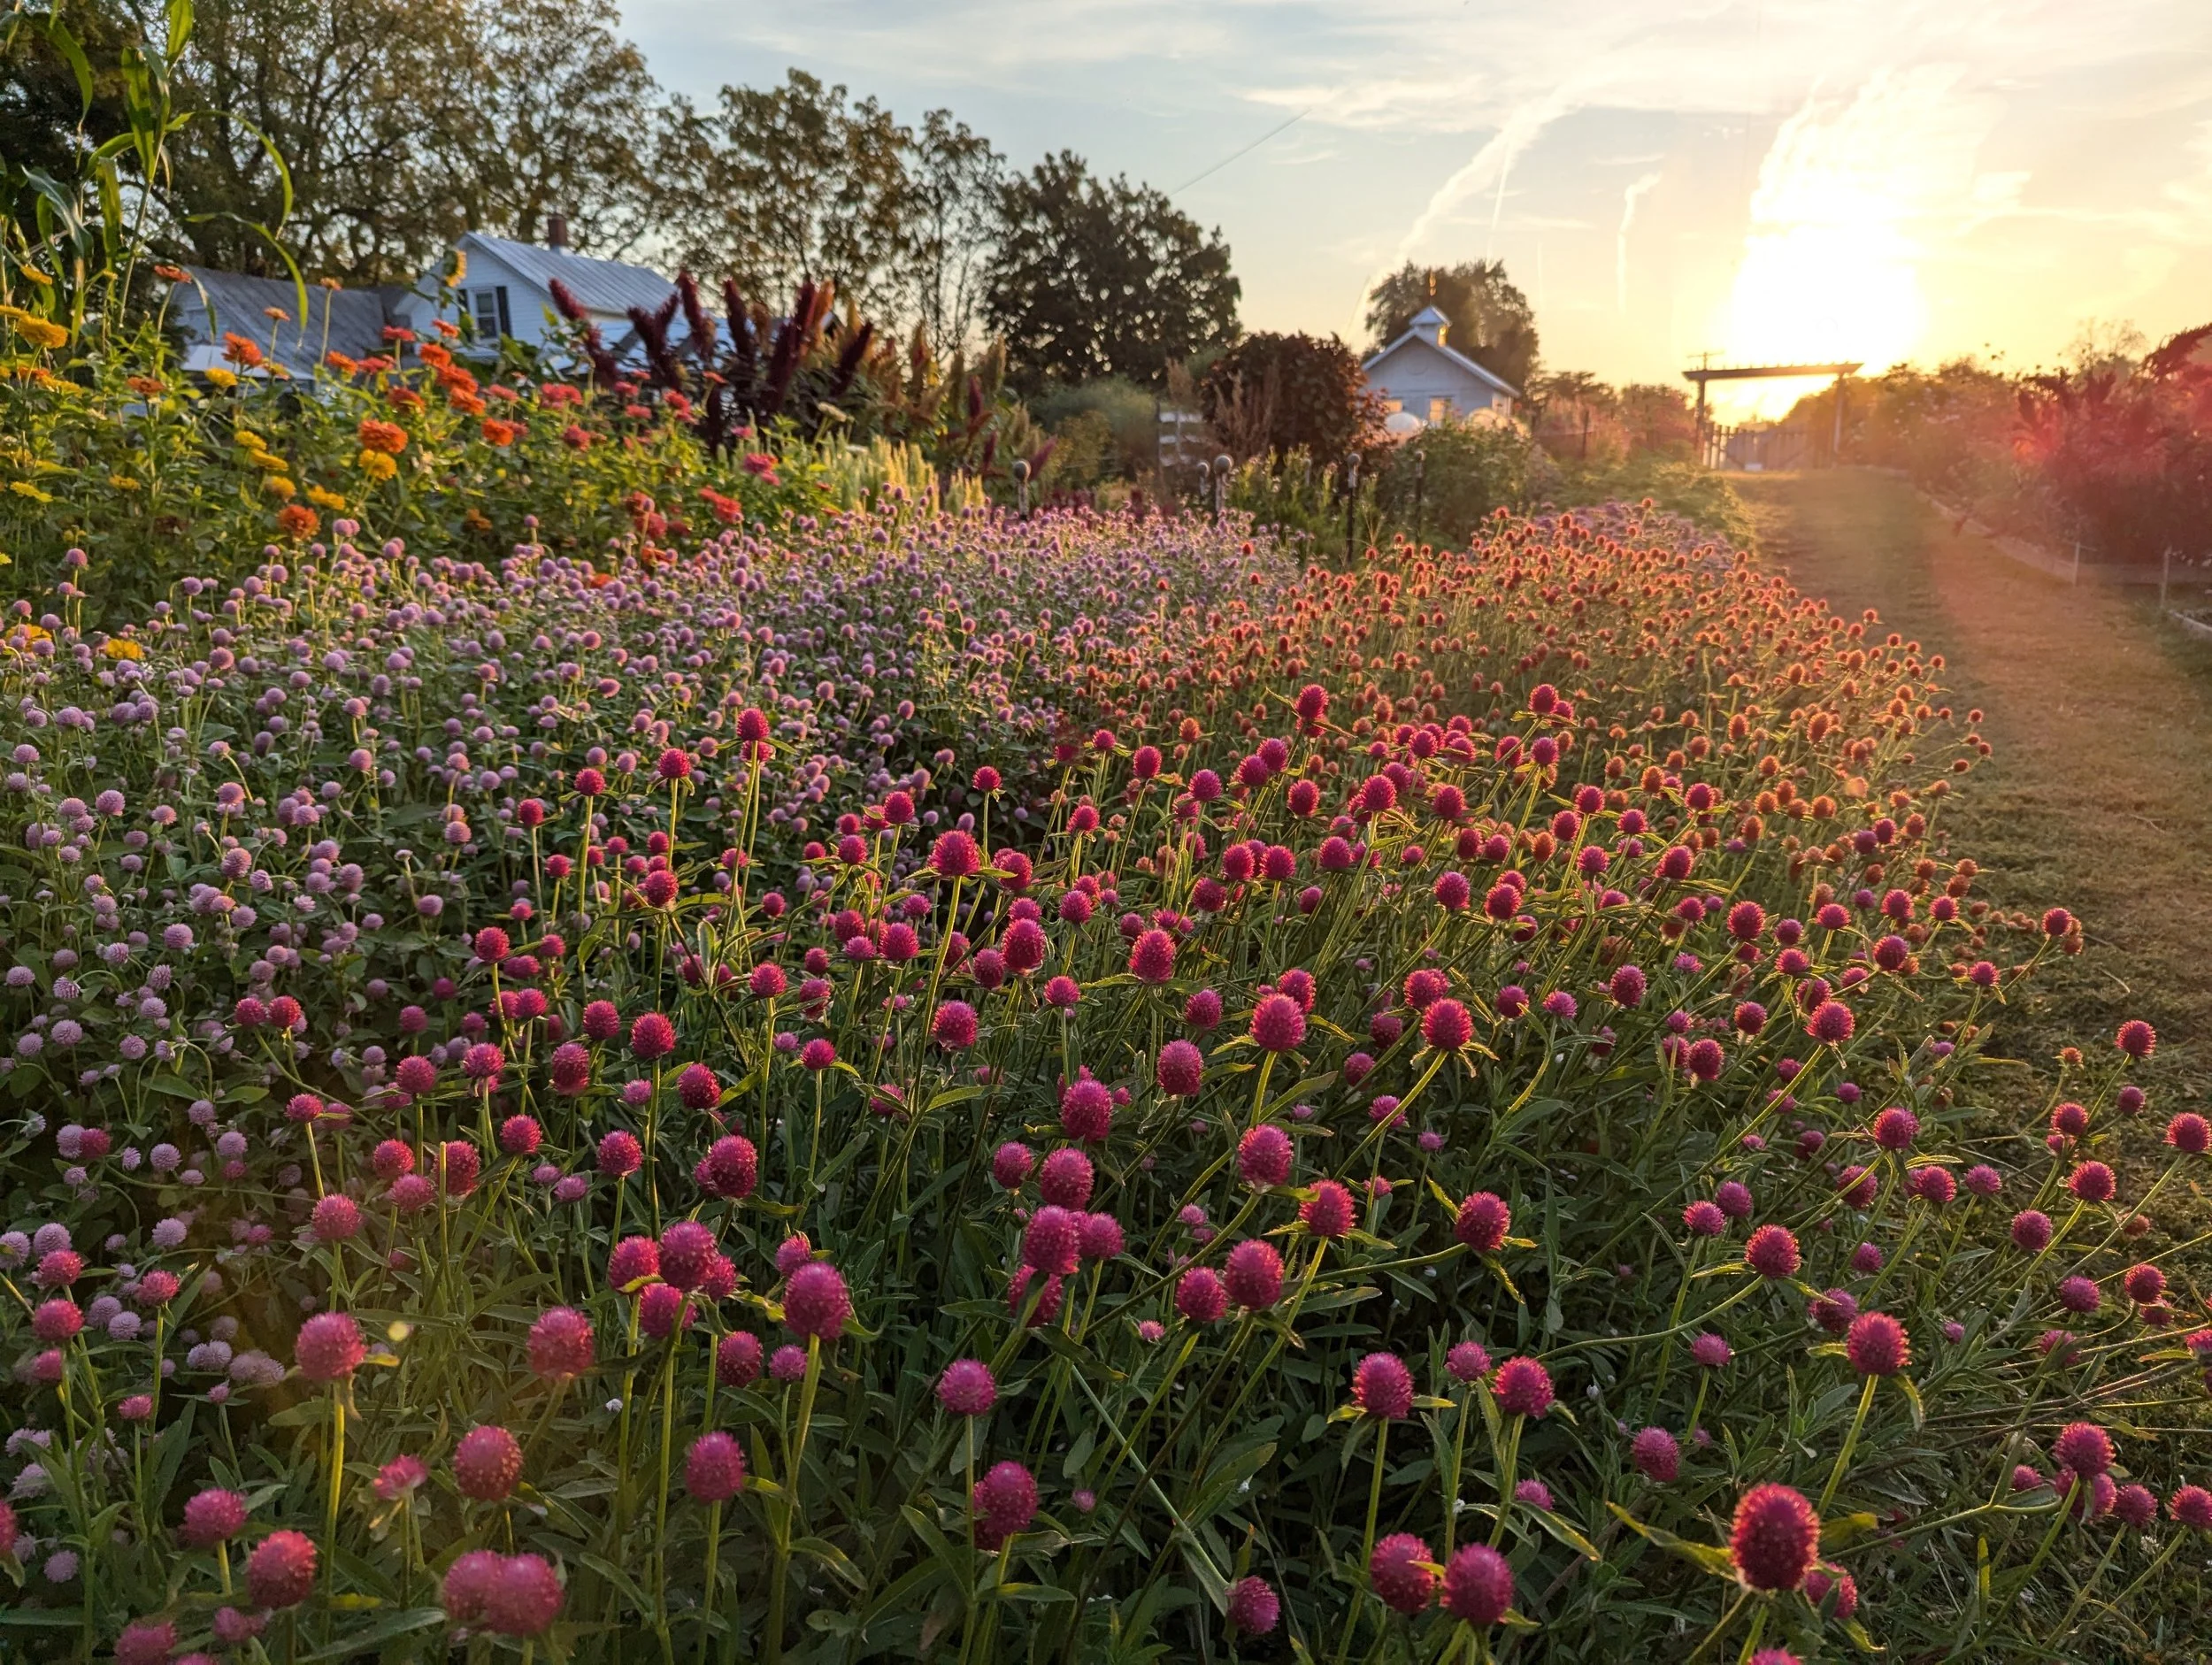
3 ft wide beds and 3 foot wide pathways at planting time on May 15…
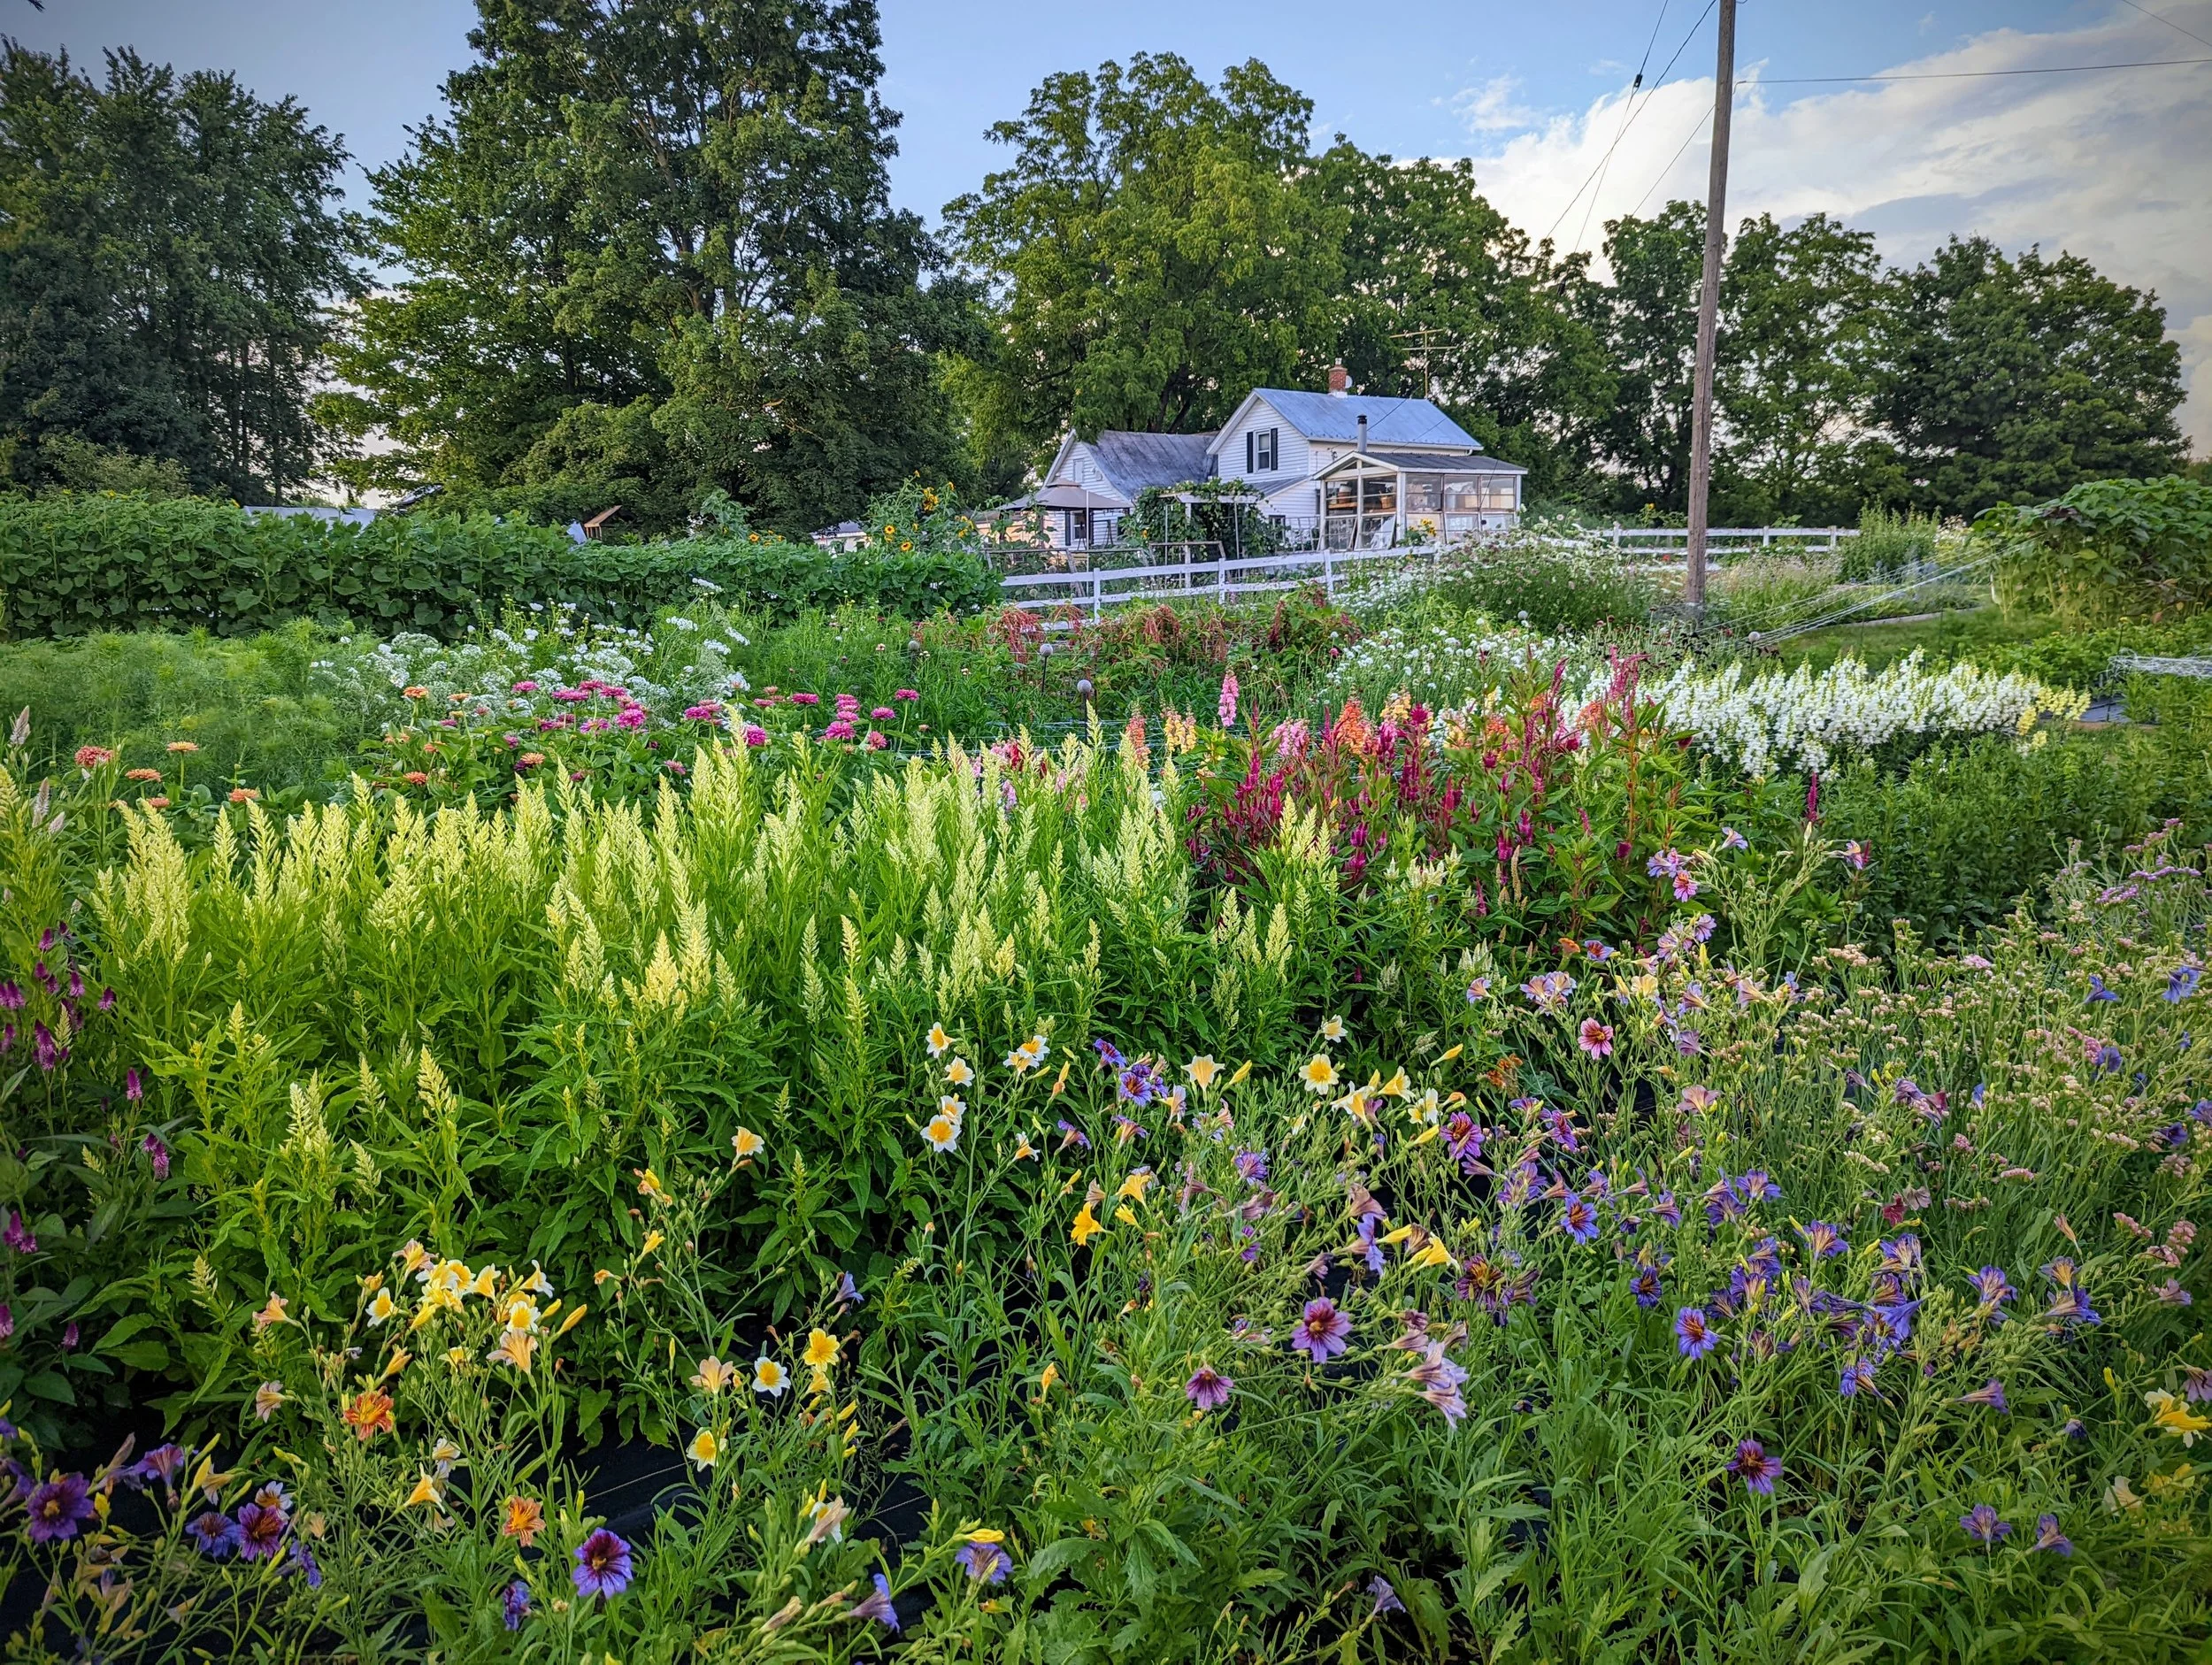
…the same area, just 2 months later! You can see why the 3 ft wide pathways are necessary.
How to Organize Your Cutting Garden: Tall Plants Go North
Here's one of my favorite cutting garden layout tips. You better believe I learned this one the hard way. Ha!
Always plant your tallest flowers on the north end of your garden.
Why? Because tall plants shade out shorter ones. If you plant your 6-foot sunflowers on the south end of your garden, the shorter plants behind them don't stand a chance. Remember that rule about 6 hours of direct sunlight?
By placing tall flowers on the north end of the bed, you allow the sun to reach all your plants evenly throughout the day. Everybody wins.
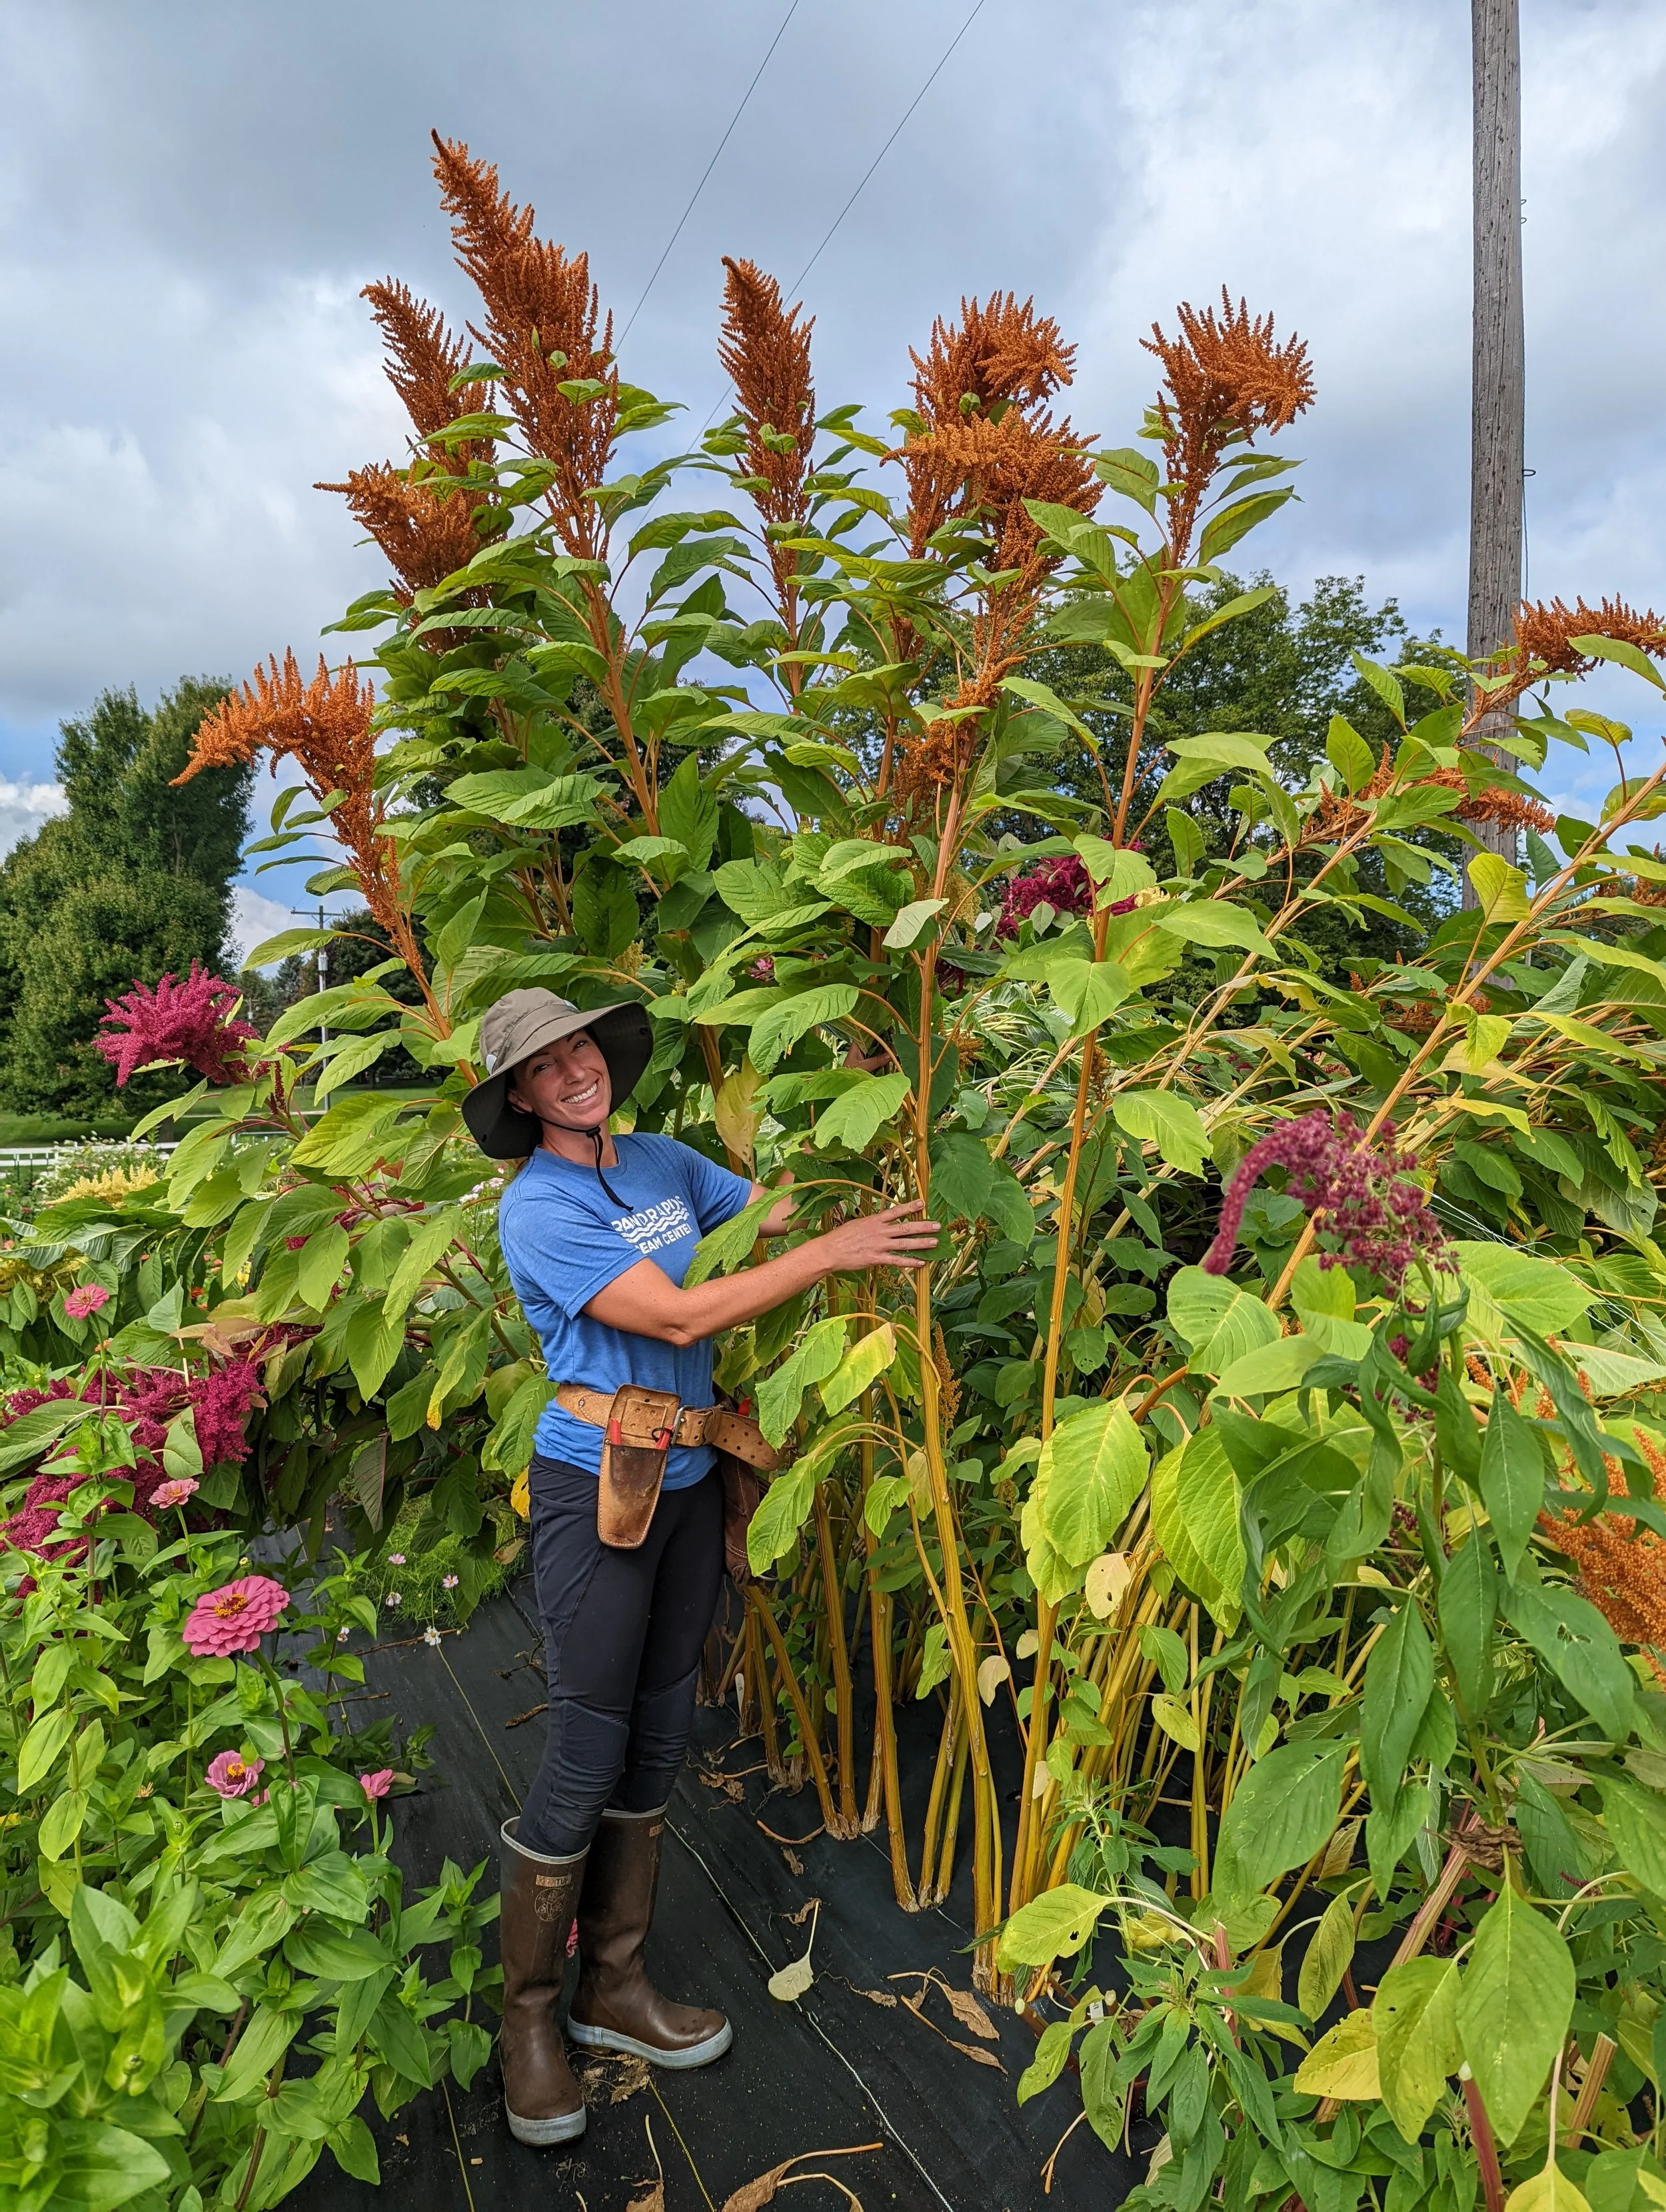
Amaranth gets HUGE so it always goes in the north end of the planting space so it’s doesn’t shade out the other flowers!
Cut Flower Spacing Guide: One Number to Rule Them All
When I started growing cut flowers, I stressed over plant spacing. I wanted to make sure I was doing it “right” and obsessively studied the seed packs.
I ended up doing way too much complicated math and planning.
After over a decade of trying multiple spacings, it turns out the vast majority of cut flower annuals thrive at 9-inch spacing.
We plant 90% of our annuals at this spacing, and it makes planning so much easier. Zinnias, Snapdragon, Celosia, Statice, Ageratum, Scabiosa, Strawflower, China Aster… all at 9 inches.
The few exceptions?
-We still plant Cosmos at 12 inches.
-Dahlias can be planted from 12 to 18 inches, depending on the variety (size can vary a lot!).
-Single-stem Sunflowers thrive at 6-inch spacing, while branching Sunflowers need 12-18 inches.
Isn't that refreshing? One number to remember, and most of your garden is covered.
NOTE: When you are planting flowers for a cutting garden, the suggested spacing on the seed pack is just that - a suggestion. I almost always recommend planting them closer than suggested, since this encourages the flowers to grow taller and straighter.
Succession Planting for Beginners: How to Have Blooms All Season Long
Have you ever had a garden that was absolutely gorgeous for two weeks… and then it fizzled out?
That's what happens without succession planting.
Succession planting simply means staggering your plantings so that new flowers are always coming into bloom. Instead of planting everything at once and having a big flush of color followed by a whole lot of nothing, you plant in intervals (every 2-3 weeks) so the harvest keeps coming.
It doesn't have to be complicated. For beginners, I recommend planting 2-3 successions, spaced about 2-3 weeks apart.
This is what it looks like in practice: You plant half of your seedlings and seeds on a certain date. Then, 2-3 weeks later, you plant the rest of your garden.
This will ensure you have months of blooms, instead of just a few weeks.
You can learn more about Succession Planting and how I do it HERE.
Sketch Out Your Cutting Garden Layout (Even Badly)
Okay, I know some of you are already breaking out the graph paper. (Hello, fellow nerds.🤓 I see you. You are my people)
And some of you are thinking, "I’m just gonna wing it and plant some stuff."
Hold up. I love your enthusiasm, but we do need a plan.
It doesn't have to be fancy. A rough sketch on the back of a grocery list is fine. The point is to get your ideas out of your head and onto paper so you can actually see what you're working with before you start digging.
Map out your rows, your pathways, your tall plants on the north end, and roughly where each flower variety will go.
This is not an art project, and you’re not being graded. Even a bad plan is better than no plan at all.
And guess what? You probably won’t stick to your plan, but that’s ok.
The process of planning is what’s important. The process helps you figure out where things could go awry ahead of time.
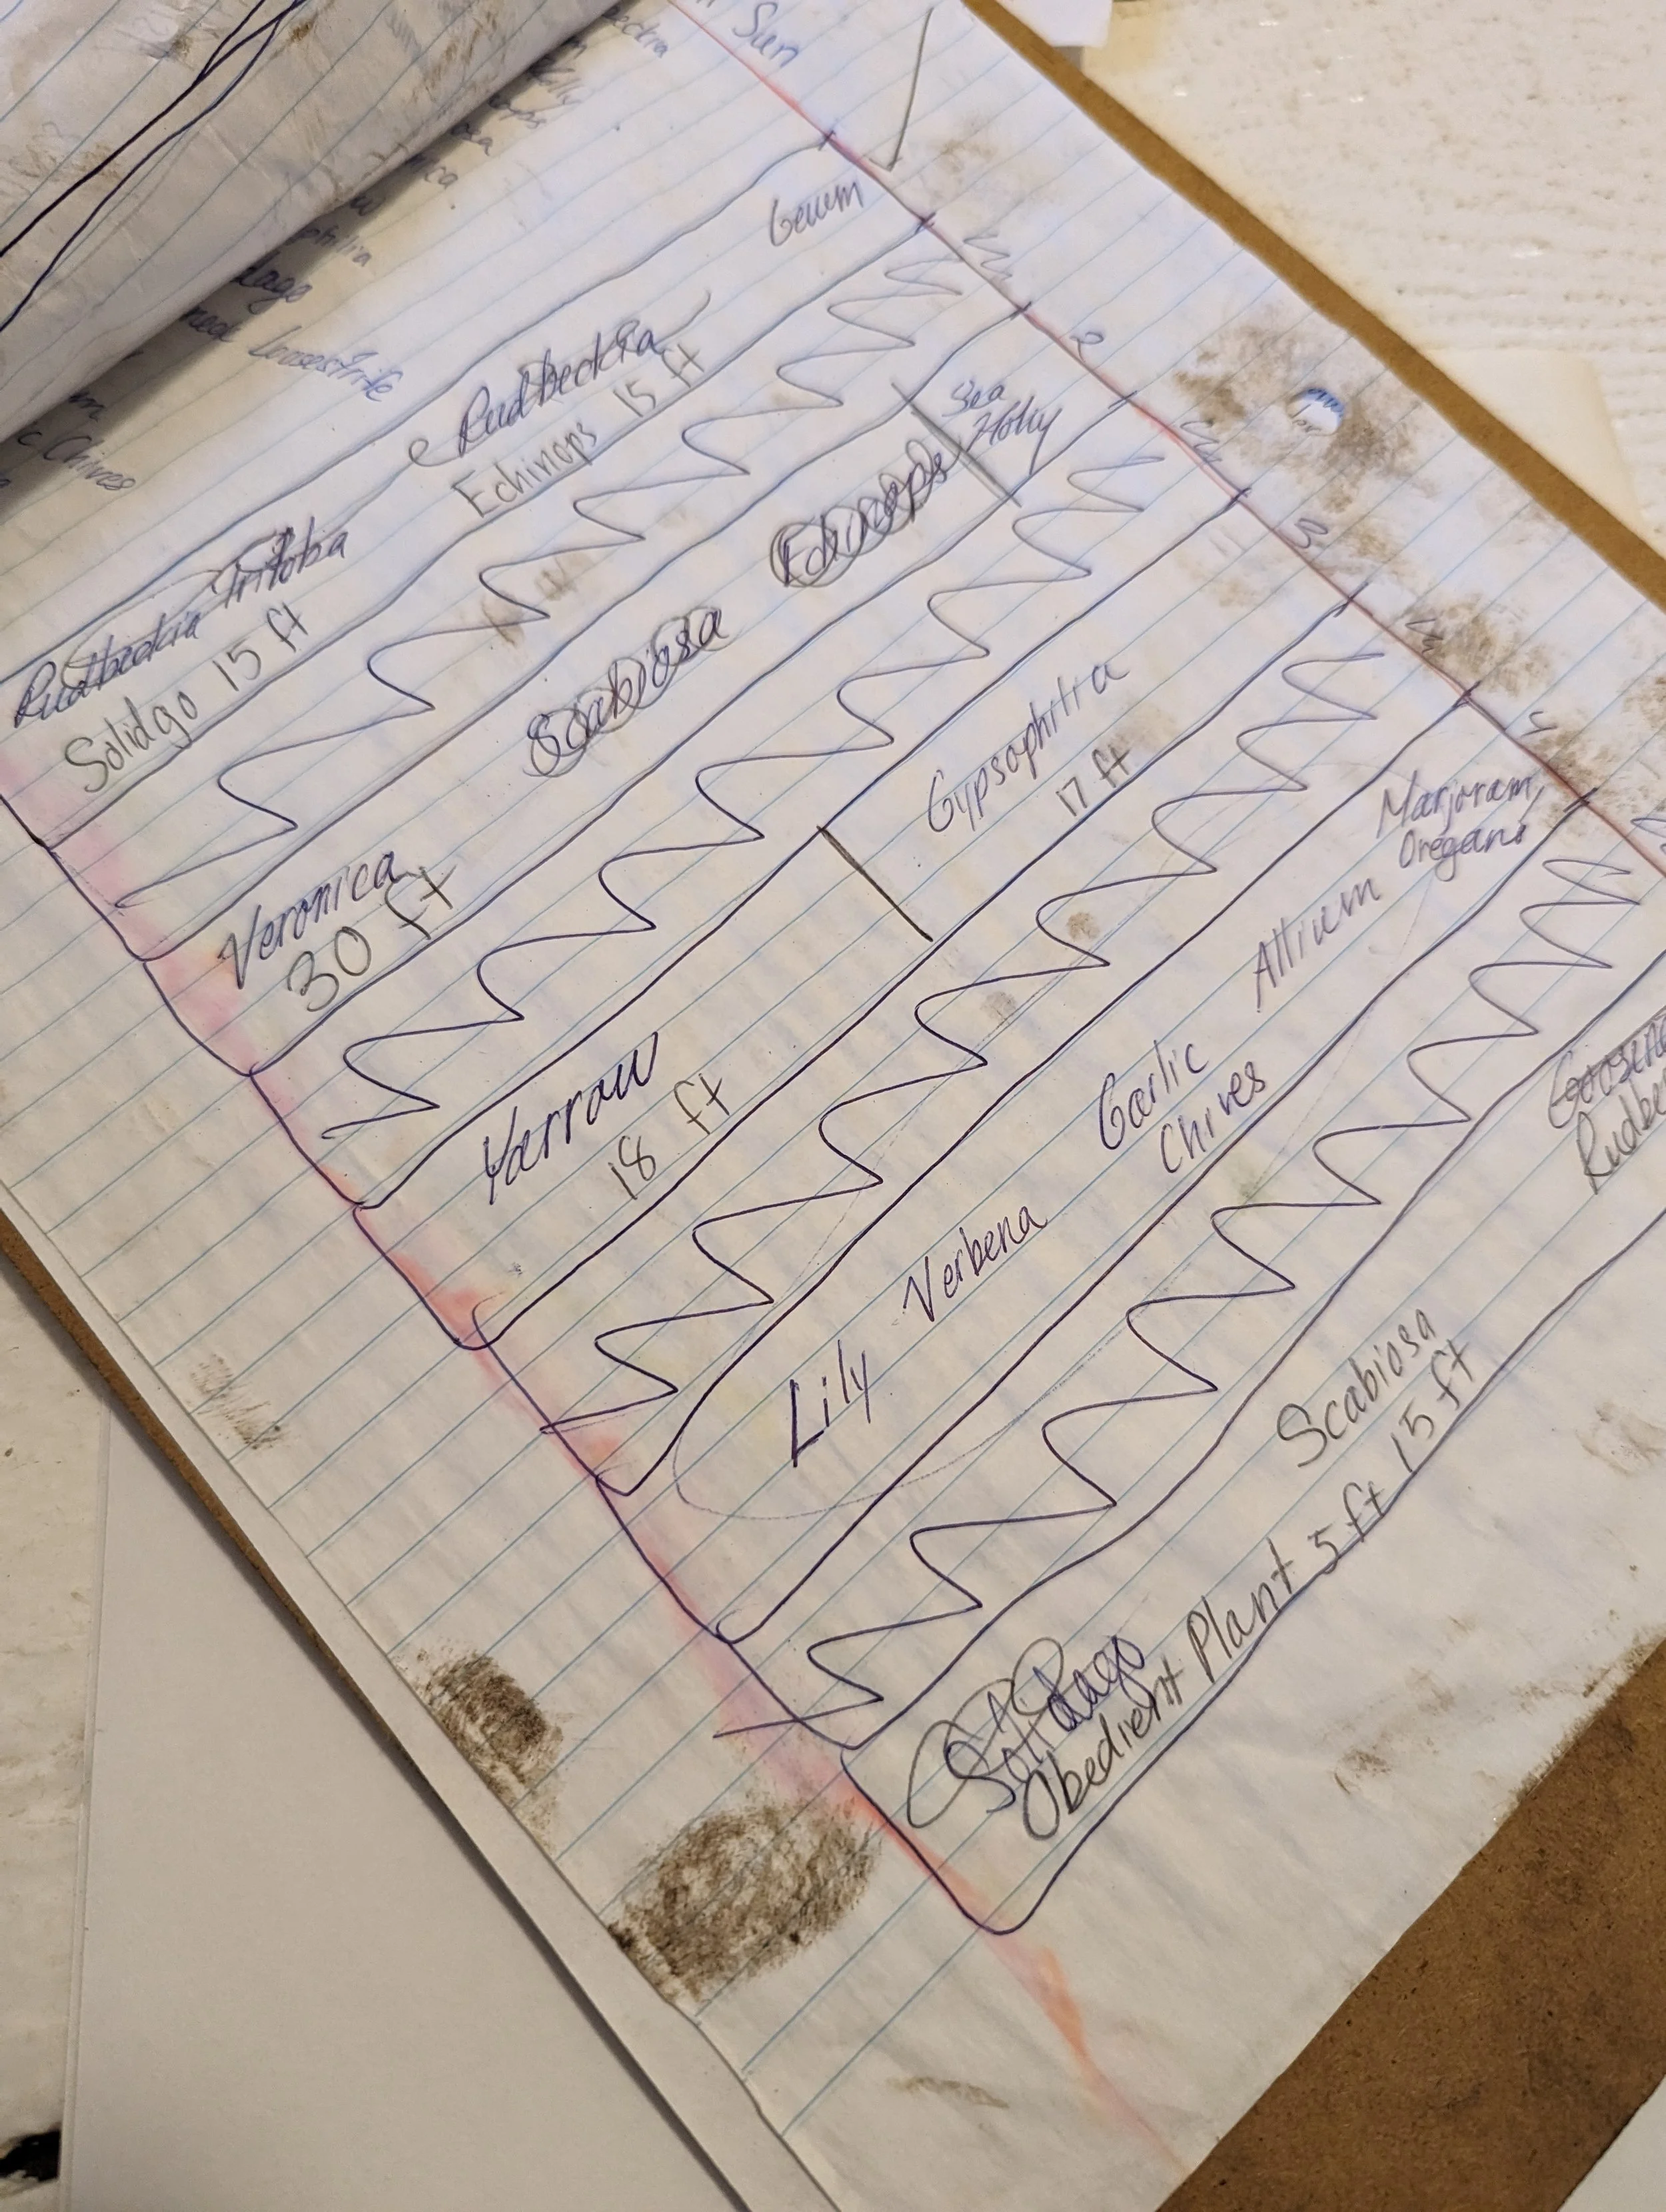
An example of one of my rough sketches, complete with misspelled words, dirt and coffee stains. Ha!
The Best Cutting Garden Layout Is the One You Actually Plant
Here's my final piece of advice, and probably the most important: Done is better than perfect.
The best cutting garden layout isn't the one with the most precise measurements or the most elaborate plan. It's the one that gets planted and enjoyed.
On our farm, our favorite phrase is “Next year is going to be great!” 🤣
You’ll never, ever have a perfect garden. You’ll always make changes and improvements.
You’re going to mess up. You’re going to have failures.
That’s all ok! Because next year’s garden is going to be great, right?
Now stop overthinking it and go plant something! 🌸
-Lori
Ready to go deeper? My online course, Backyard Cutting Garden 101, covers everything you need to plan, grow, harvest, and arrange your dream cutting garden. Click below for all the details!