

How to Create a Sensory Garden!
Learn how to create a delightful sensory experience in your own backyard!
How to Create a Sensory Garden
Have you ever heard of a “Sensory Garden”? A Sensory Garden is an area that allows visitors to enjoy a wide variety of sensory experiences. In other words, it’s a garden designed to delight ALL the senses!
Over the years, I unconsciously created my own Sensory Garden… before I even heard the term “Sensory Garden”!
I purchased some plants because of the way they tasted, some because of how they looked, some because of how they smelled, some because of how they felt, and some because of the pollinators they attracted (because I liked how the buzzing of bees sounded).
I’ve always felt deep in my soul that gardens should be a place a delight, a place where form (beauty) and function (practical output) work in harmony.
Gardens should be beautiful and engage all the senses!

“What can your eyes desire to see, your ears to hear, your mouth to taste or your nose to smell that is not to be had in the garden?” - William Lawson, 1618
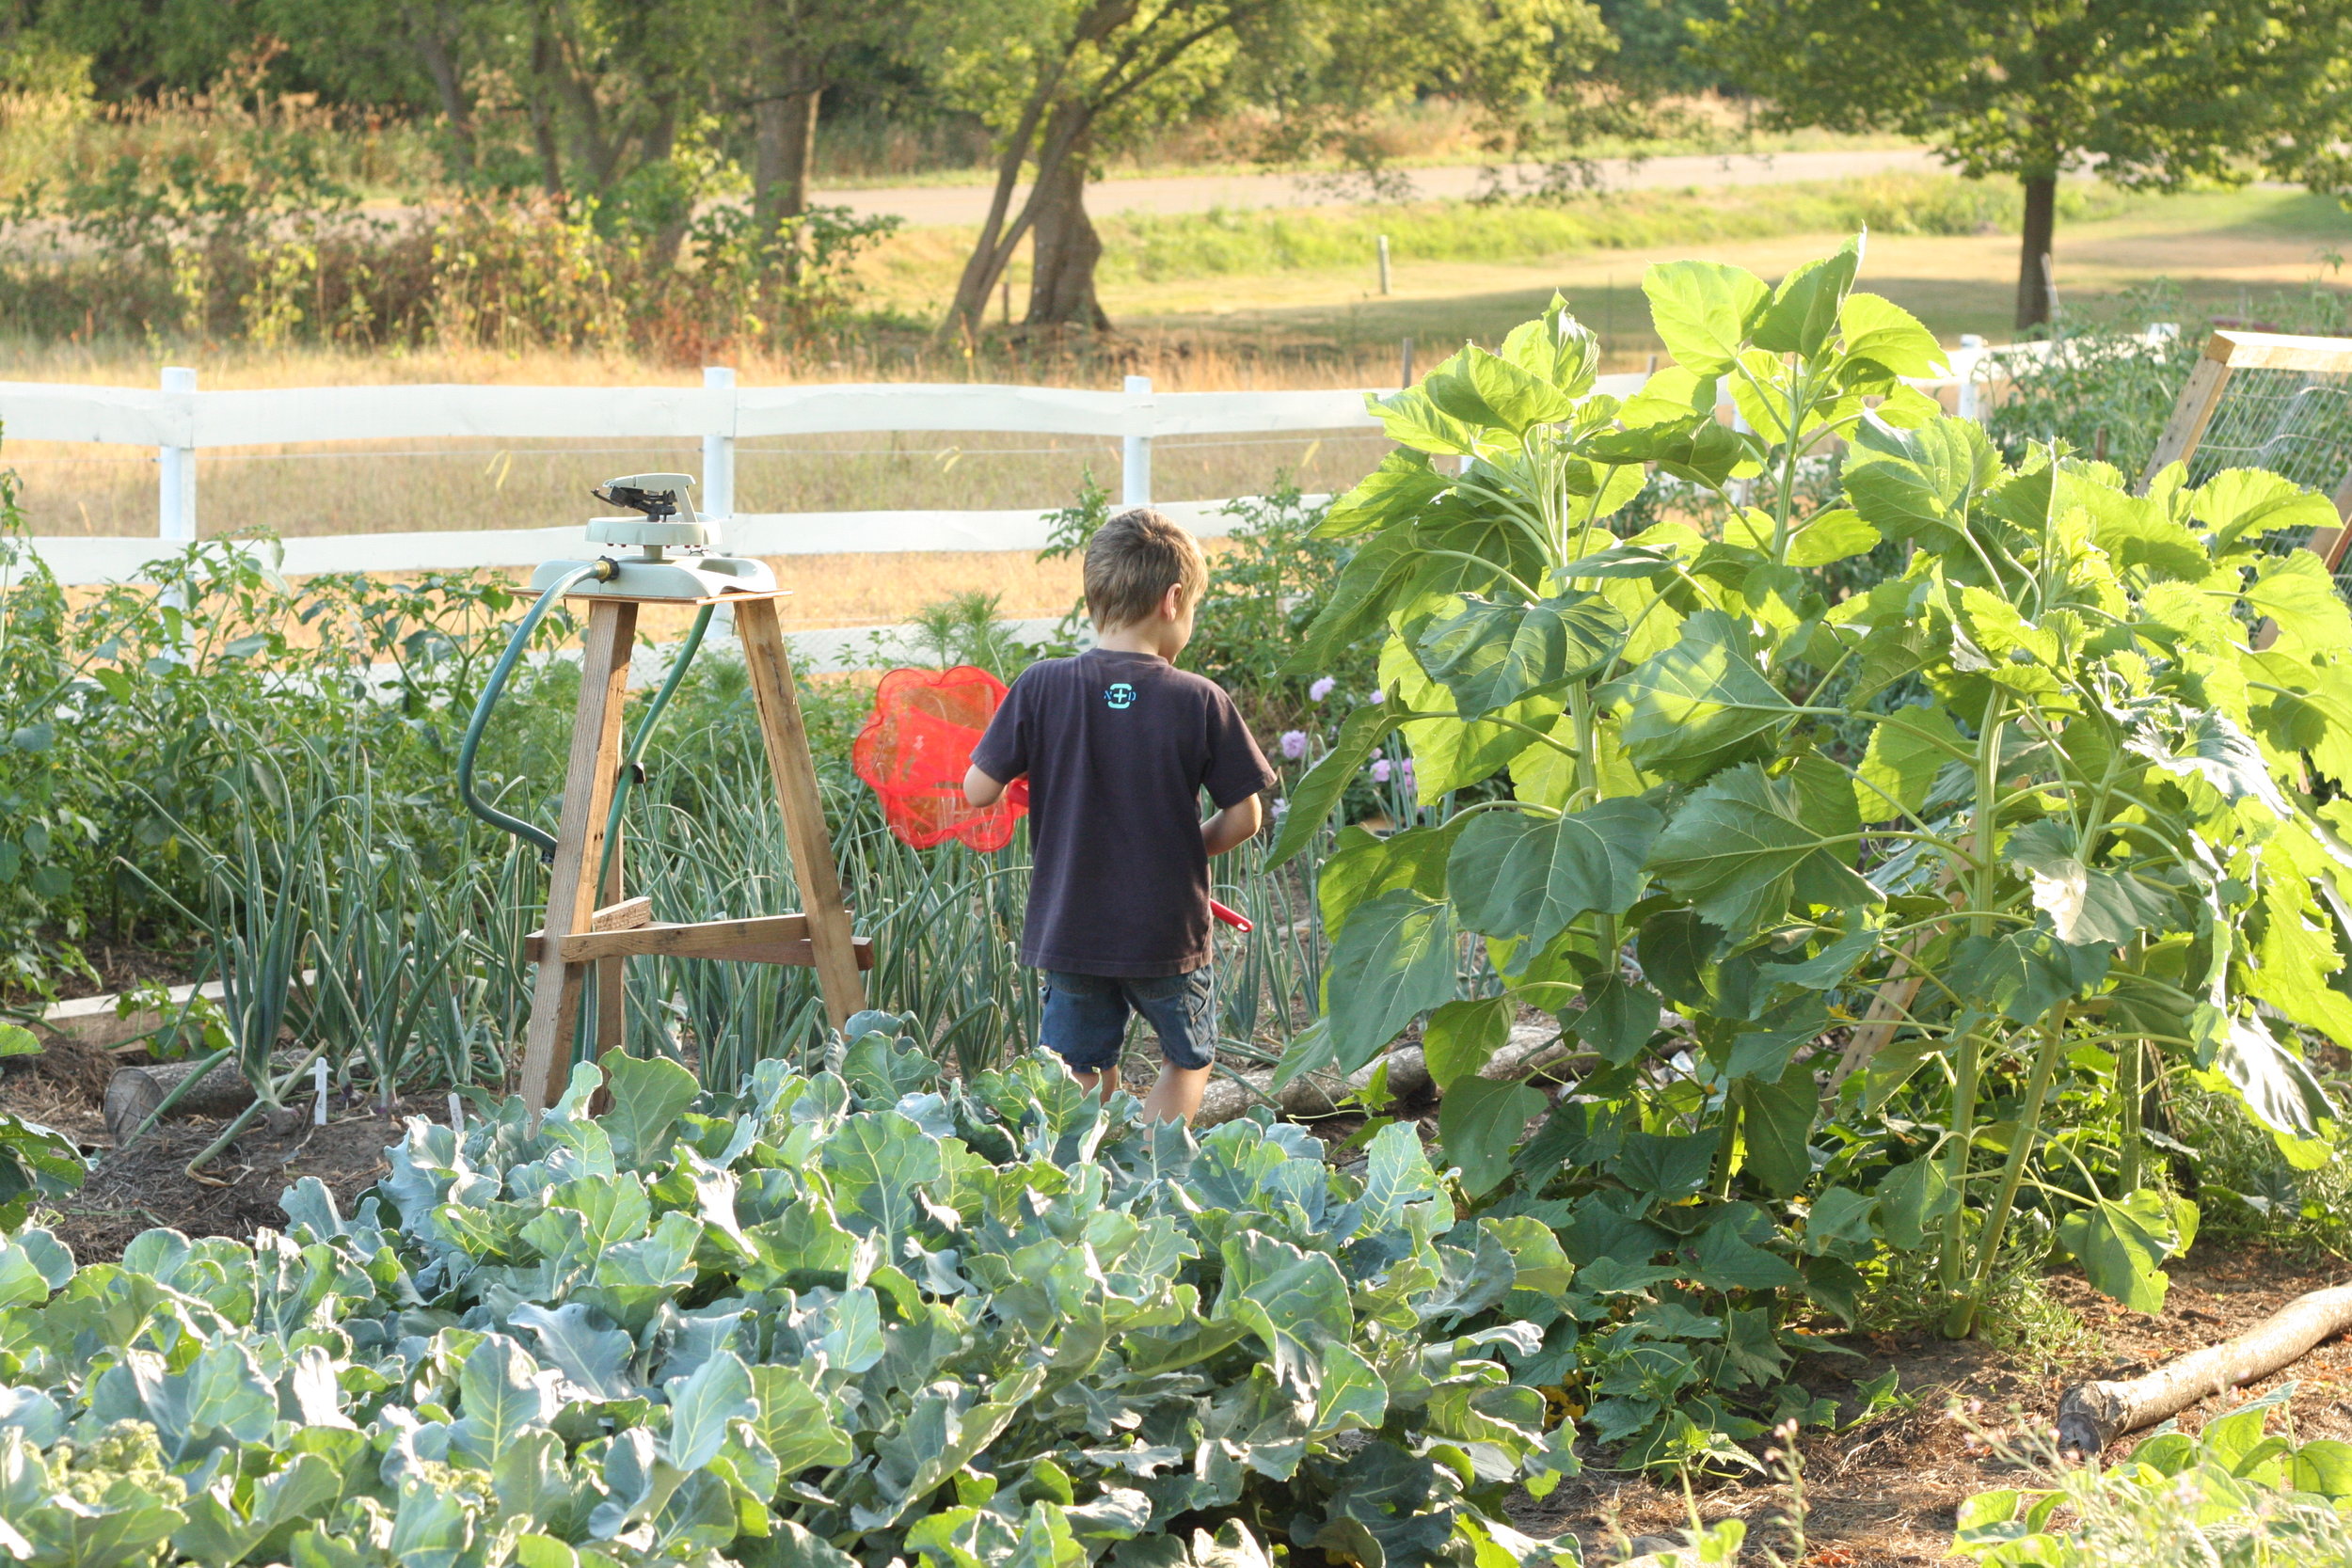
Both of my children quite literally grew up in the garden. When we moved to the farm, my kids were both under 5. The garden was the only enclosed area we had, so I would shut the gates and we’d spend hours out there together.
Their days consisted of exploring in the garden all day long, playing with worms, digging holes, making mud pies, chasing cabbage moths, eating berries and picking flowers.

Let’s explore the 5 senses and how we can incorporate them into our home gardens!
Taste
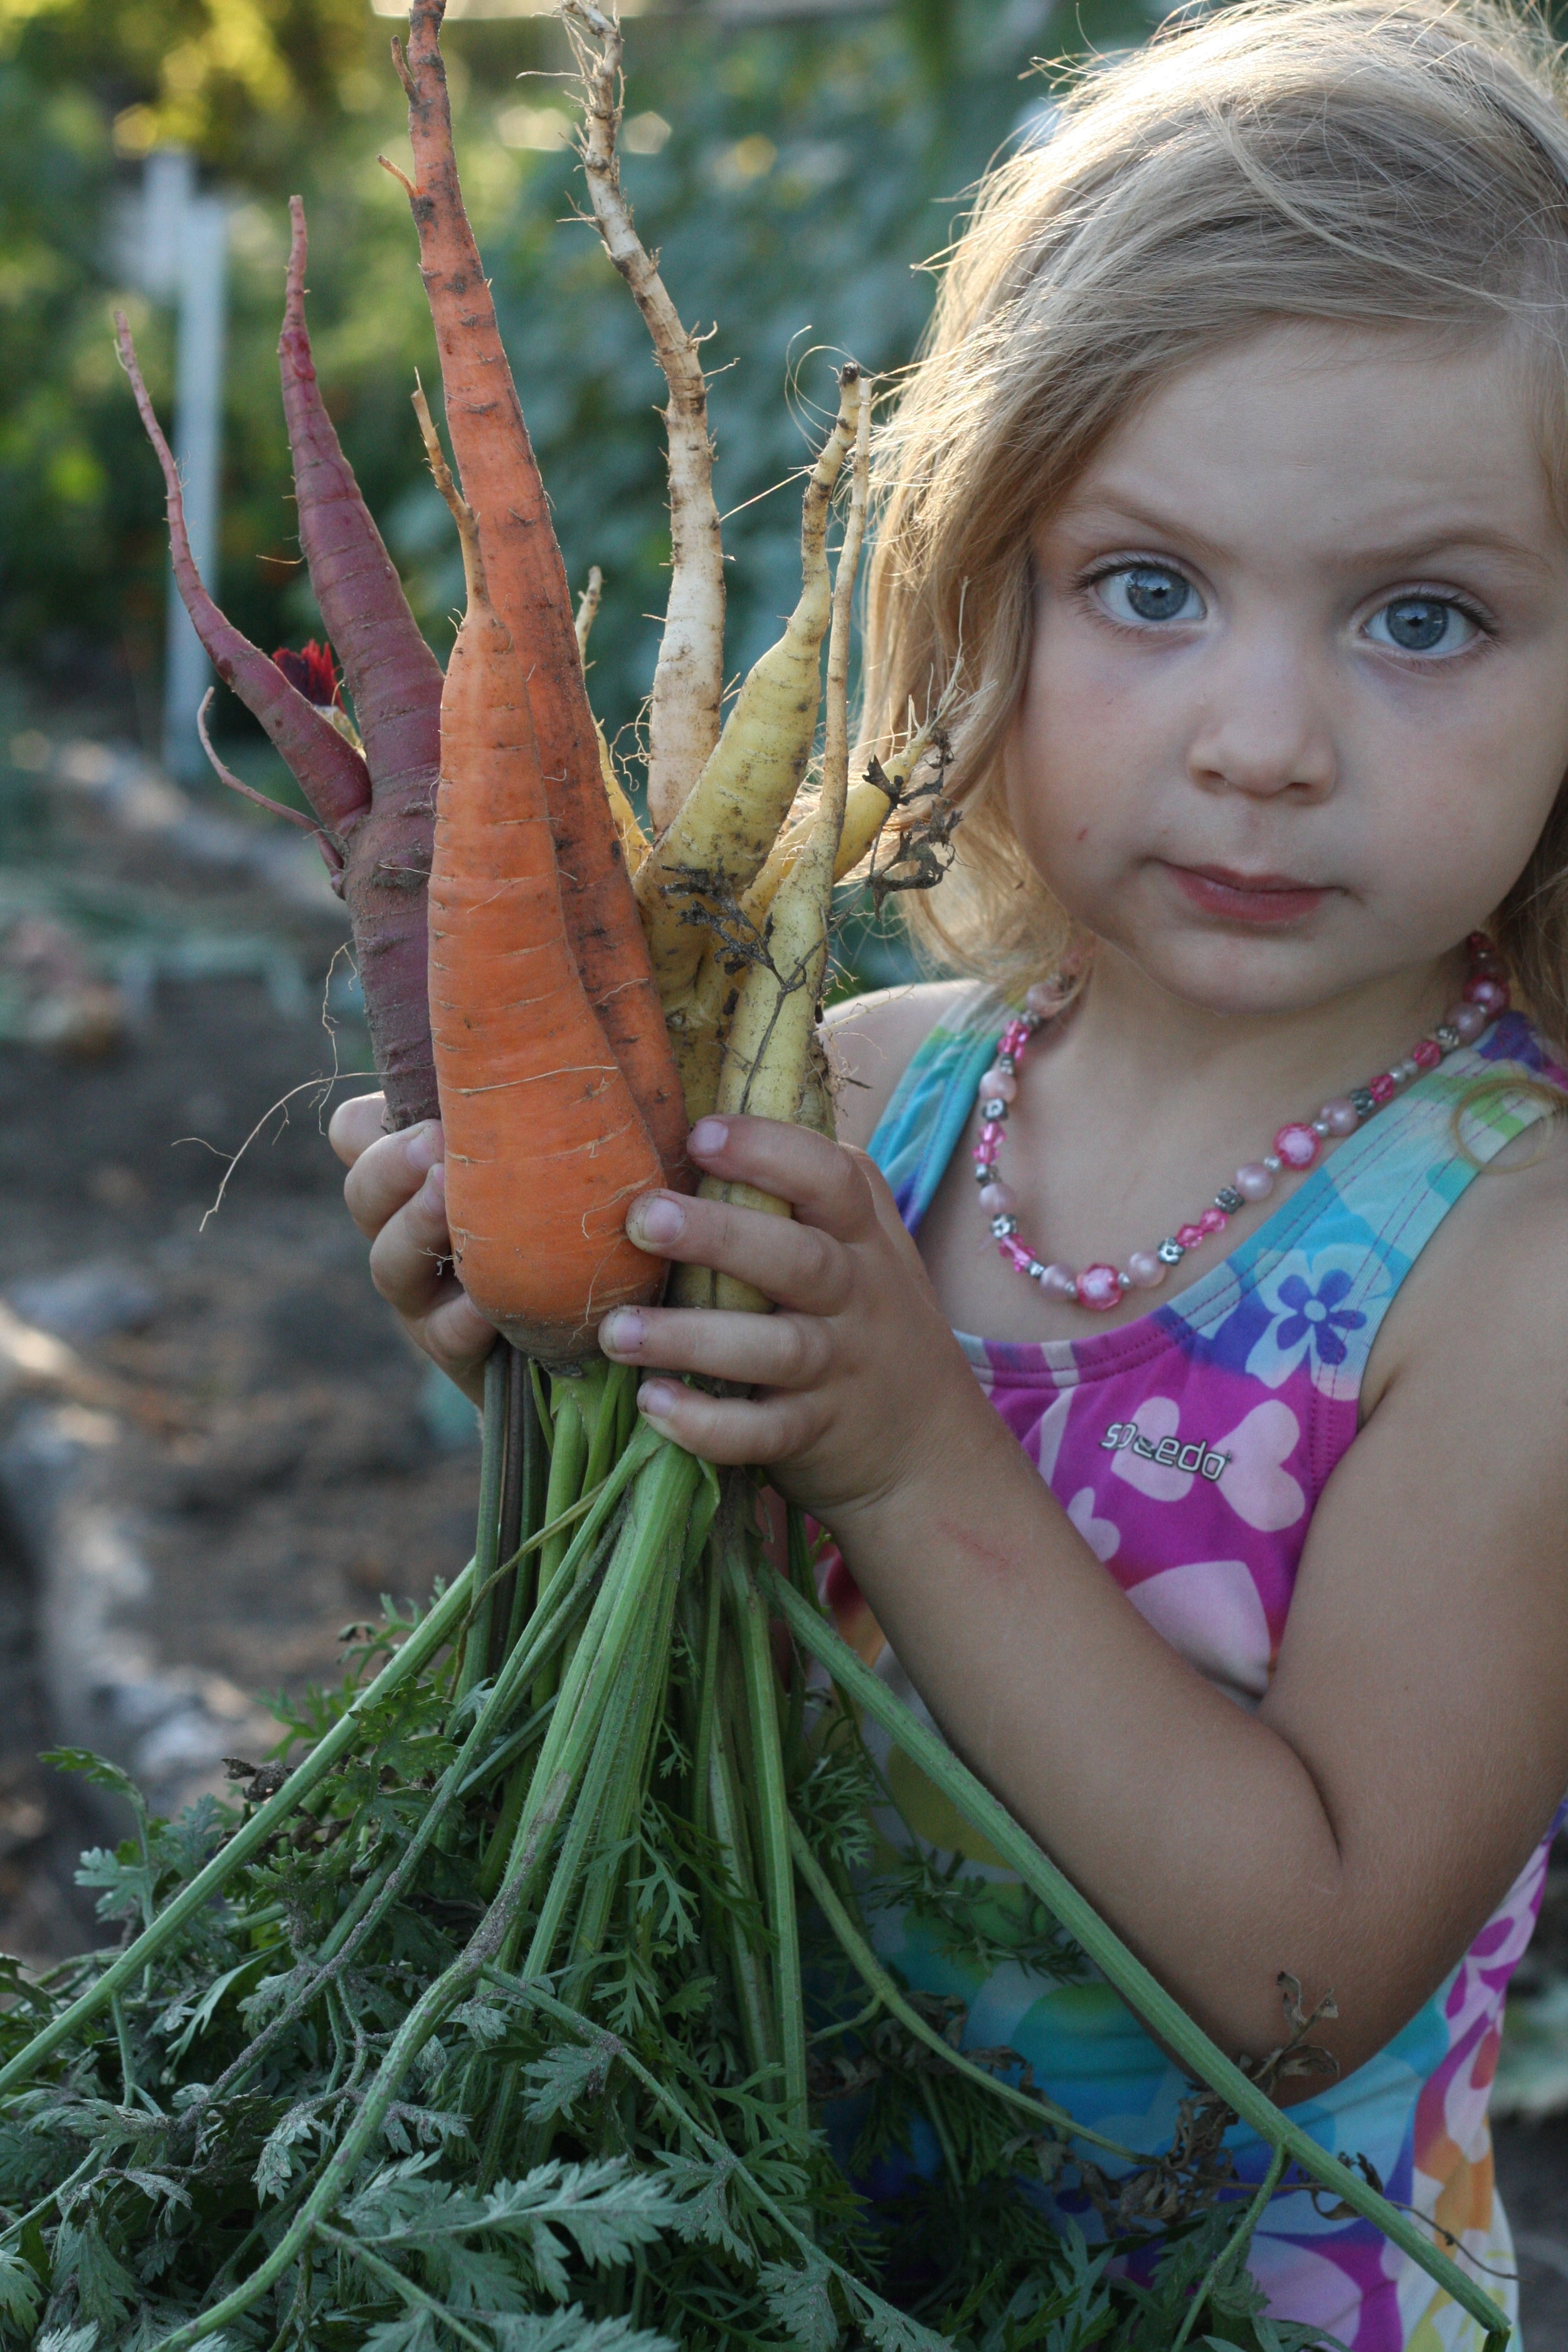
Plant a wide variety of veggies, herbs and even flowers, to sample with your kids.
When kids are involved in the growing process, they are much more likely to enjoy eating fresh, healthy foods!
Here are a few of my favorites!

Smell
It’s said that the sense of smell evokes the strongest memories. Tap into this sense and create lifelong “scent memories” for your children.
As they grow and age, the scent of these plants will remind them of the time they spent with you in the garden.
I bet you have a “favorite garden scent” that reminds you of someone you love.

Touch
Kids LOVE to get their hands dirty… and guess what? It’s really, REALLY good for them! Scientists have recently discovered that soil is teeming with microorganisms and bacteria that essentially mimic the effects of anti-depressant medications.
Yes, that’s right - DIRT MAKES YOU HAPPY.
When we get our hands dirty, our bodies absorb these beneficial microbes and they work to make us healthier and happier.
Also worth mentioning is the “Farm Effect”, a series of studies that show kids who grow up on farms (or have ready access to natural areas in which they play) are healthier than kids that spend most of their time indoors.
Let your kids touch the dirt, play with worms and maybe even eat some mud pies. ;)

Hear
There is nothing more soothing to me than listening to the “hum” of bees, butterflies and other pollinators in my gardens.
There are several ways you can attract more pollinators and birds to your gardens. It’s a win/win situation for everyone! Pollinators get what they need and your gardens will be more productive!

You can also work with your kids to create a welcoming habitat for pollinators.
Birds and pollinating insects need food, water and shelter, just like we do!
A small dish of water with sticks floating in it will be come a welcome “watering hole” for thirsty pollinators. Simply be sure to refresh the water regularly to avoid creating a breeding ground for mosquitoes.
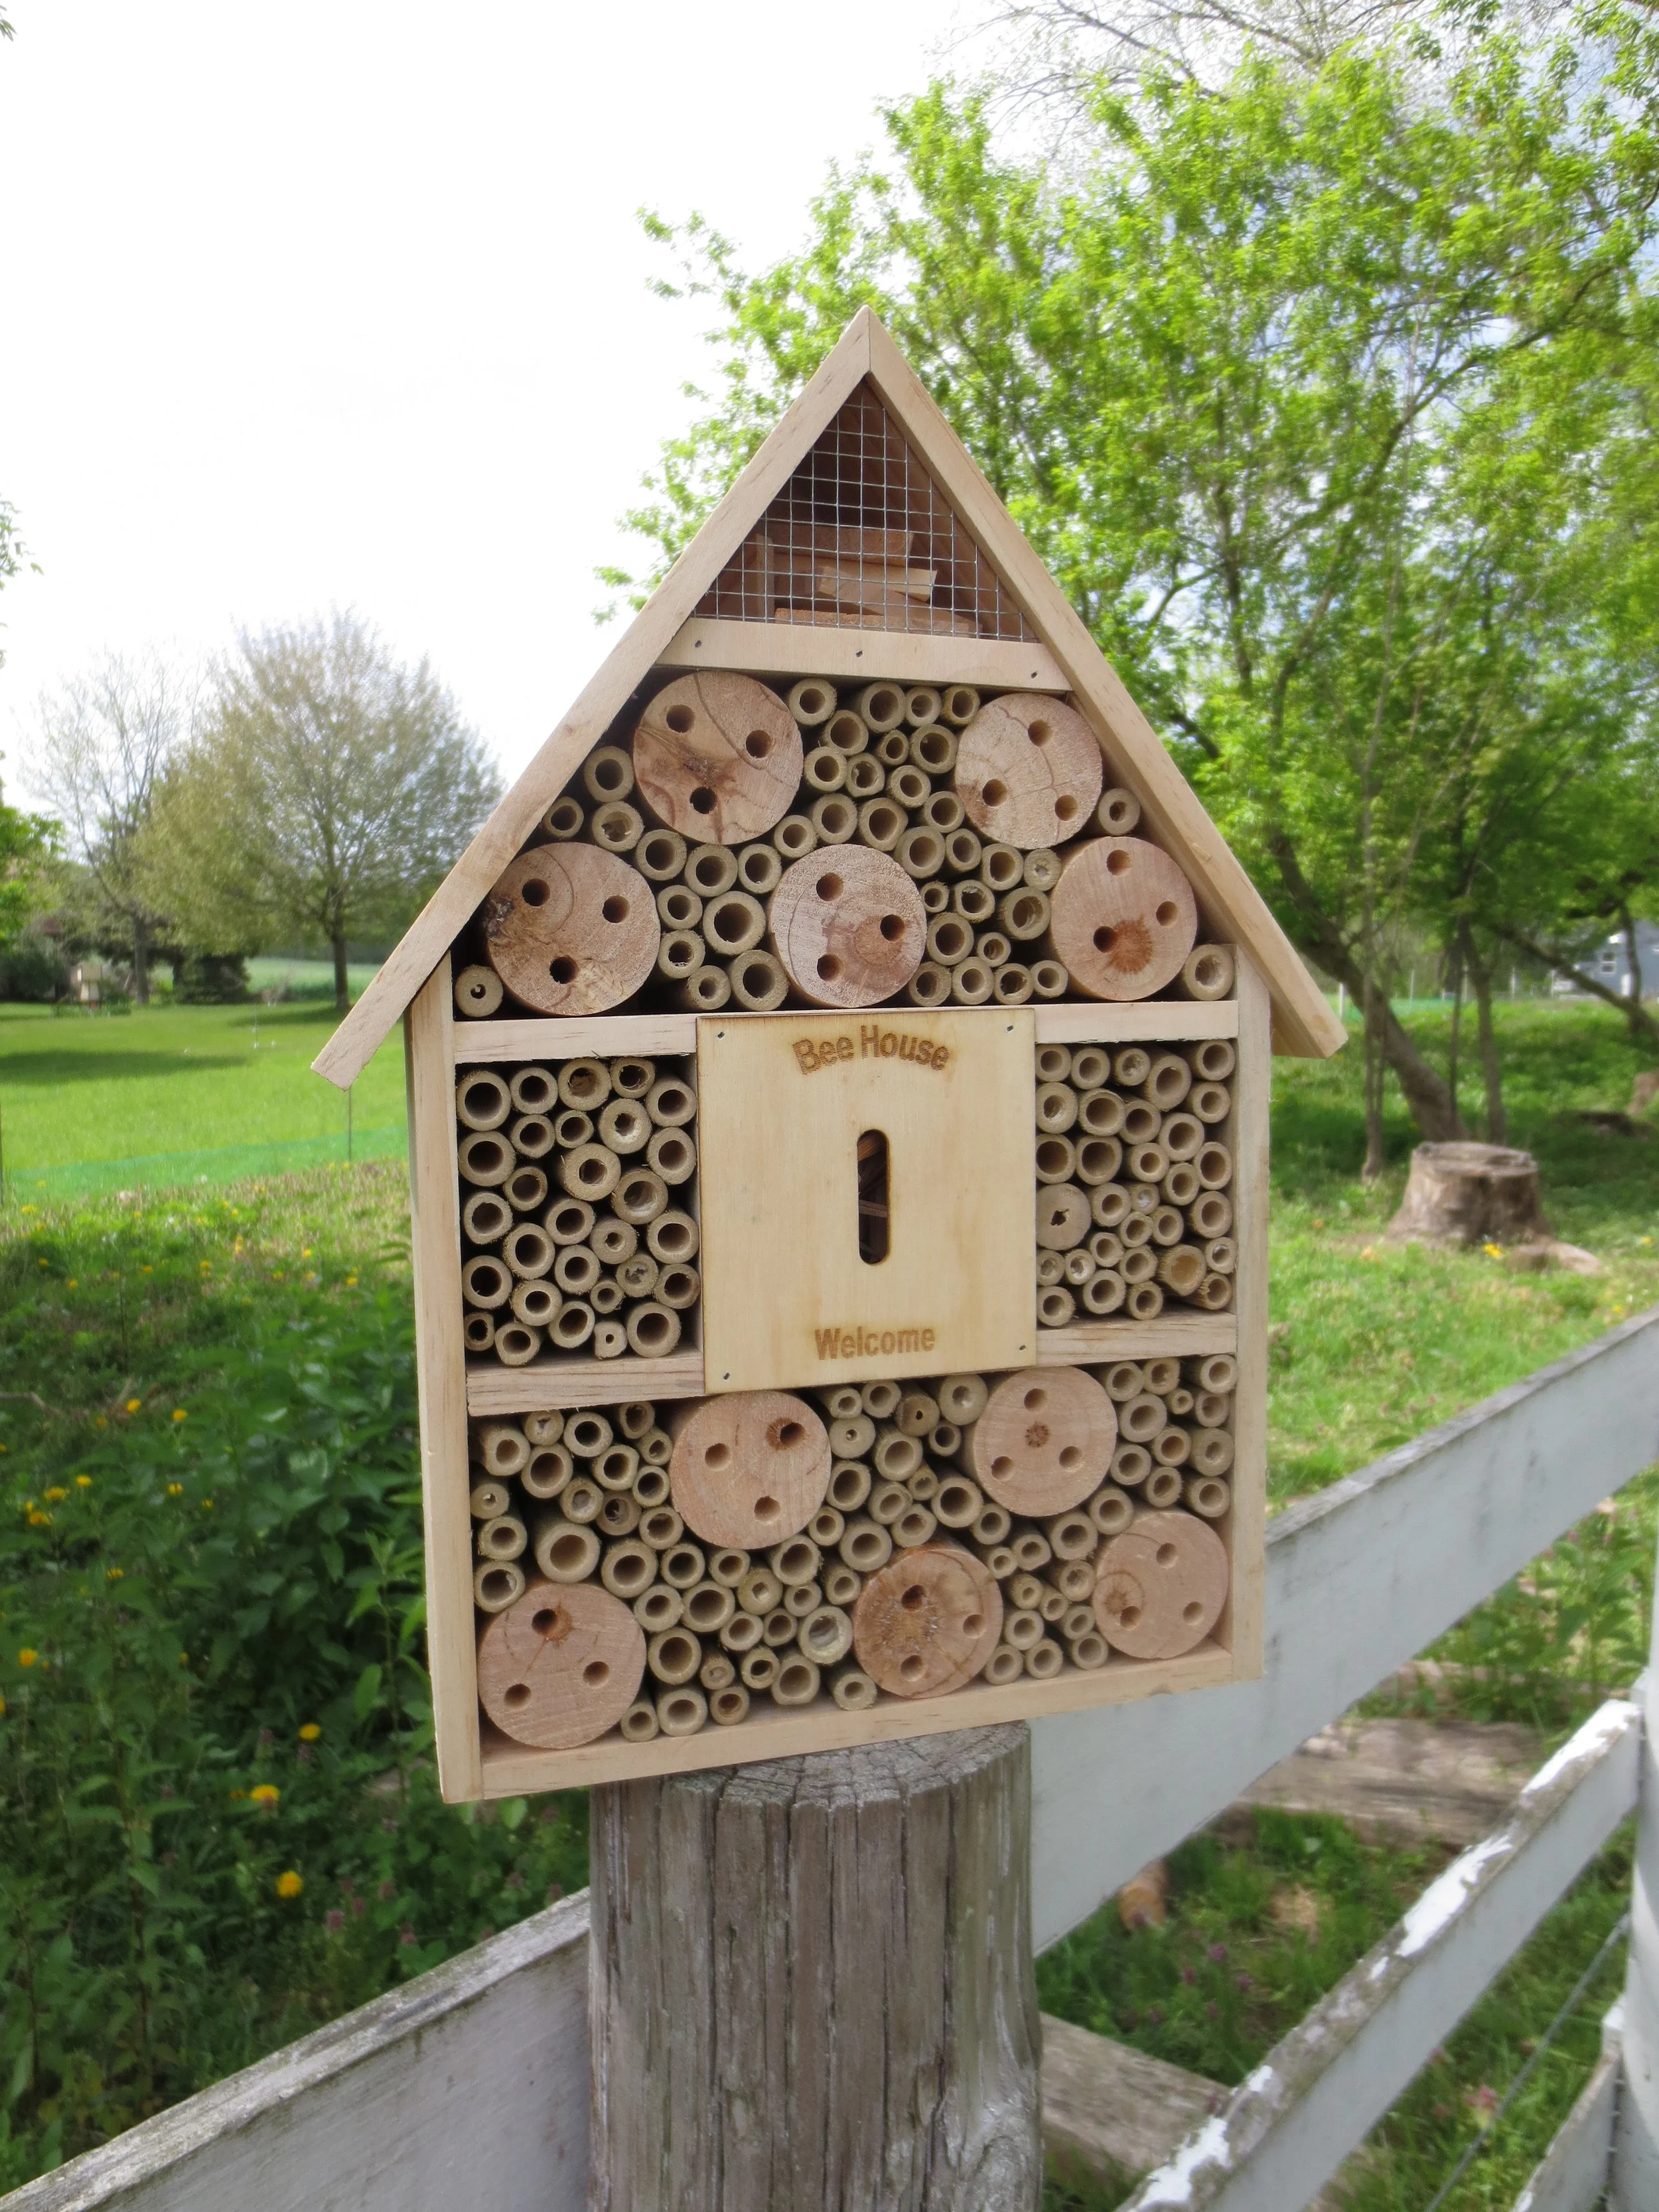
Mason bee houses can be found at many hardware stores or garden centers. Mason bees are small native bees (that don’t sting!!!) that are INCREDIBLY effective at pollination, vastly outperforming Honeybees! Welcome them to your garden and reap the benefits!

Another way to add sound to your garden is to purchase or make wind chimes! This could be a fun summer project for you and the kids!

See
Gardens change every. single. day.
Create a summer routine with your children - walk around the garden every day and point out what is new!
I walk my gardens almost every day, all year round. It’s a fun and engaging way to learn about the cycles of growth, the seasons, nature… and it’s an excellent way to teach children how to use their sense of sight and observation.
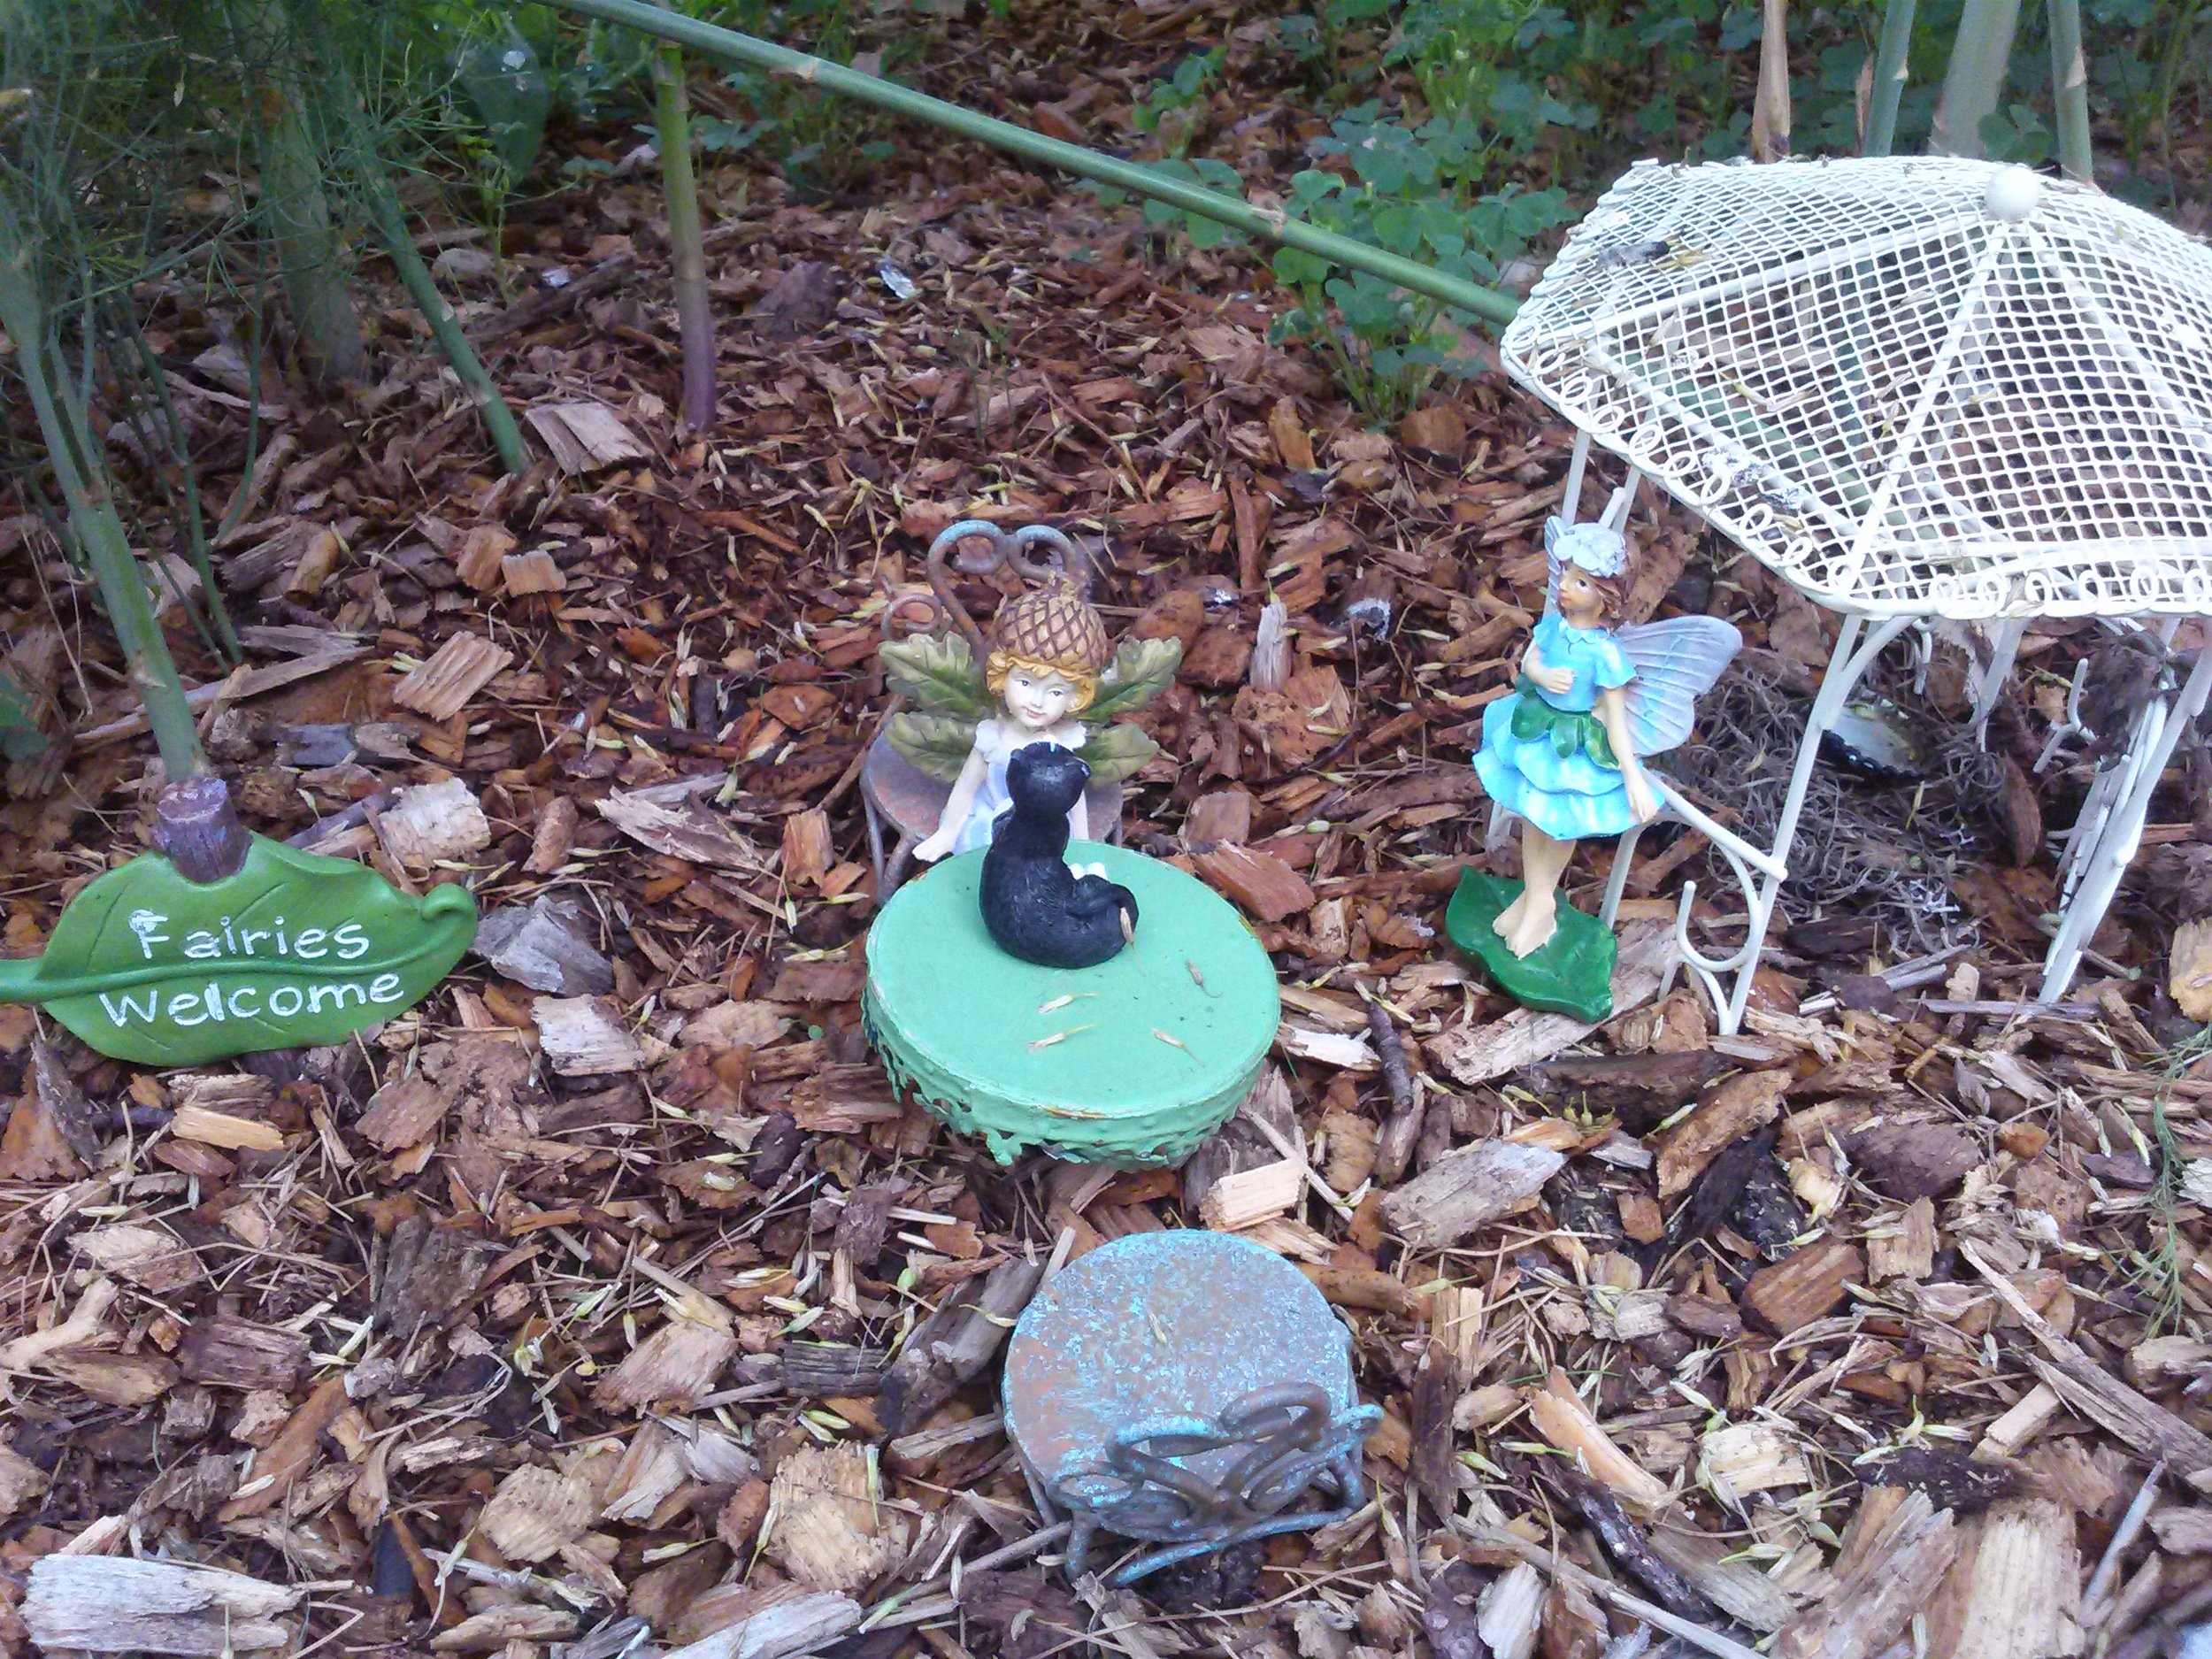
It’s also fun to fill the garden with decorations! Personally, I have a deep and abiding love for lawn ornaments (the tackier, the better. Yeah, that right - I have “frogs wearing bikinis” lawn ornaments. HA!), garden decor and fairy gardens.

Another fun project is making your own painted stones/rocks to decorate your gardens!
My daughter and I checked out a few books from the library, bought a set of paint markers, tracked down some smooth stones and she’s been having so much fun trying new designs. We’re going to have a garden full of pretty stones in no time. ;)
We found the paint pens on Amazon (Artistro Extra Fine Tip) and the stones at Home Depot (Mexican Beach Pebbles).

You could also:
Make a mosaic stepping stone
Make a DIY butterfly feeder (check Pinterest for ideas!)
Make a fruit feeding station to attract butterflies and birds
Put up bird houses
Make a fairy garden. My daughter would play in the garden for hours with her little fairies and their furniture! They lived in the “Asparagus Forest”. Ha!

There you have it! I bet your mind is overflowing with creative ideas and excitement!
Remember, you don’t have to do all of this at once. Pick one sense and figure how to incorporate that sense into your garden this season.
Let me know: What is your favorite “Garden Sense”? What will you add to your garden this season to celebrate that sense?
I can’t wait to hear your ideas!
-Lori

Beginner's Guide to Growing Dahlias
Want to try growing dahlias? We can help!
Beginner’s Guide to Growing Dahlias
It's hard for me to believe how much dahlias have changed our lives in the last few years...
You can read more about it here, but long story short, my husband came home from work one day and declared that he wanted to start growing dahlias.
As our love for dahlias grew, we read everything we could get our hands on... and my husband even joined the West Michigan Dahlia Association so he could soak up knowledge from dahlia experts and enthusiasts.
In the past few years, we have gained so much experience and currently, we grow about 1,800 dahlias on our small farm.
Below, I’ve compiled a list of some of the most common questions we receive about dahlias. Hopefully this helps you feel more clear and confident about growing dahlias yourself!
Dahlia FAQ's
1. I heard that dahlias are hard to grow. Is that true?
Yes. No. Maybe? While I would say they are NOT difficult to grow, they ARE one of the most labor intensive flowers grown for cutting. So, yes, they are "easy to grow" but require some special care.
They require careful planting, staking, pinching (more about that later) and the tubers must be dug up each fall.
If provided with proper growing conditions, they will perform beautifully and provide you with many blooms over the late summer and into the fall! Here in Michigan, September is “peak season” for Dahlias.

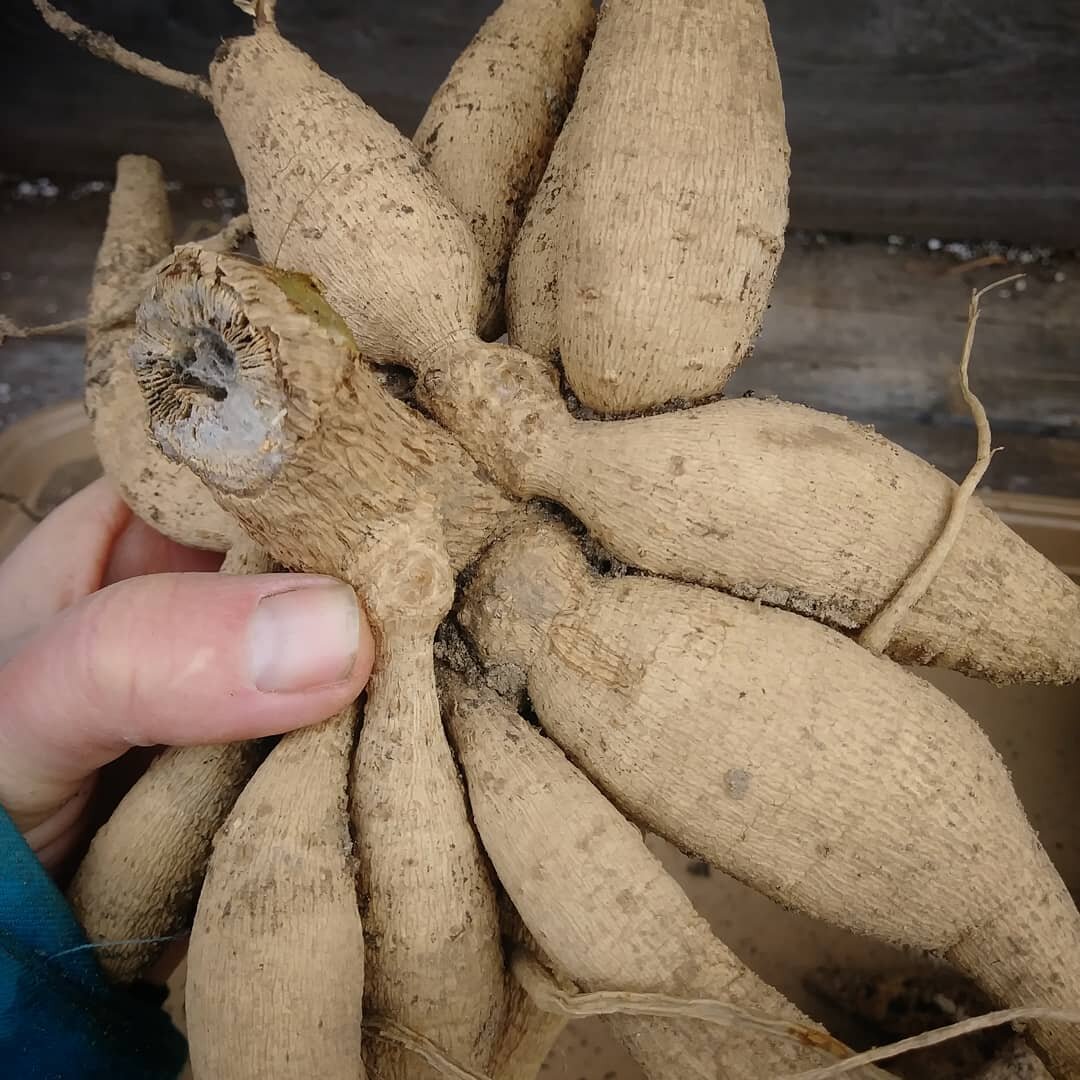
2. What is a "tuber"? Is that like a "bulb"?
Dahlia tubers are sometimes called a "bulb", but they are technically a tuber, similar to a potato. Similar to a potato, the tuber sends up a shoot that becomes the plant, which produces leaves and flowers. Underground, the tubers multiply each year (again, like a potato).
You only need one tuber with one "eye" to successfully grow a vigorous dahlia plant. Ever left a potato in the pantry too long and noticed "eyes" sprouting? Same thing with a dahlia tuber.
Watch the short video below to get an overview of dahlia tubers.
Tubers come in all sorts of shapes and sizes! Some are long and skinny, some are short and stubby, some are huge (up to 10” long!) and some are tiny (the size of your pinky).
Click HERE to read “All About Dahlia Tubers”.
It’s a common misconception that “Bigger Tuber = Bigger Plant”. This is not true.
The tuber is simply the food source for the plant until they have about 3-4 sets of leaves. After that, the root system growing from the tuber is responsible for the health of the plant.
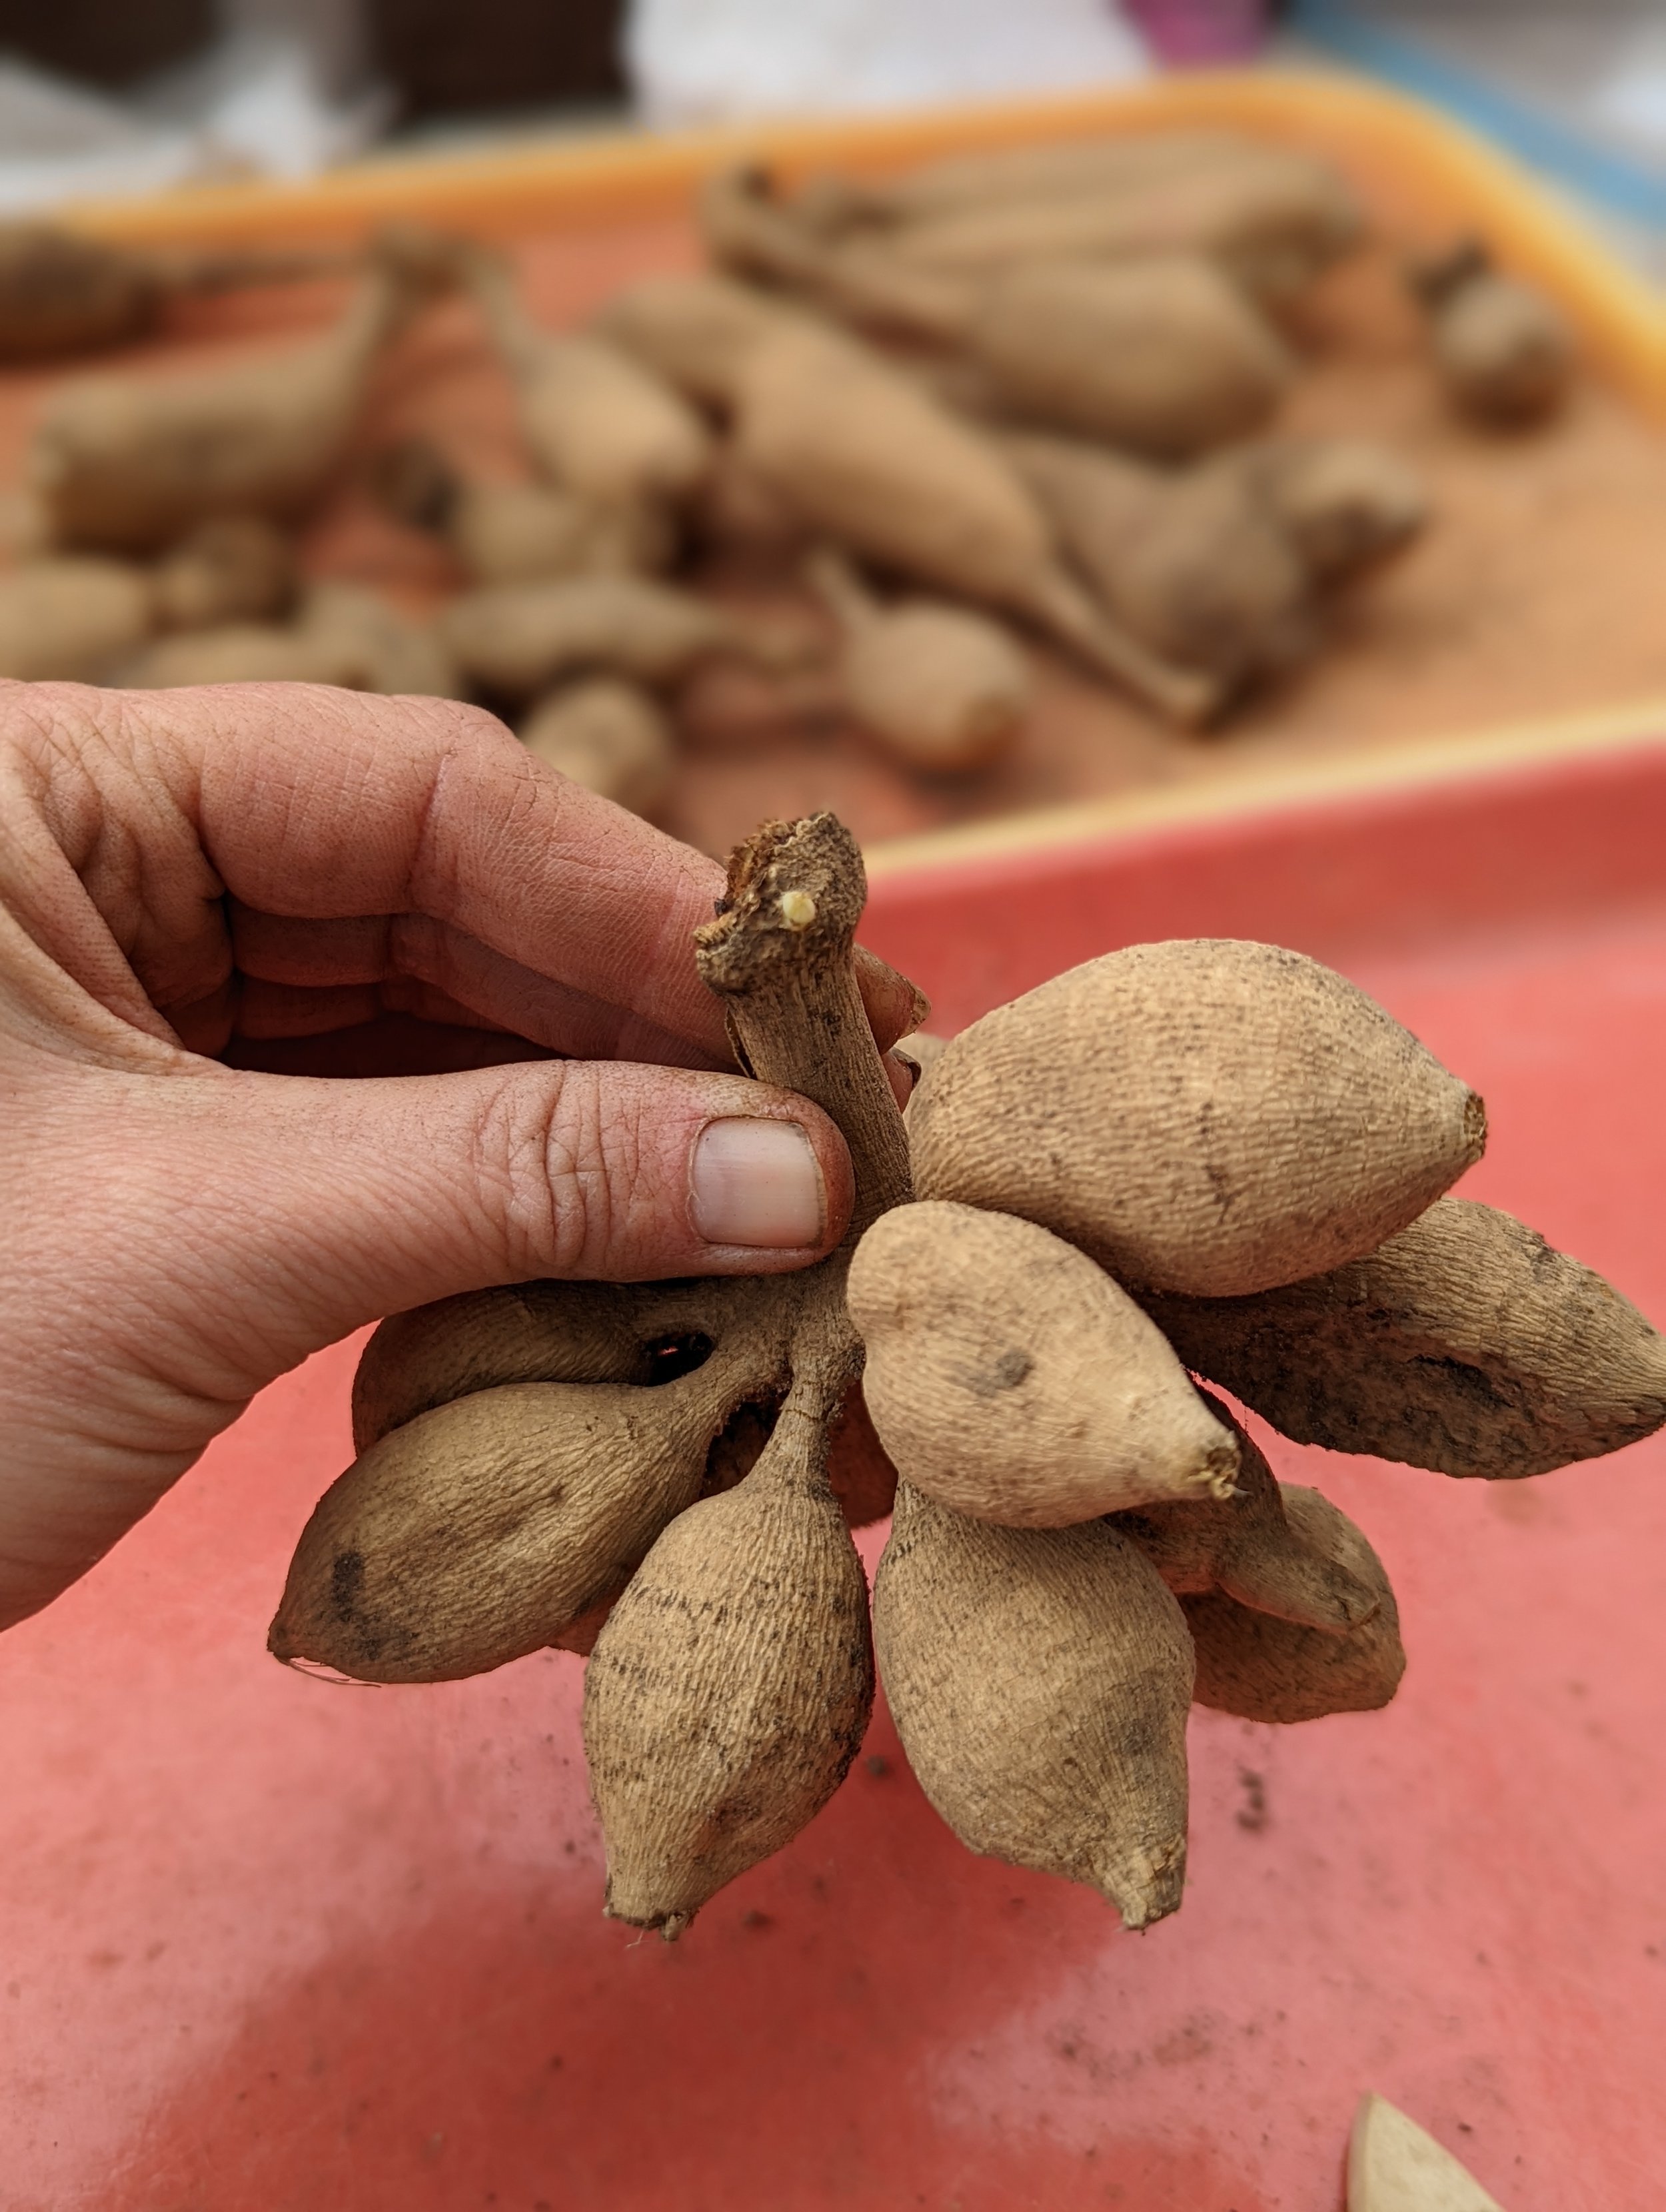
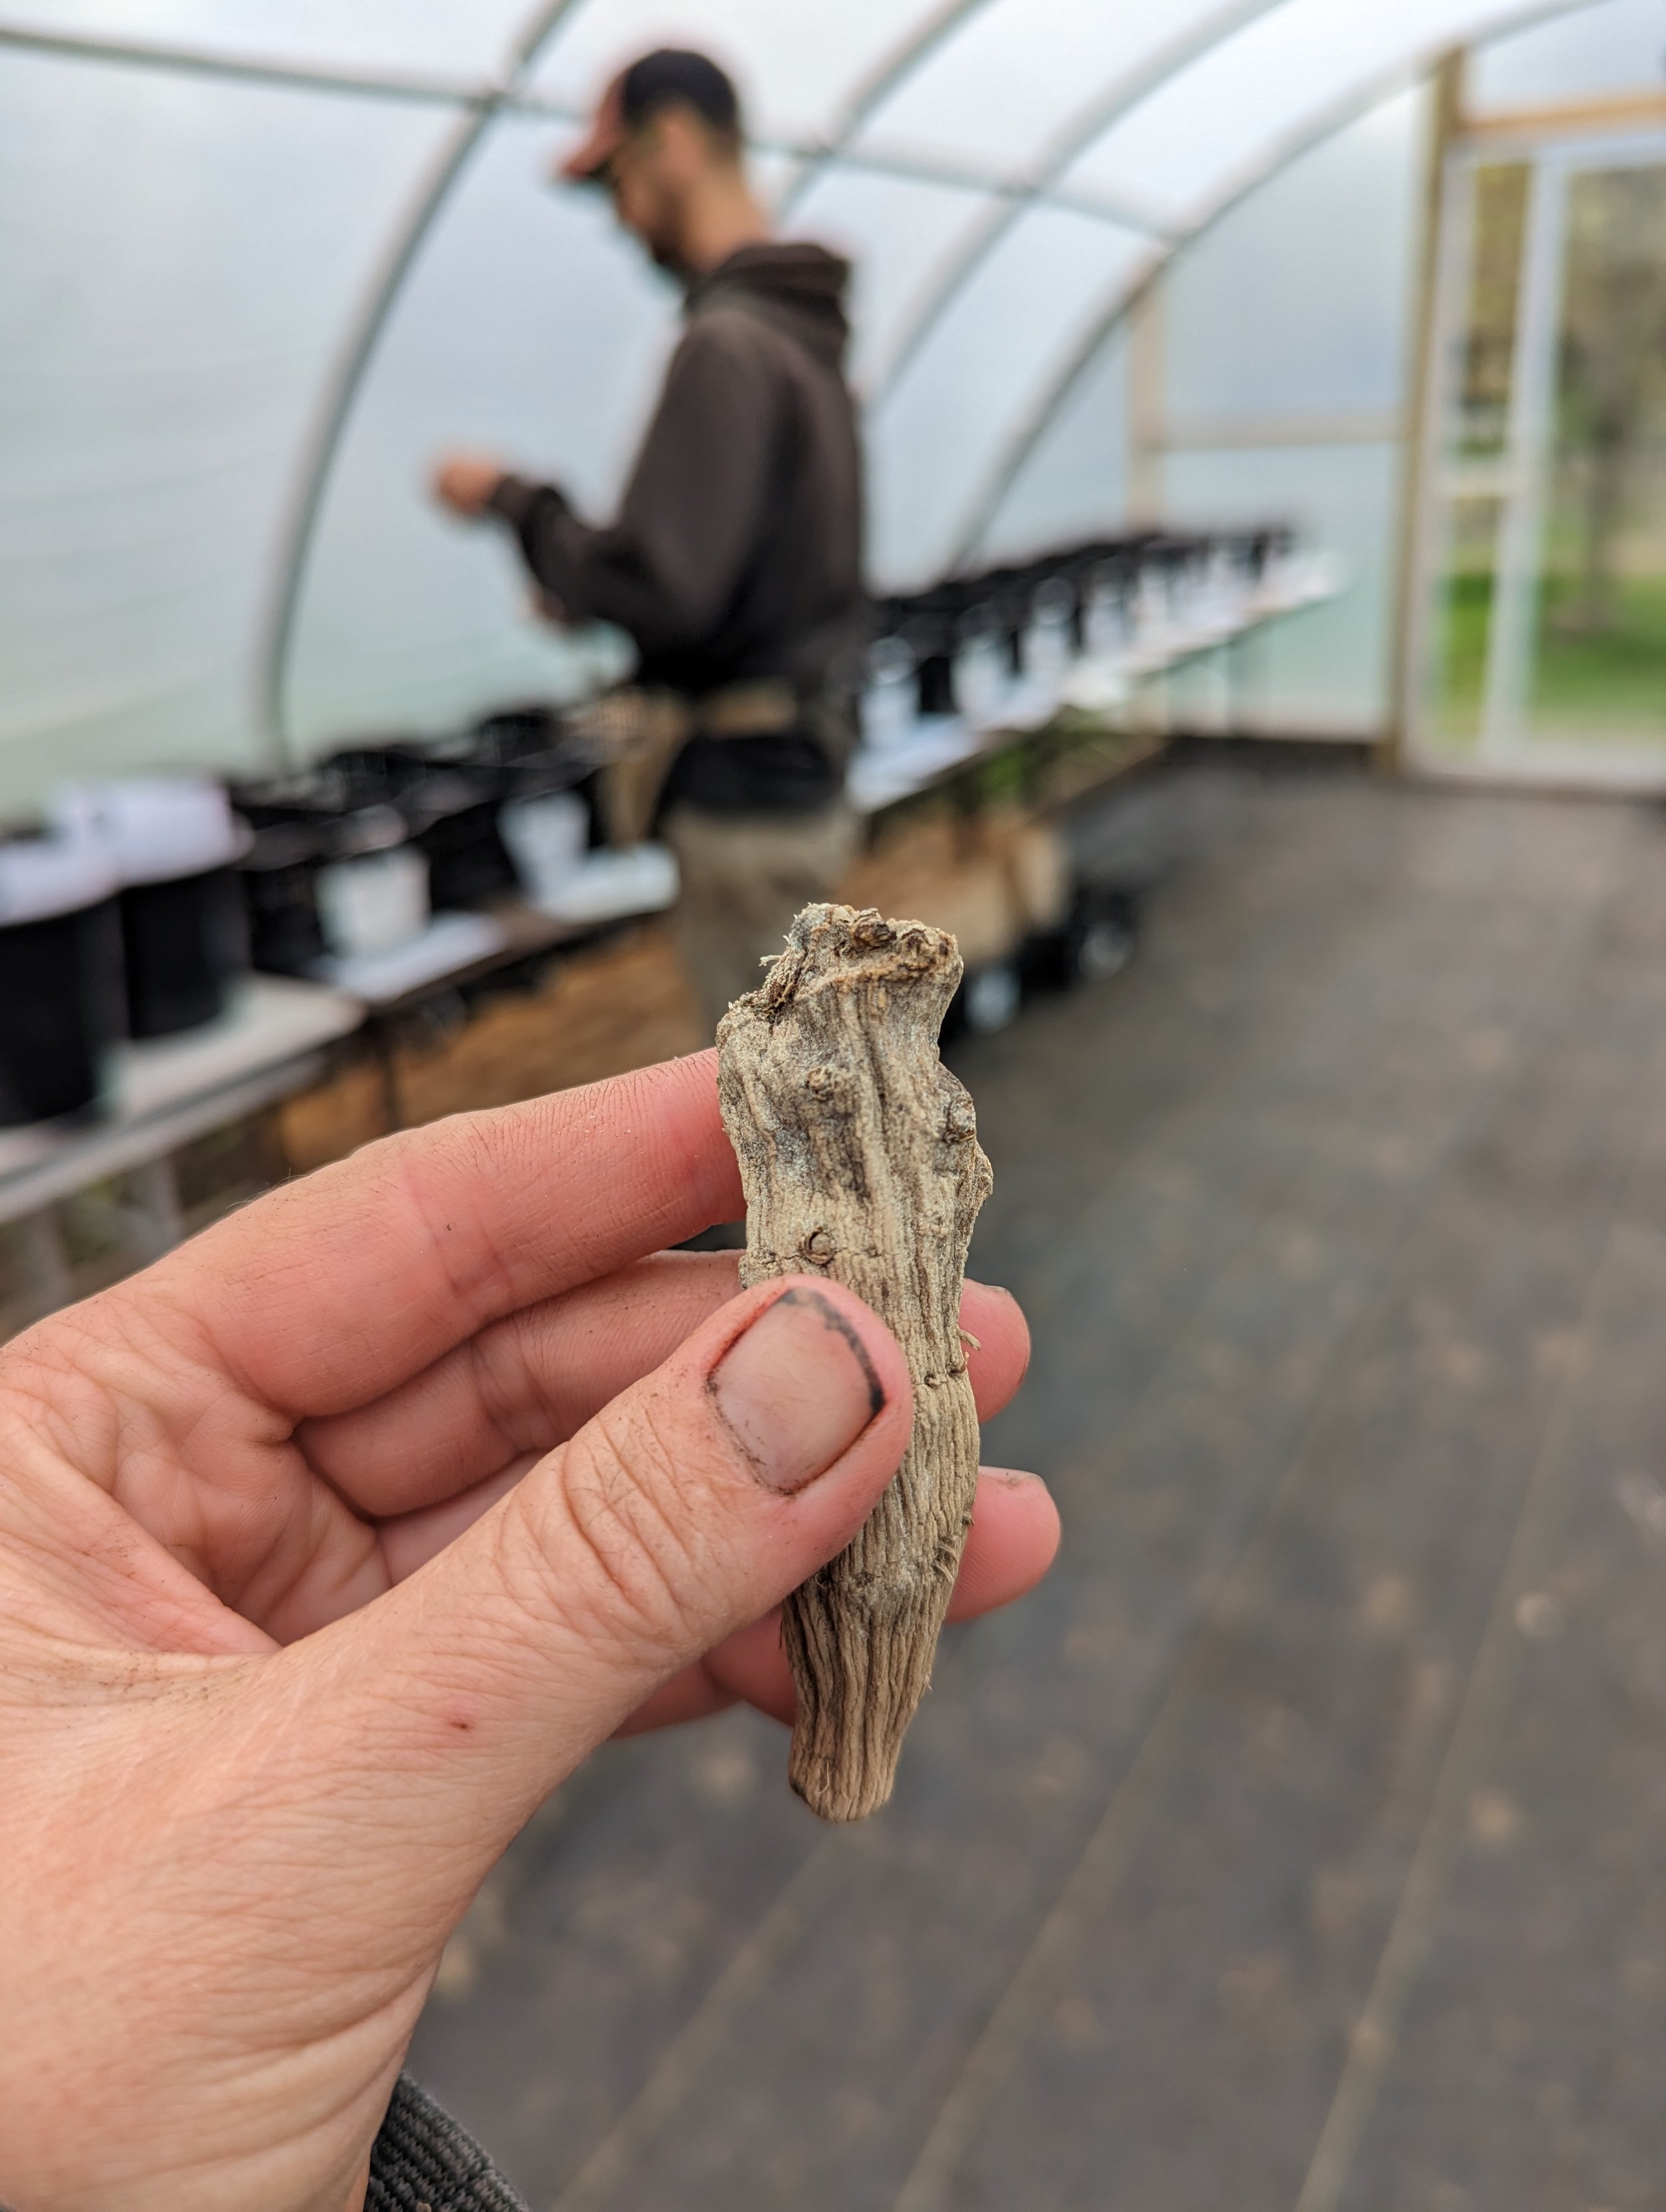
According to Michael Genovese of Summer Dreams Dahlia Farm, a tuber the size of an AA battery or larger is considered usable. All three of the tubers pictured below are acceptable, but the two tubers on the right are considered ideal sized.

So if tuber size doesn’t matter, what DOES matter?
Two things are necessary for a viable tuber:
1. The tuber MUST have 1 eye. The eye is where the sprout will grow (similar to a potato left too long in the pantry).
2. The neck MUST be intact. If the neck is broken/snapped, the tuber is worthless.

3. Pinching? What does that mean?
If you want your plant to produce multiple blooms, you must "pinch" or cut back the plant early on, when it has reached 12-16" tall. Find the center stalk, count down about 1-2 sets of leaves and make a cut with clean clippers, removing the top inch or two of the center stalk. This signals the plant to "branch out" and put it's energy into creating more branches and more blooms.
If you want bigger blooms (but less flowers in total), then do nothing.
4. Do I need to stake dahlias?
Yes, most varieties will need to be staked, otherwise the wind may flatten and ruin the whole plant. Gently tie the plant to a sturdy wooden or metal stake. A tomato cage would also work!
You can also use netting stretched between posts, hovering about 12-18" from the ground. The plants grow right up into the netting, which keeps them in place.
You can learn more about staking and supporting methods in this THIS BLOG POST.

5. Wow! Some dahlia tubers cost over $20... for just one tuber! Why do they cost so much?
Remember in Question #1 when I said they are labor intensive? Dahlia tubers are not cold-hardy and will not survive over the winter in most climates. They must be dug up. By hand!
Dahlia tubers are quite fragile and break very easily. If they break, they are worthless! As of yet, no one has been able to successfully mechanize the dahlia tuber digging process without suffering major losses. Hand digging is the most gentle method resulting in MUCH less breakage... but it is HARD MANUAL LABOR... hence the high cost of tubers.
Once the tuber clumps have been dug up, they must be divided into individual tubers... yet another extremely labor-intensive job that cannot be mechanized. It's all done by hand!
Keep reading... Question #6 may ease your mind...
![20171101_125409[2].jpg](https://images.squarespace-cdn.com/content/v1/582b872529687fd6acb7423d/1522886249744-NZYXPE3O1SLK0NNJTI77/20171101_125409%5B2%5D.jpg)
6. You said in the video that the tubers multiply each year. Does that mean I'll be able to plant even MORE of them next year?
YES! If you dig up the tubers in the fall, properly store them and divide them, you can easily triple or quadruple your stock in 1 year. Once you factor that into the price of buying a tuber (I’ve paid up to $30 for a single tuber!), they don't seem so expensive anymore!
See the photo below? I planted ONE tuber in the spring... now I have more than I can count! Yes, all of those grew from one tuber.
I like to think of tubers as an “investment”. Even if I’m paying $30 for a tuber, it’s still a bargain! I’m getting AT LEAST $30 worth of blooms from the plant the first season (retail price for Dahlias is $3-6 per bloom), PLUS I’m likely going to harvest 3-10 more tubers at the end of the season.
![20180316_153256[1].jpg](https://images.squarespace-cdn.com/content/v1/582b872529687fd6acb7423d/1522885401599-H3SZO80TID2LLNZECGHB/20180316_153256%5B1%5D.jpg)
7. So... do I HAVE to dig up the tubers every fall? What do I do with them?
No, you don't HAVE to... but then you will have to by new tubers each spring, which gets expensive!
Wait to dig up your tubers until a few days AFTER a hard killing frost. This signals the tubers to go into “storage mode” and you’ll have better success storing the tubers over the winter.
After killing frost, tubers can stay in the ground for a while, so there is no huge rush… but do dig them up before the ground freezes!
Tubers are best stored in a cool, dark location - not too warm (they will rot) and not too cold (freezing will ruin them). A root cellar is perfect.
Want to know more about digging and storing your Dahlia tubers? CLICK HERE
8. Ummm... how do I divide them? That sounds hard.
I'll admit it takes practice and you will make a lot of mistakes at first, but it gets easier with time.
Want to see how to do it? Watch this short video!
9. Help! I divided my tubers and now they have blue mold where I cut them!
No worries! This type of mold is generally just a surface mold and does not penetrate the tuber. Double check to make sure the tuber is not mushy. If it’s still solid, simply wipe off the mold with damp towel or brush it off.
See the “Before” and “After” photos below:


10. My dahlia tubers arrived in the mail but it’s too early to plant them! What do I do with them while I’m waiting?
No worries, friend! You have 2 options:
1. Leave them right in the bag they arrived in. Be sure to open up the bag to let them “breath” a bit and regulate humidity. Store the bags of tubers in a cool, dark, dry location, such as a basement or garage. Do NOT store them in a place that dips below freezing.
2. Pot them up! You can fill a small pot with potting soil and pop the tuber in there. Be sure to “plant” it tail down, and head up (look for the “eye” or sprout on the head of the tuber). Water the pot sparingly (not too wet, not too dry) and place in a warm, sunny spot. The tuber will send up shoots and leave above the soil and roots into the soil. Simply transplant outside when the weather warms up, being sure to cover the crown of the tuber.
Ok, feeling a little more confident now? Read on for instructions on how to grow these beauties!
How to Grow Dahlias
1. Choose a location with at least 6 hours of direct sun (the more sun, the better!) and well drained, fertile soil. Compost and all-purpose fertilizer worked into the soil before planting will help.
2. Plant AFTER the threat of frost has passed (about May 15, here in West Michigan). The soil should be warm and well drained.
3. Space tubers about 18” apart. Dig a hole about 4-6" deep and wide enough to accommodate the tuber. Place tuber in the hole with the "eyes" at the top (or lay it on it’s side) and back-fill the hole gently, covering the tuber completely with a few inches of soil.
4. DO NOT WATER after planting, unless the soil is super dry. You want the soil to be just slightly damp. Too much water can cause the tuber to rot. REPEAT: DO NOT WATER. It's also wise to check the weather and avoid planting right before a huge rain storm.
5. Once the plants have sprouted, you may begin watering regularly. When plants reach about 8", begin fertilizing with all purpose liquid fertilizer about twice a month.
6. Pinch the plants when they reach about 12-16", to signal the plant to produce more branches (and more blooms).
7. Plants begin to bloom in late July and produce heavily until the first killing frost of the season.
![IMG_20171111_121012_638[1].jpg](https://images.squarespace-cdn.com/content/v1/582b872529687fd6acb7423d/1522885053209-L1EJTKY2QQ549ZIE6FU4/IMG_20171111_121012_638%5B1%5D.jpg)
Questions? Comments? Just let us know.
Happy planting!

5 Perfect Perennials for Cut Flower Arrangements
Perennials are the gifts that keep on giving!
5 Perfect Perennials for Cut Flower Arrangements
When we first started flower farming, we were literally starting from scratch.
Our farm had no cut flower Perennials, shrubs or bushes to speak of.
Since we were on such a tight budget the first season, we could only afford to buy seeds… so we grew mostly Annual flowers, like Sunflowers, Zinnias, Cosmos, etc. Seeds are a real bargain and a great way to get started!
However, we knew we wanted to begin investing in Perennial plants as soon as possible. Many Perennials take about 2-3 seasons to establish before they are vigorous enough to be harvested from. For our first couple of seasons, any profits we made on the farm were invested into building up our stock of Perennials.
We’re in season 6 and we still keep adding Perennials whenever and wherever we can! Perennials are a gift that keeps on giving. While they may not bloom for a long length of time (many Perennials bloom for about 2-6 weeks out of the year), they are hardy, reliable and generally more drought tolerant than annual plants.
The best time of year to plant Perennials is late summer/early fall, about 4-6 weeks before your Average First Fall Frost (ours in October 15).
The days are starting to get shorter and cooler, so the plants won’t be as stressed by the heat and blazing sun of summer. Planting in late summer/early fall gives the plants enough to time to establish a strong root system before the ground freezes for the winter (we’re growing in Zone 5b in Michigan, USA).
Plus, many plant nurseries are looking to clear out their stock before they close for the season, so you may be able to find some great deals.
Here are 5 of my favorite Perennials we grow at Three Acre Farm:
Baptisia (Baptisia australis), “False Indigo”
A dear friend recommended I plant as many Baptisia plants as possible, as soon as possible… and she was right! Not only are their blooms stunningly beautiful, but even better, the foliage is incredible in bouquets.
Foliage is a vital, yet often overlooked, part of crafting a beautiful bouquet. You will not be disappointed with this lovely plant that provides gorgeous blooms in late May/early June (around the time Peonies are in bloom) and perfect foliage the rest of the season.
Part Sun to Full Sun
Height: 4 feet
Spread: 3-4 feet
Pictured below is “Decadence® Deluxe Pink Truffles” False Indigo Baptisia hybrid from Proven Winners.

Aruncus (Aruncus dioicus) “Goat’s Beard”
This beautiful flower has an unfortunate, yet memorable name!
Also. Rest assured that it does NOT smell like a goat’s beard. Ha! As someone who has had a breeding buck goat on our farm… believe me, a goat’s beard at mating season… OH.MY. I was nervous about growing it because I know how foul a goat beard can smell. But no worries ;)
This plant sends up the most romantic and magical looking stems in late spring. I’ve tried cutting them back after blooming to see if they would send up more blooms over the season, but it’s been spotty.
Even so, this is a great addition for spring bouquets. Here on my farm, they bloomed at the same time as my Peonies. They add the perfect touch of whimsy and sparkle to bouquets.
Full Sun to Part Sun
Height: 4-6 feet
Spread: 2-4 feet
Pictured below is Aruncus “Misty Lace”.


Yarrow (Achillea millefolium)
While Yarrow may look unassuming by itself, it’s a fabulous filler type flower for bouquets.
This Perennial will actually bloom it’s first season when started from seed, so it’s worth growing them from seed if you are so inclined. You could also purchase them as plants.
I do find that Yarrow starts to decline in quality after 2 seasons, so I simply plant more each season so that I always have some “fresh” plants in production. When you notice the plants are not producing well anymore, remove them and plant new seedlings in their place.
Yarrow tends to wilt if its harvested too prematurely. Wait until it actually starts to look a bit faded to make sure the stems will hold up properly.
Full Sun
Height: 2-3 feet
Spread: 2 feet
Pictured below is Yarrow “Summer Pastels”


Veronica (Veronica longifolia ) “Speedwell”
I love the look of “spike type” flowers in arrangements. They add height, drama and visual interest. Veronica is a great option for cut flowers.
Be sure to read the tag carefully at the plant nursery. Veronica comes in a variety of heights and you’ll want to choose the tallest variety you can find. 18-24” tall is ideal.
On our farm, I find Veronica blooms in late spring/early summer. If I deadhead/cut back the plants to about 6-8’ tall, the plants will produce another beautiful flush of blooms in late summer.
Full Sun to Part Sun
Height: Varies
Spread: Varies
Pictured below is Veronica longifolia “SKYLER™ Blue”, “SKYLER™ Pink” and “SKYLER™ White”


Rudbeckia triloba “Brown-Eyed Susan”
This mid/late summer blooming short-lived Perennial is a treasure! It’s a native plant to many parts of the USA and is easy to grow and drought tolerant once established.
Some people classify this plant as a Biennial or Short Lived Perennial, depending on where you live. I find it best to allow it to grow in a permanent location and allow the plants to self-sow (drop their seeds) to ensure new plants every season.
These Perennials are easy to start from seed, but will likely not bloom the first season so be patient!
The dainty delicate blooms and thin wiry stems look amazing in bright summer bouquets. They pair exceptionally well with Sunflowers and other Rudbeckia (Black-Eyed Susan) blooms.
Full Sun
Height: 2-5 feet
Spread: 4 feet


Remember: late summer/early fall is the perfect time to plant Perennials! Have fun!

All About Dahlia Tubers
Questions about dahlia tubers? Here you go!
All About Dahlia Tubers
Are you a beginner dahlia grower? If so, you probably have lots of questions about dahlias and how they are grown. I’m here to help answer some of your questions!
1. How are dahlias grown?
Dahlias are grown from tubers, which are “bulbs” that grow underground. Dahlia tubers are a lot like potatoes - you plant one tuber and end up with many more at the end of the season.
Dahlias CAN be grown from seed, but dahlias grown from seed are not genetically stable and often turn out to be “duds”, with irregular forms and deformed petals, like the one pictured below. I was told by Dahlia breeders that it takes planting about 800-1000 Dahlia seeds to discover a “diamond in the rough”… and I believe it!

If you’re mostly concerned about growing flowers for bees, Dahlias from seed is fine. But if you’re looking for beautiful blooms for bouquets or Dahlia shows, you’ll want to grow Dahlias from tubers, which are genetic “clones” of their mother plant.
Growing from tubers is the easiest and most popular way to grow dahlias. To grow a dahlia plant, all you need is ONE tuber with ONE “eye”/sprout.
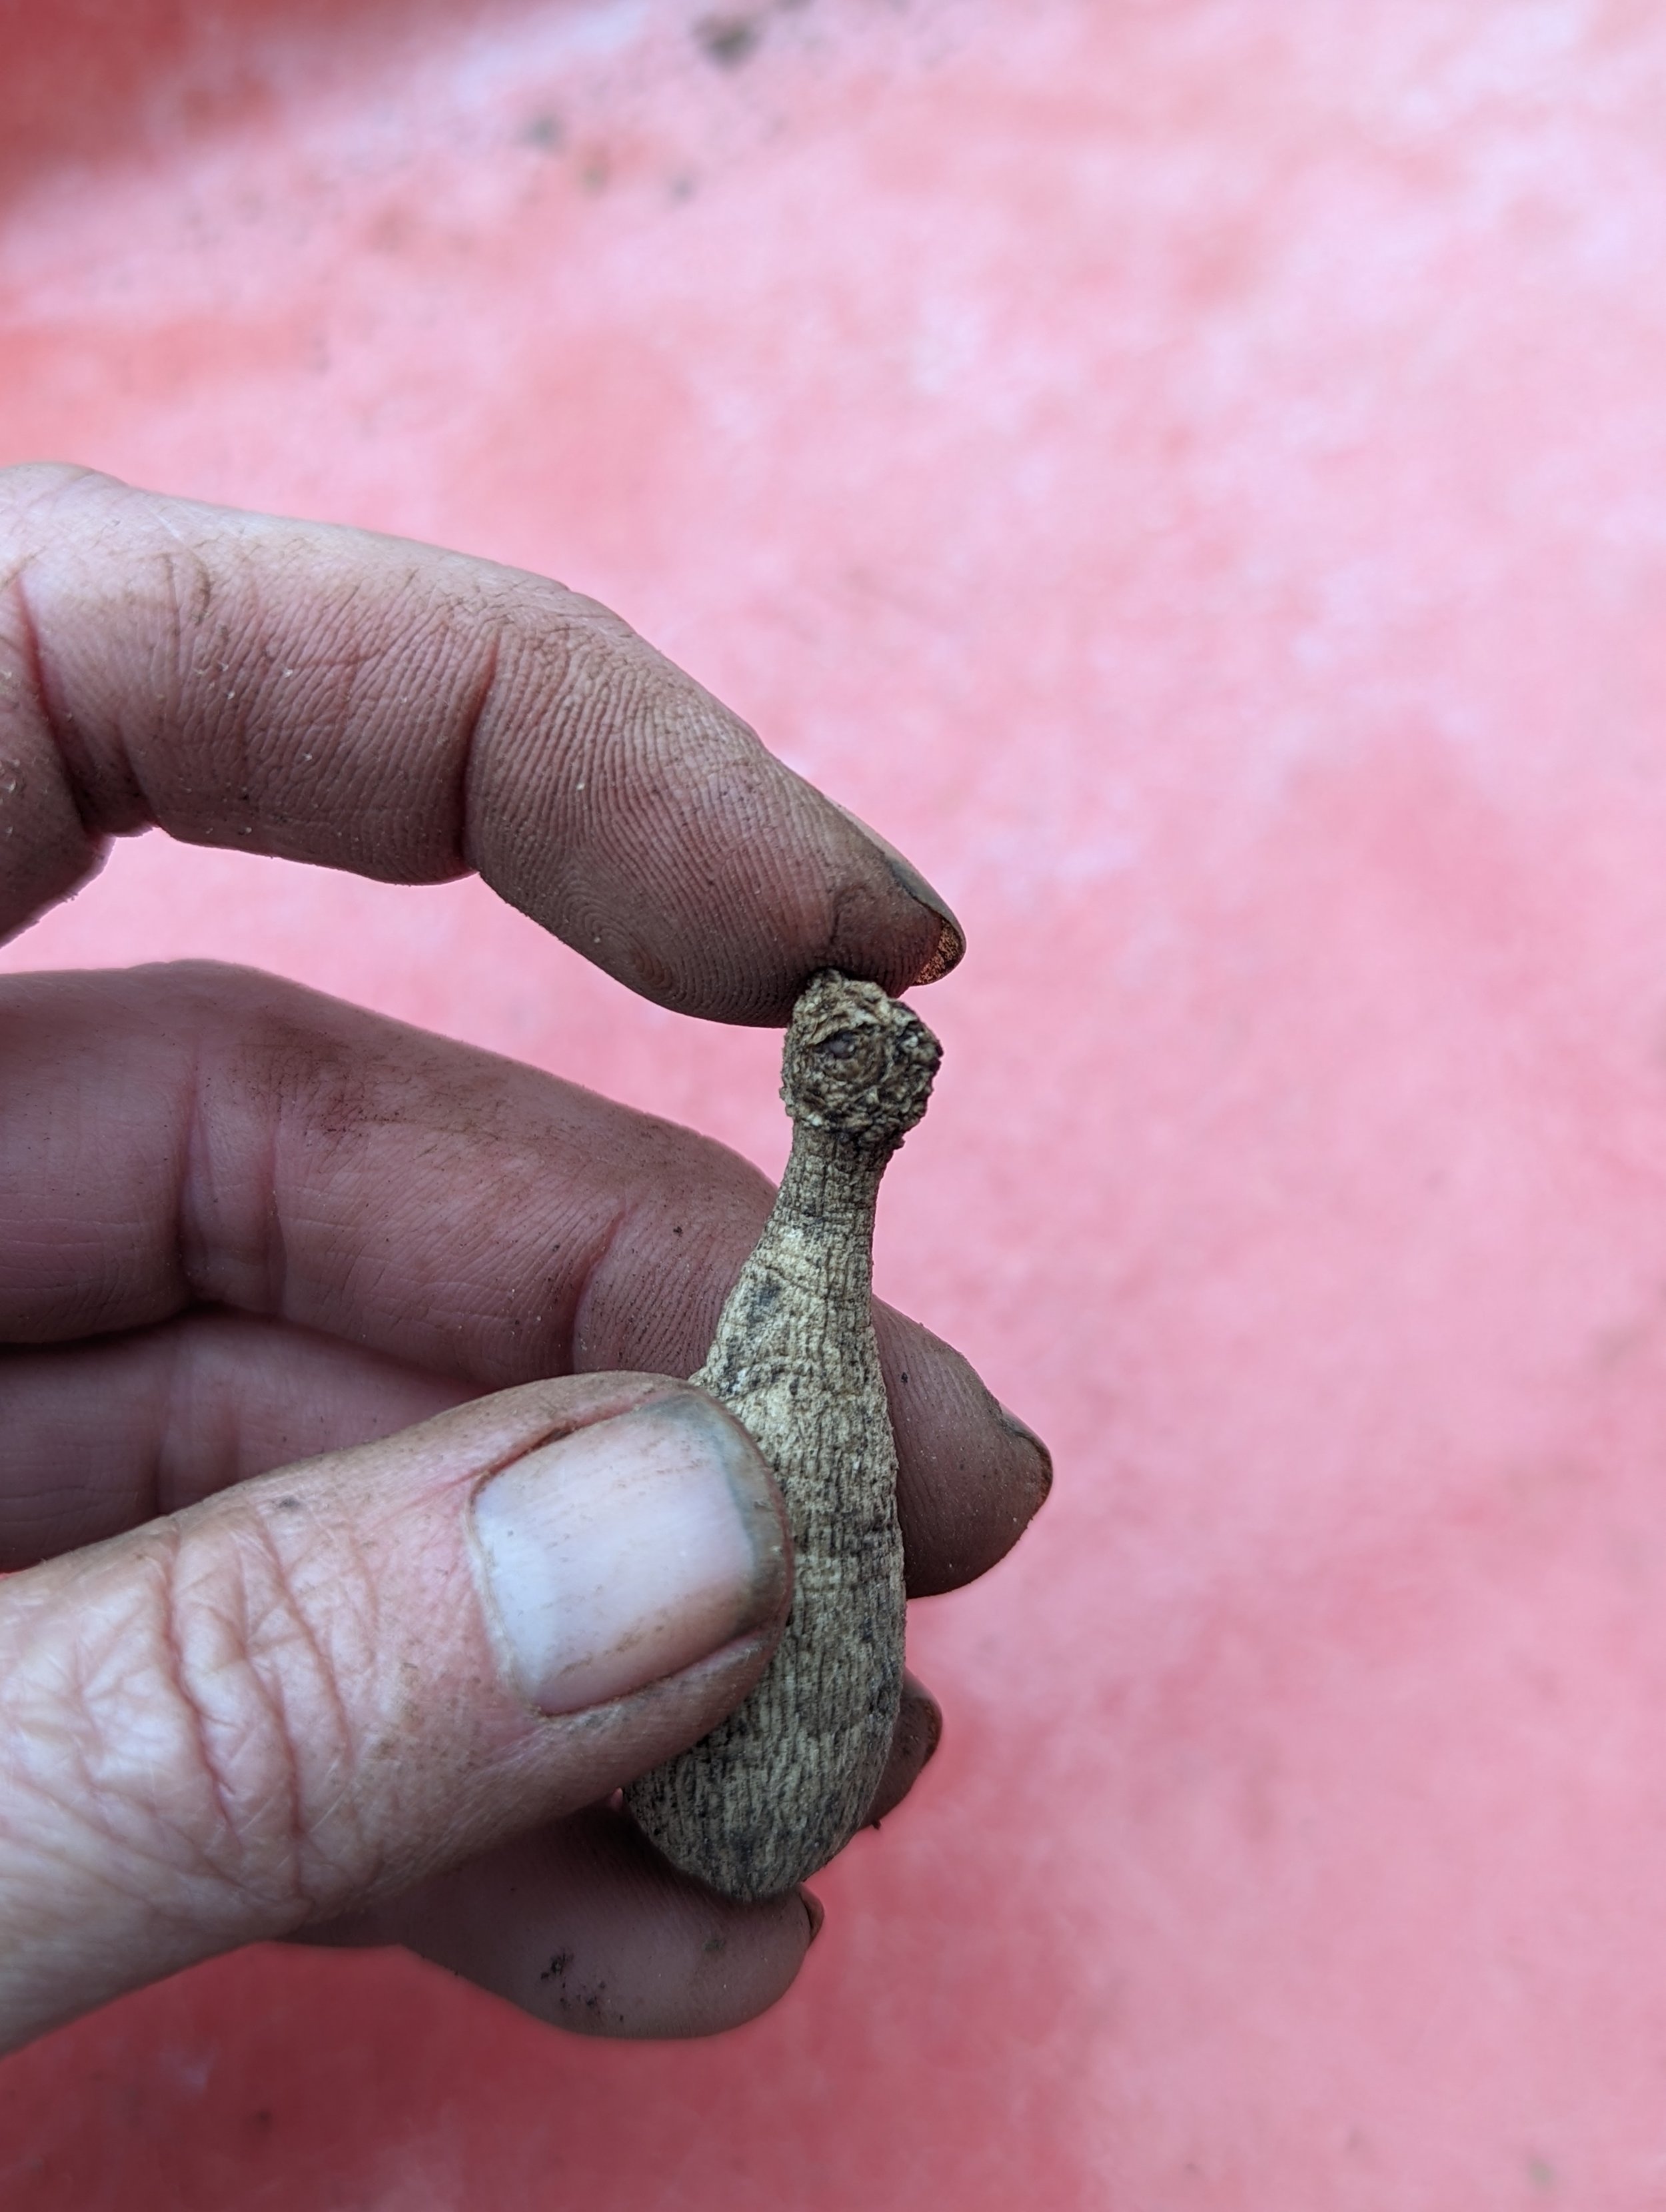
A viable tuber needs to have an “Eye”, a neck and a body. If the “tail” is too long, you can cut off up to 3/4 of the tail and the tuber is still viable.
For new growers, locating the “eye” can be tricky at first, but with practice you’ll be able to spot them.

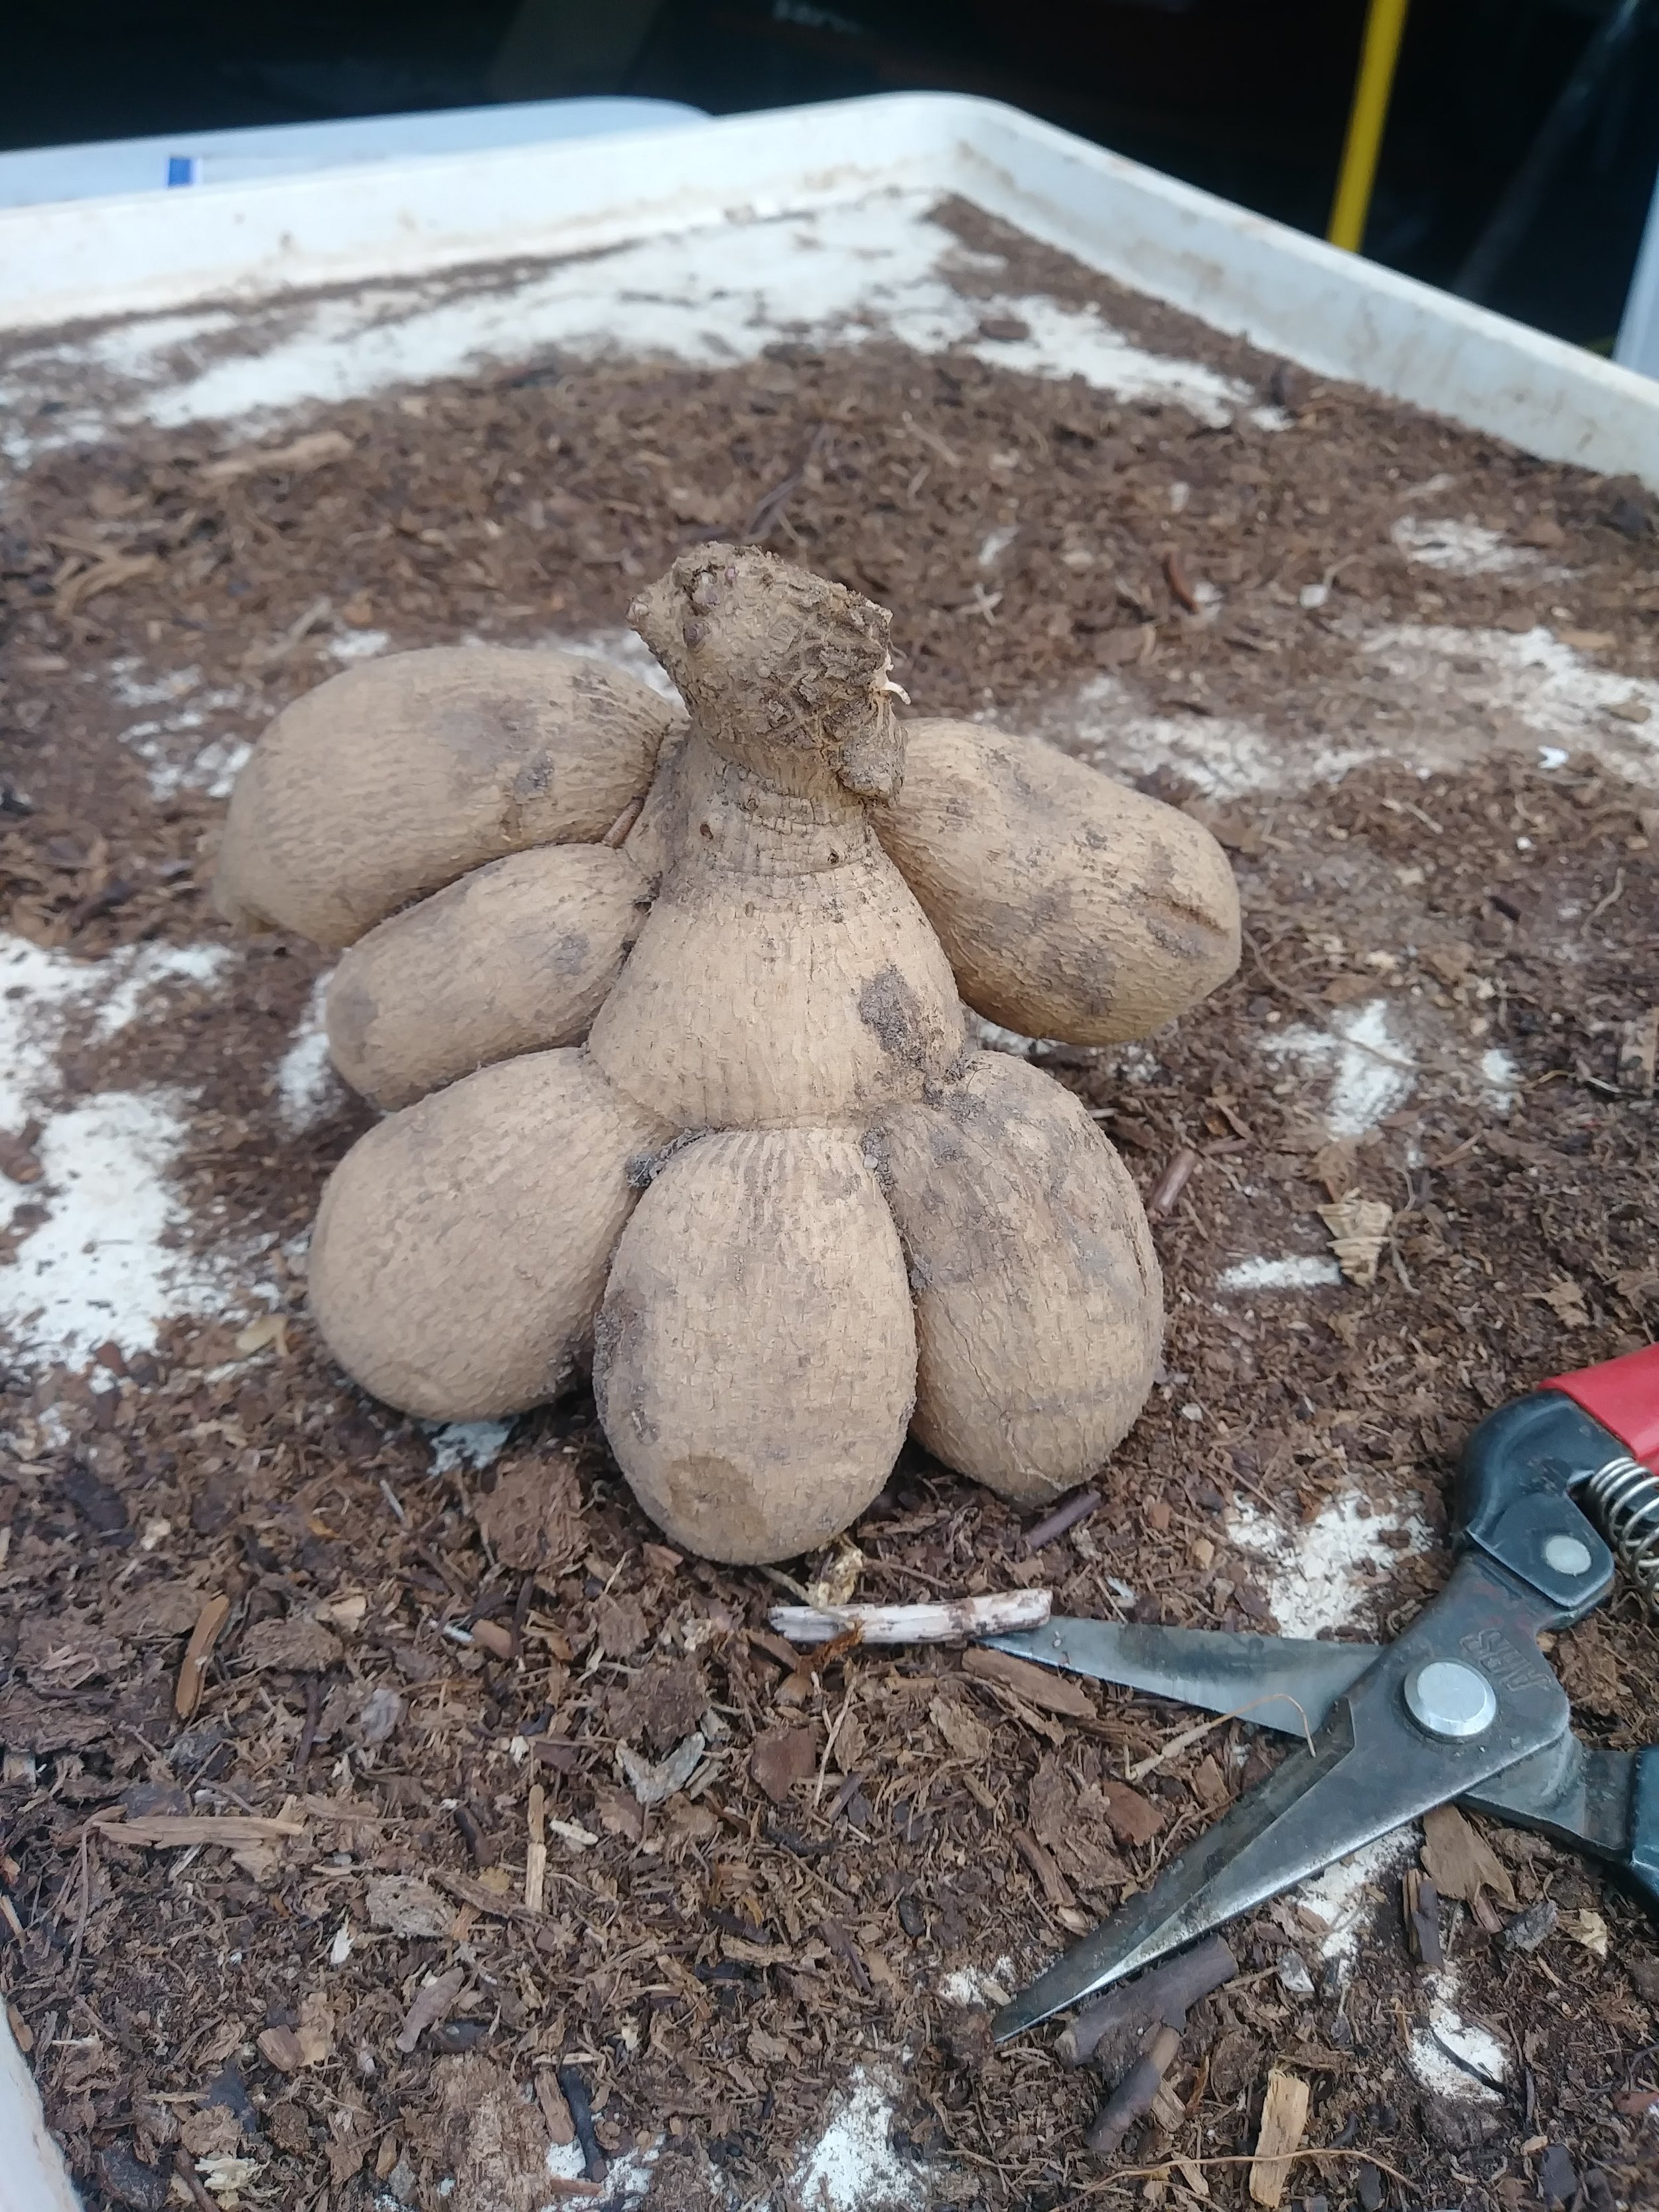
When you plant one tuber in the spring, the plant will grow and multiply… and when you dig up the plant in the fall, you will have MULTIPLE tubers! It’s like magic!
Yes, ALL of these tubers in the photo below grew from ONE tuber! Each one of these tubers can be planted out and now you have over a dozen plants!
2. Do all tubers look the same? Does the size of the tuber matter?
NO!!!!! There are thousands of different types of dahlias…. and each one grows it’s tubers a little differently. There is a shocking amount of variety in shape and size!
Some are tiny and slim, like a pencil. Some are short and stubby, with little to no neck. Some are huge and chunky. Some are skinny with loooooooong necks.
The size of the tuber is irrelevant in most cases. We grow some varieties of dahlias that never produce tubers larger than our pinky, while some produce HUGE tubers that we have to cut down to size. It all depends on the variety of dahlia.
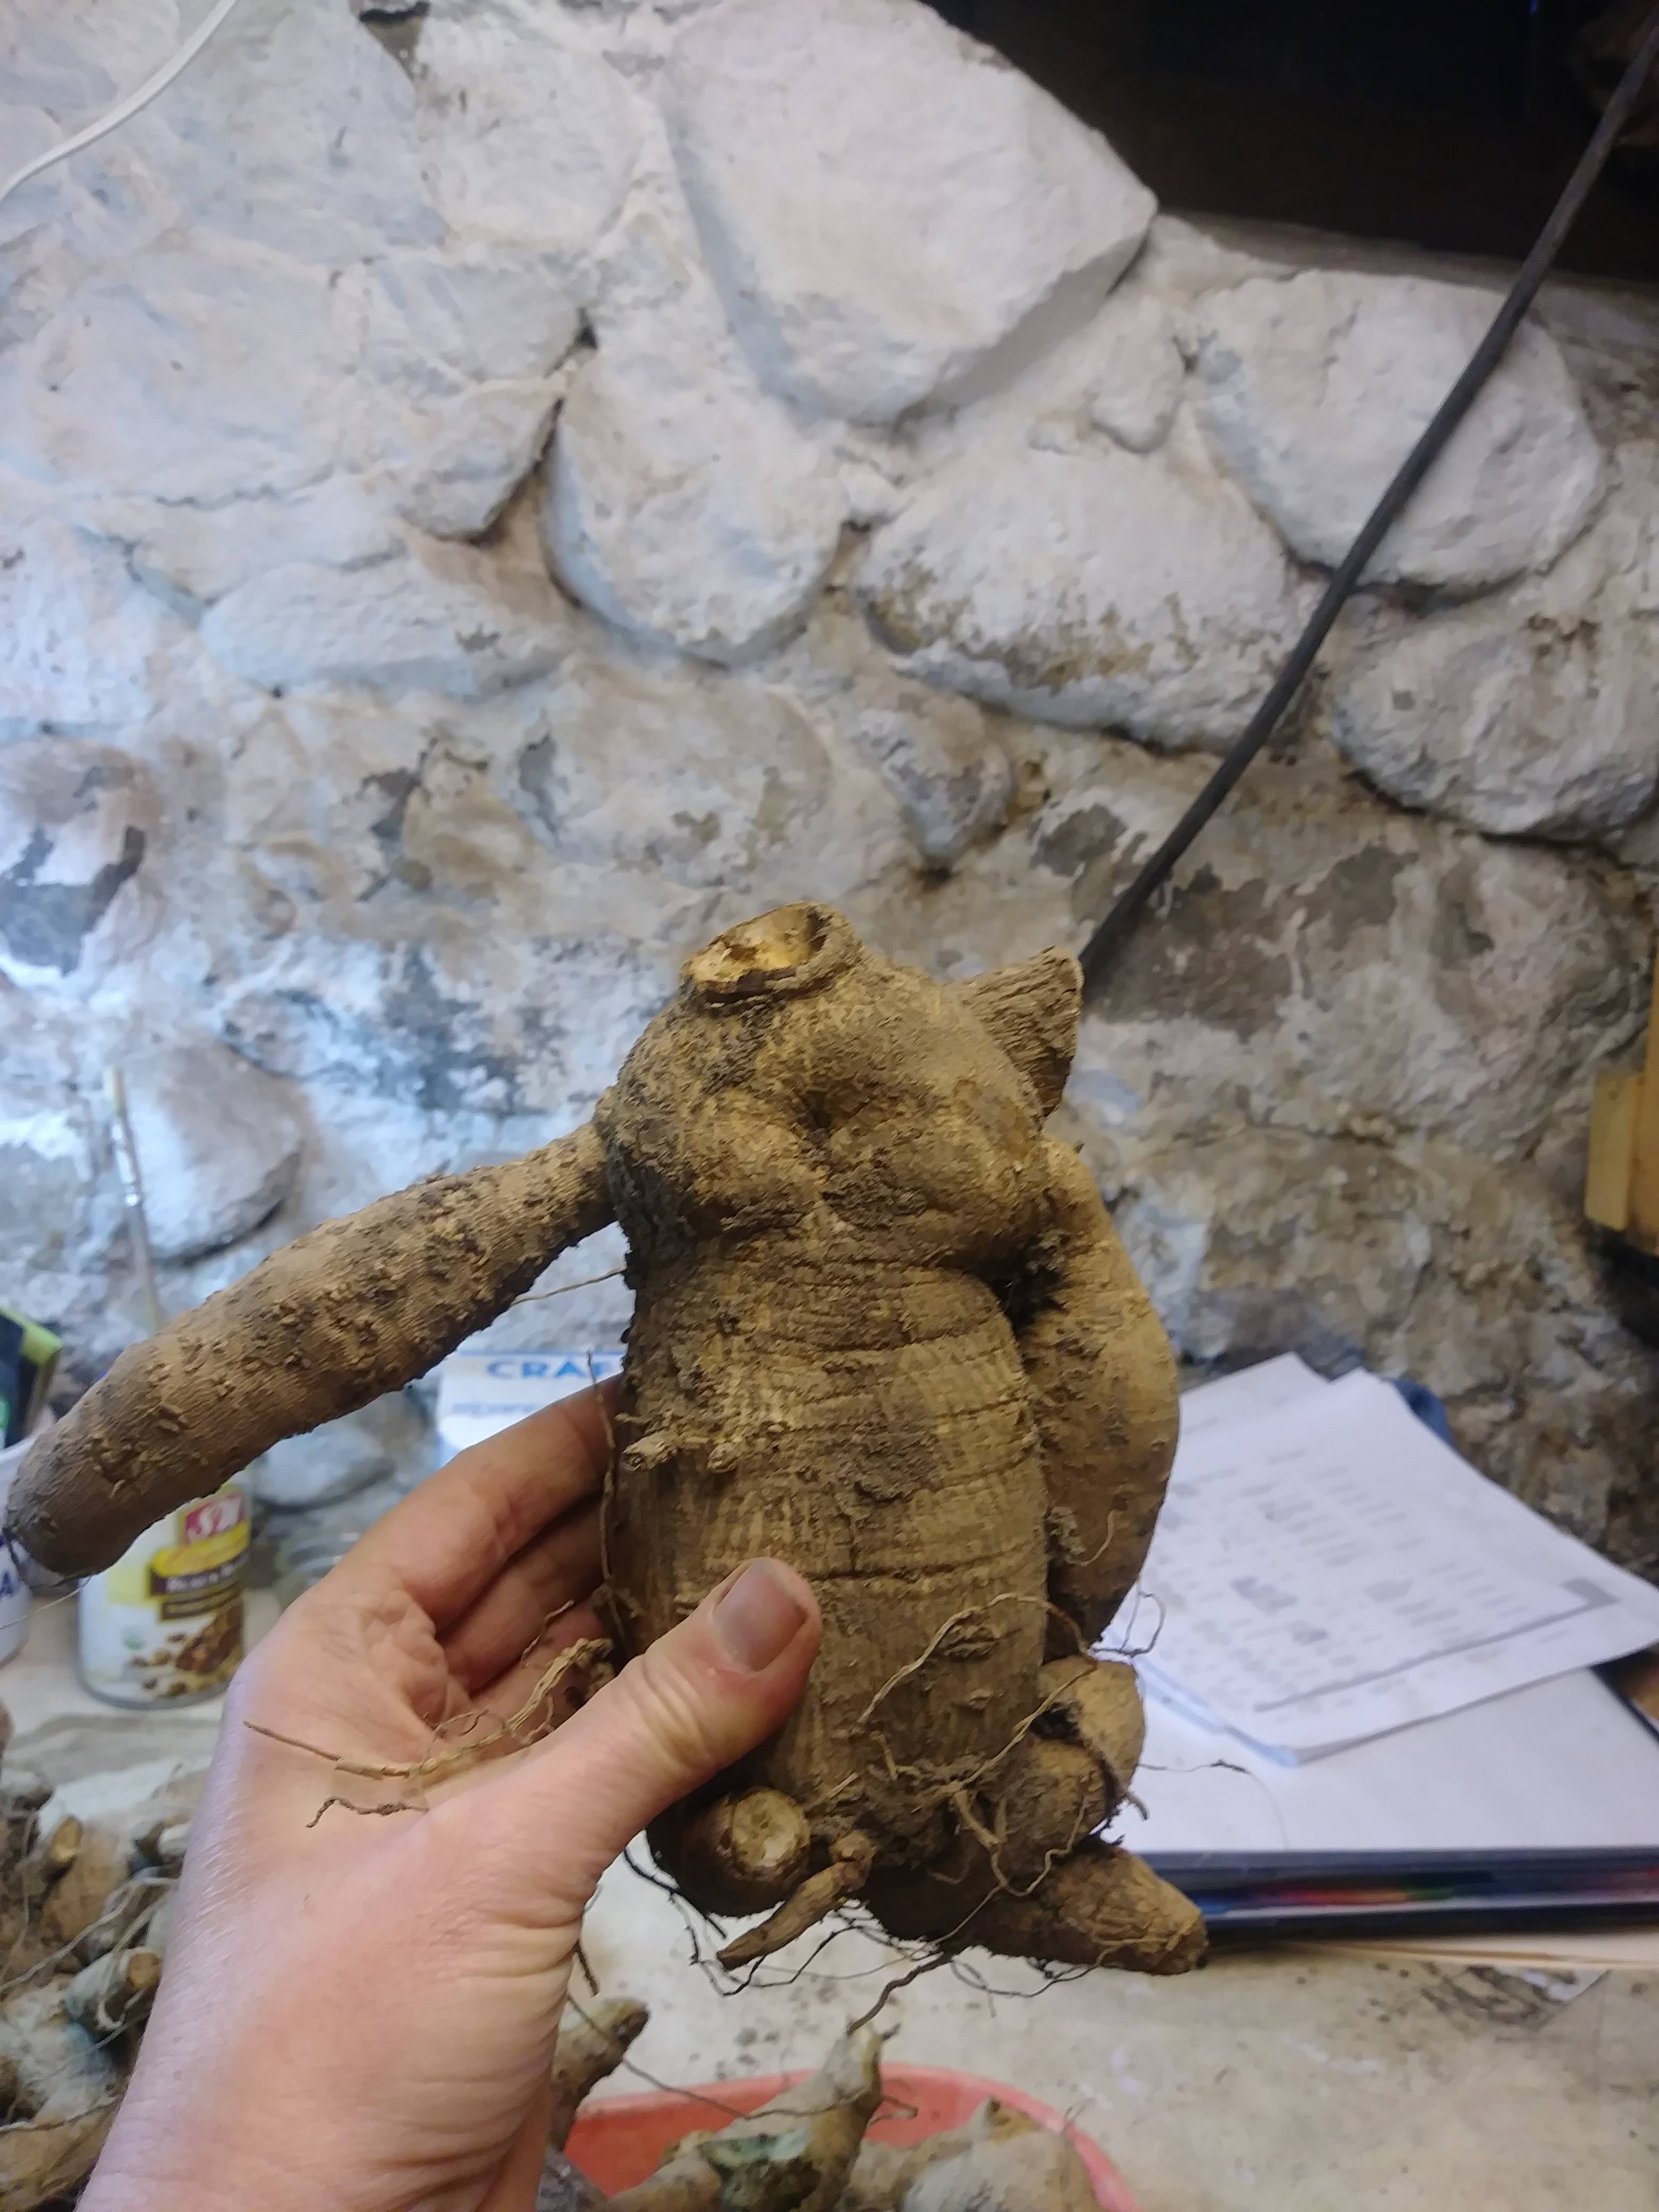
Here is an example of some of the dahlias we grow. Notice how all of them look completely different! Each one of these tubers is good example of their variety.

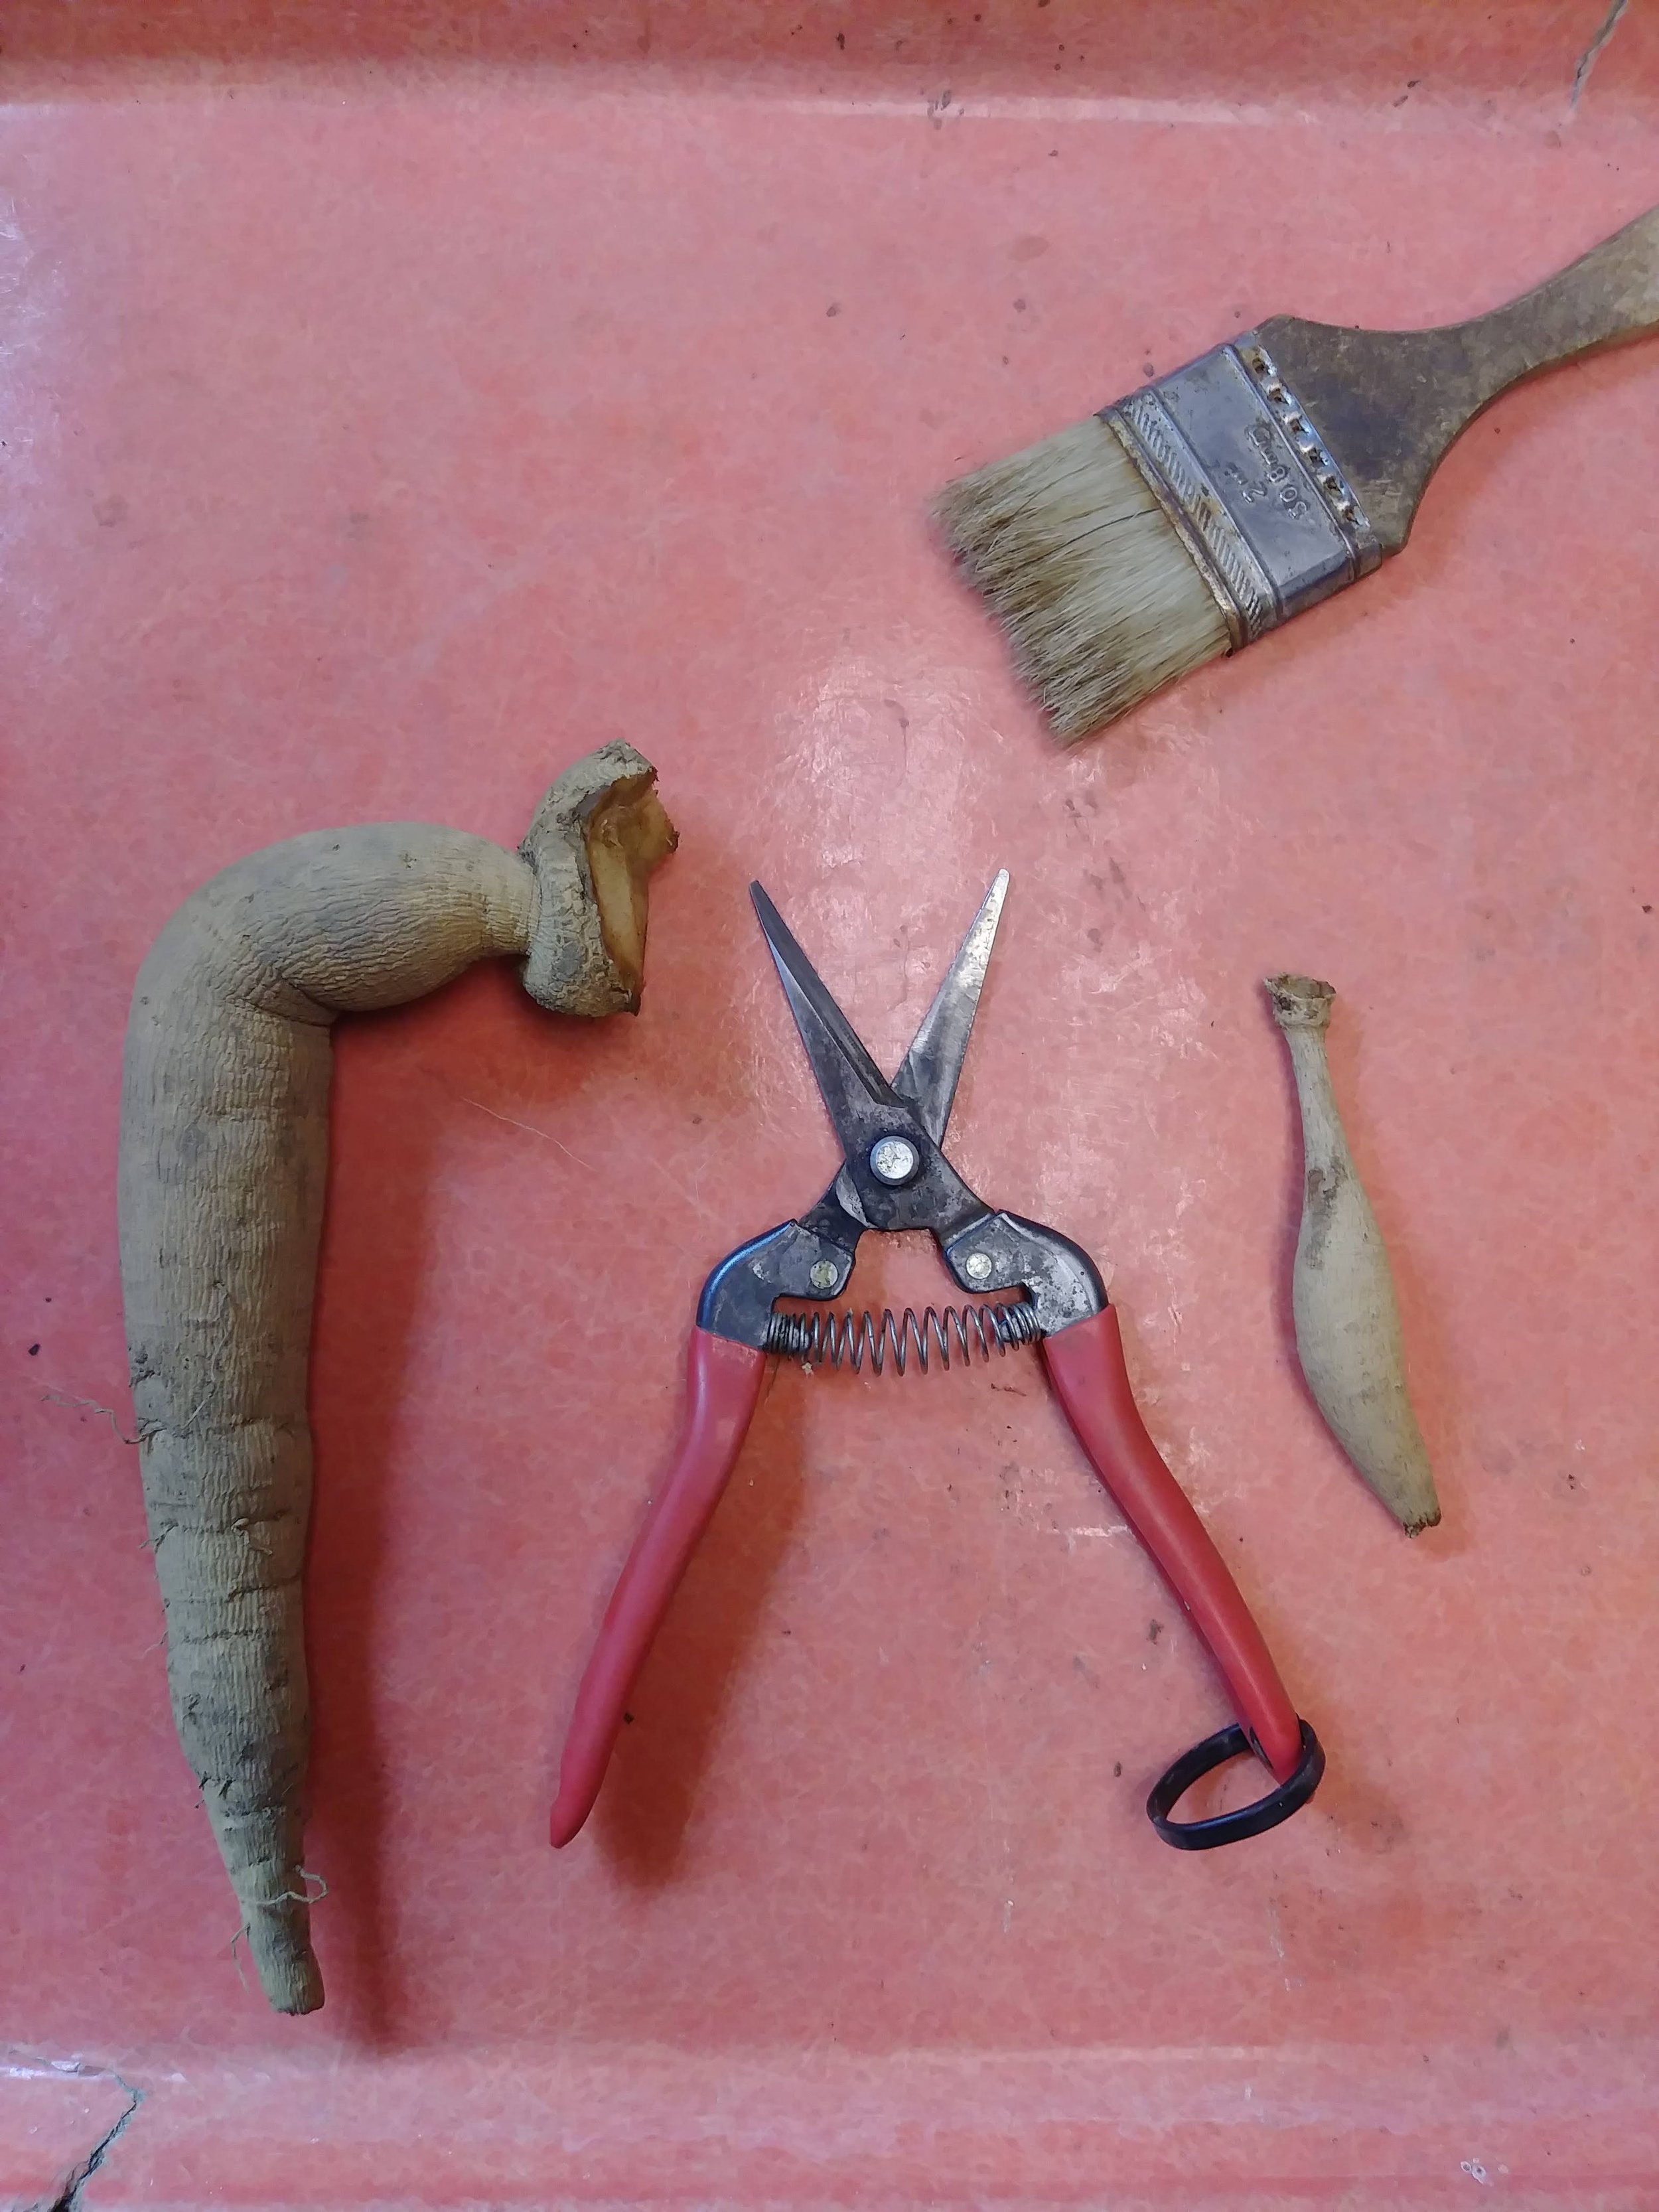
And here are a few more examples of viable tubers. Some of them look pretty funny ;)

3. My tubers look a little shriveled. Will they still grow?
In most cases, YES. Remember, as long as the tuber has an eye, it will grow.
Give the tuber a squeeze.
Is it firm and pliable? It’s probably still ok. Plant it!
Is it slimy, mushy and oozing? Throw it out.
Is it brittle and cracked? Throw it out.
Here is an example of a tuber that is completely dried out and desiccated, and does not have an eye. This one will not grow.

This tuber felt suspect, so we cut it open. Healthy Dahlias have clean firm white tissue. This one is rotting.

Below is an example of one that looks ugly, wrinkly and a little dried out…. but it will still grow. Notice the eye at the top. This tuber is not pretty, but it will still get the job done!
If all your tubers are shriveled and dried out, it means your storage space is too dry. Dahlias do best stored in locations that stay about 40F with 80-85% humidity.

Do not assume that tubers are worthless just because they look ugly. Those “ugly” tubers usually grow just fine. On our farm, we sell the “pretty” tubers and keep the “ugly” ones for ourselves. We love ugly tubers ;)
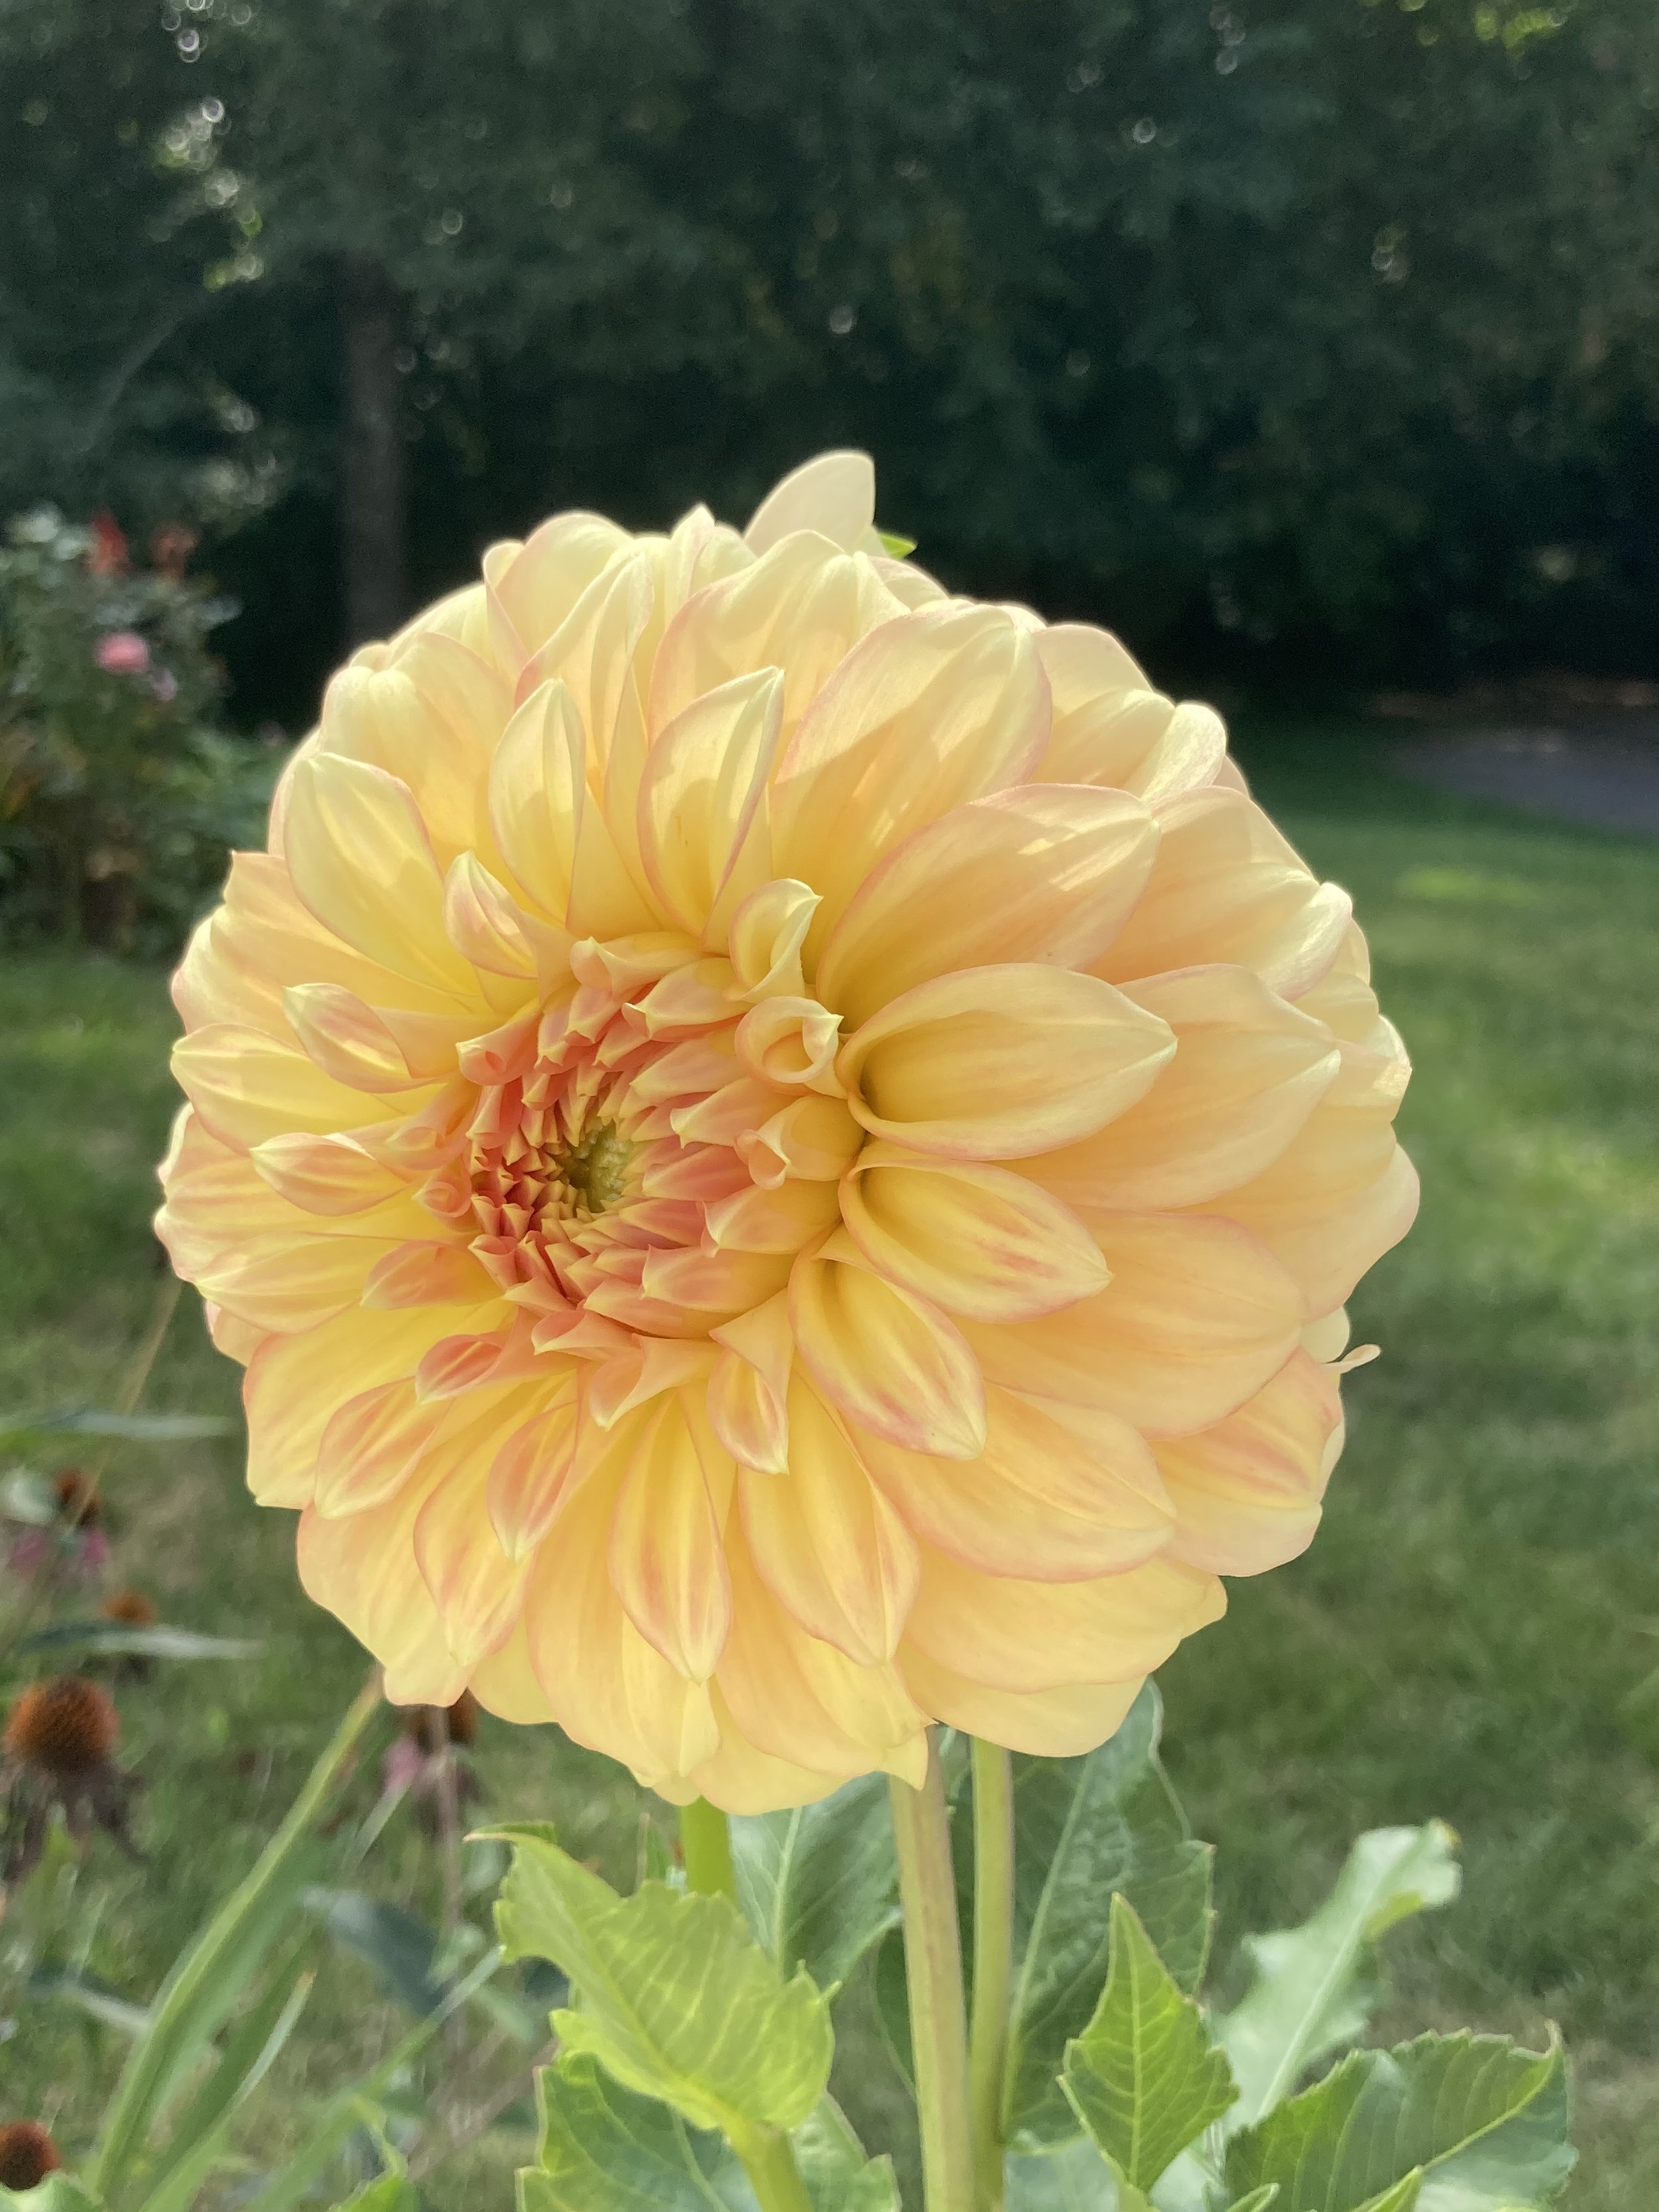
Below is an example of an “ugly tuber”… and the beautiful bloom it grew!
4. I DIVIDED MY TUBERS AND NOW THEY HAVE BLUE MOLD WHERE I CUT THEM! What do I do?!?
Step One: Take a deep breath and relax. :) It’s probably going to be ok.
Step Two: Check the tuber. If it’s slimy, oozing or mushy… discard the tubers. If it’s still somewhat firm (not slimy, oozing or mushy), proceed.
Step Three: Wipe off the mold with damp towel or brush it off.
This type of blue mold is very common. It’s usually a surface mold and it does not penetrate the tuber. Most often this mold grows because the humidity level in your storage space is too high. Try moving the tubers to a location that is a bit less humid.
See the “Before” and “After” photos below. Underneath the blue mold, the tuber is still firm.


5. Can I “pot up” my dahlia tubers to give them a head start?
Absolutely! We pot up a couple varieties each year, but the vast majority are NOT started in pots, simply because we don’t have room to pot up 1,000+ tubers ;)
Potting up is easy. Simply fill a 4” pot with potting soil, stick the tail end of the tuber in the soil and leave the head sticking out. Keep the soil slightly damp, allowing it to dry out between waterings. Do NOT over-water, as tubers can rot in wet conditions.
Keep the pots in a warm, sunny spot.
(You can watch a video demonstration of the process HERE)
After a few weeks, you will notice the eyes beginning to sprout and roots poking out of the bottom of the pot. Hooray! The tuber has done it’s job! The tuber is simply a food source until the plant creates roots.

Roots starting to poke out the bottom!

Eventually, the eye will turn into a sprout!
Bonus: If you are plant savvy and know how to make “cuttings” of plants, you can make cuttings from your tubers and propagate/clone them that way. It generally has about at 50-75% success rate, depending on your skill level. It does NOT hurt or damage the tuber, and the tuber will send up more sprouts to replace the one you cut off.

When it’s time to plant them outside, simply dig a hole about 6 inches deep and wide. Take the sprouted tuber out of the pot and bury it so the head is a couple inches below the surface of the soil. If the sprout sticks out of the soil, great!
If not, no worries! It will grow and emerge from the soil in no time. And if you accidentally break off the sprout - do not panic! It will grow a new one.
If you are planting a potted up, actively growing Dahlia plant with leaves/foliage, be sure to water it well at planting time and water the plant regularly as it’s growing.
In contrast, if you are planting a Dahlia tuber (not actively growing leaves), be sure to avoid watering until AFTER you see the sprouts/leaves emerging from the ground.

Hope this information helps! if you have any more questions, leave them below!
-Lori
Want more info about dahlias? Here you go!
The Beginner’s Guide to Growing Dahlias
Too Soon to Plant Your Dahlias? Here’s What to Do

Too Soon to Plant Your Dahlia Tubers? Here's What to Do
Too cold to plant your dahlia tubers? Here’s what to do while you wait!
If you are like us, we are DYING to get our dahlias in the ground in the spring!
Unfortunately… dahlias are NOT FROST HARDY and cannot handle freezing temperatures. Around here in West Michigan, our “Average Last Spring Frost” is May 15, which means we really need to wait until mid-May before we think about planting them outside. On our farm, our goal is to get them in before Memorial Day, but some years, we’re still planting in June.
The main rule for planting time for Dahlias? The soil should be WARM (60°+) and relatively DRY, as opposed to cold and wet (which can cause the tubers to rot).
So, what are you supposed to do when your tubers start arriving in the mail in mid-April, but you can’t plant them out for another MONTH?!?
You have 2 options:
1. Leave them right in the bag they arrived in. Be sure to open up the bag to let them “breathe” a bit and regulate humidity. Store the bags of tubers in a cool, dark, dry location, such as a basement or garage. Do NOT store them in a place that dips below freezing.
2. Pot them up! You can fill a small pot with potting soil and pop the tuber in there. Be sure to “plant” it tail down, and head up (look for the “eye” or sprout on the head of the tuber). Water the pot sparingly (not too wet, not too dry) and place in a warm, sunny spot. The tuber will send up shoots and leave above the soil and roots into the soil.

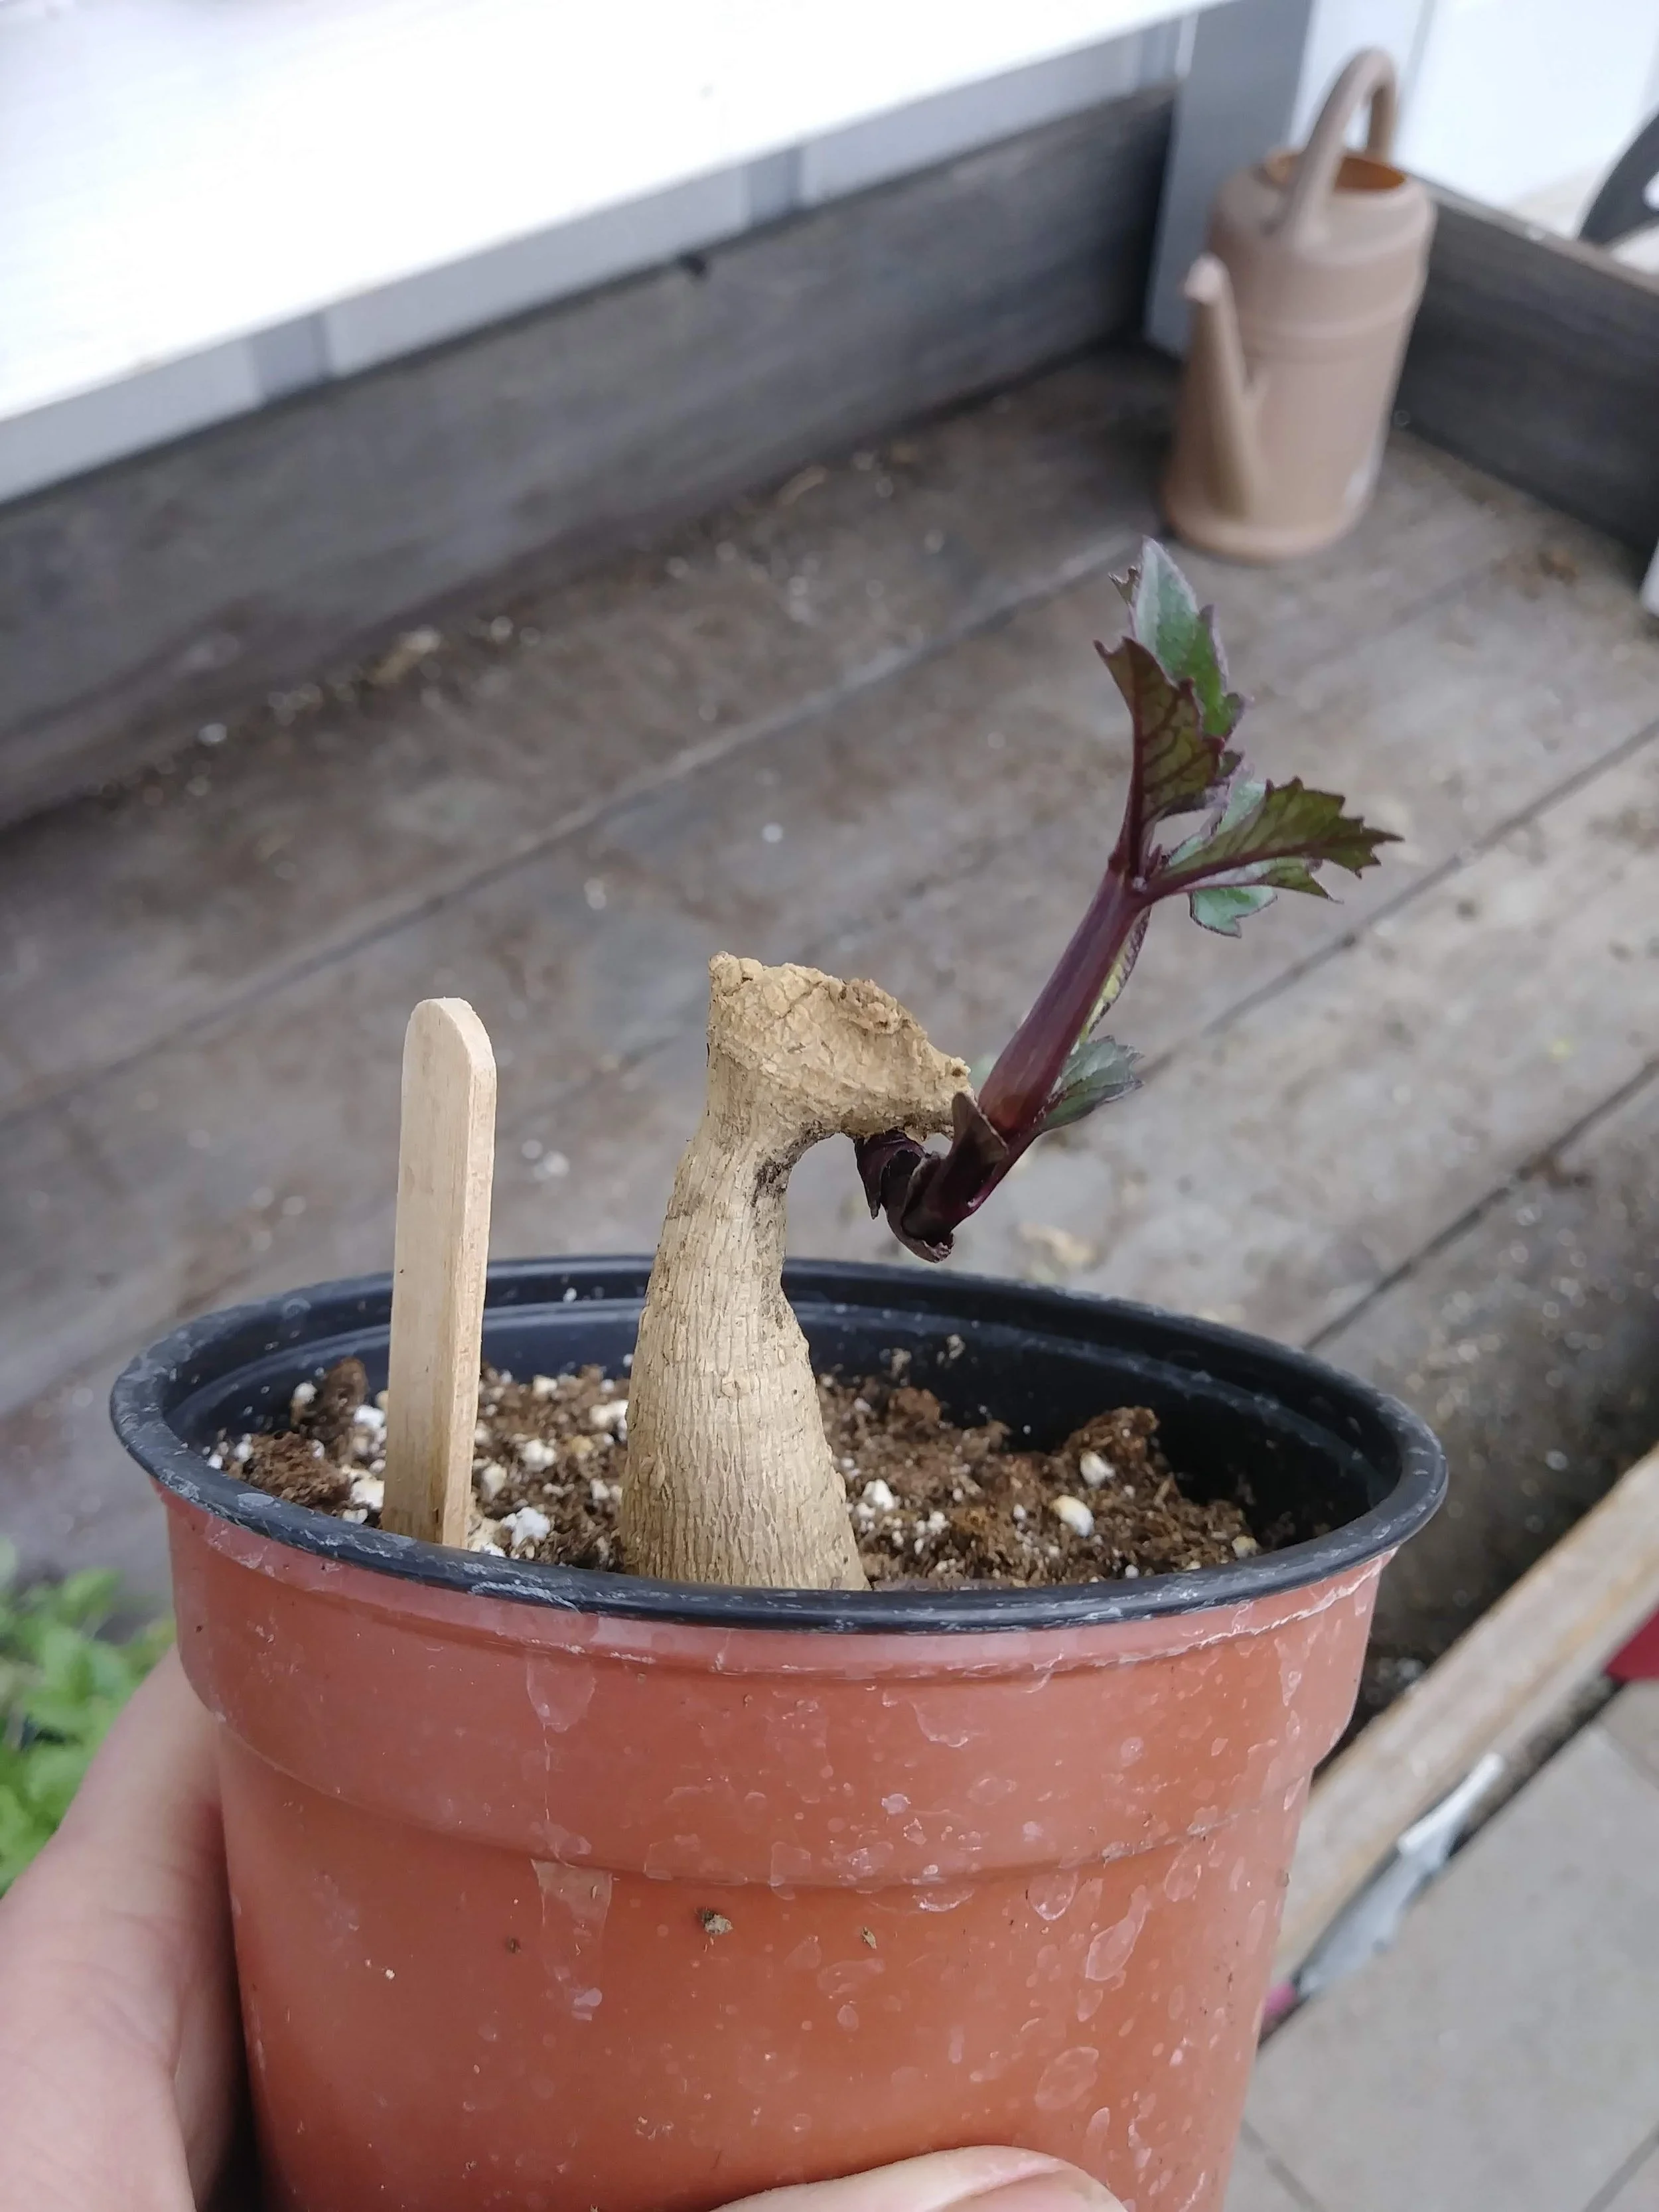
Watch the tutorial below to see how it’s done!
Once your soil is warm and dry, and the risk of frost is over, you can plant them out!
If you’ve potted up the tuber, simply remove the entire contents of the pot (tuber with the potting soil) and place it in the ground (dig a hole slightly larger and wider than the pot), being sure to bury the crown of the tuber (where the shoot/leaves are coming out) about 4” below the surface of the soil.
This might mean you’re completely burying the shoot/leaves. Don’t worry - it’s not a problem at all. The shoot will keep growing and poke out of the soil soon.
And if you happen to accidentally break off the shoot while planting… Don’t panic! It will send up a new shoot!
Water regularly to help the plant get established. This is an established plant, and like all newly planted plants, it needs generous watering at planting time and beyond.
If you’re planting an unpotted tuber, simply dig a 4-6” hole in the ground, drop the tuber in with the eye facing up, and backfill the hole. DO NOT WATER until you notice the shoots/leaves pushing through the surface of the soil (unless your soil is very dry! Dahlias do need some moisture in the soil to grow. The goal here is to avoid planting into cold, saturated soil, which can cause them to rot).

Want to know more about dahlias? Be sure to check out this post: The Beginner’s Guide to Growing Dahlias
Happy planting!