

Spring at Three Acre Farm: As Told By Lindsay Ritchie Photography
My dear friend (and old neighbor) came to visit the farm and tell the story of Spring at Three Acre Farm.
Spring at Three Acre Farm
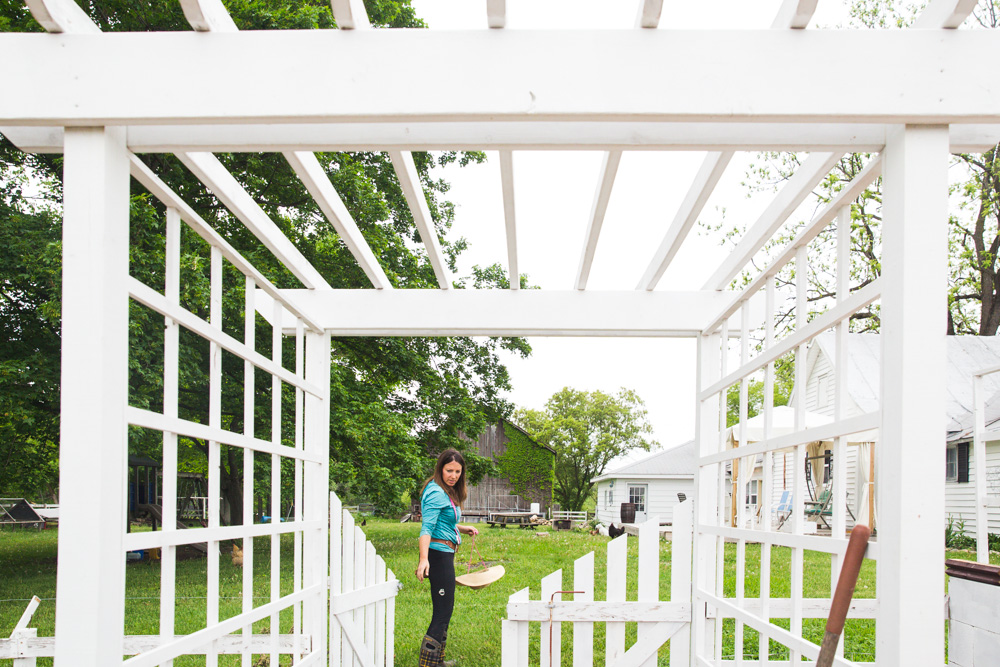
A few weeks ago, a dear friend offered to visit our farm and tell it's story through her photography. I was absolutely thrilled to have her come and thankful for a new perspective of our farm.
You see friends, most of the time when I look around our farm, I'm flooded with feelings of being overwhelmed. There is SO MUCH TO DO, ALL THE TIME. Especially at spring time, I feel crushed.
I see the fences I need to paint, the garden beds that need to be weeded, the chicken coop that needs to be cleaned out, the lawn that needs to be mowed, the piles of wood that need to be stacked, the goat hooves that need to be trimmed, the barn that needs to be purged and organized, plants that need to be watered, seedlings that must be planted, the landscaping that needs to tending... I look around and see work that needs to be done, the ugliness and shame of unfinished jobs.
But my friend Lindsay... she saw beauty instead. She saw wonder and loveliness and delight. When she showed me these images, I gasped out loud. I loved seeing the farm from her eyes.

Lindsay was the perfect person to tell our story because she has witnessed it and been part of it since the beginning.
Years ago, we were close neighbors. We lived across the street from each other. We babysat each other's kids. We ate meals together. We shared life together.
When God instructed us to leave our life in the city and start a farm, she was there. When we planted our first garden, she was there. When I struggled with discerning God's calling for our lives, she was there. She has been part of our joys, our struggles, our transformation. She was there as we stepped into the unknown and followed a dream God placed in our hearts.
She has also gone through some huge transforming life changes too in the last few years. It's been such an honor to watch her as SHE steps into the unknown and follows the desires that God placed in her heart, the desire to help others tell their story through images.
Lindsay has taught me so much about the value of beauty and how to live with intention. I love watching her embrace her skills and talents as a photographer, as she helps other find the beauty in the present, in everyday life.
If you are looking for someone to your story, you've just got to meet to Lindsay. Check out her work at: Lindsay Ritchie Photography. You won't be disappointed.
Without further ado, here is the story of "Spring at Three Acre Farm". Enjoy!
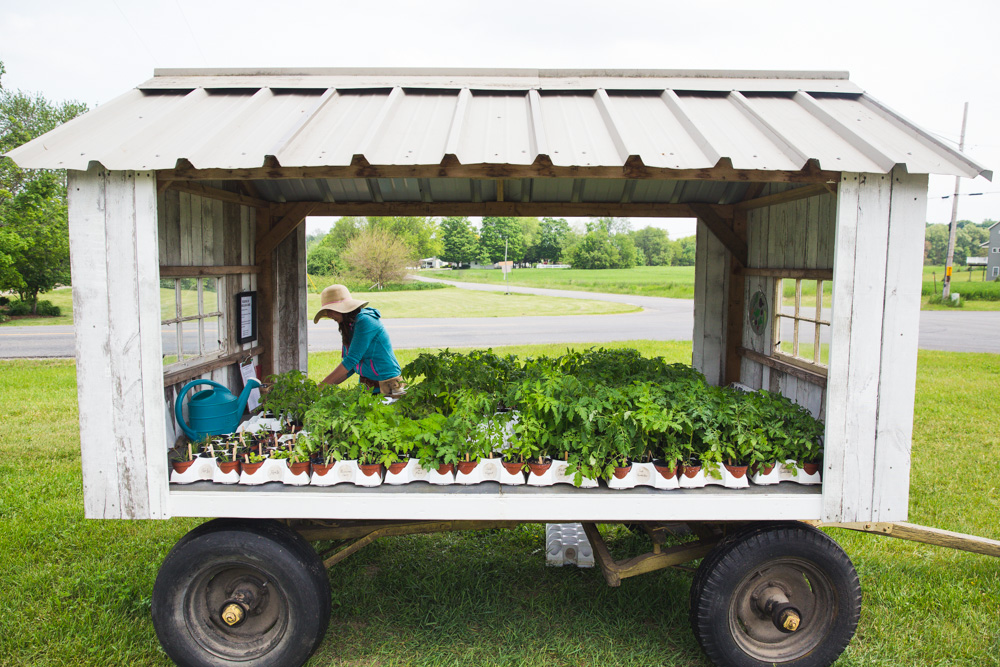
Our humble Farm Stand. My husband bought an old horse cart, took off the sides and built the base, walls and roof. It's perfect!

Everything for sale on the Farm Stand is truly "Home Grown". I start all the plants (flowers and veggies) in our 1880's farmhouse basement. Many of the plants are started from seed that I've saved from the previous year. Seed saving is an important skill to preserve.

In the spring, I sell tomato, pepper and herb plants on the Farm Stand. I started selling plants year ago, when I got the "seed starting bug" and found myself with excess plants at planting time. Friends and family kept asking if they could buy my extra plants... so I decided to start growing some each spring to sell.
I specialize in growing hard to find, unique Heirloom type tomatoes. Almost all the varieties are Open Pollinated (not hybrids), which means the seeds can be saved and used for next spring's planting.

Dahlias, dahlias and more dahlias. We put in over 750 dahlia tubers. I can't wait to see them bloom in August!
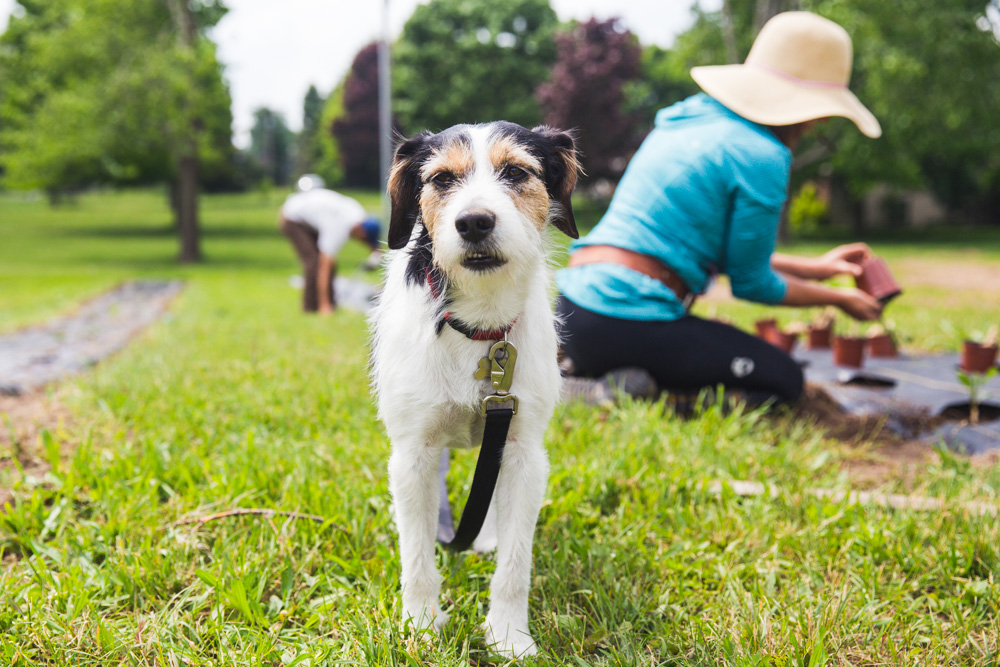
Meet Silas, my side kick. When our 15 year old dog had to be put down this winter, we were heartbroken... and our other 14 year old dog, Gibson, was lonely.
We searched for the perfect dog for months. I was ready to give up the search until fall, when this guy's profile came up on Petfinder the EXACT same day I told my husband we should stop looking. Of course, we went to the shelter to "just look" and 30 minutes later, we were driving home with our new addition.
Welcome to your forever home, Silas.
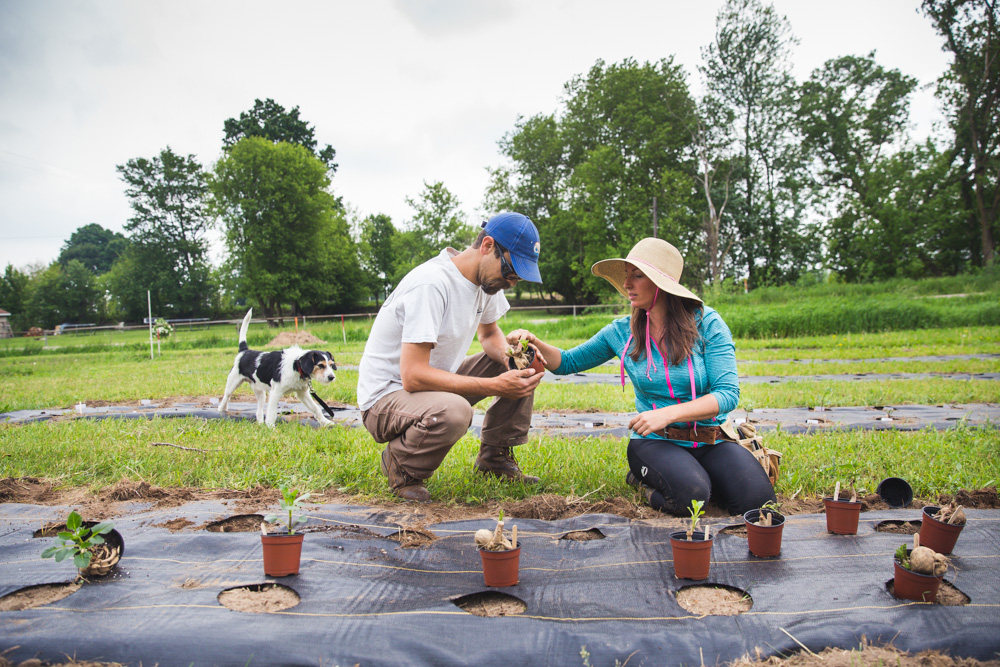
John is the dahlia expert. In fact, planting dahlias (and really this whole flower farm) was HIS crazy idea. He decided "we need more beauty in our life". He was right.
John is a member of the West Michigan Dahlia Society... where gets to hang with some wiser (older) folks that teach him all the tricks of growing these spectacular flowers. Dahlias can be pretty fussy and labor intensive, but those blooms... swoon! We'll work like dogs for that reward!

This year, we tried "pre-sprouting" some of the dahlia tubers to get a jump on the growing season. I'm so glad to finally be planting them. Every flat surface (including the bed) in our guest room was covered with flats of sprouting dahlia tubers!
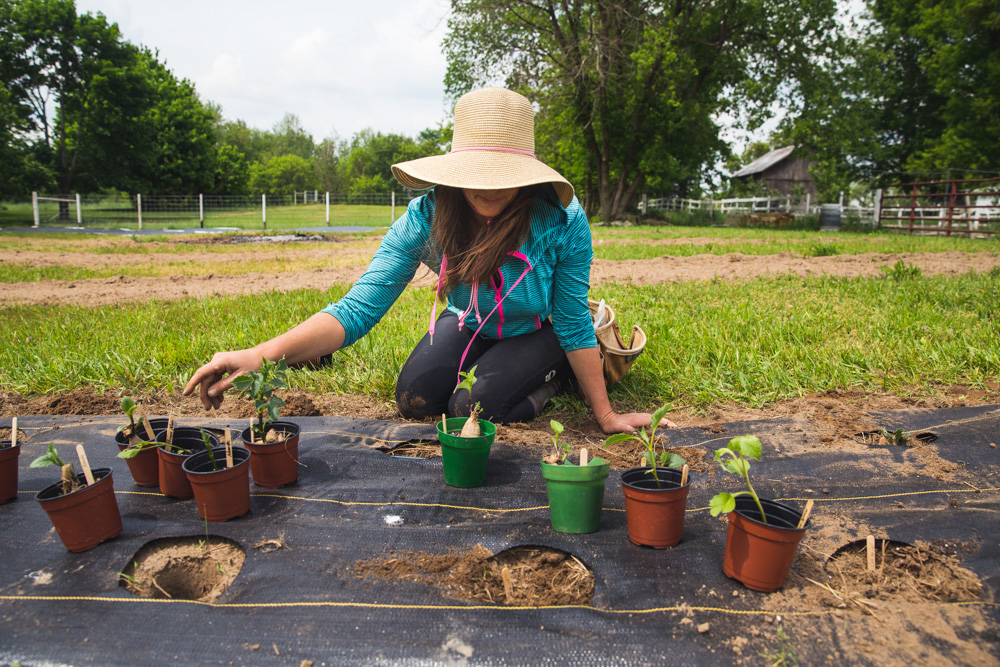
So many dahlias to plant... it took us about 3 days to get them all in.

Flowers in the greenhouse waiting to be planted. All these babies were started under lights in the basement. They eventually graduate to the greenhouse, then the field.
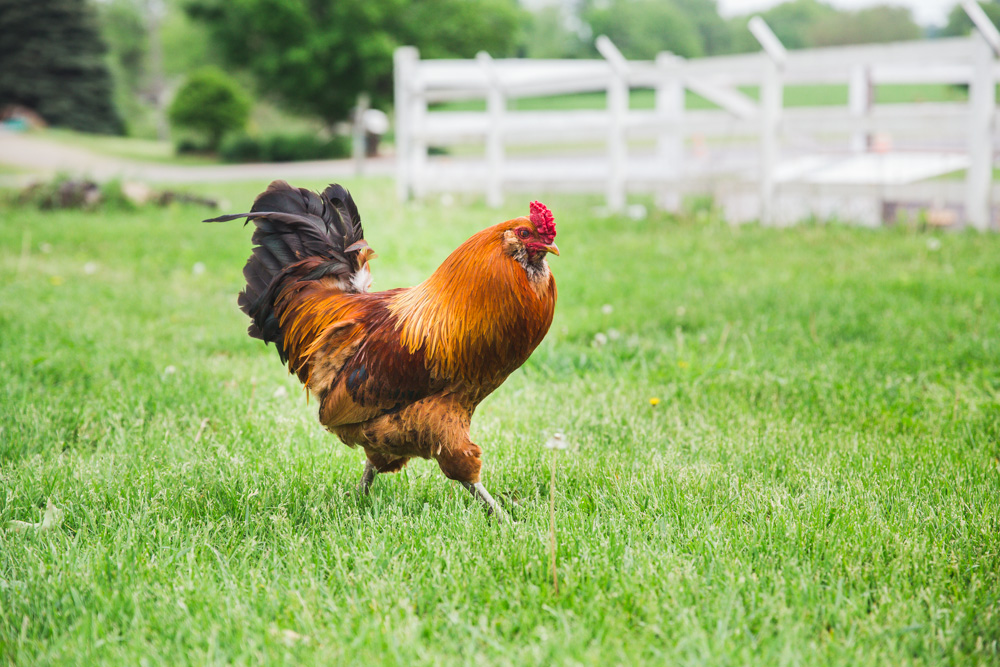
Sexy Rexy, our resident rooster. He is an Americauna( or Easter Egger) breed. Obviously, he doesn't lay eggs, but our hens of the same breed lay the prettiest blue eggs... hence the name "Easter Egger".

I know that buildings don't have feelings, but I swear this old barn lets out a deep sigh of contentment the day we filled it with goats and chickens. It hadn't housed animals in almost 40 years and I think it was lonely and feeling neglected.

Back door to the barn. The knob makes me smile every morning. So fancy!

I was created to do this.

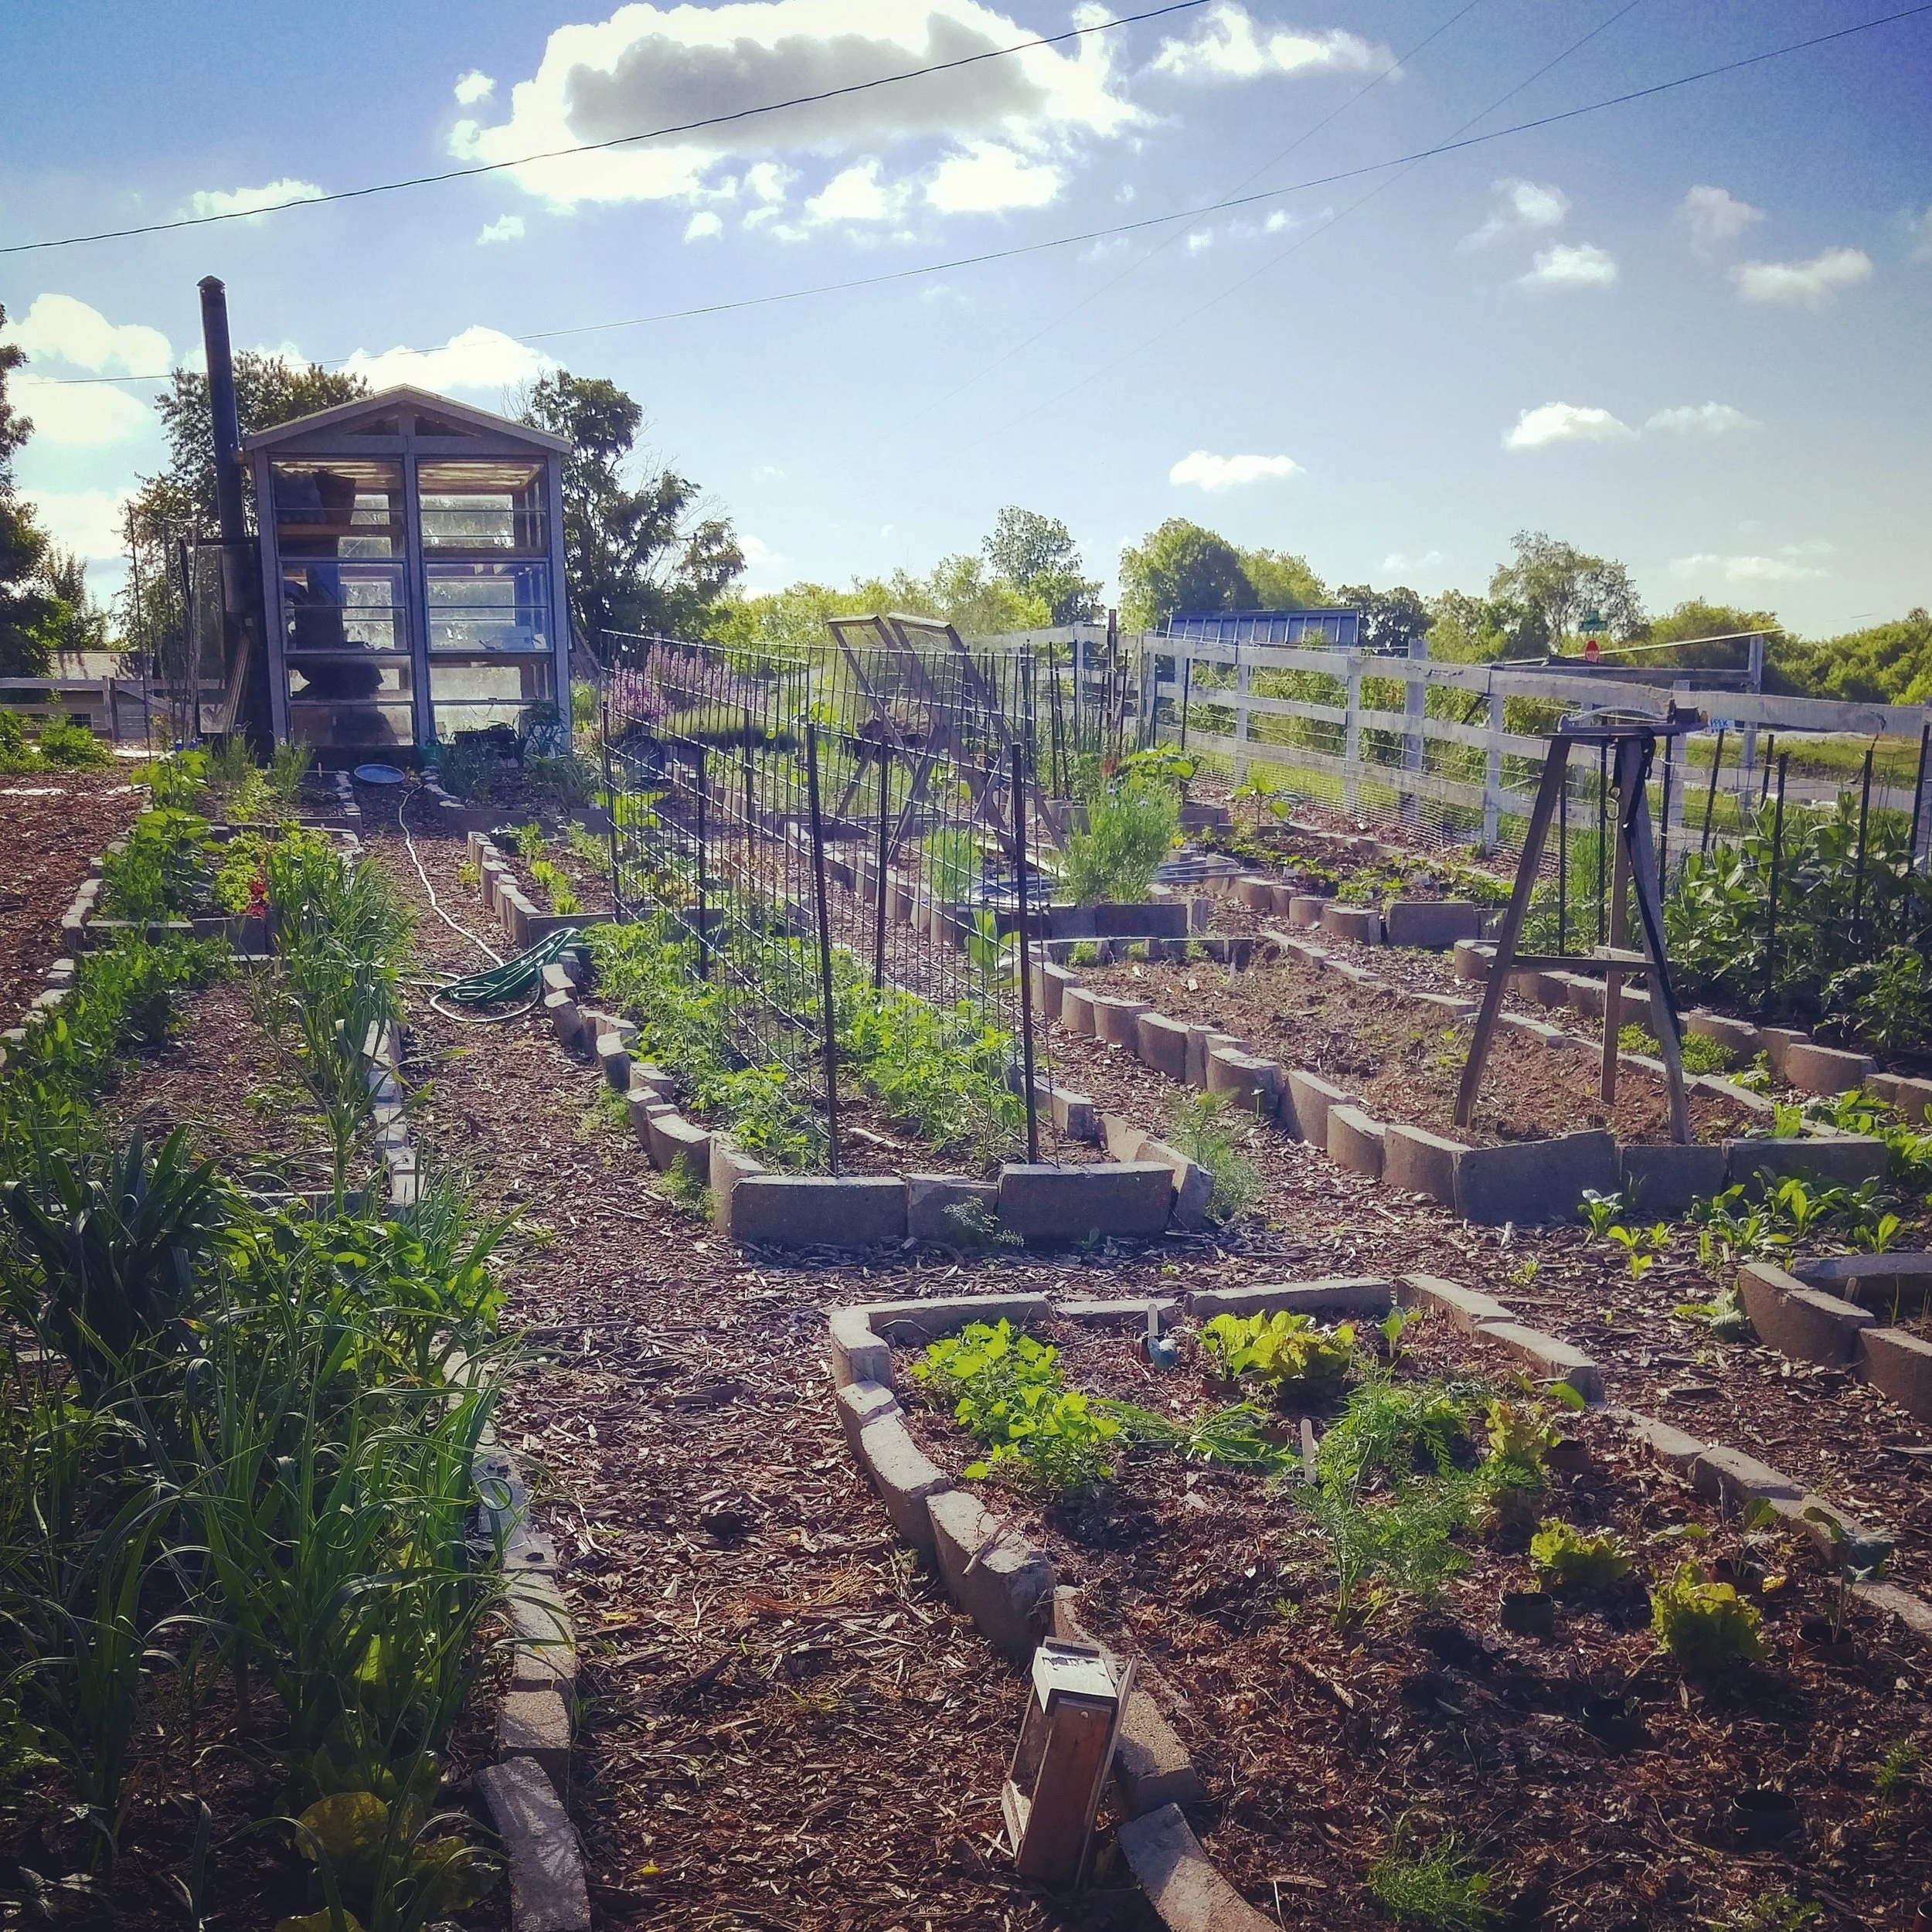
My happy place. This garden is where all the magic happens.
The raised beds are made from old silo blocks. My husband knocked down our ancient silo.
With a hammer.
And he didn't get crushed to death.
True story. We even have video footage. Remind me to post it someday!
John built me this arbor last summer and I can't decide what to grow on it. Grapes? Roses? Wisteria?
Tell me what I should plant!
******************************************************************************
Another huge thanks for Lindsay for capturing these great images!
I can't wait until she comes back later this summer for "Part Two: Summer at Three Acre Farm". It will be amazing to see the transformation!
If you are looking for someone to tell your story, contact Lindsay. You'll be so glad you did.
*All photos used by permission from Lindsay Ritchie Photography. Be sure to check out her website, and follow her on Facebook and Instagram.
Free DIY All Natural Garden Fertilizer
A simple, quick and easy way to give your plants the nutrients they need to thrive!
I just love turning trash into treasure, don't you?
What a thrill to turn waste into something valuable! It makes me feel smart, thrifty and resourceful.
Today, I will share an easy, free way to nourish your garden plants and help them thrive. And guess what? You probably have everything you need already.
The magic ingredient is: EGG SHELLS.
Yes, those lovely, wonderful, valuable shells that you have been throwing in the trash make a fantastic natural fertilizer.
STOP!!! Don't throw them out anymore!
Why Use Egg Shells
Egg shells are a great source of calcium, which is essential for optimal plant growth. Many plants need a little extra calcium to really thrive, such as:
Tomatoes
Potatoes
Peppers
Eggplant
Broccoli
Cauliflower
Kale
Collard Greens
Cabbage
Preventing Blossom End Rot
If you have ever grown tomatoes, you may have struggled with a problem called "Blossom End Rot". You'll notice it primary after periods of heavy rainfall. The fruit will look perfect, except for an ugly black, rotten spot on the bottom ("blossom end") of the tomato.
Adding calcium to the soil can help alleviate Blossom End Rot, as the calcium helps to regulate the plant's water intake.
Nobody has figured out exactly what causes Blossom End Rot or how to completely prevent it, but consistent watering and added calcium seems to be the best solution.
DIY Calcium Fertilizer Instructions
Here's how to make the fertilizer. Easy, peasy!
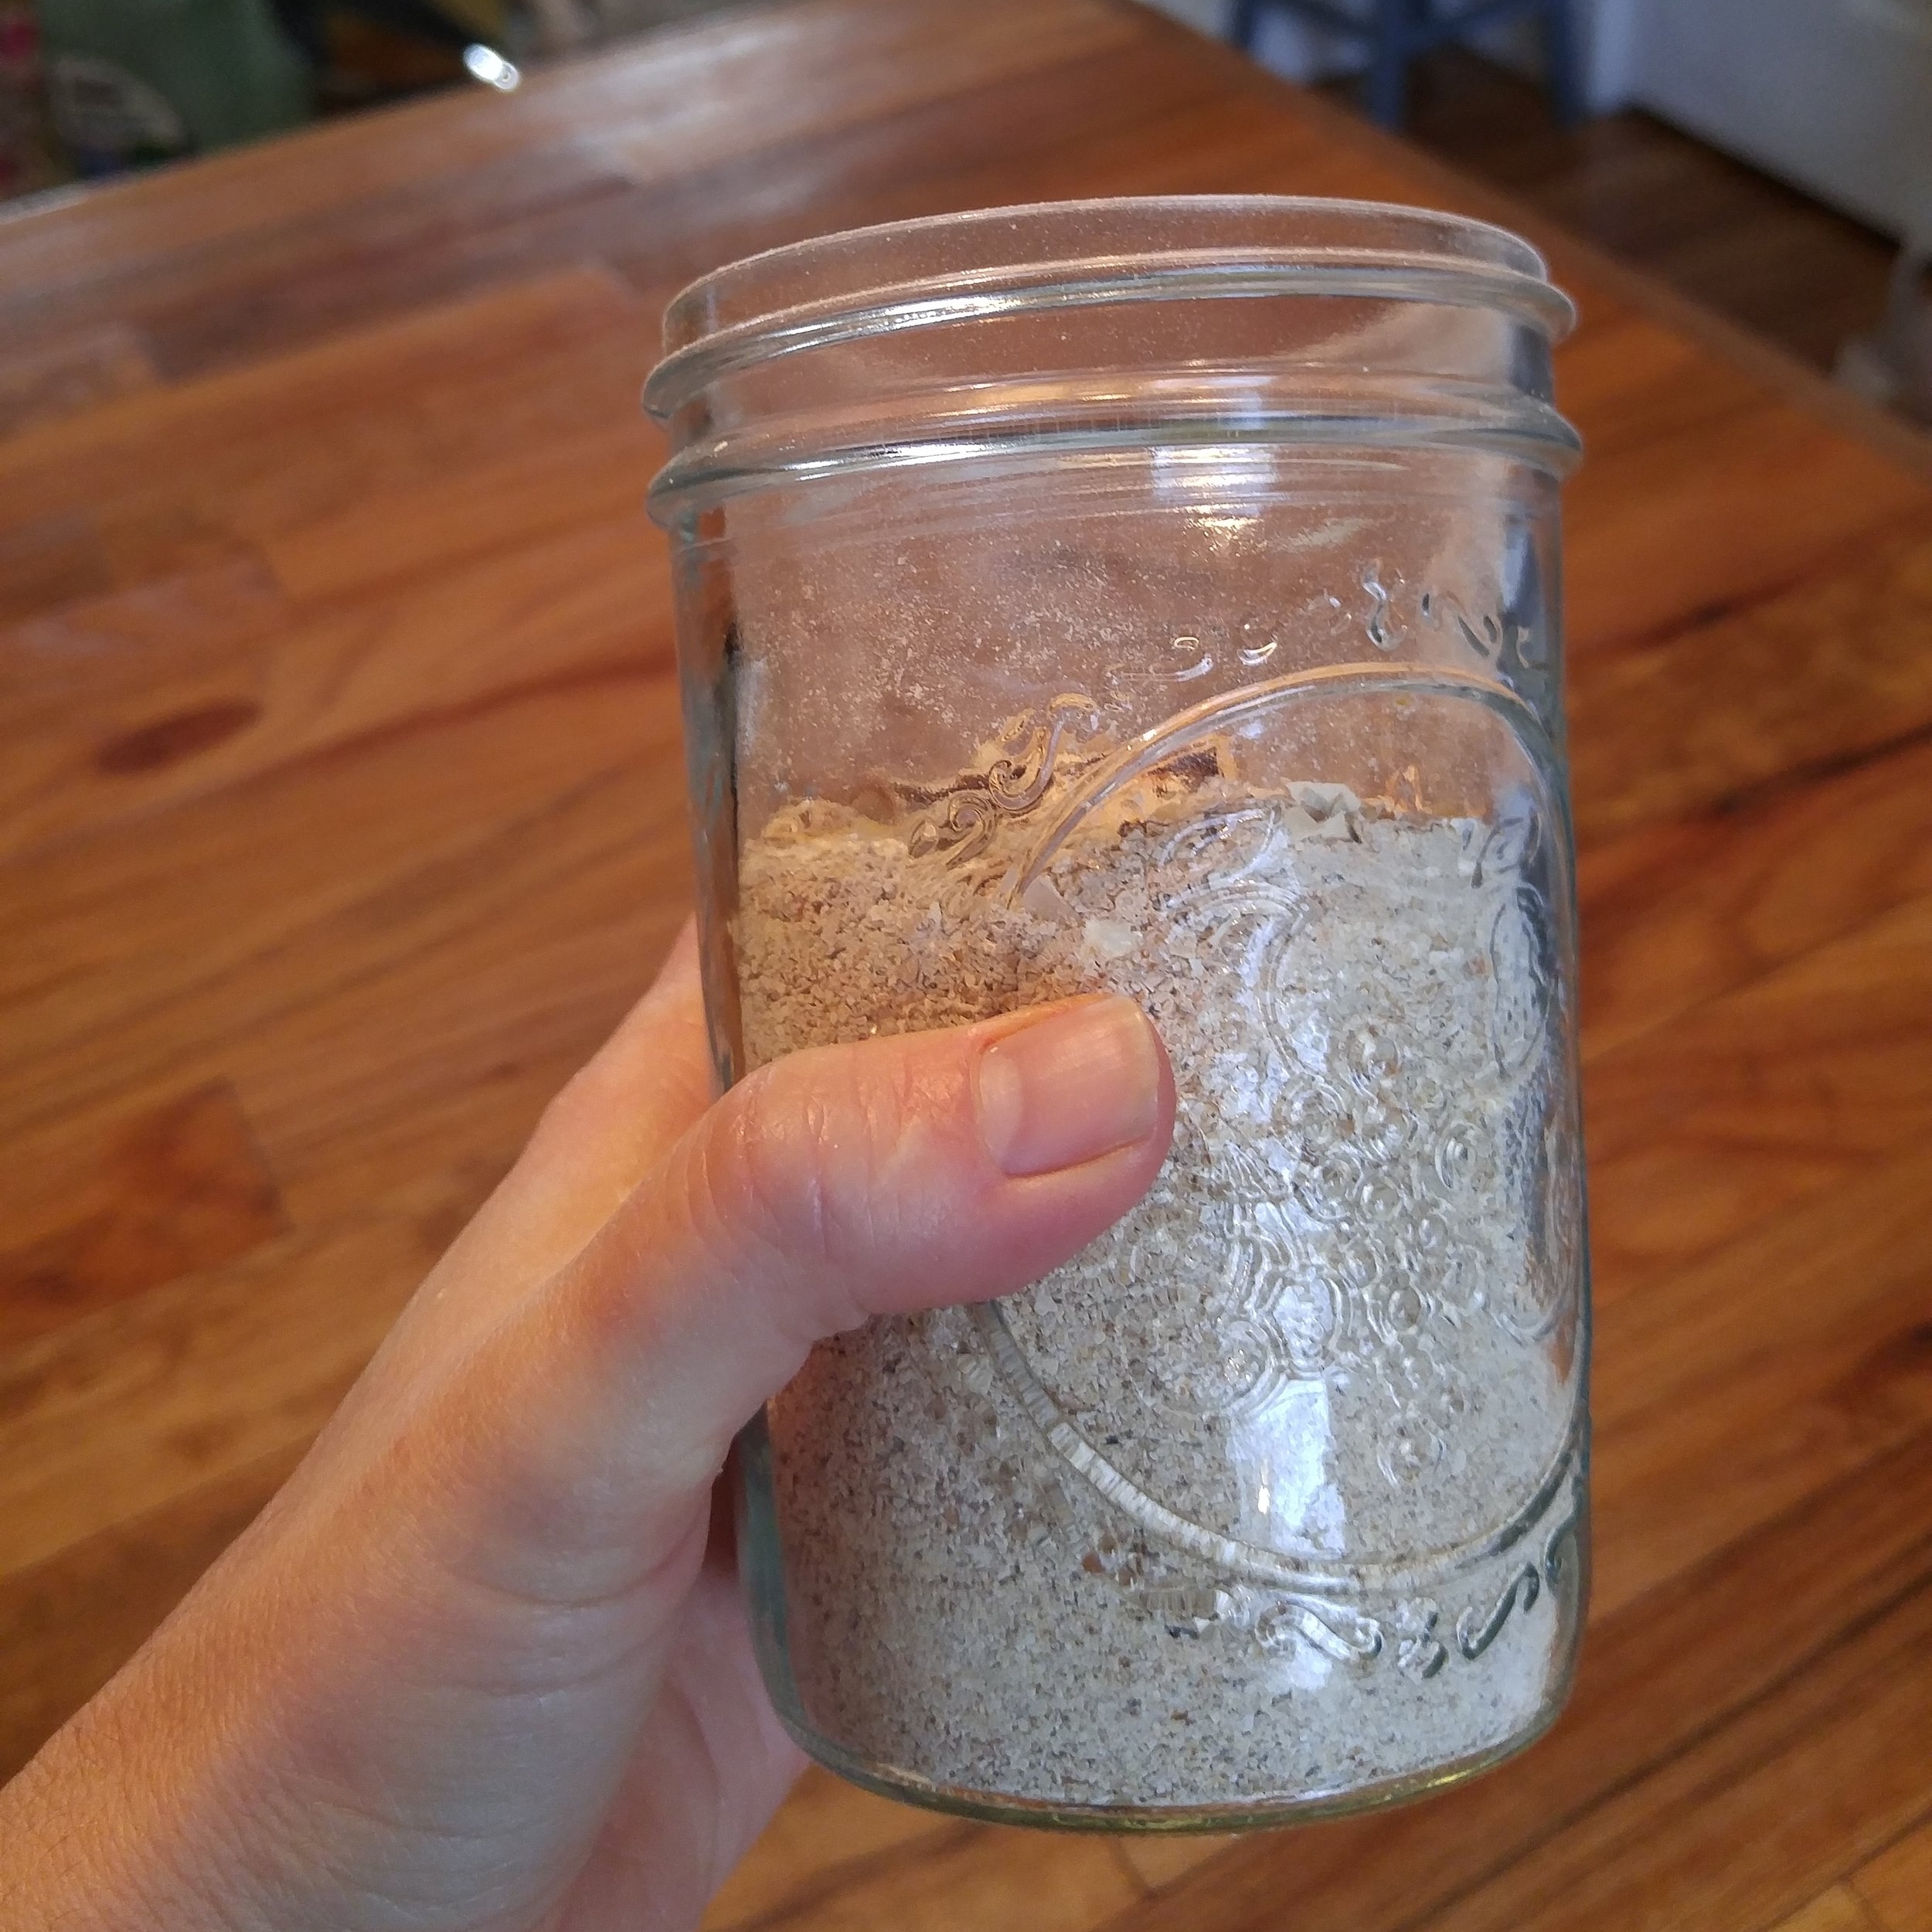
1. COLLECT THE SHELLS
I keep a bowl near the stove and throw all the egg shells in there (ummm... this bowl got a little full...).
They do not need to be washed out, but you certainly can. As you can see from the photo below, I don't wash mine, mostly because I am much too lazy ( I also do not wash the gunk/feathers off our fresh eggs before using them!).

2. DRY THE SHELLS.
Place the shells in the sunshine for a day or two. OR....
Bake the egg shells in the oven at 350 degrees for about 20-30 minutes, until nice and crispy.

3. GRIND THE SHELLS.
Place dried egg shells in a blender or food processer and grind until powdery. A few larger pieces is ok.
Alternatively, they could be crushed by hand - with a mortar and pestle, or placed in a Ziploc bag and rolled over with a rolling pin.


4. STORE THE POWDERED SHELLS.
Place the powder in jars or buckets and set aside until planting time!
Using Your Fertilizer
At planting time, simply sprinkle the powdered egg shells in the planting hole (about a tbsp. or so), place your plant in the hole and water thoroughly. Done!
If you are looking to purchase plants for your vegetable garden, be sure to check out our selection of heirloom vegetable plants, lovingly raised right on our farm. It the perfect way to bring home part of Three Acre Farm!
Trash to Treasure
Now that you know the secret to turning trash into treasure:
Be sure to spread the word!
Share this post to your DIY friends.
Ask your friends and family to save their eggshells for you.
I'd love hear what you are planting this year and if you've had problems you need help with. I'm here for you.
Bring on the questions!
-Lori